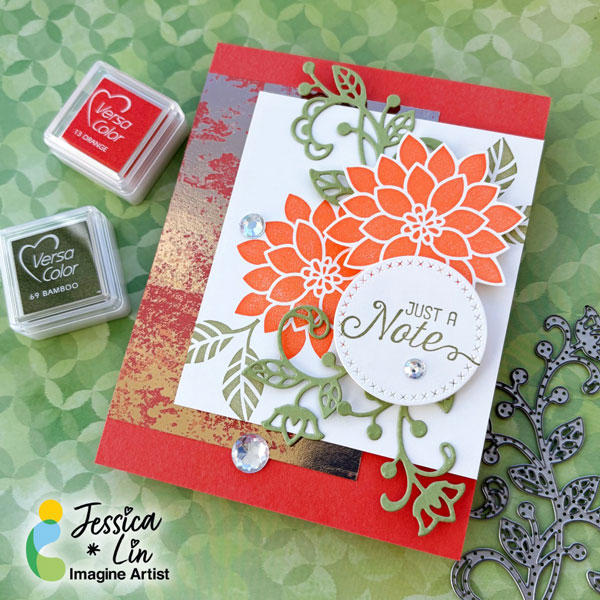
Hi everyone! It’s Jessica here. I am so happy to be on Imagine Crafts’ design team again for 2026. If you have seen some of my creations before, you would notice that I love bold, bright colors. Today, I am sharing a floral card that features this vibrant orange from the VersaColor ink line.
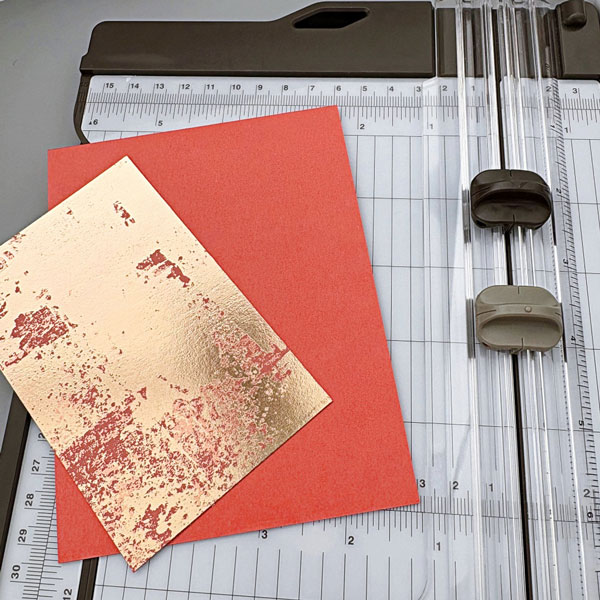
Step 1: I started out by preparing an A2 card base with Calypso Coral cardstock. Then I trimmed a piece of Dry Brushed Metallic paper to 3’’ x 4.5’’ as a background accent.
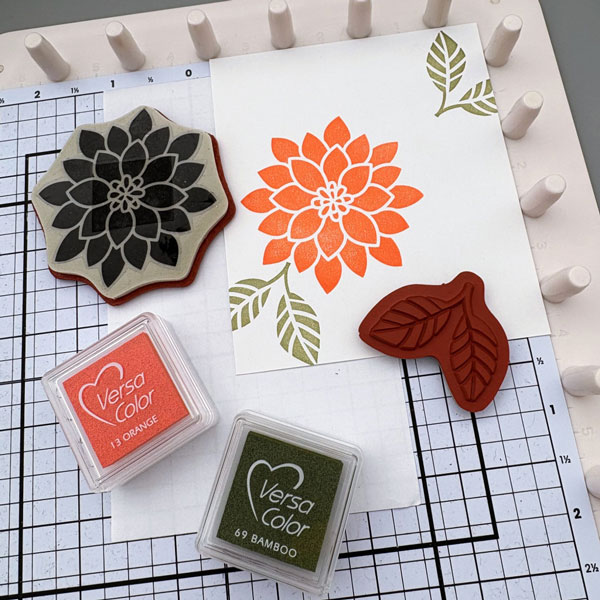
Step 2: The stamp set I am using today is Flourishing Phrases from Stampin’ Up. I stamped the flower image with VersaColor Orange ink pad on a piece of 3.5’’ x 4’’ cardstock. For the leaves, I used VersaColor Bamboo ink pad.
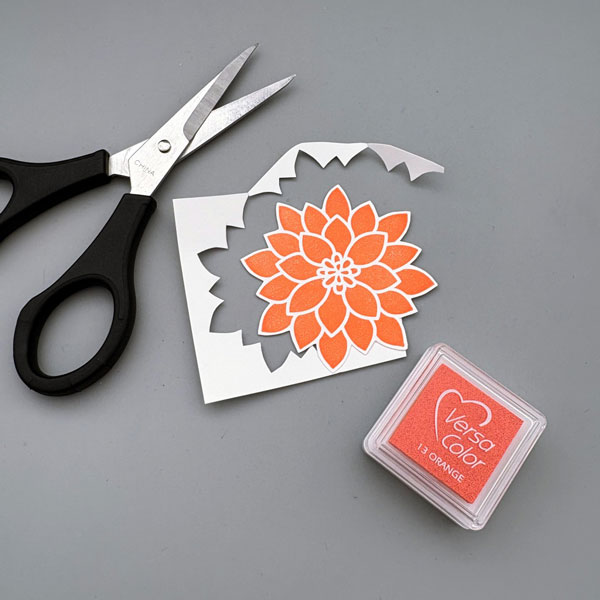
Step 3: I stamped another flower image on a scrap piece of cardstock and fussy cut it along the edge.
Step 4: Then I die cut a circle with cross-stitch details and stamped the sentiment with VersaColor Bamboo ink.
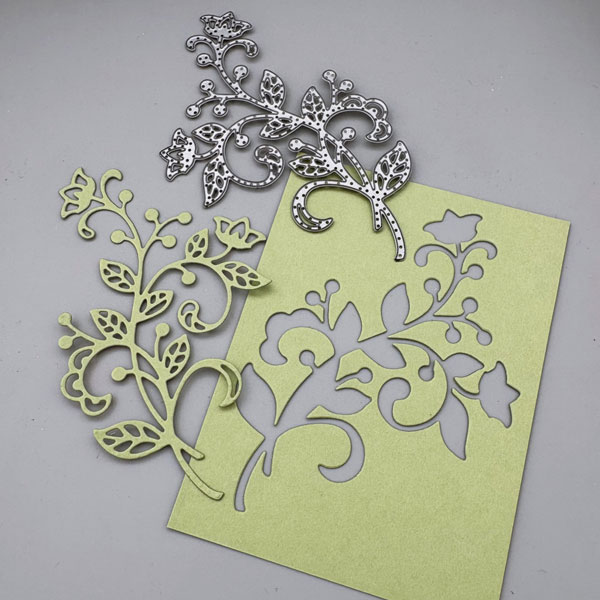
Step 5: The coordinating die set includes various floral designs that work well both by themselves and with the stamp images. I decided to die cut the largest design and cut it into 3 pieces to decorate around the sentiment. Finally, I adhered all of the elements onto the cardbase, added some rhinestones, and the card is complete!
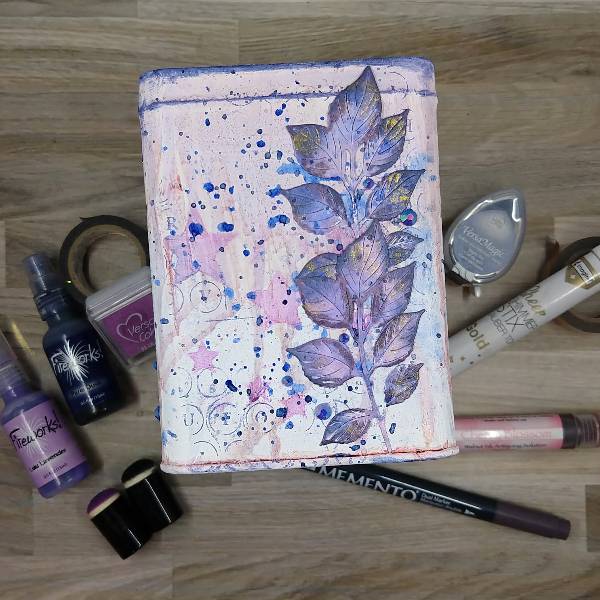
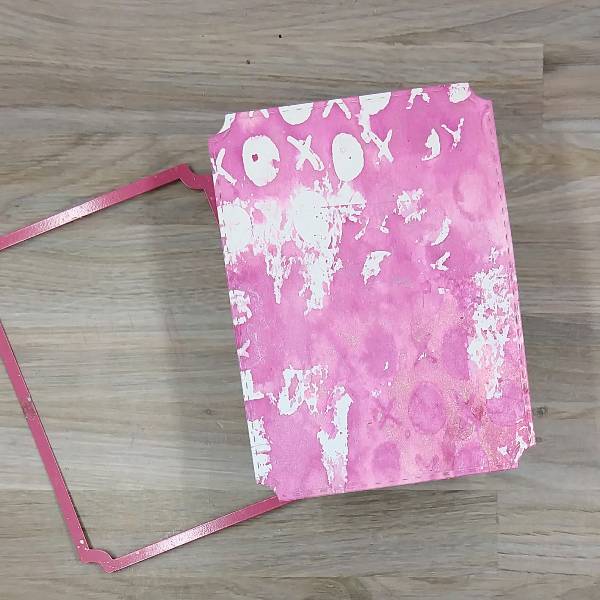
I’ve had a small metal tea box that I’ve wanted to repurpose into a mixed media piece for a while, so I took some time on a rainy day to make it happen.
Skill: Advanced Time: 1 hour active time, 6+ hours (drying between layers)
Directions:
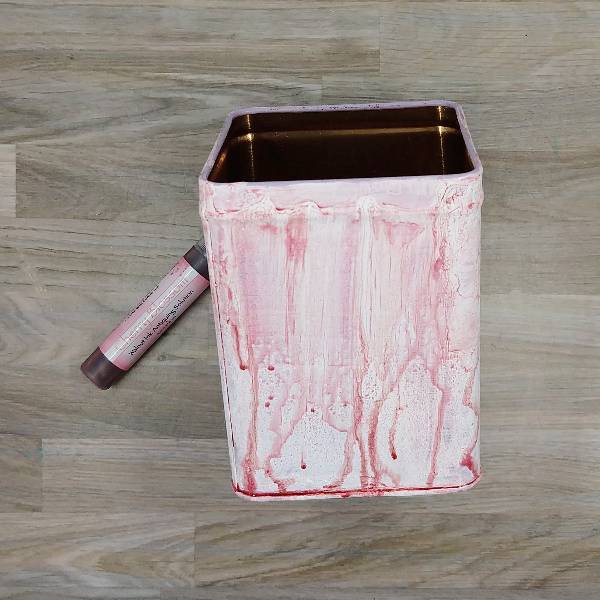
Step 1:
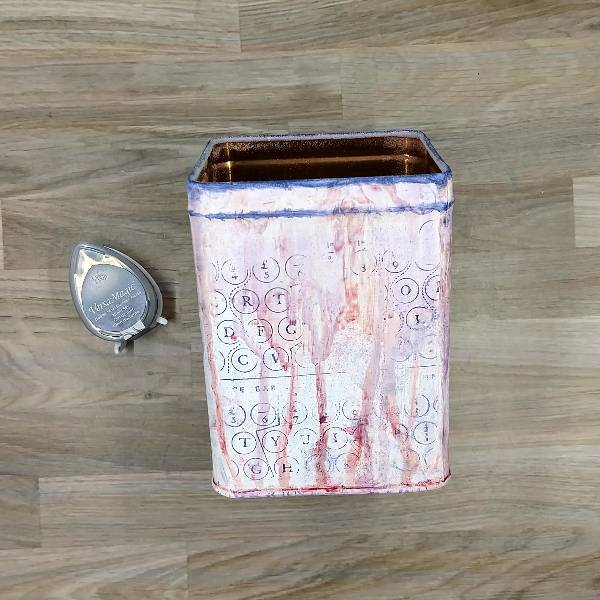
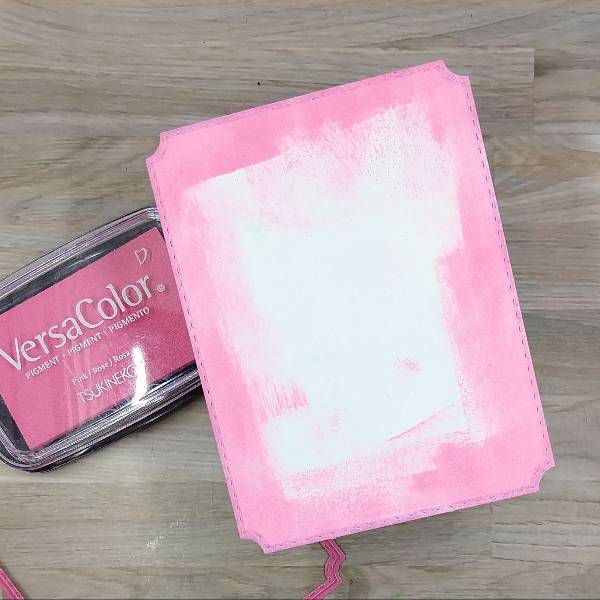
After applying two coats of gesso around all four sides of a tea tin, spray the top of the tin with Cherry Blossom Walnut Ink Antiquing Solution and allow it to drip down the sides of the tin. Set aside to dry.
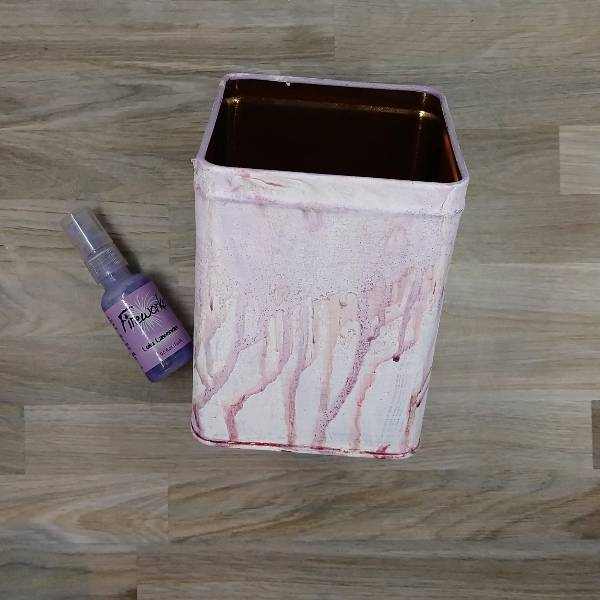
Step 2:
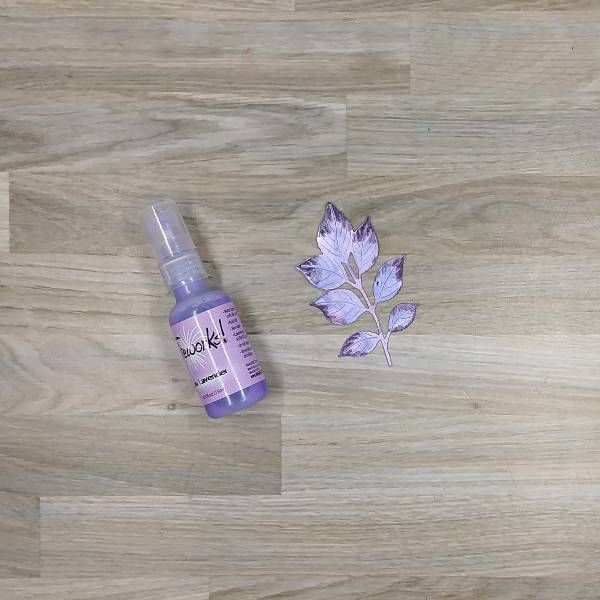
Spray all four sides of the tin with Lulu Lavender Fireworks! Craft Spray and allow to dry.
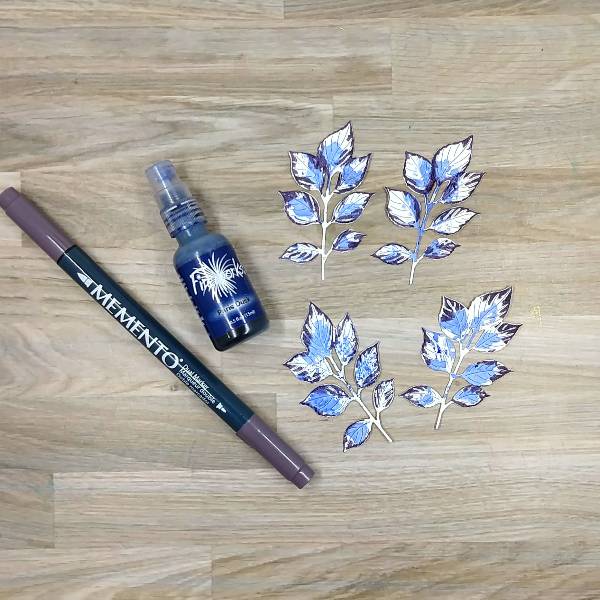
Step 3:
While the tin was drying, die cut four leaf clusters out of watercolor paper. Then randomly add Paris Dusk Fireworks! Craft Spray to the centers of each leaf with the stick of the spray nozzle and color the outsides of the leaves with Elderberry Memento Dual Marker.
Step 4:
Spray each of the 4 leaf clusters with Lulu Lavender Fireworks! Craft Spray and allow to dry.
Step 5:
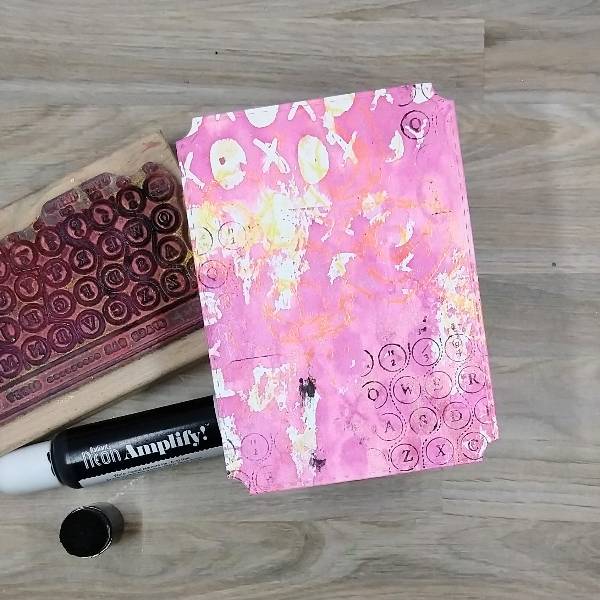
Partially stamp each of the four sides of the tin with Night Sky VersaMagic ink on a background stamp. (I used an old woodblock typewriter stamp.) Then press the ink pad along the top edge of the tin and the raised rib as well. Heat emboss the top rim of ink with clear embossing powder.
Step 6:
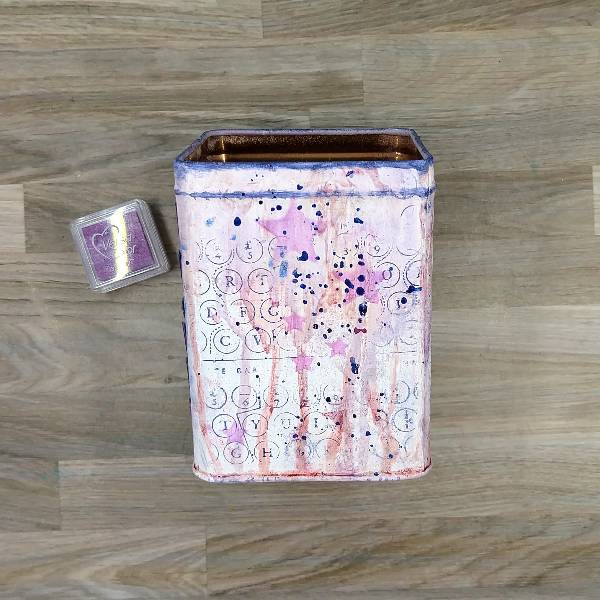
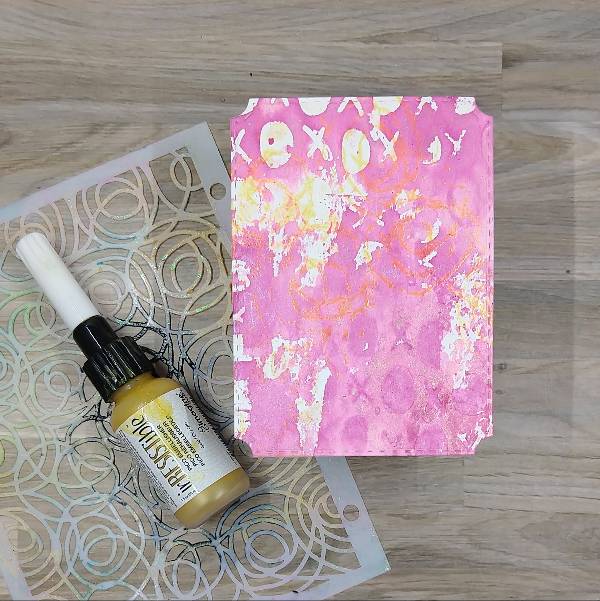
Ink blend Lilac VersaColor ink through a stencil on all four sides of the tin using a sponge dauber. (Not pictured was splattering more of the Paris Dusk Fireworks! Craft Spray onto each of the four sides as well.) Then allow everything to dry.
Step 7:
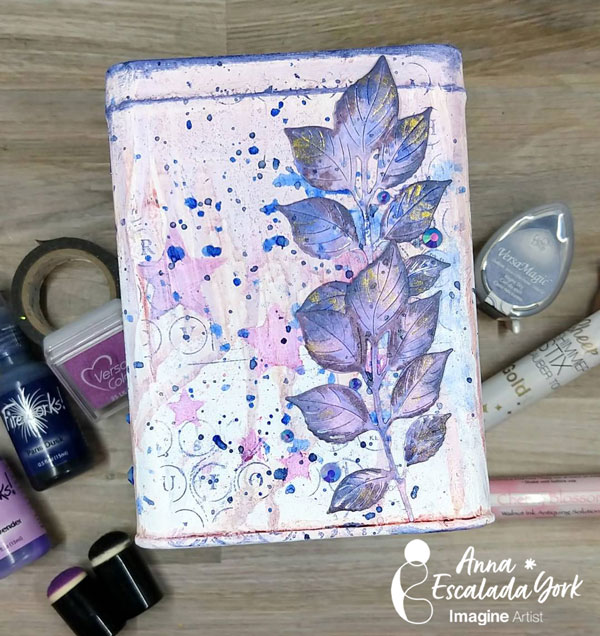
Glue two of the leaf cluster dies (one on top of the other) along the right edge of two of the sides of the tin.
Not pictured was the step after this where I decided to use my sponge daubers to ink blend some more of the Night Sky VersaMagic ink along some of the edges of the leaves while they were glued down, nor using my Gold Sheer Shimmer Stix Dauber Top to add some gold to the leaves as well.
Splatter the tin with more Paris Dusk Fireworks! Craft Spray. Allow it to dry. Then glue dark blue gems around the leaf clusters to finish the box on the two slides with leaves.
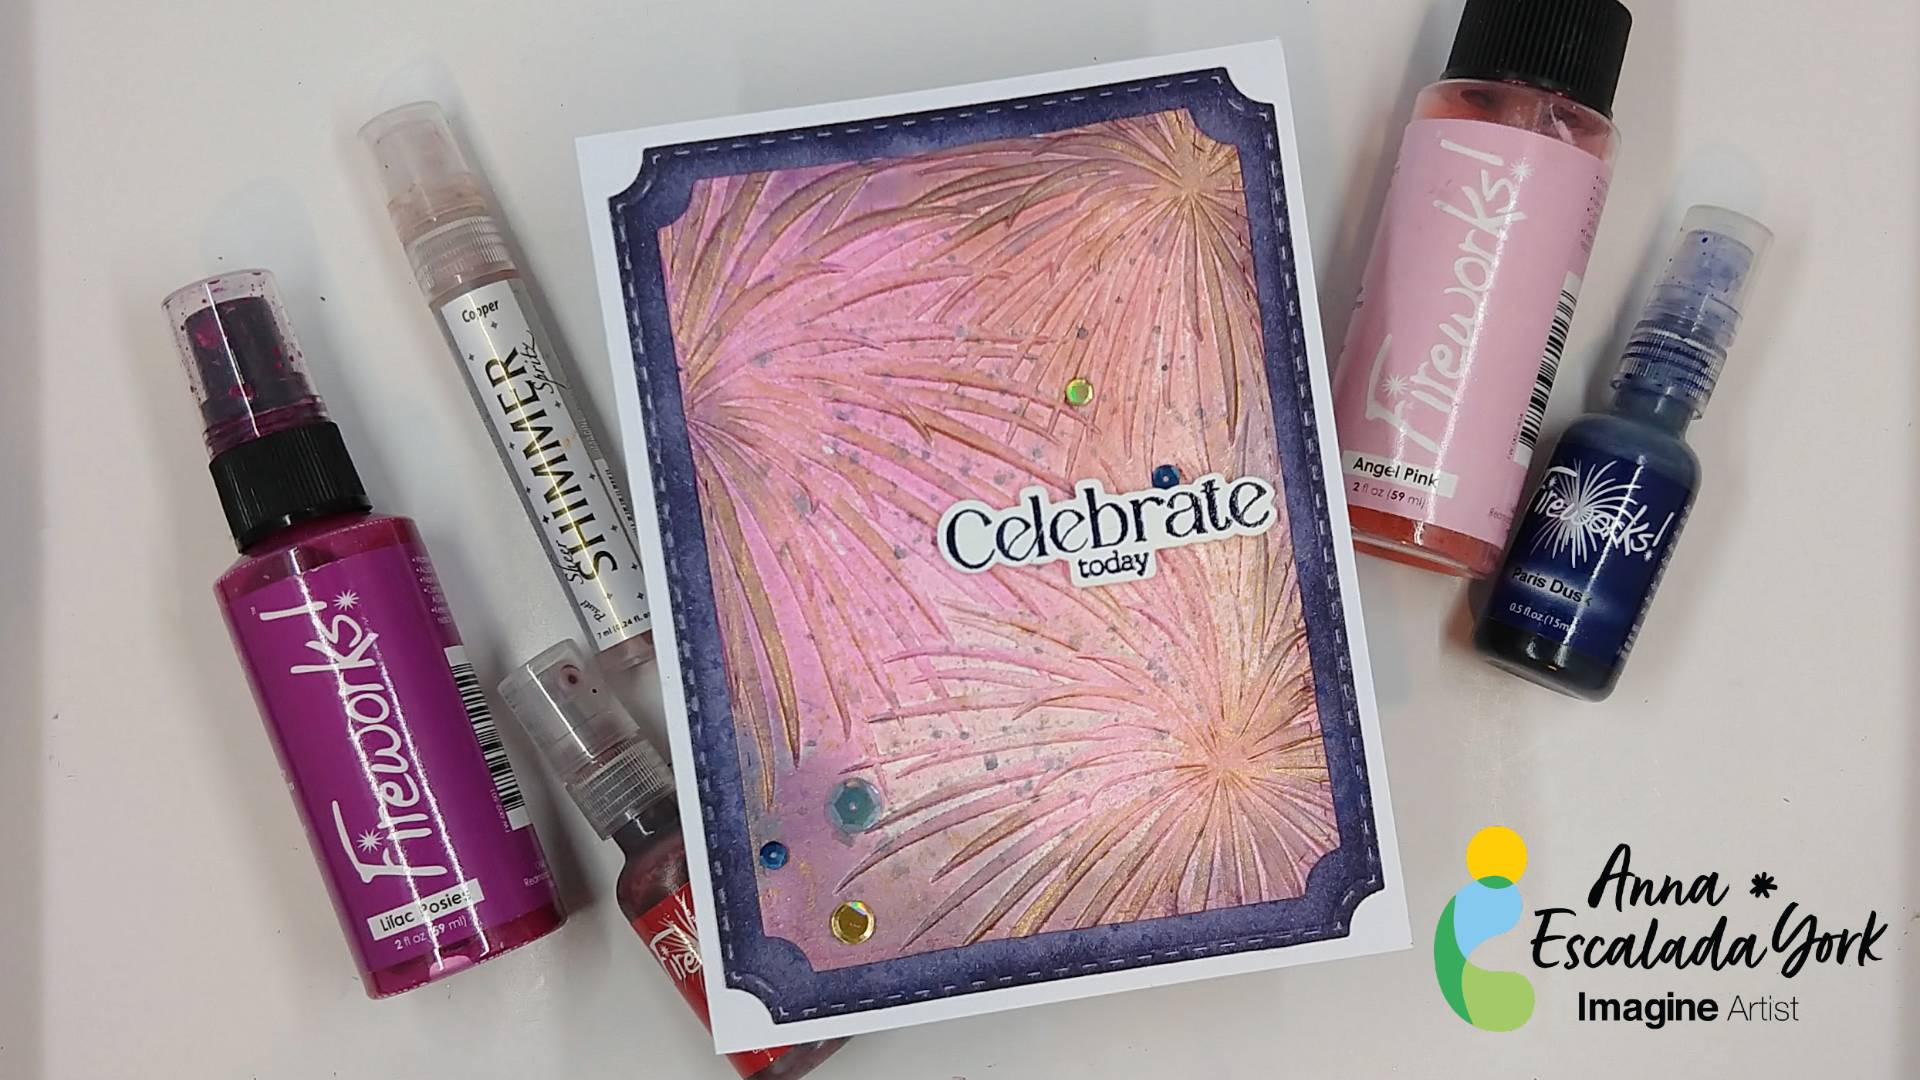
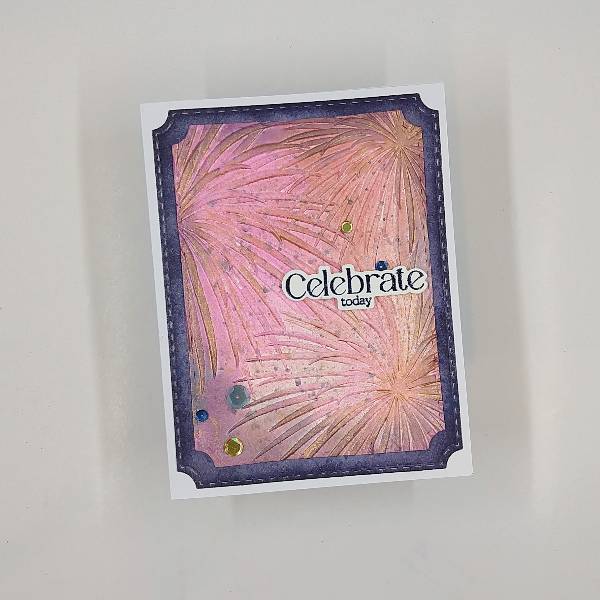
Today’s card was inspired by 4th of July celebrations, but is meant for a beloved coworker who is retiring after working at my school for over 25 years. She is one of the key people who everyone knew that they could turn to when they needed help and we will sorely miss her, but are so excited for her next adventure.
Skill: Intermediate Time: 1.5 hours
Directions:
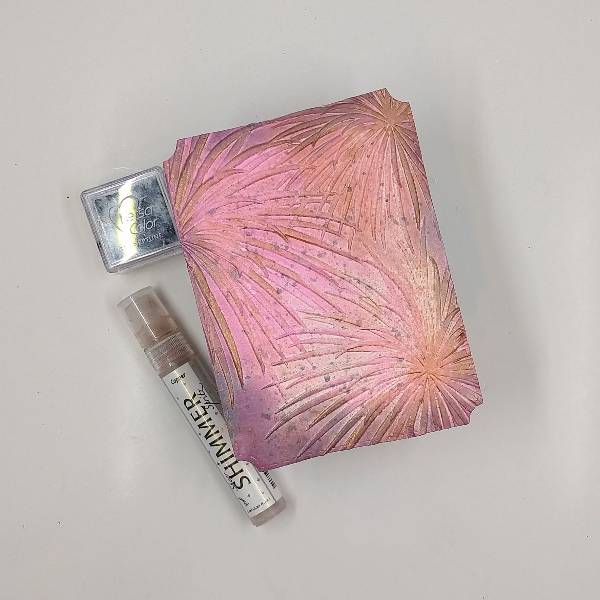
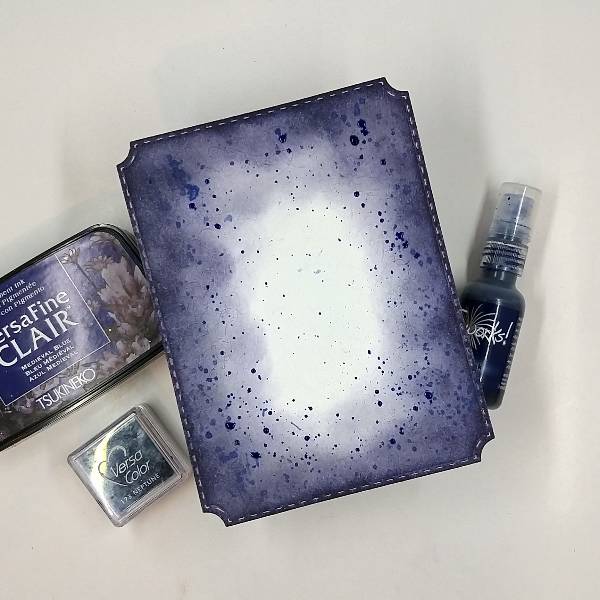
Step 1: Die cut a piece of watercolor paper with the second-largest die in an A2-sized die set. Spray Lilac Posies, Angel Pink and Rhubarb Stalk Fireworks! Craft Spray directly onto a fireworks embossing folder, trying to have the colors mix on the folder. Then add the watercolor paper panel onto the embossing folder and run the whole thing through a die cutting machine. The spray will move inside of the embossing folder when it is pressed through the machine, giving some interesting effects on your embossed panel. Allow the sprays to dry.
Step 2: Ink blend the edges of the embossed panel with Neptune VersaColor ink. Press the Neptune VersaColor ink pad onto a piece of scrap acetate and spray with water and then splatter the mix onto the panel with a thin paintbrush. Then spray the panel with Copper Shimmer Spritz. Spray more of the Copper Shimmer onto a clean piece of acetate and use the spritz to paint the raised parts of the panel (the tendrils or arms of the fireworks). Allow to dry.
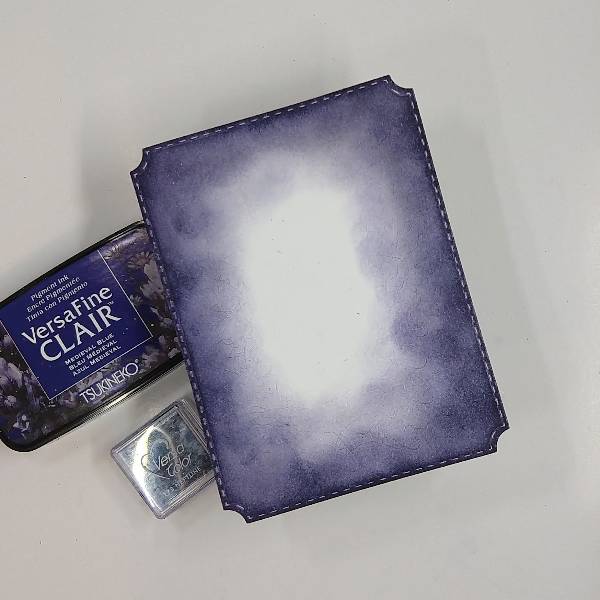
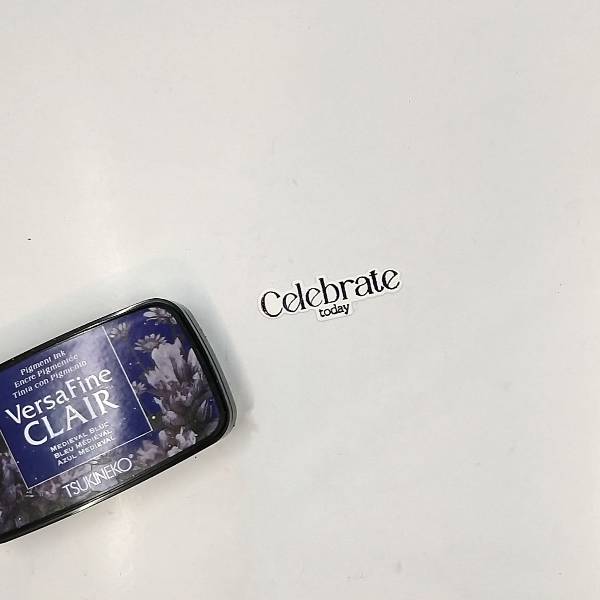
Step 3: Die cut another piece of watercolor paper with the largest die in the A2-sized die set. Using a sponge dauber, ink blend the edges with more of the Neptune VersaColor ink and then the extreme edges with Medieval Blue VersaFine Clair ink.
Step 4: Splatter Paris Dusk Fireworks! Craft Spray onto the panel and allow to dry.
Step 5: Stamp a sentiment on a scrap of watercolor paper with Medieval Blue VersaFine Clair ink and heat emboss with clear embossing powder. Die cut the sentiment with the corresponding die.
Step 6: Glue the two panels together. Attach the sentiment with foam tape. Then glue sequins on the lower left corner and just above the sentiment. Finally, glue the whole thing onto an A2-sized white cardbase to finish the card.
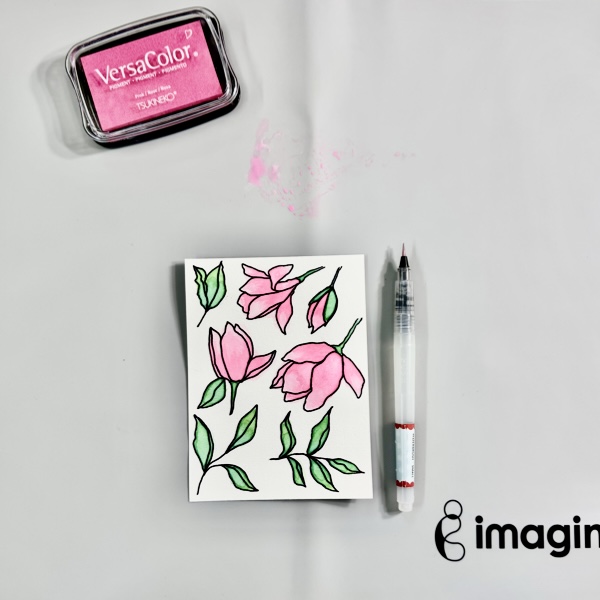
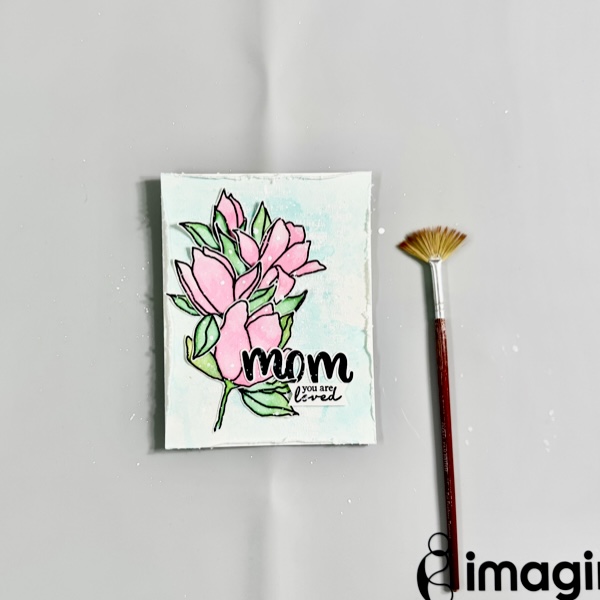
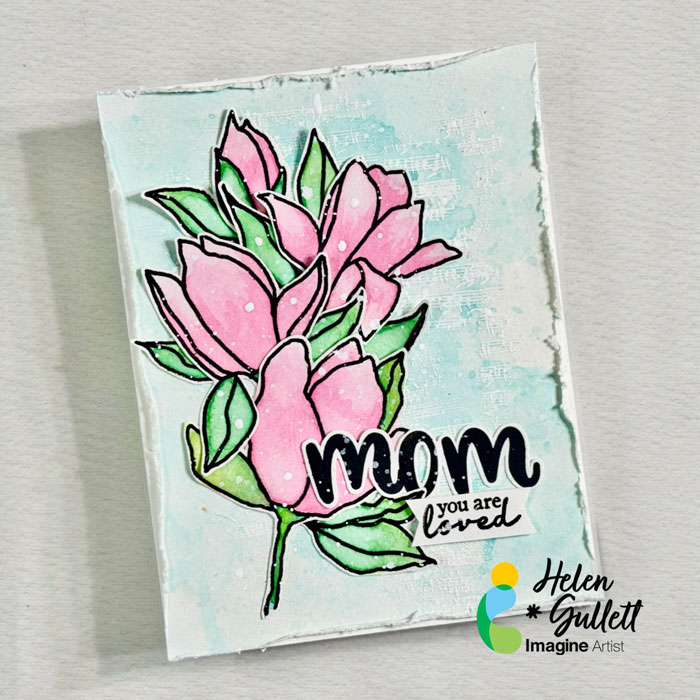
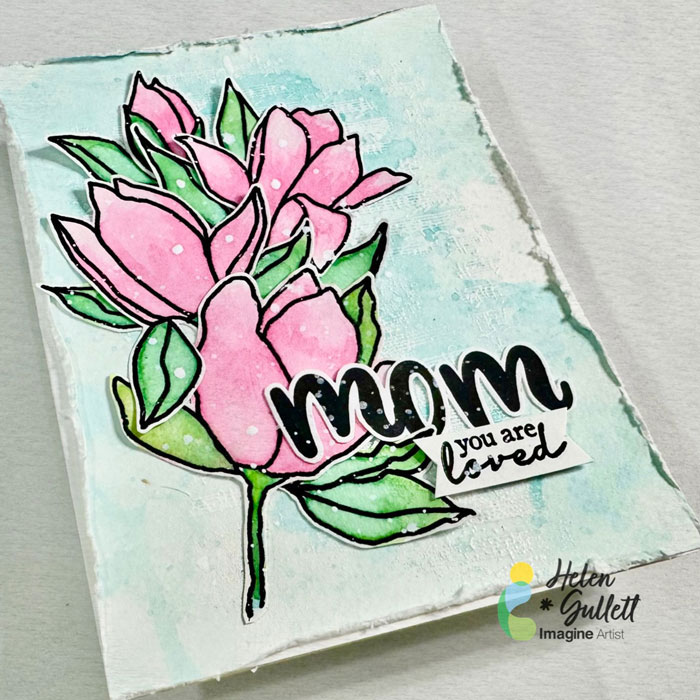
Hello crafty friends! Today, I wanna share with you a fun technique to make a card for a mom. We are going to do some watercoloring with VersaColor ink pads and also heat-embossing technique. So… Let’s get some ink pads and watercoloring together!
Skill: Beginner Time: 15-20 minutes
Direction:
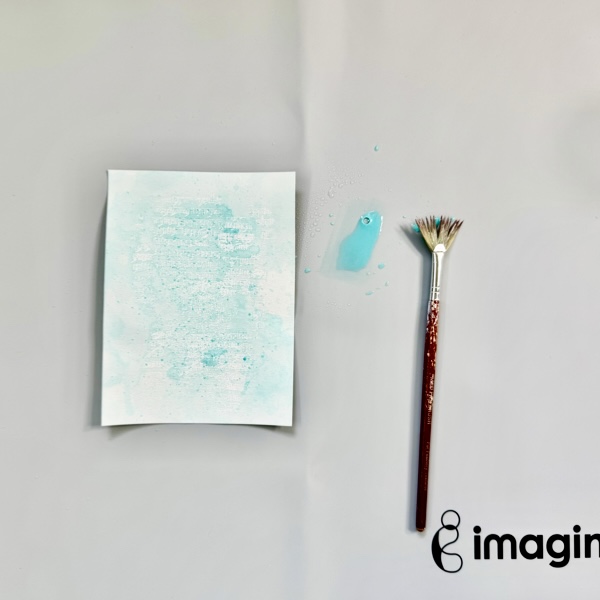
Step 1 Cut out a piece of watercolor cardstock (or mixed media paper would work, too) into a 4.25 inch x 5.5 inch card panel. Prep the background watercolor cardstock panel with some anti-static embossing powder. Then, stamp the music sheet background stamp with VersaMark ink pad randomly on it, and add some of the white opaque embossing powder. Heat the embossing powder with a craft heat gun.
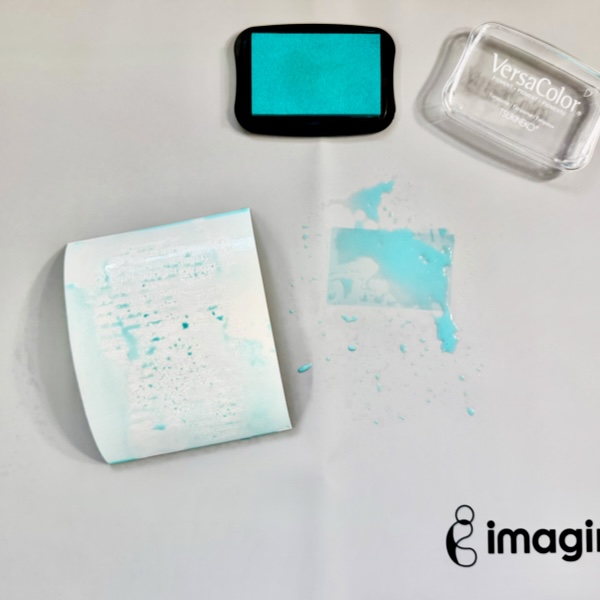
Step 2 Dab some inks of the VersaColor Turquoise ink pad on the craft mat and then spray with some water. Smoosh the watercolor panel into the ink on the craft mat, dry the ink, and repeat the smooshing and drying the ink as needed.
Step 3 Add some ink splatter on the background panel with a fan paint brush, and dry it with a craft heat gun.
Step 4 Distress the edges of the background panel with a distress tool or you can use scissors for this distress technique.
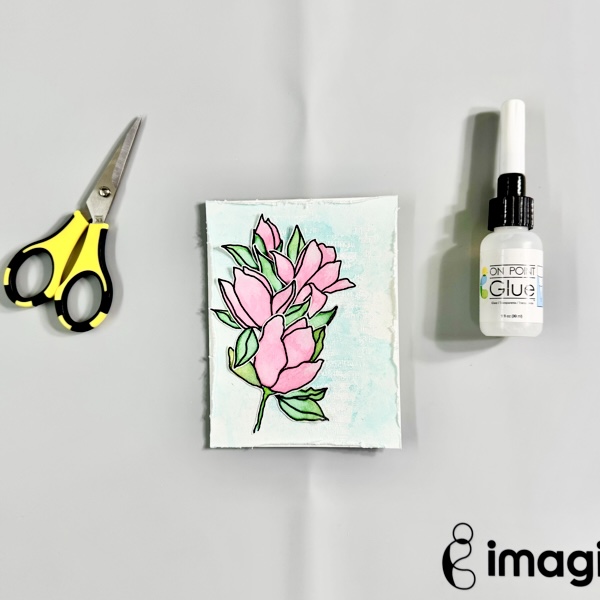
Add the background panel to the card base with On Point Glue.
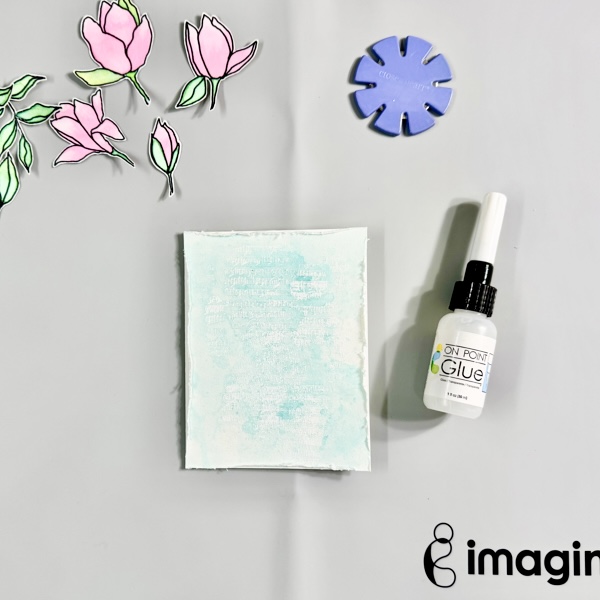
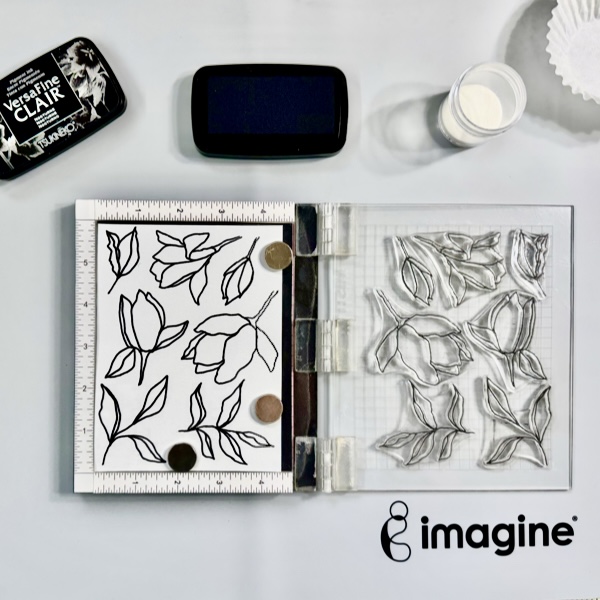
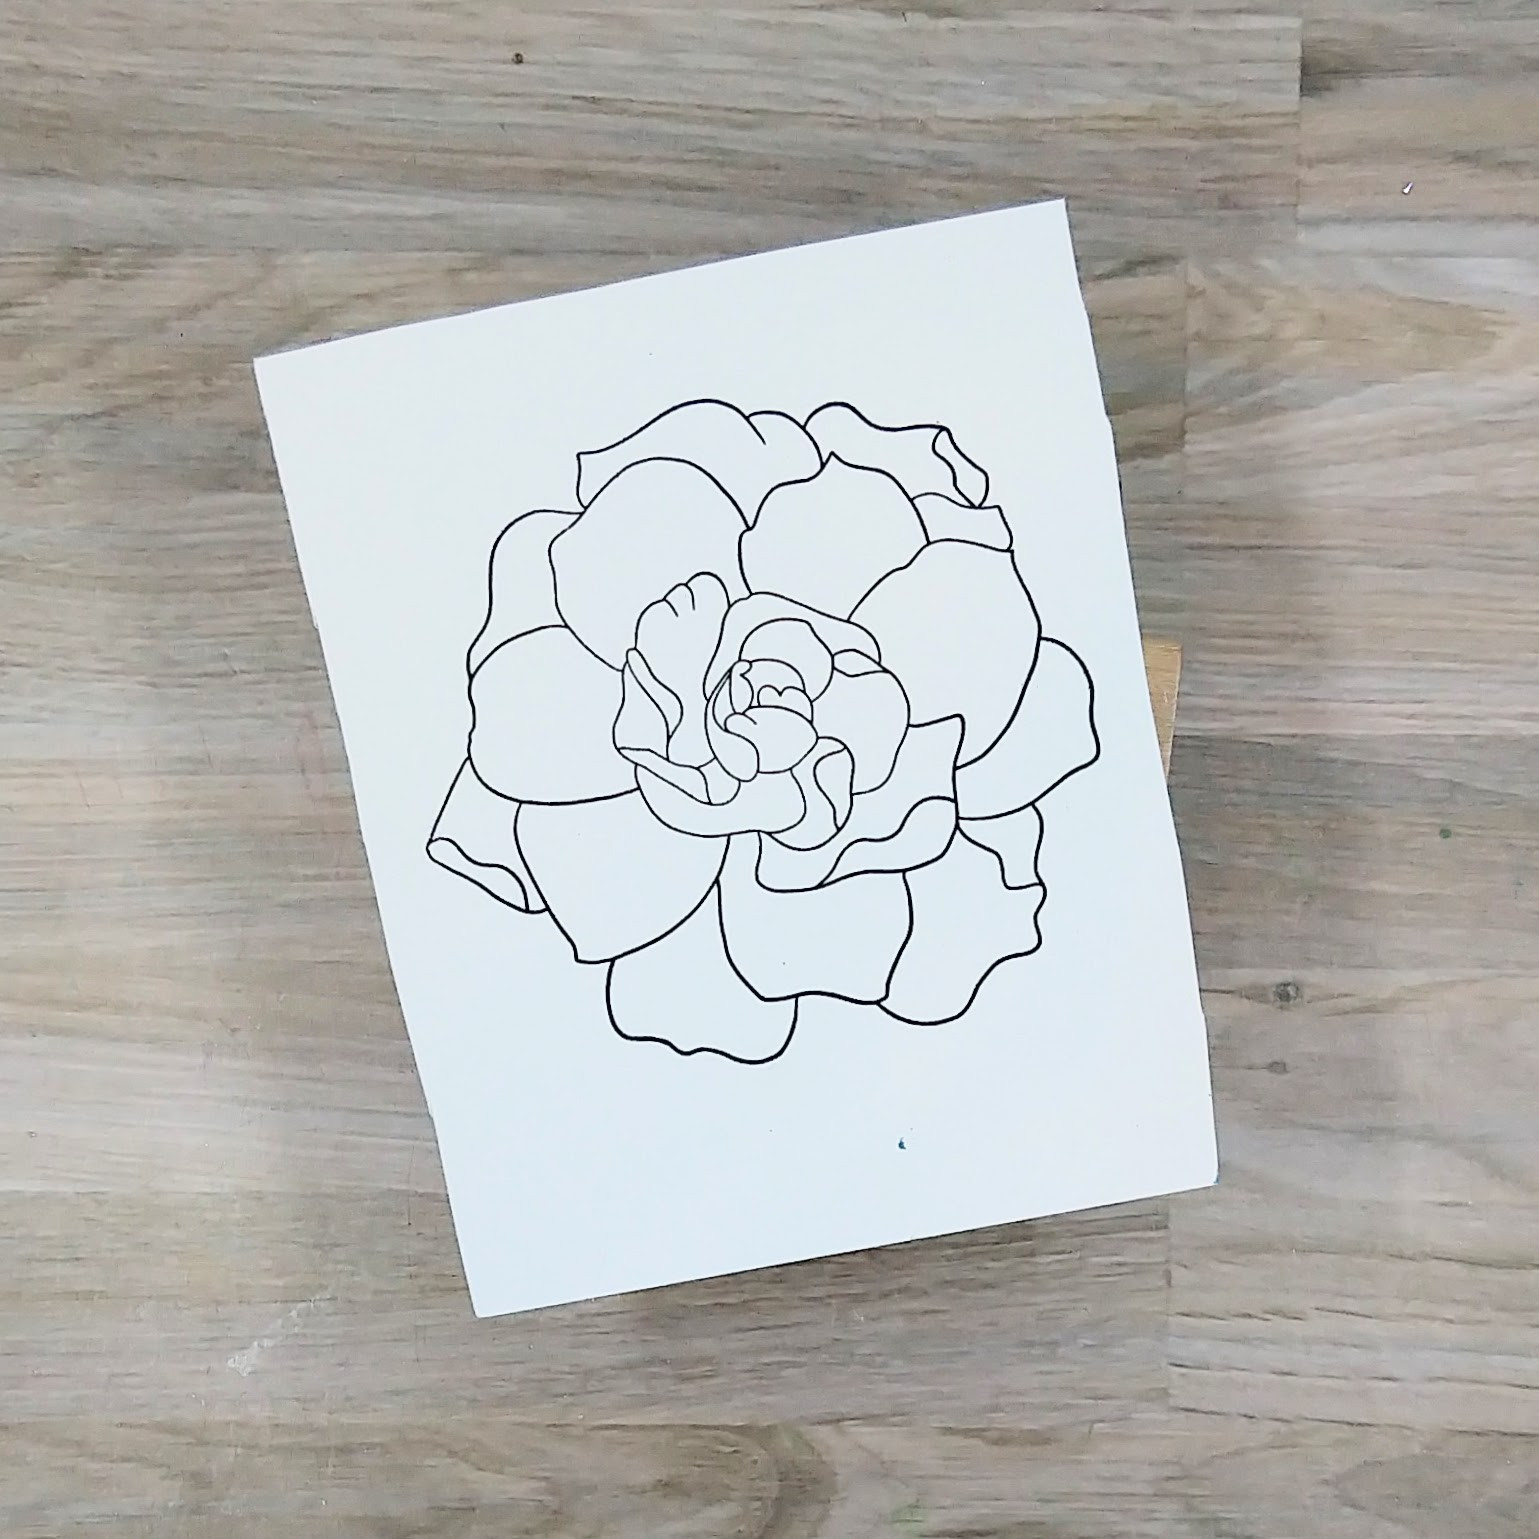
Step 5 Stamp the magnolia and leaf images on another piece of watercolor cardstock with the VersaFine Clair Nocturne using the stamping tool. Repeat the stamping if needed.
Add some of the clear embossing powder on the stamped images while the ink is still wet and then heat it with a craft heat gun.
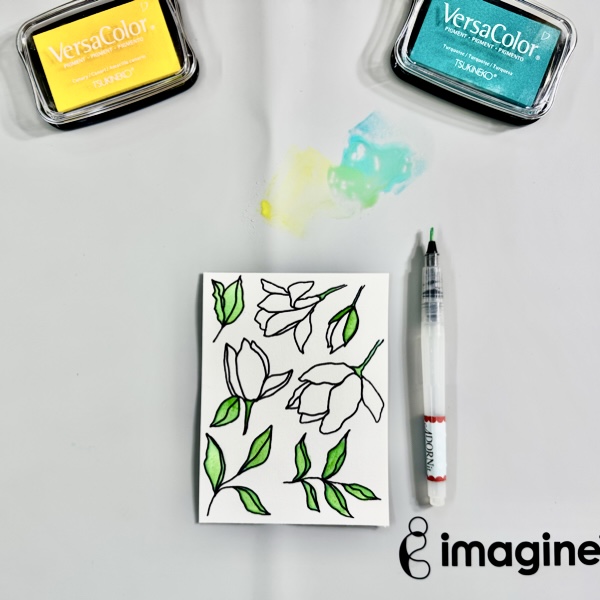
Step 6 On the craft mat, dab some inks of the VersaColor Canary ink pad and VersaColor Turquoise ink pad, and then spray them with some water. And then, color the leaves and branches with the watercolor inks. Set aside to dry or dry it with a craft heat gun.
Step 7 Dab some of the ink of the VersaColor Pink ink pad on the craft mat and spray it with some water. Then, color the magnolia flowers and set aside to dry or dry it with a craft heat gun.
Step 8 When all the watercolor images dried well, fussy cut them with micro-tip scissors. Add them to the card with On Point Glue.
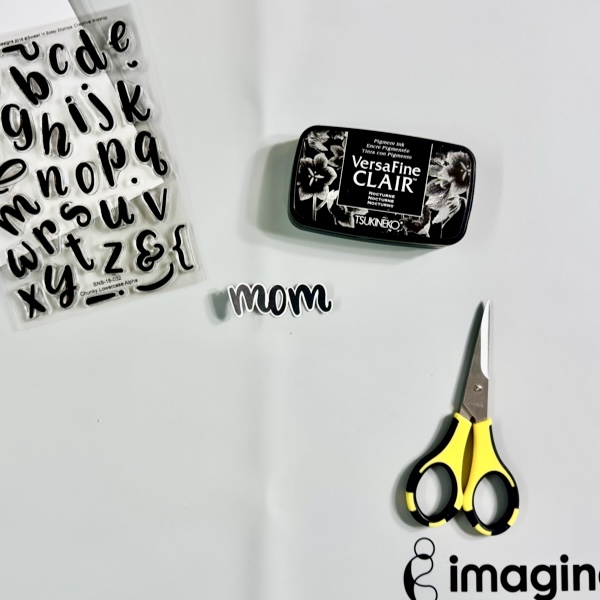
Step 9 Stamp the letters m-o-m on a piece of white cardstock with VersaFine Clair Nocturne. Dry the stamped word MOM with a craft heat gun and then fussy cut it with micro-tip scissors.
Step 10 On the white cardstock, stamp also the second sentiment with VersaFine Clair Nocturne, dry the ink with a craft heat gun, and then trim it into a sentiment label.
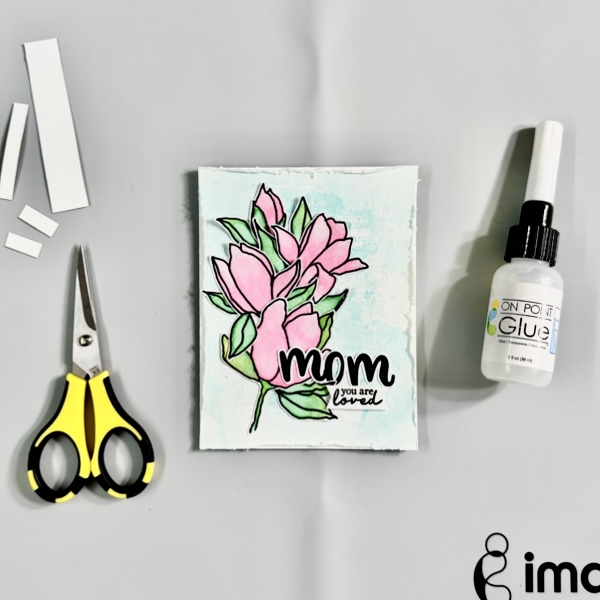
Step 11 Add the word MOM on the card with On Point Glue.
Cut out 3-4 strips of white cardstock smaller than the second sentiment label, add them on the back of the sentiment label with On Point Glue, this will add an extra dimension to the sentiment that is not as thick as foam tape. Add the sentiment to the card with On Point Glue.
Step 12 Final step, to add extra texture to the background by adding some white paint splatters. Mix a little bit of white acrylic paint with water on the craft mat, pick it up with a fan paint brush, and then splat some of the paint to the card.
Dry the splatter paint with a craft heat gun.
This simple mixed media card is done. I love how it turns out and hopefully you do, too. I like how VersaColor ink pads are not just for stamping but also work as a watercoloring medium.
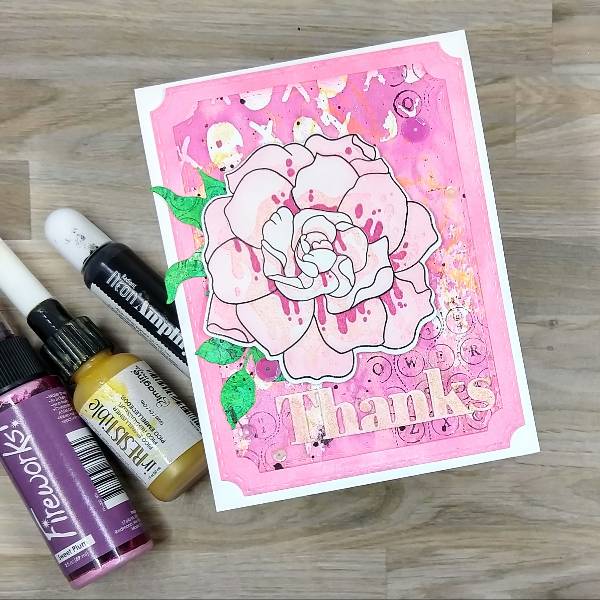
I used to be intimidated by the idea of multimedia cards, but all they are cards that have different types of products. This card features stamping, watercoloring with sprays and Amplify! Ink, and embossing.
Skill: Intermediate Time: 2 hours
Directions:
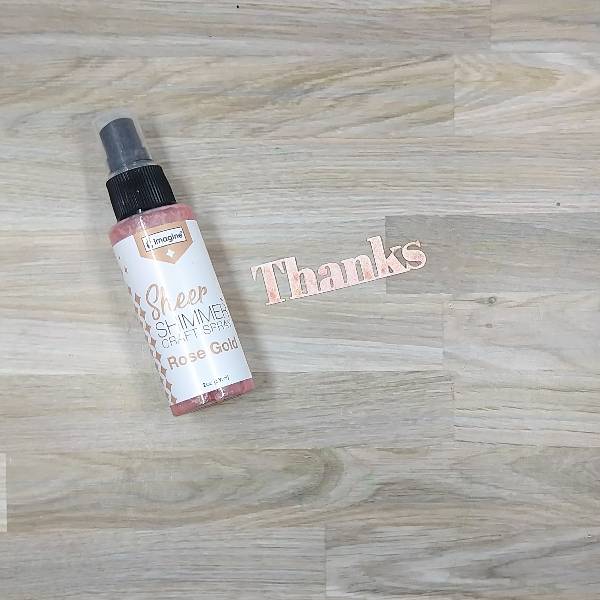
Step 1: Spray Sweet Plum Fireworks! Shimmery Craft Spray onto a 6” x 6” stencil and then flip the stencil over and gently press the stencil onto a piece of watercolor paper. Repeated this process with and Rose Gold Sheer Shimmer Craft Spray, partially overlapping part of the stencil on the watercolor paper. Repeat the process a few times, overlapping the stencil a few times and then set the panel aside to dry.
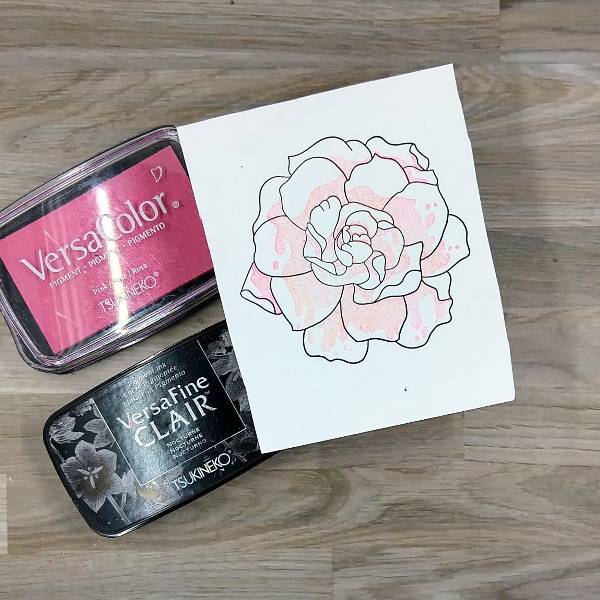
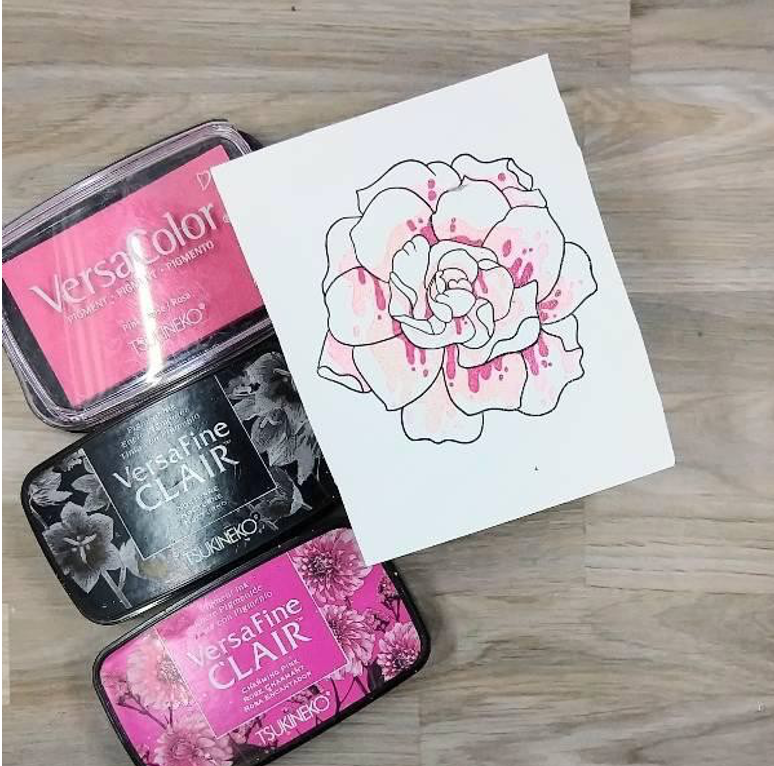
Step 2: The next three steps use a layered floral stamp set. Stamp the outline of the flower with Nocturne VersaFine Clair ink onto another scrap of watercolor paper and then heat emboss with clear ink.
Step 3: Stamp the second layer of the floral layer stamp set with Pink VersaColor ink onto the flower.
Step 4: Stamp the third layer of the floral layered stamp set with Charming Pink VersaFine Clair ink. Then heat emboss with more clear embossing powder.
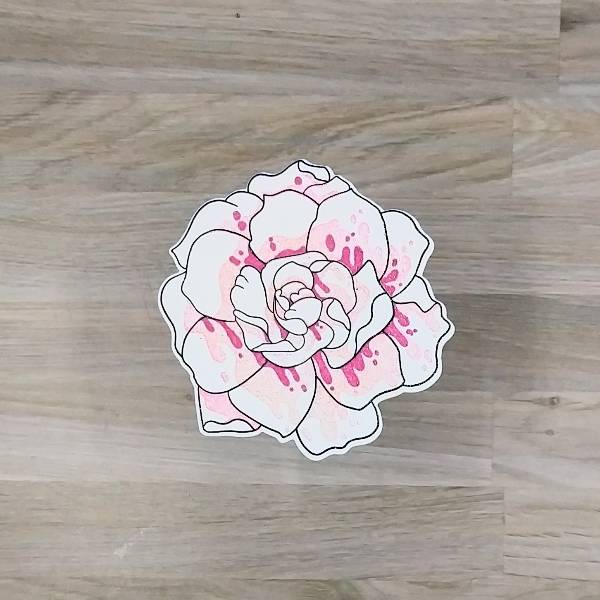
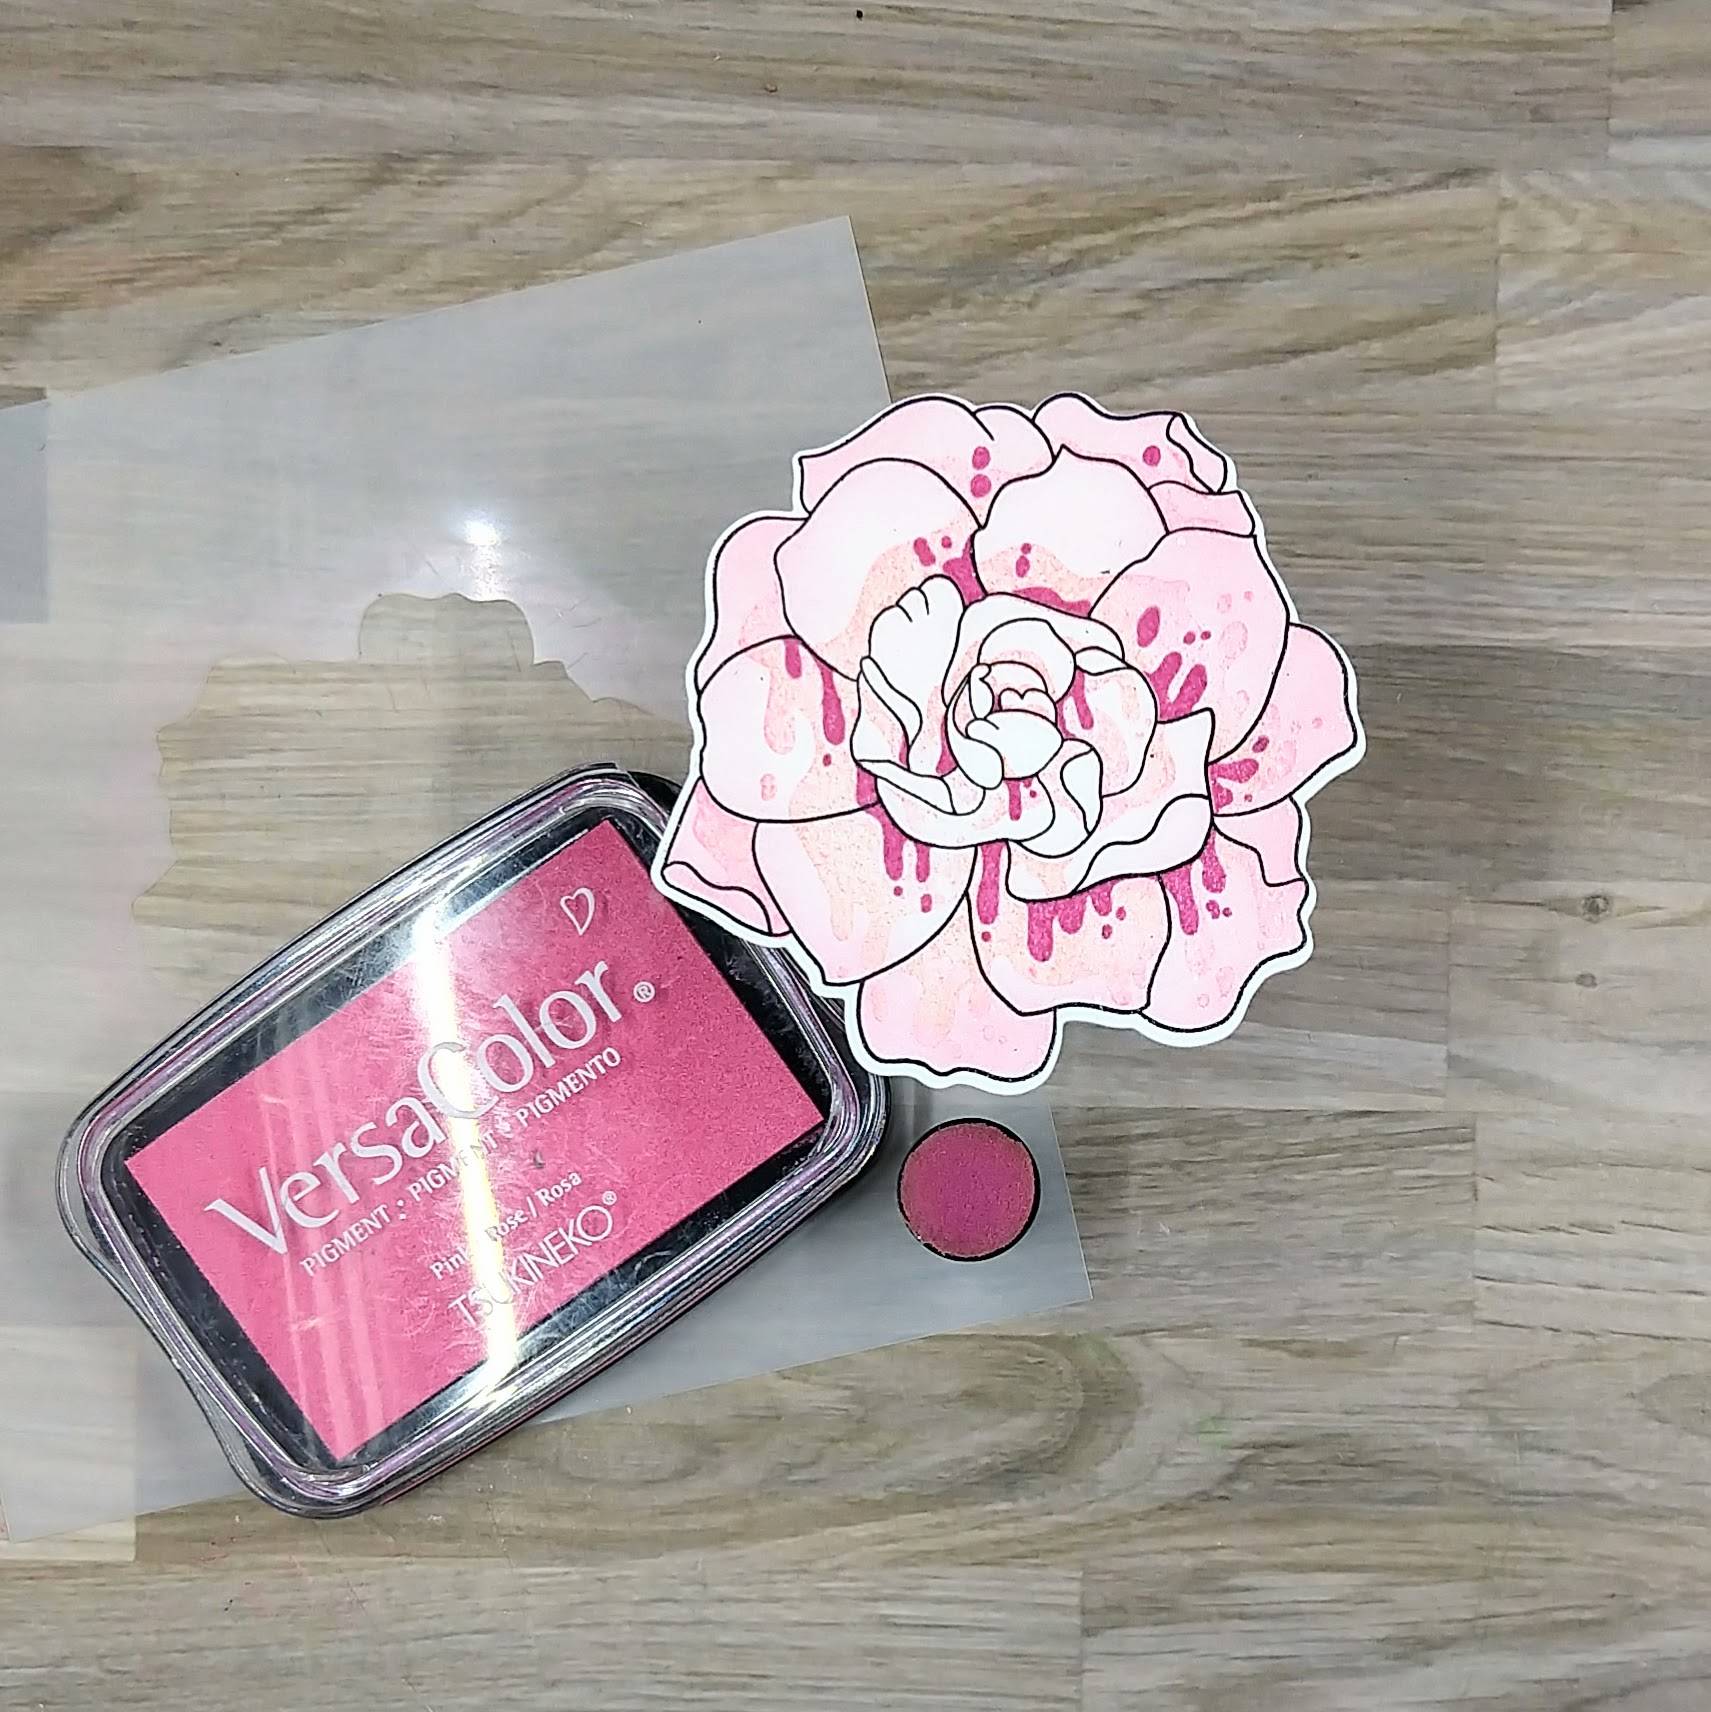
Step 5: Die cut the flower with the corresponding die.
Step 6: Use a sponge dauber to ink blend more Pink VersaColor ink onto the flower using a matching stencil–using more ink and pressure on the outer petals, and less ink and less pressure on the inner petals.
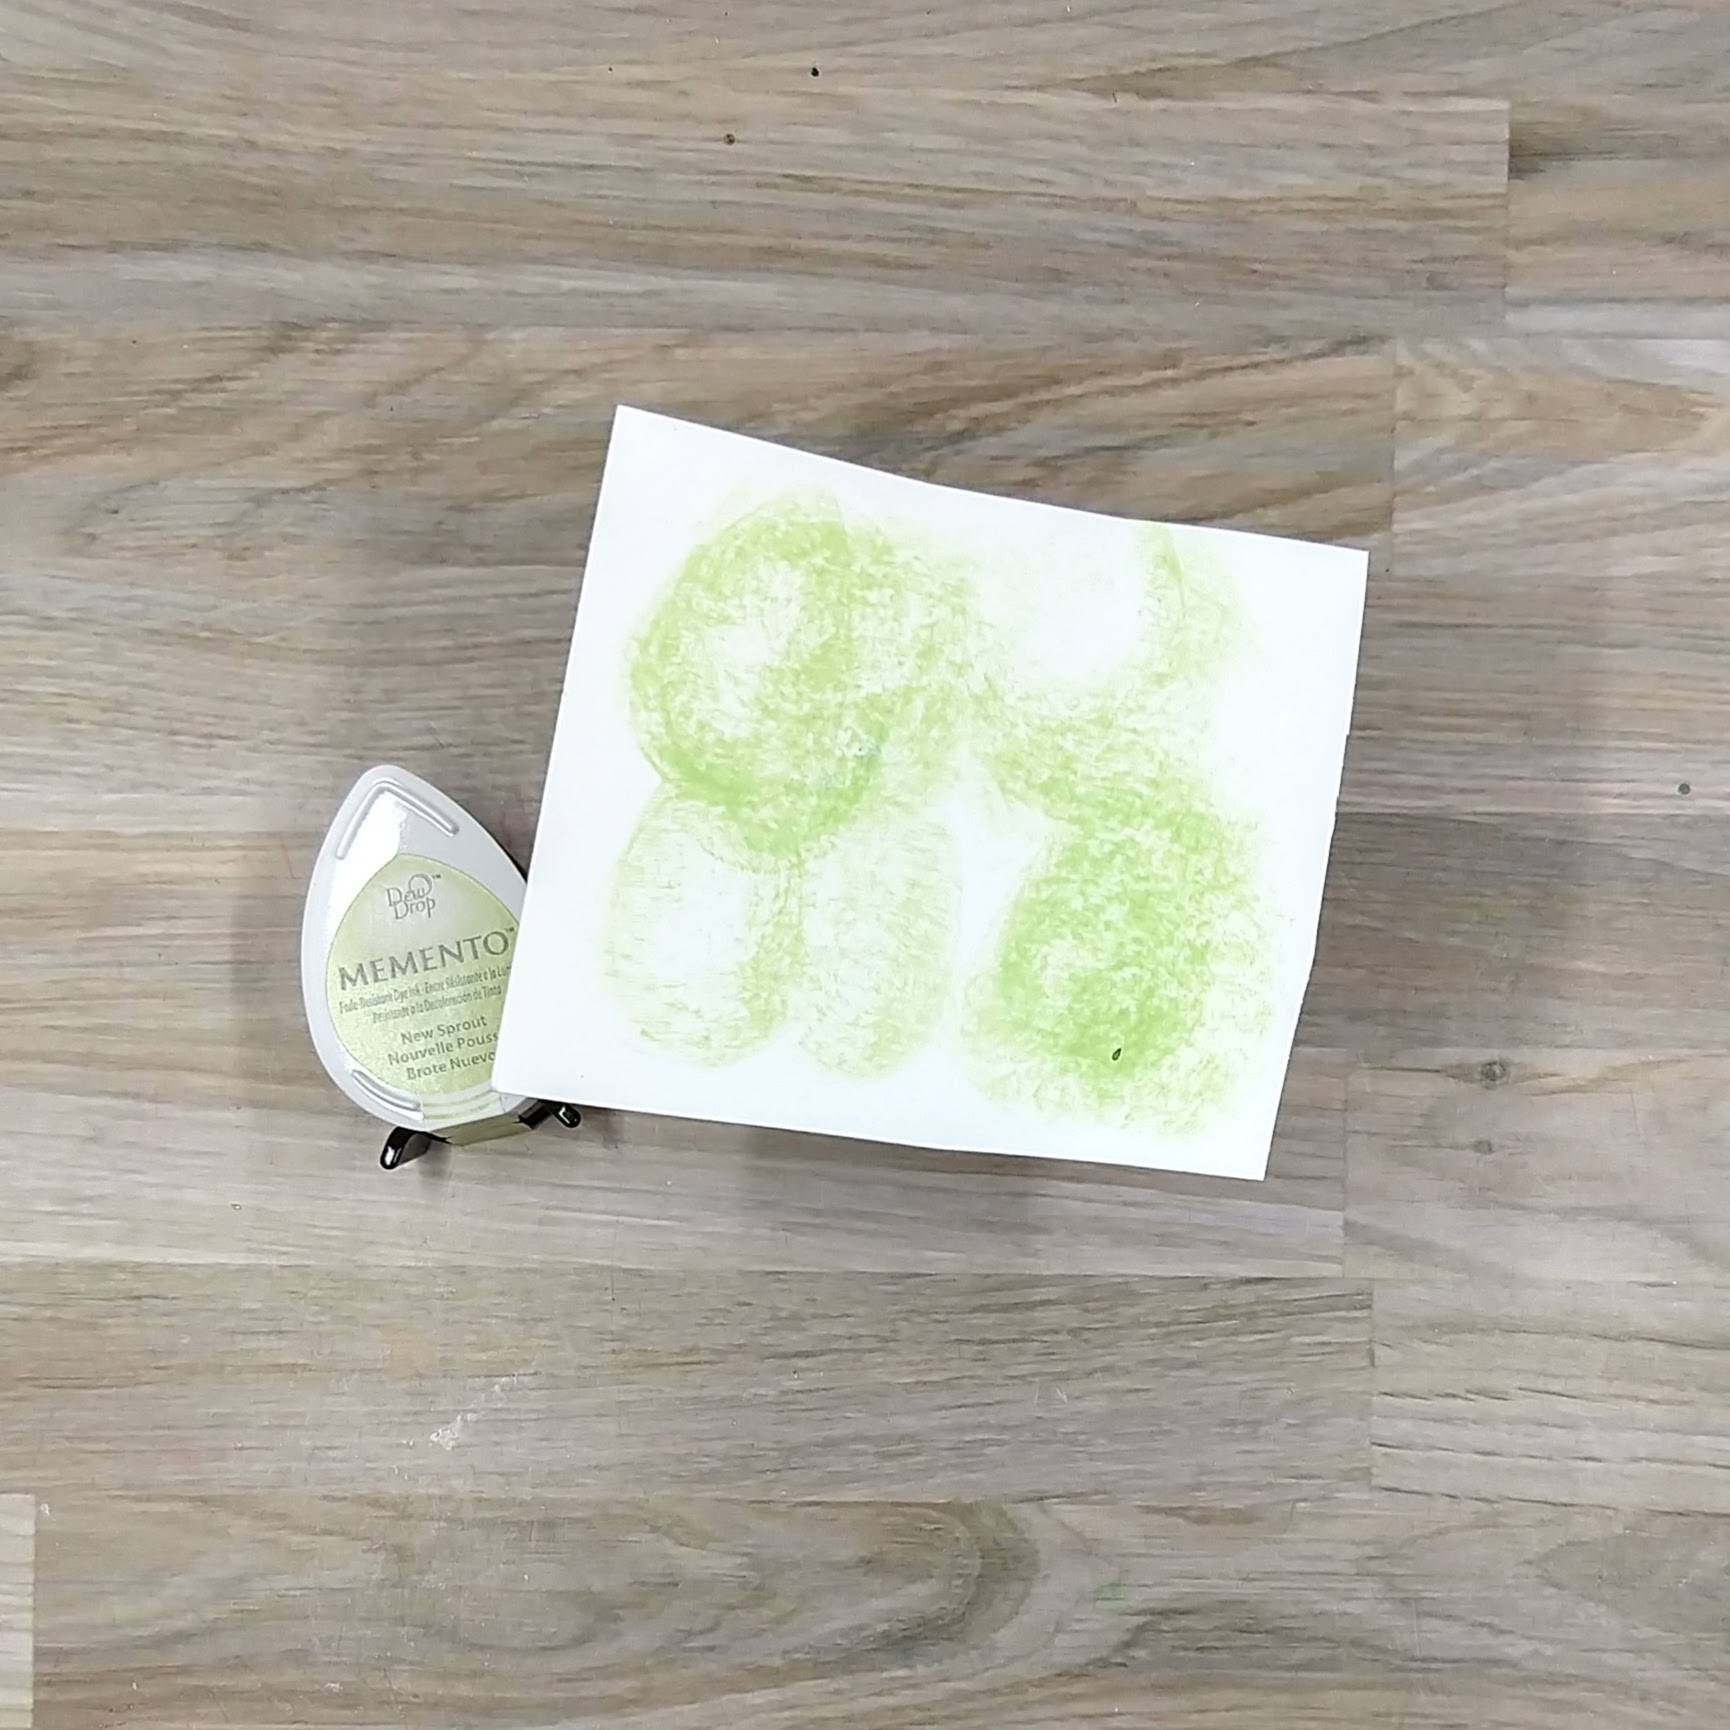
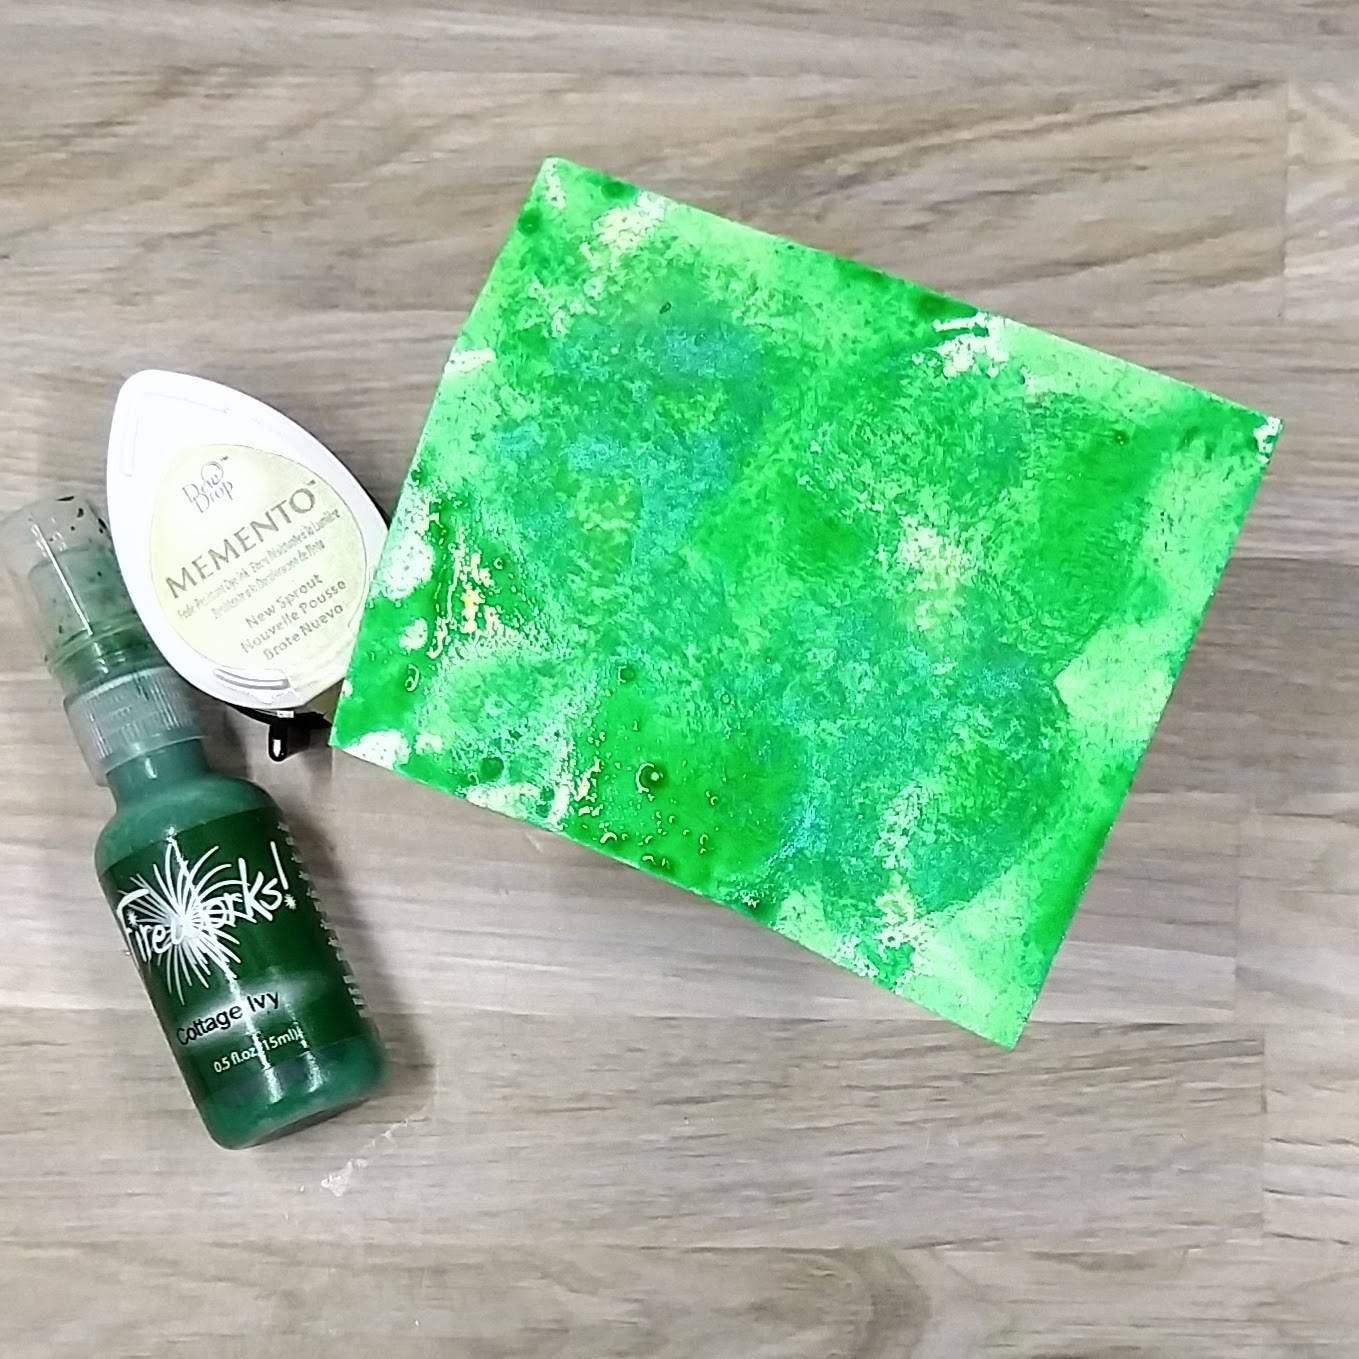
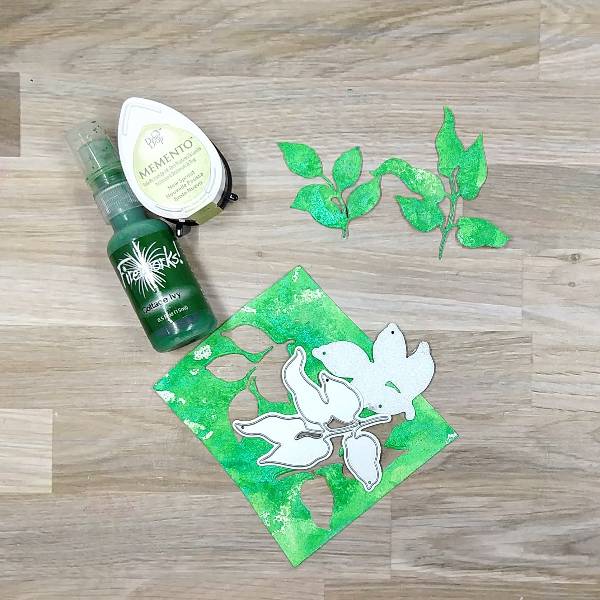
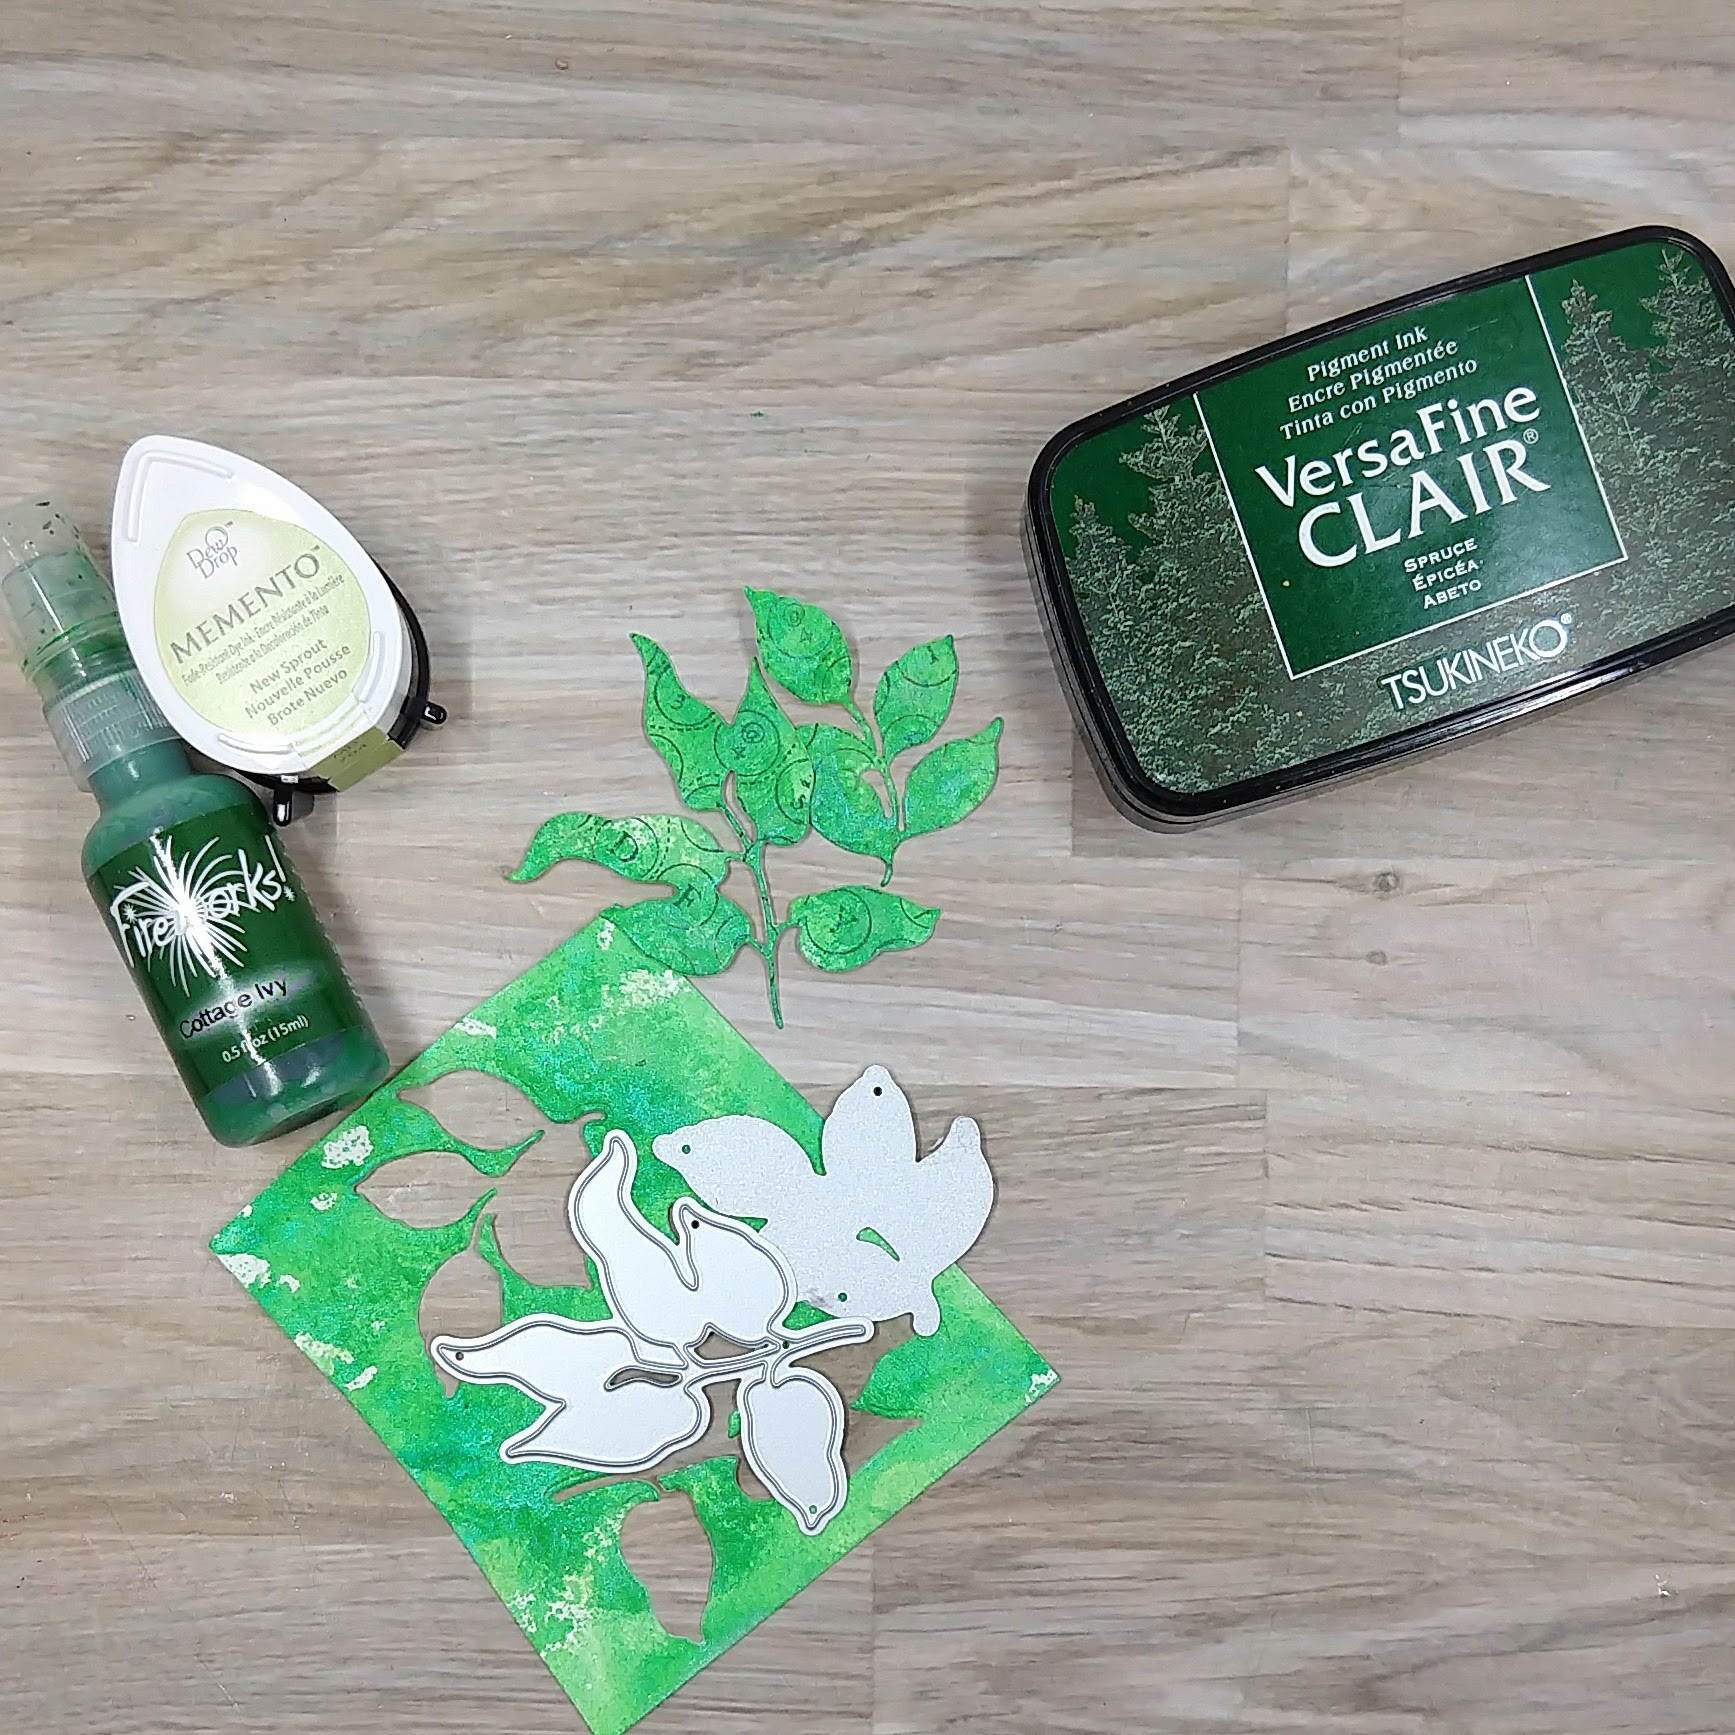
Step 7: Press New Sprout Memento Dye Ink onto a scrap of watercolor paper to start to add green textured color onto the watercolor paper.
Step 8: Spray Cottage Ivy Fireworks! Shimmery Craft Spray onto the same scrap of watercolor paper. Allow to dry.
Step 9: Die cut leaves out of the green watercolor paper using two leaf cluster dies.
Step 10: Stamp Spruce VersaFine Clair Ink onto a woodblock typewriter key stamp and press the die cut leaves onto the stamp. Set the leaves aside to let the ink dry.
Step 11: Die cut the inked watercolor paper from step 1 with the second-largest die in a nesting A2-sized die set.
Step 12: For more texture and interest on the panel, use the Gold irRESISTible Pico Embellisher’ fine tip applicator to add the medium directly onto part of the stencil. Then flip over the stencil and press it onto the watercolor panel. (You may want to put a paper towel over the stencil before pressing or you will probably get some on your hands.)
Step 13: Run more Pink VersaColor ink along the edges of another piece of watercolor paper to make the edges pink. Then die cut the panel with the largest die from the nesting A2-sized die set from step 11.
Step 14: Add a small drop of Black Radiant Neon Amplify! onto another sponge dauber and press the dauber onto the same woodblock typewriter stamp and partially stamp the smaller panel multiple times.
A couple of smudges were mistakenly stamped onto the panel, which were mostly dealt with by splattering more Black Radiant Neon Amplify! mixed with water onto a piece of acetate and then splattered onto the panel.
Step 15: Die cut another piece of watercolor paper with a sentiment die and then spray the die cut multiple times with Rose Gold Sheer Shimmer Craft Spray.
Step 16: Assemble the card by gluing the leaves and sentiment onto the smaller panel. Attach the flower to the panel with foam tape. Then glue the two panels together and glue them both onto an
A2-sized white card base. Finally, glue sequins around the flower.
• Altenew – foam tape • Altenew – die set – Amazing Things • Altenew – die set – Just Leaves • Altenew – stamp set – Amazing Things • Altenew – stencil set – Amazing Things • American Crafts – stencil – Storyteller Radiate • Catherine Pooler – sequin mix – Sofia • Pink & Main – die set – Notched Corner • Simon Says Stamp – die set – Bold Thanks • Old woodblock • typewriter key stamp • Clear Embossing Powder • Watercolor paper • Die cutting machine • Scissors • Glue
Hello crafty friends! Creating backgrounds is always fun, especially when you like something different for your cards. One of my favorite backgrounds is bokeh. There are a couple ways to create bokeh backgrounds but today we are going to do some stamping with any sizes of circle stamps you have in stash.
Let’s get crafting!
Skill: Intermediate Time: 15-20 minutes
Direction:
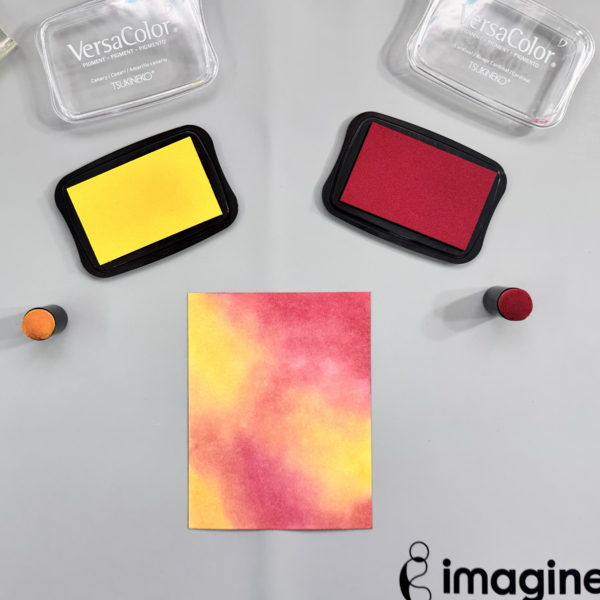
Step 1 Cut out a piece of 8.5 inch x 11 inch white cardstock into 4 panels of 4.25 inch x 5.5 inch.
Add each color of VersaColor inks (Cardinal and Canary) to the cardstock with sponge daubers.
Blend in the colors as you add it to the cardstock to create the third shade.
Dry the inks with a craft heat gun.
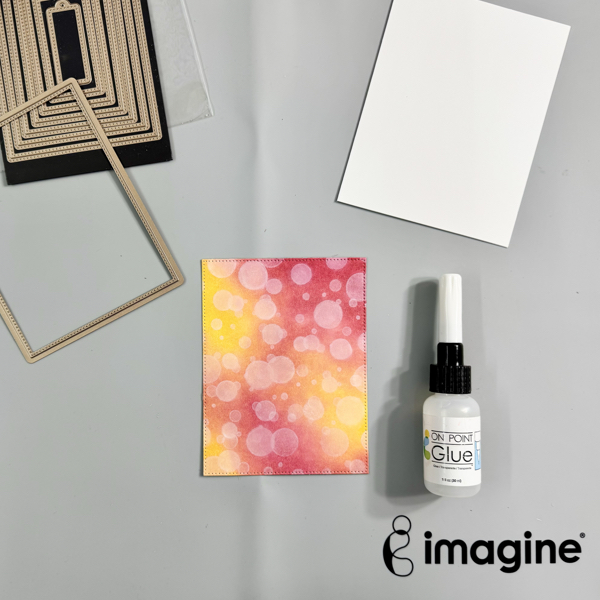
Step 2 Stamp the circles starting with the largest size and then smaller size with a Memento Luxe Wedding Dress ink pad. Repeat the stamping until you like the look of your bokeh background. Make sure some circles overlap each other to create the shadow effect.
When stamping, you might notice the lines on the edges of circles, use a small blending brush or sponge dauber to blend in the white ink around to smoothen the lines.
Dry again the whole background panel with a craft heat gun.
Step 3 Cut the background panel with one of the rectangle dies.
Add the background panel to the card base (A2 size card) with On Point Glue. Add a couple of acrylic blocks on top of it to hold it down while the glue is drying.
Step 4 Cut out 2-3 white cardstocks with the sentiment panel.
Stack the cutouts together with On Point Glue to create a chipboard sentiment panel (thicker die cut).
Step 5 Dab the VersaMark ink all over the sentiment panel, make sure it covers the whole panel.
Add some of the MBoss Sparkle embossing powder (retired) on it and heat it up with a craft heat gun. You will have a sparkly sentiment chipboard!
Add the sentiment on the card with the On Point Glue. Add some acrylic blocks (or anything heavy) on the sentiment to hold it down while the glue is drying.
Isn’t it a fun card making technique to do? You can create with any color inks, or you can even do colorful bokeh and not only white. Give it a try and have fun!