See How To Make A Birthday Card With A Dynamic Look

by Elina Stromberg

See How To Make A Birthday Card With A Dynamic Look

This card project is a playful combination of two very different design elements; a simple white graphical front and a rich bright colorful background. This design idea can be used for various card projects of different sizes and shapes; this background looks as great on a large square card as on a small ATC. For the background use your favorite colors and color combinations and add additional layers with stamps and stencils. The graphical white card front will calm down even the busiest color burst background making the result look elegant and beautiful.

Skill: Beginner
Time: 2 hours + drying time

Direction

Step 1

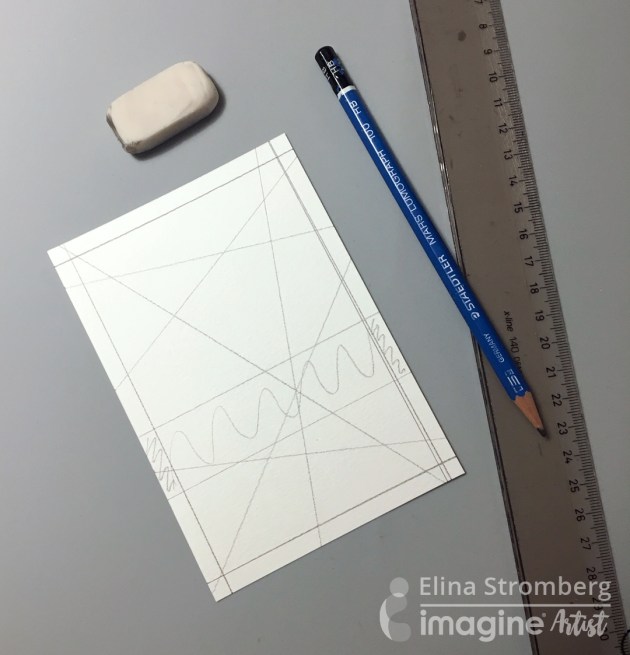
Trim a panel from white cardstock. The size should be slightly smaller than your card base (approx. 0.25 inch smaller on all edges). Place the panel on your craft mat, backside up. Using a pencil and a ruler trace a border around the edges. Trace a few straight lines across the panel, letting the lines cross. Decide on the placement of the solid front label that will be the base for the stamped sentiment. Mark the label area clearly so that it will be left uncut.

Step 2

Place the front panel on a cutting mat. Using a craft knife and a ruler cut out the areas inside the crossing lines. Leave a thin border on both sides of the lines. Do not cut into the solid label area.

Step 3

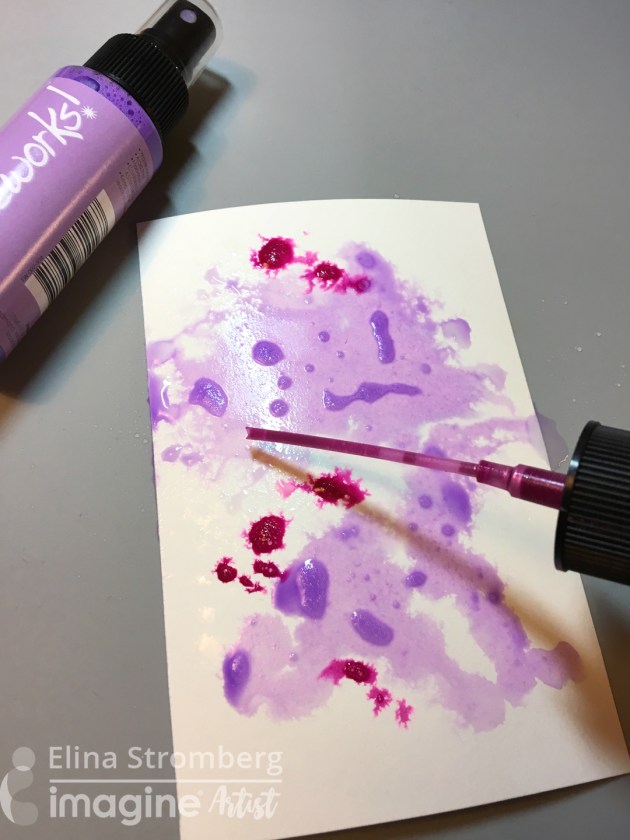
Mist a piece of white heavy watercolor paper with water. Use your craft mat as a palette: Remove the nozzle from the Fireworks mist, pour a drop of color on the craft mat and apply color on the paper using a brush. Add drops of another matching color either with a brush or with the nozzle. Mix colors using both water and a brush, let dry before adding more layers of color.

Step 4

When finished with painting splash the paper with clear water. Let water react with the colors for a few seconds and lift off excess by pressing the paper with a paper towel. Let dry completely and trim to size of your white card front.

Step  5

Using one or two ink colors stamp the sentiment text on the card front.

Step 6

Assemble the card by first gluing the white card front on the colorful background and then attaching the entire front panel on the card base.


Extra Tip:

When coloring a card background I often use a paper slightly larger than my finished project. After trimming the panel to the final size I keep the colorful leftover pieces and use them for decorating the inside of the card. This way I’m continuing the same color and/or pattern theme on the inside of the card!

Supplies

Imagine

Other

  • White cardstock
  • White heavy watercolor paper
  • Solid color card base
  • Pencil
  • Ruler
  • Watercolor brush
  • Craft knife
  • Cutting mat
  • Paper trimmer
  • Glue
  • Double-sided tape
  • Ali Edwards – ‘Hello Birthday’ Stamp
Use Different Inks to Make a Congrats Graduation Card

by Iris Rodriguez

Use Different Inks to Make a Congrats Graduation Card

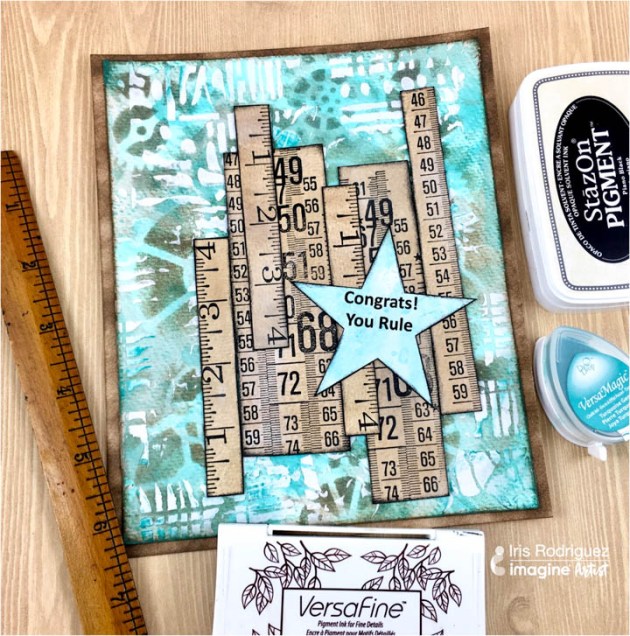
Graduation season is upon us. As much as it a joyous time in anyone’s life, you feel the pressure of the final exams, think about that next phase of your life and probably make a big move. Don’t forget the grad in your life, and make him/her a fun, grungy card. I will show you how you can create a simple, yet layered background with fun ruler embellishments and matching sentiment.

Skill: Beginner
Time: 30 minutes

Directions


Step 1

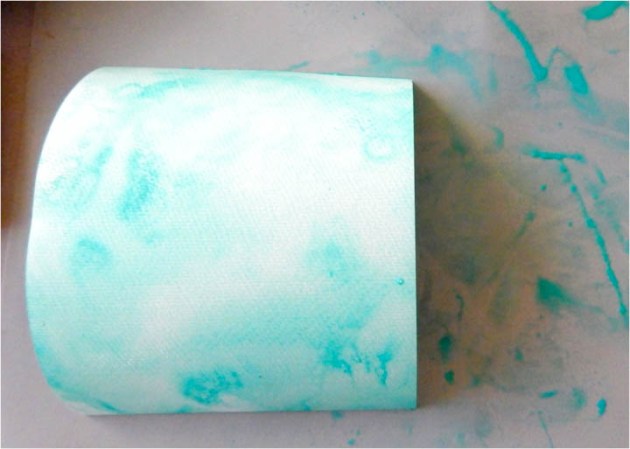
Smoosh the Turquoise Gem VersaMagic ink onto the Imagine Craft Mat.


Step 2

Spray water over the ink. Smoosh the watercolor paper and create a random background. Dry the paper.


Step 3

Stencil the gears with the Vintage Sepia VersaFine ink and Inkblusher.


Step 4

Using the palette knife and modeling paste, stencil another image.


Step 5

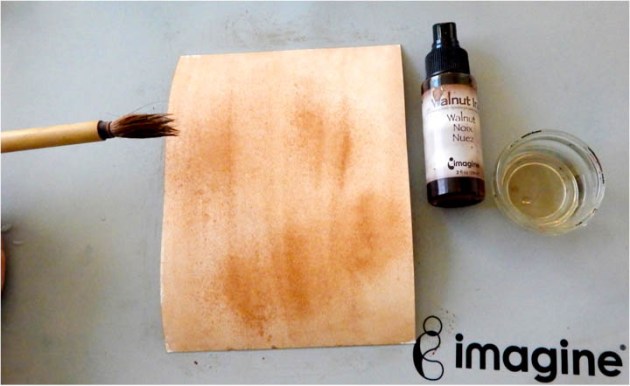
Spray some Walnut Ink, then brush the ink with a wet brush. Dry paper.


Step 6

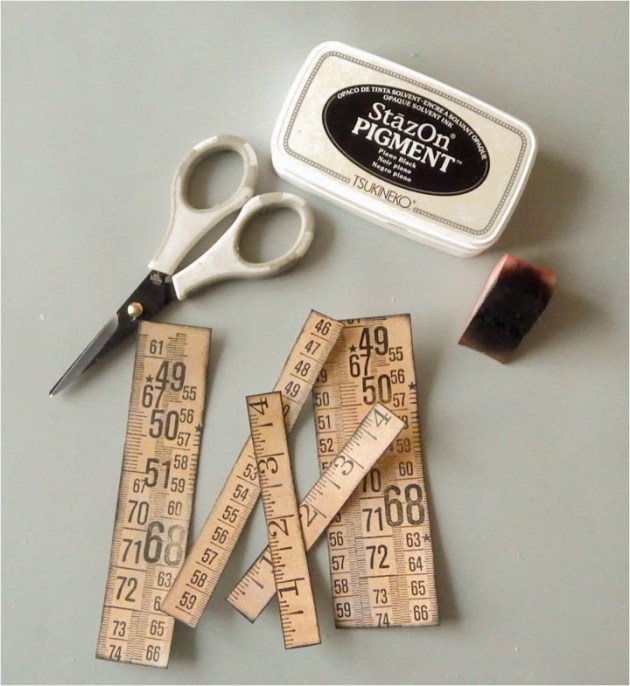
Stamp the ruler stamps with the Piano Black StazOn Pigment ink.


Step 7

Cut out the rulers and ink the edges with the Piano Black StazOn Pigment ink.


Step 8

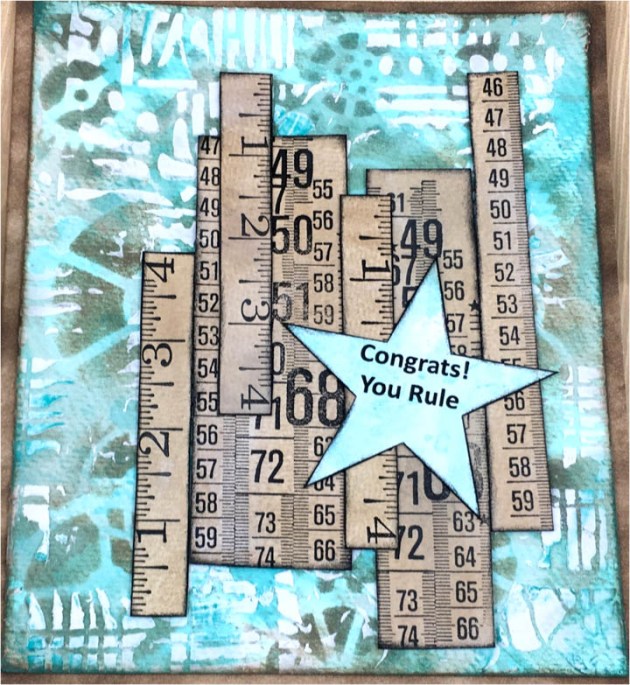
Assemble card. Glue on the rulers and add a sentiment.


Supplies

Imagine
Other
  • Watercolor Paper
  • The Crafters Workshop – 6×6 Gears stencil
  • Carabelle Studio – Steampunk Metre stamp
  • Stampendous – Ruler stamp
  • Liquitex – Modeling Paste

Learn How to Create a Beautiful Thank You Card with Ink Blending

by Arjita Sepaha Singh

Learn How to Create a Beautiful Thank You Card with Ink Blending

For my card today, I have created a peacock inspired color blended background. I have used Versafine Clair Inks and Jumbo daubers which make blending super easy and seamless. Once the background was ready I used a beautiful lacy rubber stamp and the brand new Stazon Pigment Ink in white to stamp the image. This delicate image was crisp and beautiful. To finish the card I used a die cut and a sentiment. I also added gorgeous sparkle using the new Sheer Shimmer Stix.

Skill: Beginner
Time: 30 minutes

Directions

Supplies

Imagine
Other
  • Rubber background Stamp
  • Doily die
  • Cardstock – White
  • Double sided tape
  • Scissors

Create an Ombre Background Using VersaFine Clair and Vellum Flowers

by Arjita Sepaha Singh

Create an Ombre Background Using VersaFine Clair and Vellum Flowers

For today’s card, I heat embossed few flower images with white embossing powder on vellum. I used my sharp pair of scissors to cut them. To create the background I have used Versafine Clair inks which are very highly pigmented and also blend beautifully with each other. I used a jumbo dauber to add the colors. The sunset ombre looks so beautiful and then arranged the flowers on the card. To finish the card I added few splatters of the shimmer spray and a sentiment.

Skill: Intermediate
Time: 1 hour

Directions

Supplies

Imagine

• VersaFine Clair – Red Tulip, Summer Time, Cheerful
• Embossing Powder – White
• VersaMark
• Jumbo Sponge Dauber
• On Point Glue
• Sheer Shimmer Spray – Sparkle

Other

• Cardstock – White, Vellum
• Powder Tool
• Heat gun
• Misti
• Scissors
• Stamp – sentiment, flowers

Be Inspired With A Creative Design For Valentines Day

by Martha Lucia Gomez

Be Inspired With A Creative Design For Valentines Day

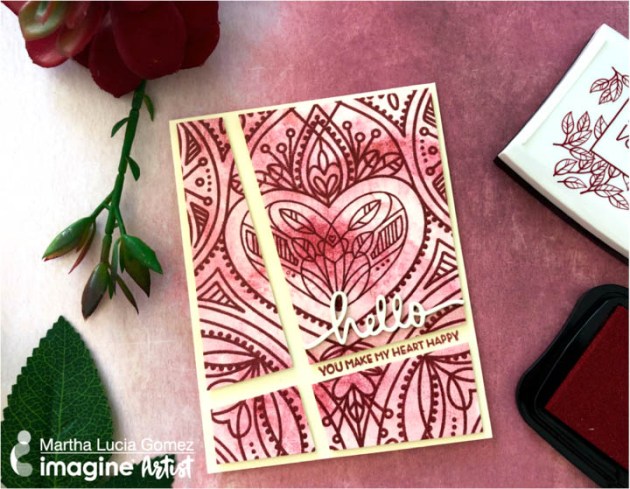
Hello friends! It’s a New Year and our next big cardmaking holiday is right around the corner. Today, I want to share a special Valentine’s card with a sentiment that expresses “You make my Heart Happy!” On this project you will see a few advantages of the new Craft Mat of Imagine.

Skill: Intermediate
Time: 1 hour

Directions


Step 1

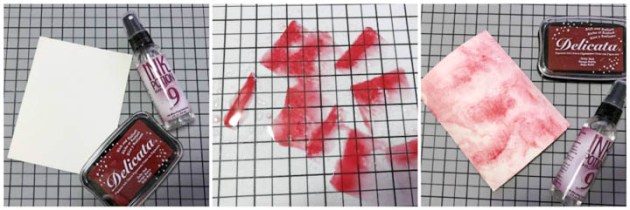
I am falling in love with the new craft mat, the grey color and the grid are perfect to work on any side and use it with your different mediums or inks. To create this card, I used Ruby Red Delicata Ink for the background texture and VersaFine Crimson Red to stamp the images. I took a piece of watercolor paper and over the mat I applied some touches of Delicata Ruby Red Ink and sprayed with Ink Potion No. 9, then I put the watercolor paper over the sprayed ink and created the texture. Maybe you don’t notice on the photos but the Delicata Ink give shiny touches to the paper and it looks very beautiful in person. I let the paper dry naturally but if you want to speed the process you can use the heat tool.


Step 2

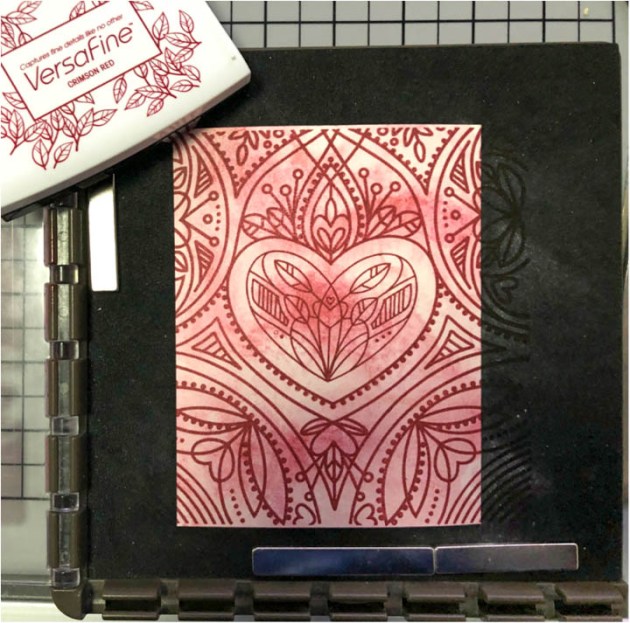
I stamped an image using the background stamp Center Cut Heart Background from Simon Says Stamps with VersaFine Crimson Red. This is one of my favorites colors on this ink because it is a dark red and show up beautifully with the watercolor look. Also, I covered the freshly stamped background with Clear Embossing Powder and melted with the heat tool.


Step 3

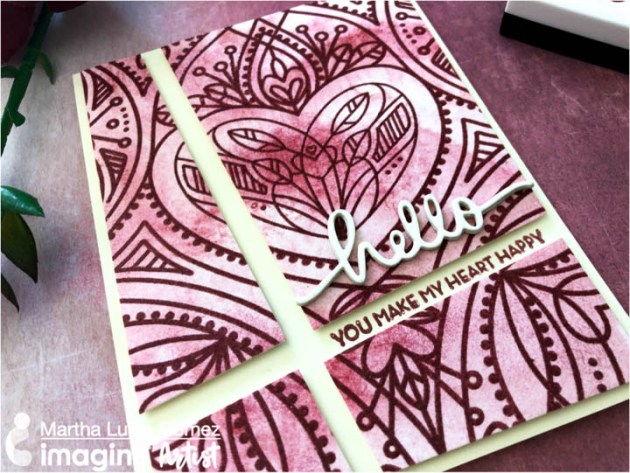
I resized the stamped layer to have it 3-3/4″x 5″ and made a diagonal die cuts over the layer to make the design more interesting. I pasted the layer over a very vanilla card base using white foam behind every piece and to finalize the process I added a sentiment from the stamp set Happy Heart of Altenew in between of the cut lines. As final touch, I added a die cut word “hello” that I cut several times to create a stacked die and pasted with On Point Glue. I love to have these kind of details to make my cards more interesting.

Supplies

Imagine
Other
  • Stamparatus or Misti Stamping Tool
  • Stamps – Center Cut Heart Background by Simon Says Stamps and Happy Heart from Altenew
  • Paper Trimmer
  • White Foam
  • “hello” die cut
  • Die cut machine


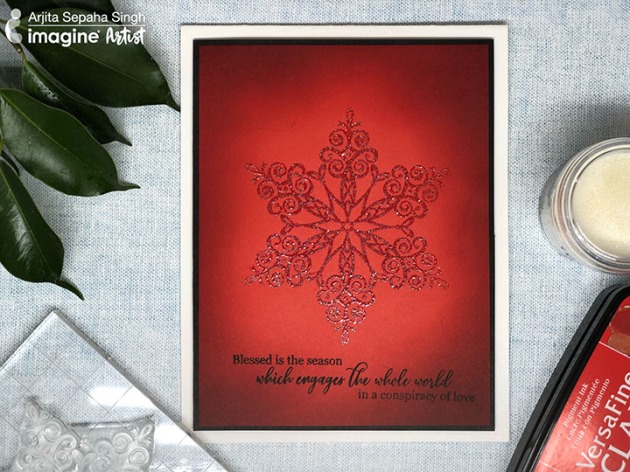
Create a Glittery Snowflake on Glowing Red Background

by Arjita Sepaha Singh

For today’s card, I used the Sparkle Embossing Powder to create the beautiful snowflake on a bright red cardstock. I used VersaMark Embossing Ink to stamp the snowflake. Once the embossing powder was melted I blended some red inks with a sponge dauber around the edges of the card. This adds a beautiful glow to the card and I finished the card with a sentiment in black. This is a perfect project to be mass-produced for your Christmas cards.

Skill: Beginner
Time: 20 minutes

Directions

Supplies

Imagine
Other
  • Card Stock – White, Black, Red
  • Powder Tool
  • Heat gun
  • Misti Stamping Tool