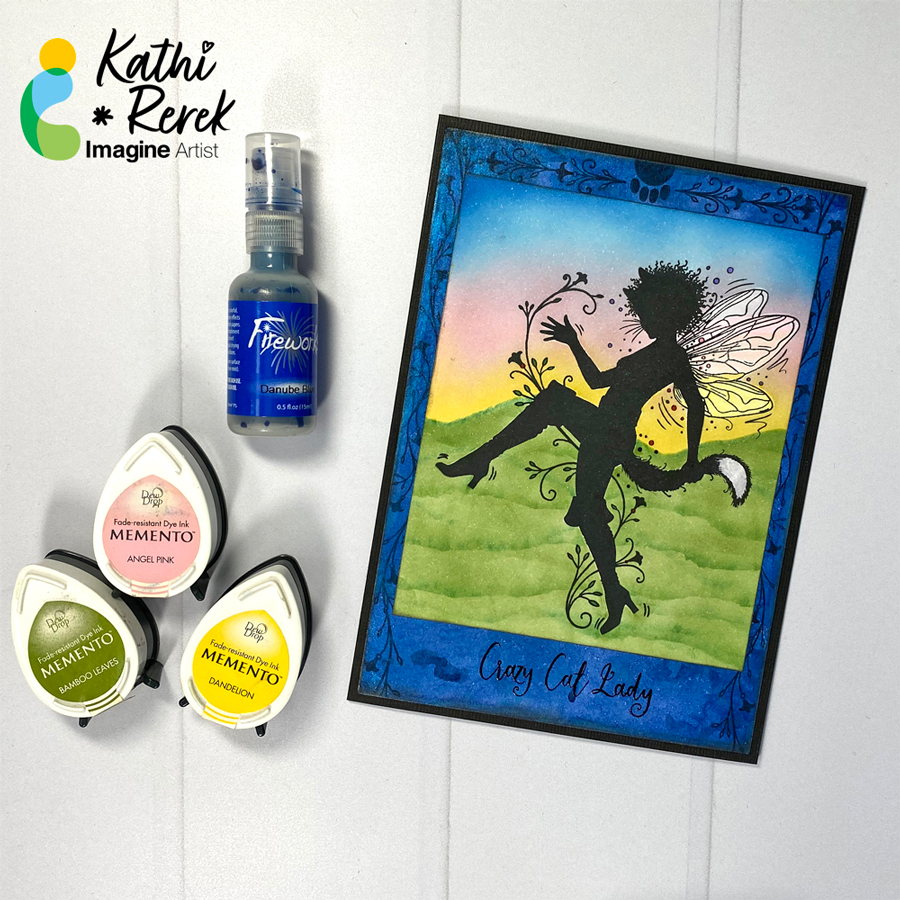
Let’s Make A Crazy Cat Lady Card

By Kathi Rerek

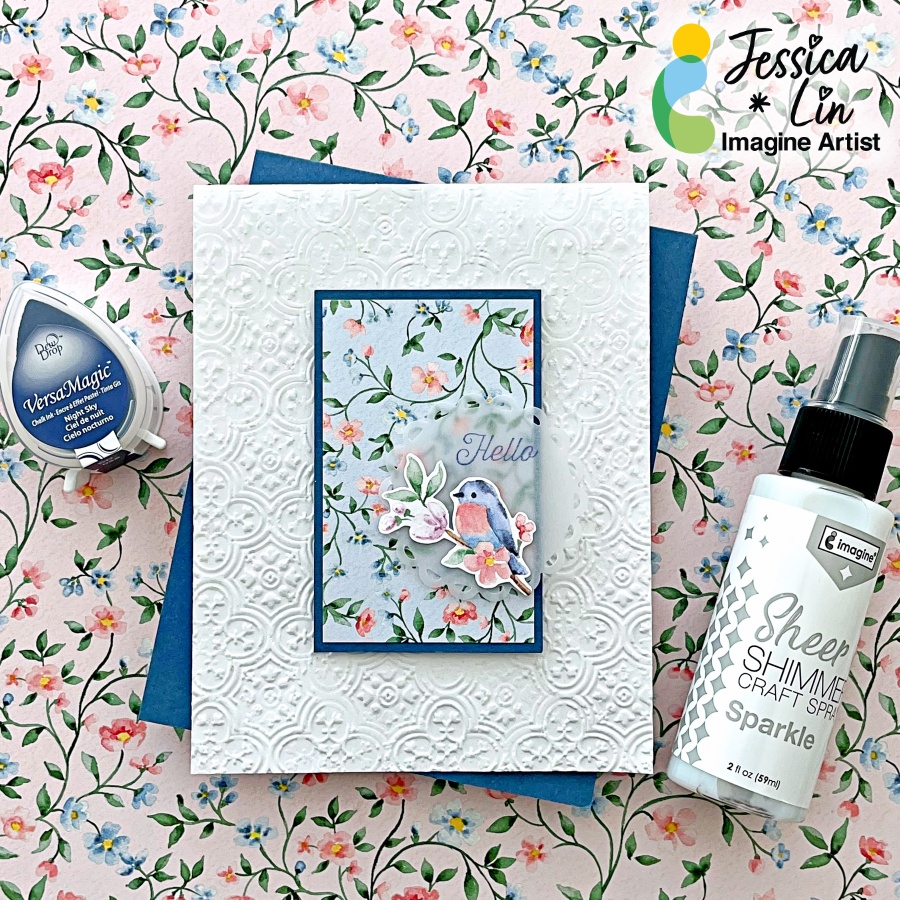
I’m delighted to be returning to the Imagine Crafts AIR program again this year. Our first assignment was to create a project that reflected ourselves. I love creating scenic cards, magical creatures, and cats!

Skill Level: Intermediate
Time: 1.5 hour

Step 1:
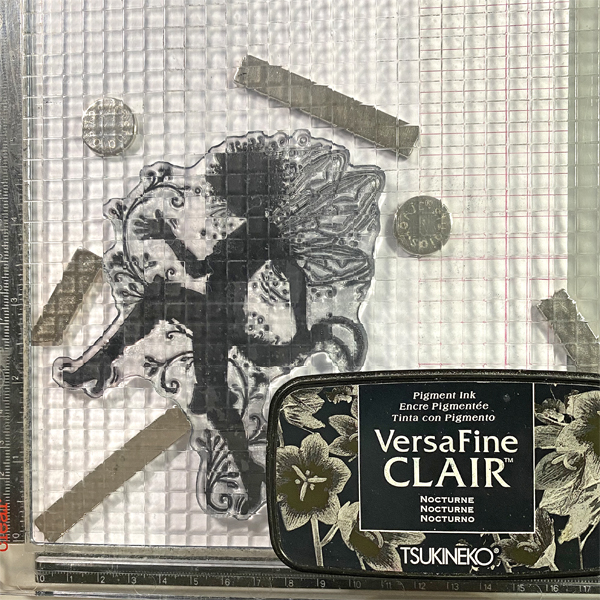
Use magnets to secure a 4” x 5.25” piece of white cardstock onto the base of a stamping platform.
Use Nocturne VersaFine Clair ink to stamp the Puss in Boots image twice — once onto the image panel and once onto repositionable sticker paper.

Step 2:
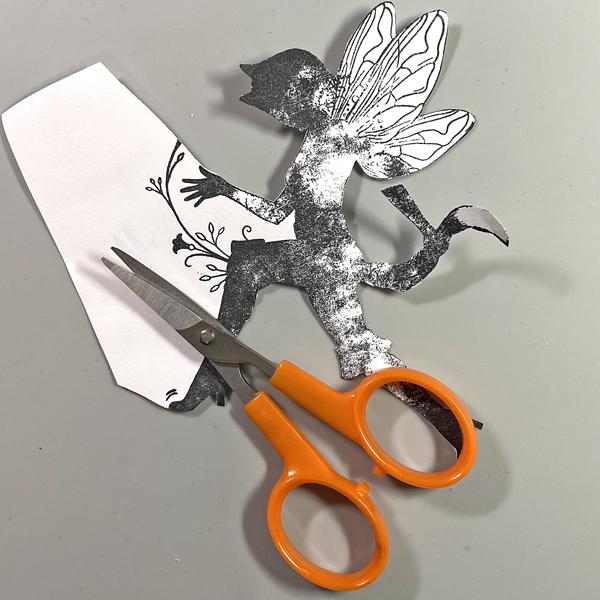
Fussy-cut the sticker paper version and place it onto the image panel as a mask.

Step 3:
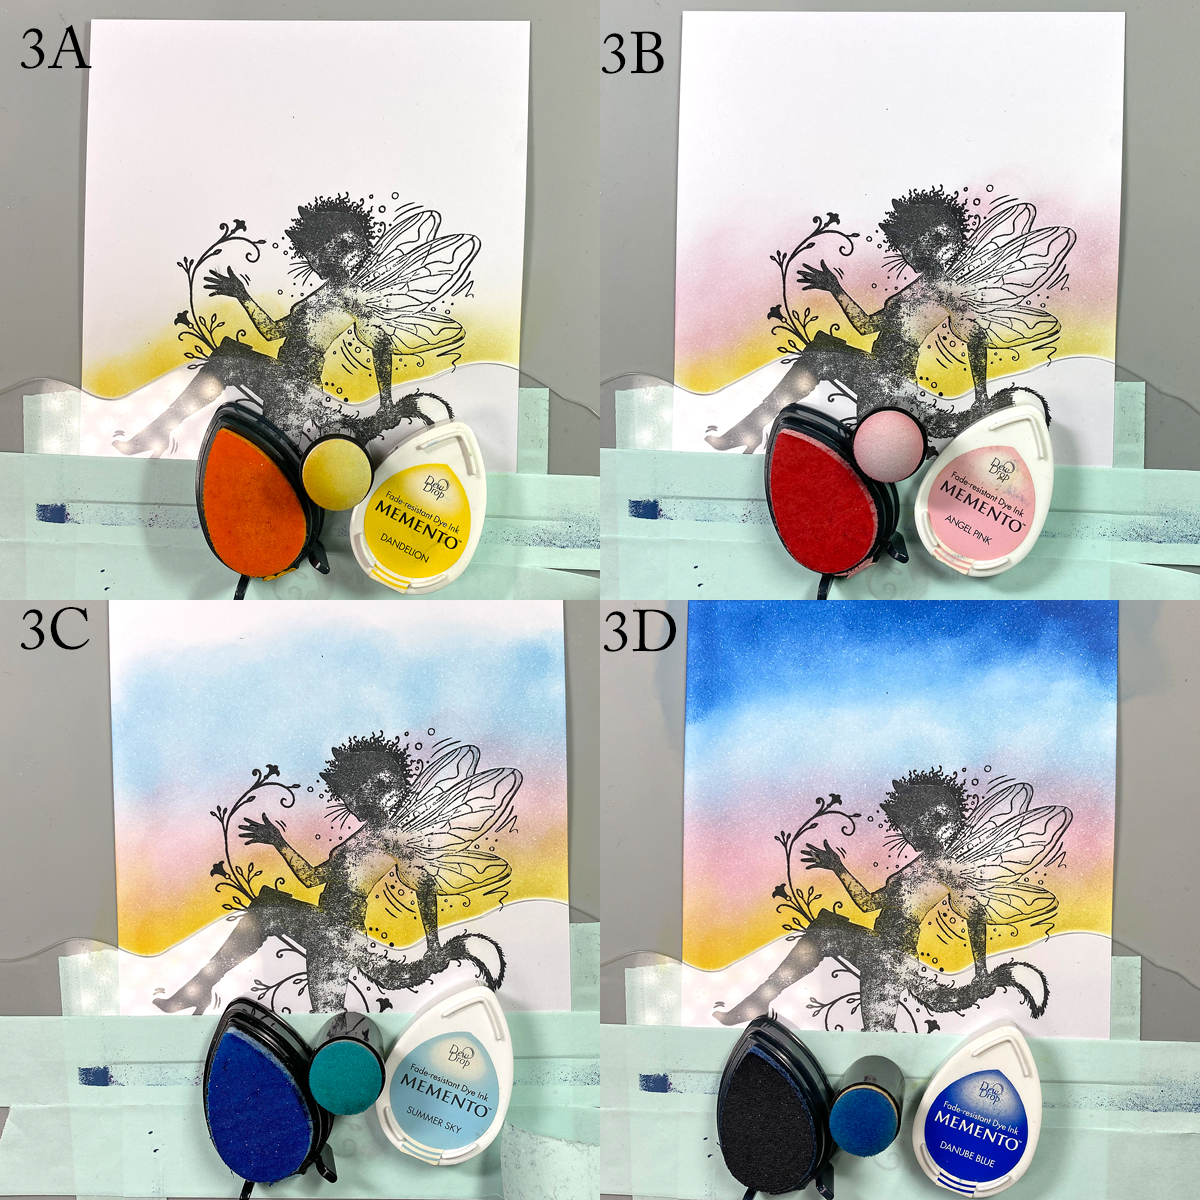
Use low-tack tape to secure the rolling hills mask from the Acetate Hills Mask set to the image panel as shown.

Use a sponge dauber to apply Dandelion Memento ink over the mask and masked image onto the image panel. (3A). Use another dauber to apply Angel Pink Memento ink onto the image panel so the pink ink is slightly overlapping and blending with the yellow ink (3B). Repeat this step with Summer Sky Memento ink (3C), then Danube Blue Memento ink (3D).

Step 4:
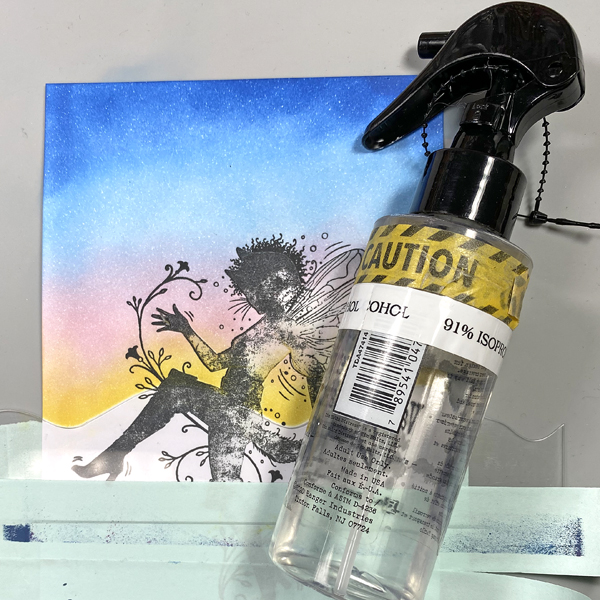
Spray the image panel with 91% Isopropyl Alcohol to slightly blend the colors and to add some white speckles and splatter.

Step 5:
Trace the rolling hills mask from the Acetate Hills Mask set onto white cardstock, fussy-cut along the trace lines. Label the top and bottom of the mask so you know which is which.
Place the top homemade mask over the sky area of the image panel and secure with low-tack tape.
Use a Fantastix to apply Cottage Ivy Memento ink over the mask onto the image panel (5A).
Place the acetate rolling hills mask below the hilly horizon. Use a Fantastix to apply Cottage Ivy Memento ink over the mask onto the image panel (5B). Continue this process to add additional grassy hills.
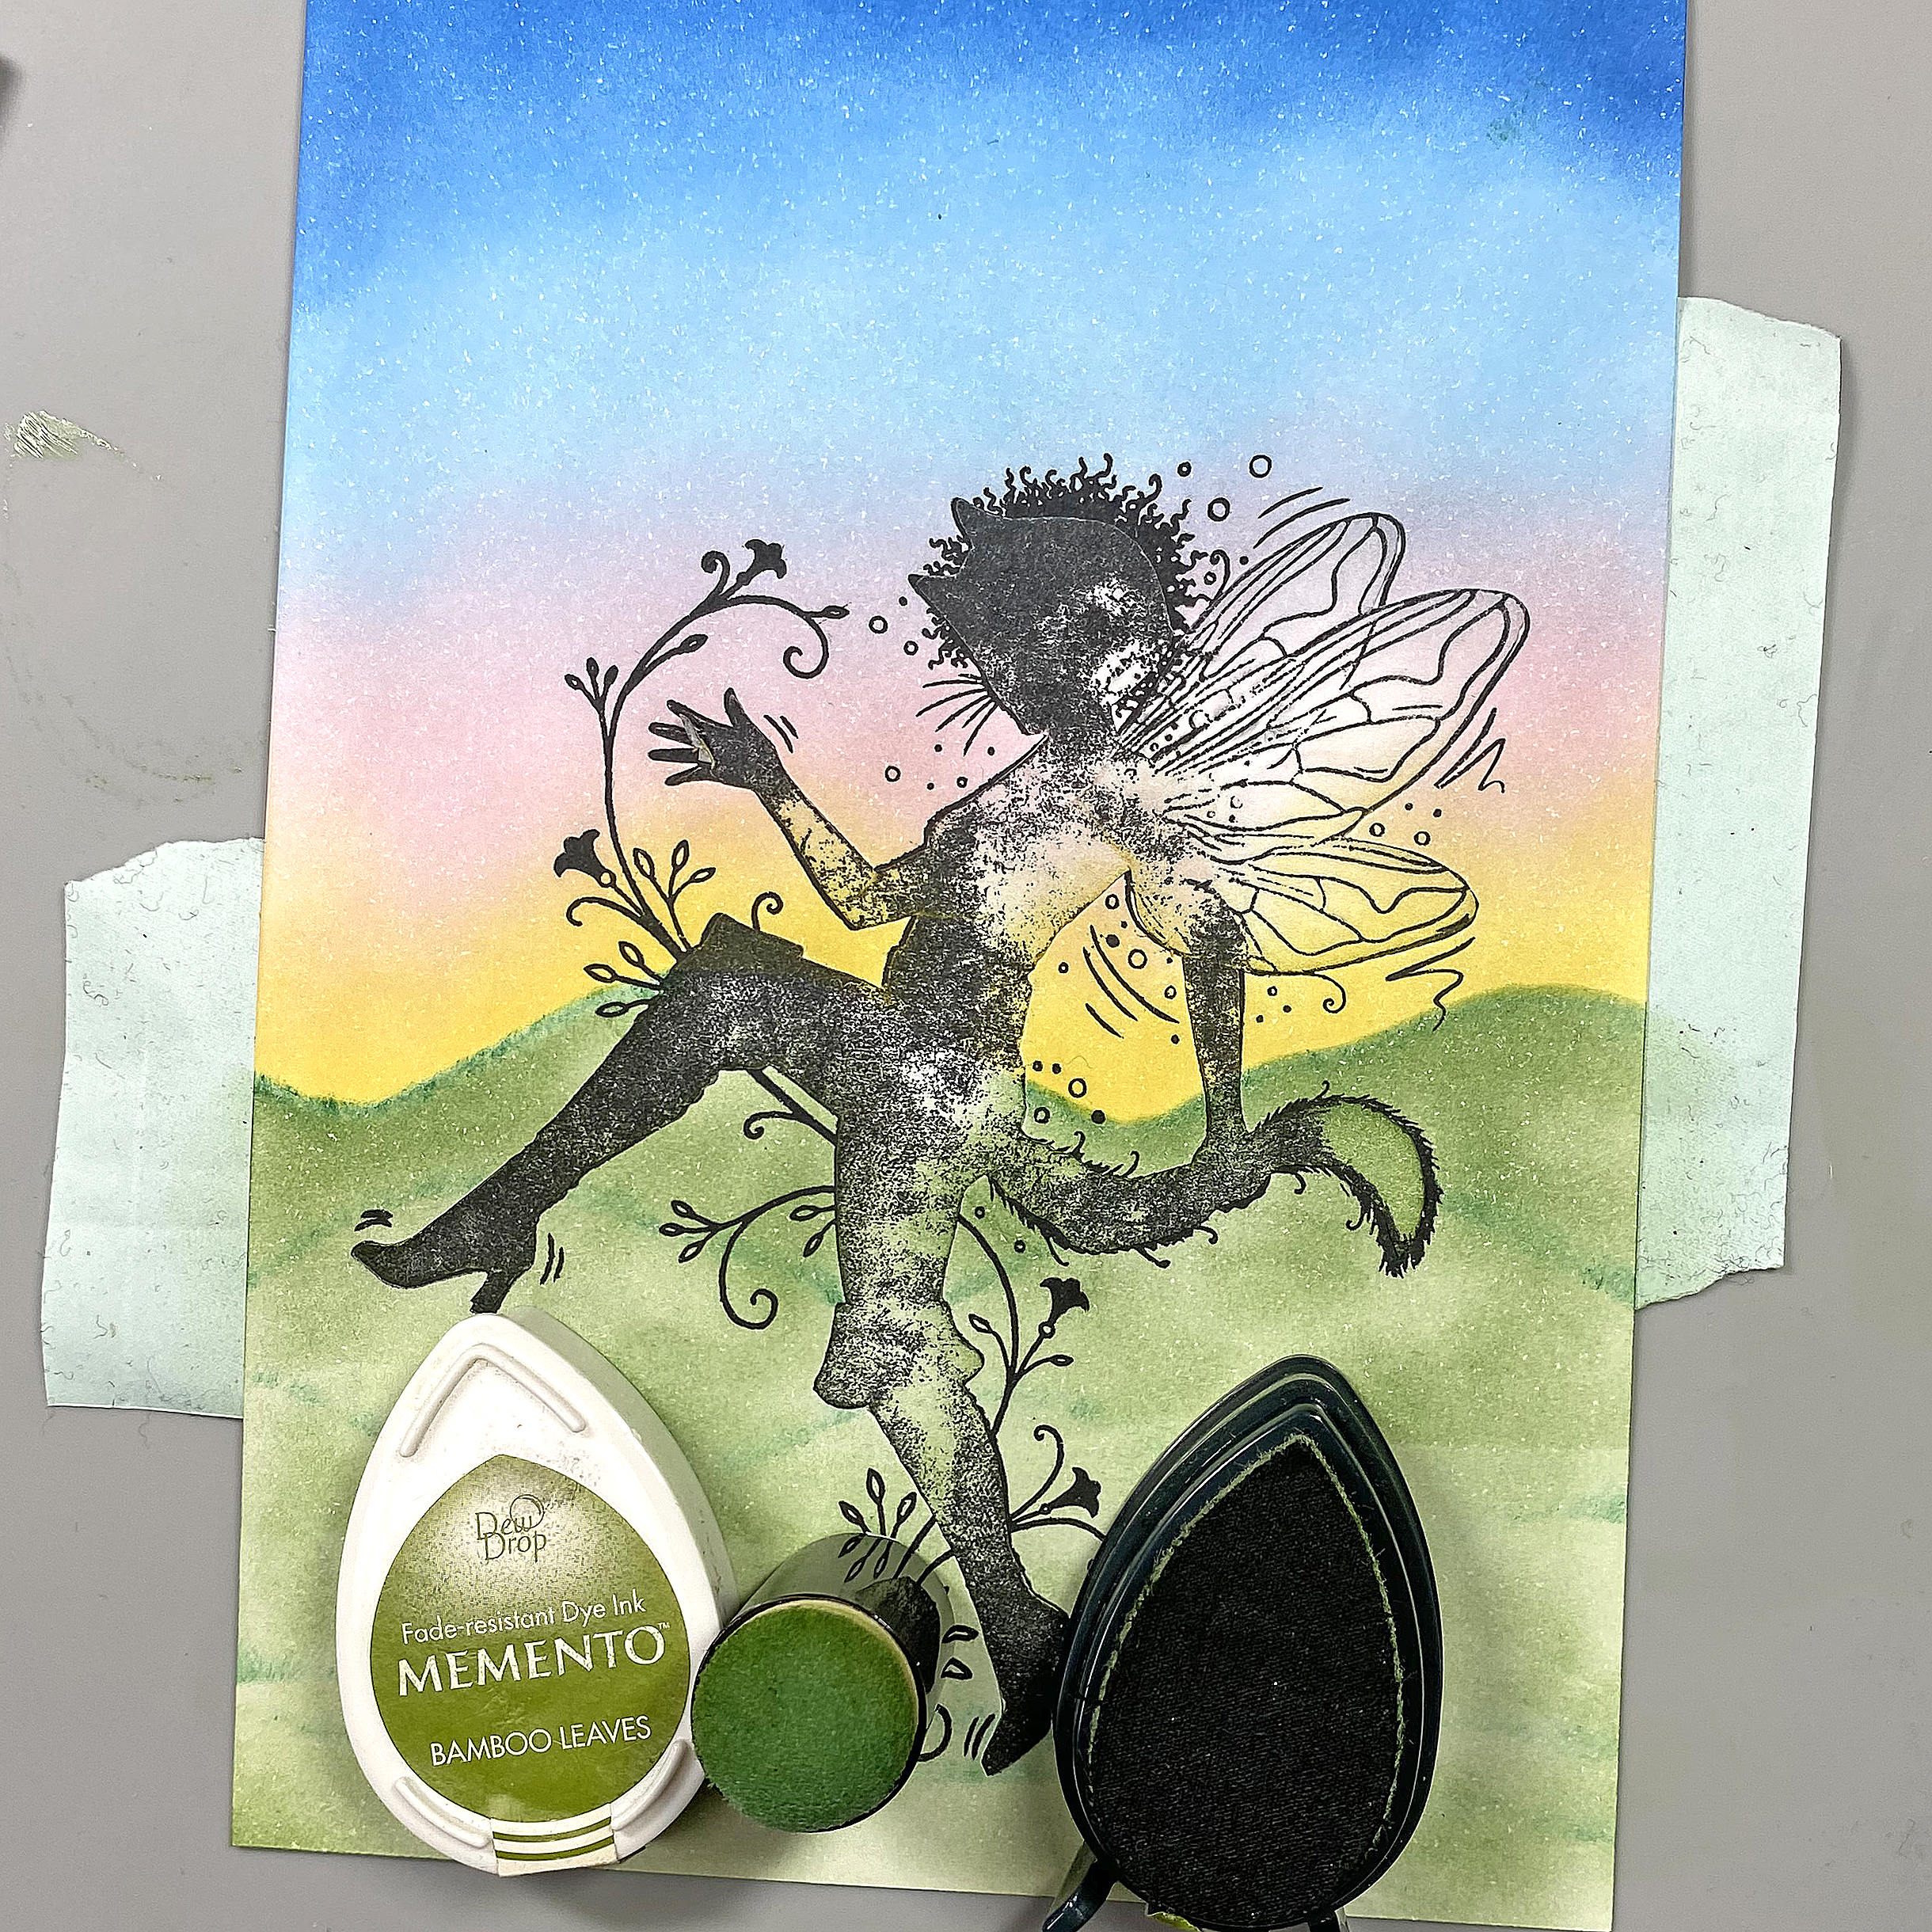
Step 6:
Use a sponge dauber and Bamboo Leaves Memento ink to fill in the grassy hills.
Colors the white area of the tail and the wings with Copic markers. Set the image panel aside.
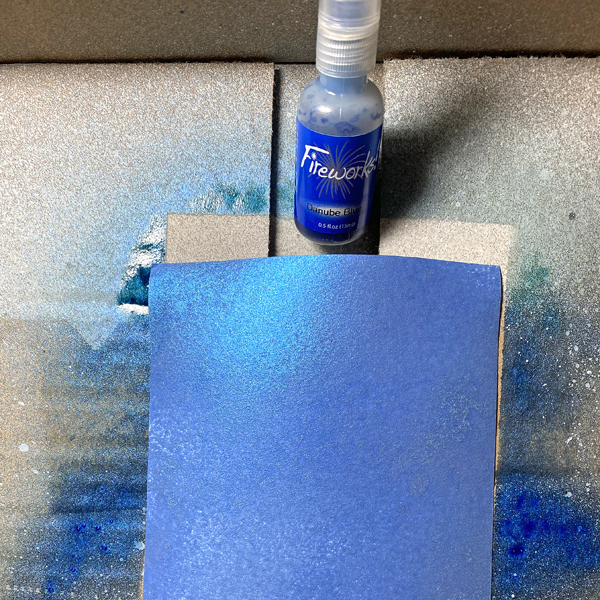
Step 7:
Place a piece of 4.75” x 6.75” Mixed Media cardstock into a box. Spray the panel with Danube Blue Firewords Spray to create a shimmery blue background panel. Heat set.
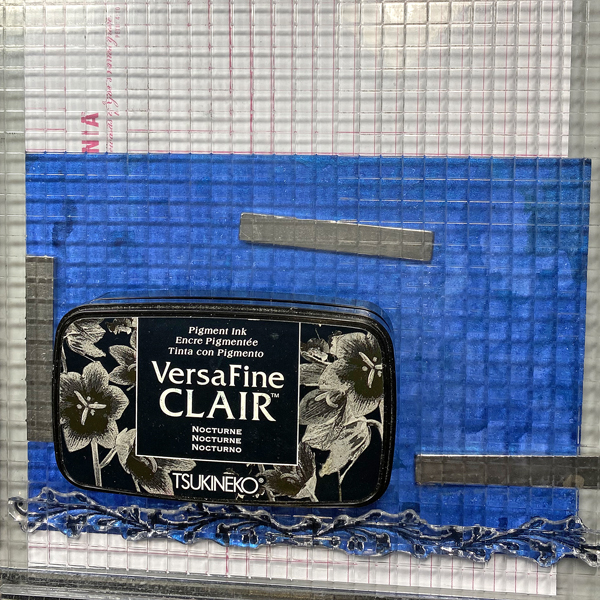
Step 8:
Use magnets to secure the background panel to the base of a stamping platform so that panel is sideways. Position the long leafy border stamp from Puss in Boots Clear Stamp Set facedown along the edge of the background panel. Press the platform’s lid onto the back of the stamp, lift the lid, ink the stamp with Nocturne VersaFine Clair, and stamp. Re-ink and stamp again if necessary to attain a good impression. Heat set.

Keeping the stamp on the platform’s lid, flip the background panel, secure it with magnets, and stamp the border on the other side of the background panel. Heat set.
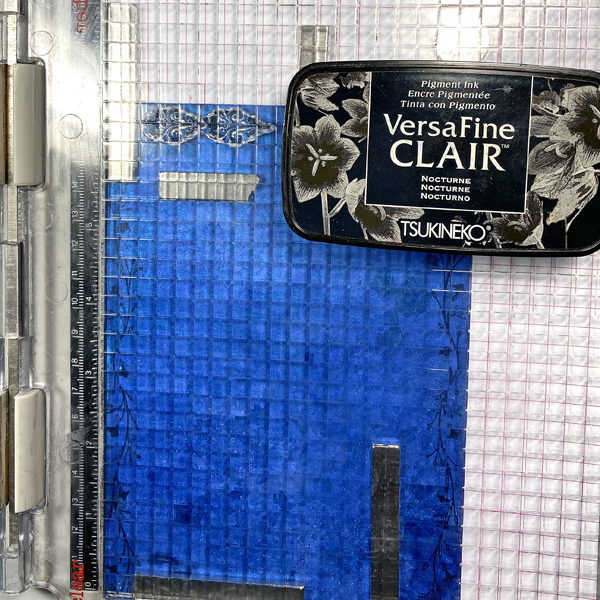
Step 9:
Reposition the background panel as shown and secure with magnets. Place the small flourish stamp facedown horizontally on the top left of the background panel. Press the platform’s lid onto the back of the stamp, lift the lid, ink the stamp with Nocturne VersaFine Clair, and stamp. Re-ink and stamp again if necessary to attain a good impression. Heat set.

Clean and dry the stamp. Reposition it so that it’s facedown on the top left of the panel. Press the platform’s lid onto the back of the stamp, lift the lid, ink the stamp with Nocturne VersaFine Clair, and stamp. Re-ink and stamp again if necessary to attain a good impression. Heat set.

Remove the flourish stamp. Place the paw print stamp so that it’s centered and facedown on top of the background panel.  Press the platform’s lid onto the back of the stamp, lift the lid, ink the stamp with Nocturne VersaFine Clair, and stamp. Re-ink and stamp again if necessary to attain a good impression. Heat set.

Step 10:
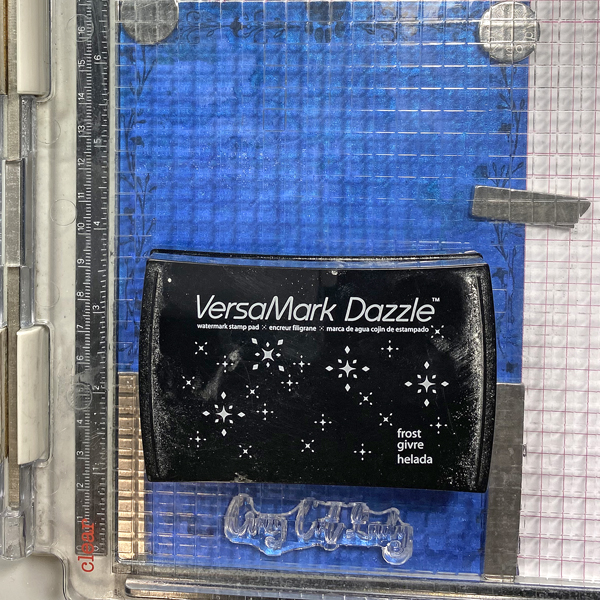
Place the “Crazy Cat Lady” stamp facedown so that it’s centered at the bottom of the image panel. Press the platform’s lid onto the back of the stamp, lift the lid, ink the stamp with Frost VersaMark ink, and stamp. Repeat.
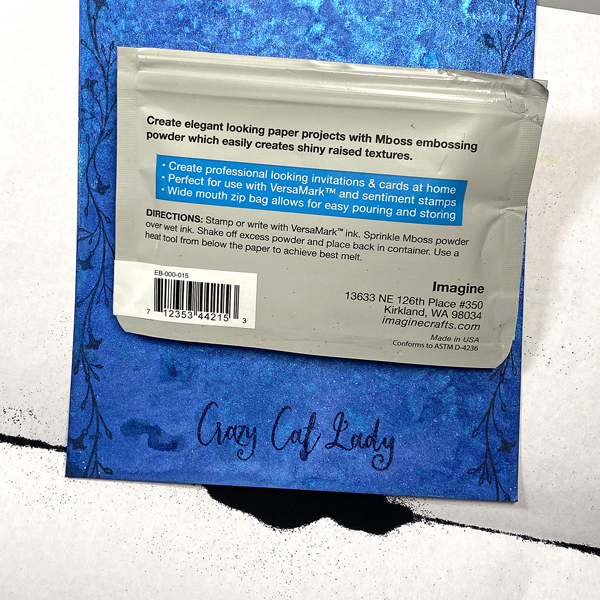
Step 11:
Sprinkle on Black MBoss Powder, slide the the excess powder back into the bag, and heat set the sentiment.
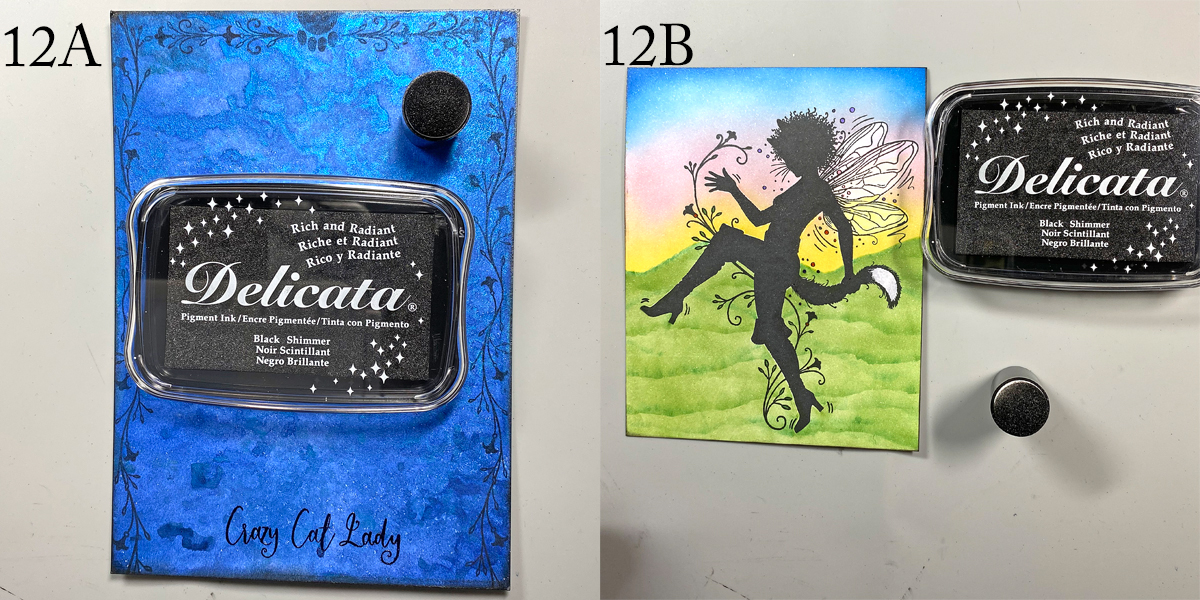
Step 12:
Use a Sponge Dauber to edge the background panel with Black Shimmer Delicata ink (12A). Heat set.
Trim the image panel to 4.25” x 5.25” and edge with Black Shimmer Delicata ink (12B). Heat set.
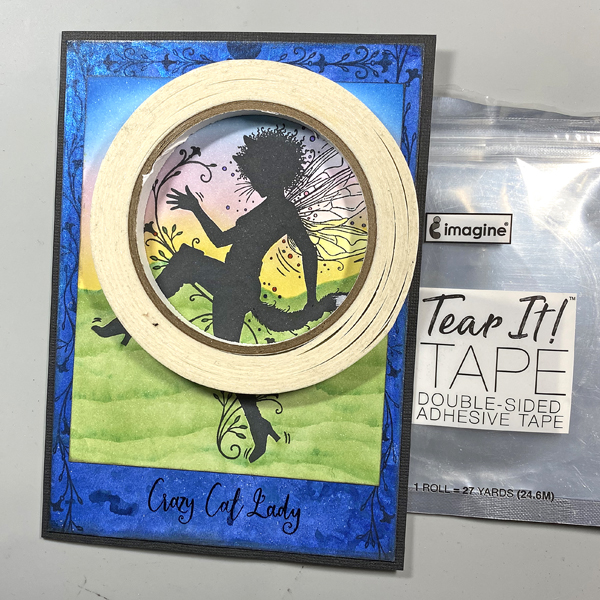
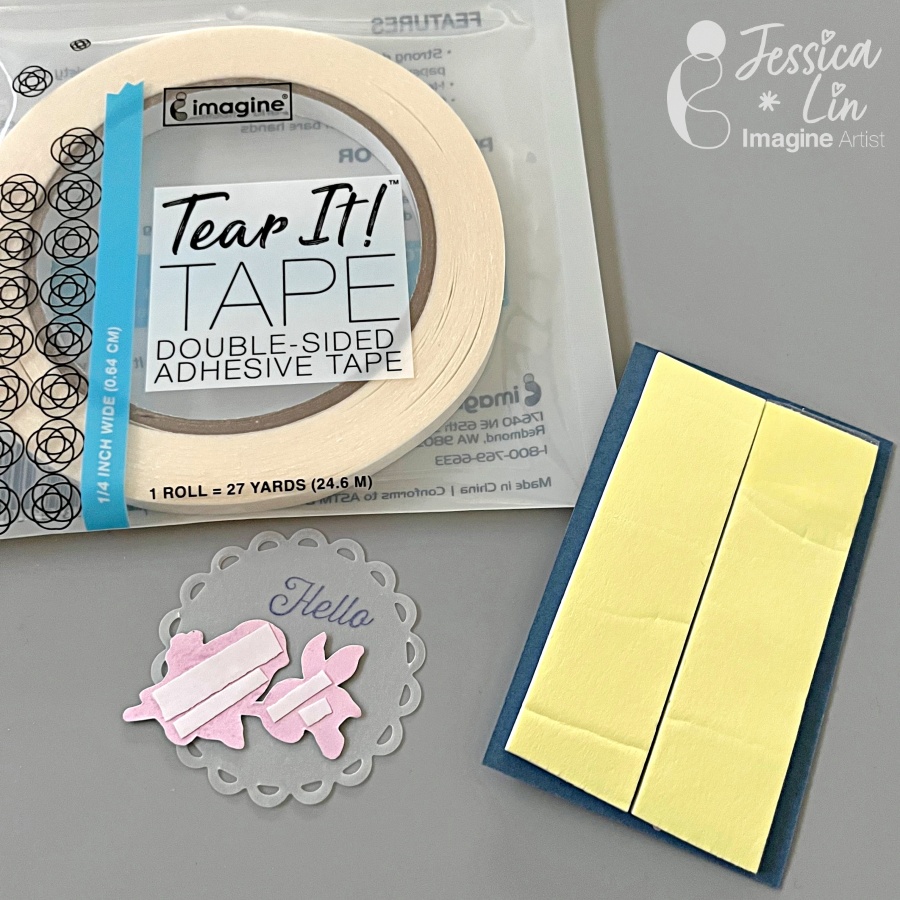
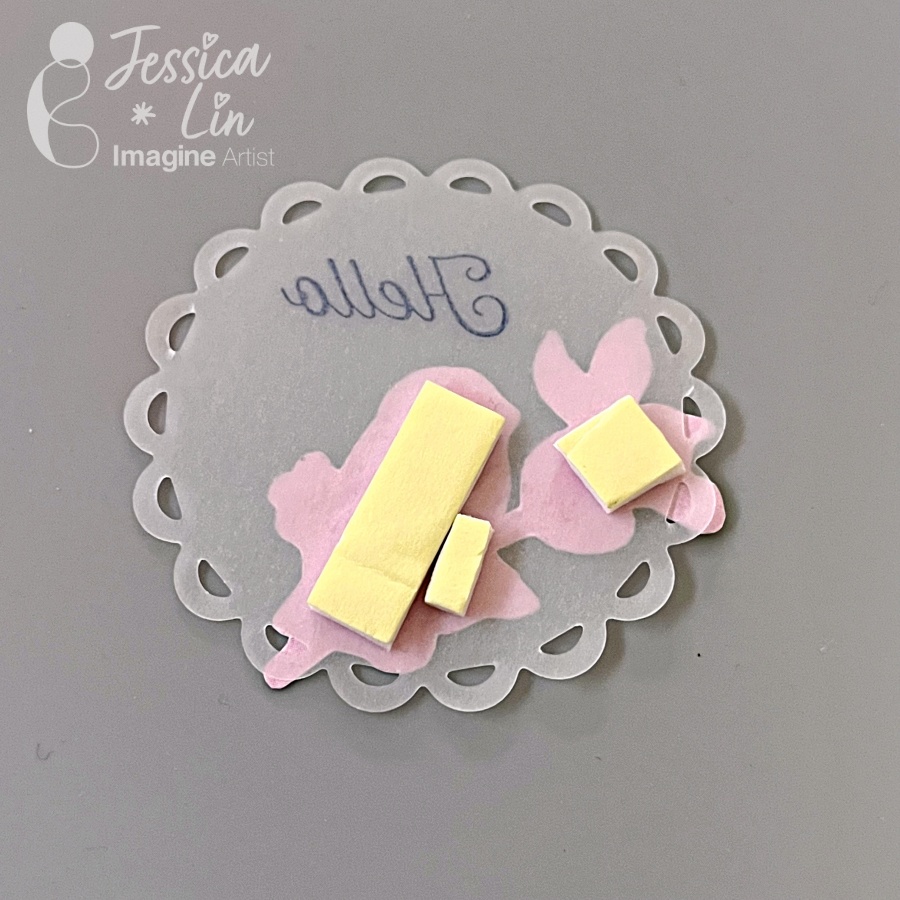
Step 13:
Use Tear It! Tape to adhere the image panel to the background panel and the background panel to a 5” x 7” black card.

Crafts Supplies

Imagine:

Other Supplies:

  • Solar White Classic Crest Cardstock by Neenah Papers
  • 140 lb. Mixed Media Paper by Strathmore
  • Puss in Boots Clear Photopolymer Stamp Set by Pink Ink Designs
  • Acetate Hills Mask by Lavinia Stamps
  • Copic Markers: Y000, Y02, Y21, YR00, R000, R00, RV10, V20, V22, C00, C0, C1, C3, FV2. R93.UR19 B20. YG45
  • Repositionable Sticker Paper by Avery
  • Fiskars Curved Craft Scissors
  • Low-tack Tape
  • Stamping Platform

Let’s Stamp on Vellum with VersaMagic Ink

By Jessica Lin

Let’s create a simple Easter card using some pretty patterned paper! The pastel colors and floral designs are too pretty to cover up! So I decided to stamp the sentiment on a piece of vellum. Stamping on vellum is tricky; but the VersaMagic ink pads work wonderfully. They don’t bead up and dry beautifully without fuzzy edges. Keep reading to see the final result! 

Skill: Intermediate 
Time: 30 minutes 

Directions: 

Step 1:
Trim a piece of patterned paper to 3 3/16’’ x 1 15/16’’ and a piece of matching cardstock to 3 6/16’’ x 2 2/16’’. I used Flight & Airy paper pack which coordinates with Misty Moonlight cardstock. Adhere the two pieces together with Tear It! Tape. 

Step 2:
Use stamps or, in my case, patterned paper to create a focal image. Fussy cut around the image with a pair of paper snips. These scissors are sharp and my favorite for fussy cutting! 

Step 3:
Die cut a piece of vellum with a circular die of your choice. I used Spellbinders Lacey Circle dies with the Stampin’ Up! Mini Cut and Emboss Machine. 

Step 4:
Stamp a small sentiment using VersaMagic Night Sky ink pad. The image is crisp and clear after stamping, so I didn’t need to restamp with the We R Precision Press. 

Step 5:
Emboss the card front with any embossing folder to add interest to the background. The Distressed Tile embossing folder is simply gorgeous! 

Step 6:
To add a wow factor, lightly spray the whole panel with Sheer Shimmer in Sparkle. It adds just the right amount of glitter mist to elevate your project. 

Step 7:
It’s time to assemble everything together! Apply Tear It! Tape and foam tape to the back and adhere them to the embossed card front. When adhering vellum pieces to your project, remember to only apply tape and/or glue in areas where it would be hidden. Otherwise the adhesive will show through the translucent vellum paper. 

Craft Supplies:
Imagine Supplies: 

Other Supplies: 

How to Use Stenciled Papers and Ink to Create Unique Birthday Cards

By Amalia Montano

I wanted to create some backgrounds just to get my creative juices flowing. I am so glad I did because I was able to use many of the different cardstock scraps and designer paper scraps to make some really cute backgrounds.

I used different stencils from my stash, some blending brushes, and a few Imagine Crafts inks and daubers to create backgrounds that I turned into Birthday cards.

Skill: Beginner to intermediate

Time: 30 minutes

Craft Supplies:

Imagine:

VersaColor In Pads in Turquoise, Canary, Rose and Cardinal
Sponge Daubers
Brilliance Dew Drop 4 Pack
VersaFine Clair Nocturne Ink Pad
Delicata Ink Pads

Other Products Used

Blending Brushes
Brutus Monroe Stick and Stamp Mat
Brutus Monroe Super Sentimental Stamp set

Create Elegant Winter Snowflakes Cards

By Ceal Pritchett

Hello crafty friends!

It’s Ceal, here. Today I am sharing my first post as an Imagine Artist In Residence.  I am so excited to be a part of the Imagine team. I love all things snow related and with the groundhog not seeing his shadow and predicting an early spring, I had to make a couple more winter cards.

Here are the supplies I used:

Skill: Intermediate to Advanced.
Time: 45 mins

Directions:

Step 1
Stamp the snowflake with VersaMark ink onto a piece of white cardstock cut to 4.25″ x 5.5″ .
Emboss the snowflake with MBoss Sparkle embossing powder.

Step 2
Using a Sponge Dauber, Ink blend over it with Brilliance Pearlescent Purple Ink

Step 3
With a die cutting machine, run the snowflake cover plate through.

Step 4
Cut a piece of amethyst cardstock to 4.25” x 5.5” to back the snowflake cover plate.

Step 5
To make the snowflake more dimensional place foam adhesive dots in between the two snowflakes
Tip: Apply a little On Point glue to each foam dot to allow you to move it as needed.

Step 6
Stamp and die cut the sentiment and add it to the card front.

Step 7
Using On Point Glue, layer and glue all the pieces together.

I made a second card using Mboss Hologram and silver foil paper with the same design.

Crafting Supplies

Imagine :
VersaMark Ink Embossing
VersaFine Clair  – Nocturne
Mboss –  Sparkle, Hologram
Brilliance  – Pearlescent Purple ink
On Point Glue
Sponge Daubers
Craft Mat

Other Supplies:
Misti 2.0
Neenah 110lb Solar White cardbase
Neenah 80lb Solar White
Lessebo Amethyst Cardstock
Silver Foil Cardstock
Pinkfresh Studio: Folk Snowflake
Pinkfresh Studio: Folk Snowflake Coordinating Cuts
Pinkfresh Studio: Snowflakes Coverplate die

Create a Watercolor Look with Delicata

By Monica Edwards

Welcome to the Imagine blog, today I will be showing everyone how you can get a watercolor look, coloring your images with Delicata inks and using Fabrico markers to highlight the fine details of the image.  

A bit about Delicata inks. Delicata is the latest generation of metallic inkpad. Remarkably true and bright, it outshines other inkpads and provides stamping results that resemble the true effects of gold and silver leafing without the mess.

Skill Level: Intermediate
Time to Complete: 45min to 60min

DIRECTIONS

Step 1
Stamp your image on watercolor paper using Stazon Black ink.  Then take a water brush and color the image using Delicata ink in Ruby Red.  Then, take your Fabrico marker in burgundy and outline the inner petals to give the image added depth.

Step 2
Mask the image and apply the Delicata Ruby Red ink and Radiant Neon Electric Yellow to create a blended background.

Step 3
Use the Fabrico pens in yellow and green to color your leaves leaving some white background

Step 4
Add a sentiment to complete the card

Craft Supplies
Imagine

Other Supplies Used:
Fabrico Watercolor Paper

How to Make a Birthday Shaker Card

By Alison Heikkila 

Hello! Alison Heikkil here. My latest video for Imagine shares how to make a birthday shaker card using a variety of great products. This card can be customized to use any colors you like, and there are different points that you can stop and complete your card, if shakers aren’t your cup of tea.

*Some affiliate links are used in this post. That means that if you shop through these links, I may receive a small compensation, at no cost to you. For more information, please see my Affiliates page, where I also have some coupon codes.

Skill Level: Basic-Intermediate
Time to Complete: 15-20 minutes

Supplies:

Imagine:
Memento Ink in Teal Zeal
Memento Ink in Rose Bud
Memento Ink in Grape Jelly
Sheer Shimmer Spritz in Sparkle
Fireworks! Spray in Grape Jelly
Tear It! Tape
On Point Glue
Craft Mat

Other:
A Colorful Life Designs: Layered Party Stencil Set (Use code AlFan10 to save 10%)
Sizzix/Tim Holtz: Bold Text #1 Die Set
Scrapbook.com: 3 mm Thick Foam Tape
Accent Opaque: 100lb. White Cardstock
Sequins/Shaker Mix
Ribbon

I hope you learned a few new ways to use some of Imagine’s products. Thanks so much for stopping by. Have an inspiring day!