Hi everyone! I have a special project to share with you: stained glass piece using acetate and aluminum foil. I’ve been wanting to try this technique and I know that now is the perfect time to do this with the new StazOn Pigment inkpads! Check out how well the StazOn Pigment inks stamp on acetate and paper in this tutorial.
The sun turned into a square! Capture the colors of the sun on faux enamel jewelry piece with a marbled pattern. Decorate the Imagine’s Sheet Metal in the squares shapes with a mix of irRESISTible colors and create a marble design that is covered with clear Mboss embossing powder to protect and give the impression of enamel.
Skill: Beginner Time: 1 hour
Directions
Step 1
Cover the square Sheet Metal shapes with the irRESISTible in Gold, mixing the gel with a bamboo skewer or toothpick.
Step 2
Add drops of the irRESISTible in Tangelo and mix in circular motions with a bamboo skewer. Let the paint dry well.
Step 3
Press the square shapes on the VersaMark inkpad, cover with Mboss embossing powder and heat set.
Step 4
Turn over to the other side of the Sheet Metal shapes, cover with StazOn Sunflower Yellow.
Step 5
Cover with GlazOn Vintage to secure the color. This is very important to use GlazOn in between uses because StazOn solvent qualities react with other layers of StazOn. In other words, you will erase or lift the color you just laid down.
Step 6
Cut 20-inch long cord pieces, pass it through a jump ring and inside the Sheet Metal shape hole. Add a gold colored bead.
Step 7
Continue with the rest of the pieces and secure all the cords together with a jump ring creating a stop.
Step 8
Cut 20-inch long cord pieces, pass them between the shapes and the previous stop jump ring. Braid the cords and secure all the edges with jewelry caps and clasps.
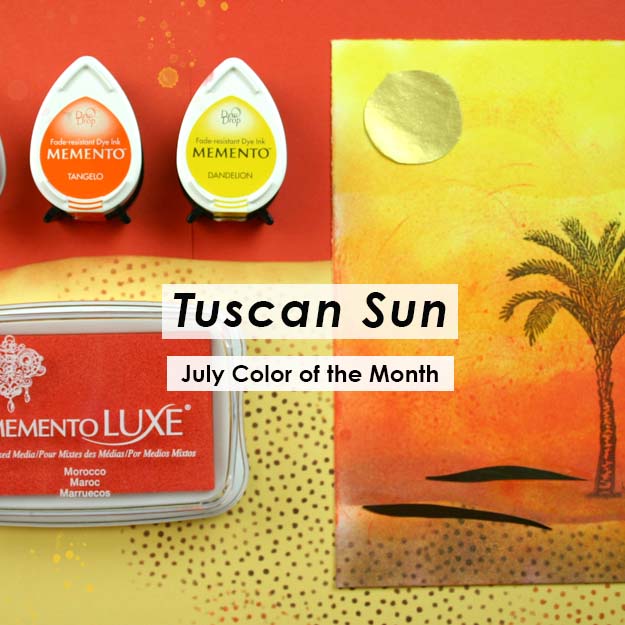
Color of the Month is Tuscan Sun. We were thinking of blended burnt orange and yellow sunset when we choose this hot summer color. Some of the inks that easily reflect this color choice are Memento Luxe in Morocco, Memento in Tangelo and VersaMagic in Pumpkin Spice.
For the Month of July August, we are also doing a special feature of Rinea Foil Paper. This beautiful paper foil comes in a variety of colors and patterns and we challenged our artists to use them in their tutorials and projects, so be on the lookout for awesomeness!!! ******Correction: the exchange with Rinea is in August!
Today, I show you a simple technique using your Memento DewDrops. You don’t need stamps when you have fabulous inks! I choose colors of Memento that work well together for an interesting background.
Skill: Intermediate Time: 30 minutes
Directions
Supplies
Imagine
Memento Inks – Nautical Blue, Teal Zeal, Summer, Olive Grove, Pistachio, New Sprout
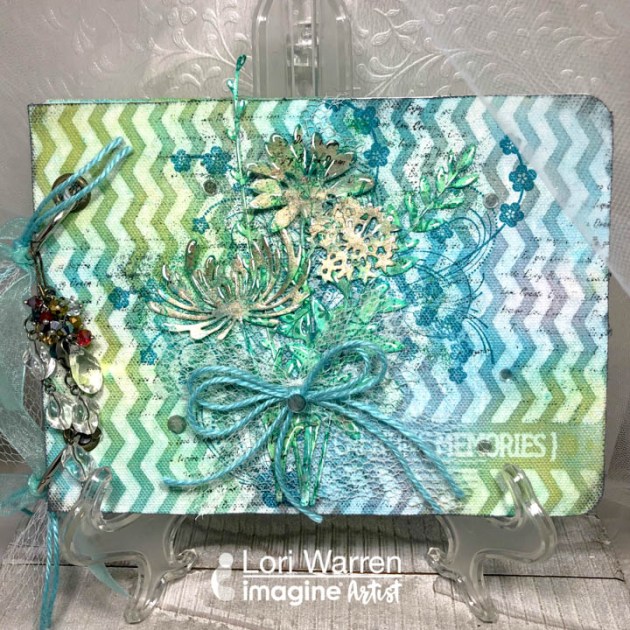
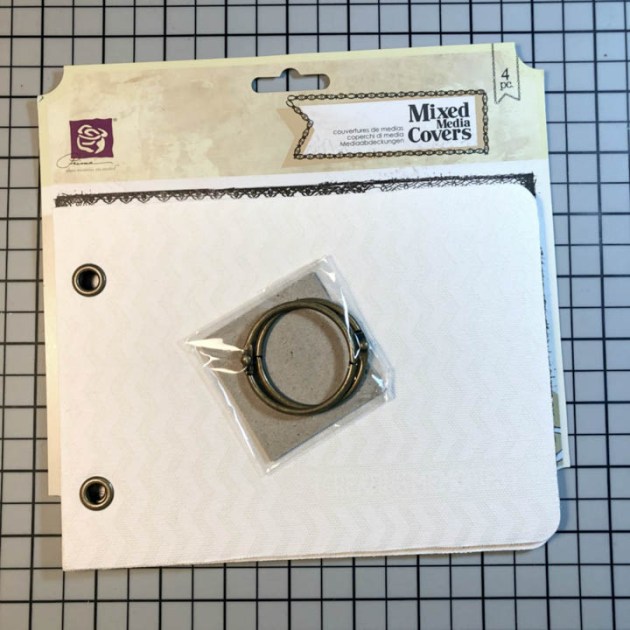
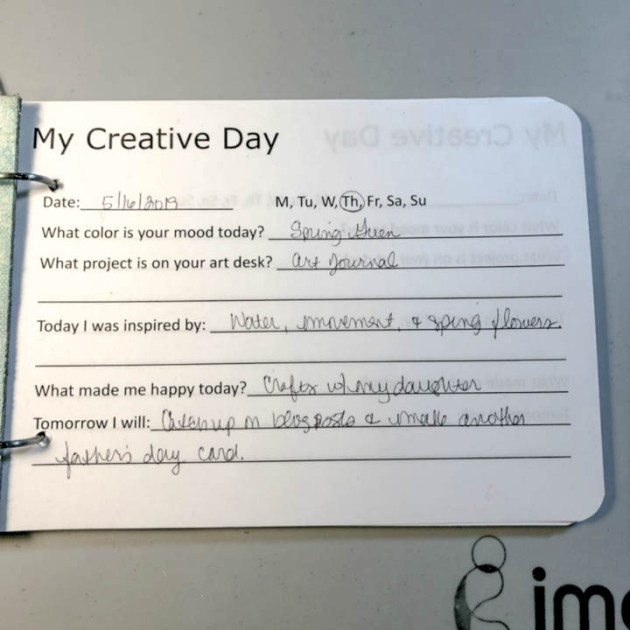
Interested is slowing down and being more mindful? A Daily Journal to document artsy ideas and creative thoughts might be just what is needed. This journal includes “My Creative Day” journal templates (with prompts for daily journaling), blank art pages (for art journaling, sketching and jotting down ideas) and a special hand decorated cover to house it all.
Skill: Advanced Time: 1 hour
Directions
Step 1
Select ready to make a cover or create a cover of your own (size 5 ½” x 7 ½”)
Step 2
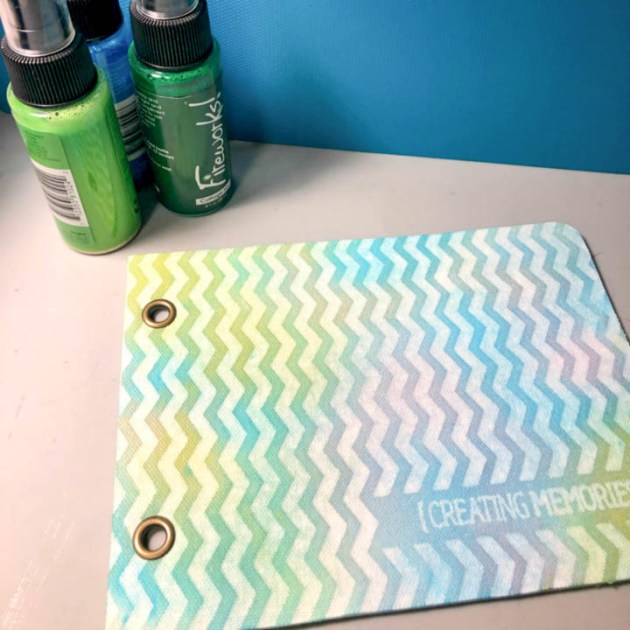
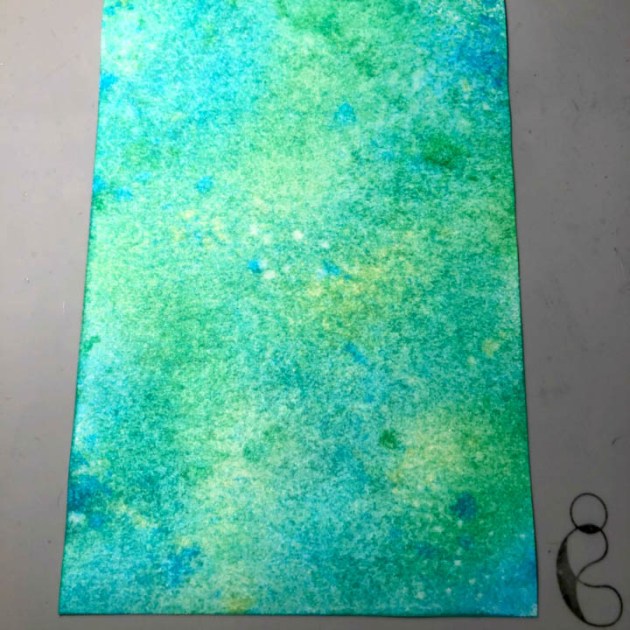
Apply a trio of Fireworks! Sprays to add color, allow to dry. As you can see the color of the waterbased inks brings out the chevron design that was preprinted.
Step 3
Use the same Fireworks! colors on a ½” sheet of white card stock, allow drying.
Step 4
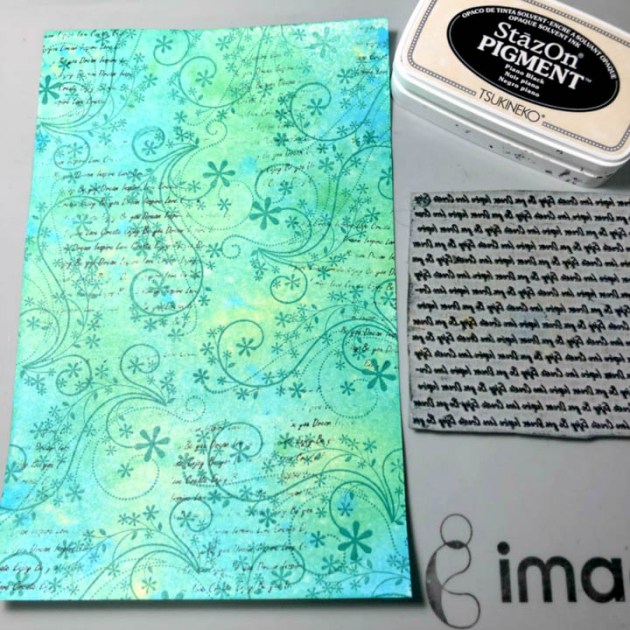
Stamp swirls and script randomly onto the card stock panel with StazOn Pigment ink.
Step 5
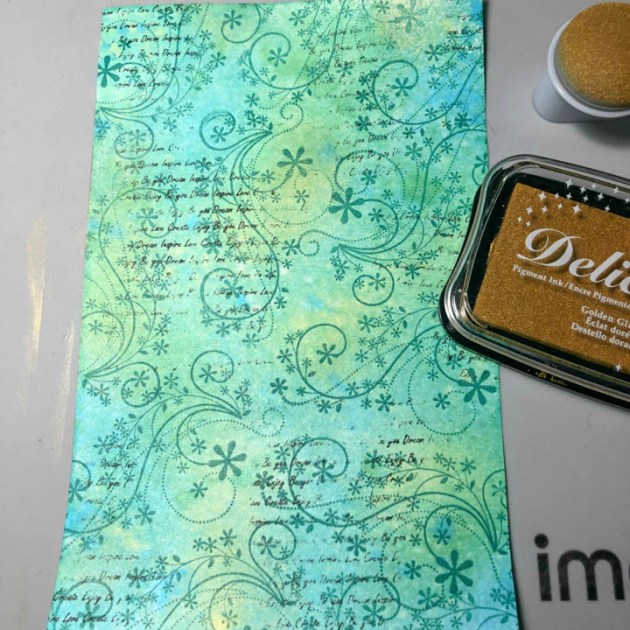
Add some shine to sections of the card stock panel with Delicata ink and a large Sponge Dauber.
Step 6
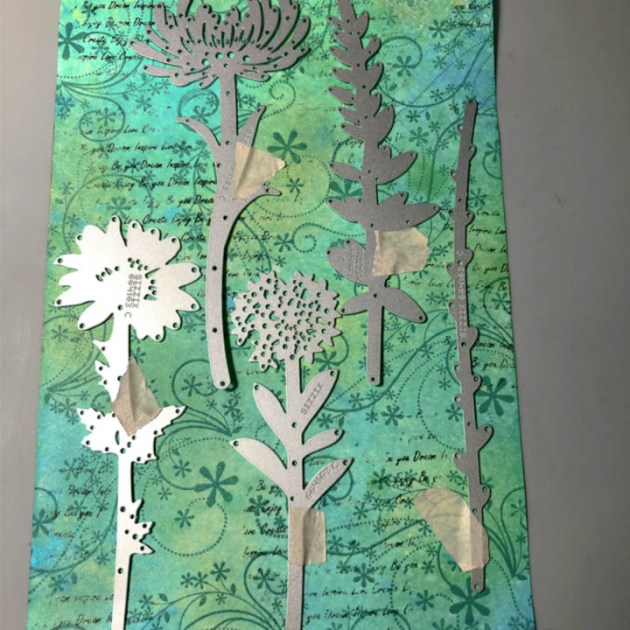
Use diecuts to cut out floral images from the card stock panel.
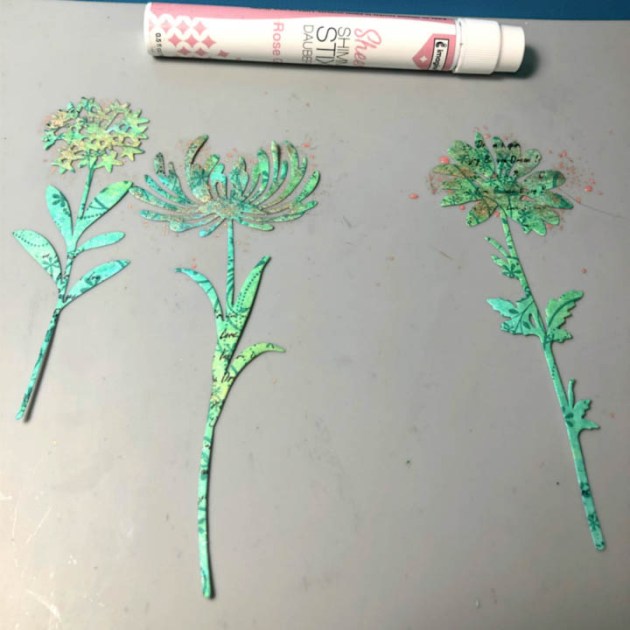
Step 7
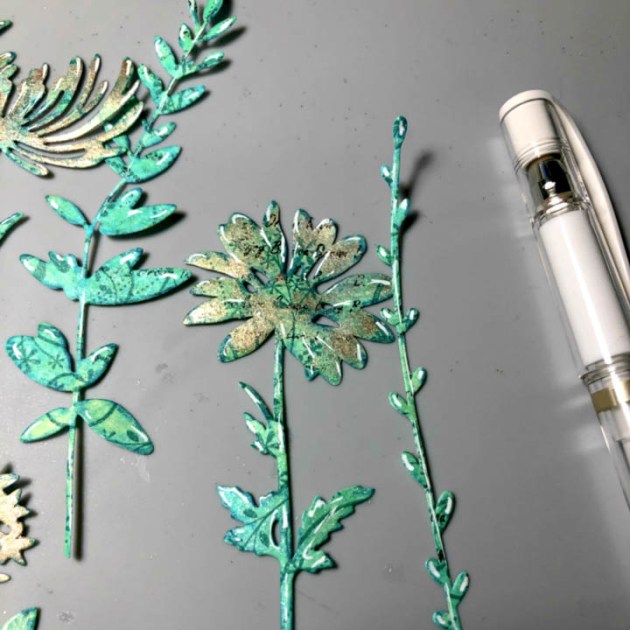
Add additional color to the flower heads with Shimmer Stix in Rose Gold.
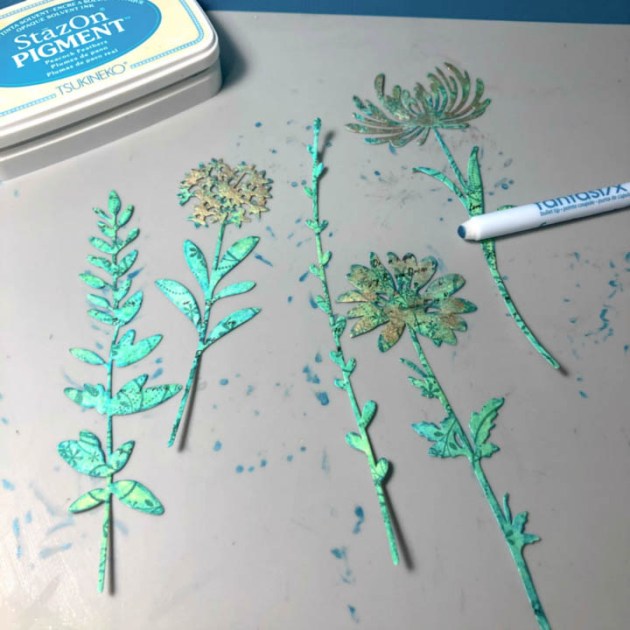
Step 8
Apply shading to the flower by using a Fantastix tool with StazOn Pigment ink.
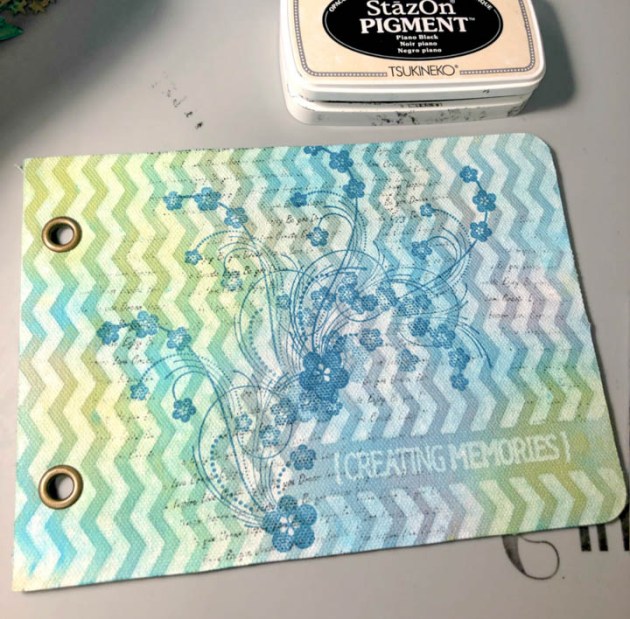
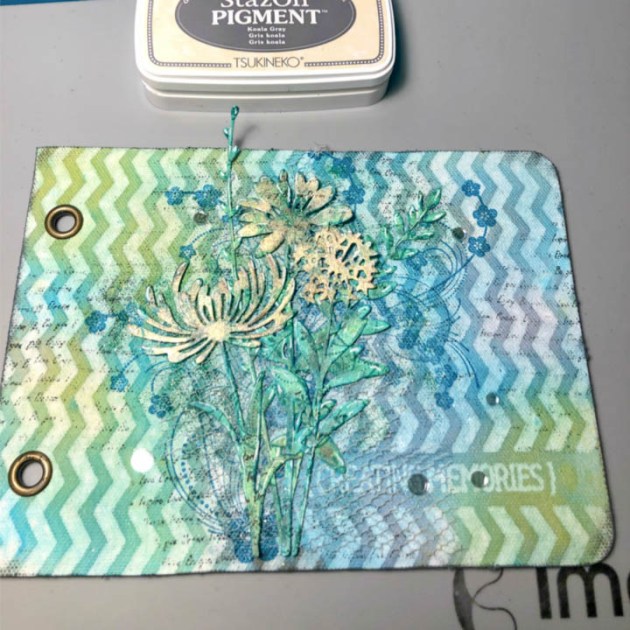
Step 9
Stamp a floral pattern and script onto journal cover with StazOn Pigment ink.
Step 10
Directly apply VersaMark ink to cover, sprinkle with MBoss powder(s) and heat set for added texture.
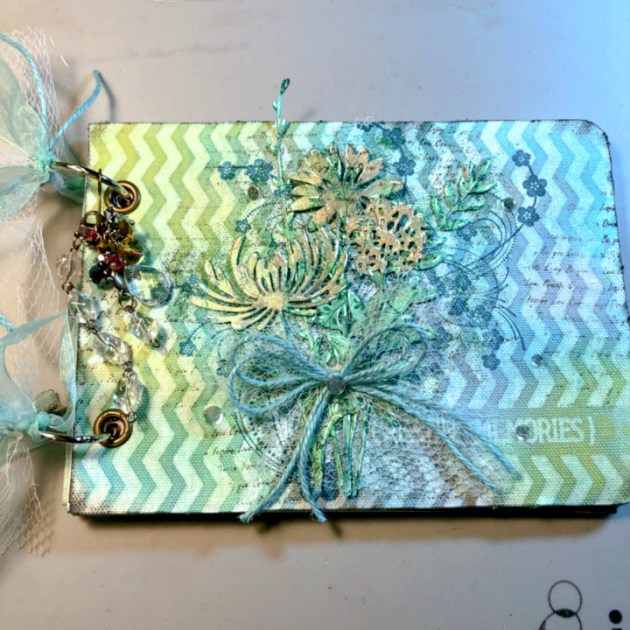
Step 11
Adhere to a layer of tulle.
Step 12
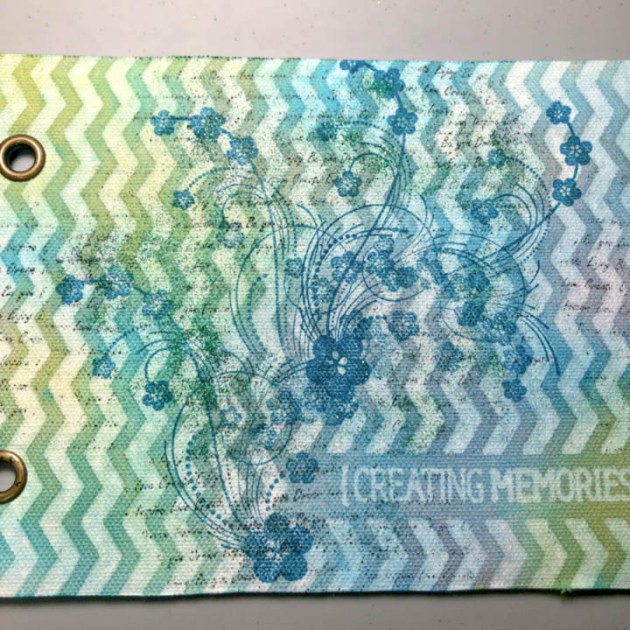
Highlight floral cutouts with white ink.
Step 13
Assemble floral die cuts, adhere sequence, and apply StazOn ink directly to edges of cover for shading.
Glittery backgrounds are the best backgrounds! I love anything glittery and the Sparkle MBoss is quickly becoming one of my favorite new embossing powders. It is a clear embossing powder with holographic glitter mixed into it. It’s perfect to add over any backgrounds because it doesn’t add any color, just shine and sparkle! You can watch the video tutorial to see two different ways to make your backgrounds sparkle!