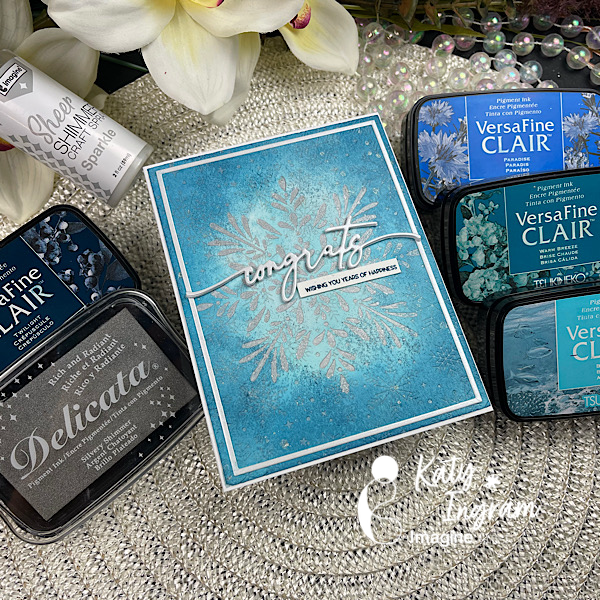
Hello Friends! Katy here with another project. In today’s video use my VersaFine Clairs with isopropyl alcohol to create a watercolor look. With this technique I created a wintry wedding card, but this will lend well to a birthday or holiday card as well.
• The Greetery Sentiment Suite Love Stamp Set • The Greetery Congrats Die • White Cardstock • Hot Pressed Watercolor paper • Stamp positioner tool • Isopropyl Alcohol
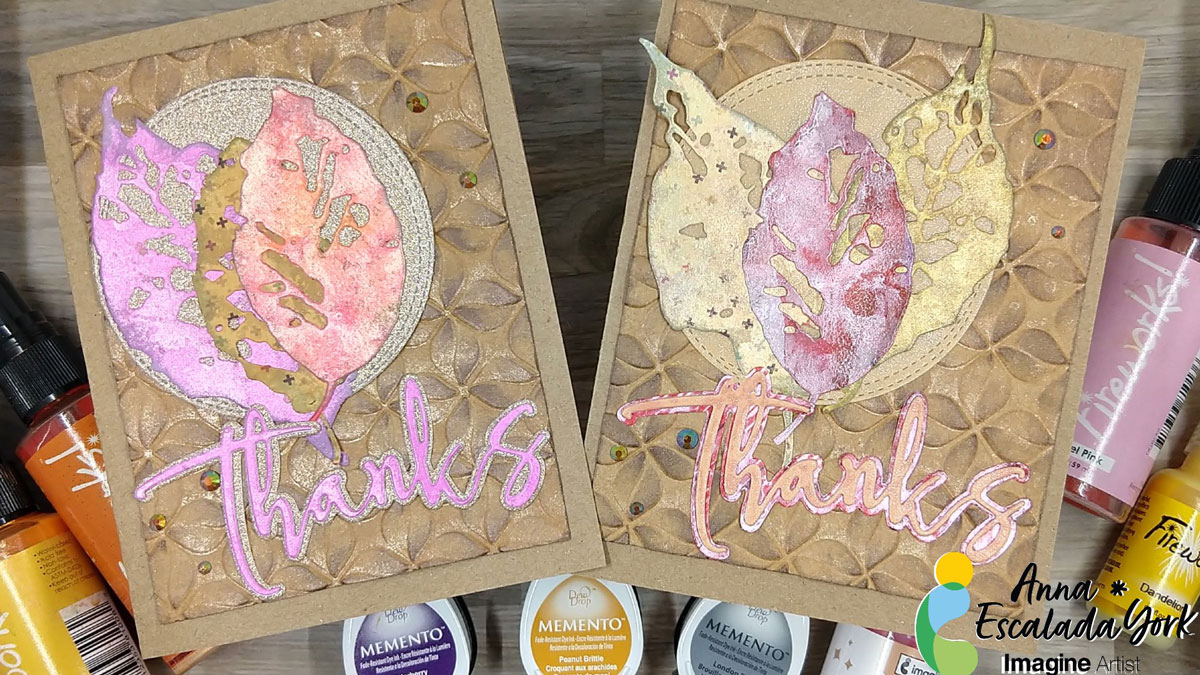
To me, Thanksgiving is mostly about food but also an excuse to say thank you to those people who are a part of my personal and professional life. So I decided to make a thank you card to let people know that I am grateful for them. I decided to use some paper scraps because I always have too many and to enhance them with sprays or ink to transform them. At first, I was planning on making one card with a lot of leaves, but changed my mind after die cutting the leaves, so ended up making two.
Skill: Intermediate Time: 1.5 hours
Directions:
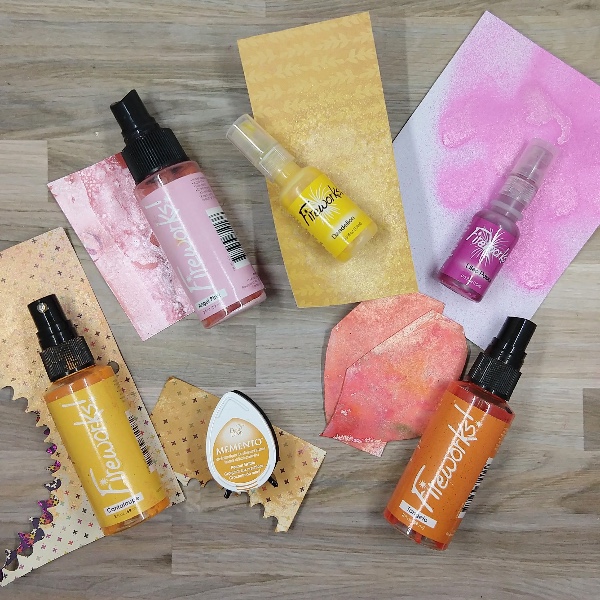
Step 1: Pull out some scraps of paper from your stash and a variety of sprays and ink. Spray the scraps with the sprays. My scraps were colored with Cantaloupe, Angel Pink, Dandelion, Lilac Posies, and Tangelo Fireworks! Craft Sprays as well as Peanut Brittle Memento Ink. After the spray dried, die cut the scraps of paper with leaf dies. Reserve some of the sprayed paper for later.
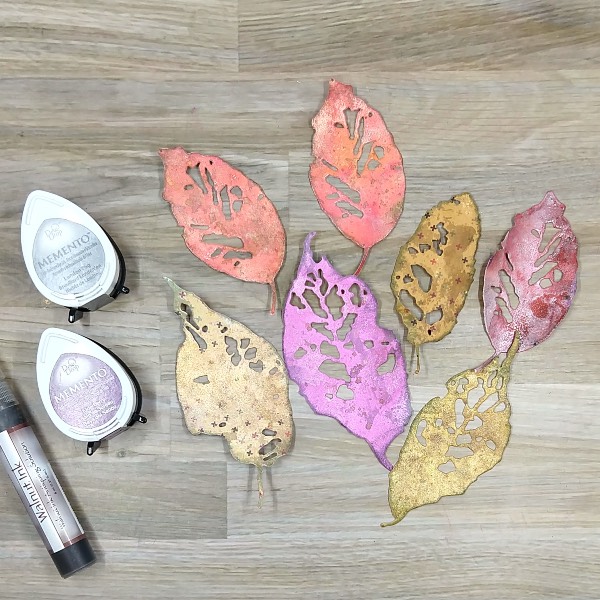
Step 2: Press Walnut Ink colored Walnut Ink Antiquing Solution as well as Elderberry Memento ink onto acetate packaging. Add water to the different parts of the acetate and splatter the die cut leaves with the Elderberry Memento ink. Then watercolor smoosh the leaves with both the Elderberry Memento ink and the Walnut Ink Antiquing Solution. After the leaves dried, rub the edges of the leaves with the London Fog Memento ink pad. Allow everything to dry again.
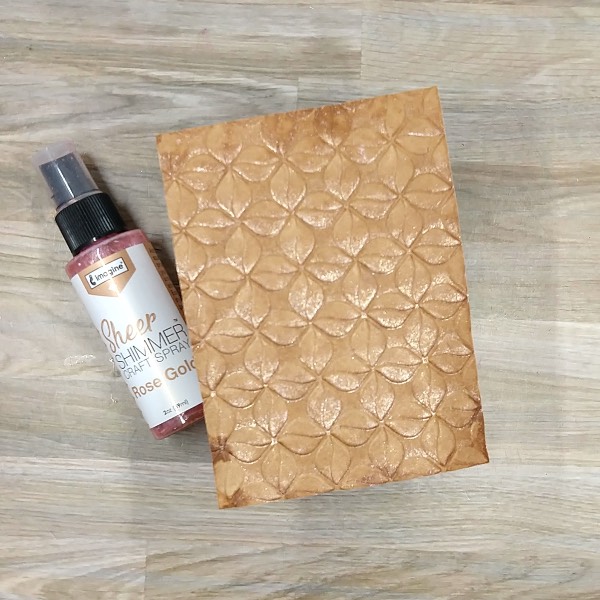
Step 3: Trim a piece of kraft cardstock with a paper trimmer to about 5 x 3.75 inches. Then spray Rose Gold Sheer Shimmer Craft Spray directly into an embossing folder. Place the kraft cardstock panel into the embossing folder and then run the whole thing through a die cutting machine.
Allow the panel to dry.
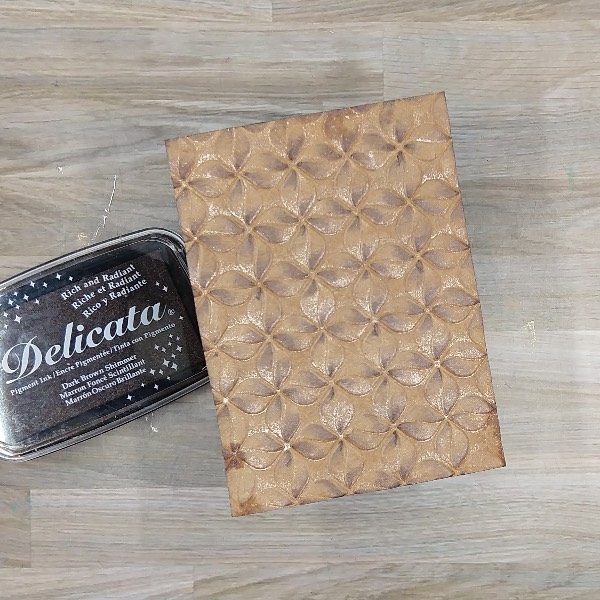
Step 4: Use Dark Brown Shimmer Delicata ink to add some color to the panel by brushing the panel lightly across the embossed paper. The raised part of the embossed panel will pick up the dark brown ink, while the other areas will be untouched. Then press the edges with the same Dark Brown Shimmer Delicata ink panel to add color to the border.
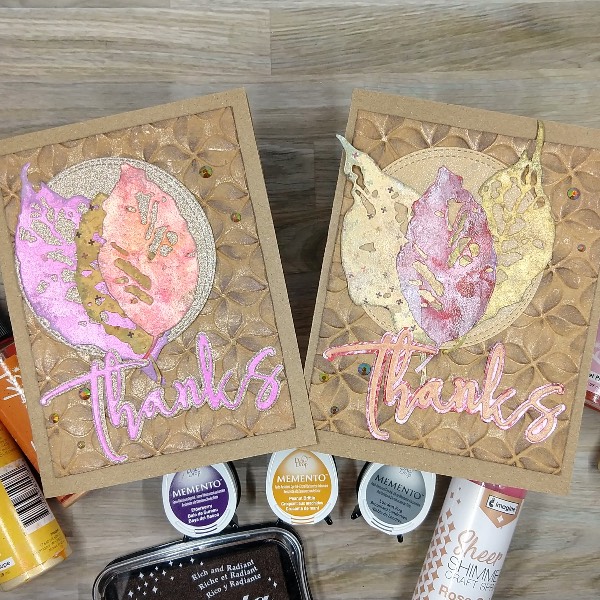
Step 5: I die cut a scrap piece of rose gold glitter cardstock with a stitched circle die as well as the shadow die of a two-layer sentiment die. In addition, I die cut another piece of the lilac (purple) sprayed cardstock from step 1 with the top layer of the two-layer sentiment die. I also die cut two pieces of scrap cardstock with the same sentiment die. The layers of the sentiment die were glued together to give dimension and then they were glued on the rose gold shadow die cut.
Then the card was assembled. I glued three of the leaves onto the glitter cardstock die cut circle and then glued the whole thing onto the embossed panel. Next, the sentiment was glued onto the panel. Sequins were glued onto the panel. Finally, the whole thing was glued onto a kraft cardbase.
A second card was made with the leftover die cut leaves in the same manner. The only changes were that I used a light orange vellum and some more of the sprayed scrap paper from step 1 to create the die cut circular background and the sentiment.
• Alex Syberia Designs – die set – Large Thanks • HAI Supply – embellishments – Cola Crystalline gems • Simon Says Stamp – Embossing folder Modern Loop • Sizzix – die set – Leaf Fragments by Tim Holtz • Circular die • A2-sized kraft card base Clear Embossing Powder Kraft cardstock • Glitter cardstock • Light orange sparkly vellum • Patterned paper scraps and magazine pages • Die cutting machine • Paper trimmer Scissors • Glue
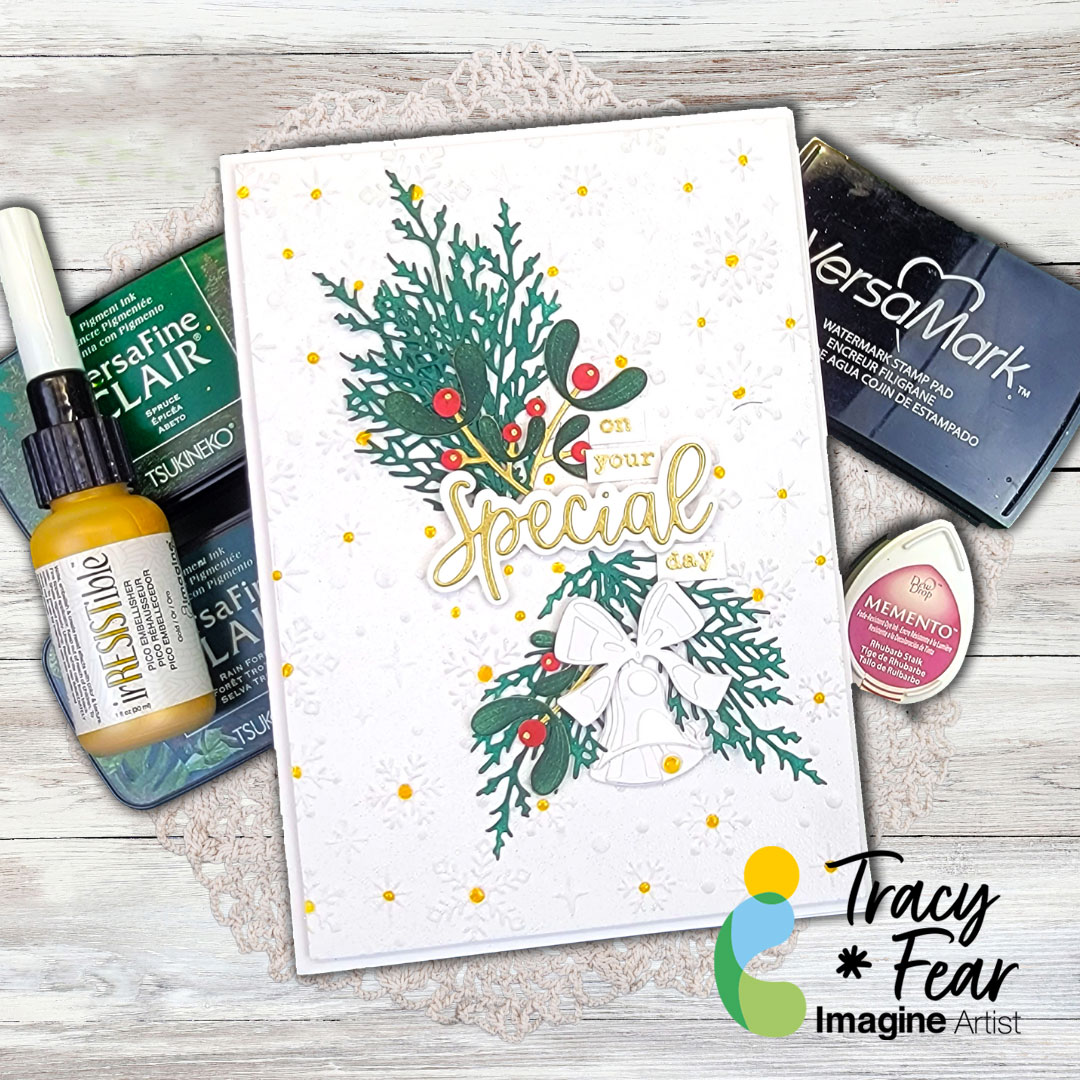
Hello Friends! It’s no secret, some people have their big day in the winter! My goal here was to create a winter wedding card. I’m not going to lie, I had no idea what would be appropriate colors for a winter wedding so I turned to a trusted friend, Google that is, and learned that forest greens and red and burgundy colors were the trend for 2025 going in to 2026 so I worked some magic with inks, embossing, and die cuts to create this 5×7 winter wedding card!
Art Supplies • Acrylic stamping block or stamp platform • Embossing Folder • Die cut machine • 100lb white paper • 5×7 Card base • Embossing powder • Stamps of your choice • Embossing heat tool
Other Products Used • Brutus Monroe Embossing Powder in Unicorn and Gilded • Simply Sentimental-Special stamps and die set from Trinity Stamps • Greenery, bells, and plant die sets from Tim Holtz • Snow embossing folder from Spellbinders and Simon Hurley • PVA Adhesive • Foam Tape
ALTERNATIVE PRODUCTS THAT CAN BE USED TO RECREATE SOMETHING SIMILAR
Any Inks any combination of background stamps, dies, and feature stamps
To learn how to create your own Winter Wedding card, click here!
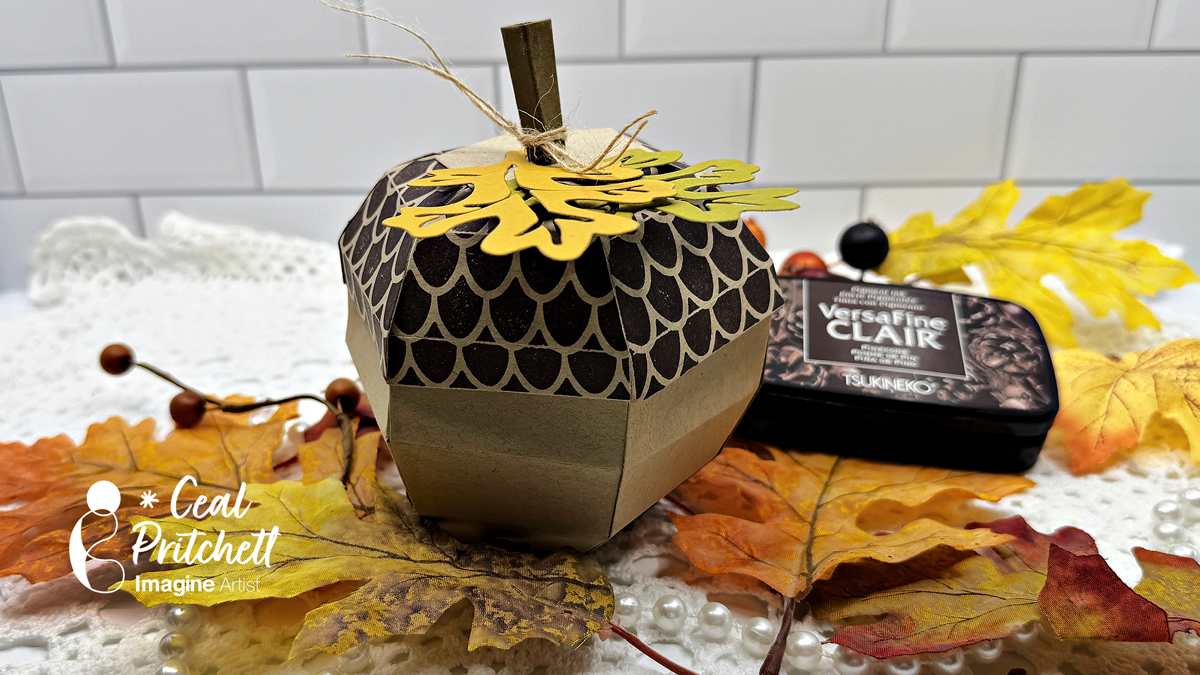
Hello crafty friends! I’s Ceal, here. Today I am sharing a tutorial on how to make this acorn gift box.
Skill: Intermediate to Advanced Time: 45 Minutes
Directions:
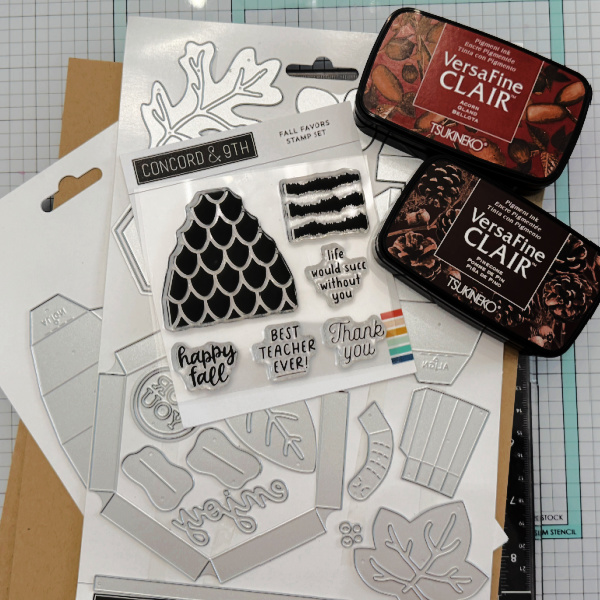
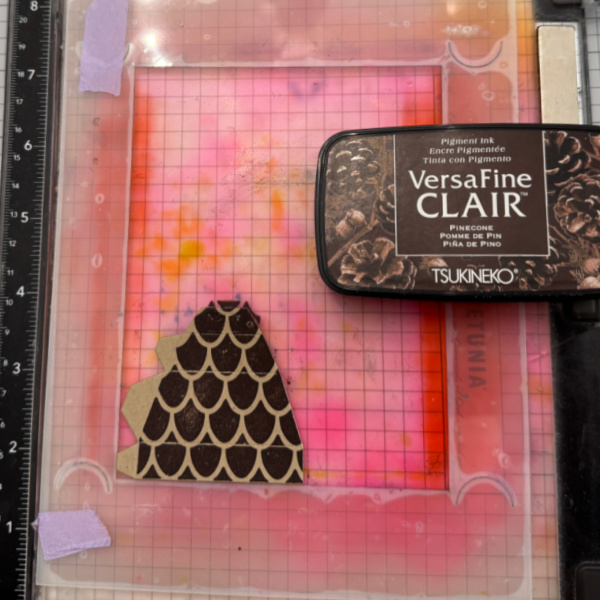
Gather your supplies. For this project you will need the Fall Favors Box die set and the coordinating stamp set. A dark brown ink (VersaFine Clair used here), Kraft and other colors of cardstock.
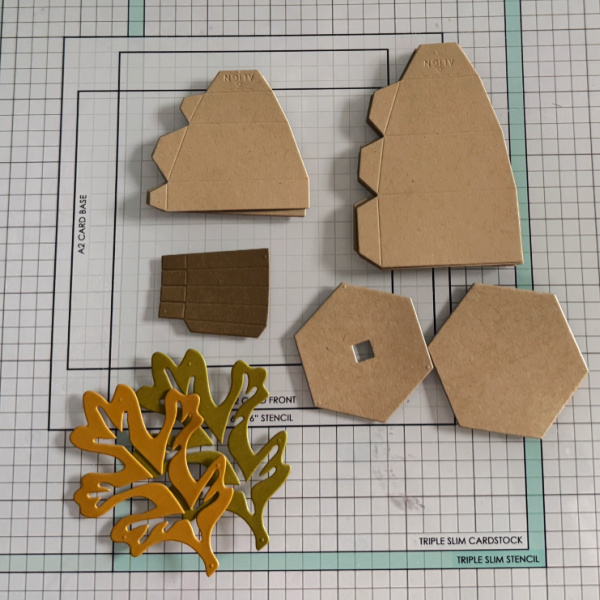
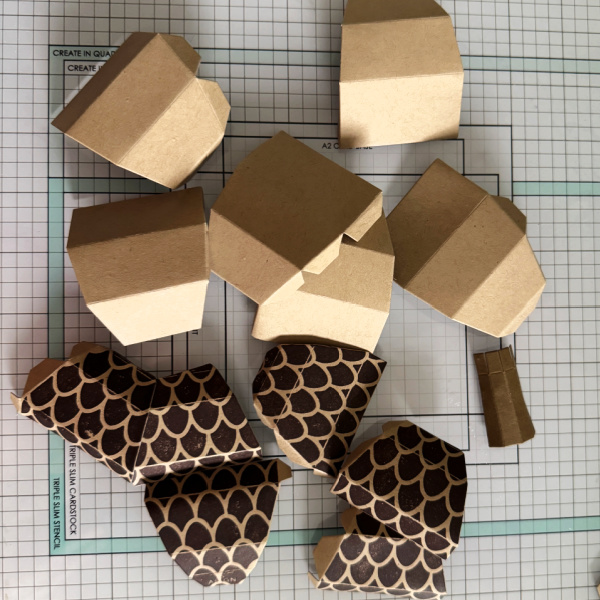
Step 1: Out of kraft cardstock, cut six pieces each of the small (top) and large (bottom) of the acorn, along with the top and bottom hexagon pieces. Cut the stem out of a dark brown cardstock and the leaves out of your color of choice.
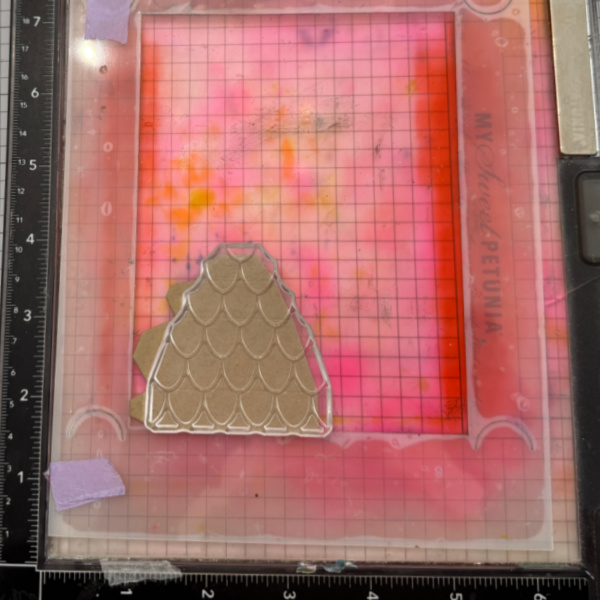
Step 2: Line up the stamp that adds the detail to the acorn top and then stamp all six pieces with a dark brown ink, VersaFine Clair Pinecone used here.
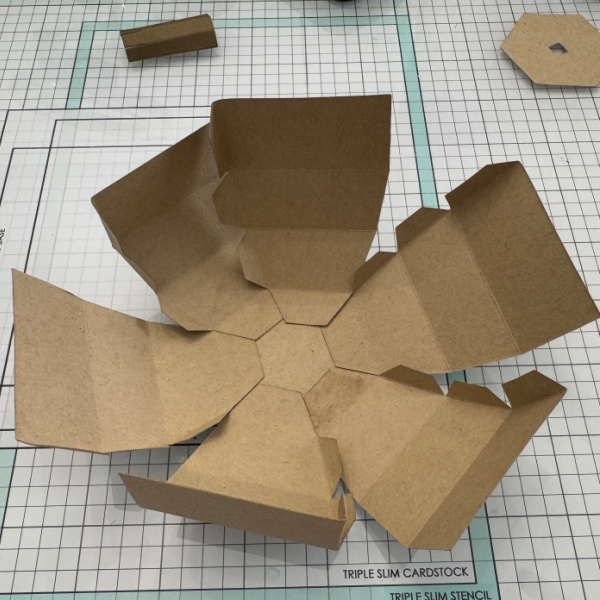
Step 3: Crease all of the score line on all the die cut pieces. Do not use a bone folder, just simply crease them on the score lines.
Step 4: Align the large (bottom) pieces of the acorn on the hexagon as shown. Tip: I used liquid glue to allow me to move them as needed.
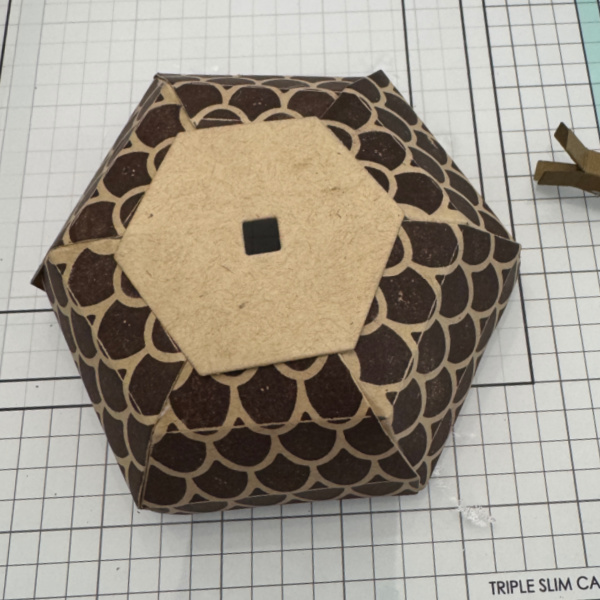
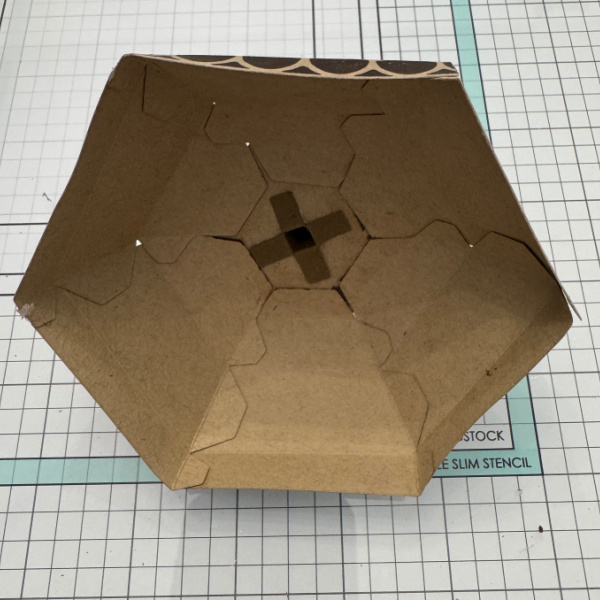
Step 5: Align the small (top) pieces of the acorn on the hexagon with the square hole in it.
Step 6: Fold the stem piece on the score lines and add h=glue to create the stem and then thread it through the square hole on the top. After threading it through the hole, fold back the tabs and glue down as shown.
Finish the project by adding the leaves and some twine.
I’ve been really enjoying Halloween cards lately and it was so fun to use a bunch of sprays to make this one.
Skill: Intermediate Time: 1.5 hours
Directions:
Step 1: Die cut all of the pieces for the die cut pumpkin out of watercolor paper and then spray the two bottom pieces with Rich Cocoa Fireworks! Craft Spray (bottom-most layer) and Tangelo! Craft Spray (second-largest layer) and let dry.
Step 2: Spray the other three die cut pieces: Dandelion Fireworks! Craft Spray on the middle die cut, Gold Sheer Shimmer Craft Spray on the upper part of the pumpkin’s body, and Bamboo Leaves Fireworks! Craft Spray for the pumpkin stem. Allow all the layers to dry.
Step 3: Glue the layers of the pumpkin together and then ink blend the edges of the pumpkin with Nocturne VersaFine Clair ink and a sponge dauber.
Step 4: Ink blend the pumpkin stem die cut with Nocturne VersaFine Clair ink and a sponge dauber.
Step 5: Spray the whole pumpkin die cut with more Gold Sheer Shimmer Craft Spray and set aside to dry.
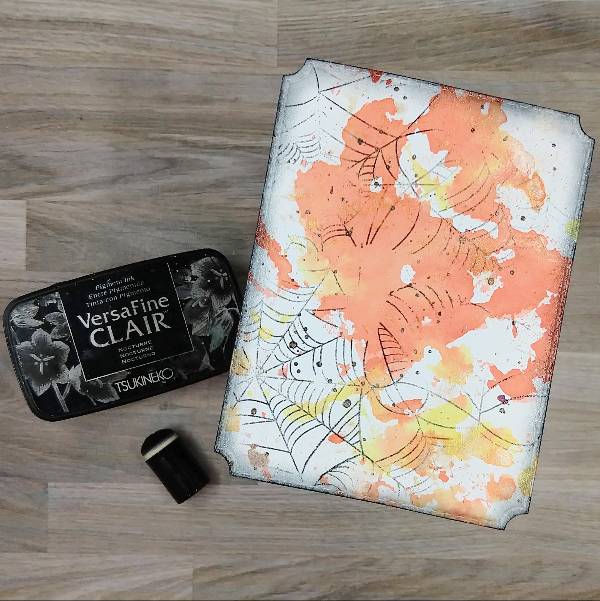
Step 6: Spray the Dandelion and Tangelo Fireworks! Craft Spray onto a piece of acetate packaging and use it to watercolor smoosh a panel of watercolor paper. After the spray dries, die cut it with an A2-sized die cut.
Step 7: Splatter Rich Cocoa Fireworks! Craft Spray onto the background panel with the stick from the bottle’s spray nozzle. Then use a Nocturne VersaFine Clair ink to partially stamp the panel as well as ink blend the edges. Heat emboss the cobwebs and ink blended edges with clear embossing powder
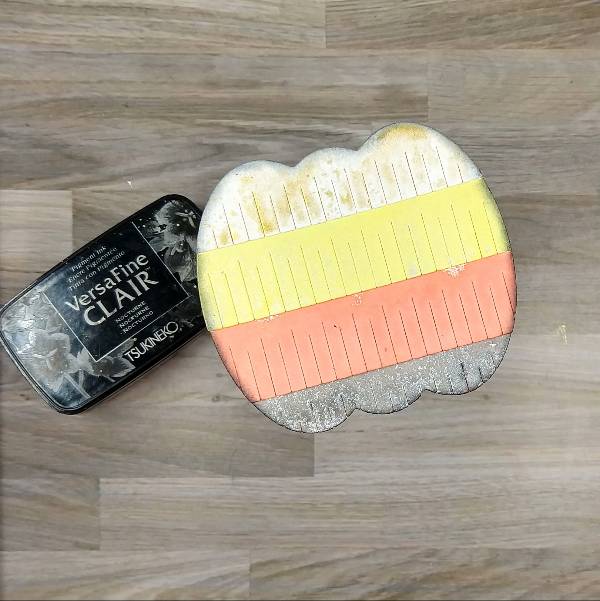
Step 8: Press the Nocturne VersaFine Clair ink pad onto a small piece of watercolor paper to color it black.
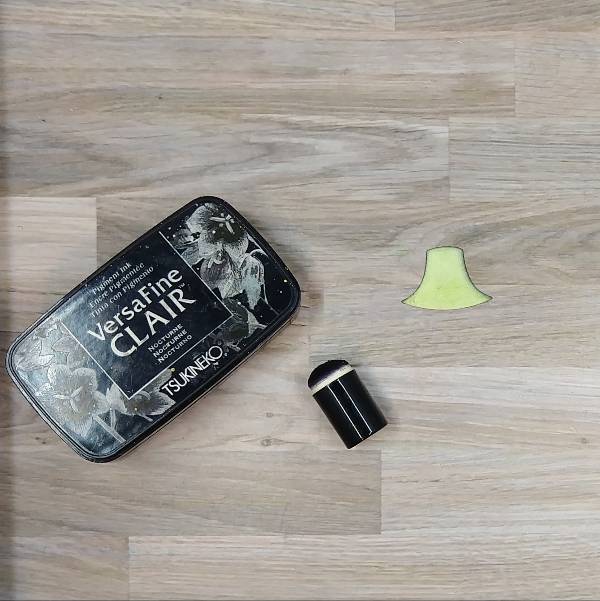
Step 9: Die cut the now black piece of watercolor paper to create the sentiment and spray it with Gold Sheer Shimmer Craft Spray.
Step 10: Die cut a piece of vellum with the sentiment’s shadow and glue both layers together.
Step 11: Assemble the card. Glue the pumpkin’s stem and the rest of the pumpkin together and glue it approximately in the center of the panel. Glue the sentiment on the right side of the pumpkin. Then add orange and yellow sequins onto the card. To finish the card, glue the whole card panel onto an orange A2-sized card base.
Pink and Main – die set – Notched Corners Pretty Pink Posh – die set – Fringe Pumpkin Simon Says Stamp – die cut – Trick or Treat 2 Simon Says Stamp – sequin mix – Autumn Leaves (retired) Tailored Expressions – stamp – Spiderweb Cling & Clear Combo A2-sized orange card base Clear Embossing Powder Watercolor paper Die cutting machine Scissors Glue
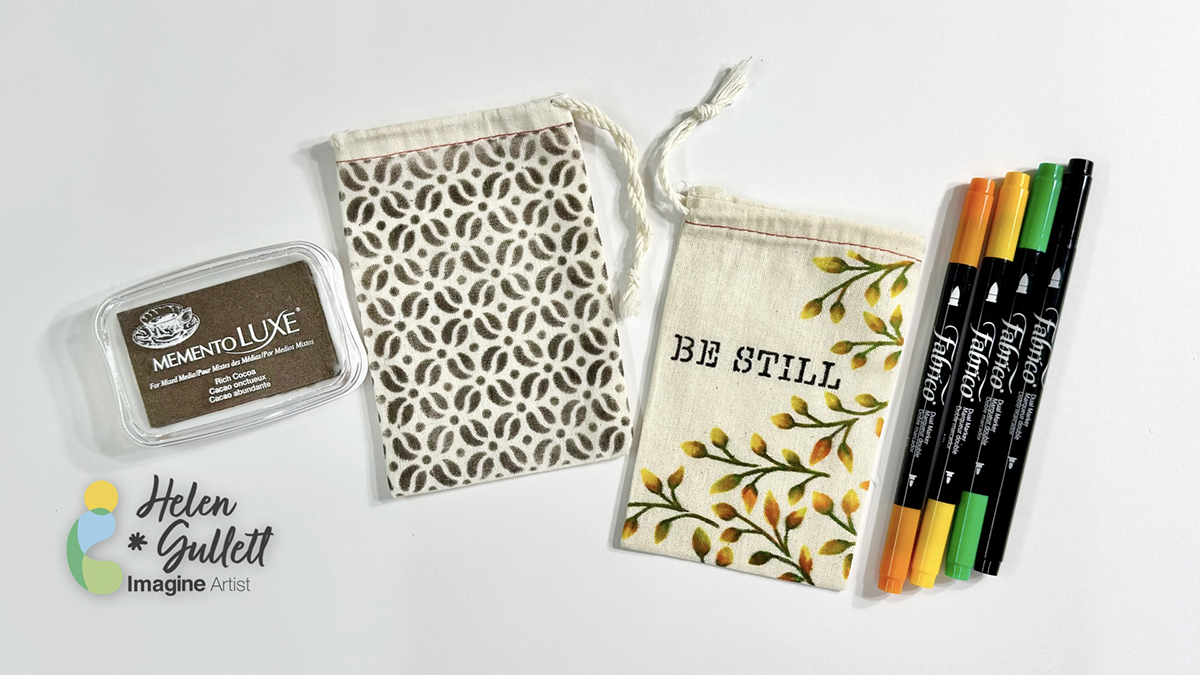
Hello crafty friends! Today’s projects are about how you can personalize any muslin bags or canvas bags by adding patterns, words, or anything you can think of with Fabrico Markers, Memento Luxe ink pads, and stencils. It will be fun projects to make for any occasion gift ideas or even for yourself to use. So, let’s make some together!
Skill: Easy Time: 15-20 minutes
Direction:
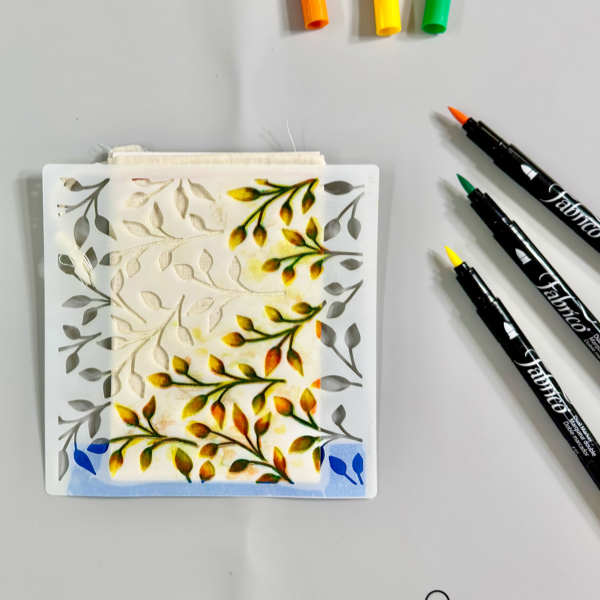
Step 1 If your muslin or canvas bag has some wrinkles or folded lines on it, you can iron it before stenciling on it. I ironed my mini muslin bags that I used on these projects today. Cut out a piece of a thick cardboard or cardstock as an insert mat to put inside the bag to prevent the ink from bleeding through the other side of the bag. Tape the stencil on the bag with masking tape or washi tape. Use Fabrico Markers to color through the leafy stencil. To do the ink blending, start with dark color first, then medium color, then lighter color after to blend the color together. The ink from the bag will transfer to the marker, but do not worry because you can clean the other ink color from the marker tip by scribbling it off on a piece of paper.
Remove the stencil from the bag.
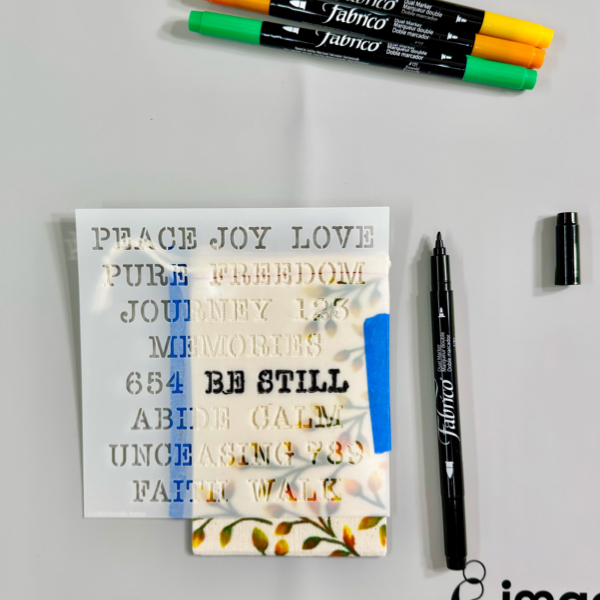
Step 2 Repeat the same step to add more pattern or word to the bag. On this one, I decided to add the word Be Still on the bag using stencil and Fabrico Marker. Remove the stencil and set aside for the ink to dry, or iron the bag to dry the inks permanently and quickly. I love how versatile these Fabrico Markers are when it comes to coloring solid images. The colors blend well together. The second technique to personalize a muslin bag you can try is by adding ink directly to the bag with ink pads, sponge daubers, and stencil.
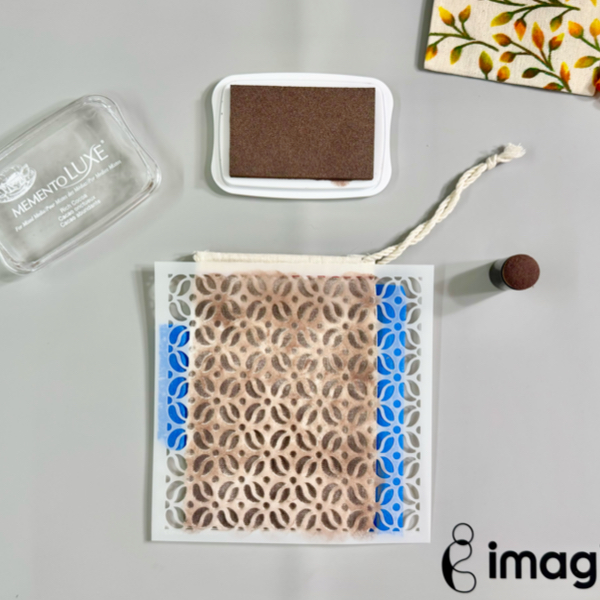
Step 3 Add the insert mat inside the mini muslin bag. Tape the stencil on the mini muslin bag with masking tape or washi tape. Using a sponge dauber, pick up the ink from the Memento Luxe Rich Cocoa ink pad by tapping on the ink pad a couple times. Dab the ink on the sponge dauber on the stencil firmly through the stencil to make sure the ink transfers to the bag. Repeat the steps until the bag is covered with the pattern.
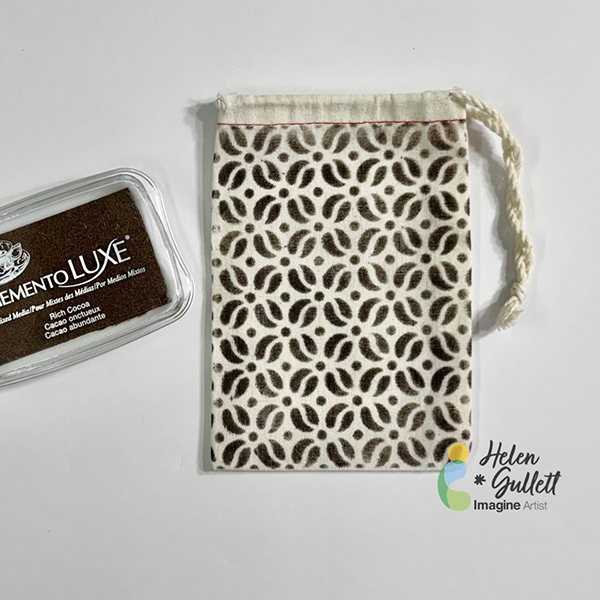
Step 4 Remove the stencil from the bag. Iron the bag to dry the ink permanently on the bag.
I love how they look after removing the stencils off the bags. I personally like both techniques, how about you? Which technique do you prefer better to do to personalize your own bags?
Hopefully you also will have fun personalizing your own bags by trying one of both techniques. Thank you for stopping by our blog today. Have a wonderful day!