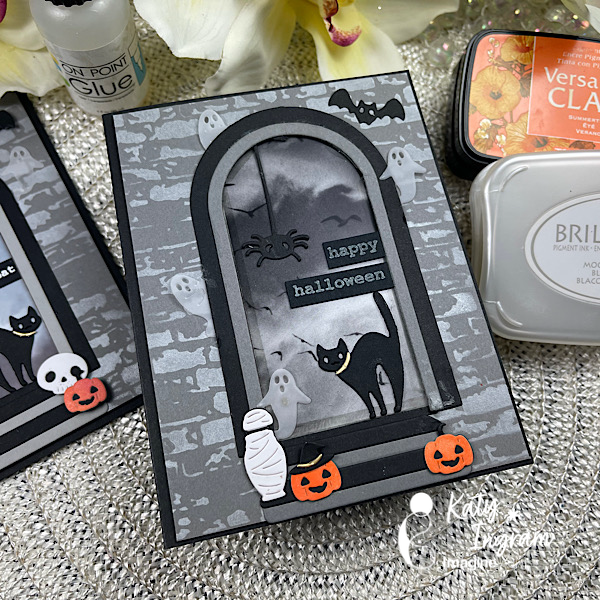
Hello Friends! Katy here with another quick project. In today’s video I create a simple Halloween card. I had some printed spooky printed acetate in my stash and paired it with a brick stencil and some Brilliance Moonlight White ink. I just love this white ink more than any others and so I like to showcase it any time I can.
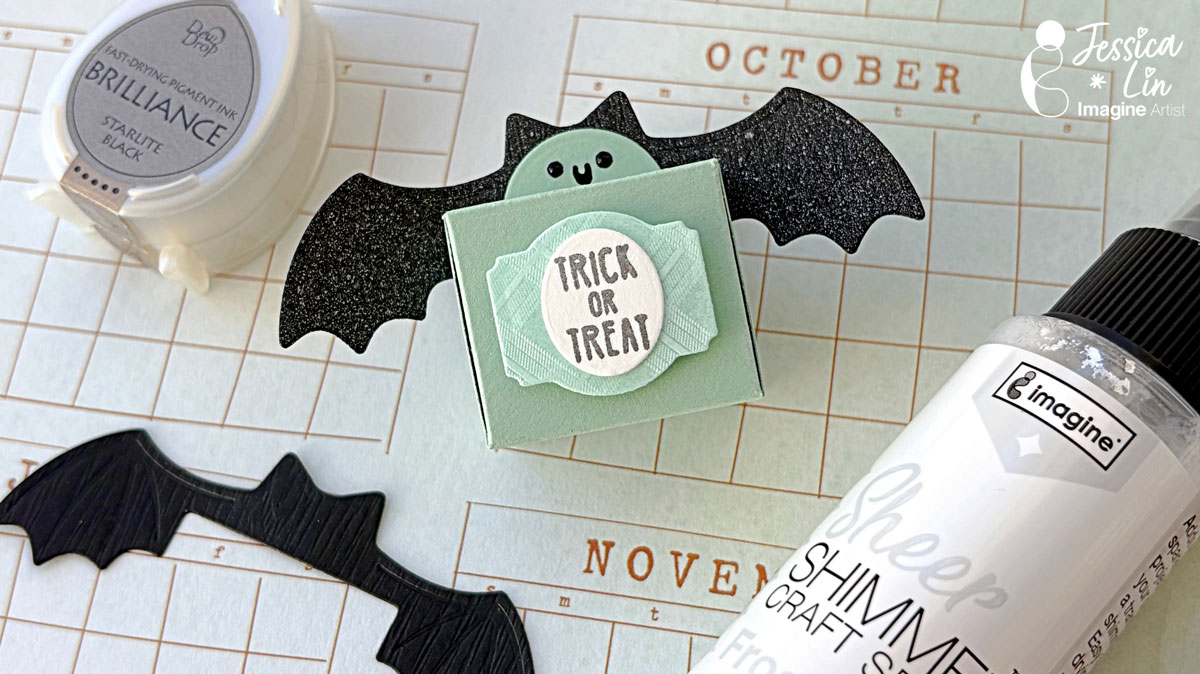
– Hi everyone! It’s Jessica here. Halloween is right around the corner and today I have a really quick & easy treat box idea for you. If you are interested in making mini treat boxes and dressing them up for Halloween, Christmas, or Easter, just keep reading!
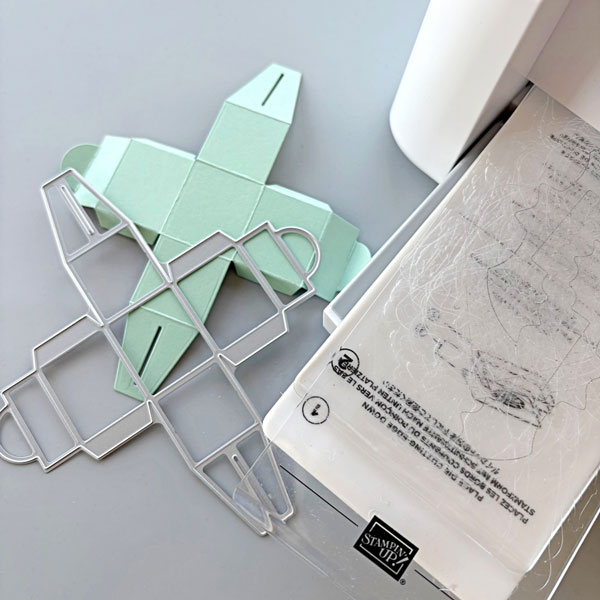
Step 1: Die cut a piece of Mint Macaron cardstock with Design a Treatbox die from Stampin’ Up. Fold along the score lines to create a mini treat box.
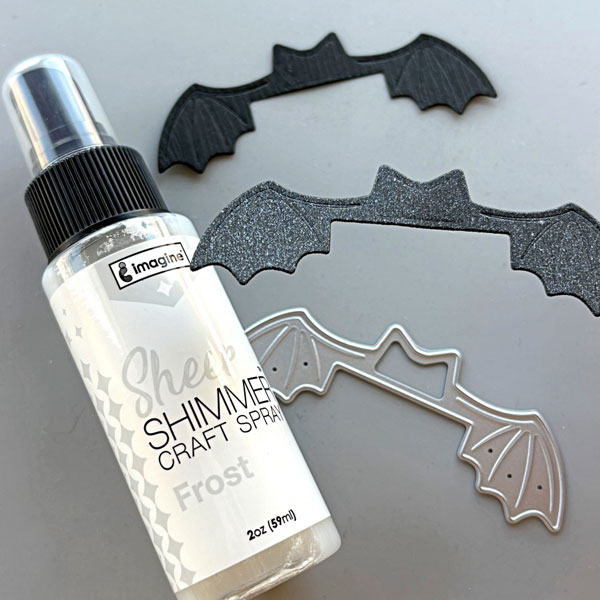
Step 2: Die cut a piece of black cardstock with the bat wing die from the same set. Then spritzed it with a generous layer of Sheer Shimmer Craft Spray in Frost. The shimmer spray really adds a whimsical touch to the bat wings! You can compare it with the die cut in the back without the Sheer Shimmer Spray. Doesn’t it look so different?
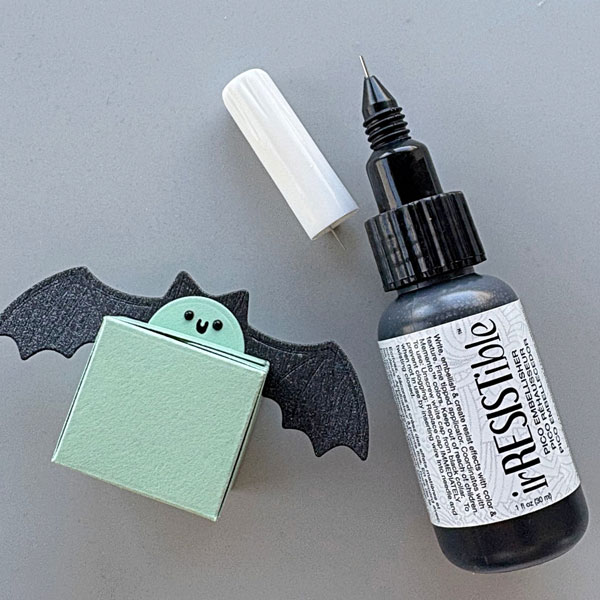
Step 3: Then I added a smiley face to the tab of the treat box with irRESISTible Pico Embellisher. The fine-tip nozzle was so easy to use to create fine details.
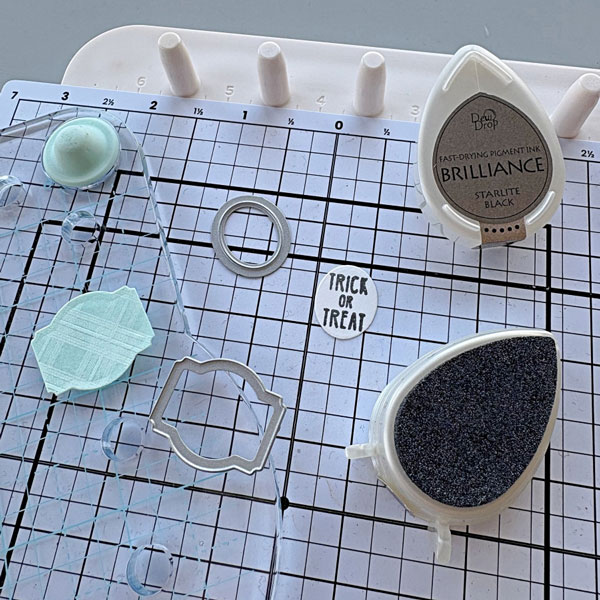
Step 4: Die cut the box labels with mint patterned paper and white cardstock. The “trick or treat” sentiment is from Mama Elephant’s Meowlloween Extras set. I stamped it with Brilliance Starlite Black ink pad.
Step 5: Since this is a mini treat box (holds 2 Hershey kisses), no tape or glue is required for the box assembly. Simply fold along the crease lines and hold it together with the flaps’ openings. This no-glue project is ideal for mass production and you could create many party favors in a short time!
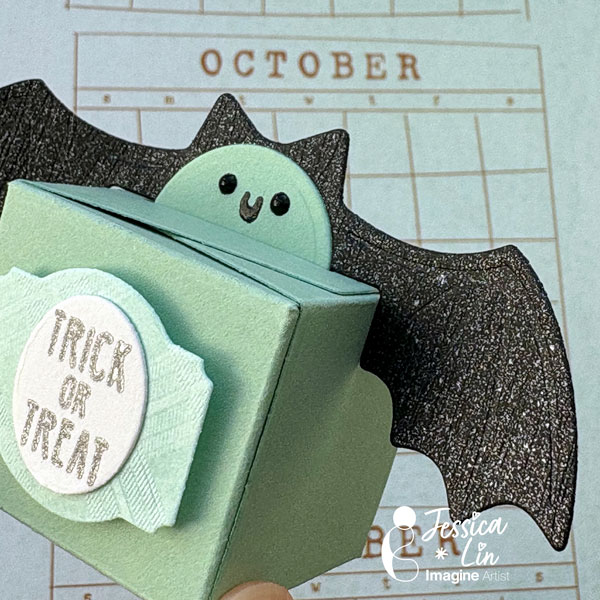
Once the box is assembled, adhere the label dies to the front and slide the bat wings die between the top tabs. You could also create Christmas or Easter treat boxes with the other dies in this set.
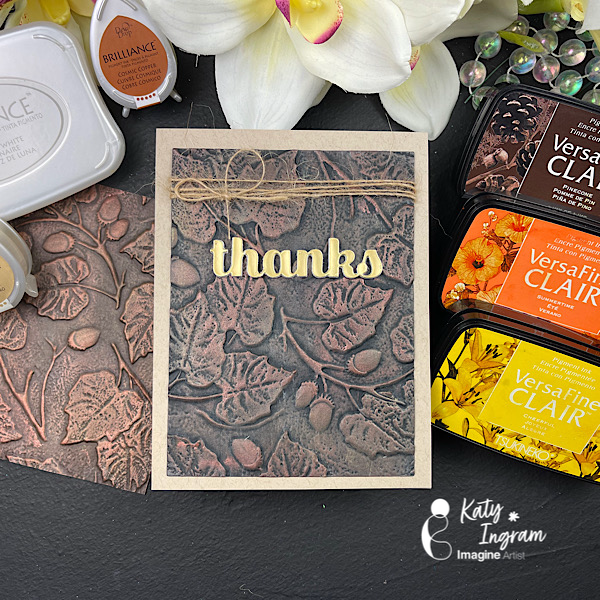
Hello Friends! Katy here with another quick project. I love trying new things with my inks and embossing folders and in todays video I used my VersaFine Clair with some Brilliance pigment inks in Cosmic Copper and Galaxy Gold and Moonlight White, with a 3D embossing folder.
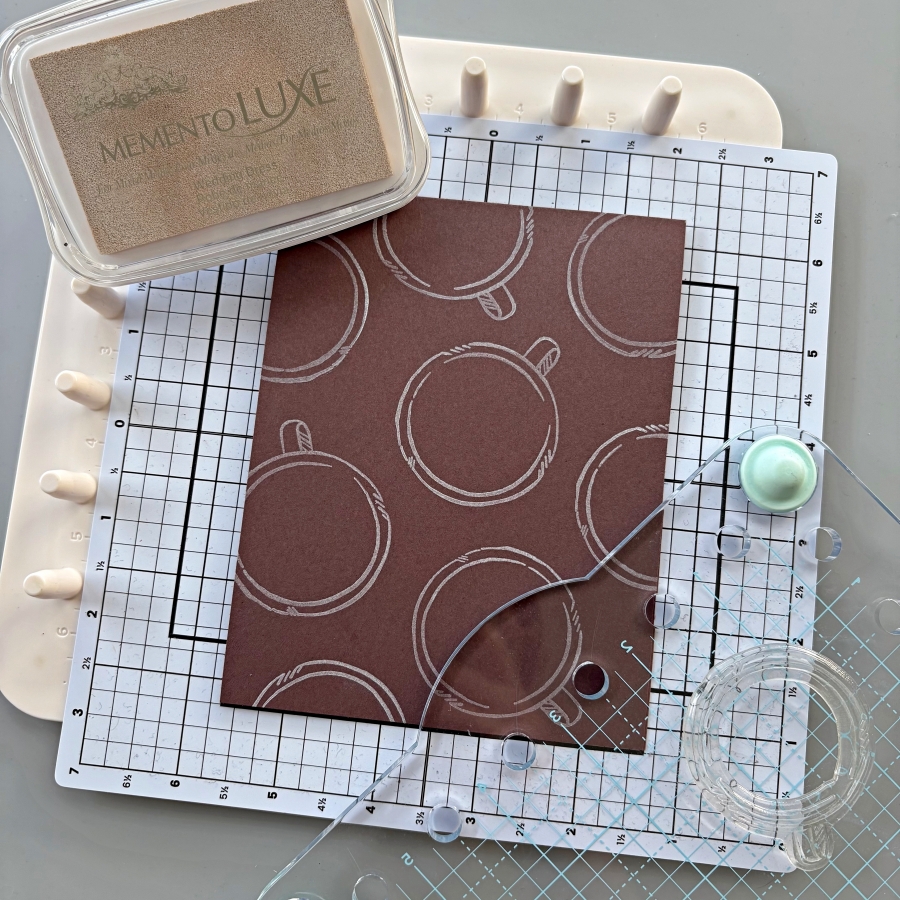
Hi everyone! It’s Jessica here. Today I have a simple coffee card to share with you. I like to include die-cutting and embossing in a lot of my projects, but I thought today I would focus on the basics – stamping with just ink and paper.
Step 1: Stamp the coffee stamps using Brilliance Coffee Bean and VersaFine Clair Warm Breeze ink pads. The stamp set I am using today is from Stampin Up’s Latte Love set, but you can use whatever coffee stamps you may have.
Step 2: To create a simple, patterned background, try stamping the same image at various angles using Memento Luxe Wedding Dress ink pad. For a more subtle, tone-on-tone look, you could use VersaMark ink pad instead. These two ink pads are my favorite for stamping background patterns.
Step 3: For the sentiment, I decided to use VersaFine Clair Pinecone since the VersaFine Clair ink pads are great at capturing fine details in sentiment stamps. I also fussy cut around the stamped image.
Step 4: I added a bow using some twine I saved from previous gift packaging, and adhered both the sentiment and the latte images with foam tape. And that completes today’s coffee card! Thanks so much for stopping by, and I’ll see you in my next tutorial!
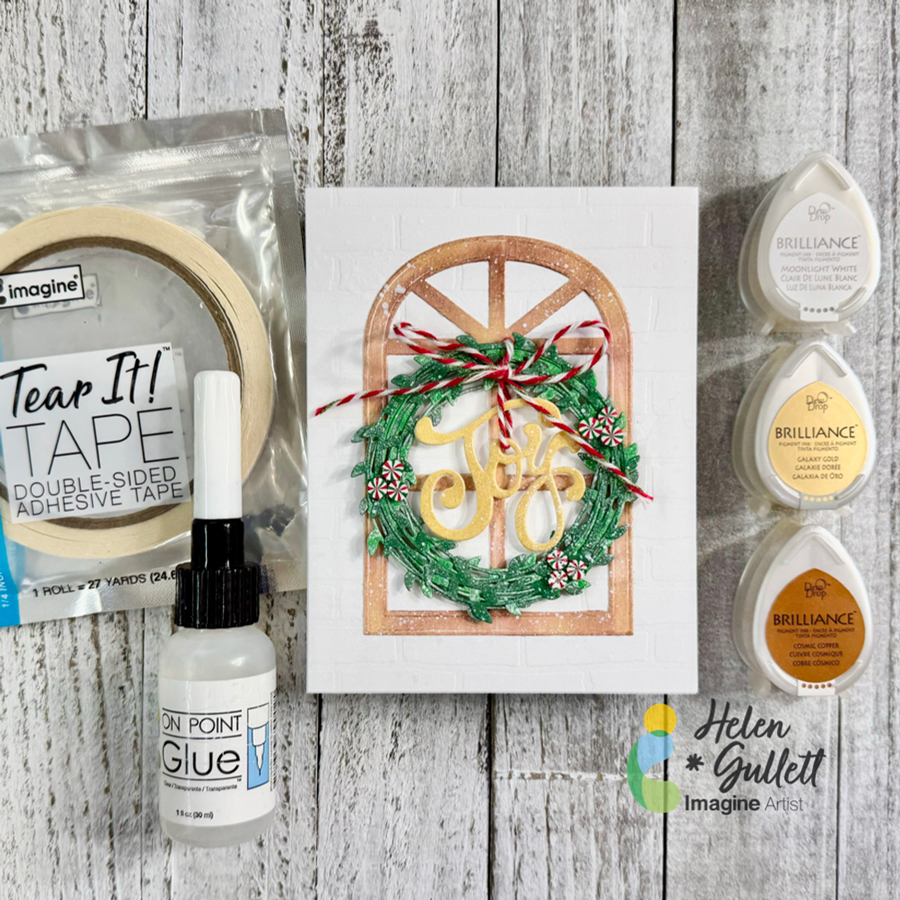
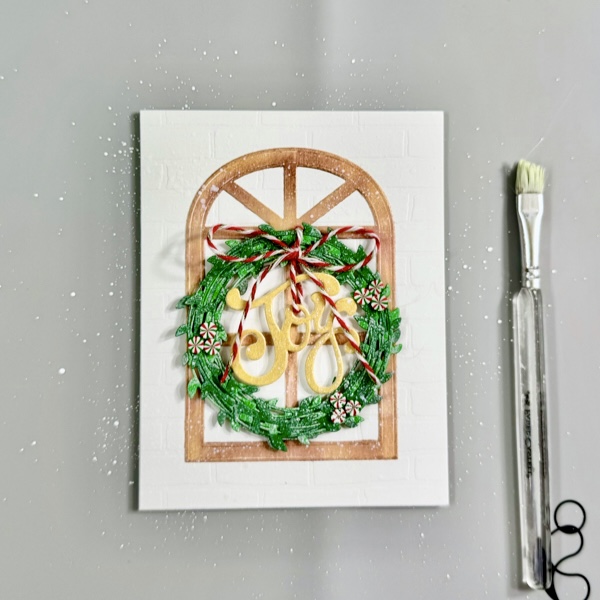
Hello crafty friends! If you ask me if we could start making Christmas projects in July, I would say the sooner the better. One of the ways to share the joy of the Holiday is by sending handmade Christmas cards. Today, I have this no-stamping Christmas card idea to share with you all. Yes… it is a no-stamping card, all die cuts. To add extra shimmer to the die cuts, I use Brilliance Dew Drop inks today. So, let’s turn on the Christmas music and get crafting!
Skill: Intermediate Time: 20-30 minutes
Direction:
Step 1 Cut a heavyweight white cardstock (110 lb) to make the A2 card base in 4.25 inch x 5.5 inch dimension. Set a side.
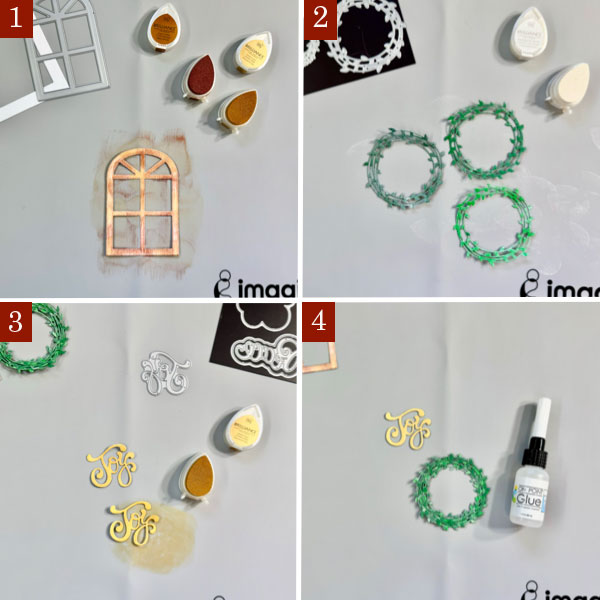
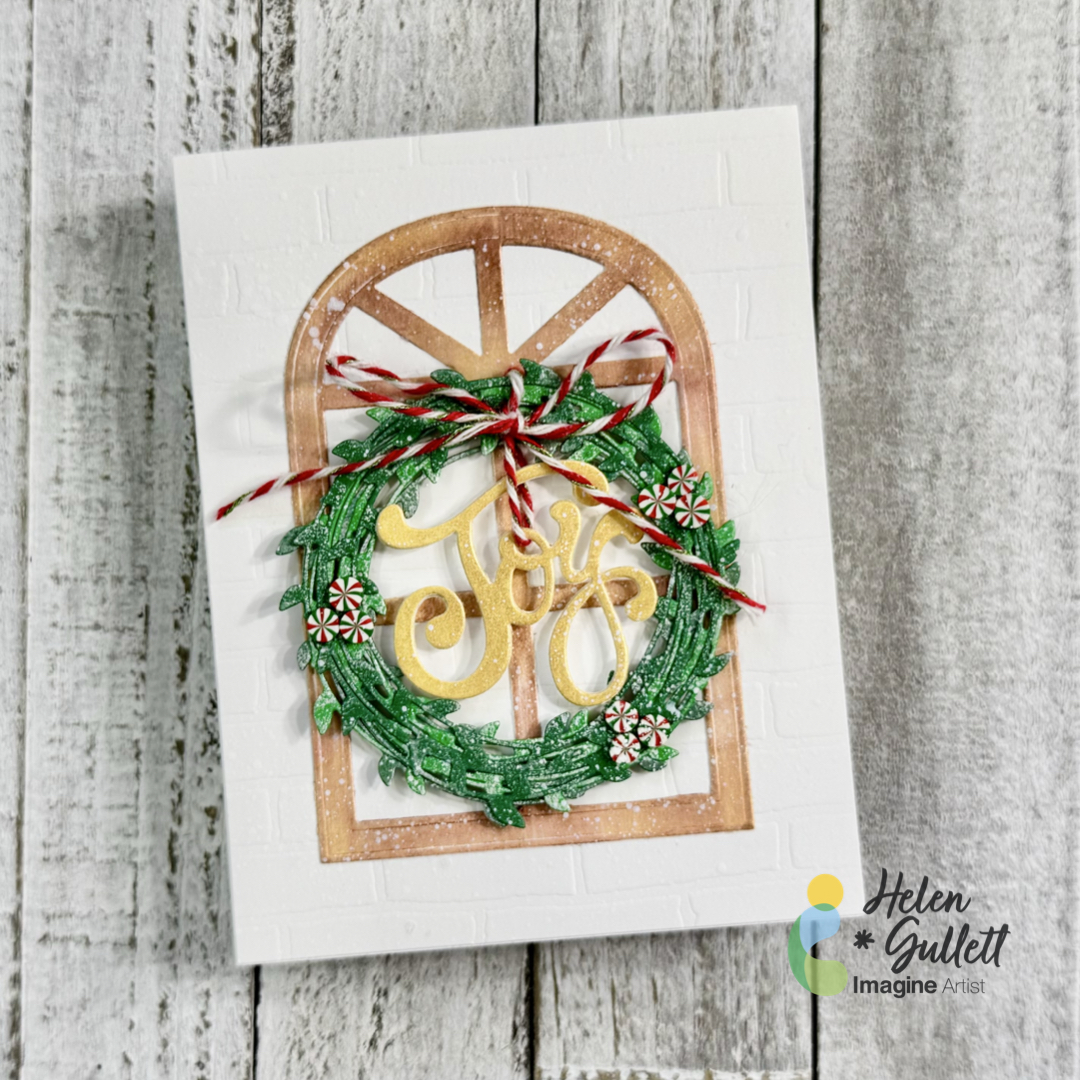
Cut out a piece of white cardstock with the Arched Window die with the die cutting machine.
Randomly dab some of the Cosmic Cooper Brilliance ink and Galaxy Gold ink on the window to cover it. Then set it aside to dry or you can use a craft heat gun to speed up the drying time.
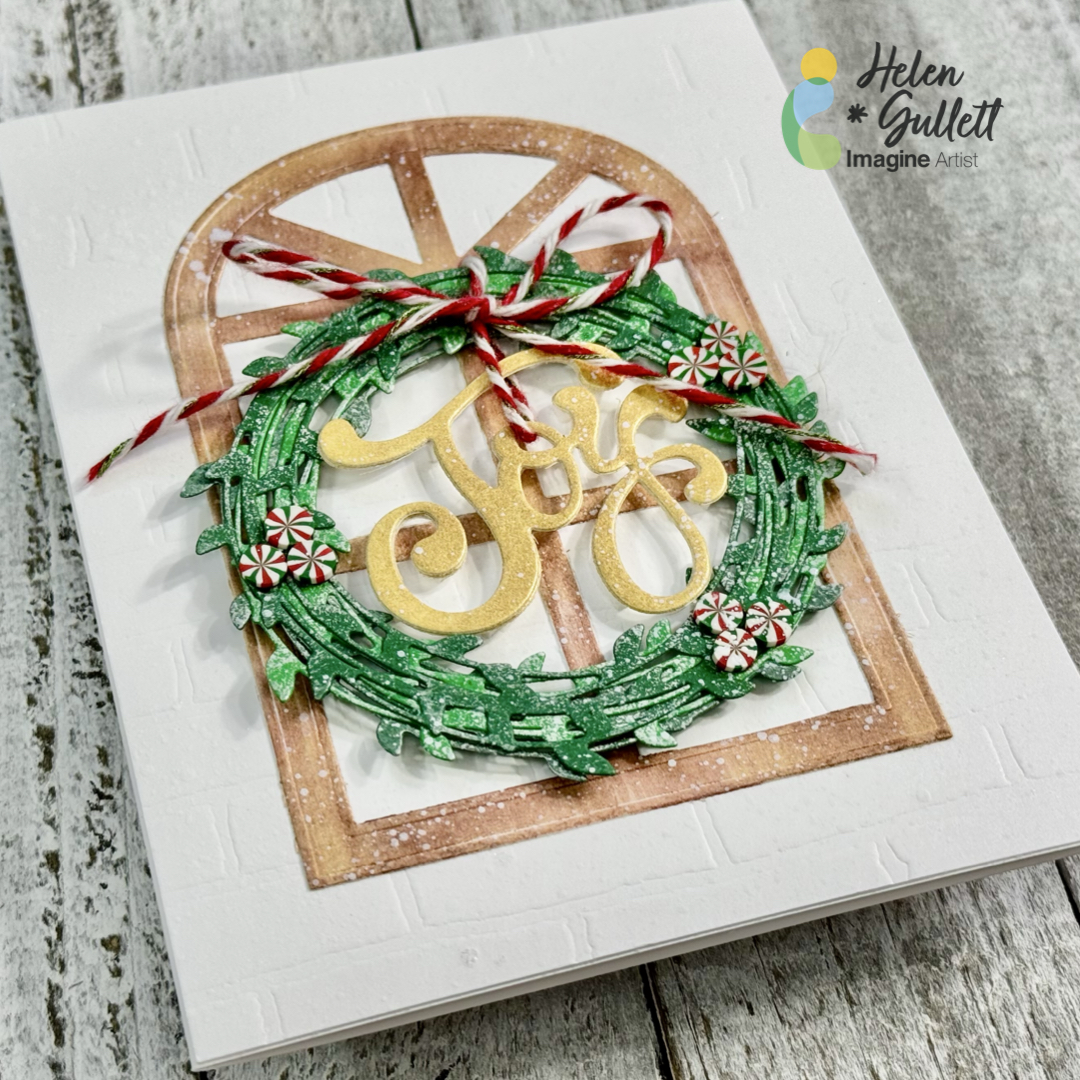
Step 2 Cut out 2 or 3 shades of green cardstocks with the wreath die with the die cutting machine.
Randomly dab some of the Moonlight White Brilliance ink on each of the wreaths to give them a snowy effect. Then set them aside to dry or you can use a craft heat gun to speed up the drying time.
Step 3 Cut out another white cardstock with the Joy word die using the die cutting machine twice. You can cut out 3-4 times to create a thicker word chipboard.
Cover the word diecuts with some of the Galaxy Gold ink to give them gold color. Then set them aside to dry or you can use a craft heat gun to speed up the drying time.
Step 4 Put together the wreath diecuts with some of the On Point Glue to become a one thicker wreath. Put a heavy object (I used a large acrylic stamping block) on them until the glue dries permanently in a couple minutes.
Do the same way with the Joy word diecuts to create the word chipboard.
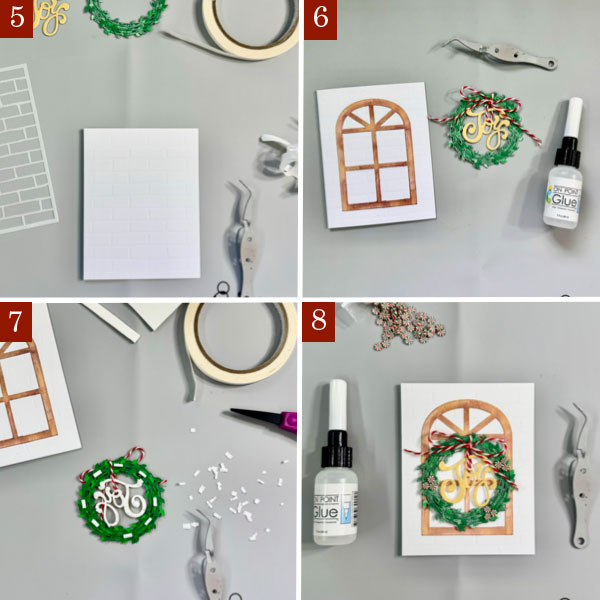
Step 5 I embossed a piece of 4.25 inch x 5.5 inch white cardstock using the Brick Wall stencil. If you have a similar background embossing folder, you can use it, too.
Add the embossed background panel to the card base with some of the Tear It! Tape.
Step 6 Add the arched window to the card with On Point Glue, add a heavy object on it (or a large acrylic stamping block) until the glue dries permanently.
Add the word chipboard to the wreath with some baker’s twine to make it look like hanging down in the middle of the wreath. Tie up the twine into a bow and secure it with a dab of On Point Glue. Put a heavy object (or a larger acrylic stamping block) on it so the twine stays in place until the glue dries permanently.
Step 7 Cut a couple thin strips out of the thin white fun foam (about ¼ inch wide) and add some of the Tear It! Tape to them to create the foam tape.
Cut the foam tape into small pieces and add them at the back of the wreath. Remove the backing of the foam tapes and add the wreath to the card.
Step 8 Decorate the wreath with some of the Peppermint clay embellishments by adding them to the wreath with some of the On Point Glue.
Step 9 On the craft mat, mix a small amount of white acrylic paint with some water.
Add some of white paint splatters to the card using brush for more texture and snowy look.
Dry the whole card with a craft heat gun.
I love how this no-stamping Christmas card turned out and I hope you do, too. I plan to make more of this card to send them out to families and friends later.
Thank you so much for stopping by our blog today. Have a wonderful day!
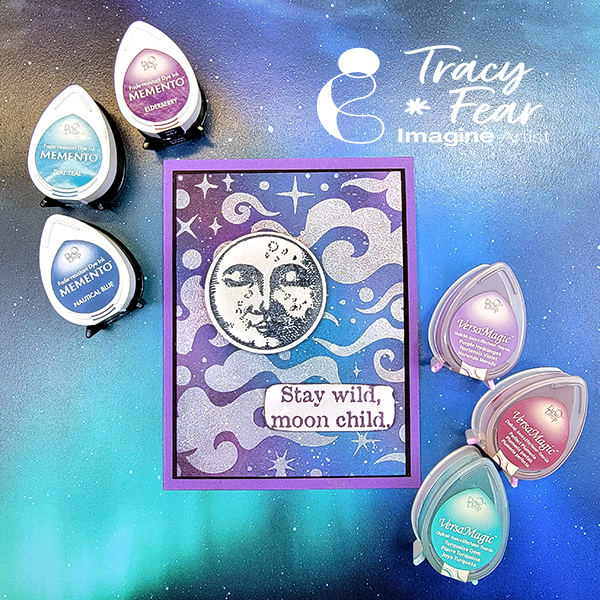
Hello Friends! Tracy here and today I am excited to share this really easy galactic, out of this world background technique!
In today’s video tutorial I am sharing how I use some Memento, VersaMagic, Brilliance, and VersaFine Clair inks to create this stunning card along with a paint pen, a stencil from my stash and some holographic embossing powder!