See How to Make a Mixed Media Project with Rinea Foil and VersaFine Clair

by Kassy Tousignant

See How to Make a Mixed Media Project with Rinea Foil and VersaFine Clair

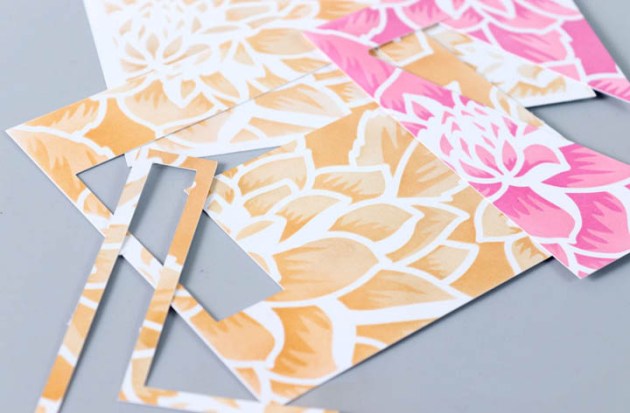
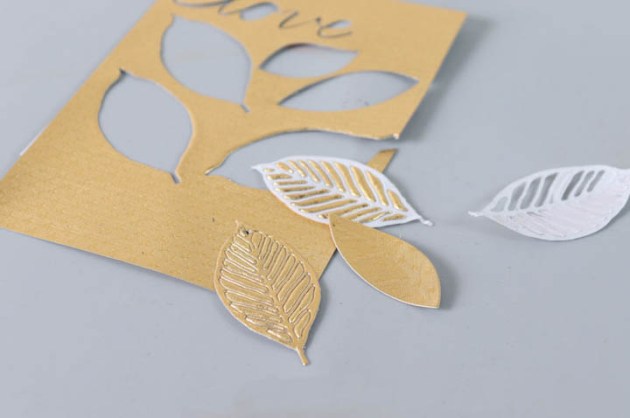
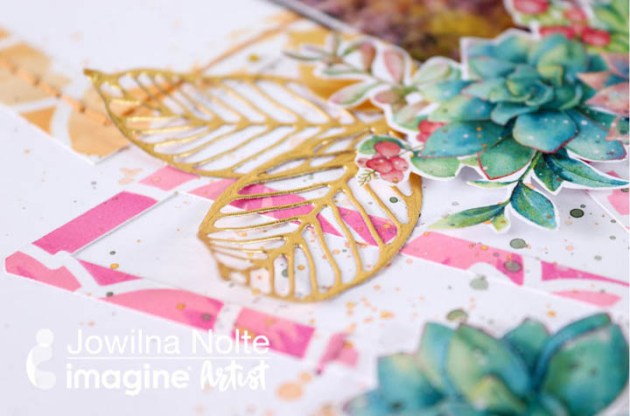
This mixed media paper doll panel was so fun to make. I used Rinea foil, Creative Medium, foam tape and Tsukineko inks in this crafting project. Rinea foiled paper works beautifully with 3D embossing folders and makes a great foundation for the girls stamped in VersaFine Clair inks. Enjoy!

Skill: Advanced
Time: 1 – 2 hours

Directions

Supplies

Imagine
Other
  • Black gesso
  • Catherine Moore stamps
  • Pink twine
  • Wood panel
  • Rinea – copper glossy paper
  • Prima – paper, and metal flowers
  • Metal charm
  • White cardstock
  • Foam adhesive
  • Sizzix – 3d embossing folder
  • Die-cutting machine
  • Metal brads

How to Use Rinea Foil and Memento Inks on a Scrapbook Layout

by Jowilna Nolte

How to Use Rinea Foil and Memento Inks on a Scrapbook Layout

Create amazing elements for your scrapbook layout using the range of Rinea foils, Memento inks, and a layered stencil set. Combined with inked backgrounds you can create a feast of color and shine.

Skill: Intermediate
Time: 45 minutes

Directions


Step 1

Blend Toffee Crunch Memento ink through the first layer of a stencil set onto smooth white cardstock.


Step 2

Then blend Peanut Brittle Memento Luxe through the second layer of the stencil to bring out some more of the details.


Step 3

Add more highlights by blending in certain areas using Memento Peanut Brittle. Layering a dye on top of a pigment ink creates beautiful results.


Step 4

Remove the stencil to reveal the blended background. And repeat with different color hues to create more variety. I repeated this process with pink.


Step 5

Die-cut the stenciled background using a die-cut machine or hand-cut some letters.


Step 6

Back a sheet of Rinea foil with double-sided tape. Then die-cut some leaves out of the foil.


Step 7

Assemble your layout by adhering the die-cut letters, then add your photo. Create a cluster using your foil leaves and cut out elements.

Supplies

Imagine
Other
  • Wooden block
  • Altenew – Stencil – Layered Dahlia A, Layered Dahlia B
  • Resin
  • Prima Moulds
  • Texture Paste
  • Little Birdie

See How to Make a Happy Birthday Panda Card with Rinea Foil

by Elina Stromberg

See How to Make a Happy Birthday Panda Card with Rinea Foil

This panda stamp set is one of my favorites, and I’ve used it on many card projects. Embossed Rinea foil took these cute images on a completely new level; the shimmering patterned background is truly eye-catching and made the adorable party pandas pop! This card design is simple to make, and the Rinea foil is easy to emboss. If you don’t have a die-cutting machine and embossing folders you can easily emboss and pattern the foil with a stylus.

Skill: Intermediate
Time: 1.5 hours

Directions


Step 1

Stamp the pandas on white cardstock using clear VersaMark ink. Heat emboss the images using black Mboss embossing powder.


Step 2

Using the craft mat as palette color the embossed pandas with black, grey and red Memento inks. Wipe the ink pads on the craft mat and pick up the colors with a water brush. Once dry add highlights with a white color pencil. Cut out the images.


Step 4

Place a sheet of red Rinea foil in an embossing folder. Run through the die-cutting machine to create an embossed pattern. Doesn’t the embossed sheet look amazing! Trim the foil to a size slightly smaller than your card front.


Step 5

Trim a white panel to a size that is ¼” smaller than your card base on all edges. Die-cut two circles on the card front. Layer the card front panel on the embossed foil and mat onto a piece of dark red cardstock. Attach the layered card front to the card base using double-sided tape. Stamp the sentiment on the card front. Glue pandas on the die-cut circles.

Supplies

Imagine
Other
  • Rinea Foil Paper – Autumn
  • Cardstock – Red, White
  • Cardbase
  • Stampin’Up – ‘Party Pandas’ Stamp set
  • Water brush
  • White color pencil
  • Scissors
  • Glue
  • Double-sided tape

Make a Simple Card with Embossing and Border Design with Rinea Foil

by Jessica Lin

Make a Simple Card with Embossing and Border Design with Rinea Foil

Hi everyone! I hope you are enjoying the mega inspirations from the Imagine & Rinea collaboration. Today I have a quick and easy card that revisits simple stamping, die-cutting, and embossing. Sometimes all you need is a couple of amazing supplies to put together an amazing card. Check out the details on the realistic-looking rose stamp and the beautifully embossed background by watching this tutorial.

Skill: Intermediate
Time: 20 minutes

Directions

Supplies

Imagine
Other
  • Rinea Foil Variety Pack – Peacock
  • We R Memory Keepers Next Level Embossing Folders – Quilted
  • Stampin’ Up Healing Hugs Stamp Set
  • Stampin’ Up Delicate Lace Edgelits
  • Stampin’ Up Stamparatus
  • White Cardstock
  • Rhinestones

Learn to Create Shine with Silver Mboss and Rinea Foil Paper for a Shaker Card

by Melissa Andrew

Learn to Create Shine with Silver MBoss and Rinea Foil Paper for a Shaker Card

Today, I am making a fun shaker card using a number of fabulous Imagine products including the new Mboss Embossing Powder in my new favorite color Silver! In addition, I’m adding some beautiful shiny Rinea paper. These two products really add a special touch to this handmade shaker greeting card. Join me in today’s fun paper crafting tutorial.

Skill: Advanced
Time: 45 minutes

Directions

Supplies

Imagine
Other 

Learn How to use Creative Medium to make a Mixed Media Tag

by Arjita Sepaha Singh

For today’s mixed media tag, I used Imagine mixed media products. I took the chipboard tag and added Black gesso to get a nice dark base. Then I took a stencil and Creative Medium to add a beautiful flourish. I also added decorative chipboard cutouts, resin pieces (heart with wings) and paper flowers to my layout. Creative medium is a great adhesive for adhering all my unique pieces onto the tag. Once everything was dry, I added the beautiful Fireworks Shimmery Craft Spray and Golden Delicata ink to give this creative gift tag extra sparkle and shine. The shimmer products are especially bright on dark backgrounds and take on a new life!

Skill: Intermediate/Advanced
Time: 30 minutes + dry time

Directions

Supplies

Imagine
Other
  • Chipboard
  • Stencil
  • Chipboard design
  • Resin Pieces
  • Paper Flowers
  • Black gesso
  • Paint Brush