“You’re the Coffee to my Morning” Card

By Katy Ingram

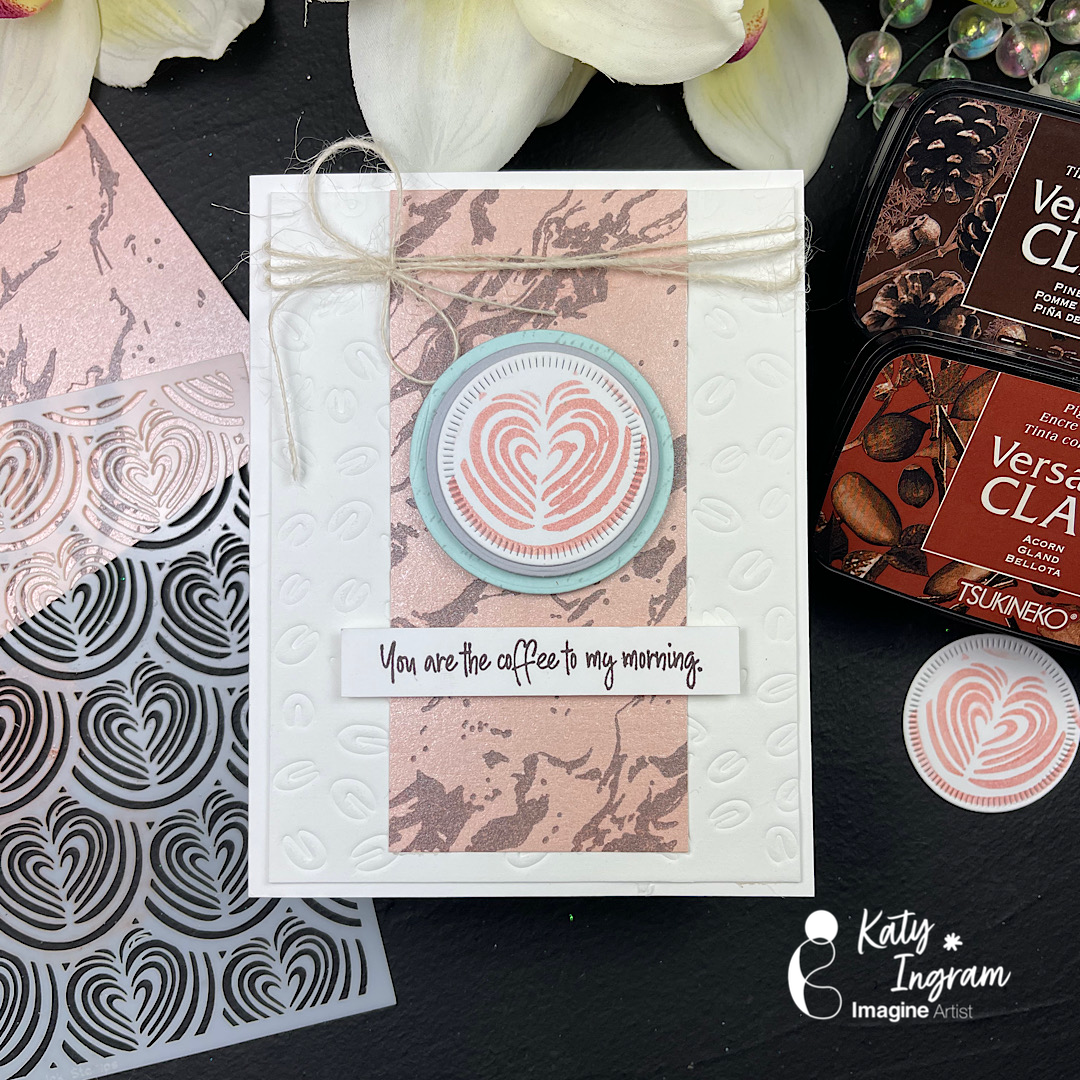
Hello Friends! Katy here with another quick project. I love trying new things with my inks and in this video I realized something great about using VersaFine Clair Inks with my BetterPress System and Shimmer Cardstock, you know the one that has a coating and is very smooth.

This particular cardstock is very hard to stamp with any kind of pigment ink because it never really dries. However; using the Betterpress System and pressing the ink into the paper it’s like it forces the ink to absorb. The best part, no smudging!

I personally don’t make coffee themed cards regularly, but I know others do and I hope this gives you some inspiration if you are a coffee card maker.

Video has all the details. Thanks for watching.

Skill: Advanced
Time: 15 minutes

Art Supplies

Imagine Products

• VersaFine Clair: Pinecone and Acorn
• Delicata Ink-Rose Gold

Other Products Used

• Affiliate links used at no additional cost to you. Thank you for your support
• Kat Scrappiness Coffee Background Die https://ldli.co/e/p34dnm6
• Altenew Gilded Marble Press Plate https://ldli.co/e/p34dnm6
• Double Sided Adhesive 1/2 inch https://amzn.to/4m9cKlc
• Rose Gold Pearl Cardstock https://ldli.co/e/p34dnm6
• Letterpress Paper https://ldli.co/e/p34dnm6
• Betterpress System https://ldli.co/e/p34dnm6

Learn Tone on Tone Stamping with StazOn Pigment Inks

by Lindsay Adreon

Rinea foil is a non porous surface that can be tricky to stamp on, however, with StazOn Pigment ink it’s a breeze! In my video today I am sharing two different ways you can achieve a tone-on-one stamping look with StazOn Pigment ink and Rinea foil!

Supplies

Imagine
Other

**Affiliate Links Used**

Quick & Easy Card Plus A Sneak Peek

by Nadine CarlierYoure perfect card by Nadine Carlier IC


Happy Valentine’s Day!
To see how I created this quick and easy card and what new Imagine product I share a sneak peek of watch my video below. Enjoy!

Skill: Beginner
Time: 15 minutes

Supplies

Imagine
Other

Visit our YouTube Channel for more inspirational videos and subscribe to get updates when we post new videos.

Use Rose Gold Ink to Color a Beautiful Floral Pattern

by Martha Lucia Gomez

Hello dear friends! Today, I have a very special card that I made just using the new All-Purpose Ink in Rose Gold from Tsukineko. All-Purpose ink comes in a variety of colors including metallics which is perfect for this project. Rose Gold is a trending color and can easily use it in all my creations and thanks to Imagine we have many options to use. Take a look at my card:

Skill: Intermediate
Time: 30 minutes

Directions


Step 1

To create my card, I used whisper white card stock, embossing powder and VersaMark ink. I stamped the flowers over whisper white card stock too using VersaMark and White Embossing Powder. I melted the powder with the heat tool and then started my painted or coloring process with All-Purpose Ink Rose Gold.


Step 2

To color the flowers I used a paintbrush but you can also use Fantastix to have the same result. I cut my card in regular size but after finish it, I changed my mind and decided to reduce the width of the card and show off some of the flowers that I used. After coloring the flowers and leaves, I cut all of them with my scissors and arranged them on the left side of the card. During this process, I changed my mind on how I used some parts of the flowers on the left side.


Step 3

To have the card on normal size, I just cut the right side border about 3/4″ of an inch. I pasted all the flowers with double-sided foam tape and added white sequins with On Point Glue. To finalize the card, I stamped with Memento Paris Dusk a Spanish sentiment from the stamp set Vive Ama Sueña from Latina Crafter. Simple, easy and beautiful!

Supplies

Imagine
Other
  • Whisper White Card Stock
  • Sequins
  • Double Sided Foam Tape
  • Even More Spring Flowers Stamp Set from Simon Says
  • Misti Stamping Tool
  • Scissors
  • Paintbrush