Holiday Gift Card Envelope Holders with Memento and Delicata Inks

By Katy Ingram –

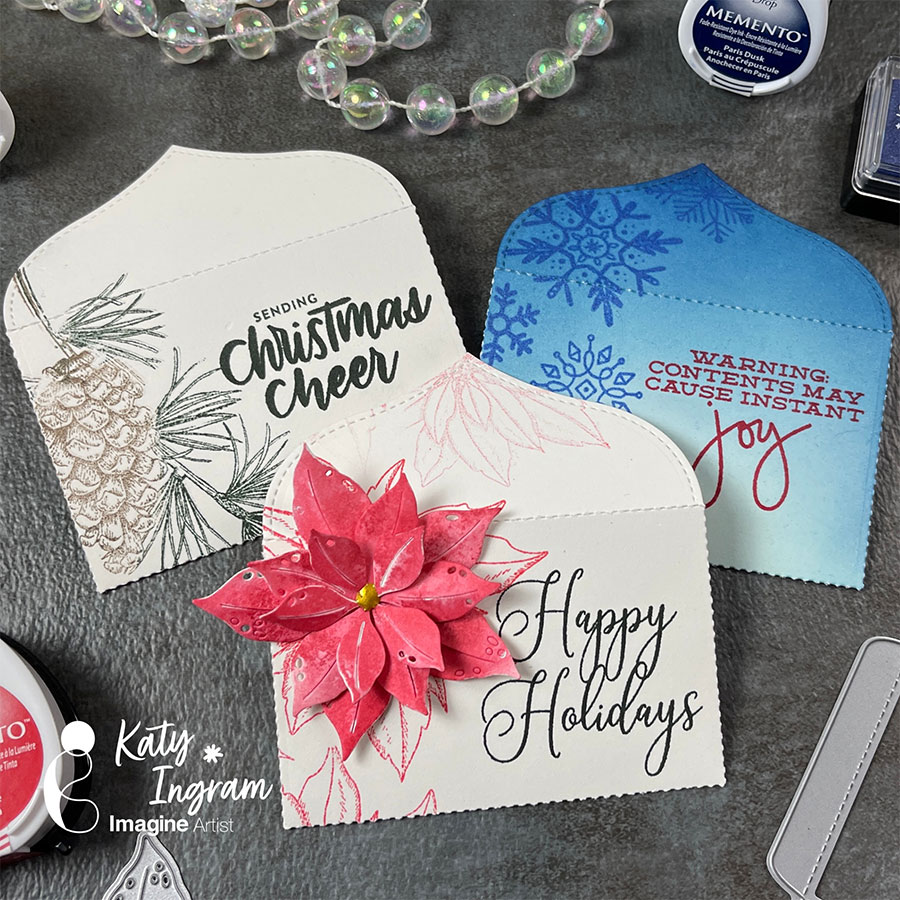
Hello Friends! Katy here and for todays project I am sharing a few simple gift card envelope holders, great for the holidays or really any gift giving occasion. 

In todays video tutorial you will see how easily these envelopes came together using some Memento and Delicata Inks. Using an envelope die makes quick work of this project and will give you more time to enjoy the holiday season. 

I hope you enjoy and are inspired to take those plain gift cards and create an envelope to dress them up. 

Skill: Beginner, Intermediate, Advanced

Time: 10 minutes

Art Supplies

Imagine Products

Snowflake Envelope

• Memento Inks: Summer Sky, Teal Zeal, Nautical Blue and Paris Dusk

• Delicata Ink: Sapphire Blue

Poinsettia Envelope

• Memento Inks: Love Letter, Lady Bug and Rhubarb Stalk

• Delicata Golden Glitz Reinker

Pinecone Envelope

Memento Inks: Rich Cocoa and Northern Pine

• Tear It! Tape

• On Point Glue

Other Products Used

Mama Elephant Venice Envelope Creative Cuts Die

Waffle Flower Layered Poinsettia Die

Simon Says Stamp The Magic of Christmas Stamp Set

Simon Says Stamp Christmas Cheer Stamp Set

Mama Elephant Confetti Stamp Set

Let’s Make Holiday Treat Boxes

By Annie Collins –

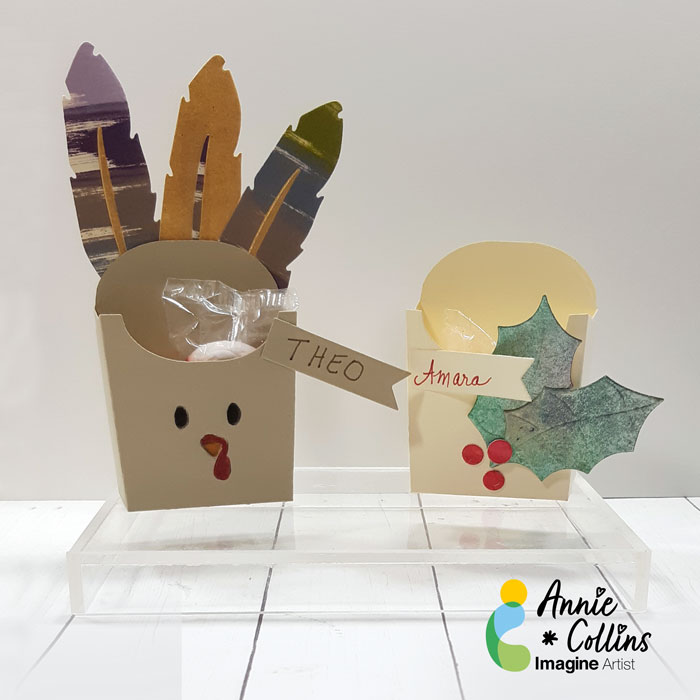
Hello Crafty Friends – Annie here with some fun an easy mini holiday treat boxes.

Skill Level: Beginner

Time to Complete: 30 Minutes

Art Supplies

Imagine:

• Kaleidacolor – Vineyard Ink

• Delicata Ink: Golden Glitz

• Memento Markers: Rich Cocoa,  Cantaloupe and Rhubarb Stalk

• Fireworks! Shimmery Craft Sprays: Ladybug, Cottage Ivy and Bamboo Leaves

• Tear It! Tape

• On Point Glue

Other Supplies:

• InkyStamper- Dies: Small Fry Box

• The Maker’s Movement: Winter Foliage Die Set

• Feather die

• Recollections Brand 80lb Cardstock: Light Cream, Medium Cream & White.

Imagine Crafts Resident Artist

Annie Collins

My Blog:  https://littlewingscreates.blogspot.com/

Instagram: https://www.instagram.com/anniec09

Facebook: https://www.facebook.com/Little-Wings-Creates-275422213079163/

Pinterest: https://www.pinterest.com/acollins01/

YouTube: https://www.youtube.com/c/AnnieCollins09

Making Your Own Ephemera

Ephemera Tag 1

By Alison Heikkila –

Hello! Today I’ve got a fun tutorial that’s all about making your own ephemera. Ephemera can be ticket stubs, advertisements, postage stamps, handwritten letters, etc. It’s fun to use “found” ephemera, but it’s also a blast to make your own. You can feel free to follow each of the “steps” below, or just choose the ones you like. There’s no real order or correct way to make these elements, and you can use them on any of your paper-crafting projects. I just decided to go with a tag today. This particular project is great if you need to loosen up, break out of a creative block, or you just feel like adding to your stash. Just have fun with it!

*Some affiliate links are used in this post. That means that if you shop through these links, I may receive a small compensation, at no cost to you. For more information, please see my Affiliates page.


Directions:


Ephemera Tag 2

Step 1: 

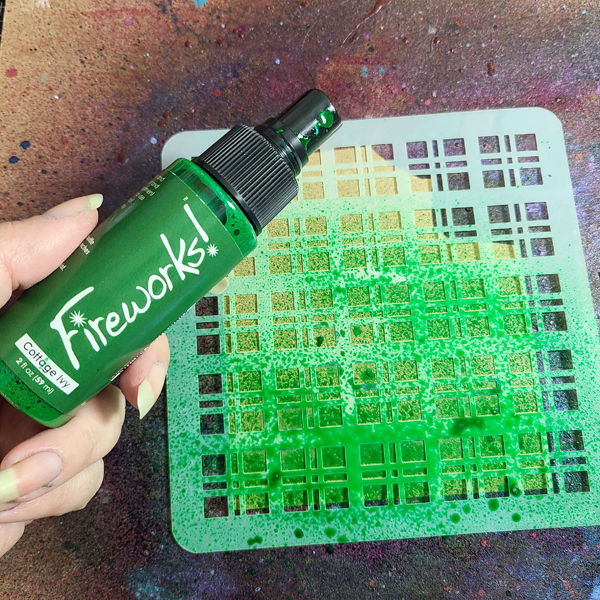
Grab some cardstock and a stencil, and start spraying them with Fireworks! Spray. 
 

Ephemera Tag 3

Step 2: 

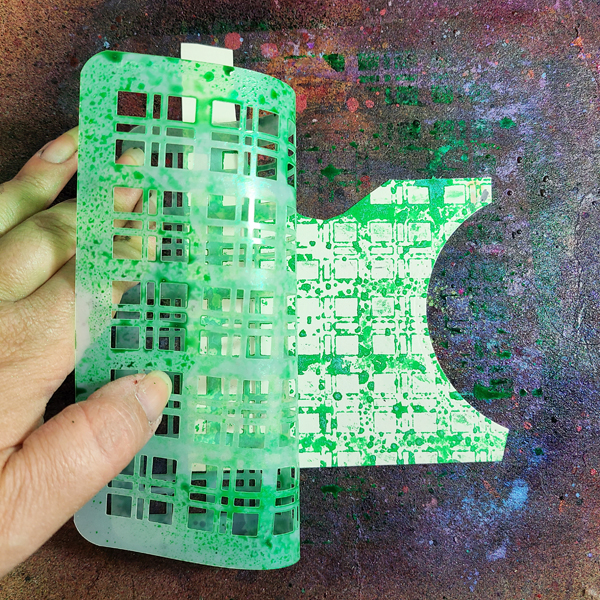
There’s a lot of spray left on that stencil, so don’t waste it! Grab another scrap of paper and flip the stencil (wet side down) on to it to get the reverse design. You can use a brayer or your hands to push the stencil into the paper to transfer the color better. 


Ephemera Tag 4

Step 3: 

Still more on the stencil? Spray it with a little water to get the color moving and press it into a third piece of paper. 


Ephemera Tag 5

Step 4: 

Grab some rubber stamps that have fun designs (especially solid images like this one), spray your craft mat with another color of Fireworks! Spray, and ink up the stamp in the puddle. Stamp some scrap paper with the wet stamp. 
 

Ephemera Tag 6

Step 5: 

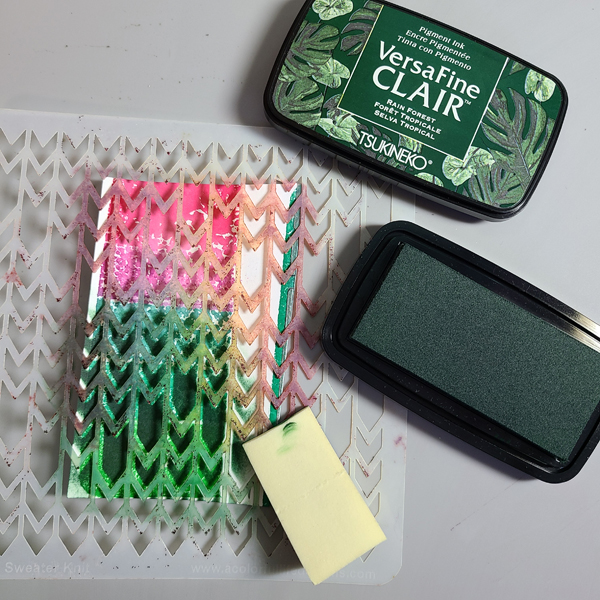
Apply Kaleidacolor inks to cardstock using your favorite method. I used the Fruitcake palette on my Gel Press with a brayer. Then, take a stencil and apply VersaFine Clair ink on top using a sponge dauber or cosmetic sponge. 


Ephemera Tag 7 

Step 6: 

Run a piece of cardstock through an embossing folder. Then ink the raised areas with Delicata Ink for shine.


Ephemera Tag 8

Step 7: 

Stamp out a sentiment with VersaMark Ink and use your favorite Mboss embossing powder on it. For texture, tear the edges and ink them with Rich Cocoa Memento Ink. 

Step 8: 

Take some old book paper and flick Fireworks! Spray on it to get different sized droplets. 

Step 9: 

Stamp some small geometric shapes and die cut/fussy cut them. 

Look at all the ephemera we’ve created by just using scraps!


Ephemera Tag 9

Step 10: 

Die cut a large tag out of cardstock. Start laying your ephemera on to the tag to see where you want your pieces to be. 


Ephemera Tag 10

Step 11: 

Let pieces hang off the edges of your piece. You can cut them off later, if you wish. Don’t be afraid to move your elements around, cut them, tear them, etc. 


Ephemera Tag 11

Step 12: 

Use different types of adhesive. I like using Tear It! Tape for the embossed layers, wet glue for flat layers, and foam tape or squares for elements that I want raised. I also love to use On Point Glue for sequins and rhinestones, which I added after I had all of my paper elements adhered. 
 

Ephemera Tag 12 600

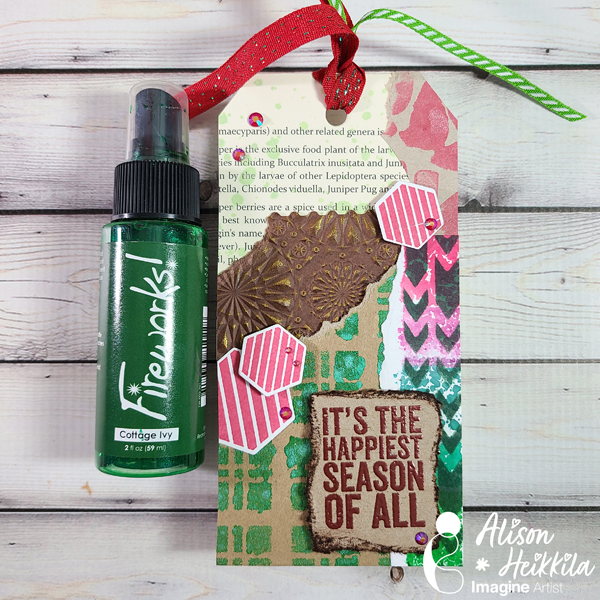
Here’s the finished tag. Again, make this however you like. It doesn’t need to be for the holidays, it doesn’t need to be a tag. Just grab a bunch of supplies and play. Whatever ephemera you have leftover can be used at another time. 

Art Supplies:

Imagine:

• Fireworks! Shimmery Craft Spray in Cottage Ivy, Lady Bug, and New Sprout

• Memento Ink in Rich Cocoa

• Kalediacolor Inks in Fruitcake

• VersaMark Ink

• Mboss Embossing Powder in Rose Gold

• VersaFine Clair Ink in Rain Forest

• Delicata Ink in Golden Gliz

• Tear It! Tape

• On Point Glue

Other:

• Stampers Anonymous: Bold Tidings Mini and Mod Cactus

• Sizzix: Tag Collection #658784, Kaleidoscope 3D Embossing Folder 

• A Colorful Life Designs: Sweater Knit stencil, Make Some Plaid stencil

• Doodles Paper Playground: Bold Rhinestones (I only used the red) 

• Simon Says Stamp/CZ Design: Hex Yeah (discontinued)

• Scraps of cardstock, old book paper, etc. 

Make a Faux Watercolor Poinsettia Gift Tag

Poinsettia Tag 1

By Alison Heikkila –

Hello! This is the time of year that people get really into making tags. Tags for gifts, tag books, etc. Today I’ve got a fun way to use Memento Inks to make them look like you’ve watercolored, but you didn’t need to work as hard. We will be using a layering stamp set to create the focal point of the tag. I used Poinsettia Parts from Stampendous.

Skill Level: Beginner
Time: 10 Minutes, plus drying time between layers

Directions:

Poinsettia Tag 2

Step 1:

Using an acrylic block or stamp positioner, adhere your most solid layer.

Poinsettia Tag 4

Step 2:

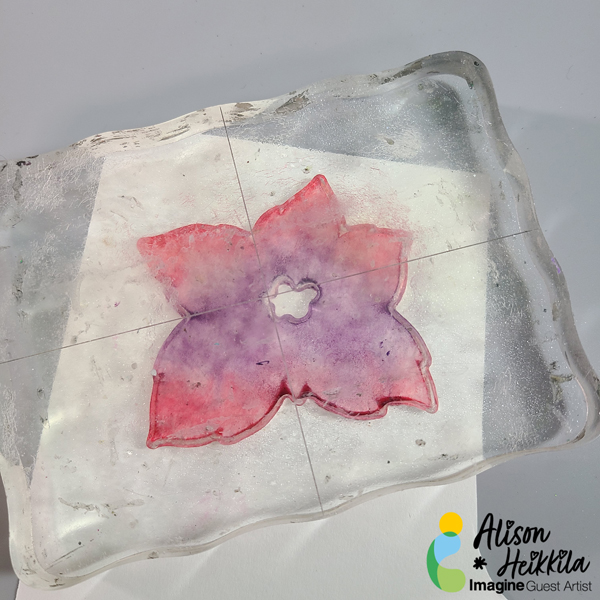
Ink up the stamp with at least 2 colors of Memento Ink. I used Sweet Plum and Lady Bug.

Step 3:

Spritz the inked stamp with water. Let the colors start to run together, but don’t spritz the stamp so much that the colors become totally washed out.

263589820_2809153279345627_665548954270270632_n

Step 4:

Carefully flip your stamp over on to a piece of watercolor paper. Gently press the stamp into the paper and leave it there for a few minutes. You can even add something heavy on top if you want more consistent pressure.

Poinsettia Tag 5

Step 5:

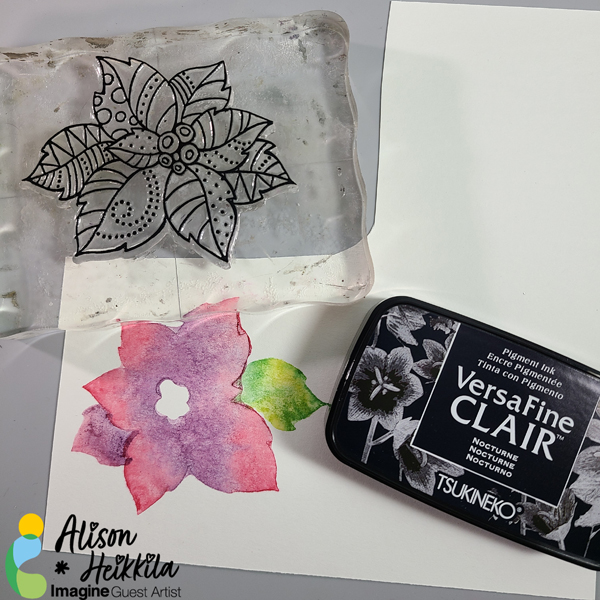
Repeat Step 4 with any additional parts of your image. I needed to add a leaf and another petal. I used Pear Tart and Cottage Ivy for the leaf. Let all of the “watercolor” layers dry thoroughly before moving on.

Poinsettia Tag 6

Step 6:

Stamp the top or detail layer with VersaFine Clair ink in Nocturne.

Poinsettia Tag 7

Step 7:

To add additional detail, you can apply some ink to your Craft Mat and spritz with water, then apply with a paintbrush. Here, I used Dandelion and Morocco to color in the center of the poinsettia. Fussy cut the stamped image.

Poinsettia Tag 8

Step 8:

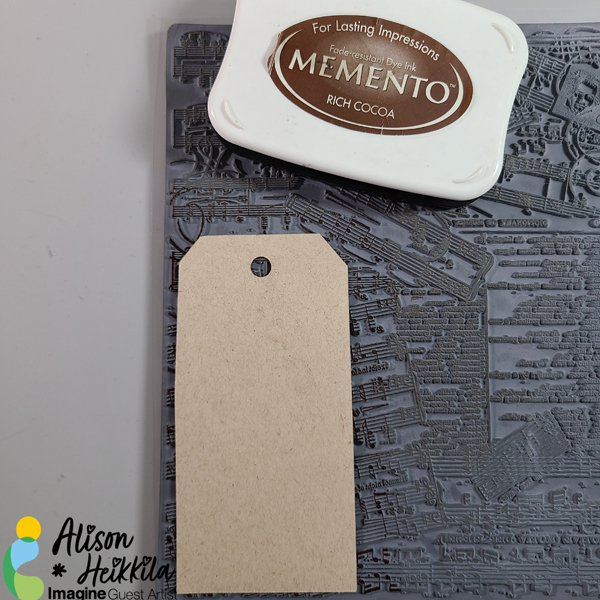
Apply Rich Cocoa Memento Ink to a background stamp. I used an older Stampendous stamp with sheet music on it. I like to flip my stamp up and apply my substrate (in this case, a tag made with Kraft cardstock) on top of the stamp. I press the tag into the stamp with my fingers. This allows me to place the tag where I want, and I don’t need to fuss with a large, sometimes unwieldy large stamp. You may also do this step while allowing your poinsettia to dry.

Poinsettia Tag 9

Step 9:

Ink up a blending brush with more Rich Cocoa ink and gently buff the edges. You may smear some of your stamped image if it hasn’t dried completely, but I don’t mind that look. It helps to make the tag look old.

Poinsettia Tag 11

Step 10:

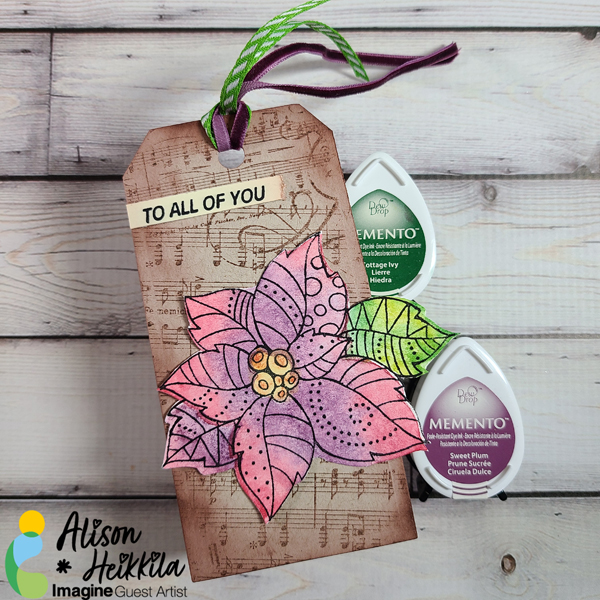
Add a sentiment strip to your tag, adhere the poinsettia, and tie on some ribbon.

Poinsettia Tag 10 600

Now you’ve got a completed tag that you can add to gifts, use it as a place card at the dinner table, or even to decorate a card base. Experiment with different color palettes to get a wide range of looks. And remember, these techniques don’t have to be used only at holiday time! Thanks so much for stopping by. Have an inspiring day!

Art Supplies:

Imagine:

Memento Inks in Lady Bug, Sweet Plum, Dandelion, Morocco, Cottage Ivy, Pear Tart, and Rich Cocoa
VersaFine Clair Ink in Nocturne
Tear It! Tape
Craft Mat

Other:

Stampendous: Poinsettia Parts and sheet music Cling Stamp
Kraft Colored Tag
Ribbon
Blending Brush

Quick and Simple Penguin Holly Jolly Card with Memento Markers


by Lori Warren

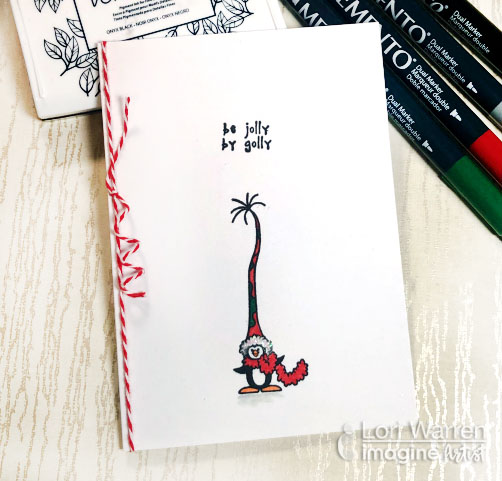
Need a quick and cute Christmas card idea? This “Be Jolly By Golly” Penguin card project was completed with Memento Markers and a few other supplies.  It’s a great project if you need to make several Christmas Cards.

Skill: Beginner
Time: 10 minutes per card

Directions

Art Supplies

Imagine
Other
  • The Angel Company – Penguins
  • Tonic Studios, Tim Holtz Stamp Platform
  • Water-brush
  • Glitter
  • String
  • White Card Stock

Adorn your Christmas Packages with Lovely Handmade Tags

by Lori Warren

Adorn your Christmas Packages with Lovely Handmade Tags

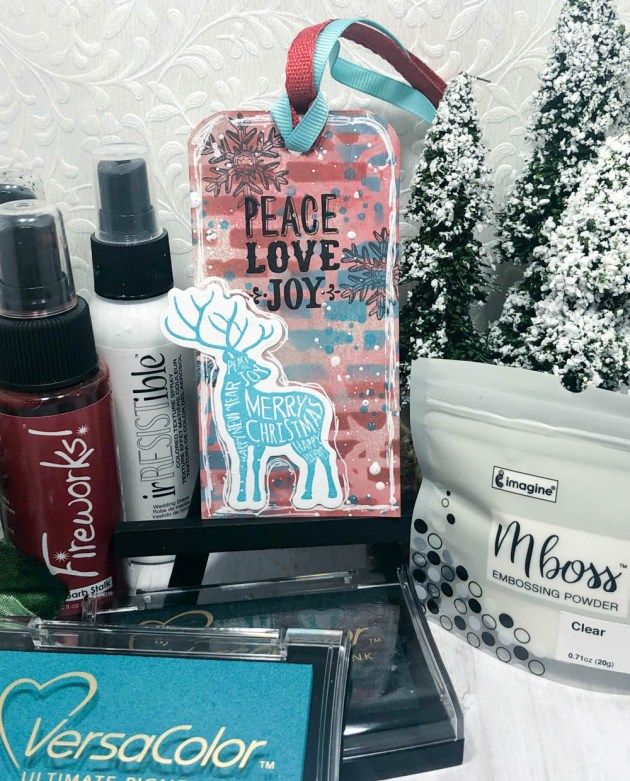
Adorn your Christmas packages with lovely home-made tags. They are a breeze to create with VersaColor ink and few other products from Imagine.

Directions


Step 1

Spray 3 White Tags with Fireworks Spray – Rich Cocoa & Rhubarb Stock

Step 2

Sponge brick stencil pattern onto tags with VersaColor Brown and then repeat with Turquoise.

Step 3

Stamp snowflake image onto tag with VersaColor Charcoal, then stamp a dot pattern with Turquoise.

Step 4

Stamp reindeer with VersaColor Turquoise and emboss with Clear MBoss embossing powder.

Step 5

Use coordinating die to cut out reindeer images.

Step 6

Stamp saying in VersaColor Black.

Step 7

Adhere reindeer image onto tag and then spray with irRESISTible Spray – Wedding Dress.

Step 8

Attach ribbons to tag.

Supplies

Imagine
Other
  • Celebrate It Ribbon
  • Uniball Signo Pen – White
  • Recollections Clear Stamps – Christmas
  • Catherine Pooler Clear Stamps – Winterhaven Collections
  • Creative Embellishments – Stencil
  • Tim Holtz – Sidekick
  • Tags – white