How to Make a Fun Rainbow Card with VersaColor

Kathy_July_2022_Step_1-600

By Kathy Pisupati –

Hi there, Kathy here with Imagine Crafts with a new tutorial.  My space is limited so by using VersaColor pigment inks, I can reduce the amount of colored card stock I need on hand.

VersaColor pigment inks are bright and bold and coupled with the Delicata Golden Glitz it’s a winning combination.

Skill Level: Intermediate
Time to Complete: 1 hour with drying time

Directions:

Kathy_July_22_Step-1
Step 1:

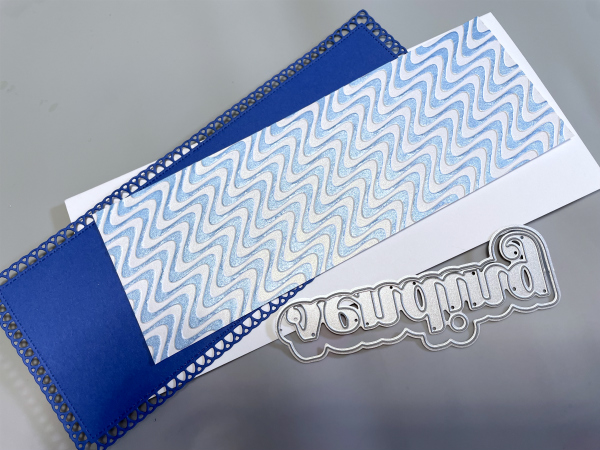
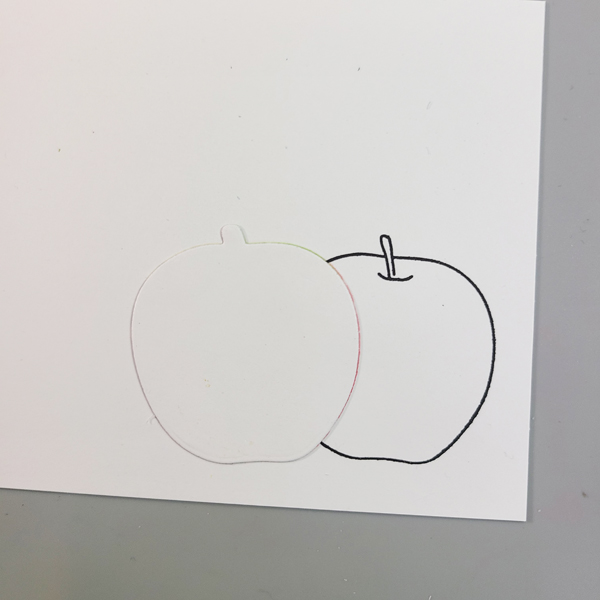
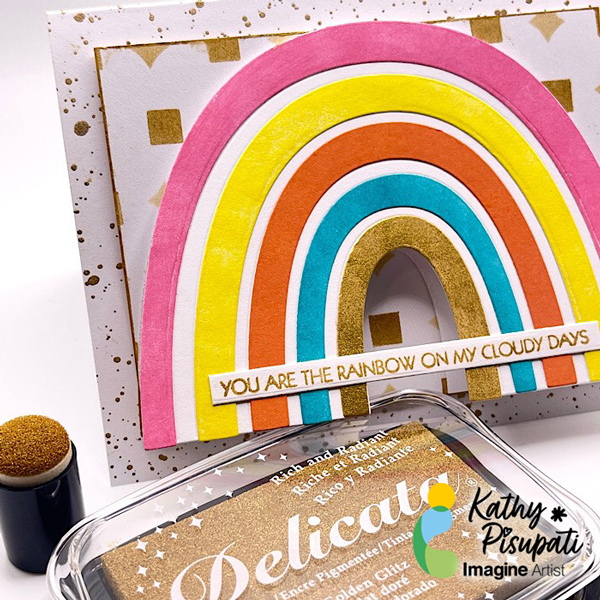
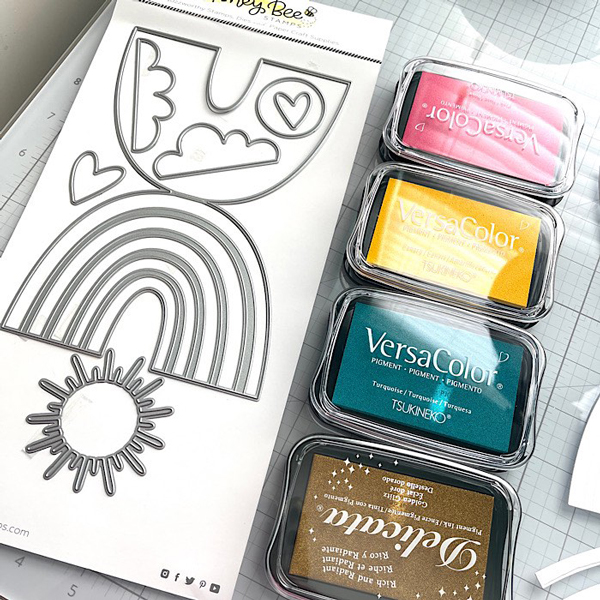
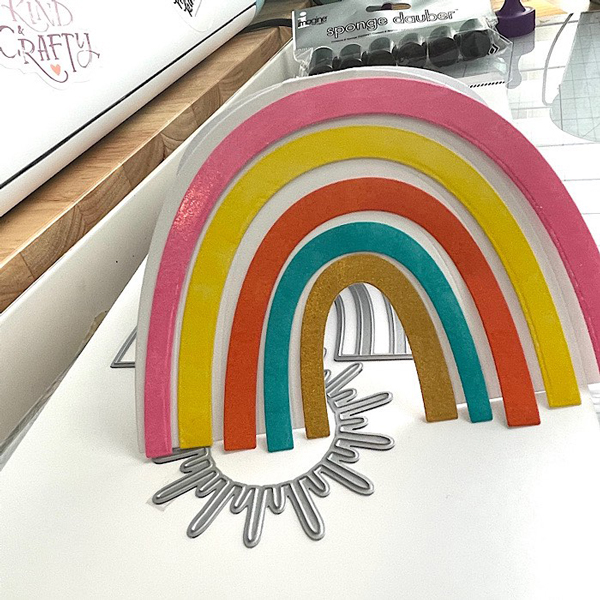
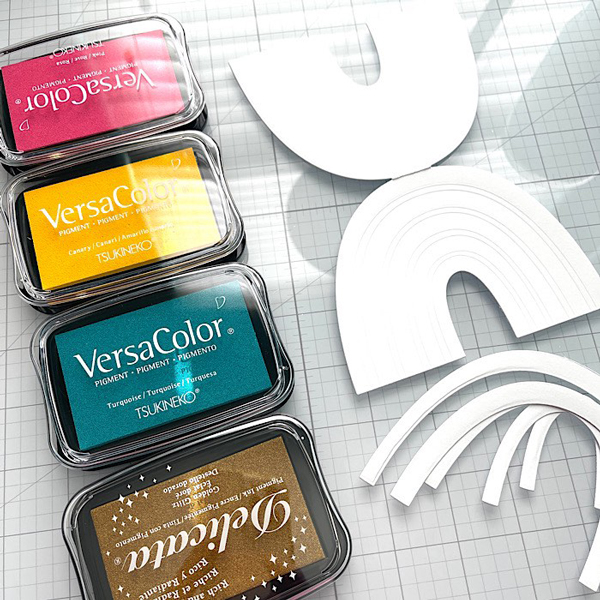
You will need a card base measuring 4 1/4 x 5 1/2“. You will also need a panel that measures 4“ x 3 1/2“. I have also used the Rainbow Builder and Rainbow Accent dies from Honey Bee Stamps. You will die-cut  the rainbow card and the rainbow stripes from the accent set. 

Kathy_July_22_Step-2
Step 2

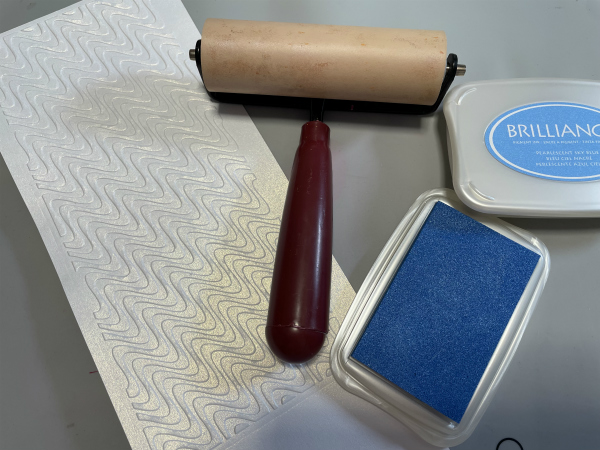
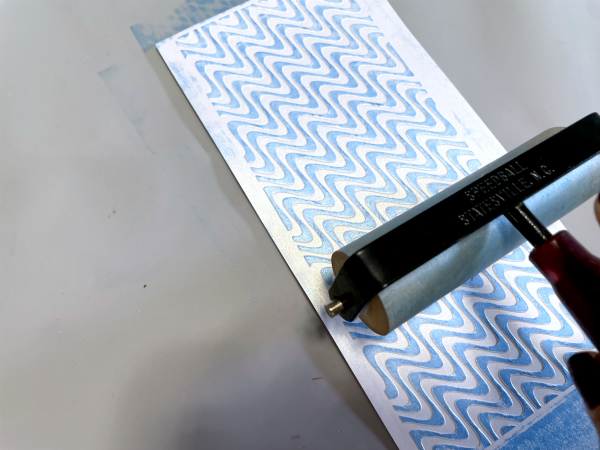
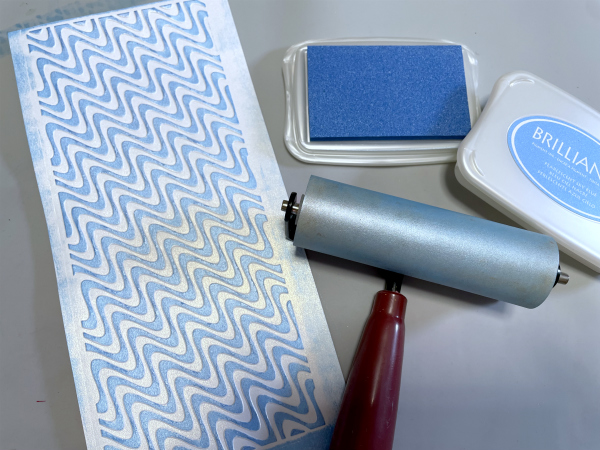
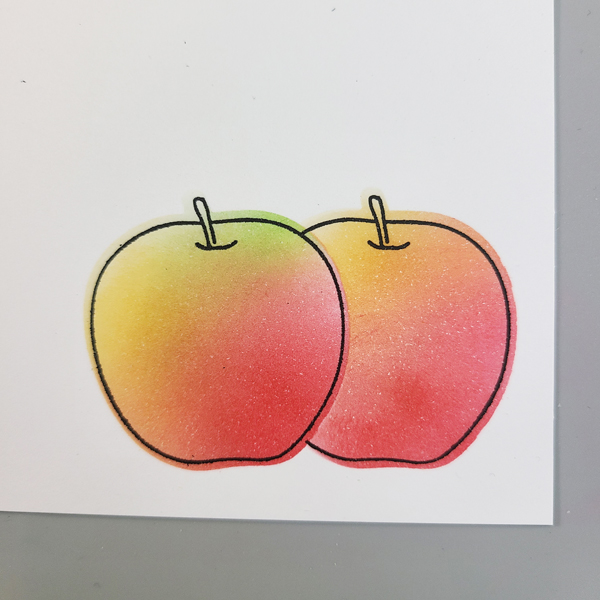
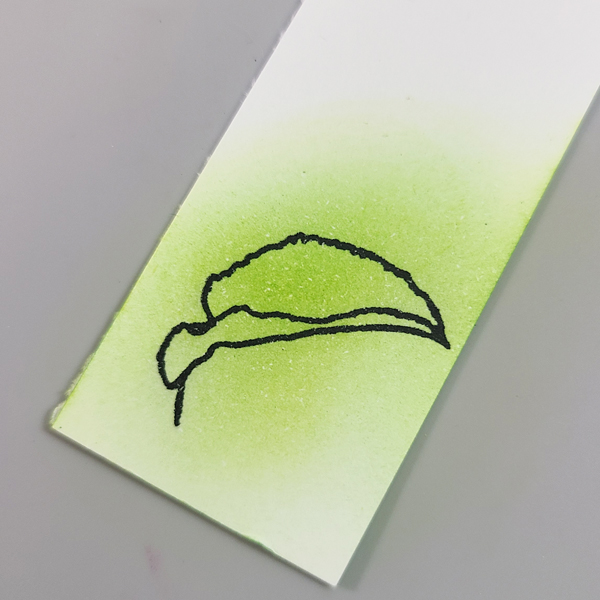
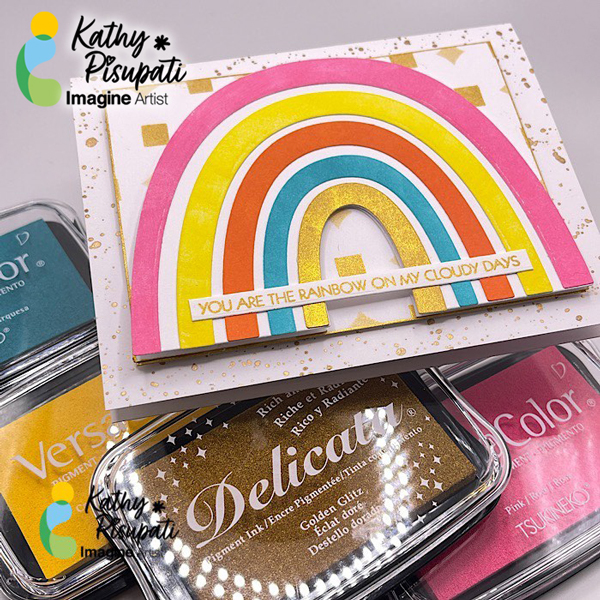
Using VersaColor & Delicata pigment inks, use Imagine Crafts sponge daubers to apply your ink to the rainbow stripes. I used the Delicata Golden Glitz for the smallest stripes. Allow these pieces to dry. 

Kathy_July_22_Step-3
Step 3

On the smaller card panel I used a stencil from Simon Says Stamp called Interlocking Circles Good Luck Charm. It is a Layered Stencil but I only used two of the layers. I used a heavy amount of Delicata Golden Glitz on the squares and a light amount on the diamonds. I also used the Daubers to ink around the edges of this panel.  On the front of the card panel, I splattered some gold watercolor paint.  I stamped a sentiment from Pink & Main, Spring Sentiments Stamp Set onto white card stock using the Delicata Golden Glitz Ink. I used my paper trimmer to cut the sentiment to size.

Kathy_July_22_Step-4
Step 4

Next use Imagine Craft On Point glue to adhere your stripes to the rainbow card die-cut.  I used Imagine Crafts Tear-It tape to adhere the rainbow card to the stencil panel. I also used Imagine Crafts On Point glue to adhere the sentiment to the front of the rainbow. Foam tape was used on the back of the stencil panel to adhere it to the card base.

Kathy_July_2022_IG_600

Supplies Used:

Imagine Crafts

Delicata Golden Glitz

VersaColor: Pink, Turquoise and Canary

Sponge Daubers

On Point Glue

Tear-It! Tape


Other

Honey Bee Rainbow Builder

Honey Bee Rainbow Accents

Pink & Main Spring Sentiment Stamps

Neenah Classic Crest Solar White 110lb

Paper Trimmer

Die-Cutting Machine

Foam Tape

Gold Watercolor paint

Paint brush

Learn Thumping Technique using Ink Pads

2022-July-Martha-Lucia-Dandelion-Card-700

By Martha Lucia Gomez –

Hello there! In today’s crafting tutorial I want to show you how to make the traditional thumping technique but this time using ink pads and not markers! To make my card, I used the large size of Memento Inks but it can be made with the Memento Drops too or with any other type of ink. This is an easy and fun summer card for any occasion.

Skill Level: Beginner
Time to Complete: 30 Minutes

Directions:


2022-July-Martha Lucia - Dandelion Card - Step 1
Step 1:

Select the stamp set that you prefer. To make most evident this technique you can use solid stamps. Additionally, pick the colors of ink that you wanted to use. I am using two, Memento Ink Bamboo Leaves and Tangelo. 

2022-July-Martha Lucia - Dandelion Card - Step 2

Step 2:

Ink your stamp with the first color. In my case Memento Bamboo Leaves. 

2022-July-Martha Lucia - Dandelion Card - Step 3

Step 3:

Without stamp the image over the cardstock, ink the stamp partially with the second colors. Keep in mind the parts that you want to look with different shadows.

2022-July-Martha Lucia - Dandelion Card - Step 4

Step 4:

Stamp the image over a piece of cardstock.

TIP: Clean the second ink pad with a dry towel to avoid contamination of the colors.

2022-July-Martha Lucia - Dandelion Card - Step 5

Step 5:

You can repeat the above step if you want to obtain darker colors. Stamp a sentiment using a contrast color to complete your card.

2022-July-Martha-Lucia---Dandelion-Card---Step-6

Step 6:

Resize the layer with, paste the sentiment and add the decorative layer over a card base. If you want, you can use your favorite crafty foam to add more dimension to your card.


Art Supplies:

Imagine:

• Memento – Bamboo Leaves and Tangelo

• VersaFine – Onix Black

Other:

• 88 and Clear – Clear Stamp Set Kissable Dandelion

• Scrapbook.com – Clear Stamp Set Handmade Essentials

• Joy Clair Designs – White Smooth Cardstock 

• Positional Stamp Tool.

• The Greetery LLC – Crimped Frame Die

• Die Cut Machine

• Scrapbook Adhesives Crafty Foam.

Create a Shimmery Background with Fireworks!

Lion 1 600

By Alison Heikkila –

Hello! Fireworks! Spray from Imagine is a collection that coordinates with the Memento line of colors, but in a shimmery spray format. I love using the in ways that go well beyond just spritzing them, and today’s technique uses a brayer. The finished look has a glistening background that looks amazing when it catches the light. 

Skill Level: Intermediate
Time to Complete: 1 Hour

Directions:

Lion-2-600


***Let me start my saying this background took a turn in the way I was planning on making it. I adore using my Gel Press Plates, but I was getting a better result with just using a brayer, so the photo above shows how I began the process, but I wound up changing my method as I went on.

Step 1:

I spritzed my 3×5 Gel Press Plate with Lady Bug, Tangelo, and Dandelion Fireworks Spray, keeping the colors separated so I would have distinct rows. I rolled the color out with my brayer. 

Lion 3 

Step 2:

I laid my cardstock on top of the Plate and pulled my print. It was pretty splotchy, which normally I like, but I wanted it to be more solid for this card. 

Lion 4

Step 3:

I decided at this point to just spray the color directly on my Imagine Craft Mat, roll the color on to my brayer, and then take it to my cardstock. After a few layers of color, I achieved the look I was going for. Solid, shimmery color with a gradation. 

Lion 5

Here is what the panel looked like after I trimmed it down. I really love the shine. 

Lion 6

Step 4:

I laid my stencil on top of the dry panel and began to apply Morocco Memento ink on top. I spread the color with my sponge dauber. 

Lion 7

I found it to be easier to spread the color on to the stencil itself, and then use the dauber to apply it to the cardstock. 

Lion 8

Here is the completed stenciled panel. 

Lion 9

Step 5:

Time to color the lion using Memento Markers. The list of colors I used is in the supply list below. Then the colored image was die cut. 

Step 6:

I inked the edges of the white card base with Sunflower Yellow Brilliance Ink. 

Step 7:

I assembled the card and stamped my sentiment with Fallen Leaves VersaFine Clair Ink. 


Lion 10Lion 11

Art Supplies:

Imagine:

Fireworks! Shimmery Craft Spray in Lady Bug, Tangelo, and Dandelion

Memento Ink in Morocco

Memento Markers in Rich Cocoa, Toffee Crunch, Desert Sand, Love Letter, Rhubarb Stalk, Lady Bug, Morocco, Tangelo, Potter’s Clay, Peanut Brittle, Cantaloupe, Dandelion

VersaFine Clair in Fallen Leaves

Brilliance Ink in Sunflower Yellow

Sponge Dauber

Craft Mat

On Point Glue


Other:

Gel Press: 3×5 Plate

Brayer

A Colorful Life Designs: Bitty Rays Stencil

Erin Lee Creative: Brave Fierce Kind Stamps

Doodles Paper Playground: Gold (and Silver) Starburst Rhinestones

Orange Ribbon

White Cardstock


Be a Star with New Embossing Techniques

2022-June-Martha-Lucia-600x600_1

By Martha Lucia Gomez –

Hello there! In today’s crafting tutorial, I will be sharing two easy ways to upgrade the basic embossing techniques using a Brilliant Ink and embossing power or MBoss.  This is a great idea for any occasion, however like summer is around the corner, I created a Patriotic Card honoring 4th of July.

Skill Level: Intermediate
Time to Complete: 1 hour

Directions:


2022-June-Martha Lucia - Patriotic Card - Step 1
Step 1:

Select a piece of card stock and embossing folder. Use a piece of cardstock larger than the folder. Dry emboss it in the normal way using your die cut machine. 

2022-June-Martha Lucia - Patriotic Card - Step 2

Step 2:

Pick a brayer or any type of roller to add ink to the emboss design. Noticed that you can use any face of the embossed piece to develop this technique. I am using Brilliance Pearlescent Sly Blue and Shimmer White Cardstock.

2022-June-Martha Lucia - Patriotic Card - Step 3

Step 3:

Ink your brayer completely and apply the Brilliance Ink over the surface with a soft movement. You don’t want to transfer the ink to the debossed part.


2022-June-Martha Lucia - Patriotic Card - Step 4

Step 4:

Repeat the step 3, until you are satisfied with the color of the layer. In my sample, I made this step three times to have a great covering.

2022-June-Martha Lucia - Patriotic Card - Step 5

Step 5:

Create the card base and layers that you wanted to use. In this model I am using white card base, and blue die cut layer to create a contrast. Resize your inked embossed piece to use it as top layer over the die cut piece. Select a shadow die set with a sentiment or any other type of image to create a window over your inked layer. Don’t paste your layers yet.

2022-June-Martha Lucia - Patriotic Card - Step 6

Step 6:

With the shadow or die base of your die cut, create a window over the inked layer. If you want you can save the die cut layer to use in another project.

2022-June-Martha Lucia - Patriotic Card - Step 7

Step 7:

Paste the inked embossed layer over the die cut layer using your favorite adhesive. If you want to have more dimension, you can use foam tape. Paste the decorative piece over the card base. 

Cut the word or image according with the die cut that you selected.


2022-June-Martha Lucia - Patriotic Card - Step 8

Step 8:

With masking tape, cover the half of the die cut word and made a partial hot embossing using VersaMark Ink and your favorite color of embossing powder or MBoss. In my model, I am using the Metallic Berry. 

Don’t remove the masking tape if you want to repeat the above step and obtain shinier and dimension with the hot embossing. I repeated this step twice.


2022-June-Martha-Lucia-600x600

Step 9:

Paste the embossed word and decorate with a complement sentiment and/or embellishments. I used a tiny sentiment stamped with Memento Paris Dusk and a few die cut stars in white cardstock.


Art Supplies:

Imagine:

• Brilliance – Pearlescent Sky Blue

• VersaMark – Clear

• MBoss – Metallic Berry


Other:

• Whimsy Stamps – Slimline Embossing Folder Wave Length

• Joy Clair Designs – White Smooth Cardstock and Loopy Rectangle Slimline Dies.

• Birch Press Design – Big Sending Sugar Scrip

• Scrapbook Adhesives – Crafty Foam Tape

• Die Cut Machine

• Heat Tool

• Brayer


• Heat Tool

• Brayer


Make a Congrats Card with Fireworks!

Fireworks-1-Full

By Alison Heikkila –

Hello! Alison Heikkila here. It’s getting close to fireworks season, and I am pretty stoked about it. My kids and I love watching fireworks, and I get so happy to see their faces light up, literally and figuratively. I decided to make a fireworks card for Imagine this month…not necessarily for a specific holiday, but as a congratulatory card instead. 

Skill Level: Beginner
Time to Complete: 30 minutes

Directions:


Fireworks 2
Step 1:

Shake up your Fireworks Spray (I chose 3 colors). Choose your lightest color (Bahama Blue for me) and open the spray bottle. Dip a brush into the bottle and apply the color to watercolor paper. Cover around 1/3rd of the paper. 

*My paper was cut to 4” x 5 1/4.” 

Fireworks 3

Step 2:

Repeat this with the other two colors. I used Danube Blue, then Paris Dusk. Try to blend the colors together where they meet. Let dry.

Fireworks 4

Step 3:

With a Sponge Dauber, apply VersaMark Ink through the stencil. I opted to use the Dazzle version, but you can use the regular one. 

Fireworks 5

Step 4:

After you apply each firework, sprinkle on some Mboss embossing powder and heat set. Fill the panel with embossed fireworks. 

Fireworks 6

Step 5:

Shake up the Sheer Shimmer Spritz in Gold, open the cap, and tap on to the card panel. Let dry. 

Fireworks 7

Here you can see how shimmery the panel is. It’s even prettier in person. 

Fireworks 8

Step 6:

Apply VersaMark to a scrap of cardstock. Sprinkle on some Mboss embossing powder, shake off excess, and heat set.

Fireworks 9

Step 7:

Die cut your sentiment from the embossed cardstock. I used vellum for my shadow layer. Glue together with On Point Glue. 


Step 8:

Adhere your sentiment and panel to a white card base. 

Step 9:

Optional: Add some sequins to the card front with On Point Glue. 

Fireworks 10

Finished!


Art Supplies:

Imagine:

Fireworks! Spray in Bahama Blue, Danube Blue, and Paris Dusk

Sheer Shimmer Spritz in Gold

Mboss in Rose Gold, Silver, and Shimmering Night Sky

VersaMark Ink: Regular or Dazzle

On Point Glue

Sponge Dauber


Other:

Brutus Monroe: Fireworks Stencil

Doodles Paper Playground: Flags and Fireworks Sparkle Blend

White Cardstock

Watercolor Paper

Paintbrush

Vellum


Make a Thank You Card for your Teacher

Apples 1 600

By Alison Heikkila –

Hello! It’s getting close to the end of the school, so I thought it was time to make cards for teachers that have worked so hard this year (and every year!). If you have a stamp set with coordinating dies, I’ve got some fun techniques that you can recreate. We’ll be using 2 types of masks and several colors of Memento inks. 

Skill Level: Intermediate to Advanced
Time to Complete: Approx. 20-30 minutes

Directions:


Apples 2
Step 1:


Let’s grab all of our supplies. Be sure to have focal images, a sentiment, the dies, and plenty of ink. We’ll be using Memento Inks because they blend so nicely.


Step 2: On a piece of white cardstock, cut to 4” x 5 1/4,” stamp the apple with Nocturne Ink. This is the apple that will be in the front.

Step 3: Stamp an additional apple on some scrap paper and fussy cut it out. You could use the die for this, but I wanted to get right up to the edge of my apple. This will be our first type of mask.

Apples 3

Step 4:

Place the fussy cut apple on to the one you stamped on your card front (you can use some low tack glue to hold it in place if you like). Then stamp your second apple, as shown above. When you remove the mask from the first apple, it will look like the second apple is behind the original. 

Apples 4

Here’s what the apples look like after they’re stamped. 

Apples 5

Step 5: Die cut an apple out of scrap paper. Make sure you have plenty of negative space around the die cut. This will be our second type of mask and will be used to protect the card front except for the apple you’re ink blending. 

Apples 6

Step 6: Let’s start ink blending! I love coloring apples because there is often so much variation in colors on them. I started with Lady Bug ink, then moved into Cantaloupe, and finished with Pear Tart. The mask we made with the die cut allows us to get a perfect edge around the apple. 

Apples 7 

Again, these dies cut slightly larger than the stamped image, but I don’t mind that clean, extra rim of color around the apple. 

Apples 8

Step 7: Place the fussy cut apple on to the inked apple, then line up your other mask around the uninked apple. Repeat the ink blending on this apple, but try to make it look a little different from the first one. 

Apples 9

Step 8: Grab one of your brown Memento markers (I used Espresso Truffle) and color in the stems. 

Apples 10

Step 9: Stamp a leaf on a separate piece of cardstock with Nocturne Ink. Ink blend Pear Tart ink on top and die cut it. 

Apples 11

Step 10:

Use the same 3 colors you used on the apples to ink blend the edges of your card base. 

Step 11:

Stamp the sentiment with Shady Lane ink. 

Step 12:

Adhere the card front with your favorite adhesive. Attach the leaf using foam tape. 

Apples 12 600


Finished!


Art Supplies:

Imagine:

Memento Inks in Lady Bug, Cantaloupe, and Pear Tart

VersaFine Clair Inks in Nocturne and Shady Lane

Memento Marker in Espresso Truffle

Other:

Mama Elephant: Fresh Fruits Stamps and Dies (discontinued…but there are many other fruit sets out there)

Stamping Bella: Planty Dandy

Blending Brushes

White Cardstock

Adhesive

Foam Tape