Make a Wintery Wedding Card

By Tracy Fear

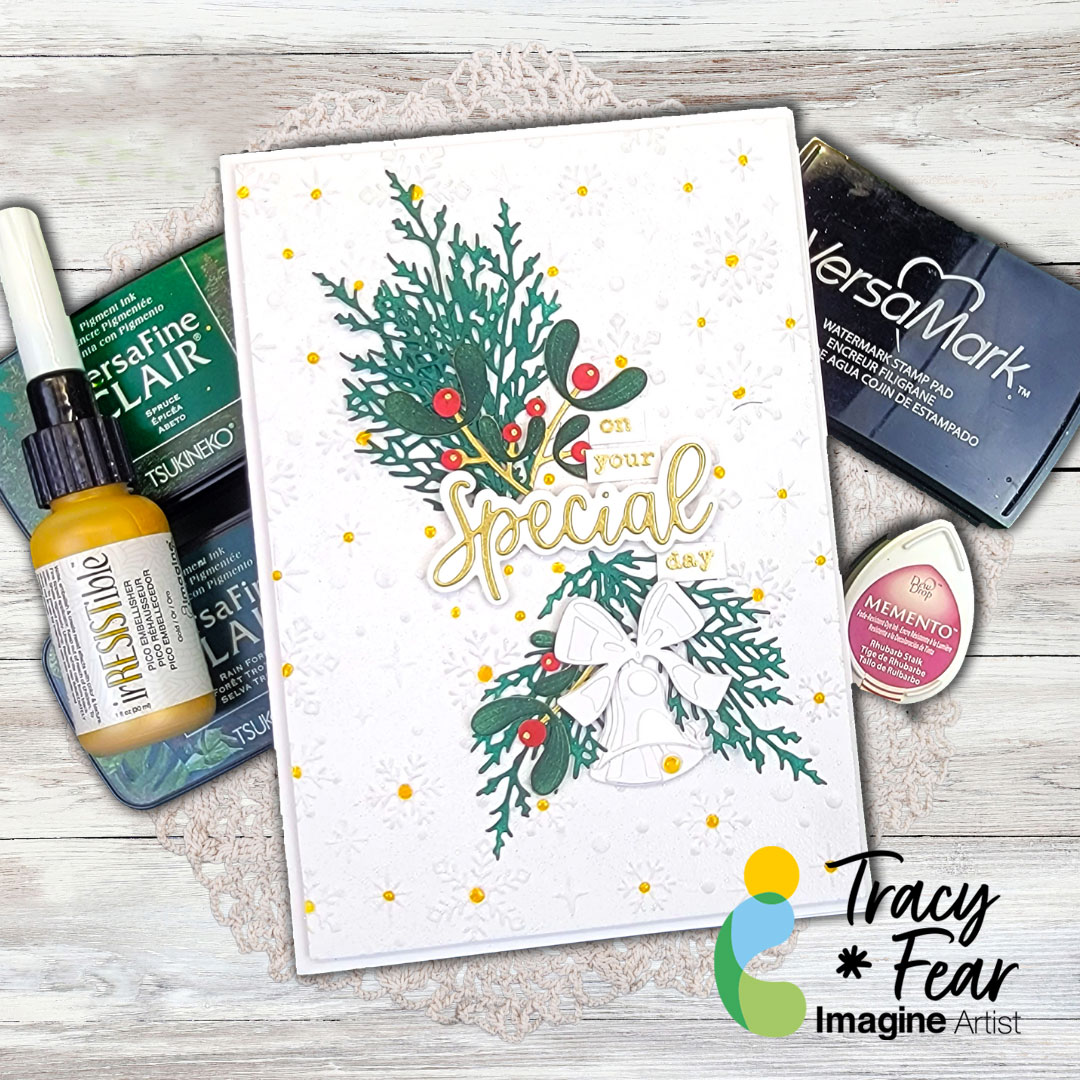
Hello Friends! It’s no secret, some people have their big day in the winter! My goal here was to create a winter wedding card. I’m not going to lie, I had no idea what would be appropriate colors for a winter wedding so I turned to a trusted friend, Google that is, and learned that forest greens and red and burgundy colors were the trend for 2025 going in to 2026 so I worked some magic with inks, embossing, and die cuts to create this 5×7 winter wedding card!

Tracy

Skill: Intermediate
Time: 90 Minutes

Products Used:

Imagine Products
• Memento Inks in: Rhubarb
• VersaFine Clair in Rain Forest and Spruce
• VersaMark
• irRESISTible Pico Embellisher Gold

Art Supplies
• Acrylic stamping block or stamp platform
• Embossing Folder
• Die cut machine
• 100lb white paper
• 5×7 Card base
• Embossing powder
• Stamps of your choice
• Embossing heat tool

Other Products Used
• Brutus Monroe Embossing Powder in Unicorn and Gilded
• Simply Sentimental-Special stamps and die set from Trinity Stamps
• Greenery, bells, and plant die sets from Tim Holtz
• Snow embossing folder from Spellbinders and Simon Hurley
• PVA Adhesive
• Foam Tape

ALTERNATIVE PRODUCTS THAT CAN BE USED TO RECREATE SOMETHING SIMILAR

Any Inks any combination of background stamps, dies, and feature stamps

To learn how to create your own Winter Wedding card,  click here!
Happy Halloween Featuring Brilliance Moonlight White

By Katy Ingram

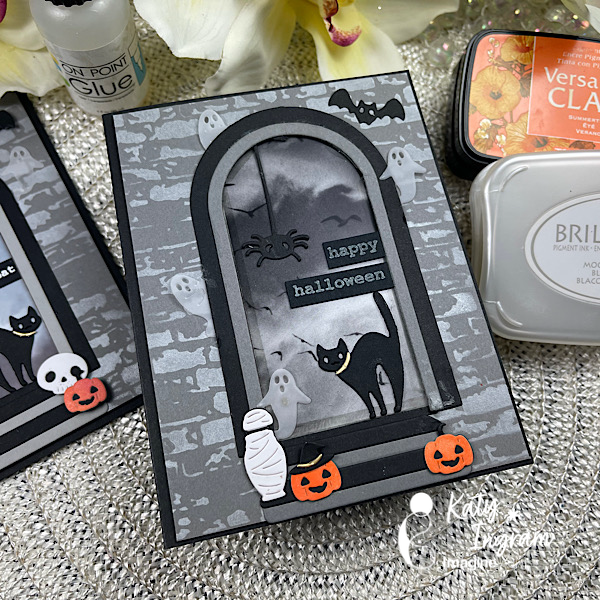
Hello Friends! Katy here with another quick project. In today’s video I create a simple Halloween card. I had some printed spooky printed acetate in my stash and paired it with a brick stencil and some Brilliance Moonlight White ink. I just love this white ink more than any others and so I like to showcase it any time I can.

Skill: Beginner, Intermediate
Time: 15 minutes

Video has all the details. Thanks for watching.

Video Link: https://youtu.be/pr5TAJxwc9c

Art Supplies

Imagine Products

Other Products Used
• Papertrey Ink Brick Stencil
• Spellbinders Halloween Tick Tock
• Black Card Stock
• Grey Cardstock
• White Cardstock
• Gold Cardstock
• Vellum
• Foam Blender tool
• Recollections Halloween X-Ray Acetate

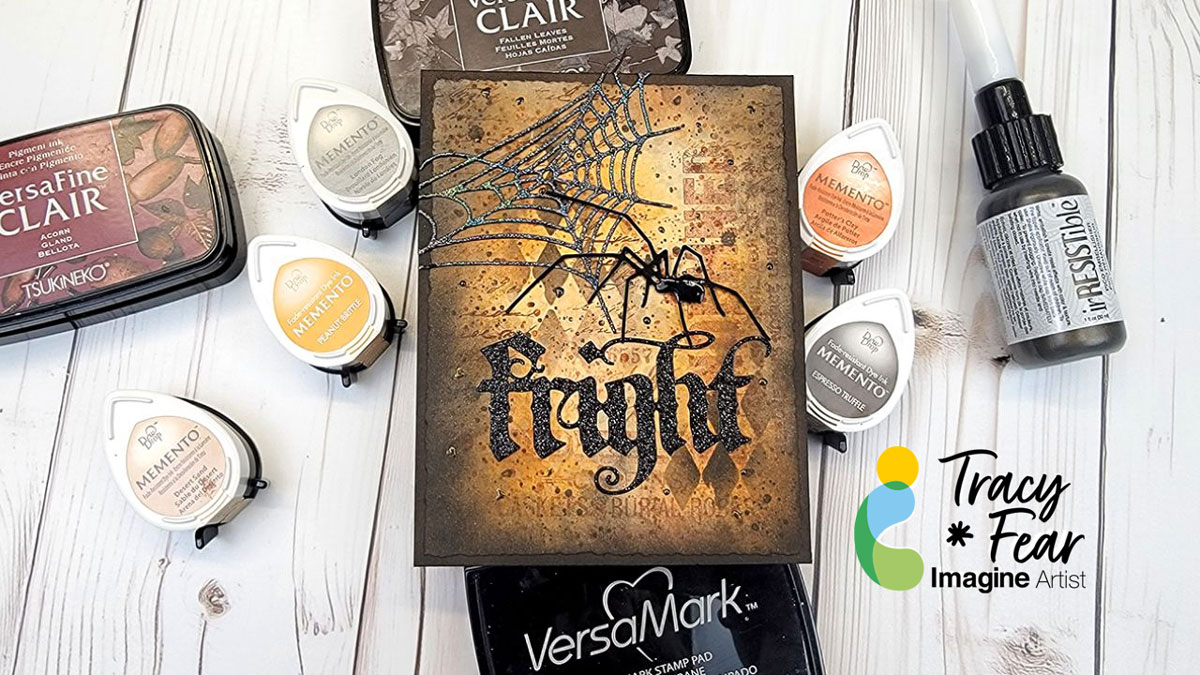
Grungy Halloween Background

By Tracy Fear

Hello Friends! Tracy here and today I am thrilled to share with you how to get this grungy background perfect for a Halloween card or even just the everyday grunge lover!

Tracy

Skill: Intermediate
Time: 60 Minutes

Video Tutorial

Art Supplies
• Acrylic stamping block
• Stencil of your choice
• Scrap paper for stamping off
• Mixed media paper
• Black Paper
• Embossing powder
• A2 Card base
• Stamps of your choice
• Blending brushes
• Glue
• Die cuts of your choice

Imagine Products
• Memento Inks:
– Desert Sand
– Peanut Brittle
– Potter’s Clay
– Espresso Truffle
– London Fog
• VersaFine Clair in Acorn and Fallen Leaves
• Versamark Ink
• irRESISTable Pico Embellisher in Bronze

Other Products Used
• Embossing Powder
• Spider and Web Die Set-Whimsy Stamps
• Word Die Set – Tim Holtz
• Various Halloween stamps from Tim Holtz and Simon Hurley
• Mixed Media Paper – Ranger
• Distress Black Heavy Stock – Ranger
• PVA Adhesive

ALTERNATIVE PRODUCTS THAT CAN BE USED TO RECREATE SOMETHING SIMILAR

Any Inks any combination of background stamps, dies, and feature stamps

To learn how to get your Halloween Grunge on,  click here!
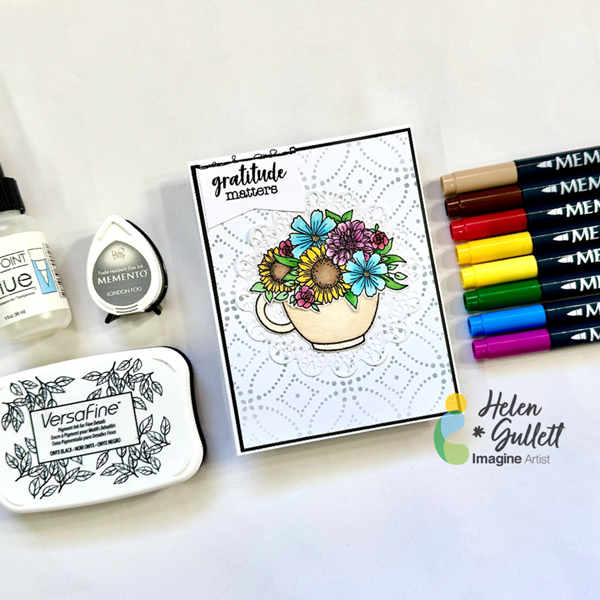
Make a Fall Floral Coffee Cup Card

By Helen Gullett

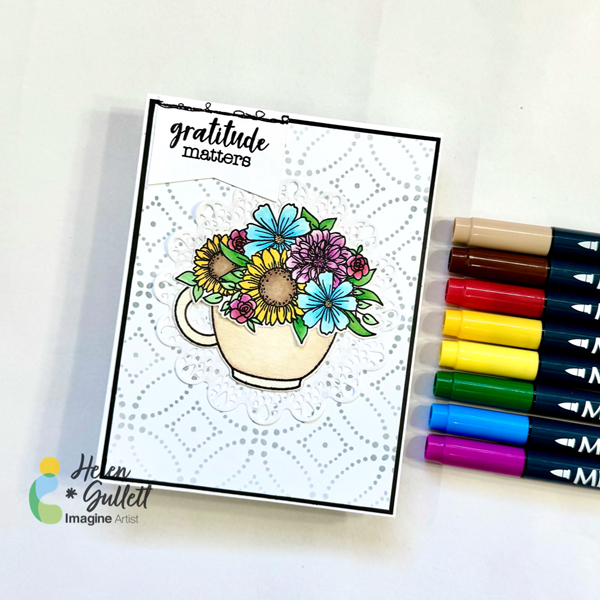
Hello crafty friends! Today, we are going to do some watercoloring with Memento markers, stenciling with Memento ink, and stamping with VersaFine ink to make this Fall floral coffee mug card. Let’s gather your supplies, grab a cup of coffee, and get crafting together!

Skill: Intermediate
Time: 15-20 minutes

Direction:

Step 1

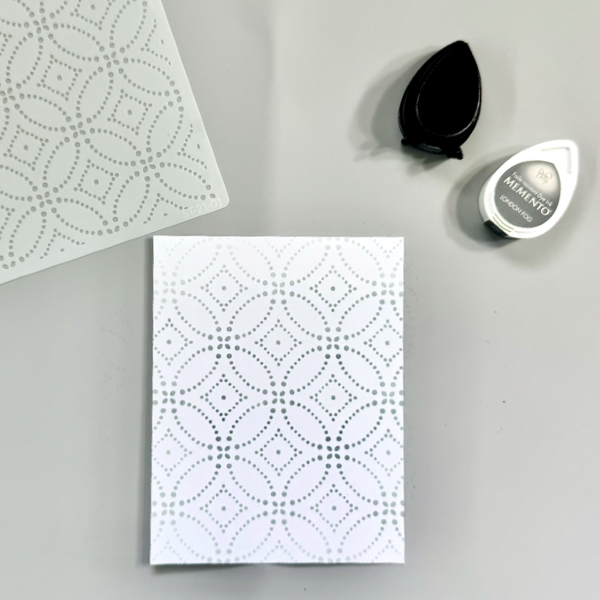
Cut out a piece white cardstock into 4″ x 5 1/4″

Put the stencil on top of the cardstock and secure it with some washi tape or removable tape.

Use a blending brush to add the Memento London Fog ink to the cardstock.

Remove the stencil and set aside for the ink to dry.

Step 2

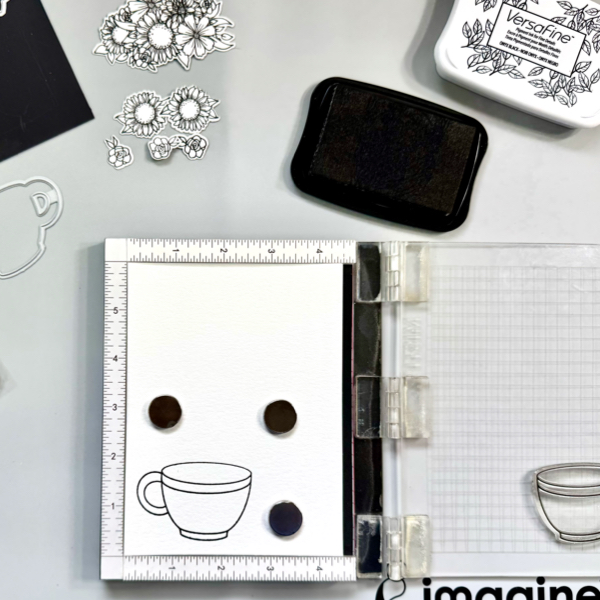
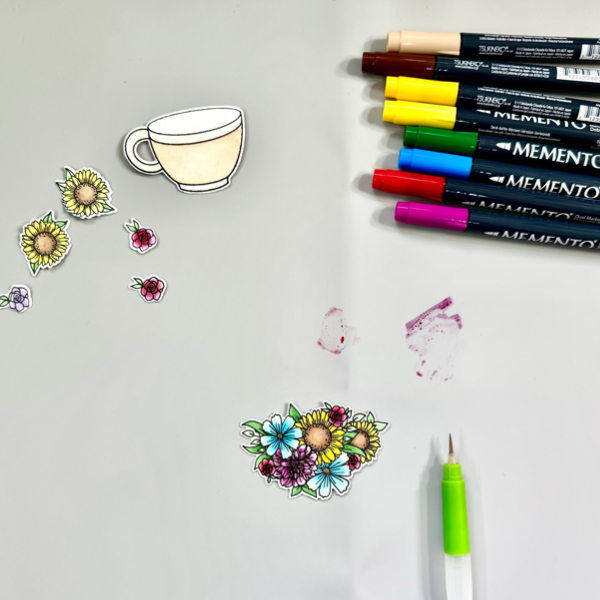
On a piece of watercolor cardstock, stamp all the floral and cup images with the VersaFine Onyx Black ink.

Cut them with their matching die set or you can simply fussy cut them with scissors.

Step 3

There are two ways of watercoloring. The first option is you can do wet on wet technique by lightly wet the area where you want to add the watercolor paint, and then pick up the ink with a water brush and color on the wet watercolor paper. And the second option is called wet on dry technique where you add the watercolor paint directly on the dry watercolor paper. Both ways work well with these Memento Markers.

On this project, I used the wet on wet technique. First, scribble each color of the Memento Marker on the craft mat. Wet the stamped image, pick up the ink with a wet water brush, and then add the color to the image. Dry the watercolored image with a craft heat gun.

Step 4

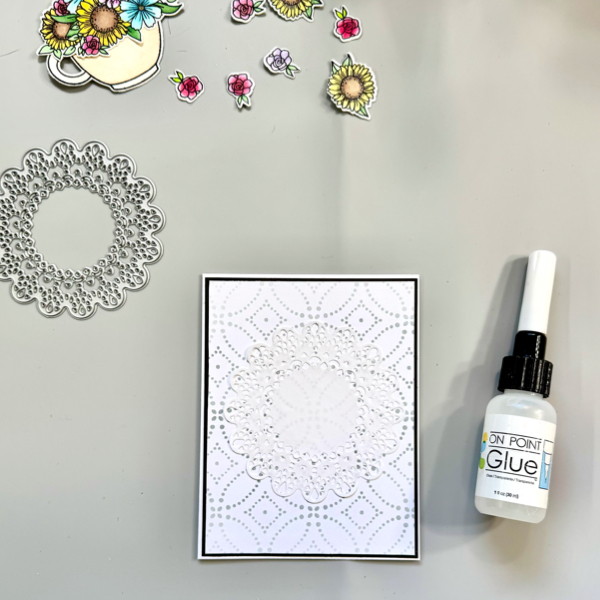
Cut out a piece of copy paper with the doily die to make paper doily. Add it to the stenciled panel with On Point Glue.

Cut a piece of black cardstock into 4 1/8″ x 5 3/8″ mat, add the stenciled panel to it with On Point Glue.

Add the whole background panel to the card base with On Point Glue.

Put together the watercolored coffee mug and flower bouquet cluster with On Point Glue.

Step 5

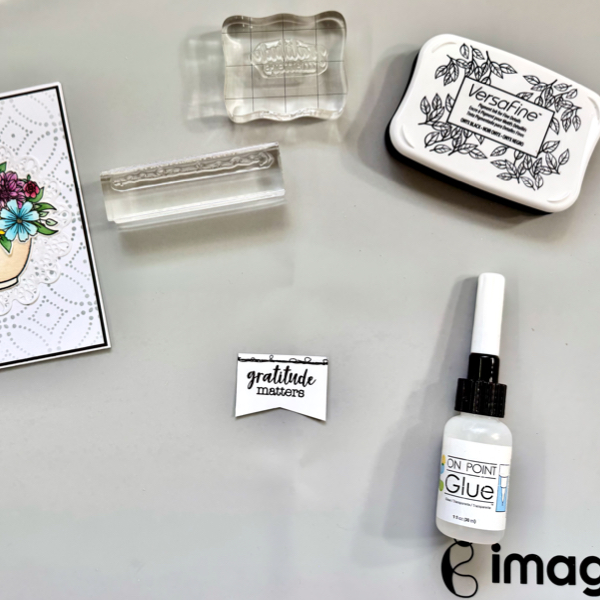
Stamp the sentiment and faux stitch pattern on a piece of white cardstock with VersaFine Onyx Black, and then trim it into a sentiment banner.

Add the floral coffee mug in the middle of the card, on top of the doily with On Point Glue.

Add the sentiment banner on the left top of the card with On Point Glue.

Memento Markers are not only for coloring, but also watercoloring. I had fun making this card with a watercoloring technique using these markers. And I hope this Fall Floral Coffee mug card can perk you up!

Thank you for stopping by our blog today. Have a wonderful day!

Craft Supplies

Imagine Crafts:

Others:

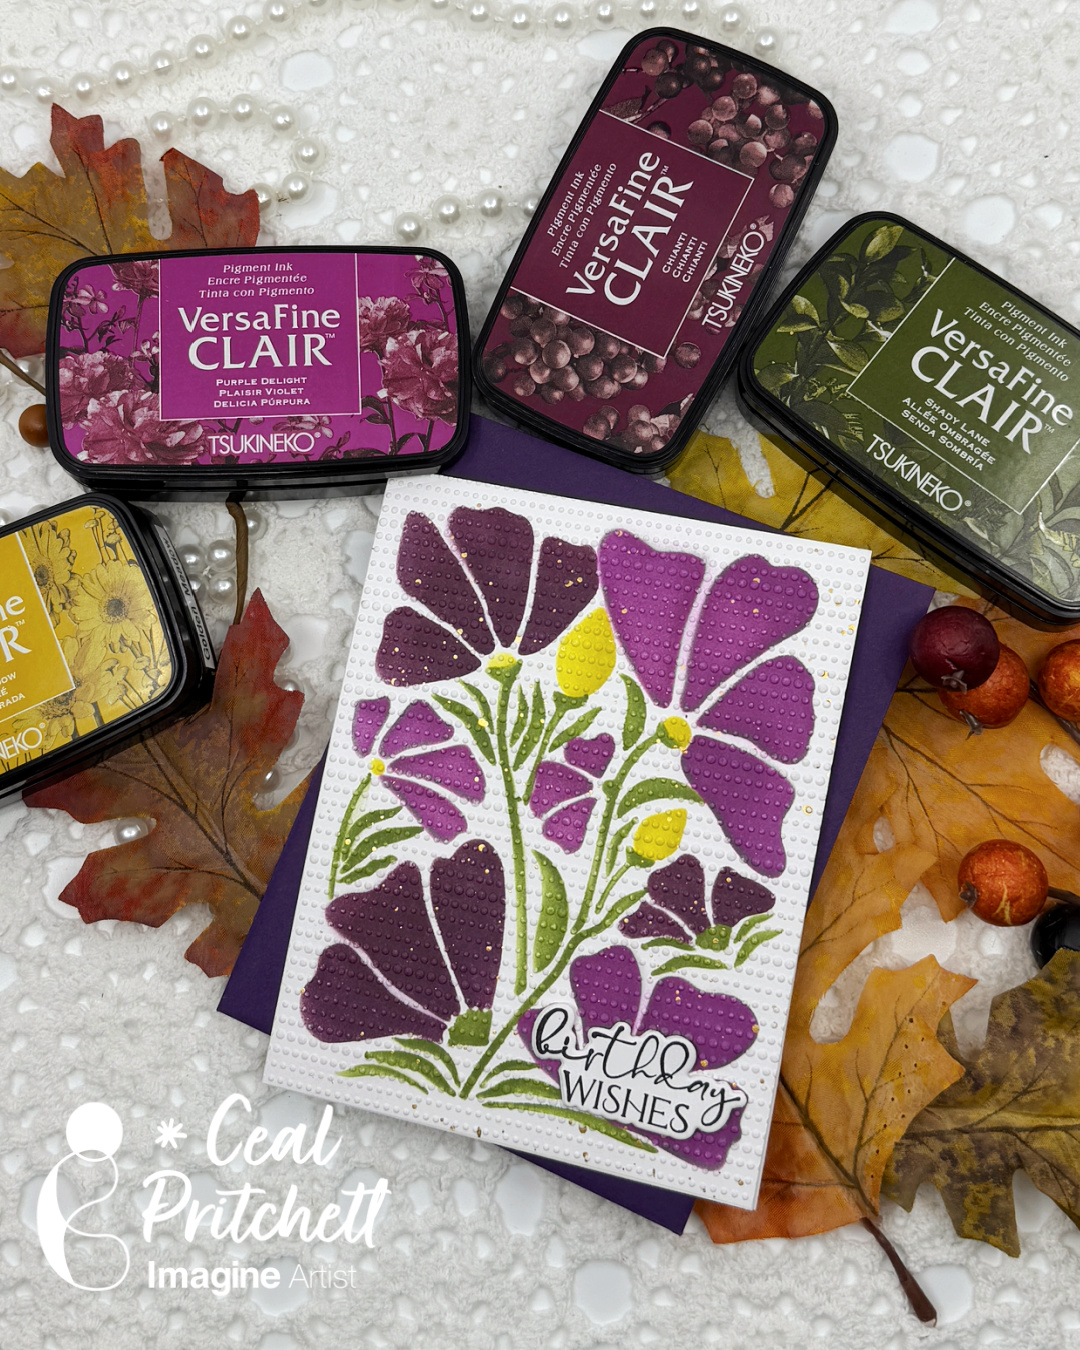
Fall Birthday Wishes with VersaFine Clair

By Ceal Pritchett

Hello everyone,
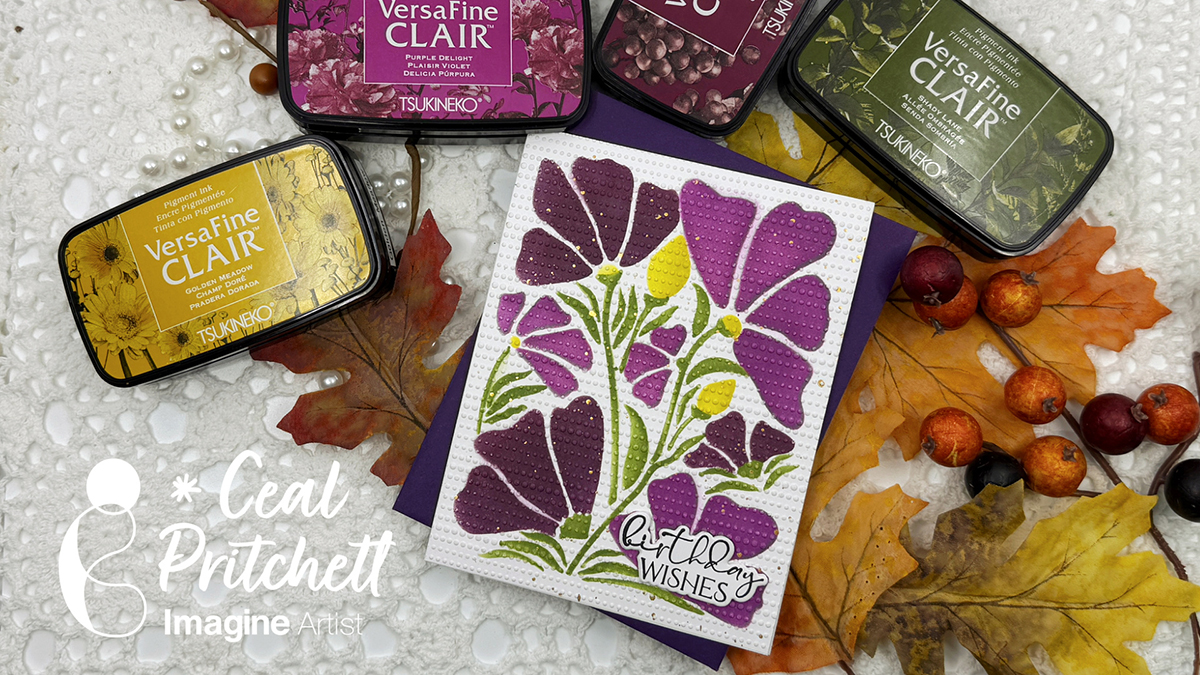
It’s Ceal, here. I am so ready for fall to be here and today I am sharing a fall birthday card with you.

Skill: Beginner to Intermediate
Time: 30 to 45 minutes

Directions:

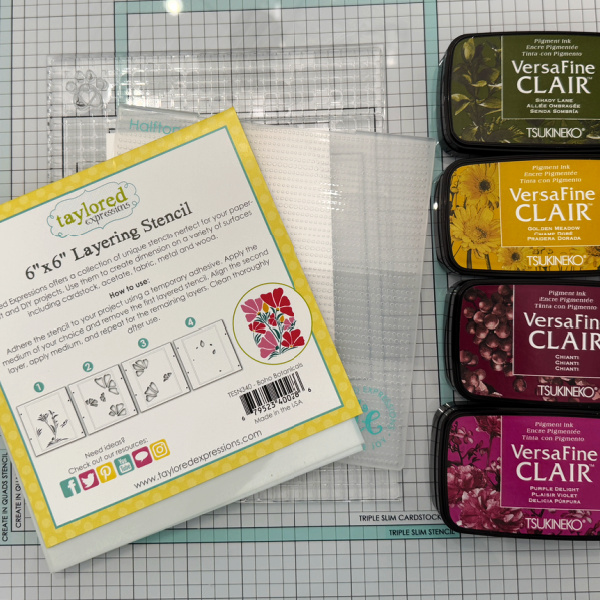
Gather your supplies. For this card you will need a stencil of choice, several colors of ink, and embossing folder and sentiment stamp.

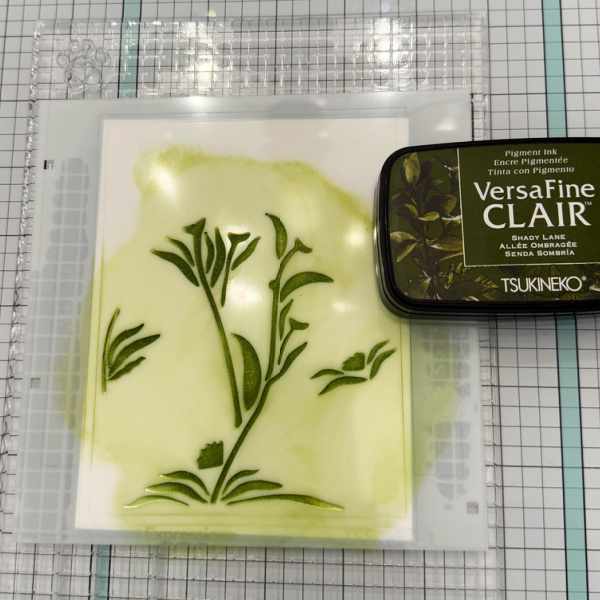
Step 1:
The stencil set I used has four different layers. The first stencil in step one is to use Shady Lane to color the stems.

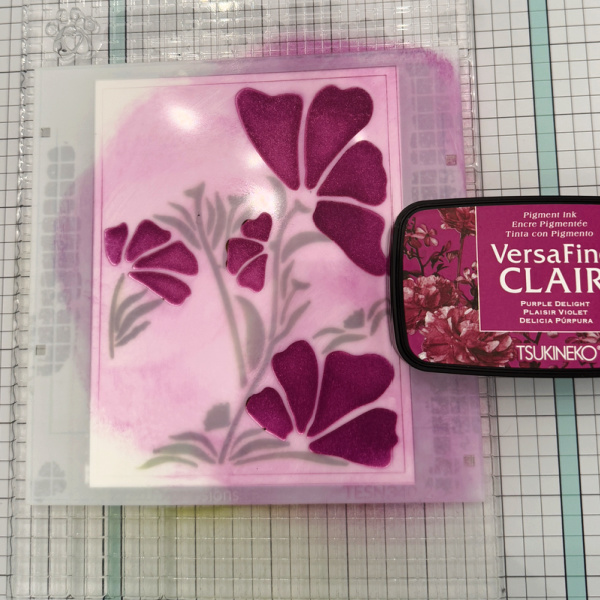
Step 2:
Using layer 2 of the stencil set and Purple Delight, color the flowers.

Step 3:
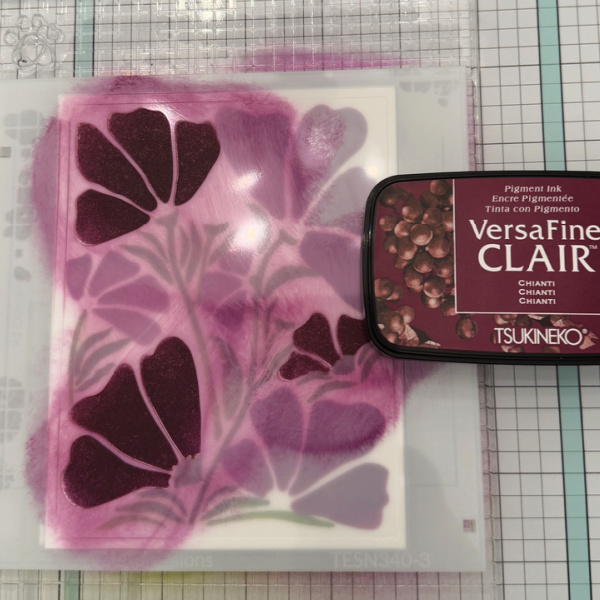
Using the third layer of the stencil and Chianti, color the flowers.

Step 4:
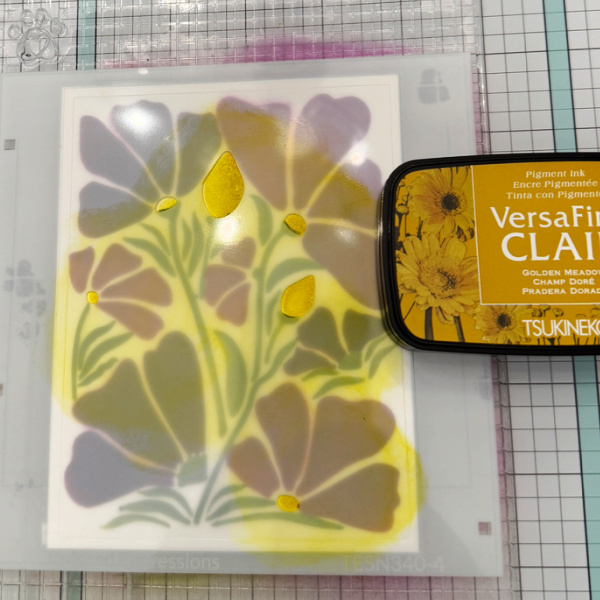
Using the fourth layer of the stencil and Golden Meadow, color in the flower centers and buds.

Step 5:
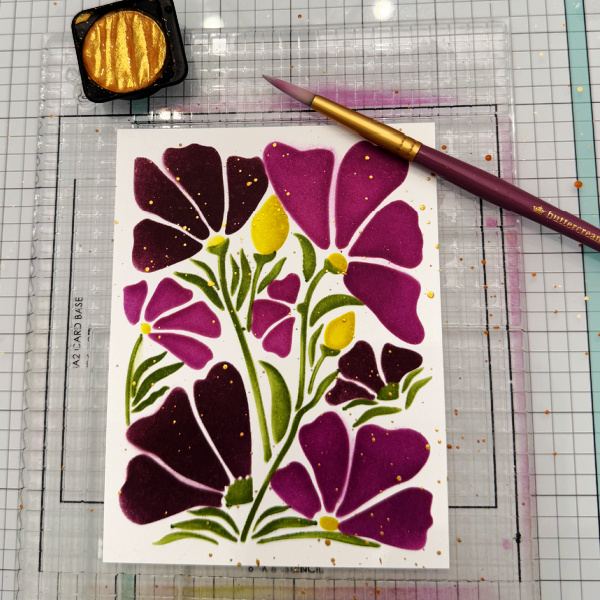
Add gold splatter using a watercolor paint, I used Fine Tec metallic.

Step 6:
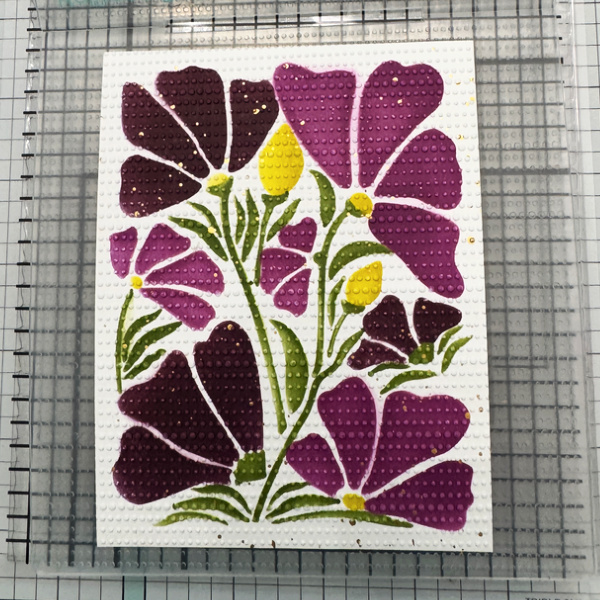
Run the finished panel through the machine using an embossing folder. Add finished panel to the card base.

Step 7:
Finish card by adding a sentiment

Supplies:

Imagine Supplies
VersaFine Clair
– Nocturne
– Shady Lane
– Golden Meadow
-Purple Delight
– Chianti
On Point Glue

Other Supplies
Boho Botanicals Layering Stencil – Taylored Expressions
Halftone Dots Stencil – Taylored Expressions
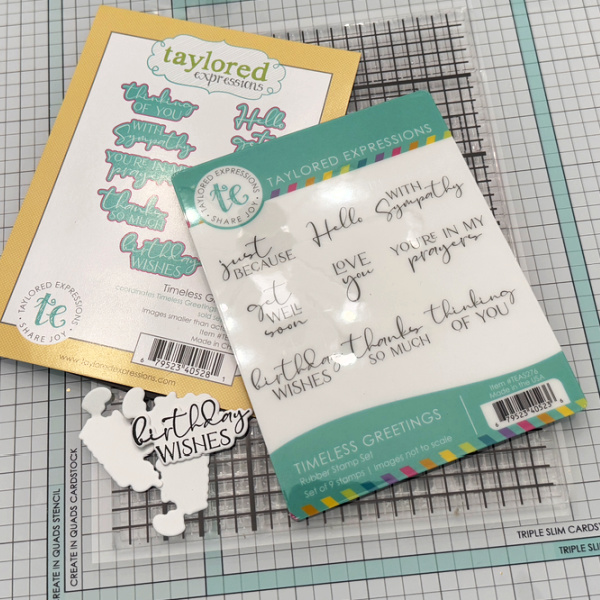
Timeless Greetings Stamp/dies – Taylored Expressions
Grip Mat – Simon Says Stamp
Blending Brushes – Simon Says Stamp

Blend Delicata Inks to Make a Beautiful Fall Florals Wedding Card

By Jessica Lin

Skill: Intermediate
Time: 1 hour

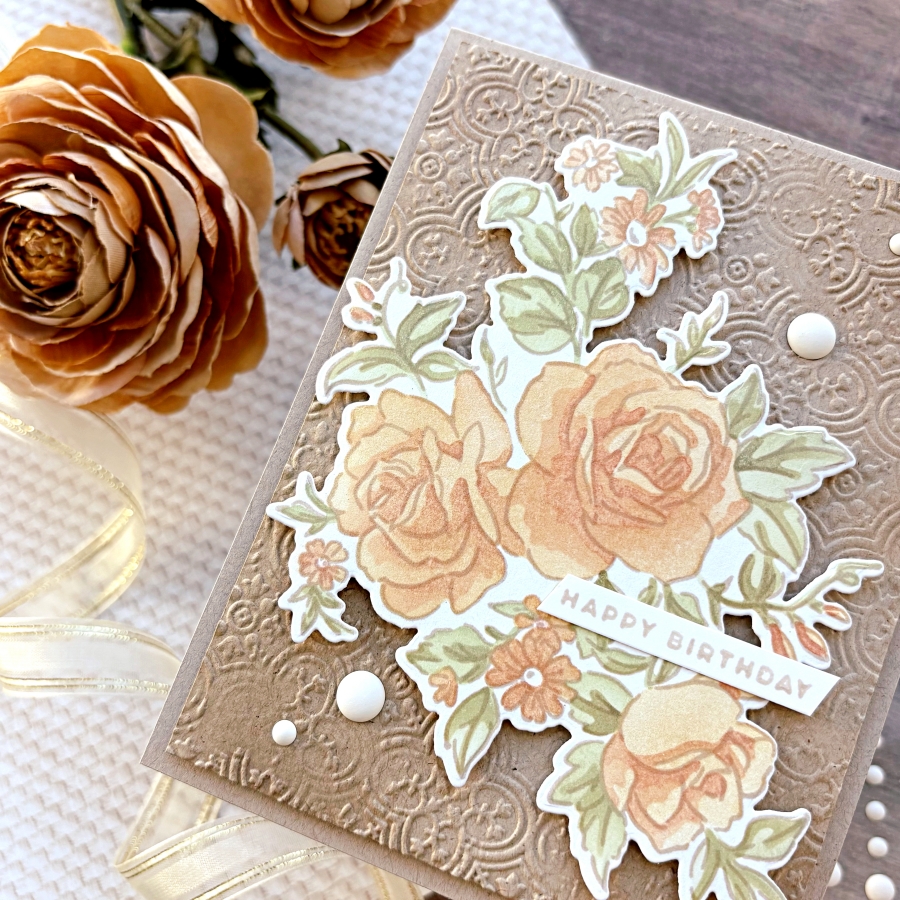
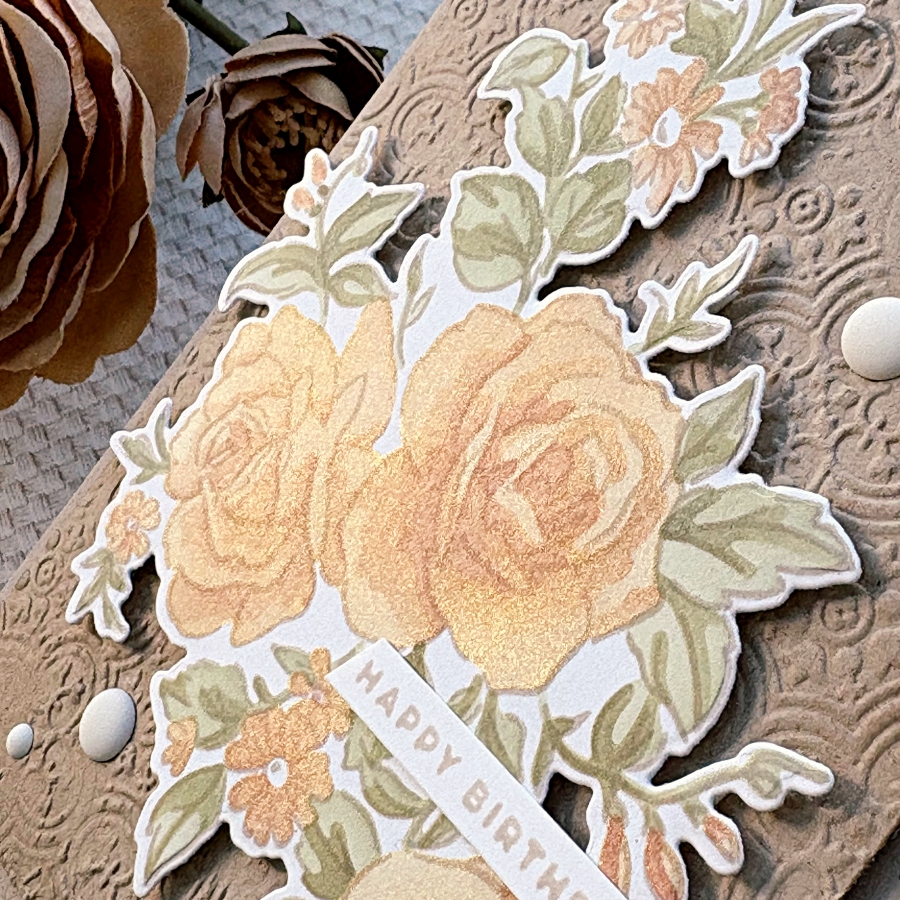
Hi everyone! It’s Jessica here. Fall is right around the corner and I have a fall floral card to share with you today. I decided to do some layered ink blending using shimmery Delicata ink pads. They are pigment-based and mostly used for stamping. However, they ink blend beautifully, too! Be sure to check out the shimmery effects of these ink pads at the end of this post.

Step 1:
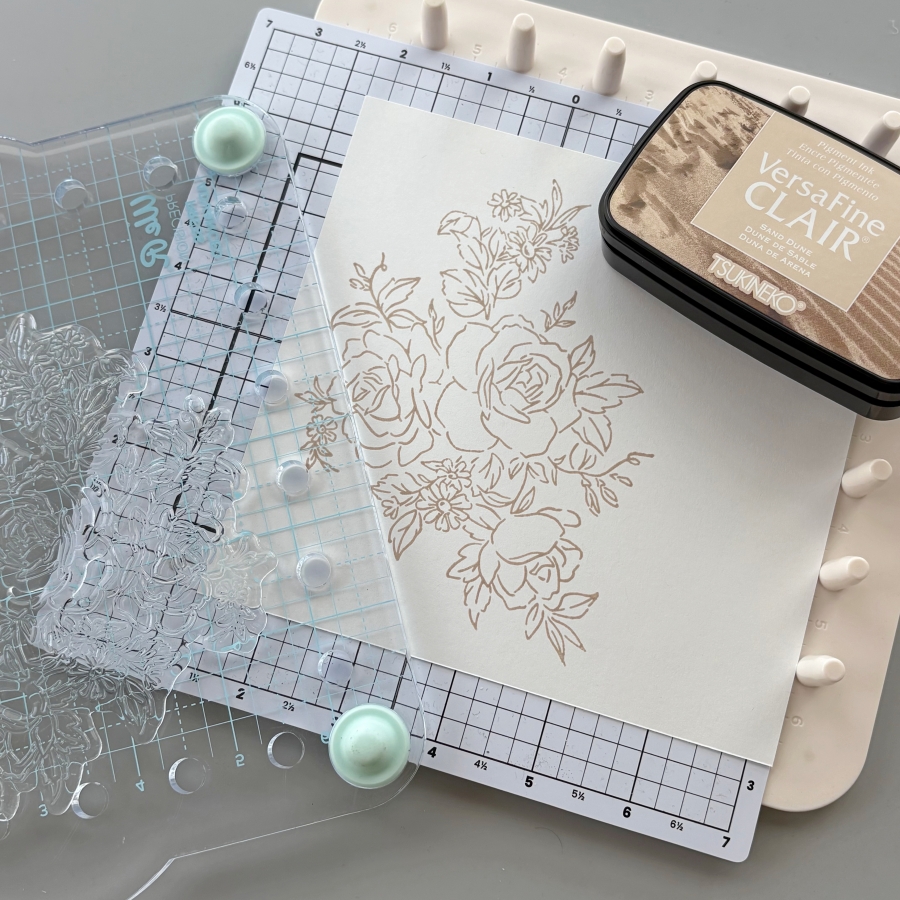
Stamp the large floral image from Stampin’ Up’s Layers of Beauty set with VersaFine Clair Sand Dune ink pad. This color is becoming my favorite for stamping outlines. The soft, neutral tone creates an entirely different feel compared to black image outlines.

Step 2:
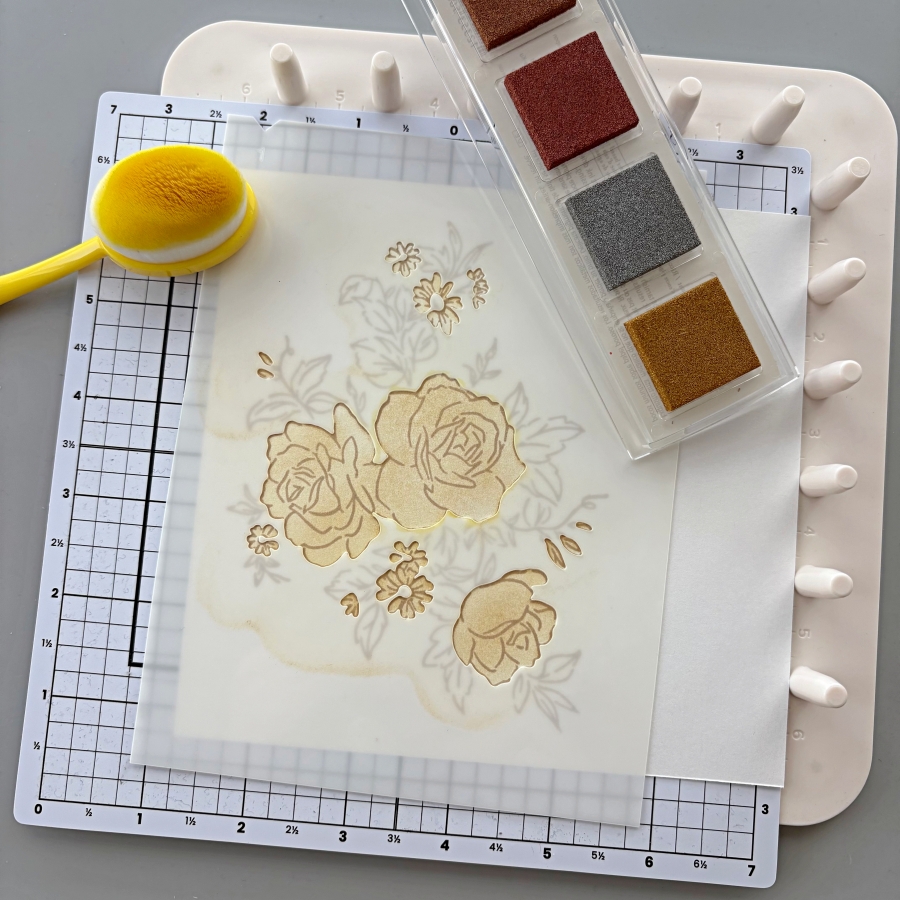
This particular stamp set coordinates with the Layers of Beauty decorative masks. I started with stencil 1 and ink blended with Delicata Golden Glitz. You could use the full size ink pad or the Quartet ink pad, which includes Golden Glitz, Silvery Shimmer, Celestial Copper, and Bronze Burst.

Step 3:
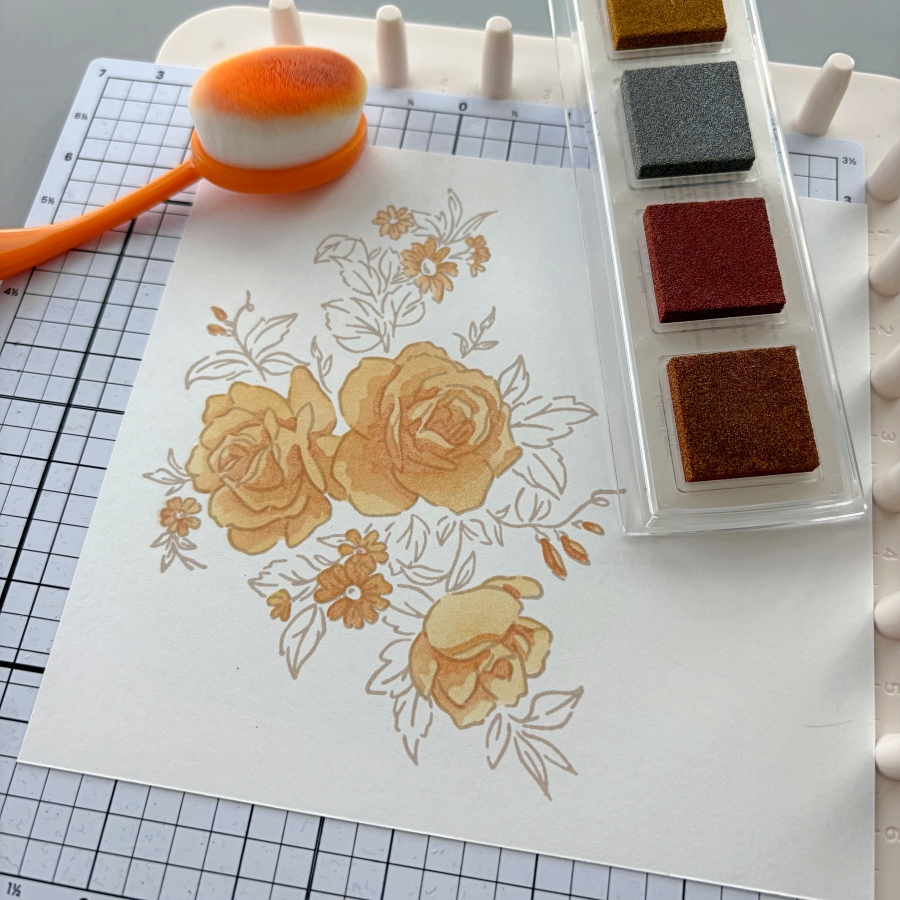
For stencil 2 and 3, I ink blended Bronze Burst and Celestial Copper. These two shades are similar, with Celestial Copper having a redder hue. I thought they contrasted too strongly against the golden base layer, so I ink blended Bronze Burst lightly to the base layer as well.

Step 4:
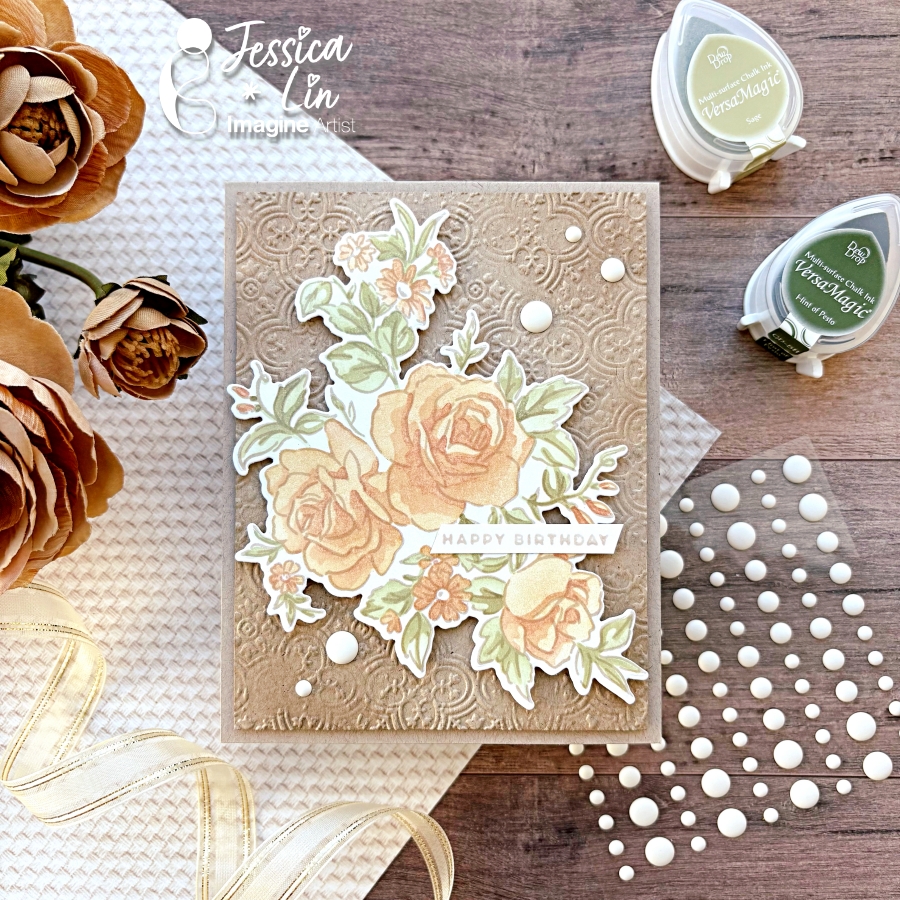
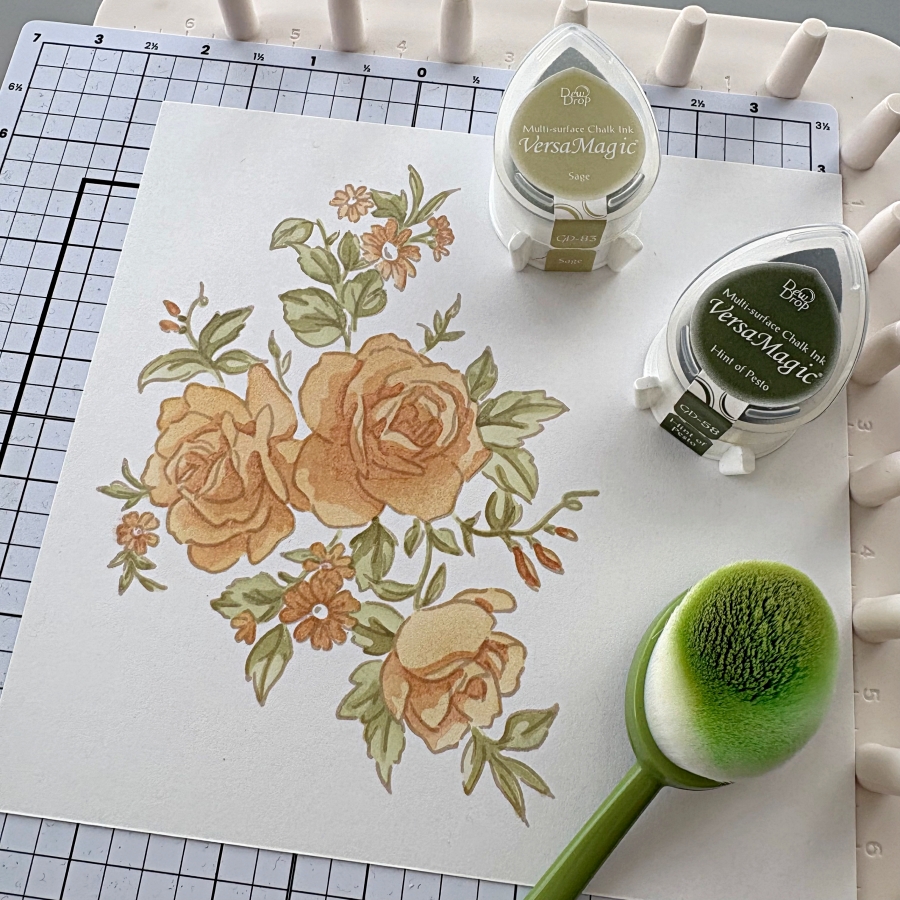
For the leaves, I ink blended VersaMagic Sage for stencil 4 and Hint of Pesto for stencil 5. Once the ink blending is completed, I die cut the floral image and mounted the back with foam tape.

Step 5:
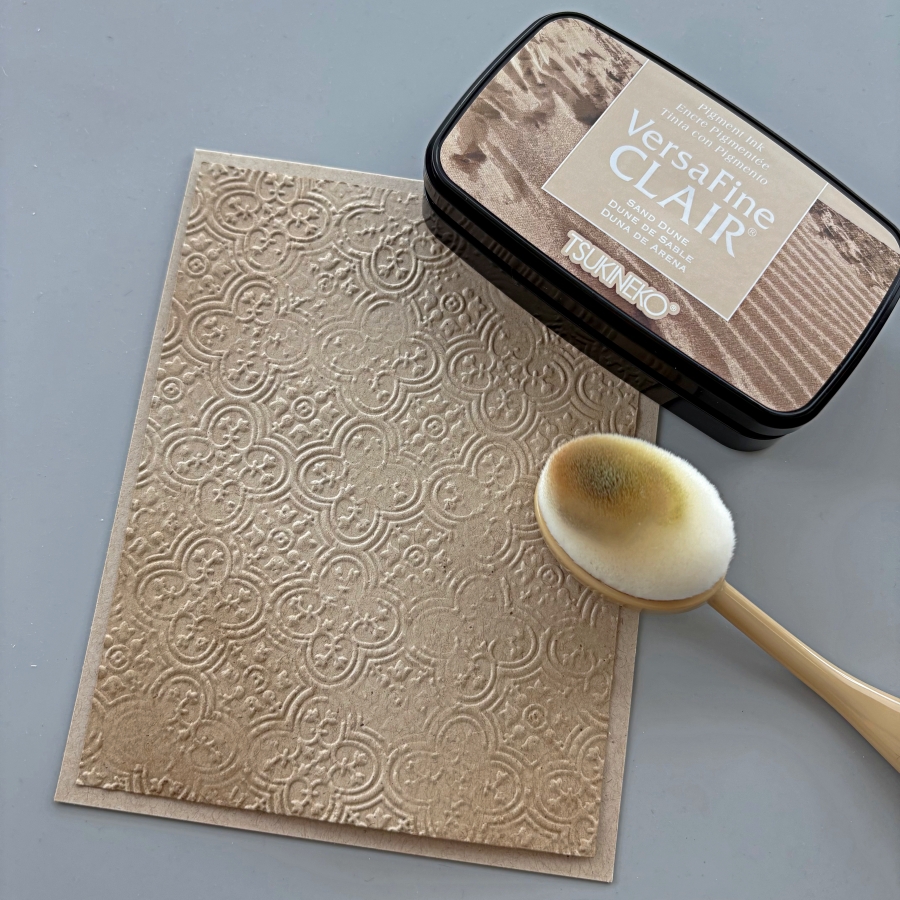
I prepared a card base using Neenah Desert Storm cardstock. Then I embossed a 4’’ x 5 ¼’’ panel with Stampin’ Up’s Distressed Tile embossing folder. To create some background depth, I ink blended the corners of the embossed panel with VersaFine Clair Sand Dune ink pad.

Step 6:
Finally, I stamped the sentiment with VersaFine Clair Sand Dune ink pad and added matte white enamel dots from The Rabbit Hole Designs.

Here’s the finished card! I tried to capture the shimmery effects of the Delicata ink pads but the photo does not do it justice. It’s mesmerizing and so pretty in real life, I hope you will give ink blending with Delicata ink pads a try!

Craft Supplies:

Imagine Supplies:

Other Supplies:

  • Stampin’ Up! – Stamps, Die, Mask bundle – Layers of Beauty
  • Stampin’ Up! – Embossing Folder – Distressed Tile
  • Neenah – Paper – Desert Storm
  • Foam Tape