Create a Beautiful Mandala Thank You Card

by Martha Lucia Gomez

Create a Beautiful Mandala Thank You Card

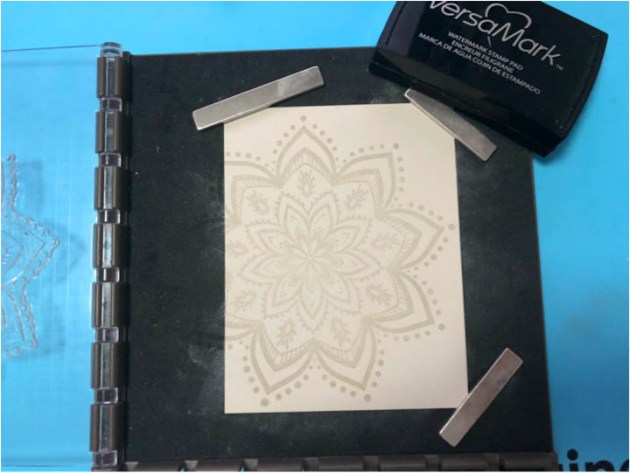
Exploring is part of this creative world, but not all of our readers are experts or have been following us for a long time so today I’ll welcome you back to the basics. A few months ago, I told you that if I had to choose one ink pad (in a hypothetical world), I would choose the VersaMark Ink. Today I am sharing with you one of the multiple reasons why I consider it my must-have product. We have inks in almost all colors but with the VersaMark Ink you create a watermark effect that enhances the color of the paper. I love this effect and love the subtle appearance it creates. In my project, I am using Sahara Sand cardstock and if you notice on the above photo the ink is the same as the paper, just a little darker to create more emphasis over the stamped image.

Skill: Beginner
Time: 30 minutes

Directions


Step 1

Select your color of cardstock and ink your stamp with VersaMark.

Step 2

Stamp your image once, twice or as many times that you need it to obtain all the details and a darker color. In my sample, I stamped twice. Let the ink dry for a few minutes. And this multiple stamping is easier with a stamping tool such as the Misti Stamping Tool.


Step 3

Repeat the process to stamp the “Thanks” sentiment. But this time you can create a totally different effect using the VersaMark with Embossing Powder. You only need to ink your stamp with the VersaMark and then cover the stamped image with Silver Embossing Powder in my case or with any other color of embossing powder and melt it with the heat tool. VersaMark is an excellent embossing ink.


Step 4

To make my card more special, I cut the stamped sentiment with the corresponding die cut and stamped the complement sentiment making the same process. If you want to obtain a major texture you can repeat the stamping process all the time that you wanted…just don’t burn your paper!

Supplies

Imagine
Other
  • Sahara Sand Card Stock
  • “Thanks” Stamps & Die cuts
  • Mandala stamp
  • Misti Stamping tool
  • Embossing powder anti-static bag
  • Die & embossing machine

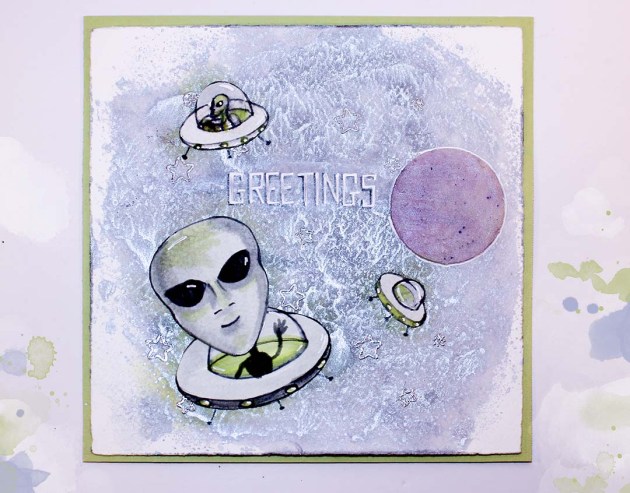
Create Shimmery Greetings From Outer Space

by Jennifer Vanderbeek

How about a little out-of-this-world fun while playing with the color of the month: Pebble Grey. While deciding what to do for this prompt I was reminded of the aliens known as Greys, so created this sky scene with shades of grey and silver and drew up some simple saucers to decorate the skies. In the video, you’ll also see how I fixed a goof and rescued the card front from a galactic disaster!

Skill: Advanced
Time: 1 hour

Directions

Supplies

Imagine
Other
  • Watercolor Paper
  • Cardstock – Pale Green
  • Paintbrushes
  • Staedtler – Combo Circle Template
  • Pickett – Isometric Ellipse Inking Template
  • Pencil
  • White Eraser
  • Acrylic Block
  • Studio Calico – Make a Wish stamp set
  • Uniball – Signo White Gel Pen
  • Fiskars – Paper Trimmer, Scissors
  • Wooden spoon
  • Post-It Tape

Create a Reversible Naughty or Nice Christmas Stocking

by Jennifer Vanderbeek

Create a Reversible Naughty or Nice Christmas Stocking

Getting a head start on the holiday crafting rush, I decided to sew up a quick stocking and decorate the linen cuff with Fabrico markers, All-Purpose Ink, and some heat-embossed accents. While deciding just how I wanted to do the embossing I tried out a lot of products: VersaMark, Delicata, and Creative Medium to name the top three contenders, but I decided that the fine details that On Point Glue afforded made it the best choice for this project. Because of the heat embossing, you want to make sure that the area you’re decorating is a fabric that won’t melt when you hit it with the heat tool. Linen, cotton, canvas, or wool (the natural, sheepy stuff, not the polyester kind) should all work just fine, but you might want to test a small piece before getting too far into decorating your stocking.

Skill: Advanced
Time: 1 hour + dry time

Directions

Supplies

Imagine
Other
  • Stocking blank (or materials to make your own)
  • Pencil
  • Watercolor paper
  • Darice – Heat tool

Bring in the Fall Season with a “Blessings” Card

by Martha Lucia Gomez

Bring in the Fall Season with a "Blessings" Card with Memento in Rhubarb Stalk

The Fall Season has officially arrived and what better way to celebrate this change than to switch inks colors to rich tones and hues. In today’s card making tutorial, I am sharing a fall card created with an embossing folder, Memento ink and die cuts.

Skill: Intermediate
Time: 1 hour

Directions


Step 1

Select your favorite design of the embossing folder and ink the debossing part using Memento Ink. I am using the Leaf Swirl from Darice and Memento Ink in Desert Sand. Insert a piece of cardstock in your inked folder and pass the complete piece through your big shot or die cut machine. Open the folder and take out the inked, embossed layer. If you want to intensify the color, just re-ink the embossing folder and use the texture created on the cardstock to align the piece.


Step 2

Now take the embossed layer and rub softly with Memento Rhubarb Stalk – a fantastic color that matches perfectly. Let the ink dry.


Step 3

Resize your inked embossed piece using a die cut. I used the Stitched Rectangle Frame Die Cut from Cottage Cutz. The idea is to have a central embossed panel to decorate the top of your card.


Step 4

Using the same die cut, cut several layers of Very Vanilla cardstock. In my project, I used four layers. Paste one of the frames created over the card base. Then paste the rectangle inked panel inside of the frame and paste all the additional frames. For this step, the On Point Glue works wonderfully. Select a die-cut word (here I used “blessings” from Gina Marie Designs) and cut out as many words as you have frames. Stack the word die-cuts to match the frame height. See photo above for an example. This effect makes the card look like a box frame.

Supplies

Imagine
Other
  • Big Shot or any die cut machine
  • Darice – Embossing Folder Leaves Swirl
  • Cottage Cutz – Stitched Rectangle Frame Dies
  • Gina Marie Designs – Blessings Die
  • Stampin Up – Very Vanilla cardstock

A Halloween Card Using An Innovative Stencil Technique

by Nadine Carlier

Have you ever tried dry embossing with a stencil? In my video, I share how I created this really cool background embossing with a stencil and using Firework! Spray and VersaMagic to get the eery color.
Watch my video below to see exactly how I did it.  Enjoy!

Skill: Intermediate
Time: 20 minutes

Supplies

Imagine
Other

Visit our YouTube Channel for more inspirational videos and subscribe to get updates when we post new videos.

See How to Make Cute Coffin Goody Bag Tags for Halloween

by Melissa Andrew

See How to Make Cute Coffin Goody Bag Tags for Halloween

In today’s video, Melissa shows you how to create this cute coffin tags for goody bags for Halloween using Fireworks Spray and VersaFine Clair. This design also uses Memento Markers and Pico Embellisher to add fun details to the Dracula image. Creating tags using Imagine products is fun and simple and Melissa shows you how!

Skill: Advanced
Time: 1 hour for several tags

Directions

Supplies

Imagine
Other