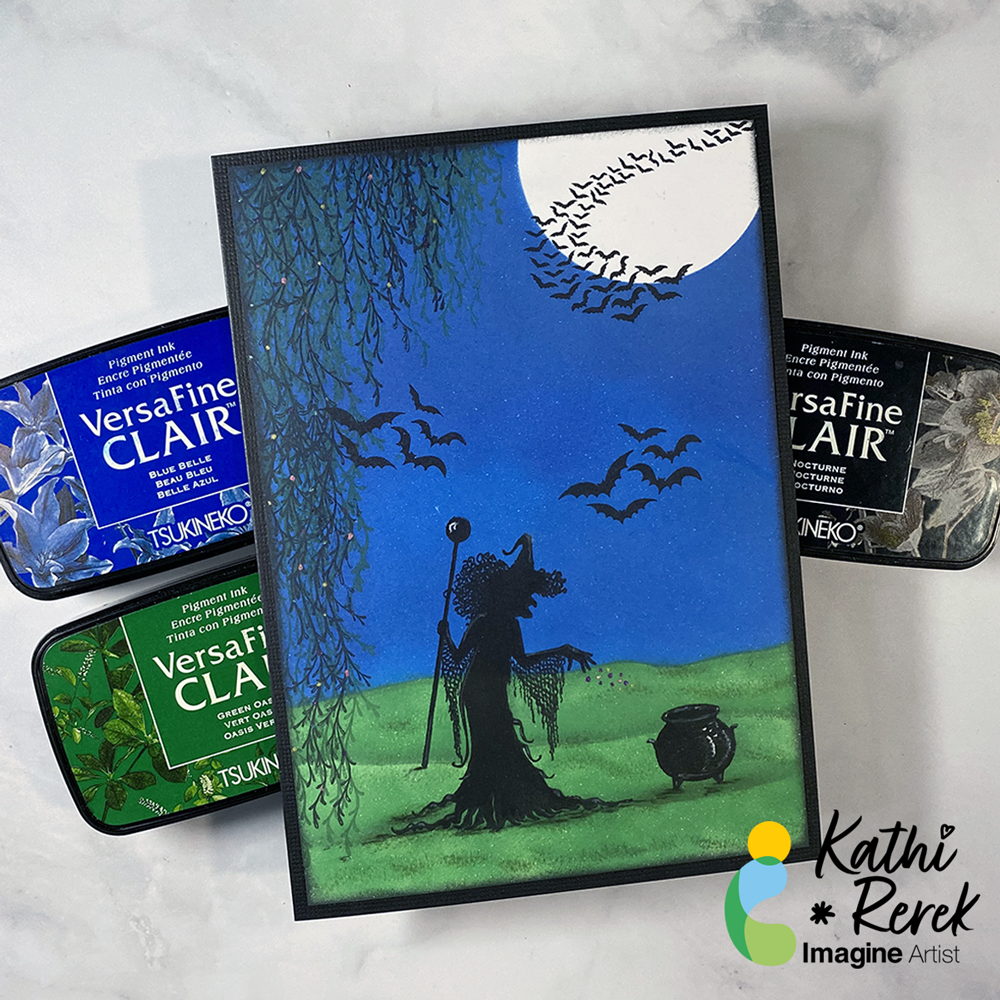
Bewitching Scene with VersaFine Clair

By Kathi Rerek

VersaFine Clair Inks make it easy to create a quick and bewitching Halloween scene!

Skill Level: Beginner to Intermediate

Time: 1 hour
Step 1.

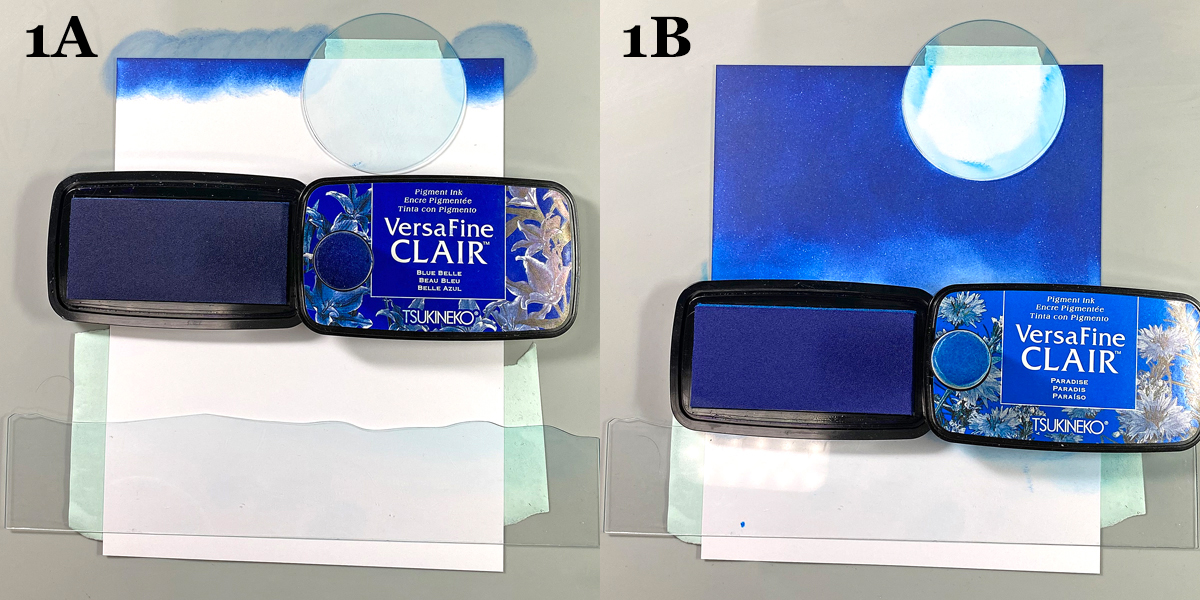
Use tape to secure the Moon mask and the flattest of the Hills mask to the back of a 4.75” x 6.75” panel of white cardstock.

Use a sponge dauber to apply Blue Belle VersaFine Clair Ink over the Moon mask onto the top part of the image panel to create a night sky.

Use another sponge dauber to apply Paradise VersaFine Clair Ink over the top of the Hills mask onto the image panel until the panel is covered.
Step 2:

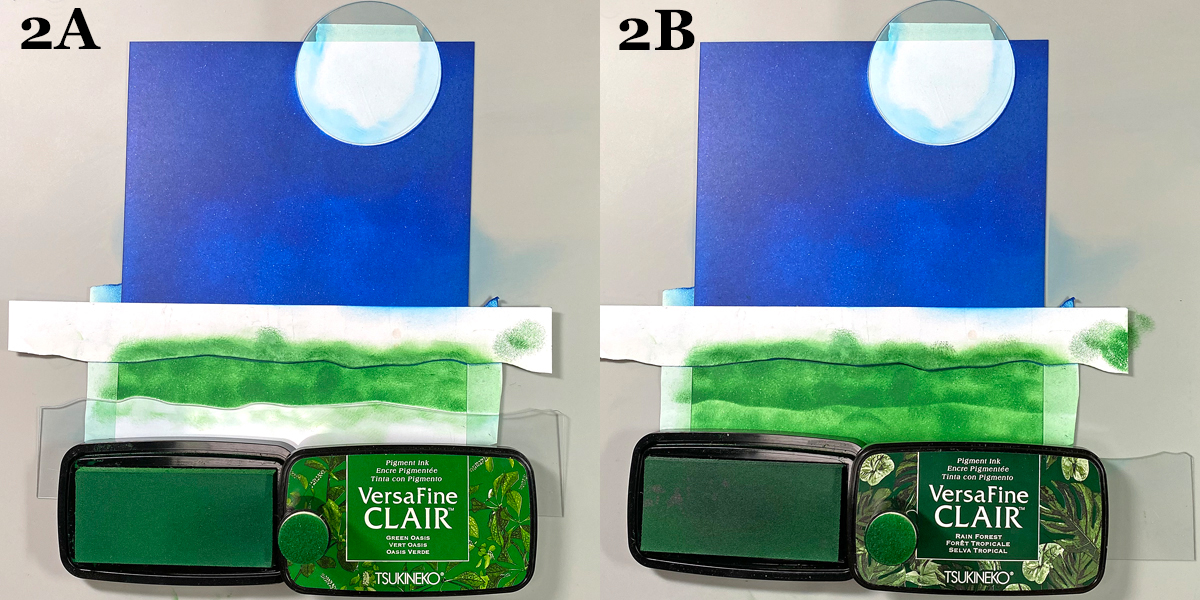
Move the Hills mask slightly downward and use the existing tape to secure it in place.

I had previously traced the Hills mask onto a piece of cardstock and fussy-cut it to create a paper mask for the negative portion of the mask. This was placed over the night sky.

Use a sponge dauber to apply Green Oasis VersaFine Clair Ink between the paper and acetate mask. Move the acetate mask downwards again and sponge Green Oasis VersaFine Clair Ink to fill in the grassy areas.

Use a different sponge dauber to apply Rain Forest VersaFine Clair Ink below the paper mask to add contrast and fill in the lawn. Remove the masks and heat set the panel.

Use a black chalk pencil to deepen the shadows in the grass.
Step 3:

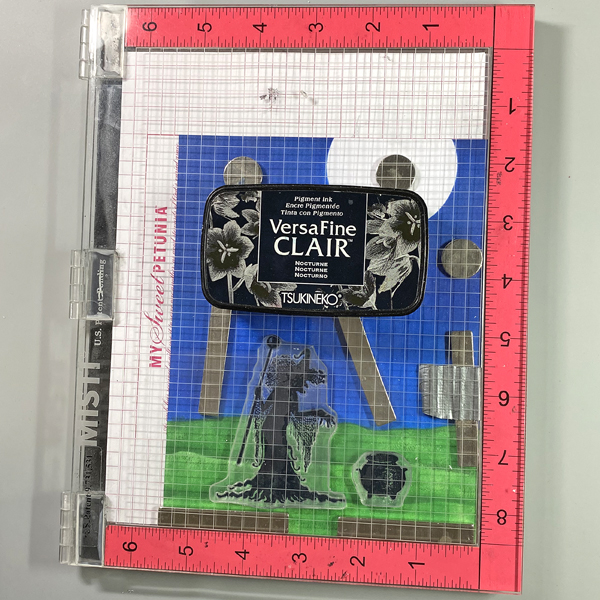
Use magnets to secure the image panel to the base of a stamping platform. Position the witch and  the cauldron stamps facedown as desired. Press the platform’s lid onto the back of the stamps, lift, and ink the stamps with Nocturne VersaFine Clair Ink. Stamp. Re-ink and stamp again if needed to attain a good impression.

Use a black chalk pencil to add shadows below the witch and the cauldron.
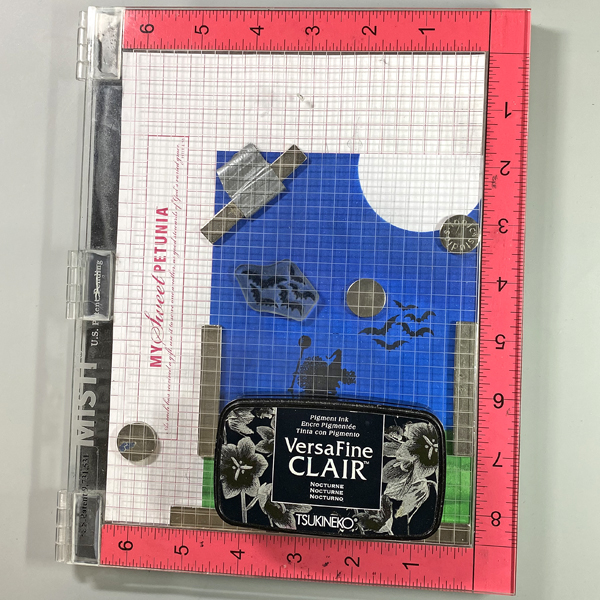
Step 4:

Position the Bats stamp on the right side of the witch and above the cauldron. Use Nocturne VersaFine Clair Ink to stamp the image. Oops. No photo.

Clean and dry the Bats stamp. Reposition it so that it’s to the left of the witch. Use Nocturne VersaFine Ink to stamp the image.
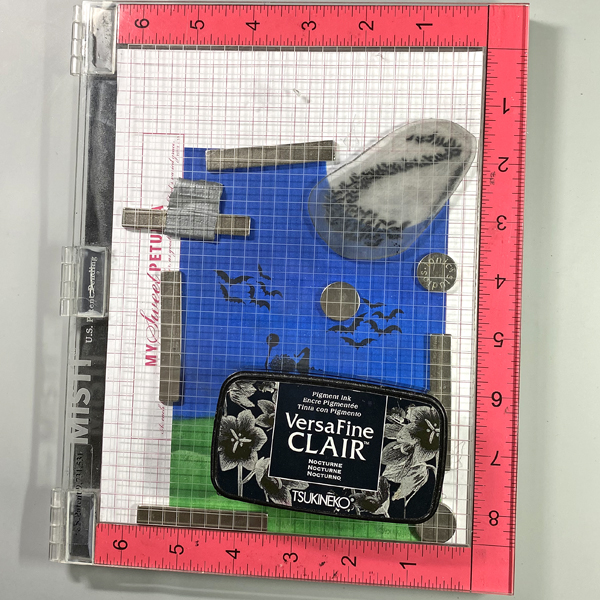
Step 5:

Position the Bat Colony stamp at the top right of the image panel so the bats are in front of the moon. Use Nocturne VersaFine Clair ink to stamp the image.
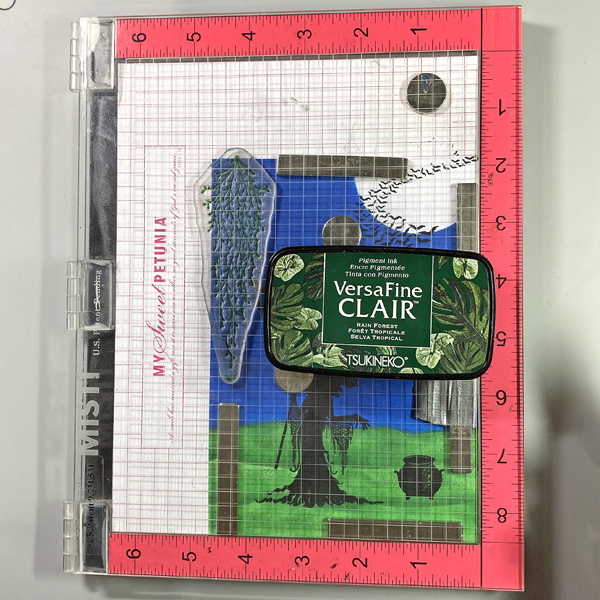
Step 6:

Position the larger of the Spanish Moss stamps along the right side of the image panel. Ink the stamp with Rain Forest VersaFine Clair Ink and stamp. Clean and dry the stamp. Move the stamp down, ink the stamp with Rain Forest VersaFine Clair Ink and stamp to extend the moss.
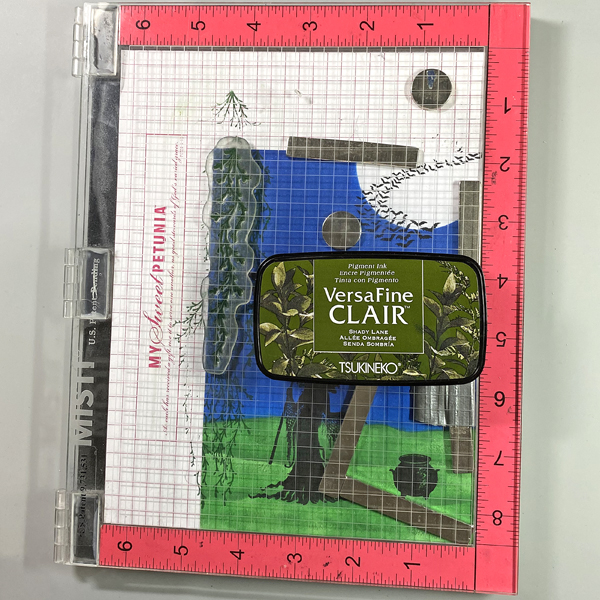
Step 7:

Position the smaller of the Spanish Moss stamps to the right of the stamped moss. Ink the stamp with Shady Lane VersaFine Clair Ink and stamp. Clean and dry the stamp. Move the stamp to the right, ink the stamp with Shady Lane VersaFine Clair Ink and stamp.
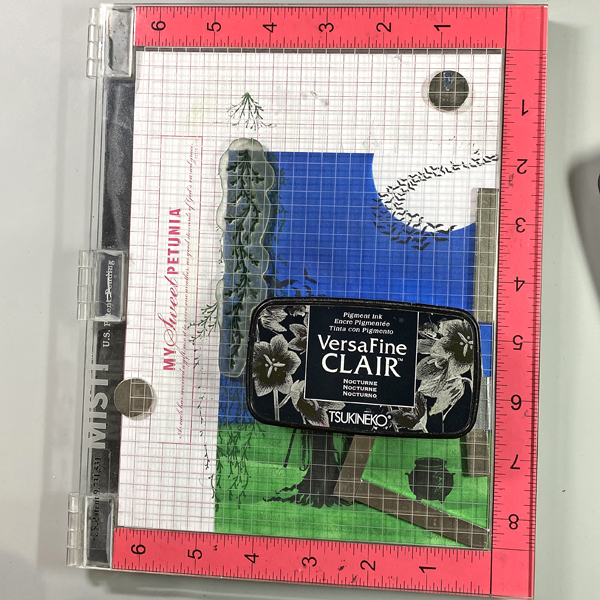
Step 8:

Clean and dry the stamp then move it back to the left. Ink the stamp with Nocturne VersaFine Clair Ink and stamp.

Step 9:

Place the larger of the Spanish Moss stamps onto an acrylic block. Ink the stamp with Nocturne VersaFine Clair Ink and stamp over the previous impressions using first and second generation stamping.  Sorry there’s no photo.

Heat set the image panel.
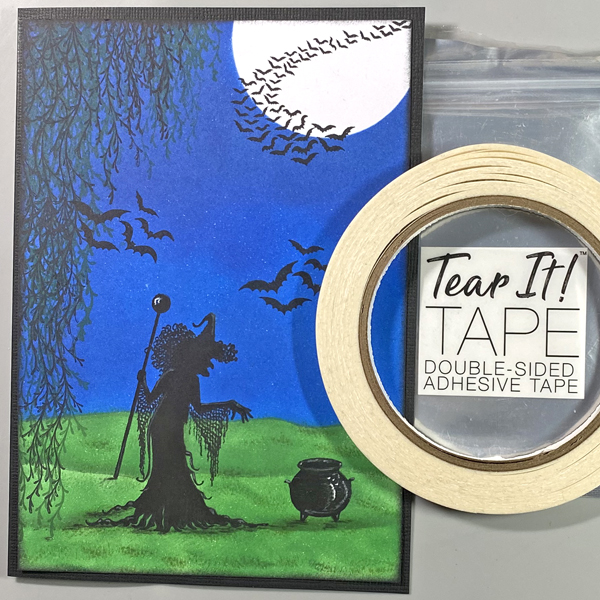
Step 10:

Use Tear It! Tape to adhere the image panel to a 5” x 7” black card.

Step 11:

Use a white Gelly Roll Gel pen to add highlights to the cauldron. Use a white colored pencil to add shading to the witch and the cauldron.

Use Stardust Glitter Gel pens to add sparkle to the contents being thrown in the cauldron and to the Spanish Moss.

Imagine Crafts Supplies:

Other Supplies:

  • Solar White Classic Crest Cardstock by Neenah Papers
  • Raven Cardstock by Bazzill Basics
  • Acetate Circle Masks by Lavinia Stamps
  • Acetate Hills Masks by Lavinia Stamps
  • Willow the Witch Clear Polymer Stamp Set by Lavinia Stamps
  • Bats Clear Polymer Stamp by Lavinia Stamps
  • Bat Colony Clear Polymer Stamp by Lavinia Stamps
  • Spanish Moss Clear Polymer Stamp Set by Lavinia Stamps
  • White Gelly Roll Gel Pen by Sakura of America
  • Purple, Rose, Sky Blue, and Gold Stardust Glitter Pens by Sakura of America
  • White Colored Pencil by Prismacolor
  • Black Chalk Pencil by General’s
  • Heat Gun by EK Success

Mini Guillotine Trimmer by Tim Holtz for Tonic Studios

Misti Stamping Platform by My Sweet Petunia
Make a Fun Pair of Embossed Skull Earrings with StazOn

By Alison Heikkila –

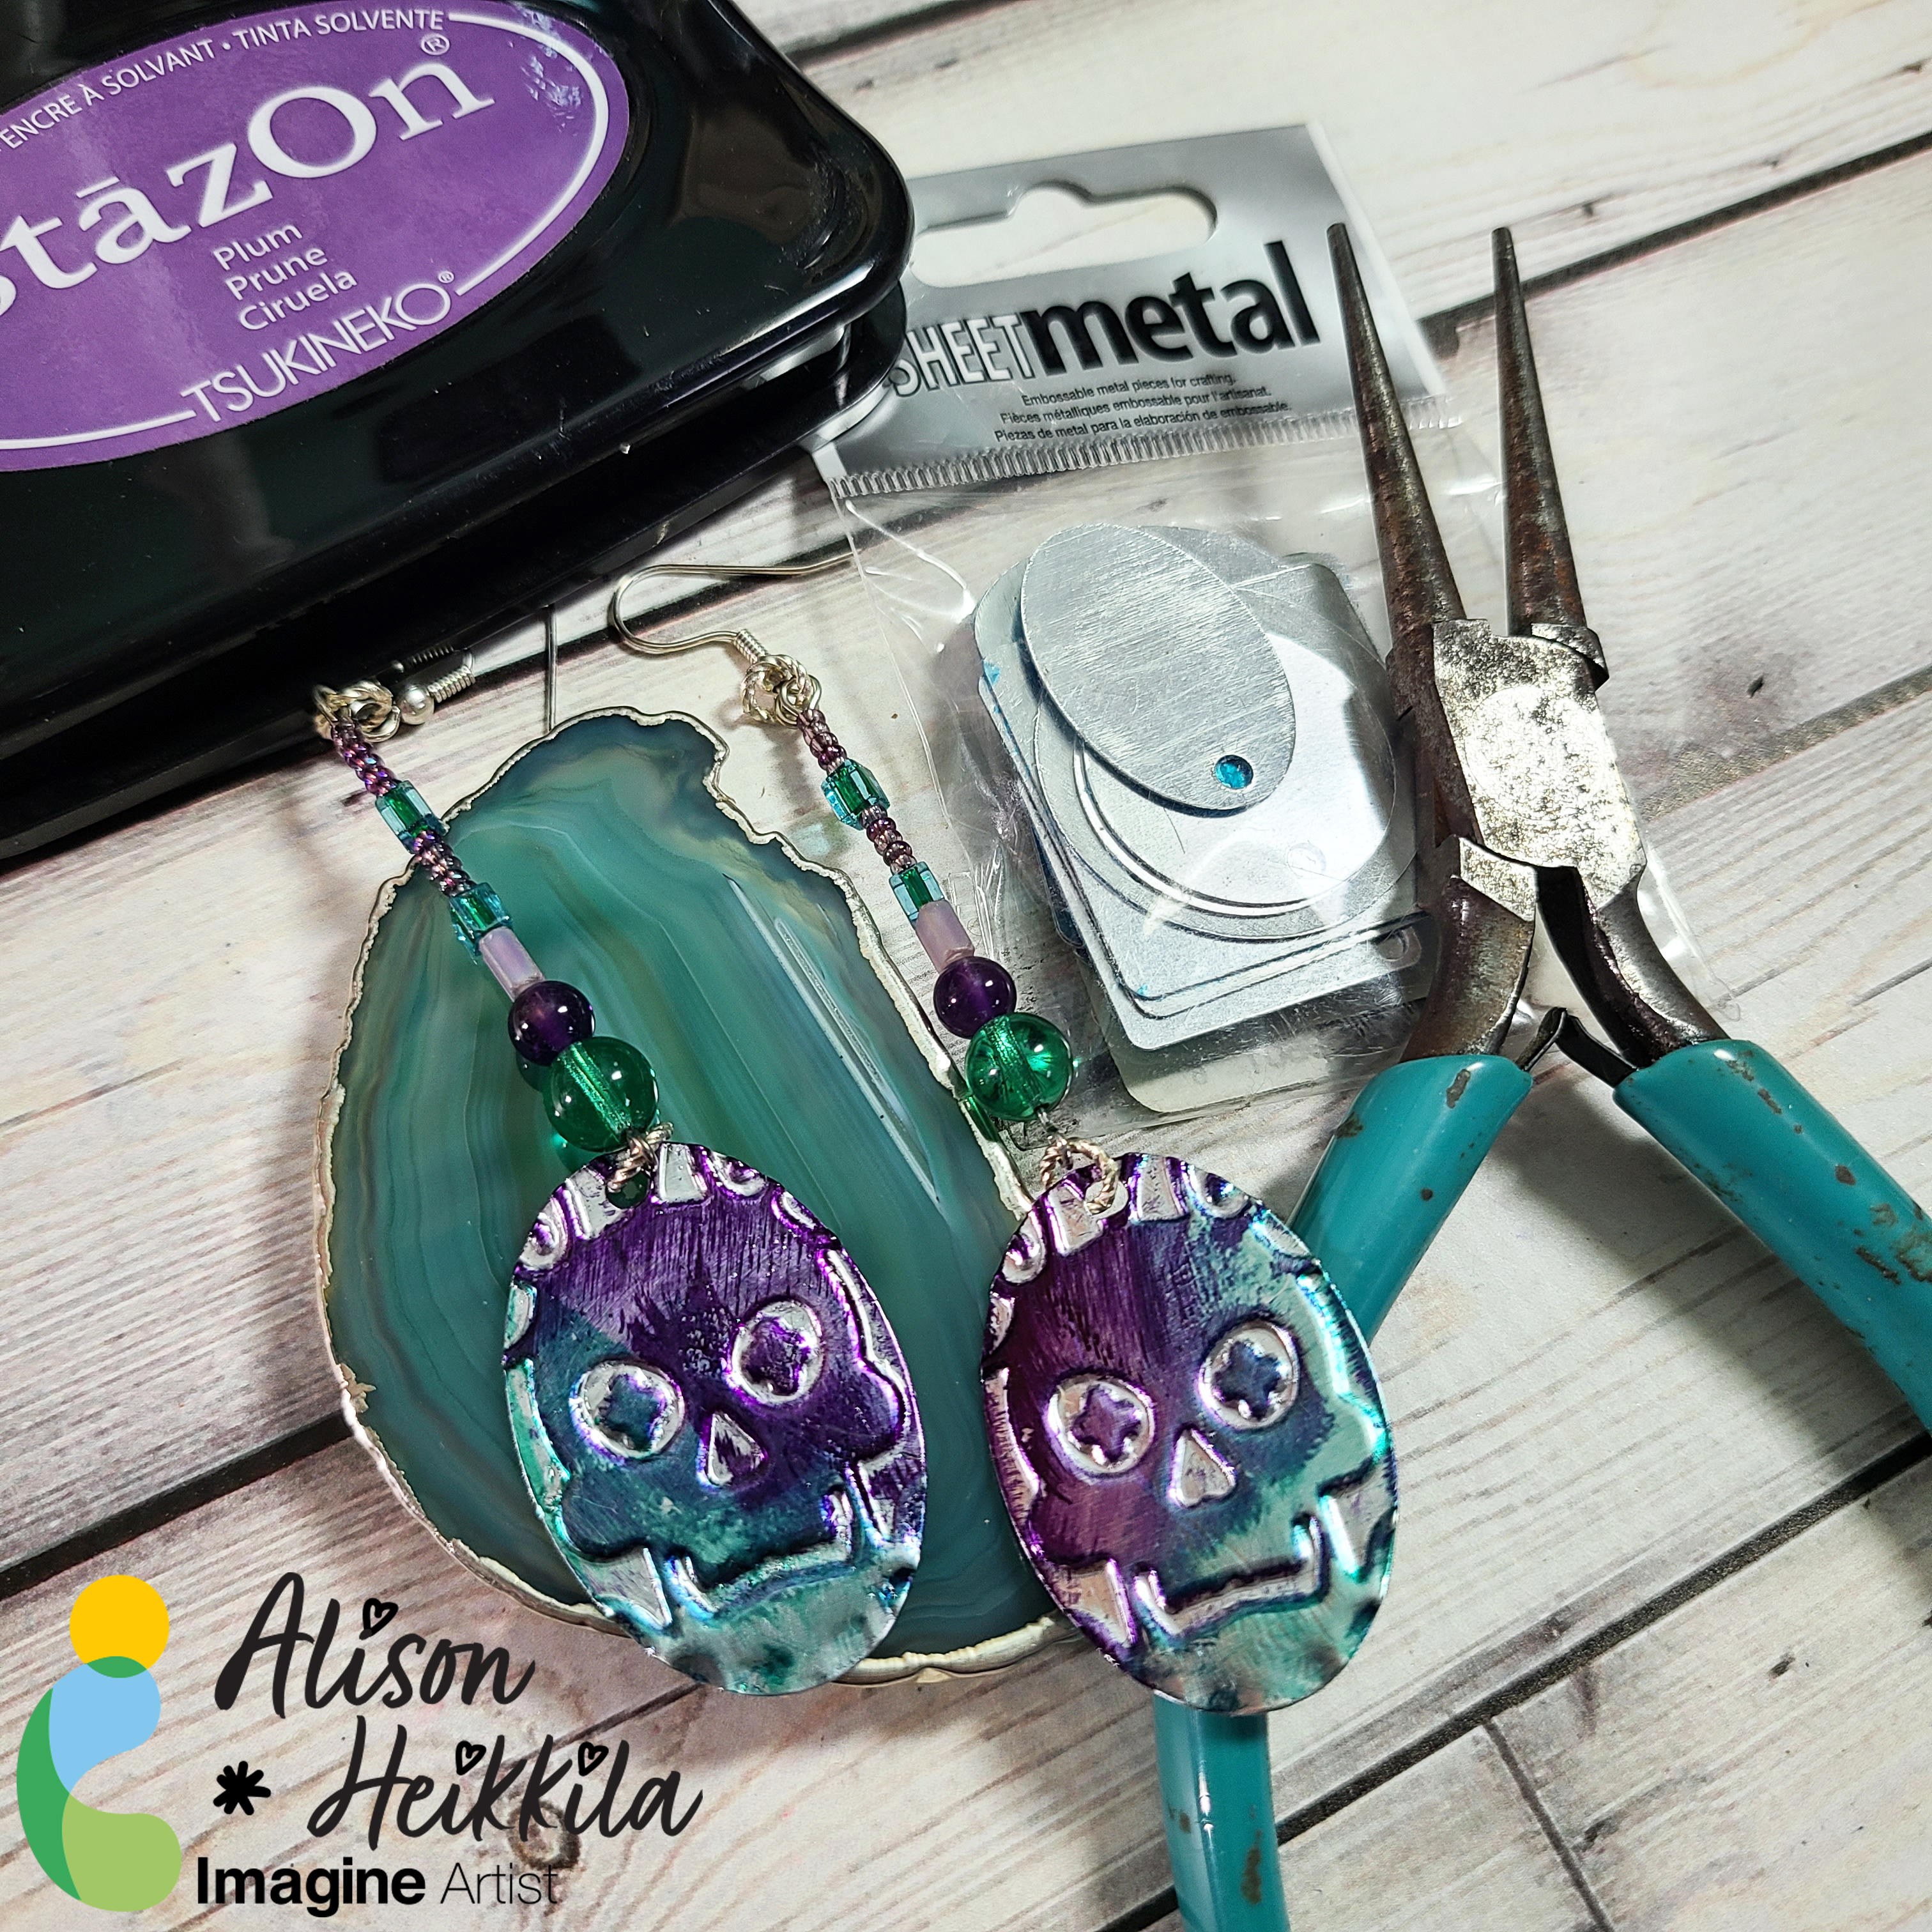
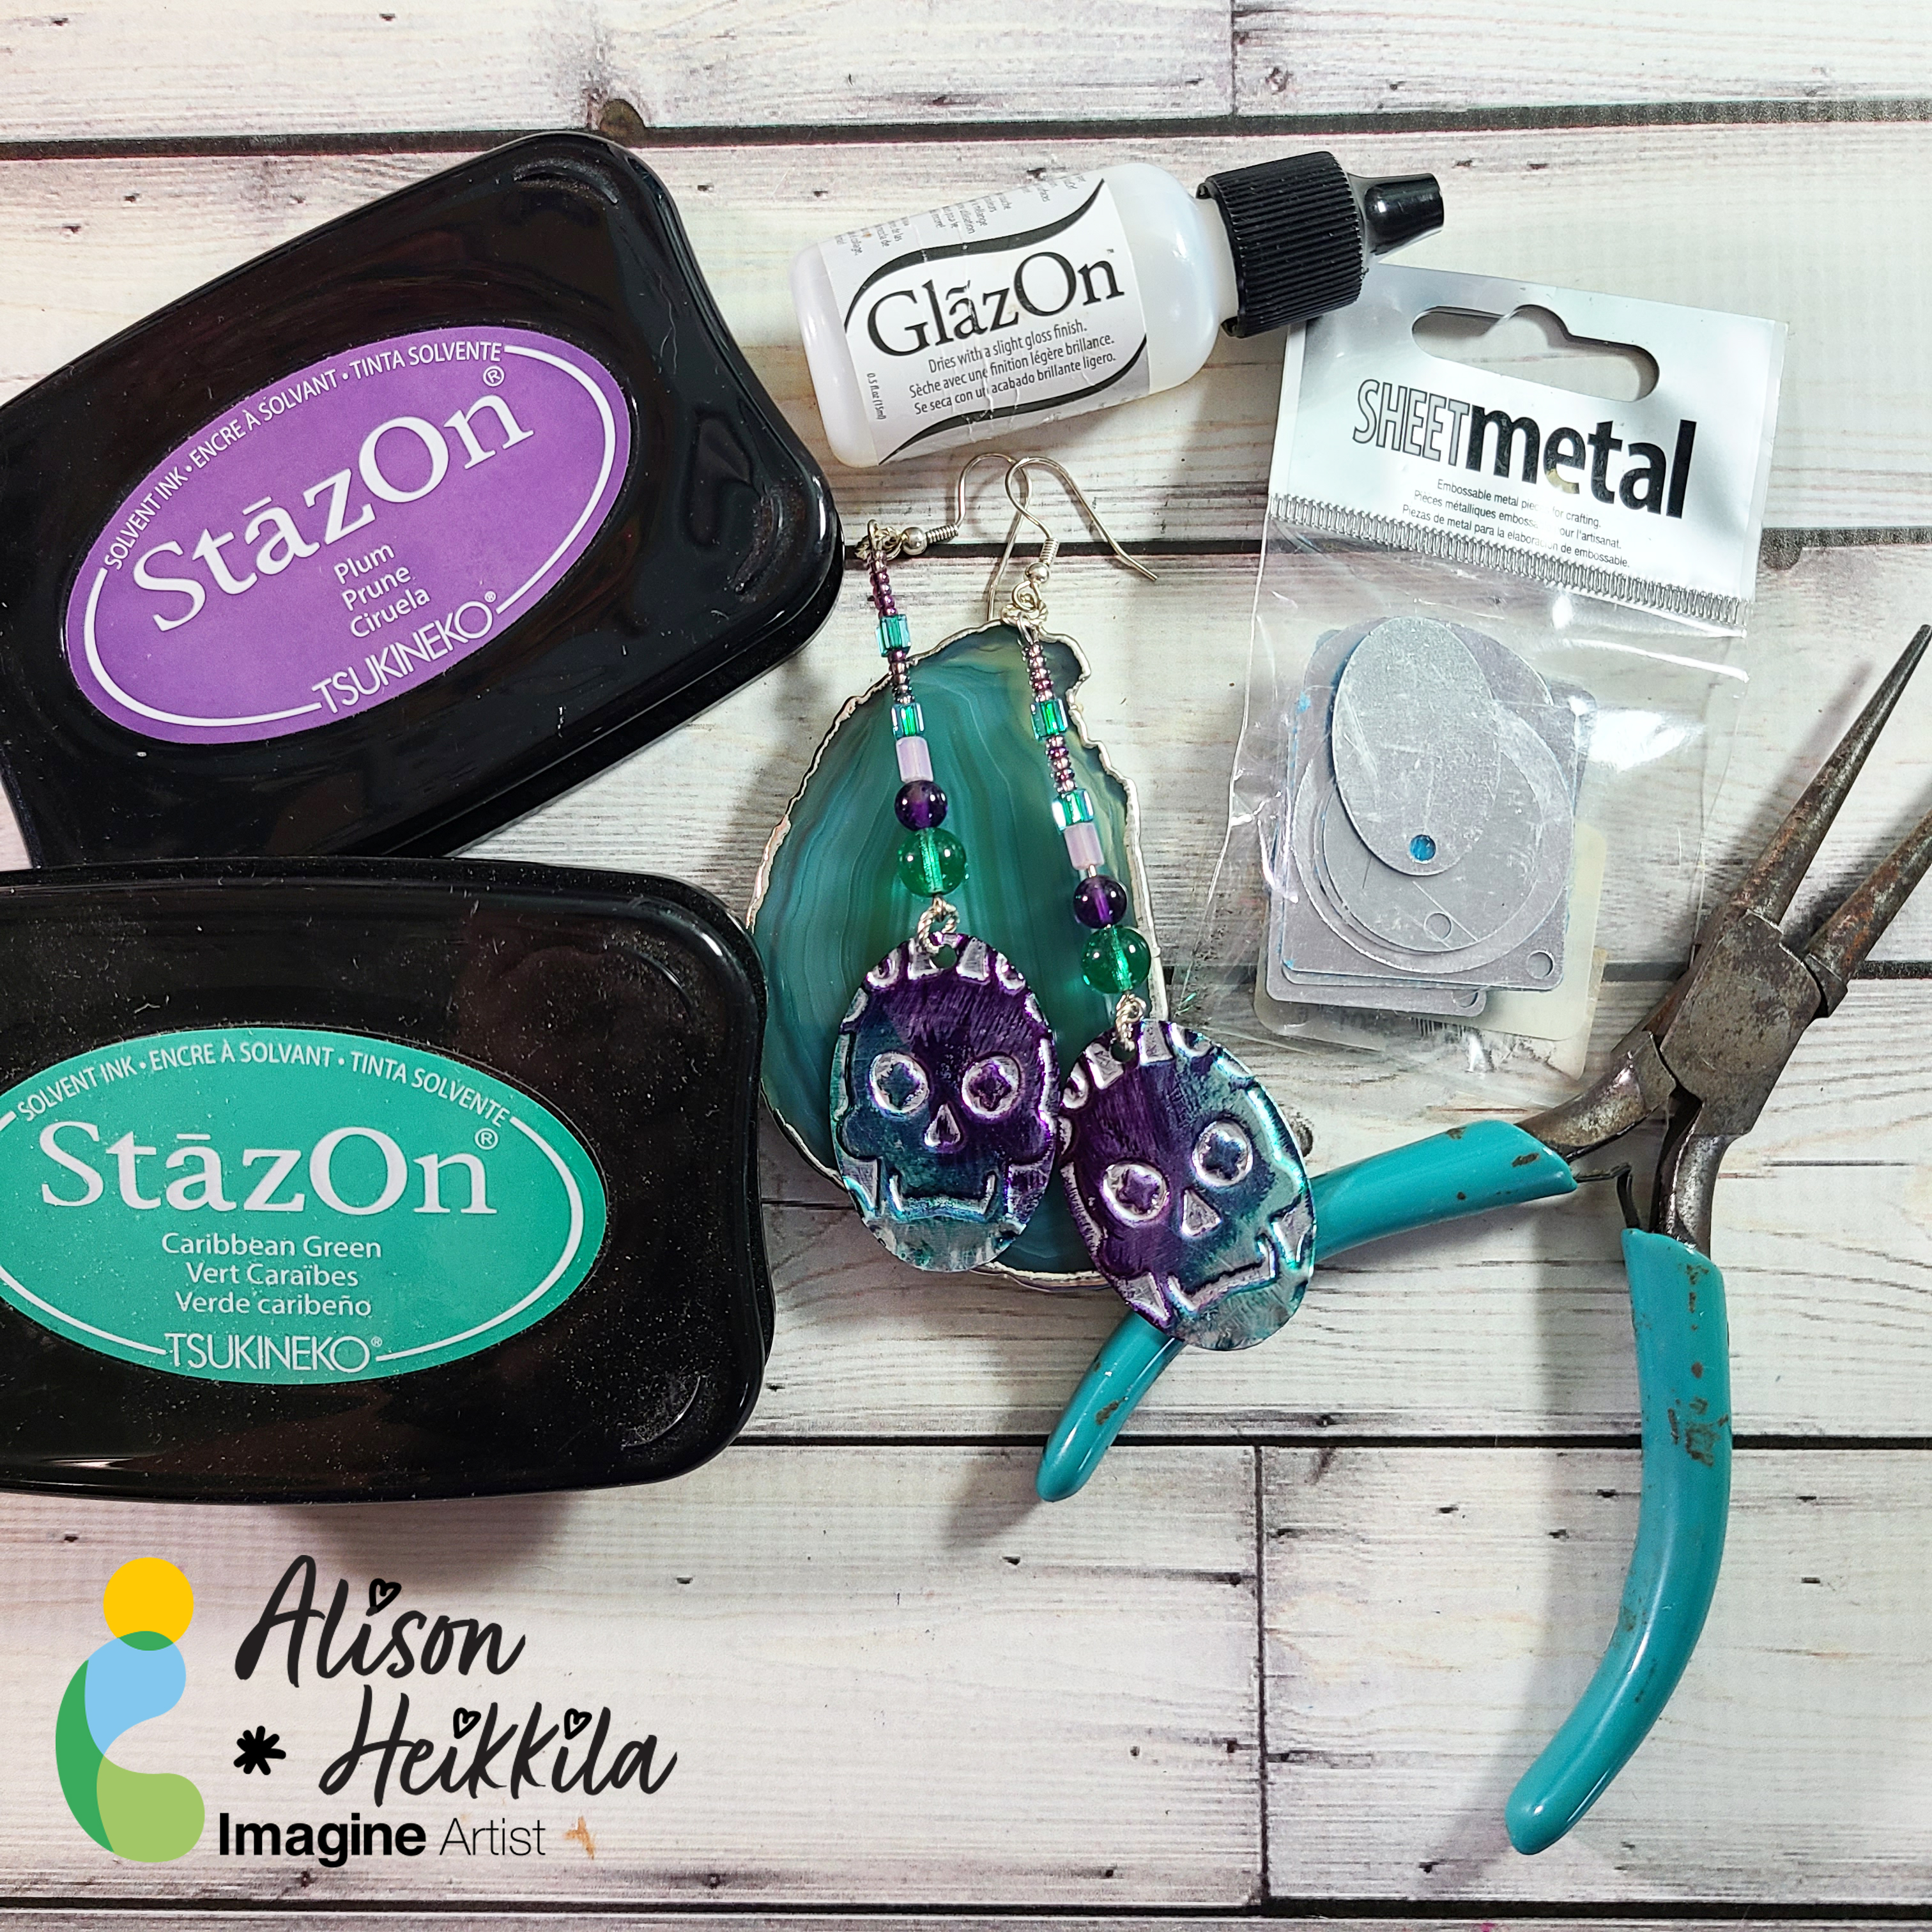
Hello! I’ve got a fun YouTube video for Imagine today that shows a fun way to use embossing folders…for jewelry! We’ll be using Sheet Metal pieces and StazOn to make fun earrings. This is a simple technique that can really be jazzed up depending on how you finish the jewelry.

Skill Level: Intermediate
Time to Complete: 20 minutes

Supplies:
Imagine:
SHEET Metal Assorted Pack
StazOn: Plum
StazOn: Caribbean Green

GlazOn: Original
Other:
Cuttlebug Midnight Hauntings Embossing Folder: No longer available. Use what you have!
Beads, eye pins, ear wires (fish hook style), jump rings, pliers.

I made them pretty long, but again, make your jewelry however you like! I love wearing long earrings with lots of movement.

I just love how these came out. I’ll definitely be wearing them all year round. I hope you give this a try and expand the use of your embossing folders. Thanks so much for stopping by. Have an inspiring day!

Have a Witchin Good Halloween Card 

2022_Annie_Sept#2_600x600

By Annie Collins –

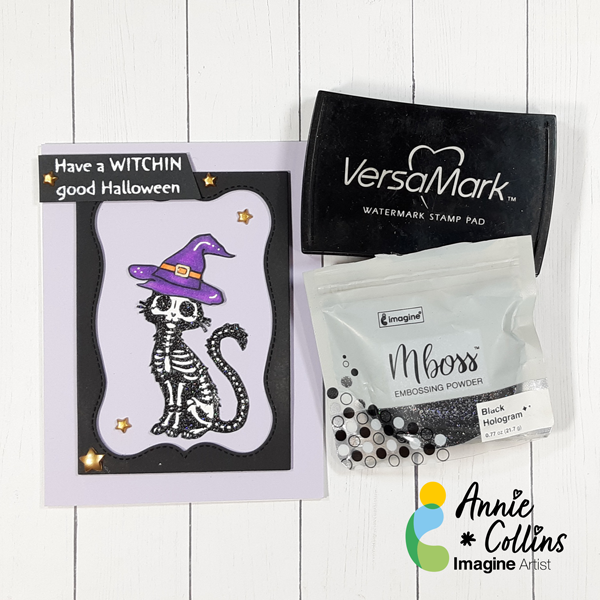
Hello Crafty Friends – Annie here with a quick and easy Halloween card featuring a variety of Imagine Crafts products.

Skill Level: Beginner

Time to Complete: 30 Minutes

Art Supplies:

Imagine:

• VersaMark Ink

• Mboss Embossing Powder: Black Hologram & White

• Memento Ink: Tuxedo Black

• Memento Marker: Tuxedo Black

• Tear It! Tape

• On Point Glue

• Imagine Craft Mat

Other products:

• Recollection Brand Stamps: Halloween Skeleton Critters

• Create & Inkspire Stamps: Halloween Sentiments

• Create & Inkspire Stamps: Halloween Icon

• Copic Marker: V12, V04, & V17

• Sakura Gelly Roll Pen # 10: White & Metallic Gold

• Recollection Brand 110lb Cardstock: White

• Recollection Brand 80lb Cardstock: Purple and Black

• Mrs. Sparkle & Co: Gold Stars

Let’s Make a Simple Trick or Treat Card

2022-LeeAnn-Oct-600_IG

By LeeAnn McKinney –

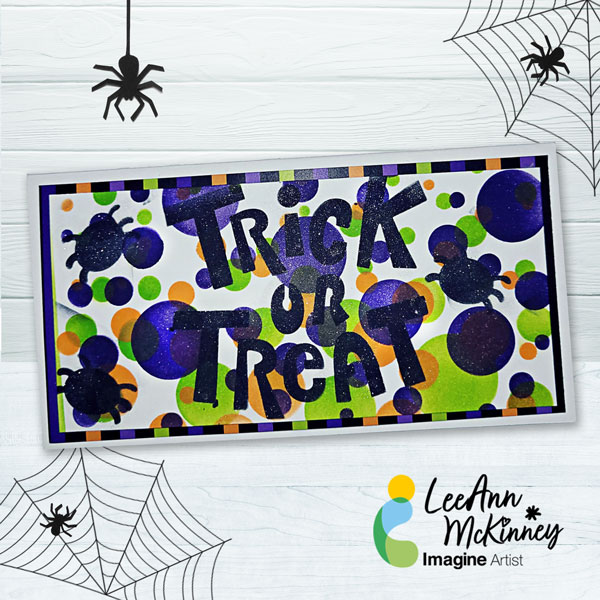
Hey there friends and Fellow Crafters, LeeAnn here with a fun stencil project using VersaFine Clair inks. I had so much fun with this project and I hope you enjoy. 

Skill level: Beginner

Time: 30 minutes

Art Supplies

Imagine:

• Imagine Craft Mat

• On Point Glue

• Tear It! Tape

• StazOn Stamp Cleaner

• VersaFine Clair Nocturne

• VersaFineClair Fantasia

• VersaFine Clair Summertime

• VersaFine Clair Verdant

• Sheer Shimmer Stix Dauber Top Sparkle

Other Products:

• Bubbles Layering Stencil from Kat Scrappiness

• Halloween Stencils from Dollar Tree

• Blender Brushes

• Accent Opaque 120lb Cardstock

Make a FABULOOOS Halloween Card

2022---September---Martha-Lucia-Gomez---Halloween-Card-1_700x700

By Martha Lucia Gomez –

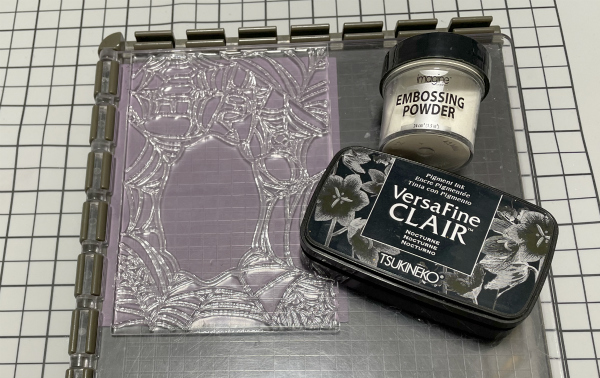
Hello there! Todays tutorial is a quick project that you can make using your Halloween stamps and the heat embossing techniques. On this, I am combined VersaFine Clair, VersaMark and Memento Inks with our traditional Embossing Powders.

Skill Level: Beginner
Time to Complete: 30  Minutes


Directions:

2022 - September - Martha Lucia Gomez - Halloween Card Step 1

 
Step 1

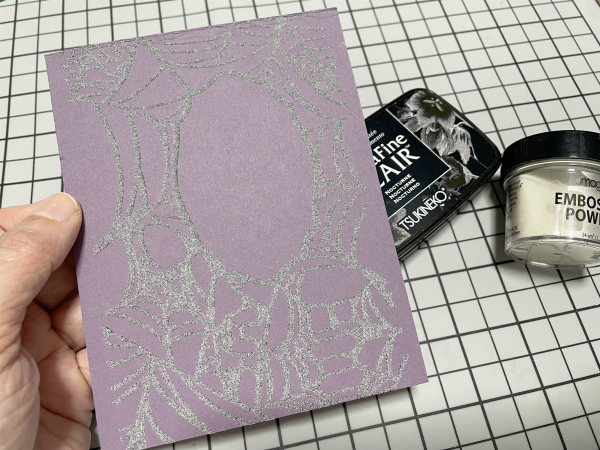
Stamp a Halloween background onto your colored card stock using VersaFine Clair Nocturne. 

2022 - September - Martha Lucia Gomez - Halloween Card Step 2
Step 2:

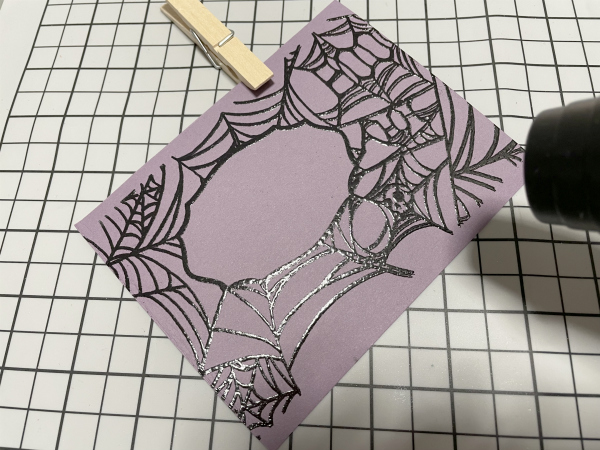
Cover the inked area with Embossing Powder and melt it with a heat tool. On this step, you can use clear embossing powder or black embossing powder.   

2022 - September - Martha Lucia Gomez - Halloween Card Step 3
Step 3:

With an Ink Blusher or sponge apply Memento Ink Grape Jelly around the stamped background.  

TIP: You can stamp your background onto white smooth cardstock and then ink all the area with your selection of Memento Ink. 

2022 - September - Martha Lucia Gomez - Halloween Card Step 4
Step 5:

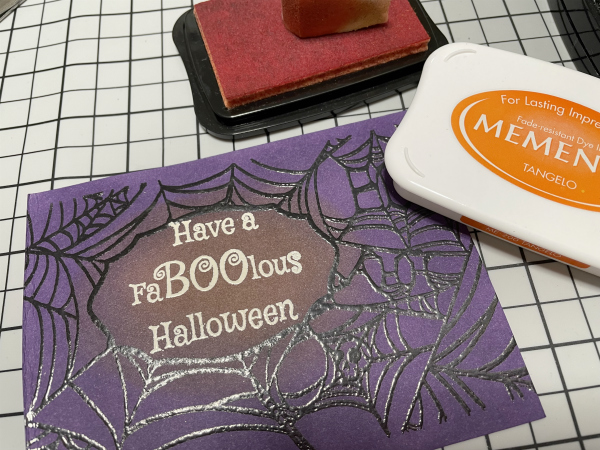
With VersaMark Ink stamp the sentiment on the center of the card and covered it with White  Embossing Powder. Melt the powder with the heat tool.

2022 - September - Martha Lucia Gomez - Halloween Card Step 6
Step 6:

Ink the center or your card using Memento Tangelo Ink.

2022 - September - Martha Lucia Gomez - Halloween Card Step 7
Step 7:

According with the stamps and colors of card stock that you used you can enhance some details using additional colors of Memento Ink. In my sample, I used purple card stock and three different colors of Memento Ink: Grape Jelly around the card, Tangelo for the Center and Paris Dusk for the corners.

2022 - September - Martha Lucia Gomez - Halloween Card Step 8
Step 8:

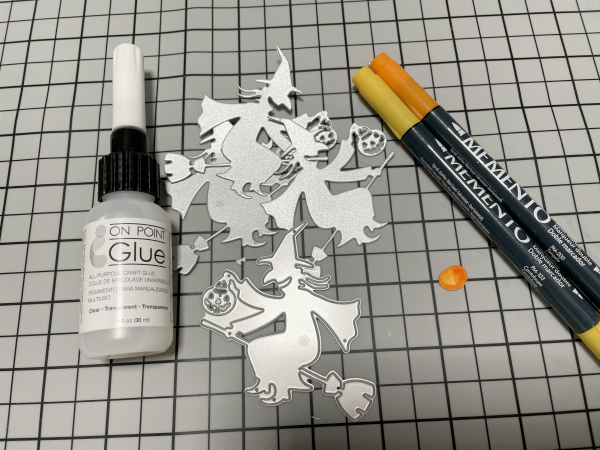
To embellish the card, you can use a coordinated die cut. I am using a witch die that I cut onto Silver Metallic cardstock three times. I layered pasted all the die cut images with On Point Glue to add more dimension. And as final touch, I gave an additional color to the face on the pumpkin using Memento Dual Tip Markers.

2022 - September - Martha Lucia Gomez - Halloween Card_700x700
Step 9:

Assemble your card pasting all the layers with Tear It! Tape or Crafty Foam Tape.

Art Supplies:

Imagine:

• VersaFine Clair – Nocturne

• VersaMark – Clear

• Memento – Grape Jelly, Tangelo and Paris Dusk

• Memento Dual Tip Markers

• Ink Blushers

• Tear it! Tape

• Craft Mat

Other:

•  Joy Clair Designs – Spiderweb Background Clear Stamp 

•  Crackerbox Stamps – Faboolous Rubber Stamp

•  Die Cut Machine

•  Positional Stamp Tool.

•  Scrapbook Adhesives Crafty Foam.

• Heat Tool

• Brayer

How to Make a Spooky Card

Crow-10-600

By Alison Heikkila –

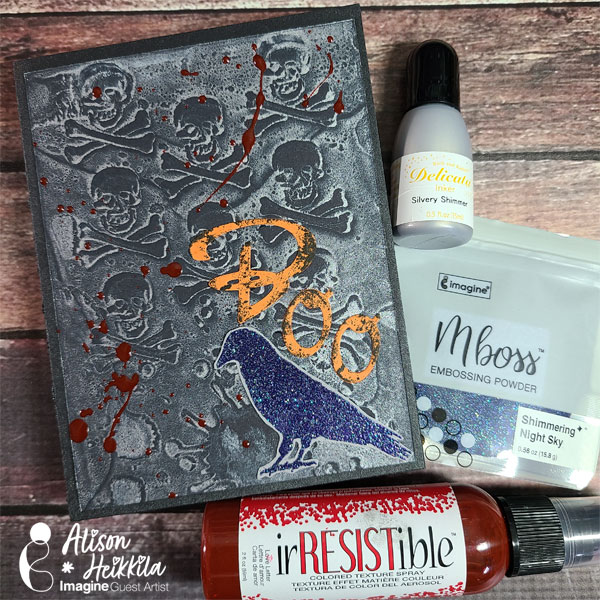
Halloween is a great time to experiment with deeper shades, interesting textures, and unique combinations. Things don’t need to be pretty or perfect…in fact, the weirder and more off-kilter they are, the better! Let’s use a variety of Imagine products to make a spooky card for Halloween.

Skill Level: Beginner to Intermediate
Time: 30 Minutes, including drying time

Directions:

Crow-1

Step 1:

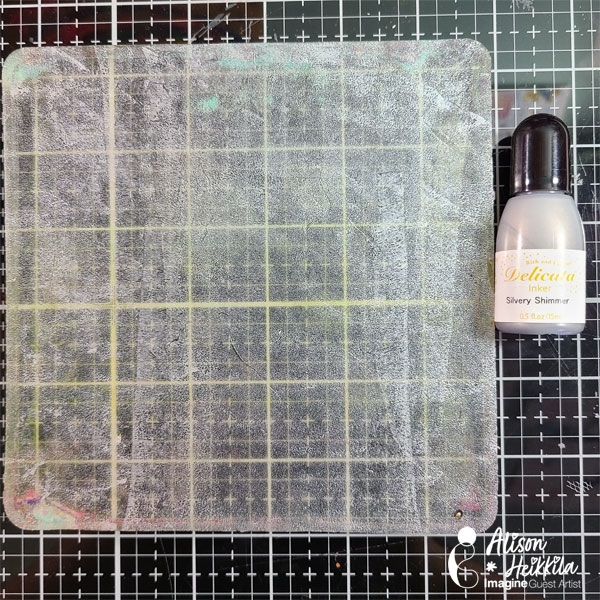
Apply Silvery Shimmer Delicata Ink Refill to a 6×6 gel printing plate and roll out with a brayer.

Crow-2

Step 2:

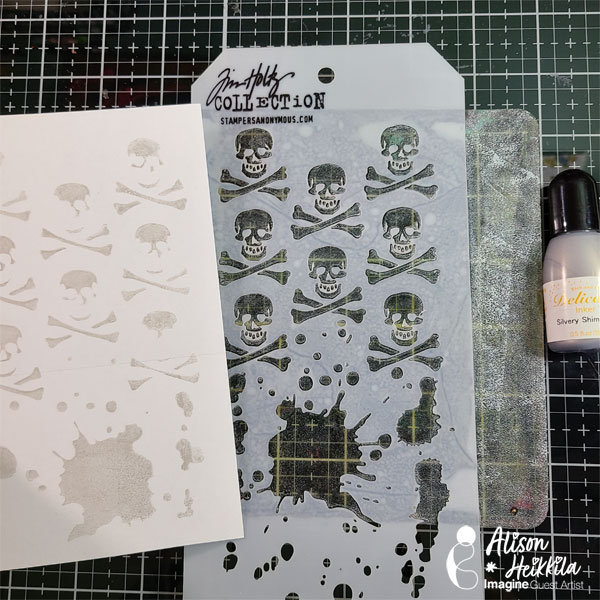
Lay your stencil on to the gel plate. Using a piece of scrap paper, rub the negative space areas to pick up the ink. Pull the print. You won’t be using this print for this project, but you can save it for another time.

Step 3:

Lift the stencil off of the plate.

Step 4:

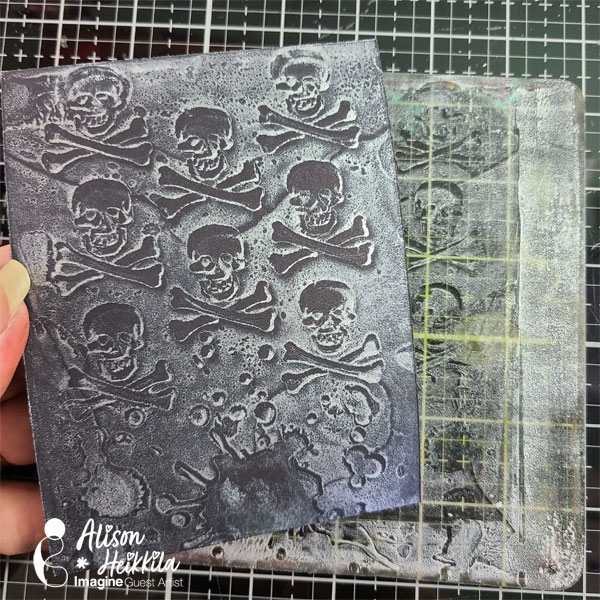
Lay a piece of 4″ x 5 1/4″ black cardstock on top of the plate, where the stenciled image is. rub the paper on to the plate firmly, making sure to rub all areas to ensure a clean pull.


Crow-3

Step 5:

Pull the print.

Crow-5

Step 6:

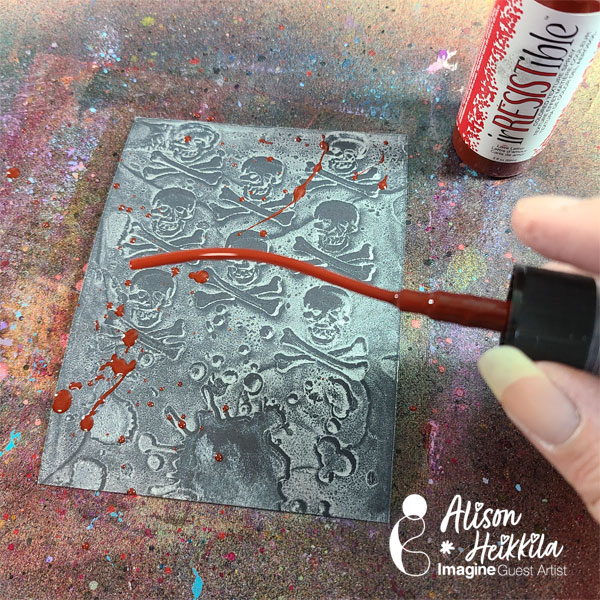
Splatter irRESISTibles Spray in Love Letter on to the gel print. I open the bottle and tap the straw to get nice, big splatters. Let dry.

Crow-4

Step 7:

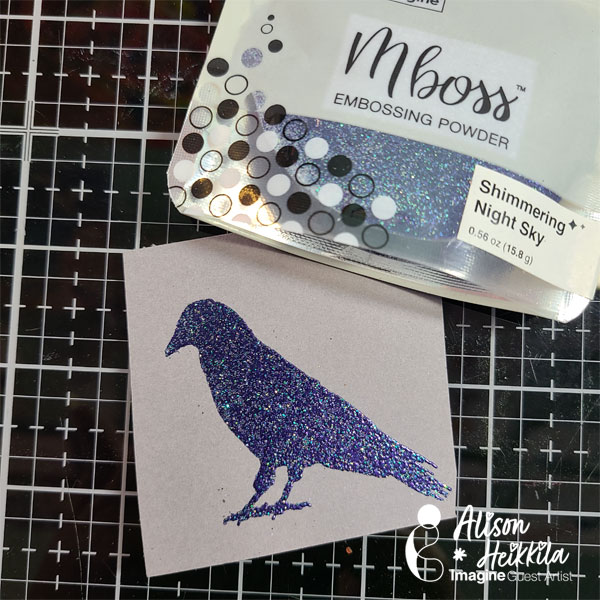
On a piece of gray cardstock, stamp a solid or silhouette image with VersaMark ink. I used a crow.


Step 8:

Sprinkle Shimmering Night Sky Mboss powder on to the inked image, tap off the excess, and heat set. Then, you can fussy cut the image out.

Crow-6

Step 9:

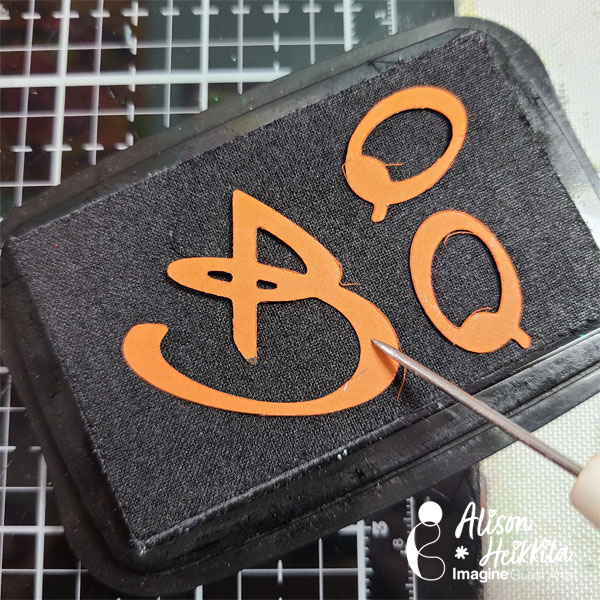
Die cut your sentiment out of a deep orange cardstock.

Step 10:

Using Tuxedo Black Memento Ink, press the front side of the letters into the pad gently. Memento ink pads have a wonderful texture, which will work perfectly with our creepy card.

Step 11:

On a black A2-sized card base, ink the edges with Black Shimmer Delicata Ink.


Step 12:

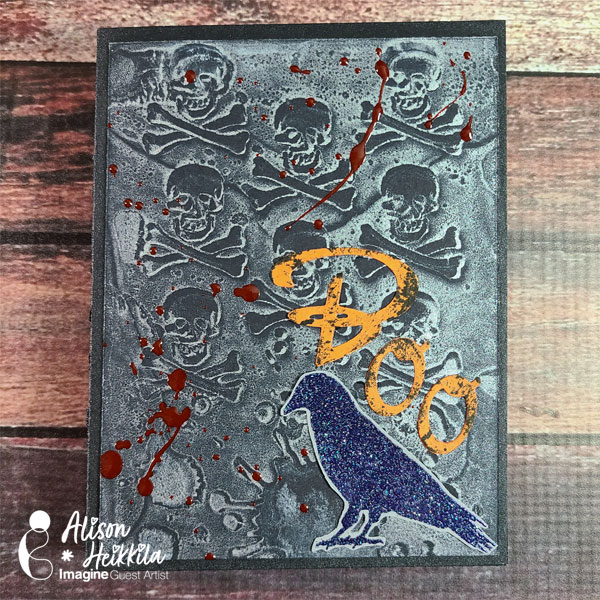
Adhere all of your elements on to the card base.


Crow-7

Art Supplies:

Imagine:

• Delicata Ink in Black Shimmer
• Delicata Reinker in Silvery Shimmer
• irRESISTible Spray in Love Letter
• VersaMark Ink
• Mboss in Shimmering Night Sky
• Memento Ink in Tuxedo Black

Other:

Black, Orange and Gray cardstock
Tim Holtz: Crossbones Stencil, Crow Stamp
6×6 Gel Printing Plate
Alphabet Dies