Create Beautiful Designs with Gold Rinea Foil and StazOn Ink

by Iris Rodriguez

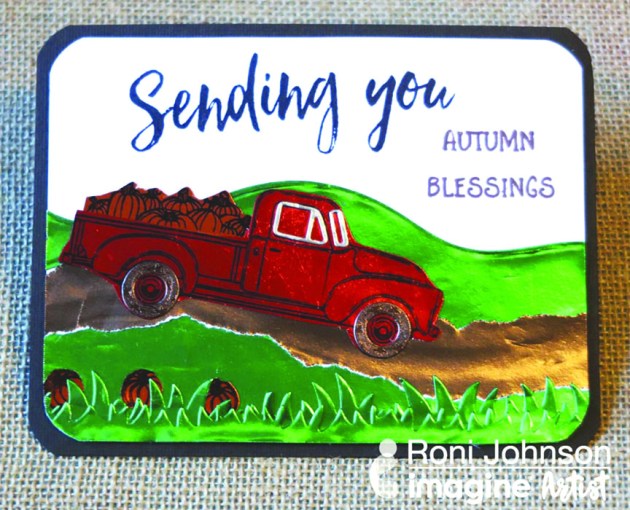
This month we have the fun challenge to make projects using Rinea foils. There are so many fun things you can do with these foils; you can stamp on it, paint, use with mediums or create 3D decorative projects. I like how the gold foil and black look together. For my card, I used Imagine’s GlazOn to seal the foil; it protects the foil and acts as a primer, which allows the ink to better adhere. I stenciled in my design with StazOn ink.

Skill: Beginner
Time: 30 minutes

Directions


Step 1

Seal the Gold Rinea foil with Light Gloss or Glossy GlazOn. It protects the foil and acts as a primer, which allows the ink to better adhere. Allow the GlazOn to dry, it dries very fast.


Step 2

Determine the size of your sentiment. I stamped the sentiment with individual alphabet stamps. If you’re doing the same, stamp the whole on a scratch piece of paper to determine the size. Rip apart a scratch piece of paper to a size that will fit the height of the sentiment, plus a little space above and below it. Place the paper about 2/3 down from the top of the foil. The paper will protect the area where the sentiment will be stamped.


Step 3

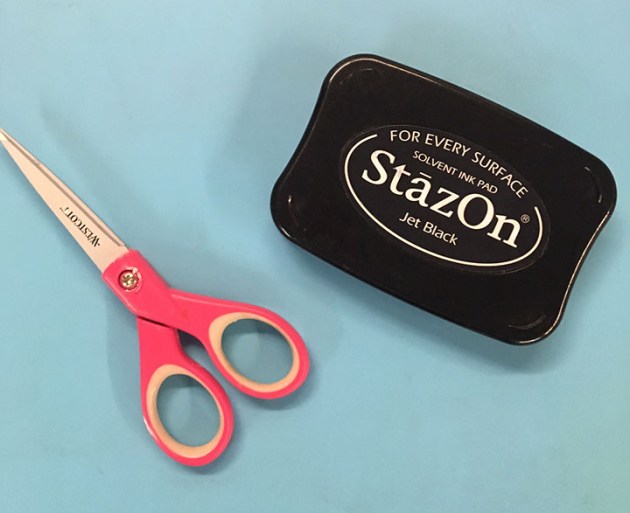
Using an InkBlusher and Jet Black StazOn ink, stencil the design onto the foil.


Step 4

Stamp the sentiment. Assemble the card. I hope you enjoyed this project and will give it a try. You can count on us to keep bringing you card making and mixed media project ideas, keep visiting the Imagine blog.

Supplies

Imagine
Other
  • Rinea Foils – Glossy Ebony and Gold Pack
  • Cardstock paper-Black
  • Crafter’s Workshop stencils- Numbers – (6×6 inches)
  • Alphabet stamps

Make a “Sending You Autumn Blessings” Greeting Card

by Roni Johnson

Make a "Sending You Autumn Blessings" Greeting Card

Autumn is my favorite time of the year so when I saw these fun stamps from Honey Bee I knew I had to have them. The pick-up is perfect for all sorts of fun scene cards. Rinea foiled papers make it that much more special. The foiled paper is so easy to stamp on using StazOn inks and can be torn, die-cut or trimmed with scissors as you see here. It’s just so much fun to add a bit of zing to your projects with Rinea Foiled Paper.

Skill: Beginner
Time: 30 minutes

Directions


Step 1

Stamp the truck onto Ruby/Gold Glossy Foiled Paper using Jet Black StazOn Ink. Fussy cut the truck; die-cut the tires from Mocha/Mocha Starstruck Foiled Paper and window detailing from Silver/Gold Glossy Foiled Paper. Adhere these accents to the pickup truck.


Step 2

Stamp pumpkin pile and individual pumpkins on Marigold/Gold Glossy Foiled Paper; fussy cut. Adhere the pumpkin pile to the truck and set the pumpkins aside. Tear a “dirt road” from Mocha/Gold Glossy Foiled Paper. Die-cut grass and hills from Emerald/Gold Glossy Foiled Paper. Adhere hills, grass and road pieces to a white card panel; affix the truck and pumpkins.


Step 3

Stamp “Sending you” with VersaFine Clair Nocturne and “Autumn Blessings” with VersaFine Clair Acorn inks on the card panel. Affix the card panel to a dark brown card blank.

Supplies

Imagine
Other
  • Rinea Foiled Paper – Autumn Variety Pack; Emerald/Gold Glossy Foiled Paper; Silver/Gold Glossy Foiled Paper
  • Honey Bee Stamps – Sending You Sentiments; Little Pick Up Stamps; Little Pick Up Dies
  • White Cardstock
  • Dark Brown
  • Card Blank
  • Adhesive

Create Paper Dresses With Stazon And Creative Medium

by Iris Rodriguez

Create Paper Dresses With Stazon And Creative Medium

I enjoy drinking tea. There is something so zen about it. The enjoyment does not have to end after tea time. Keep the tea bags to make art. You can paint and stamp on them, sew into them, and even create sculptural projects, such as these little dresses. These dresses can be used on cards, art projects, place in a shadowbox, which makes for a great home décor for young girl/lady’s bedroom or simply make for yourself.

Skill: Advanced
Time30 minutes per dress 

Directions


Step 1

Begin by allowing your tea bags to fully dry. I placed my tea bags on a ceramic plate with a paper towel and allowed them to dry for several days. The color of your tea bag will be determined by the type of tea you use. On this project, I started with a light color tea bag because it is Ginger tea.


Step 2

The tea bags are very delicate so a soft touch will be required to take them apart. Remove the tag by pulling it off. Remove the tiny staple with your nails. Rip open the seams. Take out the dried leaves by sloughing it off. Tear off the seams, otherwise, you’ll see it in your art. Do so, by tearing off the edges on the long side of the rectangle.


Step 3

The dresses will be made by using two dress patterns and gluing them at the seam, kind of like how real dresses are made. We will create one big sheet made of individual tea bags. This will be our “fabric”. One side of the tea bags will be rough, that’s where the tea leaves reside. The sheet will have one smooth side, this side is ideal for stamping. Lay the tea bags, rough side up, on a nonstick surface; wax paper or Freezer paper. Please note, in order to get one smooth side, Freezer or wax papers work the best. Brush on Creative medium and adhere the bags together by slightly overlapping them.


Step 4

Make a sheet of tea bags to the desired size. Adhere the second layer of tea bags in the exact location as the first layer. Ensure that your sheet is big enough to make two dress patterns per dress. If you want a thicker dress, add more than two layers of tea bags.


Step 5

Allow the tea bags to dry. Now you will have one single sheet of tea bags. Carefully, separate the sheet from the nonstick paper. Do this slowly, so that you don’t risk ripping the sheet. The bottom side of the sheet will be very smooth, yet you’ll still make out the tiny tea leaves granules, which look awesome. The other side will have a rough texture.


Step 6

Draw out a dress shape, or download a pattern from the internet.


Step 7

Fold the sheet in half. Using tracing paper, trace the dress on the tea bag sheet on the smooth side.


Step 8

Cut out the dress. Spray the dress with the Fireworks! Shimmery Craft Spray in Lady Bug on the smooth side.

Step 9

Stamp images on your dresses using a variety of StazOn inks.

Step 10

Glue the seams together with the On Point Glue.


Step 11

In order to give the dress dimension, strengthen the paper with Clear Creative Medium. Add saran wrap to inside to give the dress volume and brush on Creative Medium.


Step 12

Create a hanger for the dress. Measure desired hanger size against the dress. Bend the two ends of the wire at about 45 degrees. On one end, bend the wire to 90 degrees, wrap the other end around it, and bend the wire into a hook shape. Hang your dress on the hanger.


Supplies

Imagine
Other
  • Used teabags
  • Rubber Stamps
  • Freezer or wax paper
  • 16 or 18 gauge aluminum wire
  • Plyers
  • Scissors

Use Simple Shapes to Make Holiday Cards

by Jennifer Vanderbeek

Use Simple Shapes to Make Holiday Cards

There are so many cute and fun stamps and dies on the market these days for the holidays that it’s truly tough to resist them. I don’t know about you but there’s only so much room in the budget and the stamp storage to go around, so I’m always happy to come up with ways to use the things I already have and getting more mileage out of my tools and supplies. To that end, these cards use patterned stamps that are not holiday-specific and simple shapes you can cut with basic dies, punches, or even just scissors. These simple shape cards are also perfect for crafting with kids in preparation for the holidays!

Skill: Intermediate
Time: 1 hour depending on the number of cards

Directions

Supplies

Imagine

• Delicata – White Shimmer, Pink Shimmer, Ruby Red
• VersaFine – Olympia Green
• VersaMark – Champagne Dazzle
• Embossing Powder – Gold, Clear
• All-Purpose Ink – Vegas Gold
• StazOn Studio Glaze – Claret
• irRESISTibles Spray – Wedding Dress
• Fantastix – Brush Tip
• Creative Medium – Shimmer
• Palette Knives
• Tear It! Tape
• On Point Glue

Other

• Cardstock – Dark green, Green, Royal Blue, Burgundy, Cream, Yellow
• Patterned Paper – Red with White Dots
• Pencil
• Fiskars – Scissors
• Darice – Heat Tool
• Acrylic Blocks
• Stampers Anonymous – Doily Stamp
• Studio Calico – Make a Wish stamp set
• Joy Clair Stamps – Lovely Swirl Background stamp
• Our Daily Bread – Vine Background stamp
• Simon Says Stamp – Merry and Bright stamps
• Bo Bunny – Sentiments Stamp
• Marvy Uchida – Star Punch
• My Favorite Things – Pierced Oval Stax dies
• Lawn Fawn – Stitched Circle Frames dies
• Sizzix – Big Shot Plus
• Bone Folder
• Ribbons & Threads

Mythbusting – StazOn Ink & StazOn Cleaner with Clear Stamps

by Nadine Carlier

StazOn ink is a solvent ink that can be used on plastic, glass, metal, paper, and a host of mixed media surfaces and ephemera. So it is natural to assume that it might damage your stamps. We asked Nadine to talk a little bit about why StazOn is totally safe to use with any stamp set!

Supplies

Other

How to Create a Metal Stamped Look with Creative Medium

by Jennifer Vanderbeek

How to Create a Metal Stamped Look with Creative Medium in Silver and Gold

I’ve been pondering puzzle pieces lately—as a craft medium and metaphor for life. Somewhere along the mental stroll, I was reminded of the old Girl Scouts song “Make New Friends” which goes

Make new friends
But keep the old
One as silver
And the other gold

Today’s project was inspired by the way friends fit into our lives like puzzle pieces, the song, and the best friend necklaces I swapped with those close to me back in the day. Metallic silver and gold Creative Mediums and letter stamps were a perfect combination to turn a couple puzzle pieces into jewelry charms.

Supplies

Imagine
Other
  • Puzzle Pieces
  • Wooden Spoon
  • Sticky Dots
  • Paint Brush
  • Darice – Heat Tool
  • Contact USA – Letter Stamps
  • Cornstarch
  • Craft knife
  • Jewelry findings
  • Satin cord or ribbon