Make a Super Fun Birthday Party Banner

2021-jun-kyriakos-party-banner-main-wm-900

By Kyriakos Pachadiroglou

Cut some V-shape fabric pieces and decorate with large dots using MEMENTO inks and Imagine’s Jumbo Daubers. Use the Tear It! Tape to set everything in place and small round pieces of SHEET metal to add some shine and embellish this party banner.


Skill: Beginner

Time: 1 Hour


Directions:

2021-jun-kyriakos-party-banner-step1

Step 1

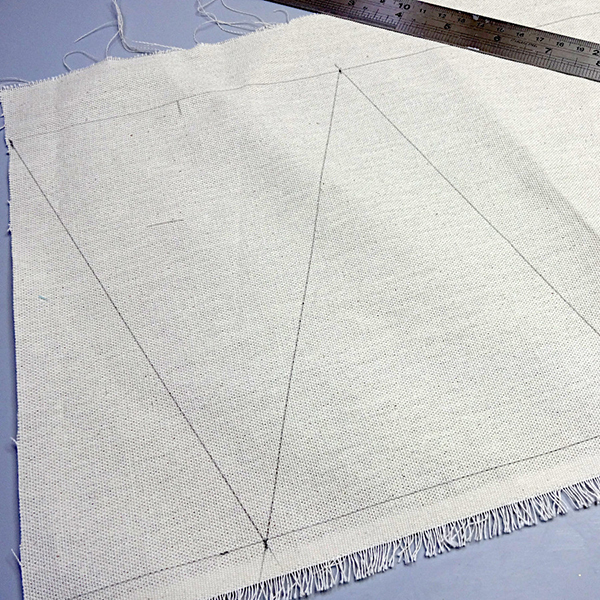
Lay the piece of fabric and mark two lines with 8″ apart of them. Mark the top every 6″. Leave 3″ from the same start point to the bottom line and mark again every 6″ and this will be the pointed edge of your flag. Mark the side lines in V shape and cut the flags.


2021-jun-kyriakos-party-banner-step2

Step 2

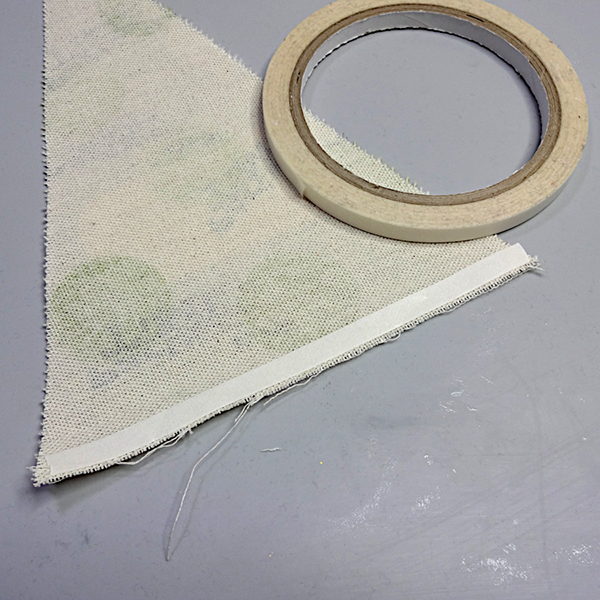
Use the Jumbo Daubers and the MEMENTO ink pads, Pear Tart, Summer Sky and Lilac Posies to make large spots just by long pressing the Jumbo Daubers on the fabric.


2021-jun-kyriakos-party-banner-step3

Step 3

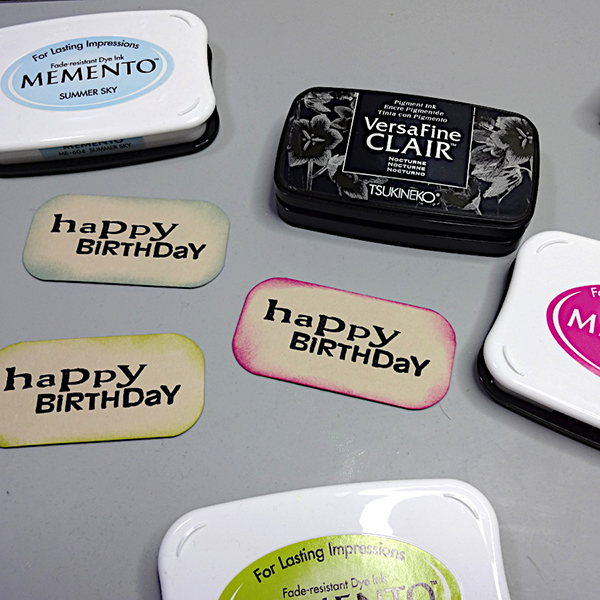
Use stamps and the VersaFine CLAIR Nocturne ink pad to randomly place sentiments on the fabric.


2021-jun-kyriakos-party-banner-step4

Step 4

Cut 3×1.5in pieces of the card stock to create tags, stamp with the happy birthday stamp and the VersaFine CLAIR Nocturne ink pad and distress the edges with the MEMENTO ink pads.


2021-jun-kyriakos-party-banner-step5
Step 5

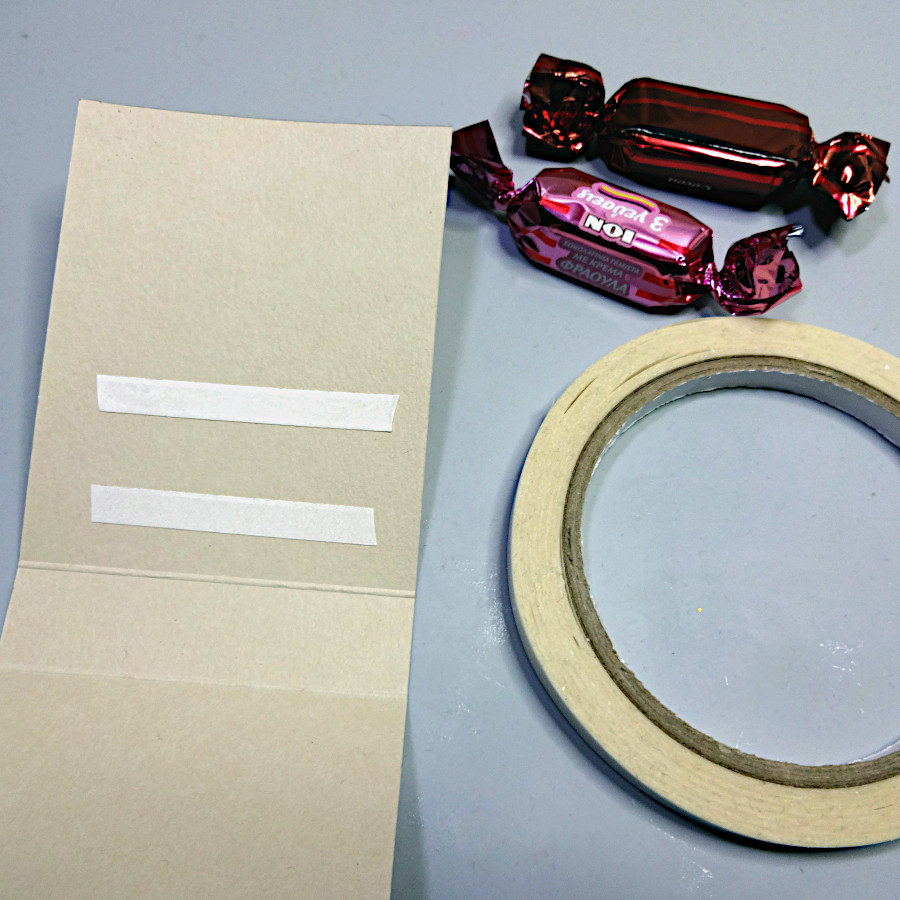
Place Tear It! Tape on the back of the tags and place them on the flags.


2021-jun-kyriakos-party-banner-step6
Step 6

Add Tear It! Tape to the top edge of the back side of the flag and fold to the size of it.
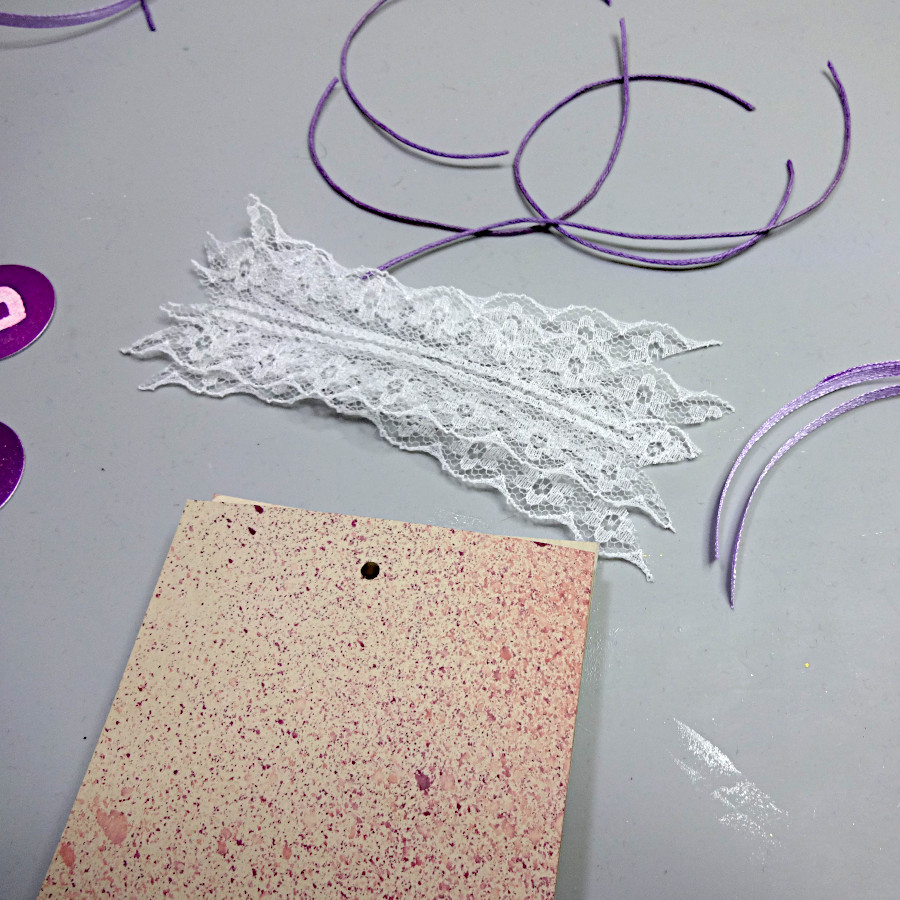
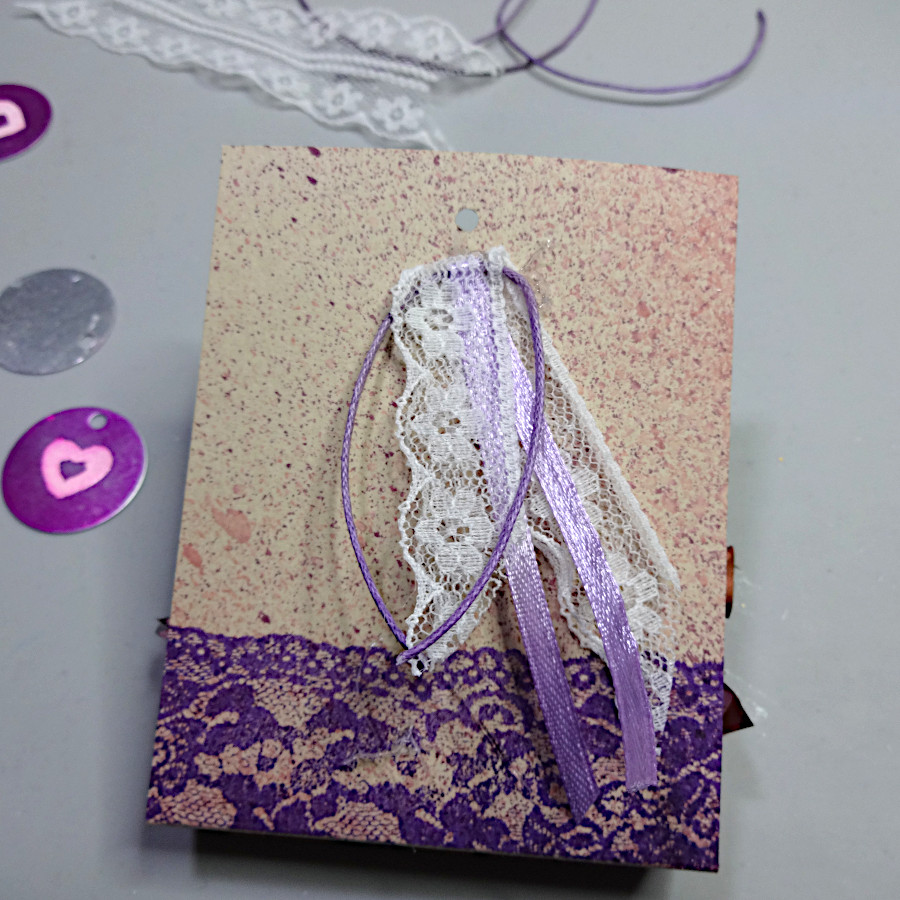
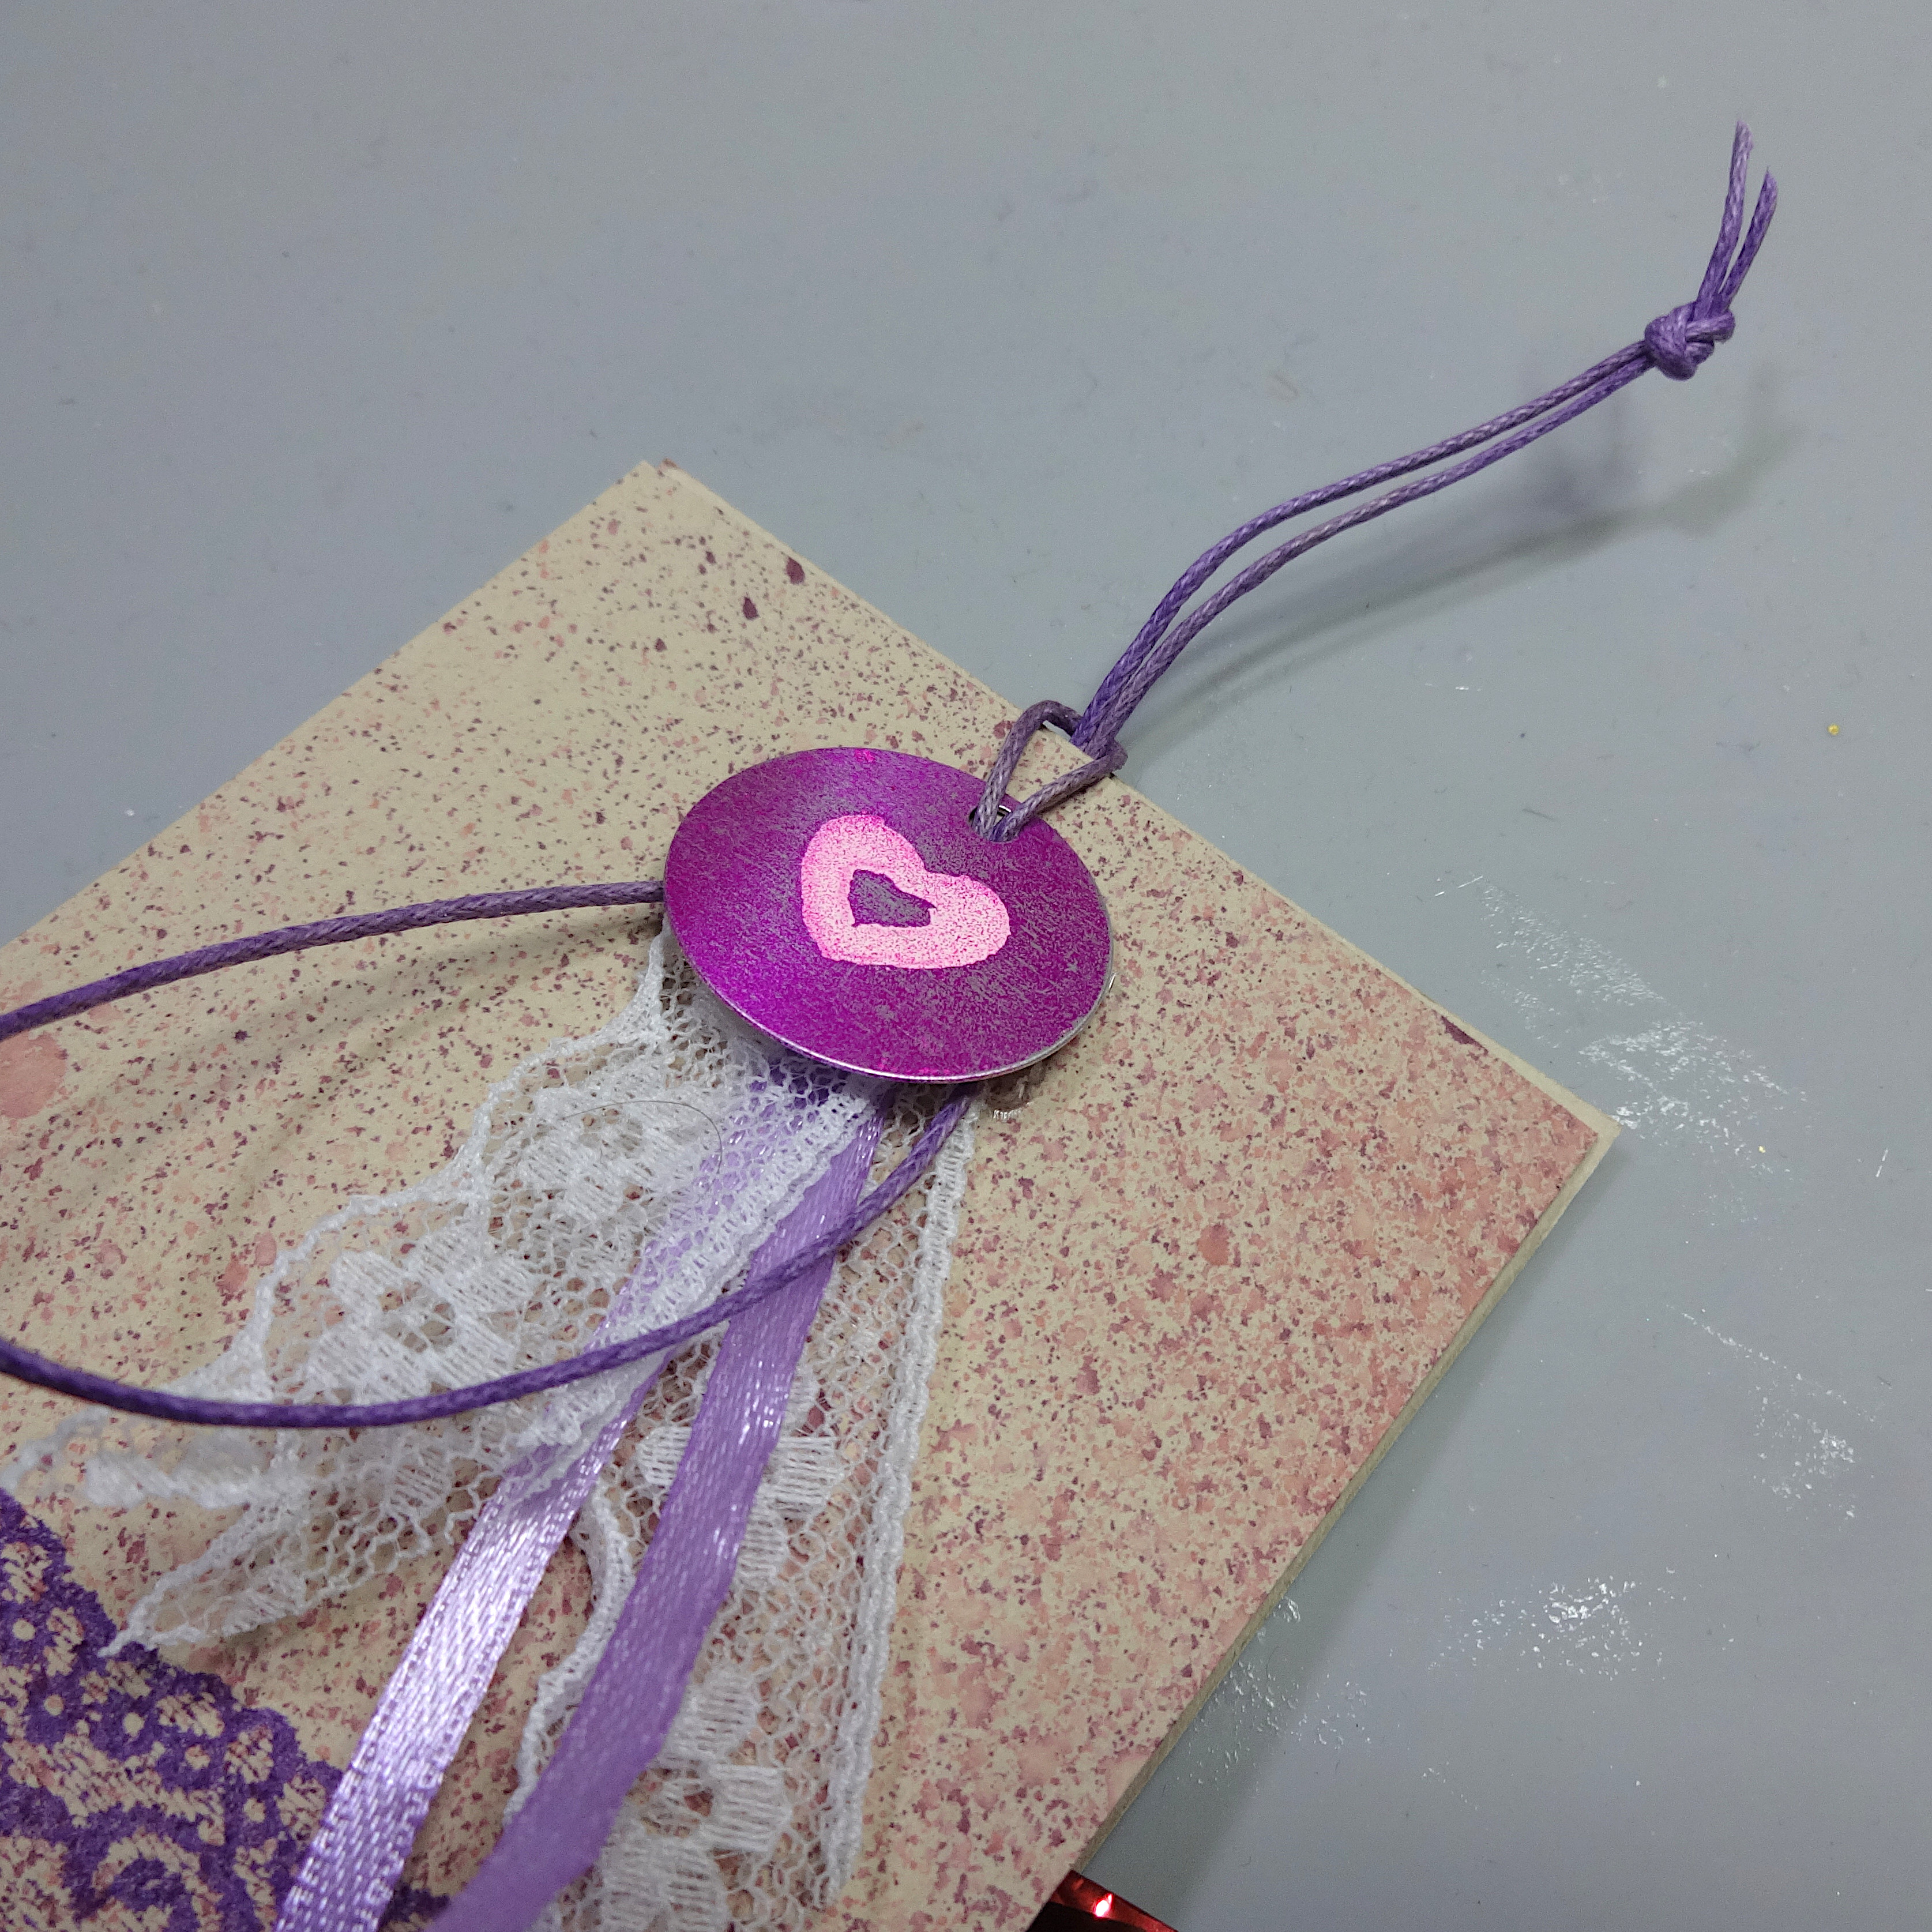
 

2021-jun-kyriakos-party-banner-step7

Step 7

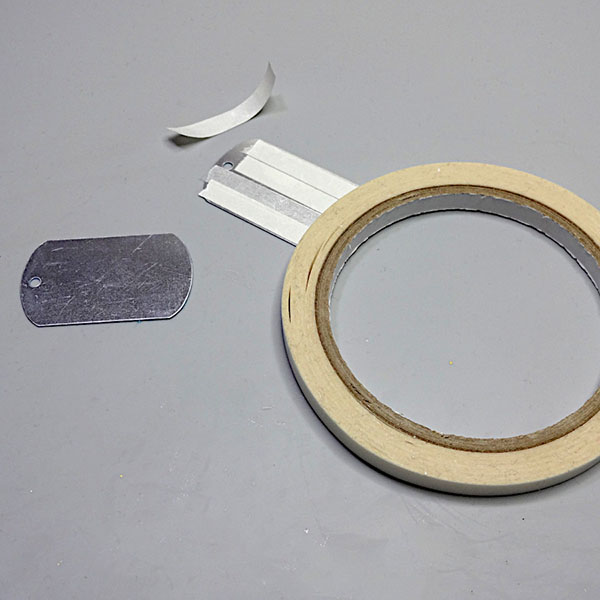
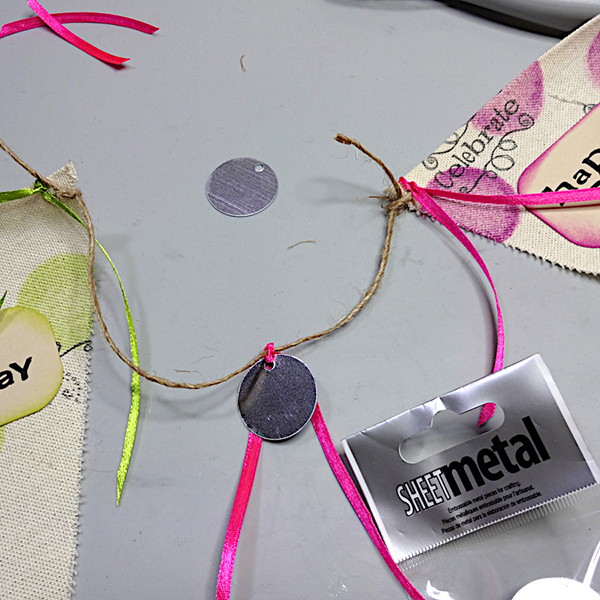
Open holes to the flags, tie a 7″ long piece of jute cord to connect the flags and add ribbons and round SHEET metal pieces in the middle of each cord.


Art Supplies:

Imagine

SHEET metal – 1 inch

MEMENTO ink pads – Pear Tart, Summer Sky and Lilac Posies

VersaFine CLAIR – Nocturne

Jumbo Daubers

Tear It! Tape


Other

Card stock in natural color

Cotton fabric / canvas

Ribbons

Jute cord

Celebrations stamps

Ruler

Scissors

Round hole punch (optional)

Corner punch (optional)


Make a Star-Spangled Independence Day Card

2021-jun-kyriakos-celebrate-card-main-wm-900

By Kyriakos Pachadiroglou

Celebrate Independence Day with an easy to make Kraft paper card, using Walnut Inks and adding some shimmer with Delicata inks.


Skill: Beginner

Time: 30 Minutes


Directions:

2021-jun-kyriakos-celebrate-card-step1

Step 1

Damp the Jumbo Daubers with the Walnut Inks and press them to the edges of a 4×6 inch white card stock to create a thick line.


2021-jun-kyriakos-celebrate-card-step2

Step 2

Use a large Stipple Brush to add strike shimmering color from the Delicata ink pads, Sapphire Blue and Ruby Red on the above lines.


2021-jun-kyriakos-celebrate-card-step3

Step 3

Cut a star from a piece of Kraft card stock and stamp stars with the VersaColor White ink pad.


2021-jun-kyriakos-celebrate-card-step4

Step 4

Cut 5 inch long pieces of the gingham ribbons and add Tear It! Tape.


2021-jun-kyriakos-celebrate-card-step5
Step 5

Place the ribbons to form an X shape and stamp upon them with the VersaFine CLAIR Nocturne ink pad and the Sunshine stamp.


2021-jun-kyriakos-celebrate-card-step6
Step 6

Stamp the “CELEBRATE” sentiment with the VersaFine CLAIR Nocturne, cut around and place it on a bit larger Kraft color paper cutting.


2021-jun-kyriakos-celebrate-card-step7

Step 7

Set the sentiment with Tear It! Tape and then on a card base.


Art Supplies:

Imagine

Walnut Ink – Cherry Blossom, Cornflower

VersaColor – White

VersaFine CLAIR – Nocturne

Delicata – Sapphire Blue, Ruby Red

Stipple Brush

Jumbo Daubers

Tear It! Tape


Other

Card stock

Gingham ribbon – blue, red

Darkroom door stamp – Sunshine

Star stamp

Celebrate stamp

Make a Key Holder with Metal Dog Tags

2021-may-kyriakos-dog-tag-key-holder-main-wm-900

By Kyriakos Pachadiroglou

Use two SHEETmetal dog tags to easily make a key holder that is colored with StazOn inks. Attach metallic gears and charms on the tags using Goosebumps texture spray that works as a glazing medium too.


Skill: Beginner

Time: 30 Minutes plus drying time


Directions:

2021-may-kyriakos-dog-tag-key-holder-step1

Step 1

Place Tear It! Tape on one of the two SHEET Metal tags and glue together.


2021-may-kyriakos-dog-tag-key-holder-step2

Step 2

Remove the protective film and with the help of the sponge daubers color the surface using the StazOn Ultramarine, Timber brown and Black cherry ink pads.


2021-may-kyriakos-dog-tag-key-holder-step3

Step 3

Let it dry for a few seconds and secure the colors with a layer of GlazOn using an InkBlusher.


2021-may-kyriakos-dog-tag-key-holder-step4

Step 4

Deep a wooden stick in the bottle of the GooseBumps and place a thick layer of the medium on the tag. Place the charms and let it dry.


2021-may-kyriakos-dog-tag-key-holder-step5
Step 5

Color further the metallic charms with the StazOn ink pads and again secure with the GlazOn.


2021-may-kyriakos-dog-tag-key-holder-step6
Step 6

Add a chain or a key holder lobster and a ring.


Art Supplies:

Imagine

SHEET Metal – Dog Tags

StazOn – Ultramarine, Timber brown, Black cherry

GooseBumps Dauber Top Bottle – Original

GlazOn – Clear

InkBlushers

Sponge Daubers

Tear It! Tape


Other

Metallic gears and charms

Ring and lobster lock for key holder

Make an Elegant Happy Father’s Day Card

2021-may-kyriakos-happy-fathers-day-card-main-900

By Kyriakos Pachadiroglou

Match a few colors and an elegant sparkling background using the Mboss New Year’s Eve embossing powder to make a special card for Father’s day. Contrast among black and white with a touch of gold give a smart look on the card that can be made by anyone.


Skill: Beginner

Time: 45 Minutes


Directions:

2021-may-kyriakos-happy-fathers-day-card-step1

Step 1

Stamp in a repetitive pattern the diamond chain stamp on a 4x6in card stock using the VersaMark Watermark Ink pad. Cover with the Mboss New Year’s Eve embossing powder and heat set to create the background.


2021-may-kyriakos-happy-fathers-day-card-step2

Step 2

On a 4.5″ x 2″ piece of cardstock stamp the Happy Father’s Day sentiment on the lower part of it and on a small piece of cardstock the tie using the VersaMark Watermark Ink pad. Cover with gold Mboss Embossing Powder and heat set.


2021-may-kyriakos-happy-fathers-day-card-step3

Step 3

Color the inner part of the stamped tie with All-Purpose Ink Vegas Gold and cut around the design.


2021-may-kyriakos-happy-fathers-day-card-step4

Step 4

Cut a 2″ piece of the gingham ribbon and fold the two edges to the low middle of it to form a collar shape. Glue it on the long piece of the cardstock and add the stamped tie with some foam tape.


2021-may-kyriakos-happy-fathers-day-card-step5
Step 5

Cut 4″ long pieces of the ribbons and set together with Tear It! Tape.


2021-may-kyriakos-happy-fathers-day-card-step6
Step 6

Finally usually Tear It! Tape to set the ribbons on the background and continue adding the long cardstock piece.


Art Supplies:

Imagine

VersaMark Watermark Stamp Pad

Mboss Embossing Powder – Gold, New Year’s Eve

All-Purpose Ink – Vegas Gold

Tear It! Tape


Other

Grosgrain ribbon

Gingham ribbon

Crafty Secrets stamps – Favourite Fellas

Heat tool

Card stock

Hot glue

Foam tape

How to Make Little Paper Bags for Wedding and Party Favors

2021-apr-kyriakos-party-favors-bags-main-wm 2

By Kyriakos Pachadiroglou

Decorate folded into bag paper cuttings that are distressed with Walnut Inks and stamped with a lace design using MEMENTO ink. Add a round SHEET metal charm with an embossed heart on it. Add sweets in the bags and place them in baskets, on side tables or hang them on branches in a large vase.

Skill: Beginner

Time: 30 min

Directions:

2021-apr-kyriakos-party-favors-bags-step1

Step 1

Cut 8×3″ pieces (~half of an A5)of the cardstock and spray them with Ink Potion No 9. While still wet, spray with the Walnut Inks Cherry Blossom and Lilac in some distance from the papers.


2021-apr-kyriakos-party-favors-bags-step2
Step 2

Let them dry (or speed up the process with a heat tool), mark the center (long side) and score ¾in from the center left and right.


2021-apr-kyriakos-party-favors-bags-step3

Step 3

Stamp the lace stamp with MEMENTO Grape Jelly ink pad.


2021-apr-kyriakos-party-favors-bags-step4

Step 4

Color the round SHEET Metal pieces with the StazOn Royal Purple.


2021-apr-kyriakos-party-favors-bags-step5

Step 5

When the ink dries, stamp a heart with the VersaMark ink pad, cover with Mboss White Embossing Powder and heat set.


2021-apr-kyriakos-party-favors-bags-step6

Step 6

Add Tear It! Tape to the inner if the card cuttings and place the sweets (flat ones will fit better and they can be any shape (like hearts, squares).


2021-apr-kyriakos-party-favors-bags-step7

Step 7

Punch a hole to the folded sides and cut 4″ long pieces of the lace, the ribbon and and the cord.


2021-apr-kyriakos-party-favors-bags-step8

Step 8

Fold in half the above cuttings and glue them just below the punched hole.


2021-apr-kyriakos-party-favors-bags-step9

Step 9

Add the round SHEET Metal charm with some cord (which can be also used to hang the paper bag).


Art Supplies

Imagine

MEMENTO – Grape Jelly

Walnut Ink – Cherry blossom, Lilac

Ink Potion No.9

SHEET Metal – Round 1″

Tear It! Tape

Sponge Daubers

Mboss Embossing Powder – White

VersaMark – Original

 
Other materials

250g/m2 – 115 lb Cardstock Natural

Kaiserkraft Stamp – Lace

Heart Stamp

Hole Punch

Heat Tool

Hot Glue

Lace, Ribbon, Cord

Sweets


Learn How to Stamp Clay to Make a Jewelry Charm

2021-apr-kyriakos-stamped-clay-charm-main-wm

By Kyriakos Pachadiroglou

Metallic frames, usually used for epoxy, can work nicely to form clay and make jewelry pieces. Mix Walnut ink for a soft, pale shade to create a marble effect ink to the clay. Then stamp with any design using StazOn ink pads that will quickly dry, won’t bleed and give a sharp outcome. StazOn will also allow you to use markers and won’t mix with them. Add some sparkle with SHIMMER Spritz and secure the result with a coating of GlazOn. Use the charm as a jewelry piece or to decorate your cards and crafts.


Skill: Beginner

Time: 30 minutes plus drying time


Directions:

2021-apr-kyriakos-stamped-clay-charm-step1

Step 1

Separate two pieces of clay and color the one with Walnut Ink. Mix together.


2021-apr-kyriakos-stamped-clay-charm-step2

Step 2

Lay flat  the clay and place the frame. Remove the excess and let it dry.


2021-apr-kyriakos-stamped-clay-charm-step3

Step 3

Remove the clay from the frame and stamp with StazOn ink pad.


2021-apr-kyriakos-stamped-clay-charm-step4

Step 4

Add some color with a MEMENTO marker (or none, if you want to leave it just with the stamped image).


2021-apr-kyriakos-stamped-clay-charm-step5
Step 5

Spray with the SHIMMER Spritz Sparkle and let it dry.


2021-apr-kyriakos-stamped-clay-charm-step6
Step 6

Secure the result and add some shine with GlazOn.


2021-apr-kyriakos-stamped-clay-charm-step7

Step 7

Place On Point Glue to the inner sides of the metal frame. Let it sit for a few minutes and place the stamped clay. Add cord or chain according to your style.


Art Supplies:


Imagine

Walnut Ink – Lilac

StazOn – Royal Purple 

MEMENTO Marker – Lulu Lavender

SHIMMER Spritz – Sparkle

GlazOn – Clear

On Point Glue

InkBlushers


Other

Jewelry Metal Frame

Air Dry Clay

Rubber Stamps of your Choice

  •