Make a Fun Summertime Watermelon Slice Mason Jar

2021_05_Roni_WatermelonSliceMasonJar_Main05

By Roni Johnson

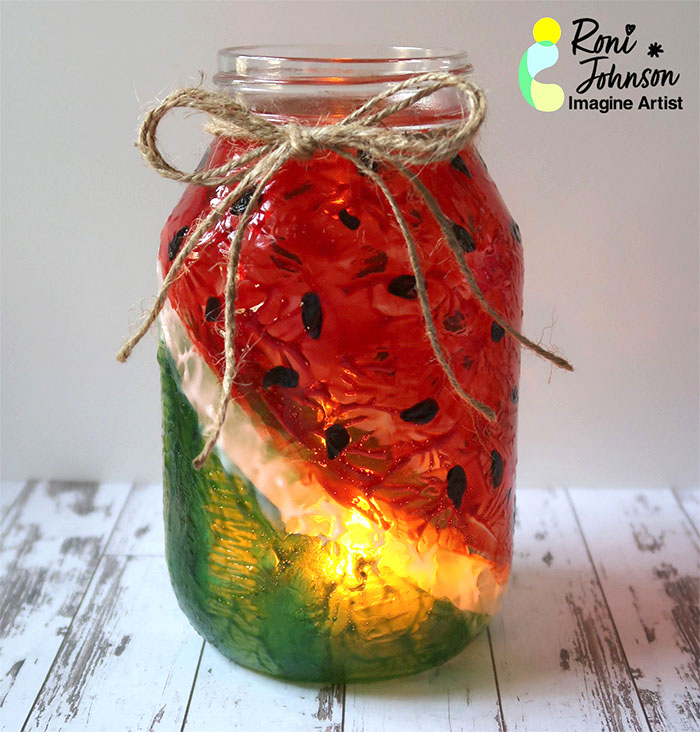
It’s finally beginning to look like summer! To welcome in the season I have a fun project to add cheer to your picnics, BBQ’s or anywhere you are going to gather. A multi-use Watermelon Slice Mason Jar – it can be used as a vase for fresh flowers, a handy organizer to hold forks, knives and spoons or even a fun lantern for late-night get together. It will add a fun fruity element no matter how you choose to use it.

Skill: Beginner

Time: 35 minutes + Dry Time

Directions:

2021_06_Roni_WatermelonSliceMasonJar_Instructions_Step02

Step 1

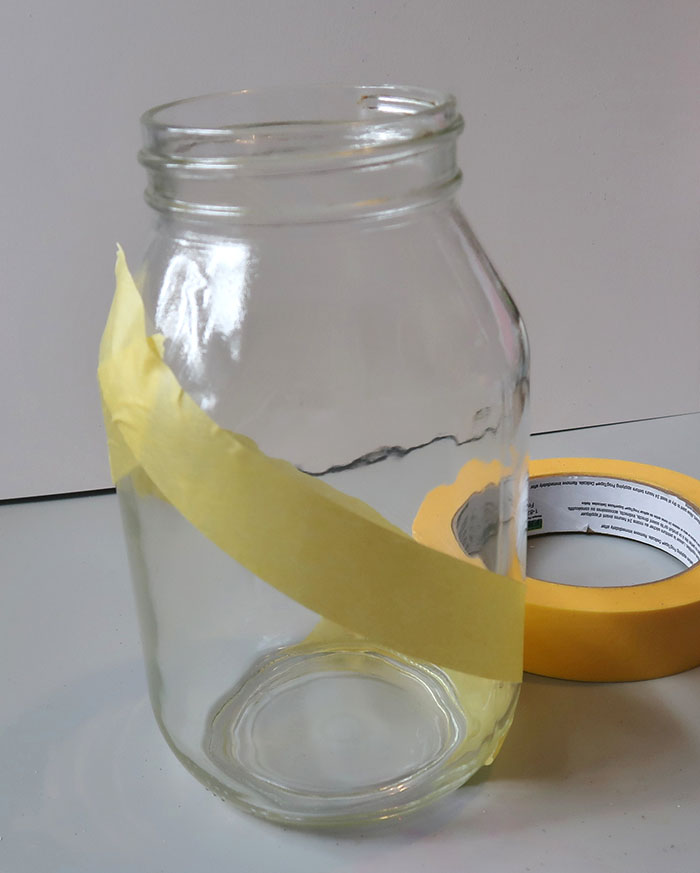
Wash and dry the mason jar.

Step 2

Tape off a diagonal design using painters tape as shown.


2021_06_Roni_WatermelonSliceMasonJar_Instructions_Step03

Step 3

Draw a zigzag vertical line using the Cotton White StazOn Studio Glaze leaving ¾” – 1” between lines and let dry.


2021_06_Roni_WatermelonSliceMasonJar_Instructions_Step04

Step 4

Apply one or more layers of Cactus Green StazOn Studio Glaze over the taped off section of the jar. For the example I applied one layer over the entire area and a second layer between the zigzag stripes to create the dark and light green stripes found on a real watermelon.

Step 5

Remove the painters tape. You may need to use an exacto knife on stubborn areas of the tape.


2021_06_Roni_WatermelonSliceMasonJar_Instructions_Step06


Step 6

Use Cotton White StazOn Studio Glaze to create a ½” wide border around the edge of the green watermelon rind.
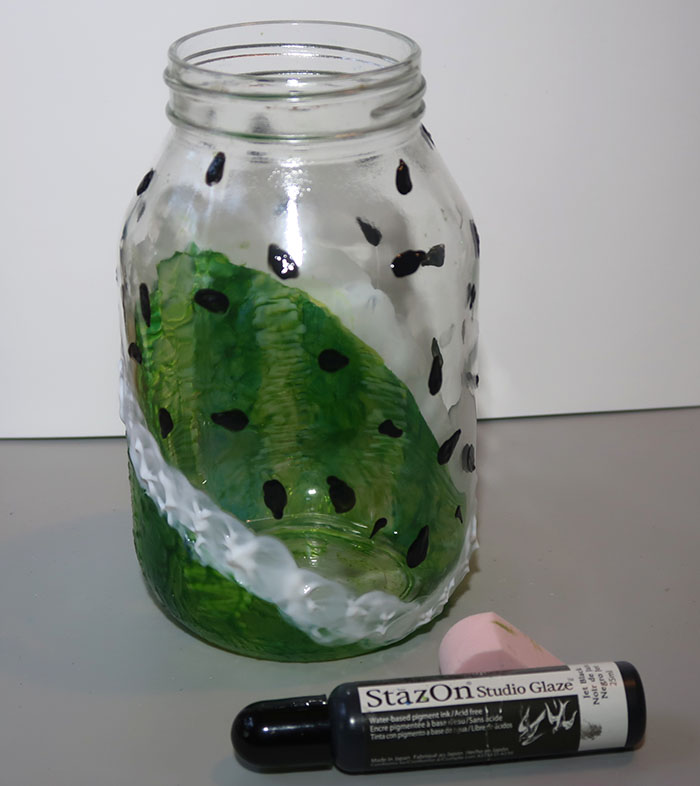
 

2021_06_Roni_WatermelonSliceMasonJar_Instructions_Step07


Step 7

Draw watermelon seeds over the remainder of the jar using Jet Black Studio Glaze and let them dry completely.
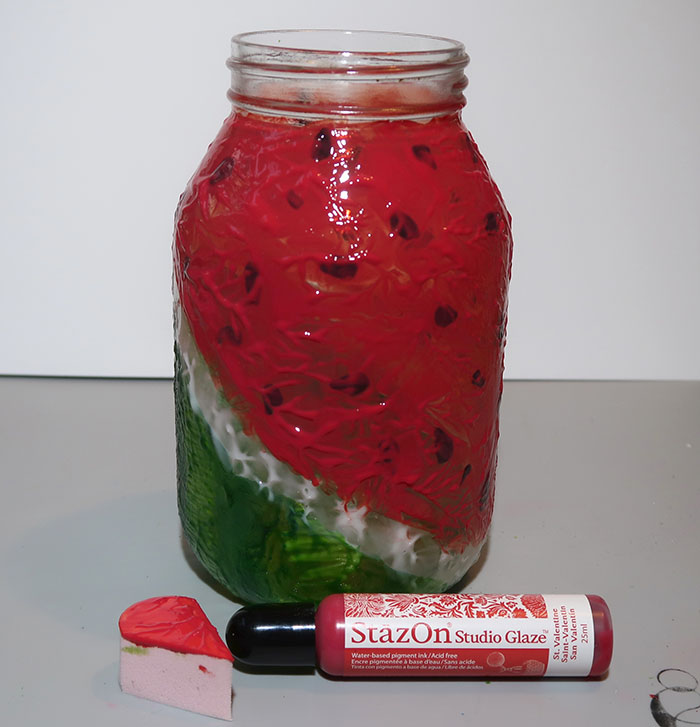
 

2021_06_Roni_WatermelonSliceMasonJar_Instructions_Step08

Step 8

Apply St Valentine’s StazOn Studio Glaze to the upper portion of the jar covering the watermelon seeds as you go. Let this layer dry completely.
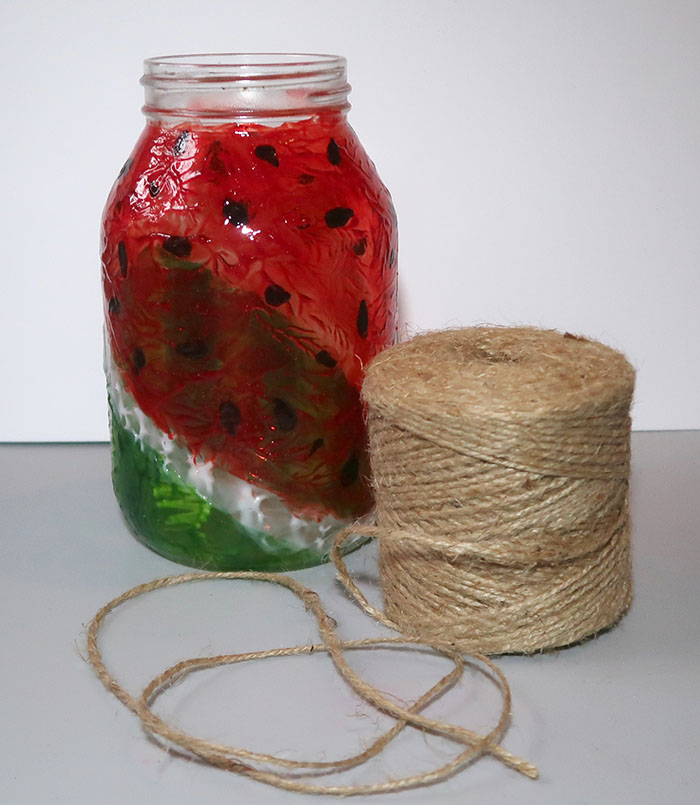
 

2021_06_Roni_WatermelonSliceMasonJar_Instructions_Step09


Step 9

Finish off the project by adding a bow around the neck of the jar.


2021_05_Roni_WatermelonSliceMasonJar_Main01


Art Supplies:

Imagine
Other
  • Mason Jar
  • Jute Twine
  • Battery Operated Tea Light

Learn How to Make a Quick Father’s Day Card


By Neva Cole 

Today I will be demonstrating how to make a quick multi-layered card using three stamps and VersaColor and StazOn inks.  This tone on tone card is a simple way to create a wonderful card for the Father in you life.


Skill: Beginner

Time: 30 Minutes


2021-May-Neva-FathersDay-Card


Directions:


2021-May-Neva-FathersDay-Card-1

Step 1

Stamp the sentiment in VersaMark Mountain Lake and heat emboss with Sparkle Embossing Powder.  Then die cut the sentiment with Lawn Fawn Everyday Sentiment Banners.


2021-May-Neva-FathersDay-Card-2
Step 2

Use VersaColor Mountain Lake and stamp the “Tape Measure” and the “Love Beyond Measure” around the perimeter of an A-2 card base.  Ink the edges of a 3 1/2″ x 4 5/8″.  Stamp the Tape Measure in StazOn Ink in in Jet Black, die cut with matching die.


2021-May-Neva-FathersDay-Card-3

Step 3

Pressure emboss the 3 1/2″ x 4 5/8″ with Spellbinders Maze Embossing Folder.  Lightly ink with Seafoam.  Stamp the the Love Beyond Measure on card front.


2021-May-Neva-FathersDay-Card-4

Step 4

Assemble the card with dimensional foam adhesive and enjoy!


Art Supplies

Imagine

VersaMark: Mountain Lake, Seafoam

StazOn-Jet Black

Embossing Powder-Sparkle


Other

Hero Arts CL1498 Holiday Sentiments

Technique Tuesday What a Guy Stamp and Die

Lawn Fawn Everyday Sentient Banner

Spellbinders Maze Embossing Folder


Alter your Stamps to Create Fun Cards

By Baerbel Born

2021_may_born02_IG

Skill: Beginner

Time: 30 Minutes

Do you have a stamp and wish to use only a section of the image?  Rather than trying to not get ink on a section, you can cut it. So many stamps can be turned into 2 or even 3. You can use sharp scissors but be very careful. Do NOT cut your lovely fingers!

Art Supplies

Imagine :

Memento Luxe Stamp Pad

Other supplies:

Watercolor or any color you like.

Rubber Stamp (German Company): https://stempelschmiede.de/product_info.php?info=p2463_grosse-emily-mit-giesskanne.html

Watercolor paper

Watercolor brushes

Blue Paper Craft card and envelope

Glue

Make an Elegant Happy Father’s Day Card

2021-may-kyriakos-happy-fathers-day-card-main-900

By Kyriakos Pachadiroglou

Match a few colors and an elegant sparkling background using the Mboss New Year’s Eve embossing powder to make a special card for Father’s day. Contrast among black and white with a touch of gold give a smart look on the card that can be made by anyone.


Skill: Beginner

Time: 45 Minutes


Directions:

2021-may-kyriakos-happy-fathers-day-card-step1

Step 1

Stamp in a repetitive pattern the diamond chain stamp on a 4x6in card stock using the VersaMark Watermark Ink pad. Cover with the Mboss New Year’s Eve embossing powder and heat set to create the background.


2021-may-kyriakos-happy-fathers-day-card-step2

Step 2

On a 4.5″ x 2″ piece of cardstock stamp the Happy Father’s Day sentiment on the lower part of it and on a small piece of cardstock the tie using the VersaMark Watermark Ink pad. Cover with gold Mboss Embossing Powder and heat set.


2021-may-kyriakos-happy-fathers-day-card-step3

Step 3

Color the inner part of the stamped tie with All-Purpose Ink Vegas Gold and cut around the design.


2021-may-kyriakos-happy-fathers-day-card-step4

Step 4

Cut a 2″ piece of the gingham ribbon and fold the two edges to the low middle of it to form a collar shape. Glue it on the long piece of the cardstock and add the stamped tie with some foam tape.


2021-may-kyriakos-happy-fathers-day-card-step5
Step 5

Cut 4″ long pieces of the ribbons and set together with Tear It! Tape.


2021-may-kyriakos-happy-fathers-day-card-step6
Step 6

Finally usually Tear It! Tape to set the ribbons on the background and continue adding the long cardstock piece.


Art Supplies:

Imagine

VersaMark Watermark Stamp Pad

Mboss Embossing Powder – Gold, New Year’s Eve

All-Purpose Ink – Vegas Gold

Tear It! Tape


Other

Grosgrain ribbon

Gingham ribbon

Crafty Secrets stamps – Favourite Fellas

Heat tool

Card stock

Hot glue

Foam tape

How To Make A Fun Father’s Day Card

Dad Card Blog

by Annie Collins

Hello Crafty Friends – Annie Collins here with a fun Father’s Day card featuring Memento Markers and Metallic Silver Creative Medium.

Directions


Art Supplies

Imagine
Other

Forever In Time Stamps: Tools

Stencil: Grid – Amazon

Colorbok Pattern Paper: Woodgrain

Accent 80# Ultra Smooth Cardstock: Opaque White

Recollections Brand 110# Cardstock: White

Recollections Brand 65# Cardstock: Teal


Make a Father’s Day Card with Gorgeous Textures and Dimension

2021_May_JN_Fathersdaycards_2

By Jowilna Nolte 

For Father’s day I a pulling out some of my favourite products from Imagine and creating gorgeous textures and dimension. Shades of blue gives card a fun but masculine feel and the shimmer adds just that bit of elegance – perfect for even the hardiest of men.

Skill Level: Intermediate

Time: 45minutes including drying time

Directions:

2021_May_JN_fathersdaycards_step1

Step 1

Use a variety of Memento Luxe inks in shades of blue and blend a background.
Tape your stencil to your smooth white cardstock to hold it in place.
Blend the darkest shade of blue Nautical Blue and then Teal Zeal.

2021_May_JN_Fathersdaycards_step2

Step 2
Blend some Bahama Blue – remember to overlap onto the previous colour to get a nice blended effect.

TIP: For seamless blending I vary the pressure I apply. When blending over the previous colour I have a very light hand ensuring I only blend the colour instead of replacing it.

2021_May_JN_Fathersdaycards_step3

Step 3

Lastly, I blend some Grey Flannel right at the bottom of my card.

2021_May_JN_Fathersdaycards_step4

Step 4

While my stencil is still in place I apply a thin layer of Creative Medium over the entire panel.
You can also get creative and tape off some shaped areas like I did here.
While the Creative Medium is still wet, lightly sprinkle with clear frosted glitter before removing the stencil carefully. Leave the paste to dry – as the medium dries it keeps the glitter in place.

2021_May_JN_Fathersdaycards_step5

Step 5

Punch a large vellum circle. Use Memento Markers to add a stamped element onto smooth white cardstock and punch into a circle.

Stamp a sentiment using VersaFine Clair and trim to size. Assemble your elements to the stencilled background once dry and adhere the panel to a folded card. Finish off with diamante and enamel dots.

2021_May_JN_Fathersdaycards_6

The embossing powder adds some glamour and shine to this simple yet fun card. Just like the couple – fun colours combined together with a touch of glam and pizazz.
Mboss embossing powder really takes any project t the next level. Available in a  huge variety of colours they truly are amazing.

So many fun products used for a simple but striking card.

Art Supplies

Imagine

VersaFine Clair Nocturne

Memento Luxe Nautical Blue

Memento Luxe Teal Zeal

Memento Luxe Bahama Blue

Memento Luxe Grey Flannel

Jumbo Dauber

Creative Medium

Palette Knife 

Craft Mat

Other

Smooth white cardstock
Vellum
Stamps: Joy Clair, PSX
Clear frosted glitter: American Crafts
Foam Tape: Kaisercraft