Learn How to Make a Multi-Color Stamp with Shine

by Lindsay Adreon

Learn How to Make a Multi-Color Stamp with Shine

I love to create backgrounds for my cards and using fun techniques to add more interest. To make this fun Valentine’s or love card today I used not only a really fun multi-color stamping technique but also, a SHINY INK PAD!! The Brilliance Pearlescent Coral ink pad was perfect for stamping this background and adding some shine for even more interest on this CAS card!

Skill: Intermediate
Time: 30 minutes

Directions


Supplies

Imagine
Other
  • Crackerbox & Suzy Stamps – Just the Way You Are, Lips
  • MISTI Stamping Tool
  • Cardstock
  • Cardbase

Watercolor a Rose in 3 Minutes with Rose Gold Shimmer Stix

by Jessica Lin

Watercolor a Rose in 3 Minutes with Rose Gold Shimmer Stix

Hi everyone! I’m so excited to share the new Sheer Shimmer Stix with you! These handy, little guys come with dauber heads, so you can apply shimmer easily without the mess of a spray. We also have a new Rose Gold color and it’s *absolutely* gorgeous. Check out my video and see how you can use them to “watercolor” these images within 3 minutes!

Skill: Intermediate
Time: 3 minutes

Directions

Supplies

Imagine

• Sheer Shimmer Stix – Rose Gold, Sparkle – http://bit.ly/2lSt6SK
• Memento Dew Drop Inkpad – New Sprout – http://bit.ly/2g8OWzf
• VersaFine Clair – Norturne – http://bit.ly/2ERrIYC
• Craft Mat – http://bit.ly/2ypJtwb
• On Point Glue – http://bit.ly/2CY5TJt
• Tear It! Tape – http://bit.ly/2y4RlFM

Other

• Stampin’ Up Petal Palette Clear-mount stamps
• Stampin’ Up Petals & More Thinlits Dies
• Big Shot Machine
• Cardbase
• Cardstock
• Paintbrush

See How Memento Dye Inks Create a Beautiful Blended Background

by Arjita Sepaha Singh

See How Memento Dye Inks Create a Beautiful Blended Background

For my card today I wanted to create a dreamy background and for that, I used a few Memento Inks and a Jumbo Dauber to add a well-blended background. Next, I added a few spatters of Sheer Shimmer on the card to add the beautiful shine. I stamped the critters using Nocturne VersaFine Clair ink and quickly colored them with few Memento Markers and water. I fussy cut the images and adhered it on the inked card panel. I finished the card with a sentiment in black.

Skill: Intermediate
Time: 30-40 minutes

Directions

Supplies

Imagine
Other
  • Acrylic Stamp
  • Card Stock – White
  • Scissors
  • Waterbrush

Learn How to Blend Ink using Shimmer Stix

by Roni Johnson

Learn How to Blend Ink using Shimmer Stix

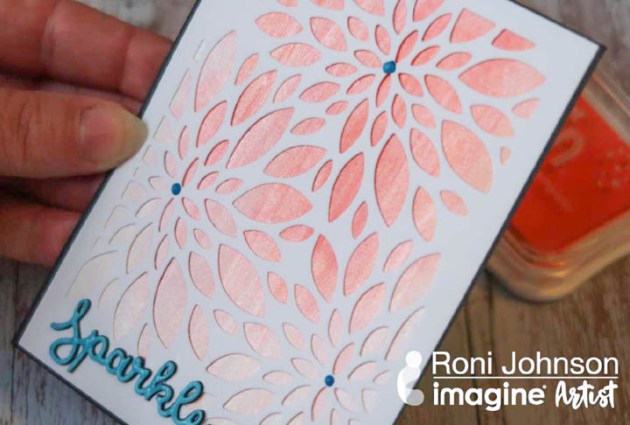
New products are always fun but they are even MORE fun when it sparkles which is exactly what Shimmer Stix has in spades. It’s the same beautiful Shimmer Spritz Spray in a fun new package. AND this card is doing double duty by picking up on the Color of the Month – Living Coral but with a twist, it is a combination of 2 Radiant Neon colors blended together to make one with the help of Shimmer Stix.

Skill: Intermediate
Time: 30 minutes

Directions

Step 1

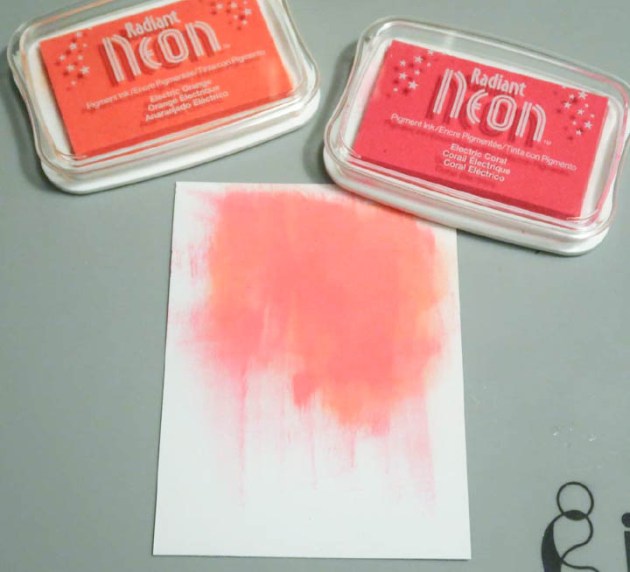
Cut a piece of white cardstock to 3.75 x 5 inches. Rub Radiant Neon Electric Coral on the upper portion of the card panel. Rub Electric Orange Radiant Neon Ink directly over the Electric Coral. Rub Electric Orange Radiant Neon Ink directly over the Electric Coral.
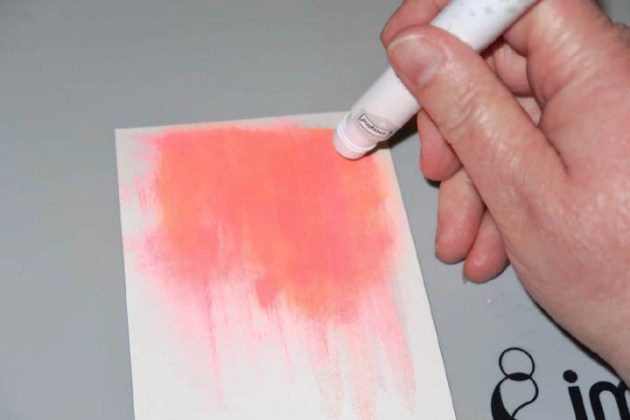

Step 2

Use the Shimmer Stix to blend and drag the inks together down the length of the panel.
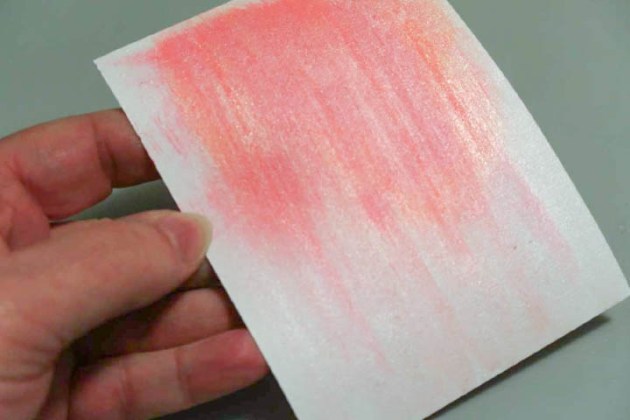

Step 3

This blends the ink and colors the panel with shimmer at the same time. It’s hard to show the truly beautiful shimmer you get from the Shimmer Stix but this photo captures a bit of that shimmer and sparkle.
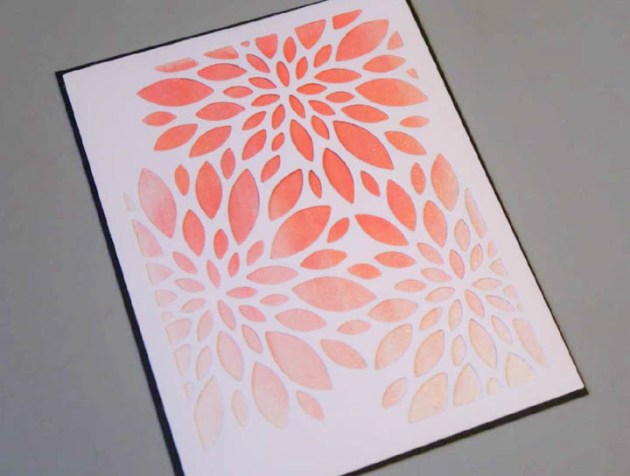

Step 4

Cut a cover-up using the Gina Marie Flower Burst Trio Cover Plate on white cardstock. Mount the cover up onto the Shimmer Blended card panel and affix to a black card base.
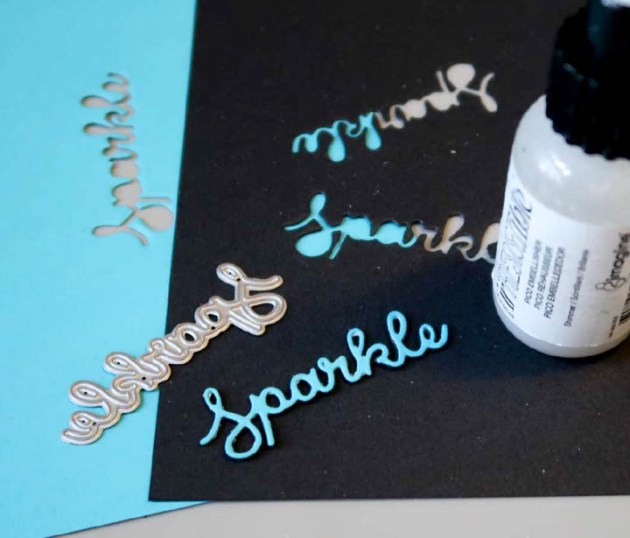

Step 5

Cut three “Sparkle” sentiments, one from blue cardstock and two from black cardstock.

Step 6

Use On Point Glue to glue the layers together with the blue on top. Apply a layer of Shimmer irRESISTible Pico Embellisher to the sentiment and let dry. Add a dot of Electric Blue irRESISTible Pico Embellisher to the center of each flower. Adhere the sentiment to the card using On Point Glue. Just look at that beautifully blended shimmer!!

Supplies

Imagine
Other
  • Gina Marie – Flower Burst Trio Cover Plate
  • Queen and Co – Sparkle Sentiment Die-cut
  • Cardstock – White, Black, Blue
See How to Create a Soft Plaid Print on Kraft Paper

by Melissa Andrew

See How to Create a Soft Plaid Print on Kraft Paper

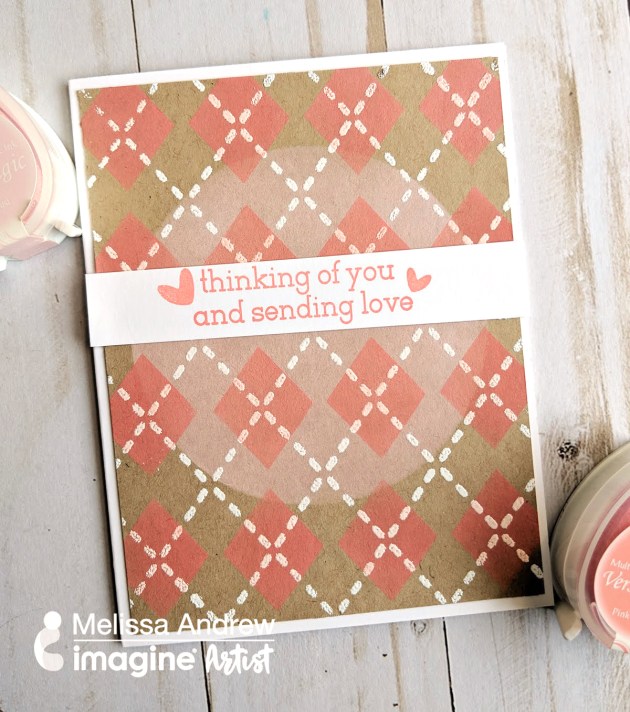
Today I’m showing you the versatile properties of the creamy and blendable chalk ink called VersaMagic. This ink is beautifully thick and shows on your darker cardstocks.

Supplies

Imagine
Other
  • Newton’s Nook – Plaid Stencil
  • Waffle Flower – “Here for You” sentiment
  • Gina K Designs – Kraft
  • White cardstock
  • Paper trimmer
  • Stamping platform
  • Heat tool

Learn How To Use Rose Gold Shimmer Stix For A Beautiful Card

by Jowilna Nolte

Learn How To Use Rose Gold Shimmer Stix For A Beautiful Card

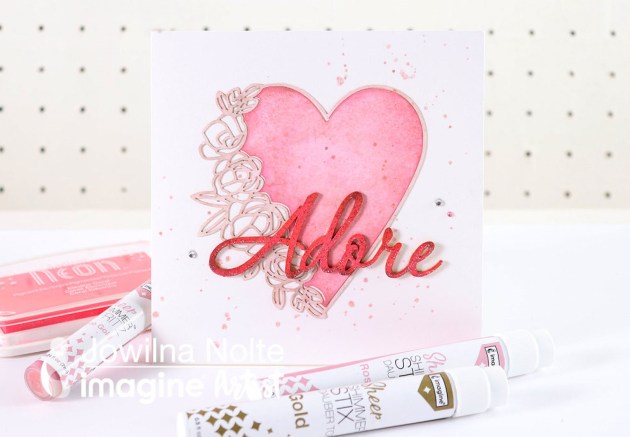
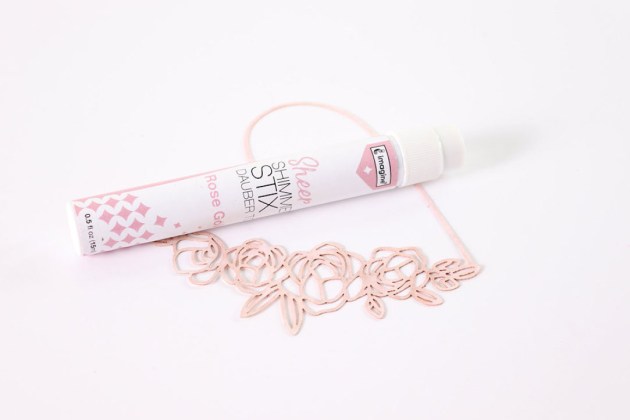
The new Sheer Shimmer Stix shows the range of products from Imagine and how the control of the dauber adds just the right amount of shimmer and shine to any crafting projects. Take a look at how this die-cut element is transformed into the star of the show with a few strokes of genius using the clever new Shimmer Stix.

Skill: Advanced
Time: 20 minutes

Directions


Step 1

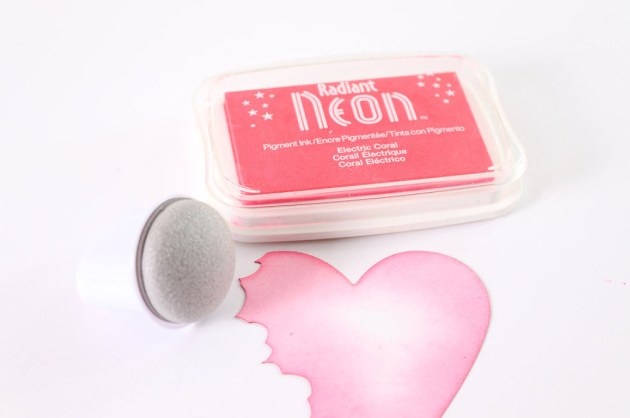
Use a pre-cut heart or download the cut file from the link in the products list below and cut with a Cricut machine. Create the die-cut heart and take it apart. Use a jumbo dauber and blend Radiant Neon Coral around the outside edges.


Step 2

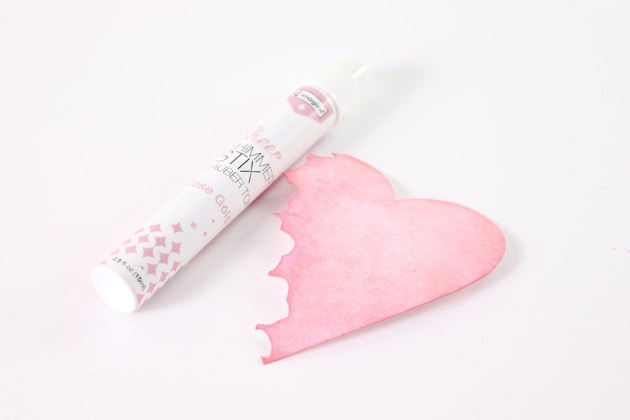
Use the Rose Gold Sheer Shimmer Stix to add shimmer over the inked heart.


Step 3

Use the same Shimmer Stix to add color and shine to the outside of the die-cut heart. Leave to dry.


Step 4

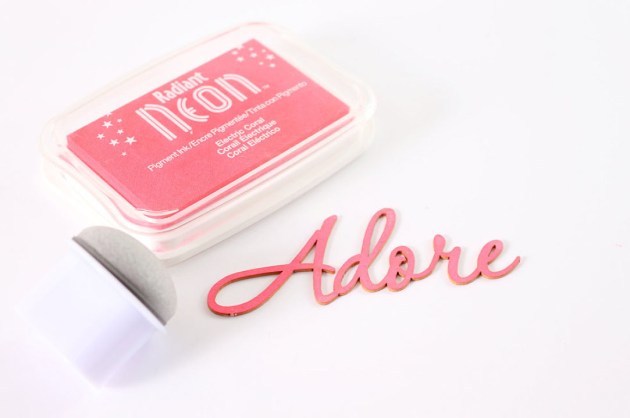
Ink a chipboard sentiment using Radiant Neon Coral ink pad.


Step 5

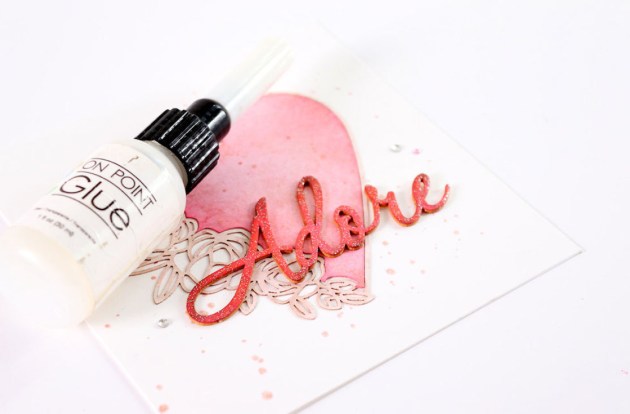
Ink the chipboard sentiment with VersaMark ink pad and sprinkle with glitter embossing powder. Heat the powder until fully melted with your heat gun. Use On Point Glue to adhere the outside and the inner of the die-cut heart to the front of your folded card.


Step 6

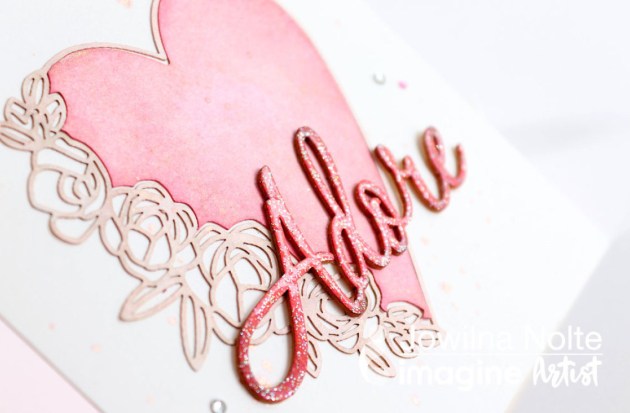
Use Rose Gold Sheer Shimmer Spritz to add colored splats to the background of your card and leave the ink drops to dry. Adhere the embossed sentiment to the front of the card and finish off diamanté. The shimmer created by the embossed sentiment and that of the Sheer Shimmer Stix and Spritz makes for an amazing shiny card.

Supplies

Imagine
Other