Learn How to Upcycle an Old Jar into a Mystical Fairy Lantern

by Roni Johnson

I don’t know any little girl that didn’t want to be a fairy when they were little…some of us have never forgotten that dream and love fairy’s to this very day. Here’s a way to sprinkle a little fairy dust in your home with this upcycled DIY Fairy Lantern craft!

Skill: Intermediate
Time: 1 Hour

Directions


Step 1

Wash and dry a glass jar that you will use to create the lantern. Cut a fairy silhouette or cut out from black cardstock. Apply a layer of On Point Glue to the paper die-cut. Apply a layer of On Point Glue to the die-cut.


Step 2

Press the fairy to the inside of the jar front. Note: If you have a fairy stamp you can exchange that for the fairy die cut and stamp it on the outside of the jar with StazOn Pigment Ink.


Step 3

Glue a bit of moss to the bottom of the jar so that when the lantern is lit it will look like she is standing in a bit of foliage or plant life.


Step 4

Stamp flowers images on the other 3 sides of the jar using StazOn Pigment Ink. Silhouette flowers work best but use what you have.

Step 5

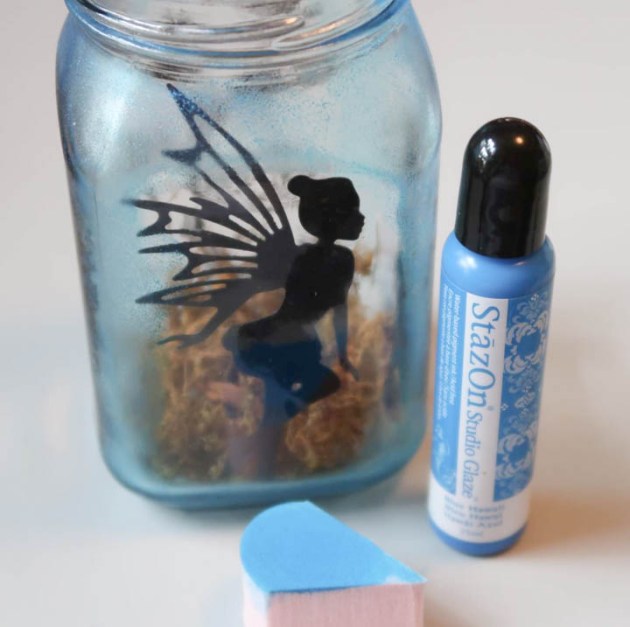
Sponge Blue Hawaii StazOn Studio Glaze to the corners, top and bottom areas of each side with an Ink Blusher sponge and let dry.

Step 6

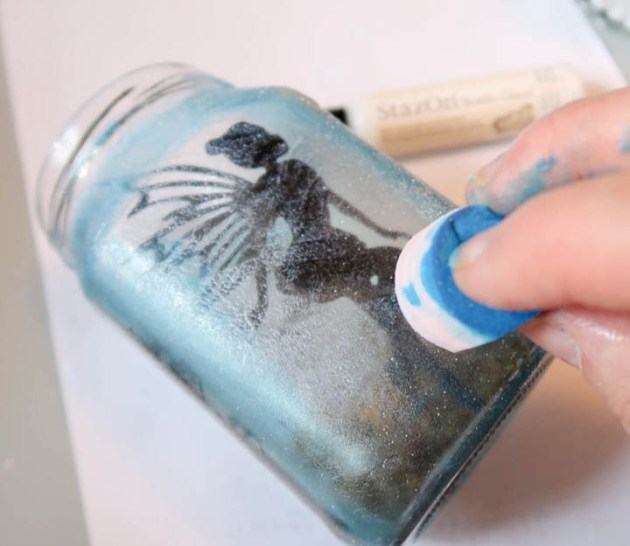
Sponge on a coat of Wedding Dress (white – dries frosty) StazOn Studio Glaze over the entire jar and let it dry.


Step 7

Sponge on a second coat of the Wedding Dress Studio Glaze on one side of the jar and immediately sprinkle with Mboss Sparkle embossing powder. Shake off the excess and reserve for the next side.


Step 8

Set the jar on the craft mat and heat the embossing powder to melt. Let it cool! Note: the jar will become very hot during this process. Do not try to pick it up as you will burn your fingers.


Step 9

Repeat steps 9 and 10 on the rest of the jar. When the jar is fully covered it is now time to move on to the lid. Sponge Piano Black StazOn Pigment Ink over the writing on the lid.


Step 10

Add desired embellishments to the lid and top of the jar. Wrap wire around an LED flicker light so you can insert it into the jar with ease.


You now have an amazing little fairy lantern to light your way! Use this tutorial to create decorations for a summer party, birthday or any fun outdoor event!

Supplies

Imagine
Other
  • Mason Jar
  • Posh Paper Supplies – Fairy die cut
  • Hobby Lobby – Pearl Trim, Garland
  • Prima – Flowers
  • Heat Tool
  • Battery Operated Candle

Learn How To Use Creative Medium To Upcycle A Wooden Box

by Roni Johnson

Learn How To Use Creative Medium To Upcycle A Wooden Box

Preserving memories is a fun and rewarding past time but if you’re like me I like to keep little mementos as well. After every trip we take I end up with a little pile of goodies collected during our travels. I thought it would be fun to create a memory box to house all of these little treasures. Upcycling an old worn out box is just the ticket.

Skill: Intermediate
Time: 3 hours + dry time

Directions


Step 1

Find a suitable box for your needs. Garage sales, thrift stores or flea markets are an excellent place to start your search.


Step 2

Remove the insert from the lid (if applicable). Paint the lid insert with a layer of gesso.


Step 3

Make a skin from Copper Metallic Creative Medium. See our Make section for more details.


Step 4

Spritz the skin with Cottage Ivy Fireworks Spray and let dry.


Step 5

Apply a layer of Creative Medium to the lid insert and adhere the skin to the panel. Let the Creative Medium dry.


Step 6

Pounce VersaMark ink around the edges of the skin using a stipple brush.


Step 7

Sprinkle gold Mboss embossing powder over the ink.


Step 8

Shake off excess powder and return it to the bag for later use.


Step 9

Use a heat tool to melt the embossing powder. Set the insert aside for now.


Step 10

Remove the insert from the lid, lightly sand the box to roughen up the surface a bit.


Step 11

Apply a layer of gesso to the entire box, inside and out. I am using DecoArt Chalk Gesso in light green for this example.


Step 12

Stamp desired text and images on the body of the box using VersaFine Clair Inks.


Step 13

After the ink has dried, use a palette knife to spread Antique Creative Medium over the stamped area. Apply more medium in some areas, less in others, by doing so this will create depth and add interest to the finished piece. Let the Creative Medium dry. Use a Fantastix and your ink brand of choice to color the ruler yellow.


Step 14

Stamp and apply Creative Medium to the lid of the box just as you did in step 5. Use a stipple brush and pounce VersaMark ink on the edges of the lid.


Step 15

Sprinkle Gold Mboss embossing powder over the ink; shake off excess and return it to the bag. Use a heat tool to melt the powders. Repeat until all edges have been embossed.


Step 16

Emboss various elements which will be used to embellish the box lid. Here I choose butterflies and an ornate flower.


Step 17

Replace insert into the box lid. Use hot glue to affix the various elements to the box lid. Fill the box with all of the treasures you have found along your journey.

Supplies

Imagine
Other
  • Box with a lid
  • Sandpaper
  • Just For Fun Stamps – Postcards, Postage, Keys, Keyholes
  • Lost Coast Designs – Ruler Border Stamp
  • Stamperia – Molds
  • Spellbinders – Embossing Folder
  • Misc embellishments
  • Hot Glue Gun
  • Heat Tool

Learn to Scrapbook Mother’s Day Memories

by Lori Warren

Learn to Scrapbook Mother's Day Memories
Scrapbooking is a great way to craft and upcycle your memory keeping. The last memory I wanted to save is of Mother’s Day, so I decided to create this keepsake using a vintage book cover, walnut ink, and Fireworks Shimmery Sprays. It’s not your traditional scrapbook page, but is a great piece to see at home and treasure the memory!

Skill: Intermediate
Time: 1 hour

Directions


Step 1

Start with a cover from a vintage book.


Step 2

Adhere vintage book and music print as well as a vintage lace to cover.


Step 3

Spray with Walnut Ink, blot and dry.


Step 4

Spray with Dandelion Fireworks, blot and dry.


Step 5

Repeat with Bamboo Leaves Fireworks.


Step 6

Print a small photo.


Step 7

Color paper flowers with Fireworks in Dandelion and Bamboo Leaves and dry.


Step 8

Wrap sheer ribbon around the top of the book cover.


Step 9

Adhere paper flowers to the book cover, and mounted photo.


Step 10

Cover photo and spray with Sparkle, Sheer Shimmer Craft Spray.


Step 11

Type up a personal sentiment.


Step 12

Adhere typed sentiment to cover.

Supplies

Imagine
Other
  • Paper Clay shapes
  • Vintage book print & music sheets
  • Vintage book cover
  • Recollections paper flowers
  • Sheer ribbon

Learn to Create a Quick and Easy Wood House with Walnut Crystals

by Iris Rodriguez

Learn to Create a Quick and Easy Wood House with Walnut Crystals

This is a fun easy peasy DIY Home Décor project made using a wooden house and walnut ink. The house can be purchased at most craft stores or if you’re a woodworker, just cut out a 4×4 into a house shape. I colored the house with Walnut Ink Crystals and embossed images with Imagine’s new Mboss White embossing powder.

Skill: Beginner
Time: 30 minutes + drying time

Directions


Step 1

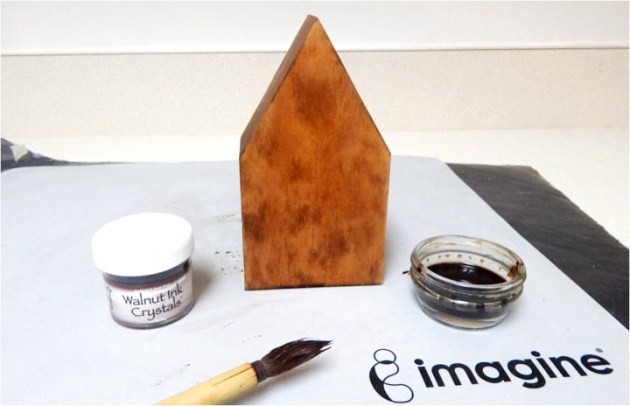
Mix a few Walnut Ink crystals into a small amount of water. The crystals dissolve quickly and the amount you use will determine the density and rich color of the ink. Once you have mixed the crystals, brush on the Walnut Ink. Let the ink dry completely. You can use a heating tool or allow it dry naturally, which takes about an hour.


Step 2

Apply VersaMark ink through the stencil with an Inkblusher. Add the White Mboss embossing powder and apply heat to melt the embossing powder. The embossing powder is 100% opaque so the final result is beautiful showing embossed images on the sides on the back. That’s it! Now you have a nice home décor, custom made by you.

Supplies

Imagine
Other
  • Wooden House
  • Folk Art-Flower Stencil
  • Paint brush
  • Small dish

See How to Upcycle a Tea Tin with Walnut Ink

by Kassy Tousignant

See How to Upcycle a Tea Tin with Walnut Ink

I love upcycling old, found items. In today’s video, I give this tea tin has a fresh new shabby chic look while still holding on to that vintage feel using the VersaFine Clair ink in Fallen Leaves paired with the Walnut ink. I love this way this turned out and hopefully, you will give this project a try.

Skill: Intermediate
Time: 1 hour

Directions

Supplies

Imagine

• Walnut Ink – Walnut
• On Point Glue
• VersaFine Clair – Fallen Leaves
• InkBlusher
• Tear It! Tape

Other

• Jewels
• Patterned paper
• Metal die
• Die-cutting machine (Gemini)
• Glitter
• Tea Tin
• Paintbrush

May Color of the Month is Hologram

May Color of the Month is Hologram

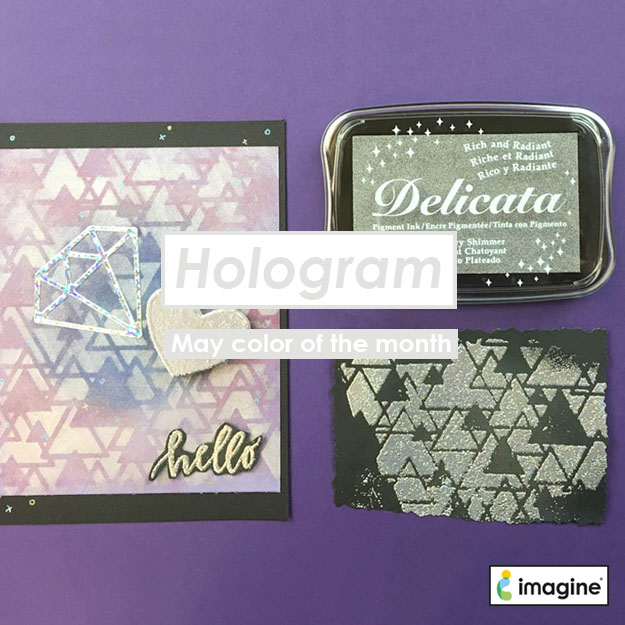
We are excited to announce that our Color of the Month is Hologram. This intriguing color is actually several colors that refract from a 3-D object, but for the papercrafting world we love seeing it in embossing powders, ink blending techniques, foil papers, premade items, and shimmer inks. Some of the inks we suggest in our catalog include blending Delicata Silvery Shimmer, Delicata Pink Shimmer, and Sapphire Blue.

The month of May is also bringing a new product release that we are teasing you with today but will release very soon! So stay tuned for an announcement.

Otherwise here is a sneak peek of our projects for this month.

Holographic Unicorn by Arjita Sepaha Singh

You are a Lucky Star by Kassy Tousignant

Floral Card Design by Melissa Andrew