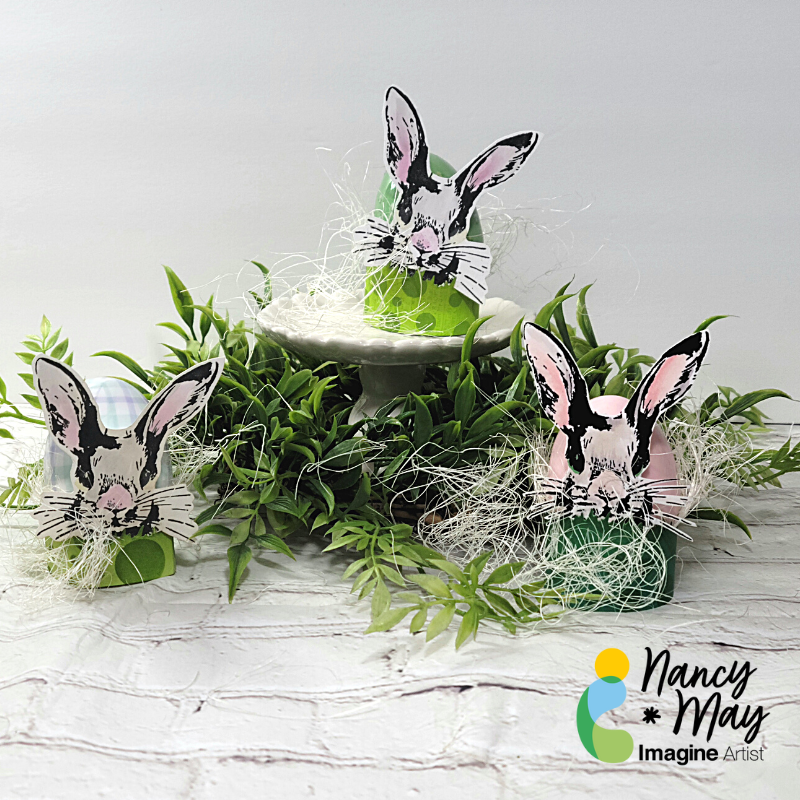
Hey y’all. I am going to share how you can create simple Easter egg holder rings that you can use to create an Easter display to match your style, your décor, etc. The sky is the limit! Let get to it!
~Nancy
==============
Skill: Beginner (but adaptable to more advanced learners)
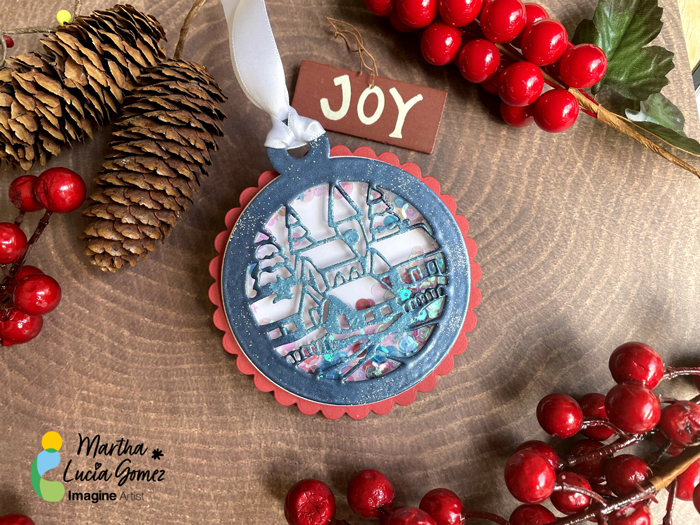
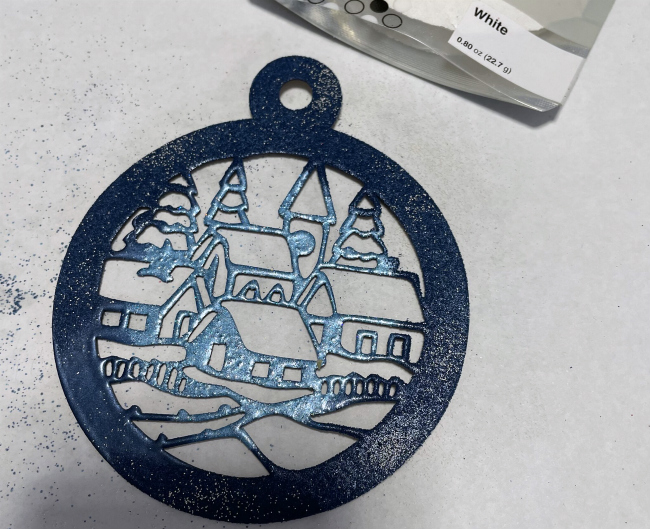
Hello there! Today’s tutorial is a shaker ornament created with embossing powders and using different colors in a single piece. To make this, I used the MBoss in Blue Icicle, Sapphire and White. To create this type of embellishments or ornaments for your cards, gifts or Christmas Trees, you can also use our traditional Embossing Powders in any color.
Skill Level: Medium
Time to Complete: 45 minutes
Directions:
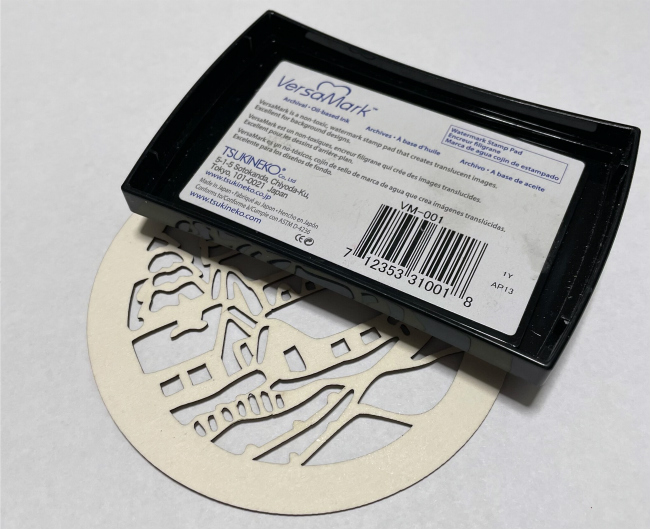
Step 1:
Apply a layer of ink to your Shaker Base or Chipboard piece directly with the ink pad of VersaMark. You can also use the small size or cube of VersaMark Ink if you are using a small piece of shaker card or chipboard. Make the emphasis on the center if it has the designed part.
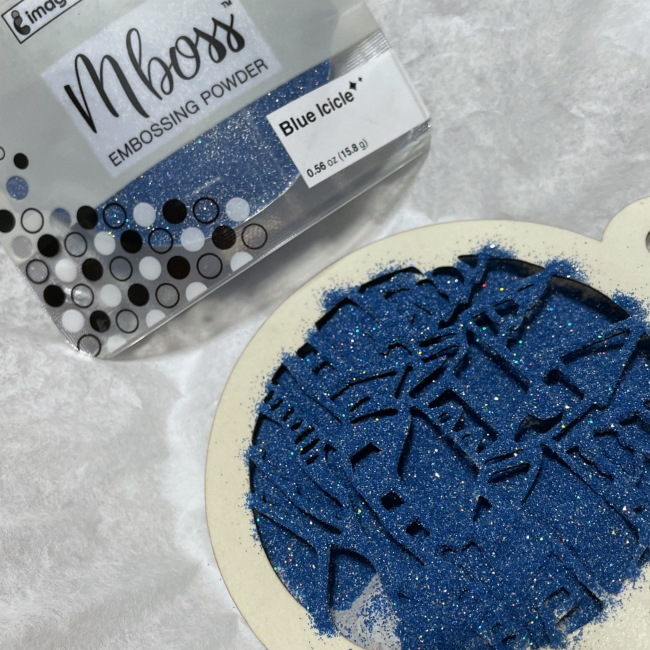
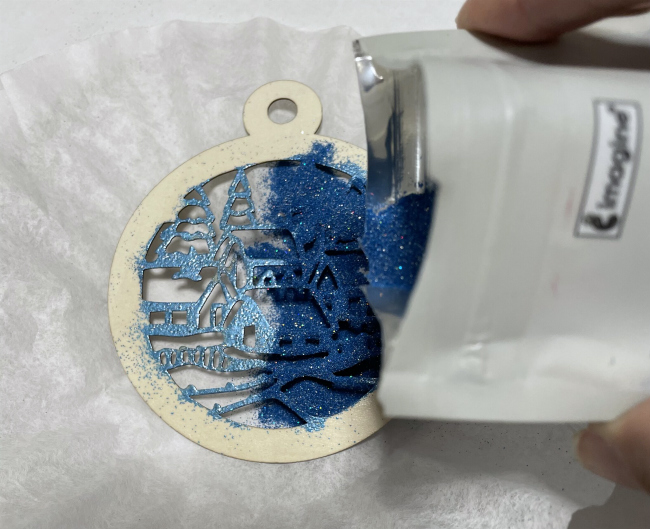
Step 2:
Cover the center of your ornament with the light color of MBoss or embossing powder. In my sample, I am using the Blue Icicle.
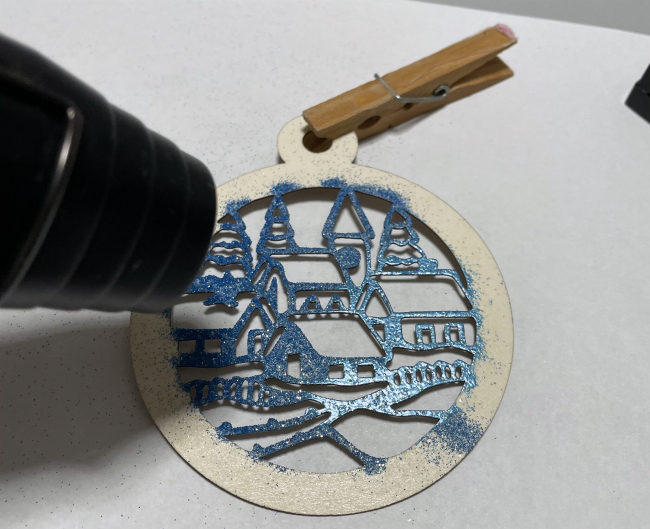
Step 3:
Melt the MBoss or Embossing Powder with the heat tool. Don’t worry if the powder covered some parts of the border.
Step 4:
Repeat steps 2 and 3 if you want a thick effect or want better coverage.
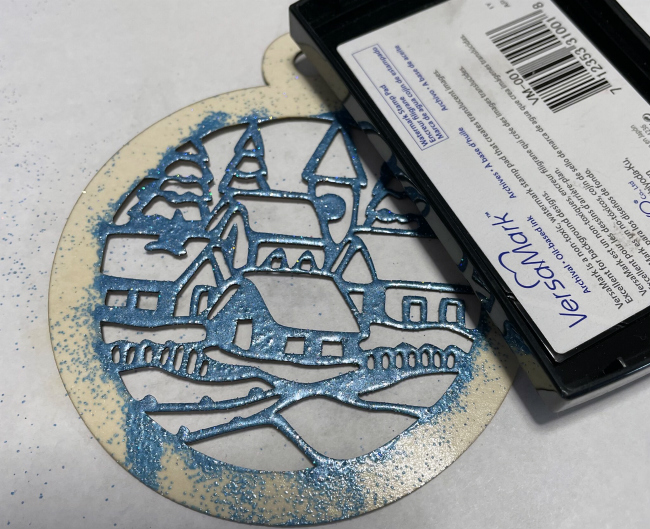
Step 5:
Ink the border or the chipboard ornament or shaker piece with the VersaMark Ink Pad, taking care not to cover the center of the piece.
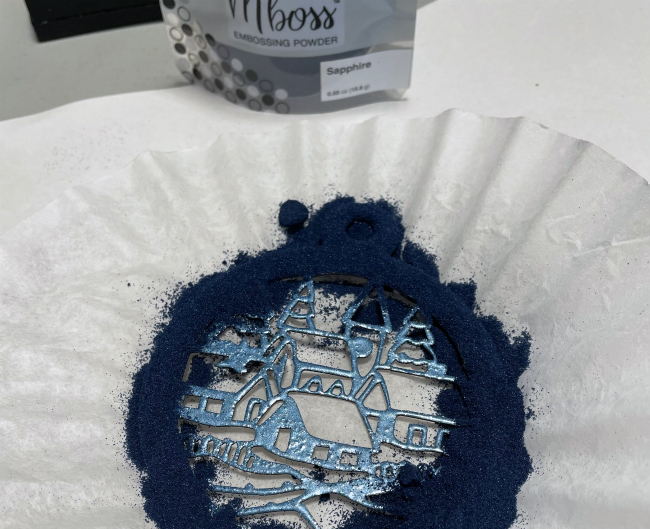
Step 6:
Cover the inked area with the dark color of MBoss. I am using the Sapphire.
Step 7:
Melt the powder with the heat tool. Then, add some touches of MBoss White to create more dimension over it. Melt the MBoss White or White Embossing Powder with the heat tool.
Step 8:
Assemble your shaker card or finish the ornament by adding some sprinkles or small sequins and adding a piece of ribbon to tie it.
Voila! Our ornament is finished and can be used to decorate a card, a gift or to be handled on a Christmas Tree.
Remember that you can use this idea for any type of chipboard piece or for any occasion, not only for Christmas.
In today’s tutorial you will learn to create a super easy wood sign using the ever versatile VersaFine Clair inks. The VersaFine Clair worked beautifully for this project that took just under and hour from design concept to completion! The ink pads are nice and juicy, so the first stamp image was perfect every time, which is helpful when free hand stamping with out a stamp platform.
Skill: Beginner
Time: 1 Hour
Directions:
Step 1:
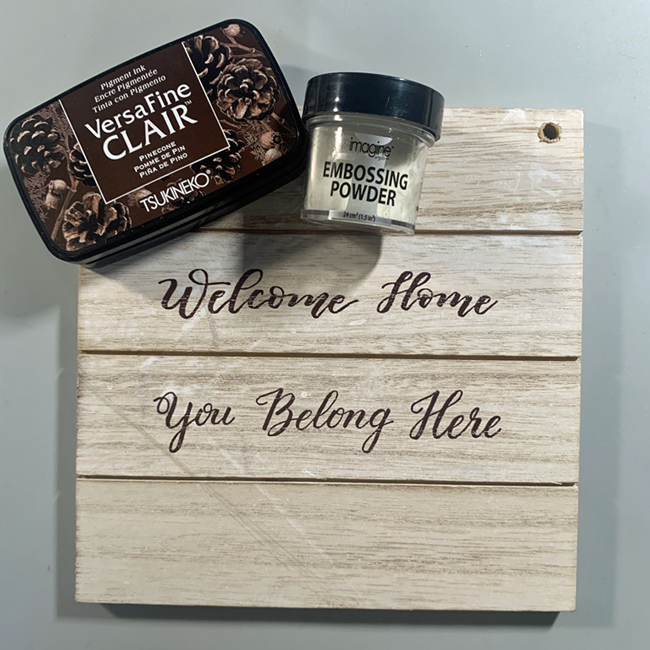
Remove twine from the sign so it will lay flat on your work surface. With lines on the sign already in place it was easy to line up the sentiment and acrylic stamp block. Once the stamps are aligned, place a large acrylic block over the stamps lining up the edges to allow perfect positioning.
Step 2:
Stamp the sentiment in VersaFine Clair Pinecone and heat emboss with clear Embossing Powder. Gives the sentiment a bit of shine and keeps it from smearing!
Step 3:
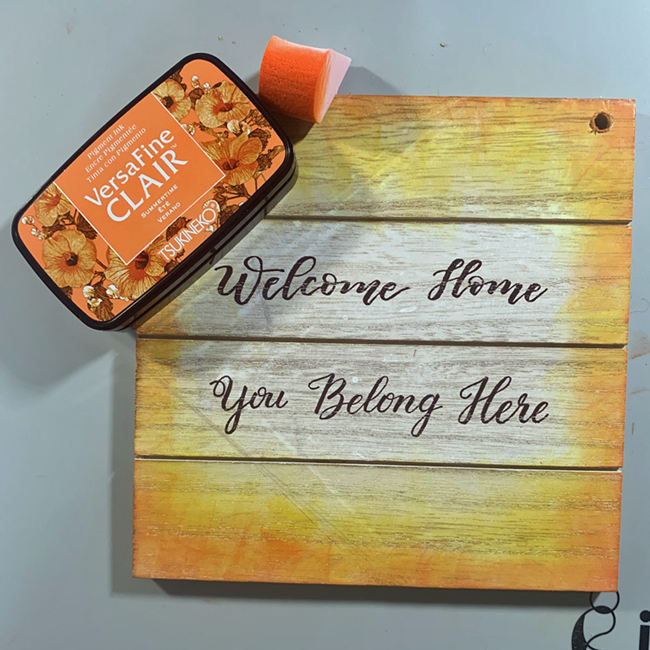
Using and ink blusher ink the edges of the sign with VersaFine Clair Cheerful. Start from the outside edge and blend toward the center to create a slight ombre look.
Step 4:
Using and ink blusher ink the edges of the sign with VersaFine Clair Summertime. Start from the outside edge and blend toward the center but not as far as the Cheerful layer.
Step 5:
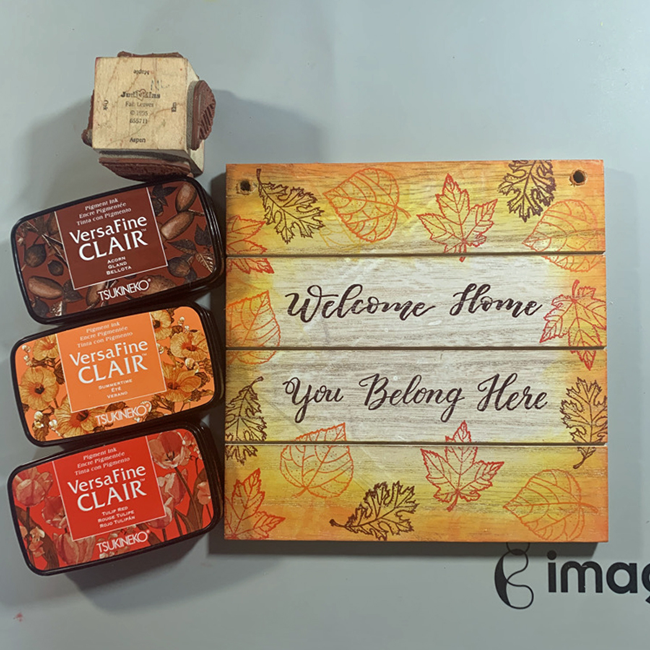
The leaf images are stamped using a very old stamp that features Fall leaves. The Oak leaf is stamped in VersaFine Clair Acorn, the Aspen leaf in Summertime, and the Maple leaf in Tulip Red. The sign can be heated with a heat gun, or set aside until the ink dries.
Step 6:
Replace twine through holes in the sign and display!
Hey there friends and fellow crafters, LeeAnn here with a fun Inspirational Card I made using my absolute favorite technique, and those of you that have been here for a while know I love Kaleidacolors.
– Hi there friends and fellow crafters, today I am sharing a fun project with you that I have made for my oldest granddaughter. I saw this photo frame and it made think of her immediately.
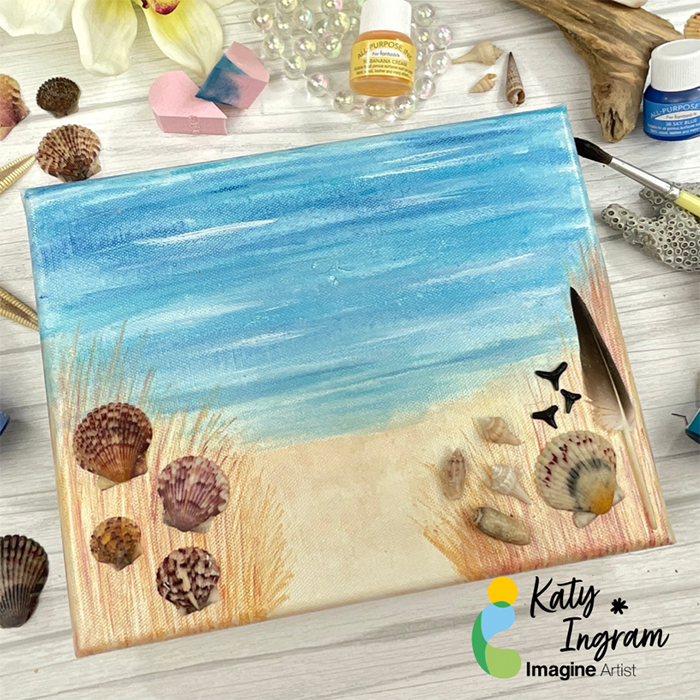
Hello Friends! Katy here with something a bit different today. I am using some All-Purpose Inks and Ink Potion Number 9 to do some painting on canvas. I did some research and could’t find anything that shows All-Purpose Inks being used on canvas so I thought I would share my experience today.
I used the All-Purpose Inks to create a Coastal painting and used some sea shells, sharks teeth and a small pelican feather that my husband and I have found on our many beach walks over the years.
Check out the video below to see how this came together and get some tips and tricks for painting on canvas with the All-Purpose Inks and Potion Number 9.