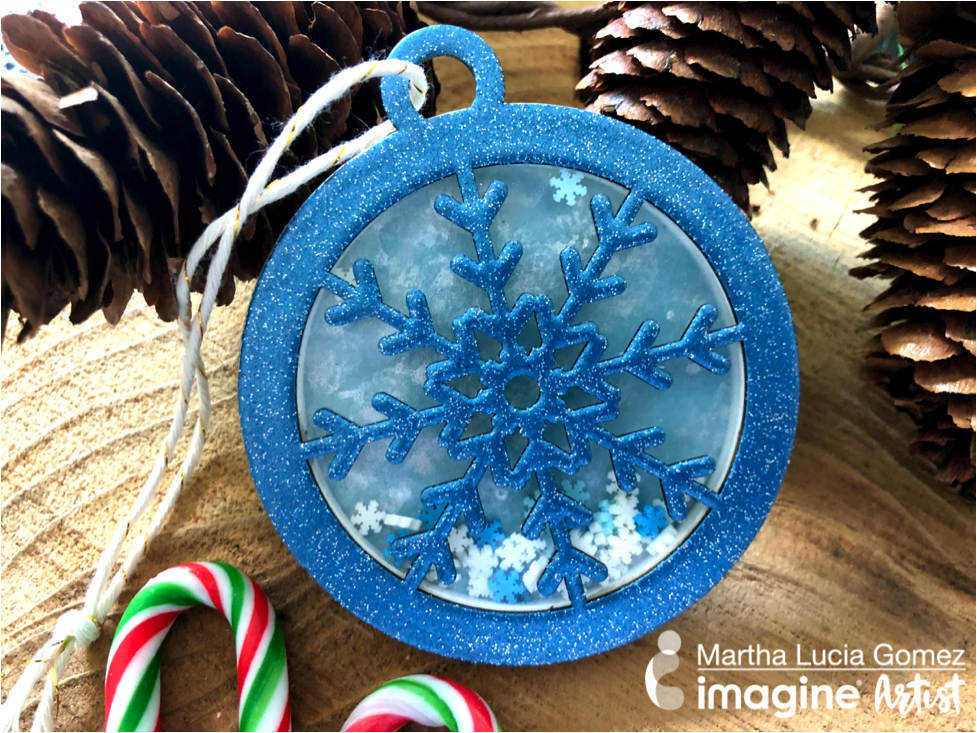
Stamping Holiday Wrapping Paper with a .. Fork?

by Roni Johnson

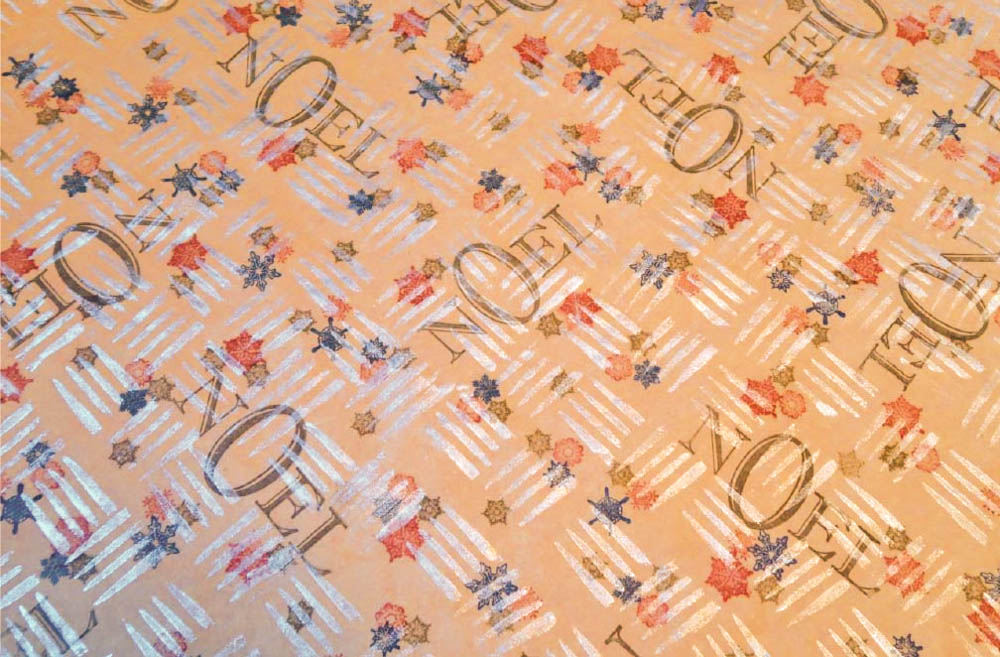
Keeping with my Berry, Blue and Silver theme I decided I wanted to make wrapping paper and matching gift tags this year as well. The limited color palette is very aesthetically pleasing when grouped together under the tree. Since I was using all the same colors I thought it would be fun to vary the patterns so I went from very easy (Joy wrapping paper) to a more complicated layered pattern (Noel paper) which I will share with you today.

Skill: Beginner
Time: 15 minutes to 45 minutes depending on the design

Directions

Step 1

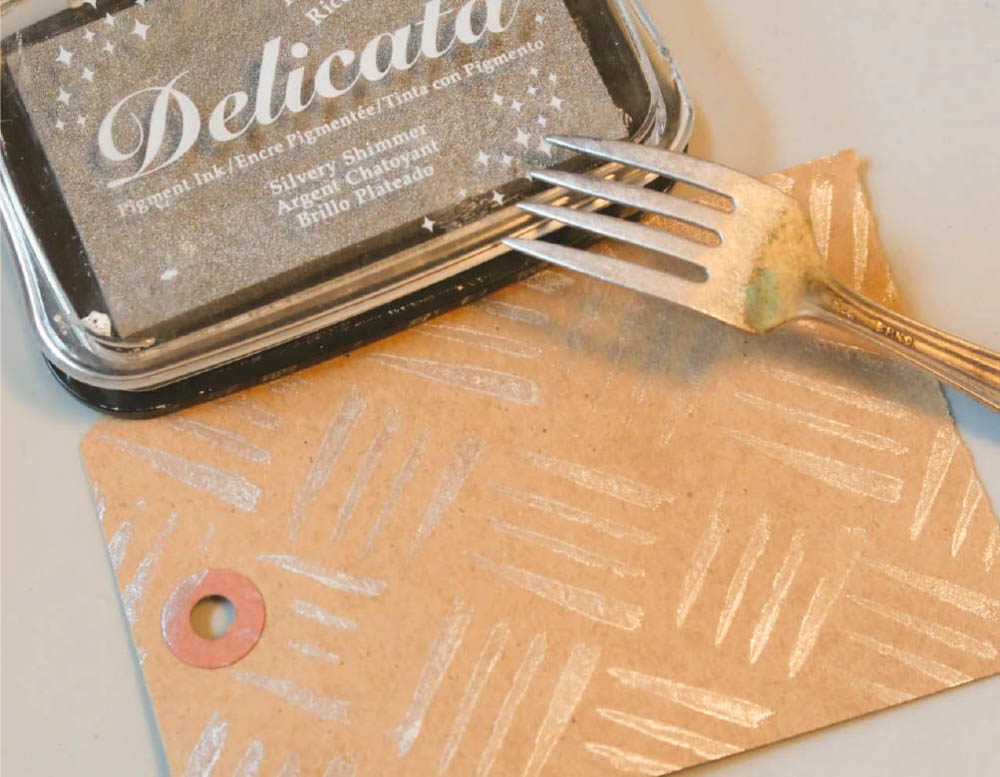
Tear off enough of the kraft paper to cover the gift you will be wrapping.


Step 2

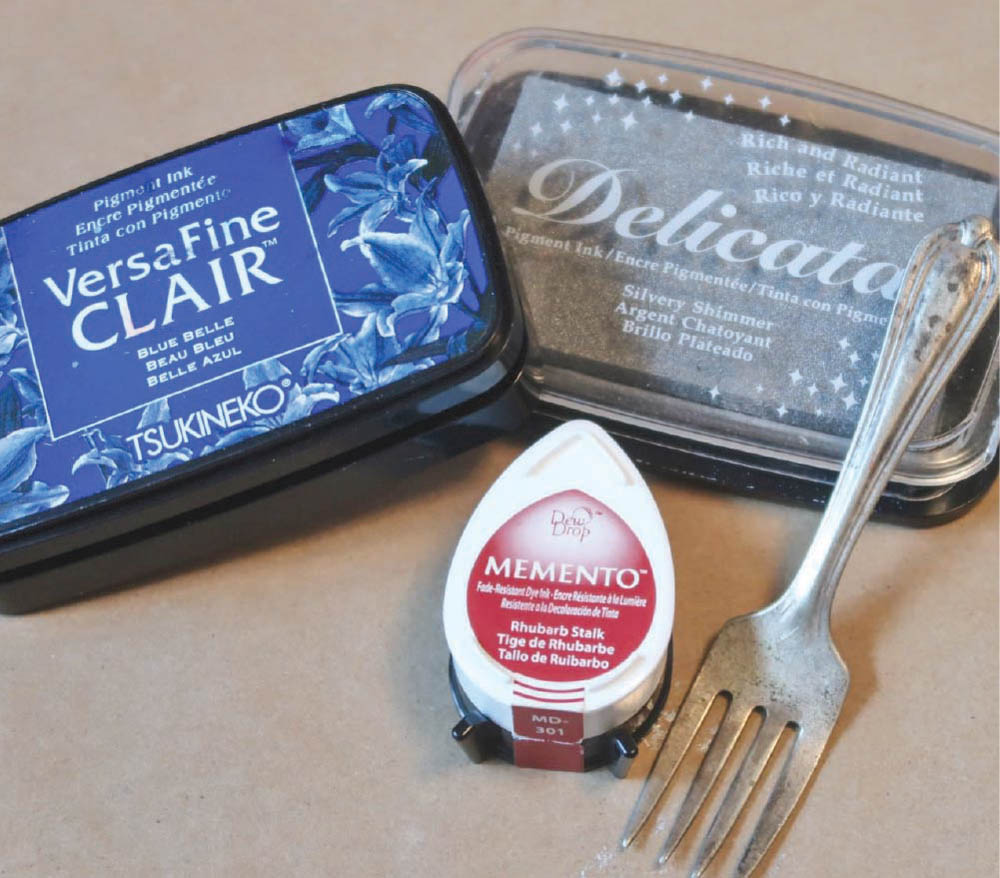
To create the layered look use a fork (I am using a baby fork for the example) to make a cross hatch pattern with Silvery Shimmer Delicata ink.


Step 3

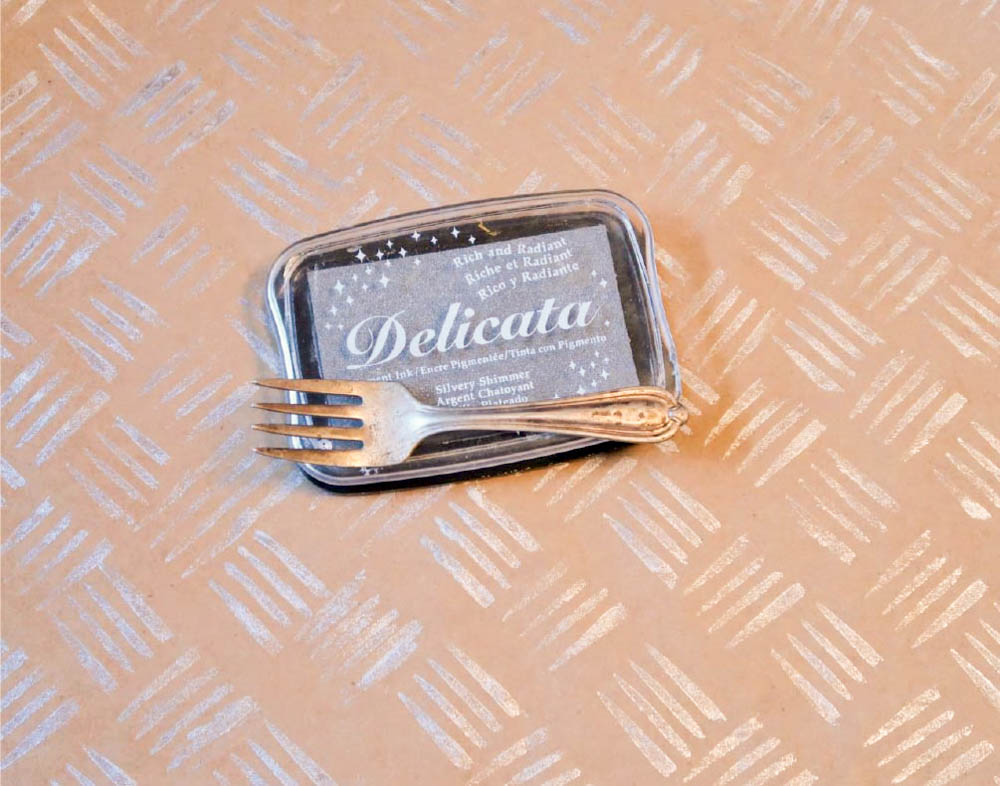
Heat set the Delicata ink to speed drying. As you can see it creates a stunning background which could be used as is.


Step 4

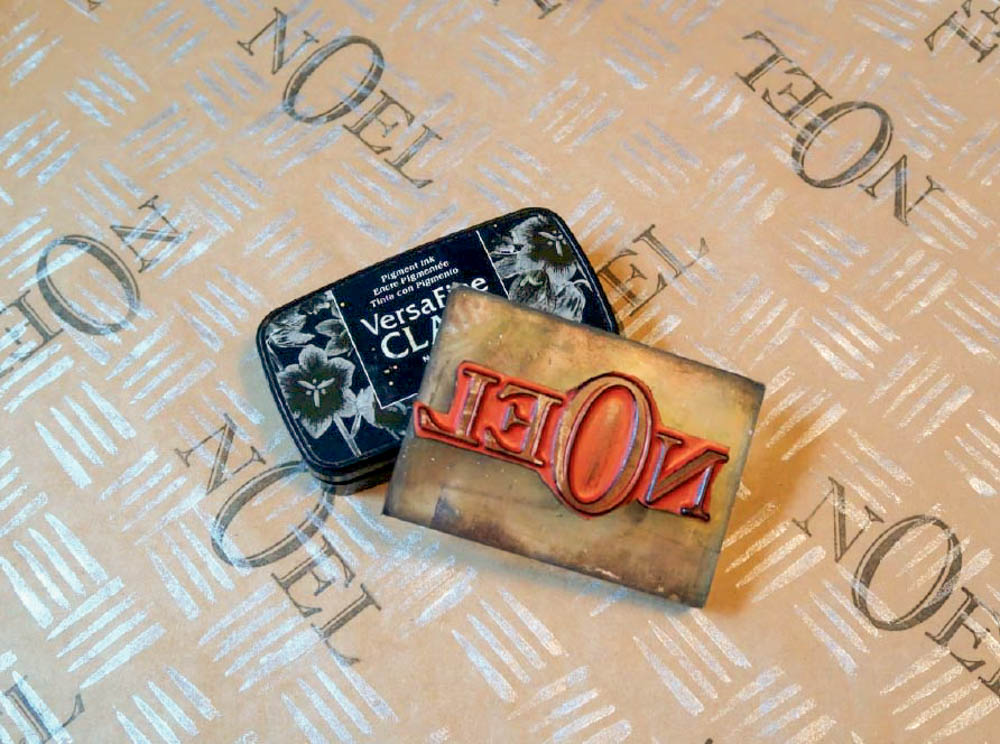
Stamp Noel using VersaFine Clair Nocturne ink over the entire sheet of kraft paper. Vary the direction of the image to add interest.


Step 5

Layer 3 consists of several snowflakes stamped using Blue Belle VersaFine Clair ink.

Step 6

Several more stamped snowflakes are added using Rhubarb Stalk Memento ink.


Step 7

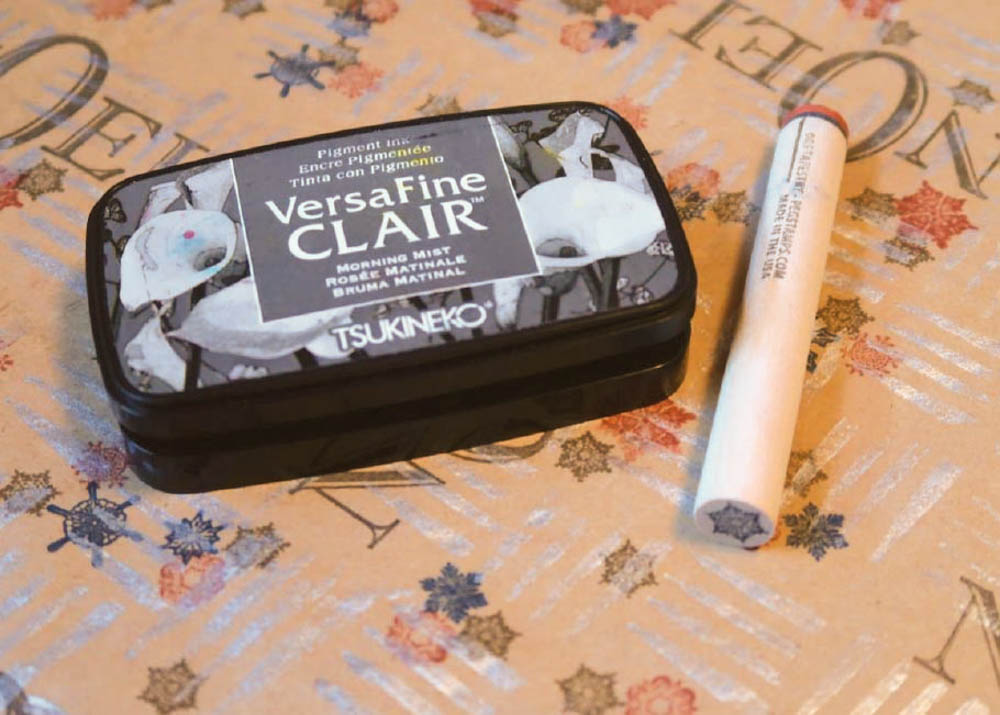
And finally Morning Mist a lovely shade of grey to finish it off. You will have created a beautiful multi layered wrapping paper worthy of any gift you have for giving.


Step 8

Follow the same steps to create the matching gift tag.


Step 9

Use a sponge dauber to apply Blue Belle ink to the edge of the tag. Add a bit of ribbon to finish it off. And here is my gift all wrapped up ready for giving. Below you will find additional examples to inspire.

Supplies

Imagine
Other
  • Kraft Paper (On a Roll – Paint Section of a Hardware Store)
  • Rubber Stamp Tapestry – Oh So Fancy (Joy/Noel), Snow Much Fun, Snow Storm, Poinsettias in the Pines, Holiday Bell Trio, Deer Head, Christmas Greetings (gift tag sentiment)

Create a Watercolored Thanks Card with Memento Markers

by Lindsay Adreon

Create a Watercolored Thanks Card with Memento Markers

Sometimes you just need a quick card or even set of cards to give as a gift. This background is the perfect way to create those at this time of year! And all you need is cardstock, painter’s tape, and an ink pad!

Skill: Intermediate
Time: 30 minutes

Directions

Supplies

Imagine
Other
  • Painter’s Tape
  • Paper Trimmer
  • Waffle Flower Nesting Oval Die Set
  • Heffy Doodle Thanks Die

Adorn your Christmas Packages with Lovely Handmade Tags

by Lori Warren

Adorn your Christmas Packages with Lovely Handmade Tags

Adorn your Christmas packages with lovely home-made tags. They are a breeze to create with VersaColor ink and few other products from Imagine.

Directions


Step 1

Spray 3 White Tags with Fireworks Spray – Rich Cocoa & Rhubarb Stock

Step 2

Sponge brick stencil pattern onto tags with VersaColor Brown and then repeat with Turquoise.

Step 3

Stamp snowflake image onto tag with VersaColor Charcoal, then stamp a dot pattern with Turquoise.

Step 4

Stamp reindeer with VersaColor Turquoise and emboss with Clear MBoss embossing powder.

Step 5

Use coordinating die to cut out reindeer images.

Step 6

Stamp saying in VersaColor Black.

Step 7

Adhere reindeer image onto tag and then spray with irRESISTible Spray – Wedding Dress.

Step 8

Attach ribbons to tag.

Supplies

Imagine
Other
  • Celebrate It Ribbon
  • Uniball Signo Pen – White
  • Recollections Clear Stamps – Christmas
  • Catherine Pooler Clear Stamps – Winterhaven Collections
  • Creative Embellishments – Stencil
  • Tim Holtz – Sidekick
  • Tags – white

Call for Art – Planner’s Unite for 2020

We are launching a new Call for Art program for 2020

Be published on the Imagine Blog! Submit a photo of a Planner Project for the New Year. Some of the themes can include:

Planning out the year, Life Goals, Inspiration, Planners, Journals, Papercrafts for the Home Office, Calendars, Shopping Lists, Budgeting, Exercise Plans, Inspirational Quotes as Art. #lifegoals #success

Submit a 600 x 600 pixel square or 900 x 900 pixel square photo of a planner project, a short description and a link to your Instagram profile to marketing@imaginecrafts.com.

Submissions due on December 30th

See How to Make a Snowflake Shaker Ornament with Mboss

by Martha Lucia Gomez

Hello crafty friends, Martha Lucia here! Today, I am sharing a snowflake shaker ornament that you can use to decorate your gifts and/or Christmas tree. To create this, I am using a shaker dimension set with a snowflake design, VersaMark Clear Ink and Mboss Blue Icicle. Like this set came with a piece of acetate sheet to cover the free areas, I made it like a shaker piece adding some sprinkles.

Skill: Advanced
Time: 30 minutes

Directions


Step 1

Ink one of the sides of your or the ornament directly with the VersaMark Inkpad. Cover it with your selection of Mboss color. I used the Blue Icicle.


Step 2

Melt the powder with the heat tool. And repeat the process twice or three times to give more dimension to your ornament.


Step 3

Cut a piece of card stock with the same shape or your ornament and apply over it some touches of Frost Sheer Shimmer Stix. Let the paper dry naturally.


Step 4

Paste the base shape or double-sided foam tape onto the inked shape. Add your fillers, it could be sequins, sprinkles, beads or whatever you want. Adhere the clear acetate on top with liquid glue and cover it with the embossed design. Finalize your ornament adding a tie or pasting it to your gift. You can try different designs and different colors of Mboss to add your personal touch! Thank you for stopping by and see you soon!

Supplies

Imagine
Other
  • Snowflake Shaker Dimension Set by Kat Scrappiness
  • Chipboard Ornament
  • Cardstock
  • Plastic
  • Heat tool
  • Coffee Filter

Double Emboss a set of Ornaments for a Unique Holiday Craft

by Roni Johnson

It’s that time of the year to kick making into full gear. It is easier to create when you narrow your focus and choose a color scheme to work with. This year I have chosen Berry, Blue and Silver. I knew I wanted to make some “Mail-able Ornaments” for my far away friends. MBoss embossing powders are just the ticket!

Skill: Intermediate
Time: 15 minutes per ornament

Directions


Step 1

Die-cut or hand cut desired ornament shapes from a medium weight chipboard. I used the ornament die from Sizzix.


Step 2

Pounce the ornament on a VersaMark pad until the entire ornament has been covered with the ink.


Step 3

Pour desired color of Mboss embossing powder over the ornament, shake off and reserve excess powder for future use.


Step 4

Use a heat tool to melt the embossing powder and let cool.


Step 5

Repeat steps 2 – 4 one or two more times creating a thick molten layer of embossing powder over the ornament.


Step 6

Immediately after the final melting cycle press a stamp into the molten embossing powder and let the embossing powder cool. Note: the molten embossing powder will not damage the stamp.


Step 7

After the embossing powder has cooled, peel the ornament from the stamp.


Step 8

Embellish the ornaments as desired.


Step 9

Add a length of stretch cord for a hanger.

Supplies

Imagine
Other
  • Chipboard
  • Sizzix Ornament Die
  • Unity Stamp Co – Burst of Snowflakes, Trees
  • Silver Stretch Cord