Fun Snow Globe Christmas Card

By Kathi Rerek

– Let’s make a festive and fun Christmas card with ink, stamps, stencils, and minimal coloring.

Skill Level: Beginner to Intermediate
Time: 1 hour

Step 1.

Use a stamping platform and Nocturne VersaFine Clair ink, stamp the penguin from the Penguin Clear Stamp Set onto a panel 6” x 8” panel of Mixed Media cardstock. Re-ink and stamp a second time to ensure a good impression. Keep the image panel secured to the base of the stamping platform. Remove and clean the stamp.

Step 2:

Position the the penguin from the Frost Clear Stamp Set to the right of the previously stamped penguin. Ink the stamp with Nocturne VersaFine Clair Ink and stamp. Re-ink and stamp if necessary to ensure a good impression. Remove the image panel from the platform. Remove and clean the stamp.

Step 3:

Place a piece of repositionable sticker paper on the base of the stamping platform. Place both penguins facedown onto the sticker paper. Ink the stamps with Nocturne VersaFine Clair Ink and stamp. Remove the stamps and the sticker paper sheet from the platform. Heat set the image panel.

Step 4:

Fussy-cut the sticker paper versions of the penguins and place atop their counterparts on the image panel to mask them.

Step 5:

Position the Snow Globe stencil so that the opening is framing the penguins. Use low-tack tape to secure the stencil to the image panel and to cover the base of the image panel. Use a Sponge Dauber to apply Summer Sky Memento ink heavily around the edges of the Snow Globe fading inward over the masked penguins.

Step 6:

Keeping the Snow Globe stencil in place, remove some of the tape from below the globe area. Position the Snow Globe’s Base stencil below the snow globe on the image panel. Secure it with low-tack tape.

Position the circle mask, included with the Snow Globe stencil set, so that it covers the penguins. Secure it with low-tack tape as shown.

Use a Sponge Dauber to apply Rhubarb Stalk Memento ink along the top, bottom, and both sides of the Snow Globe Base stencil. Use the same Sponge Dauber to apply and blend Lady Bug Memento from the edges towards the center of the Snow Globe Base. When happy with the blending and coverage, remove, clean, and dry the Snow Globe  stencil, Snow Globe Base stencil, and the circle mask. Use Scarlet Red and Red Chalk pencils to add dimension and detail to the Snow Globe base. Use a white chalk pencil to add a highlight.

Step 7:

Place low-tack tape horizontally across the inked Snow Globe Base. Place the circle mask over the inked Snow Globe and masked penguins on the image panel. Use low-tack tape to secure the circle mask in place.

Use a Sponge Dauber to apply New Sprout Memento ink to the top part of the image panel as shown.

Step 8:

Place the Holly Background stencil over the circle mask onto the image panel. Secure the stencil in place with low-tack tape. Use a Sponge Dauber to apply Oasis VersaFine Clair ink over the stencil’s  holly leaves onto the image panel. Use a paper towel to remove as much ink as possible from the stencil.

Use a Fantastix to apply Tulip Red VersaFine Clair ink over the stencil’s holly berries onto the image panel. Remove, clean, and dry the stencils and the circle mask. Heat set the image panel.

Step 9:

Use the stenciled leaves and berries as a guide to re-position the Holly Background stencil onto the image panel. Secure with low-tack tape. Place the Snow Globe stencil over top so that the globe aperture is framing the snow globe on the image panel. Secure with low-tack tape.

Use a Fantastix to lightly apply green ink from the Fresh Greens Kaleidacolor inkpad (the second pad from the left) over the stencil’s holly leaves onto the snow globe on the image panel. Use another Fantastix to apply Lady Bug Memento ink over the stencil’s holly berries onto the image panel.

Remove, clean, and dry the stencils.

Step 10:

Place low-tack tape horizontally on the line separating the snow globe from the holly leaf background.

Use a Sponge Dauber to apply Acorn VersaFine Clair ink to the image panel. Use black chalk pencils to add shading and horizontal lines. Smudge the chalk slightly.

Step 11:

Smoosh Sparkle Sheer Shimmer Stix onto the craft mat. Use a paintbrush to apply to the ground under the penguins to make it look icy.

Step 12:

Apply Sparkle Sheer Shimmer Stix onto the craft mat. Add a drop of New Sprout Memento Inker to the sparkly puddle. Mix with a paintbrush, then use the brush to make the penguins’ eyes green. Clean the craft mat.

Apply Sparkle Sheer Shimmer Stix onto the craft mat. Add a drop of Danube Blue Memento Inker to the sparkly puddle. Mix with a paintbrush, then use the brush to add an outline to the white areas of the penguins’ bellies.  Clean the craft mat.

Step 13:

Apply Frost Shimmer Stix to the craft mat. Use a paint brush to add white to the beak of the compass penguin (on the left). Clean the craft mat.

Step 14:

Place the Snow Globe stencil back over the image panel. Cover the remainder of the background with a ruler or tape. Add a drop or two of Moonlight White Brilliance Inker to the craft mat. Spray with 91% Isopropyl Alcohol. Mix with a paint brush and splatter the penguins to add a snowy touch. Remove and clean the stencil. Clean the craft mat. Use a white chalk pencil to add highlights to the right and left side of the snow globe.

Step 15:

Use Tulip Red VersaFine ink to stamp the “Merry Christmas” stencil onto white cardstock. Use a sentiment cutting die to cut the sentiment.

Use a fancy tag cutting die to cut green cardstock. Adhere the sentiment to the green die-cut. Adhere the matted sentiment to the image panel as shown. Enhance the sentiment with rhinestones.

Step 16:

Trim the image panel to 4.625” x 6.625”. Cut a piece of black cardstock to 4.75” x 6.75”. Use Tear-It!Tape to adhere the image panel to the black mat. Use Tear-It! Tape to adhere the matted image panel to a 5” x 7” green card.

Imagine Crafts Supplies:

Other Supplies:

  • 140 lb. Mixed Media Paper by Strathmore
  • Penguin Clear Stamp Set 604 by AALL and Create
  • Frosty Clear Stamp Set 603 by AALL and Create
  • Snow Globe Stencil Set by Funky Fossil
  • Holly Background Stencil by Funky Fossil
  • Classic Sentiments Clear Stamp Set by Hefty Doodle
  • Cutting Dies by Spellbinders
  • Diamond Sparkles by Hunkydory Crafts
  • Scarlet Red, Red, White, and Black Chalk Pencils by General’s
  • Heat Gun by EK Success
  • Mini Guillotine Trimmer by Tim Holtz for Tonic
  • Big Shot

Create A Holiday Tree Ornament Using Creative Medium, Memento and Brilliance Inks 

By Katy Ingram

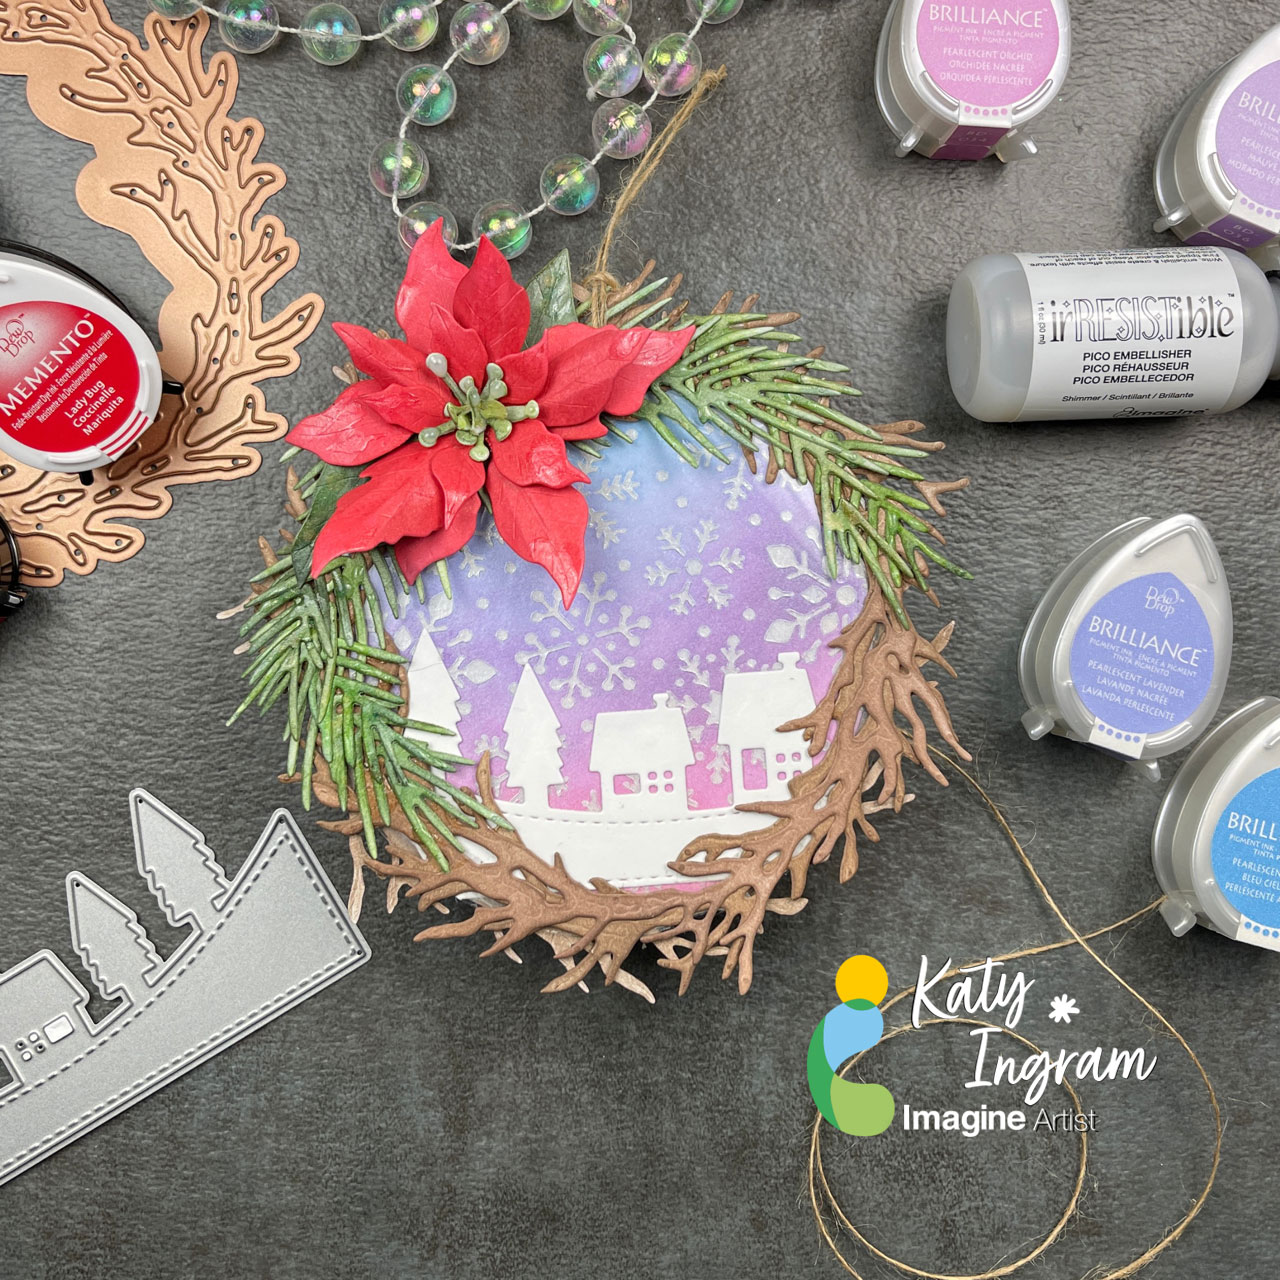
Hello Friends! Katy here and for todays project I thought I would used a variety of products with some die cuts to create an ornament for the Christmas tree. 

In todays video tutorial I explain each layer of the ornament starting with the snowy background which uses the Creative Medium with a snowflake stencil, once dried I applied the Brilliance Ink in Pearlescent Orchid, Pearlescent Purple, Pearlescent Lavender and Pearlescent Sky Blue and was blown away. Check out the video for all the details on how this ornament came together. 

I hope you enjoy and thanks for stopping by. 

Skill Level: Beginner, Intermediate, Advanced

Time: 10 minutes 

Art Supplies

Imagine Products

Poinsettia

– Memento Ink Angel Pink, Love Letter, Lady Bug, Rhubarb Stalk

– Delicata Ruby Red

– Pico Embellisher-Shimmer

Greenery

– Memento Ink Bamboo Leaves, Northern Pine

– Pico Embellisher-Shimmer

Woodland Wreath

– Memento Ink Toffee Crunch, Rich Cocoa, Espresso Truffle

Back Panel

– Delicata Ruby Red

– VersaFine Clair Nocturne

Snowflake Background

– Brilliance Inks

– Creative Medium-Shimmer

On Point Glue

Tear It! Tape

Multi-Purpose Squeegee

Other Products:

Spellbinders Poinsettia Die

Spellbinders Woodland Wreath with Feathered Friends Die

Spellbinders Blizzard Stencil

The Greetery Botanicuts Pine Bough Die

Simon Says Stamp The Magic of Christmas Stamp Set

Kat Scrappiness Holiday Village Slimline Border Die

Honey Bee Stamps Simple Alpha Stamp Set

Lawn Fawn Acetate

Make a Holiday Card Using VersaColor and Painter’s Tape

By Kathy Pisupati –

creating art for Imagine Crafts!  Today I have a new tutorial for you.  This is an OLD technique it is still fun, but messy!  What do you need?  A fabulous VersaColor Ink and some painter’s tape or any masking tape!

Skill Level: Intermediate

Time to complete: 1 hour

Step 1

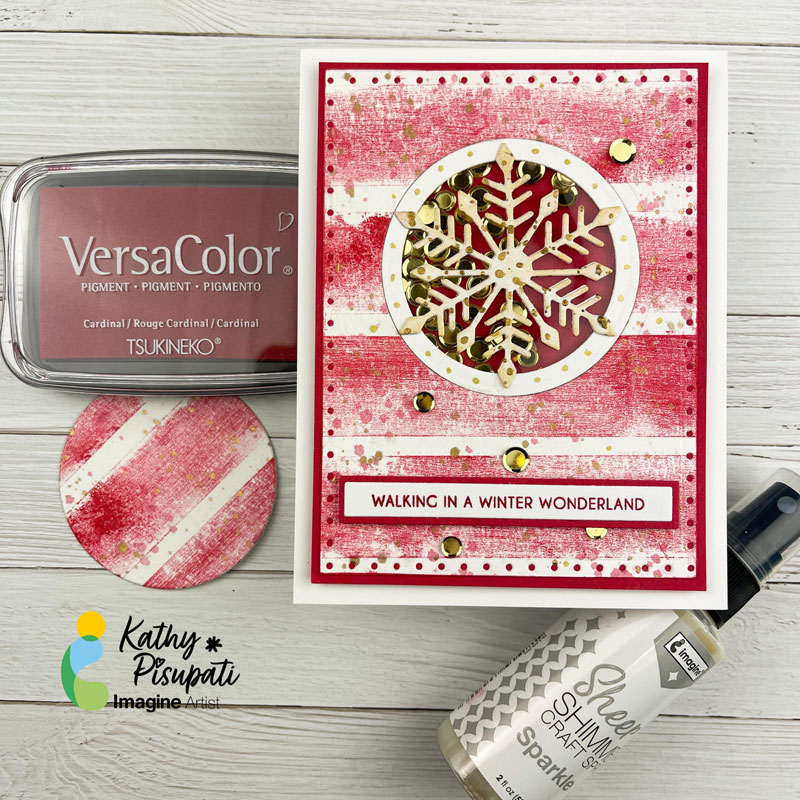
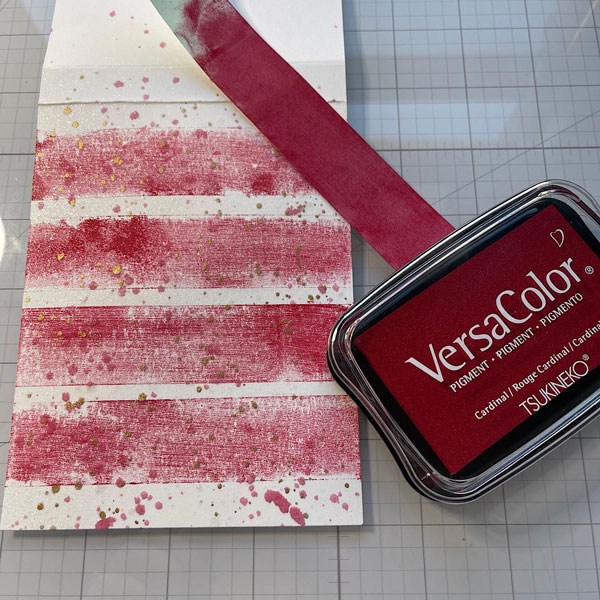
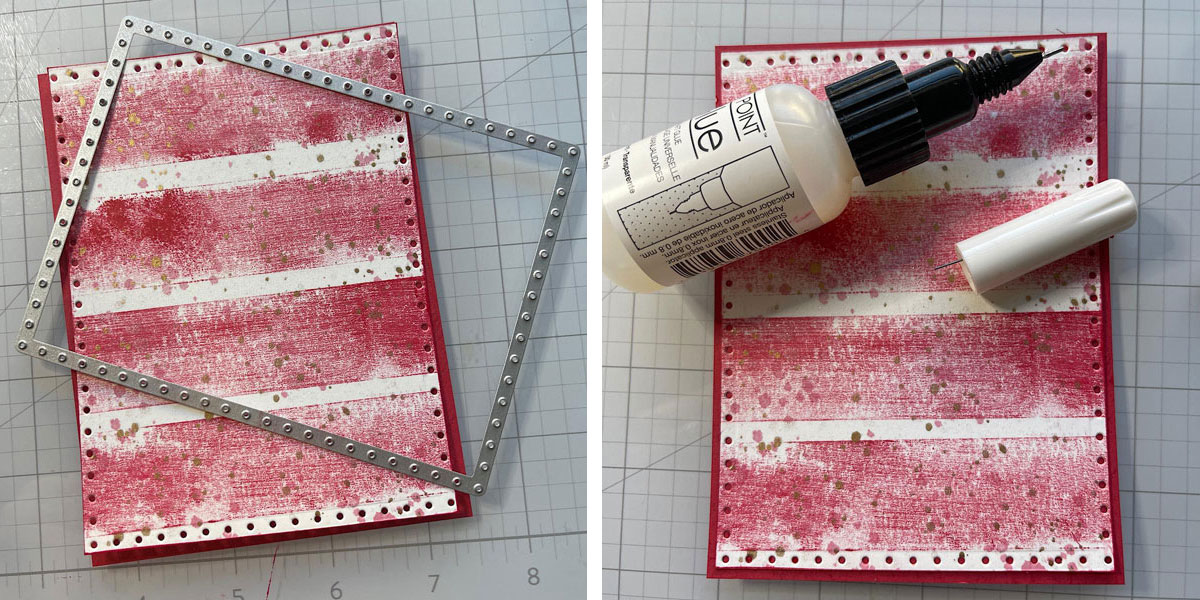
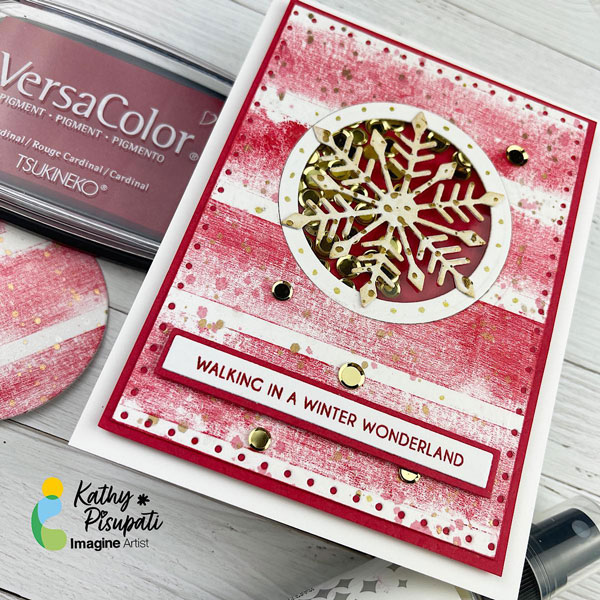
You will need a top-folding card base measuring 4 1/4 x 5 1/2“. You will also need another white panel measuring 3.75” x 5”.  Grab your masking tape and a VersaColor ink.  I used Cardinal.  At this point you can put on some gloves if you want but I didn’t.  I swiped the ink across a 5”piece of tap.  I then laid the tape across the white card stock panel, put a piece of copy paper over it and pressed.  I repeated this stripe 4 times.  I like the texture of the stripe.

Step 2

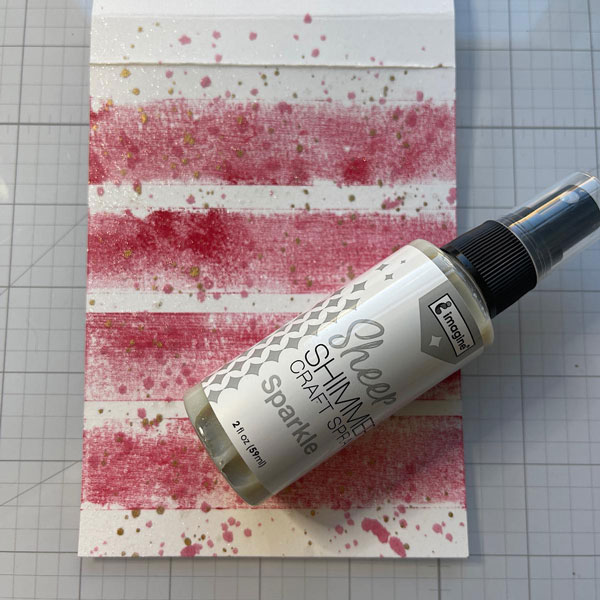
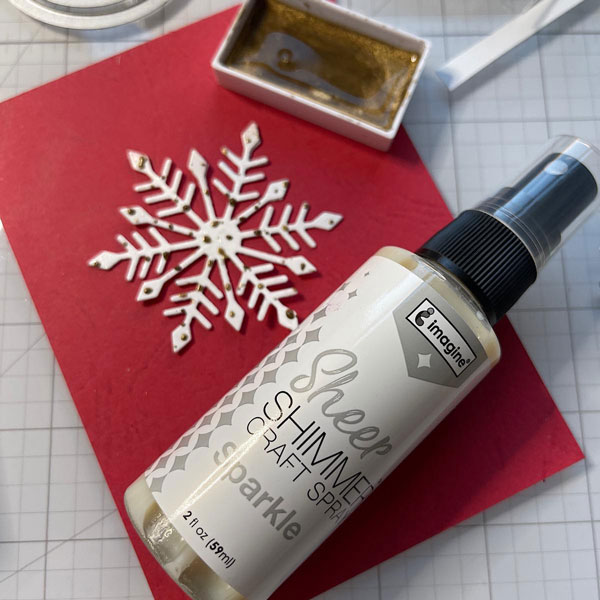
Next I smushed some of the Cardinal ink on my glass mat, added water and with a paint brush I splattered the panel.  I did the same with some gold water color paint.  Finally, I spritzed the Sheer Shimmer Craft Spray in Sparkle all over the panel.  Can you see the shimmer?  It is pretty!

Step 3

Next, I cut the panel with a die and added a piece of red stock to the back.  The red card stock is 1/4’’ larger than the striped panel.  Adhere with some On Point liquid glue.

Step 4

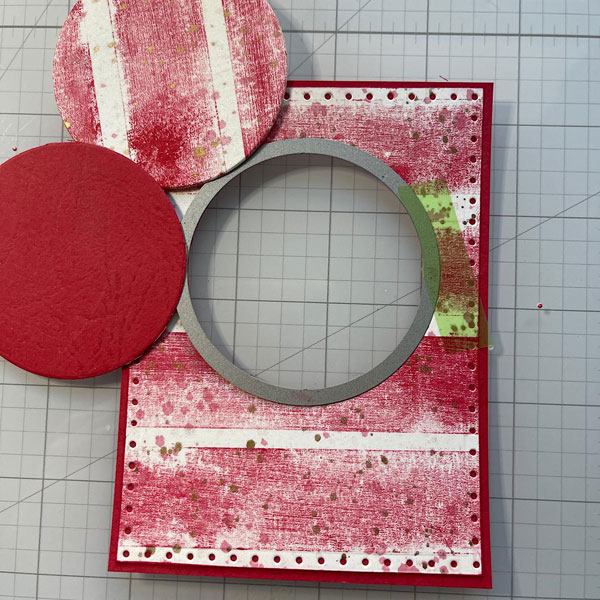
Now cut a hole from the panel and the red card stock you used for the frame.

Step 5

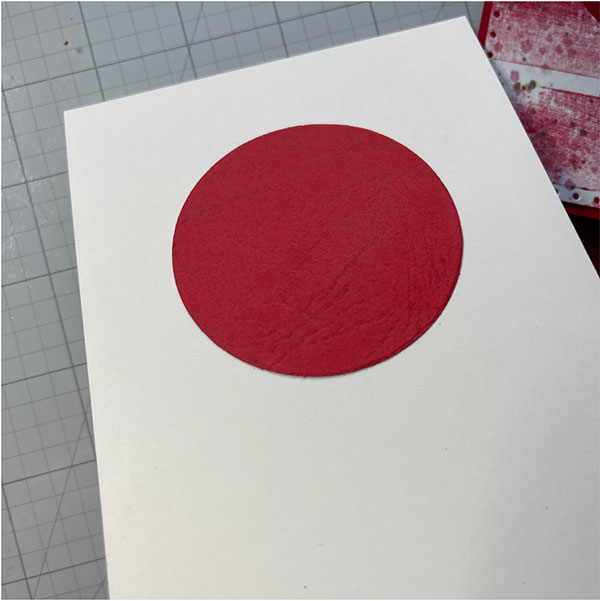
Cut a panel of white card stock slightly smaller than your main panel.  Add liquid glue to the back of the red circle.  Use your main panel as a guide, place over the white panel and press your circle into place.

Step 6

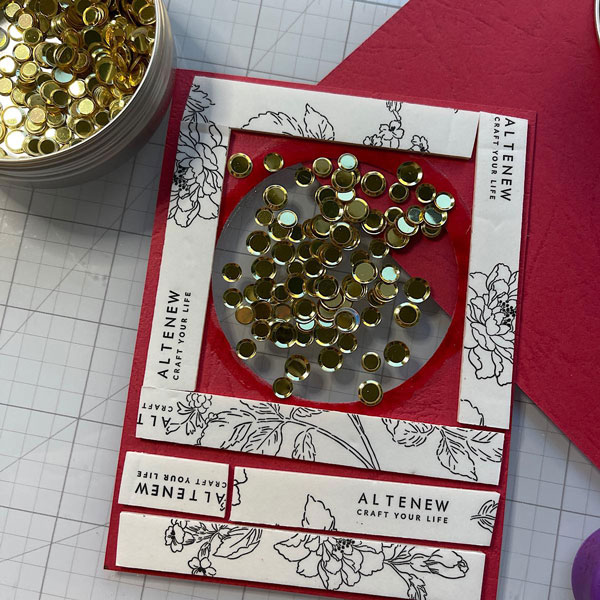
Cut a slightly larger circle from acetate or old packing and glue to the back of the main panel.  Add foam tape all around and add flat embellishments to the center.  I used gold confetti from Kat Scrappiness.

Step 7

Die-cut a few of the medium sized snowflakes from the Kat Scrappiness Snowflake Trio and glue together.  Then I used the Sheer Shimmer Craft Spray and spritzed the snowflake.  I also splattered it with gold water color paint.  It was still a bit too white so I pressed the snowflake into my Delicata Golden Glitz ink pad.

Step 8

Cut a circle frame using the die you used for the front panel and a slightly smaller one.  Glue this inside the cut out on top of the acetate. Adhere the snowflake on top of the acetate and allow to dry. Add a sentiment, I used the Christmas Stack Sentiment from LDRS Creative with the Sentiment Stack Shadow.  I glued these together and then popped it up with foam tape. I also added a few of the gold confetti around the outside of the card and some dots to the frame with a gold gel pen. I added foam tape to the back of the panel and adhered to an A2 top-folding, white card base.

I hope you enjoy this card and the tutorial. Thanks for stopping by.

SUPPLIES

Imagine Crafts

• VersaColor Cardinal

Delicata Golden Glitz

• Sheer Shimmer Craft Spray SPARKLE

• Imagine Craft Mat

• On Point Glue

Other

• Kat Scrappiness Snowflake Trio

• Circle Dies

• LDRS Creative Christmas Sentiment Stack Stamp

• LDRS  Creative Sentiment Stack Die

• LDRS Creative Shadow Stack and Die

• Essentials Rectangles for Stitching by Ellen Hutson

• Kat Scrappiness Round Gold Confetti

• Gold Gel Pen

• Gold Watercolor Paint

• Paint brush

• Spellbinders Platinum 6 Die-Cutting machine

• Colored card stock

• Neenah Classic Crest Solar White 110lb

• Paper Trimmer

• Teflon bone folder

• Foam Tape

Let’s Make a Shaker Ornament

By Martha Lucia Gomez

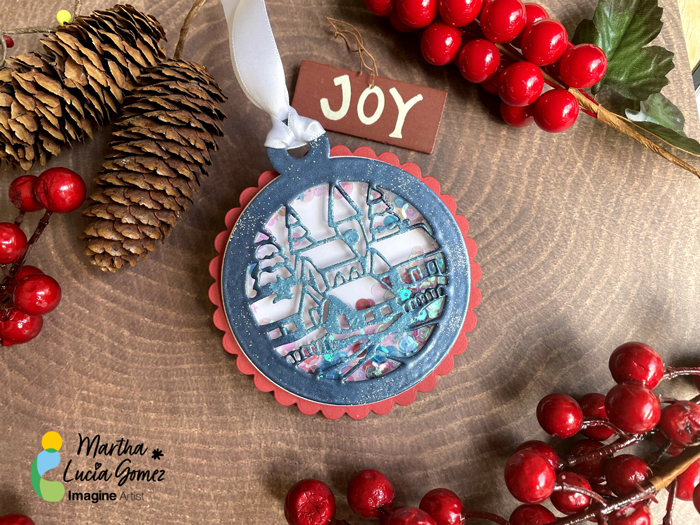
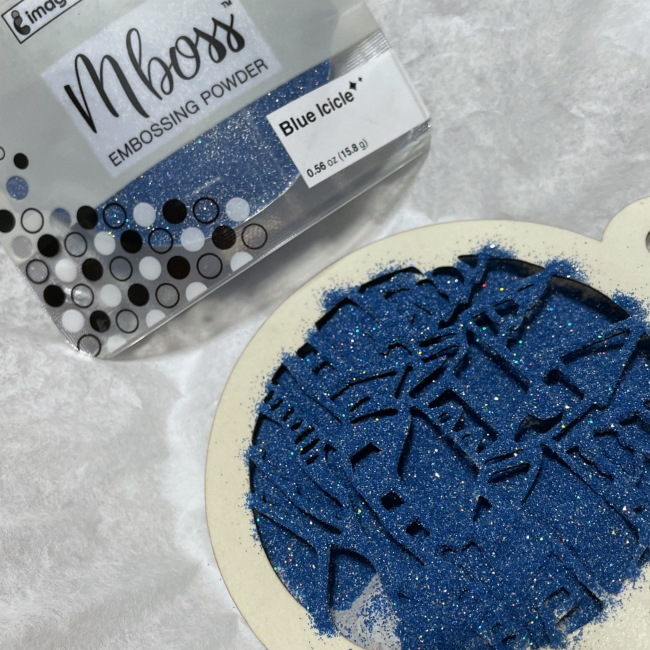
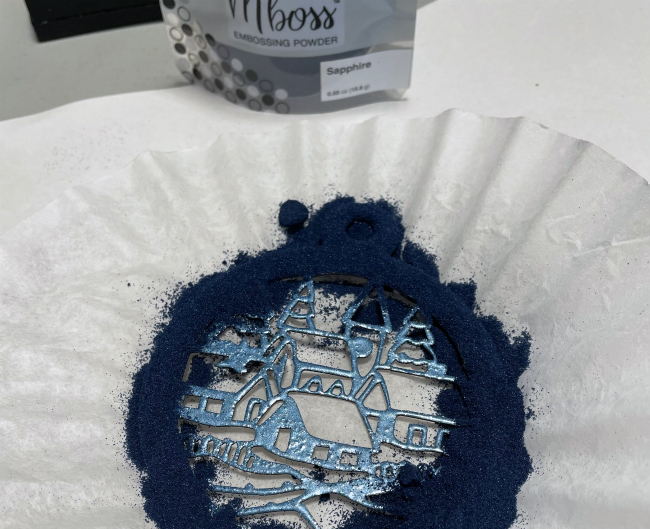
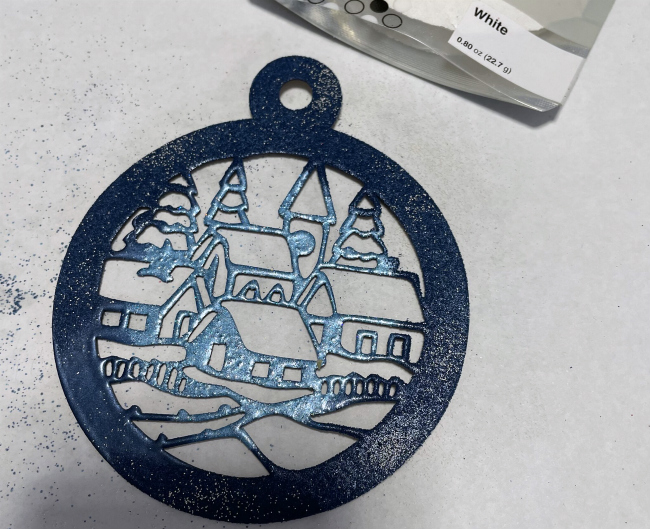
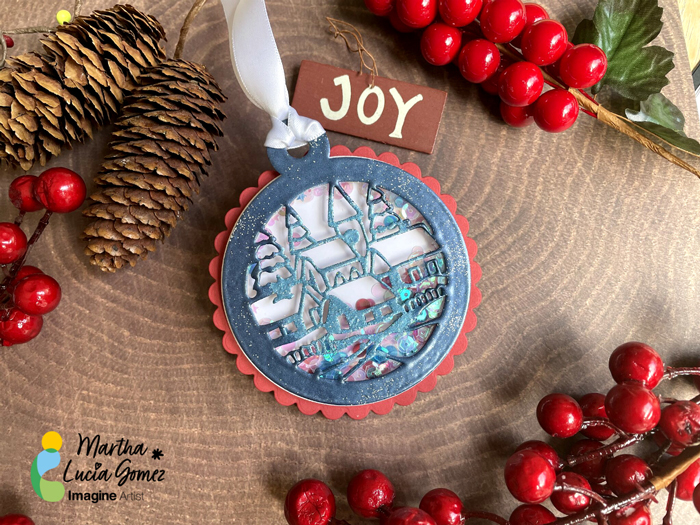
Hello there! Today’s tutorial is a shaker ornament created with embossing powders and using different colors in a single piece. To make this, I used the MBoss in Blue Icicle, Sapphire and White. To create this type of embellishments or ornaments for your cards, gifts or Christmas Trees, you can also use our traditional Embossing Powders in any color.  

Skill Level: Medium

Time to Complete: 45 minutes

Directions:

Step 1:

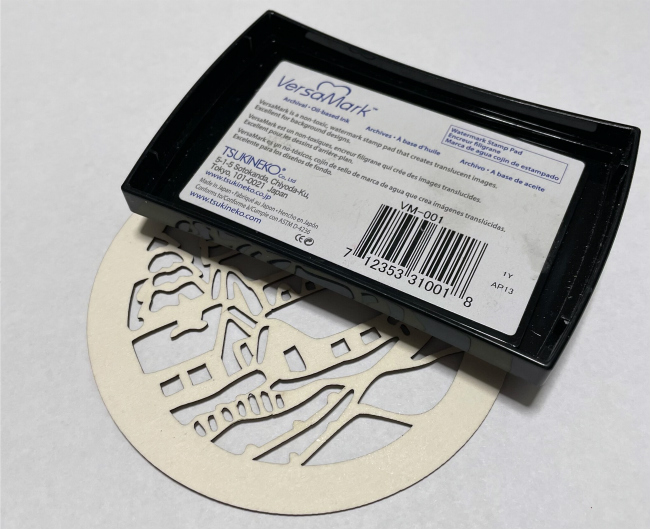
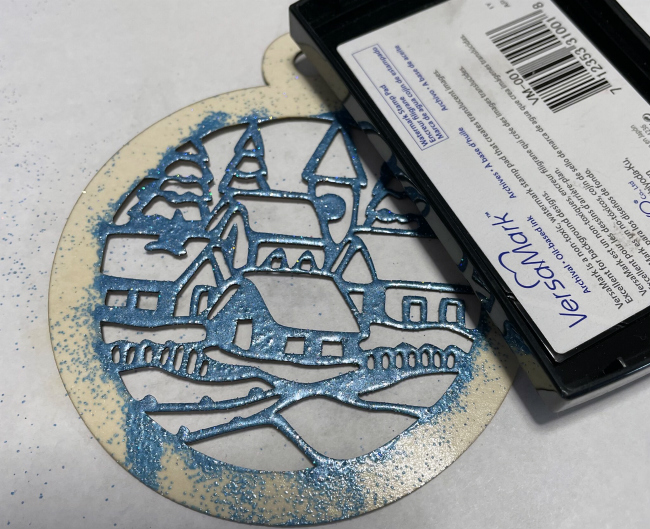
Apply a layer of ink to your Shaker Base or Chipboard piece directly with the ink pad of VersaMark. You can also use the small size or cube of VersaMark Ink if you are using a small piece of shaker card or chipboard. Make the emphasis on the center if it has the designed part. 

Step 2:

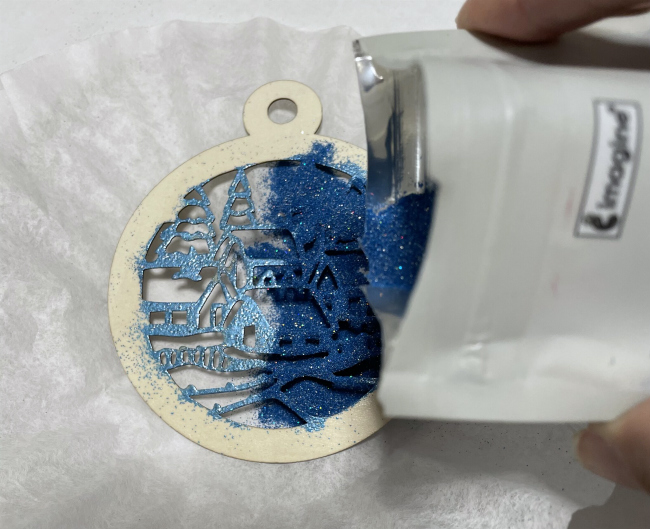
Cover the center of your ornament with the light color of MBoss or embossing powder. In my sample, I am using the Blue Icicle.

Step 3:

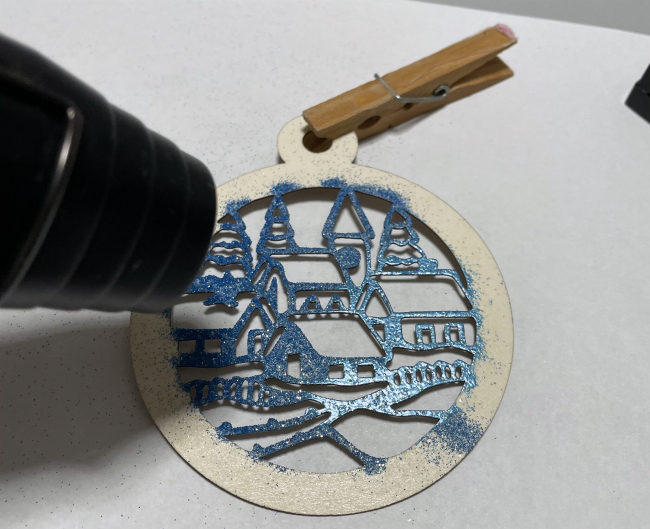
Melt the MBoss or Embossing Powder with the heat tool. Don’t worry if the powder covered some parts of the border.

Step 4:

Repeat steps 2 and 3 if you want a thick effect or want better coverage.

Step 5:

Ink the border or the chipboard ornament or shaker piece with the VersaMark Ink Pad, taking care not to cover the center of the piece. 

Step 6:

Cover the inked area with the dark color of MBoss. I am using the Sapphire.

Step 7:

Melt the powder with the heat tool. Then, add some touches of MBoss White to create more dimension over it. Melt the MBoss White or White Embossing Powder with the heat tool. 

Step 8:

Assemble your shaker card or finish the ornament by adding some sprinkles or small sequins and adding a piece of ribbon to tie it.

Voila! Our ornament is finished and can be used to decorate a card, a gift or to be handled on a Christmas Tree.

Remember that you can use this idea for any type of chipboard piece or for any occasion, not only for Christmas. 

Art Supplies:

Imagine:

• Mboss Sapphire, Blue Icicle and White

• Tear it! Tape

• Craft Mat

• VersaMark

Other:

• Shaker Dimension Set or Chipboard Piece. 

• Heat Tool

• Sequins

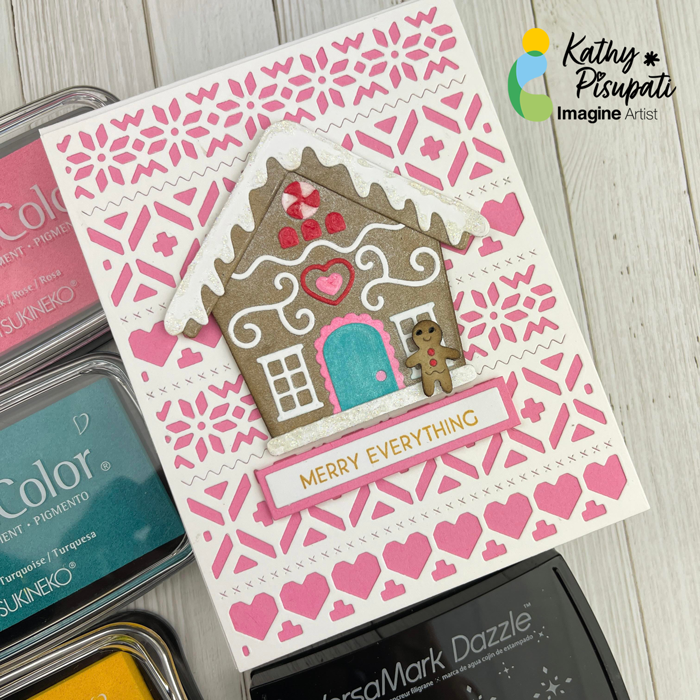
Make an Adorable Gingerbread House Card

By Kathy Pisupati –

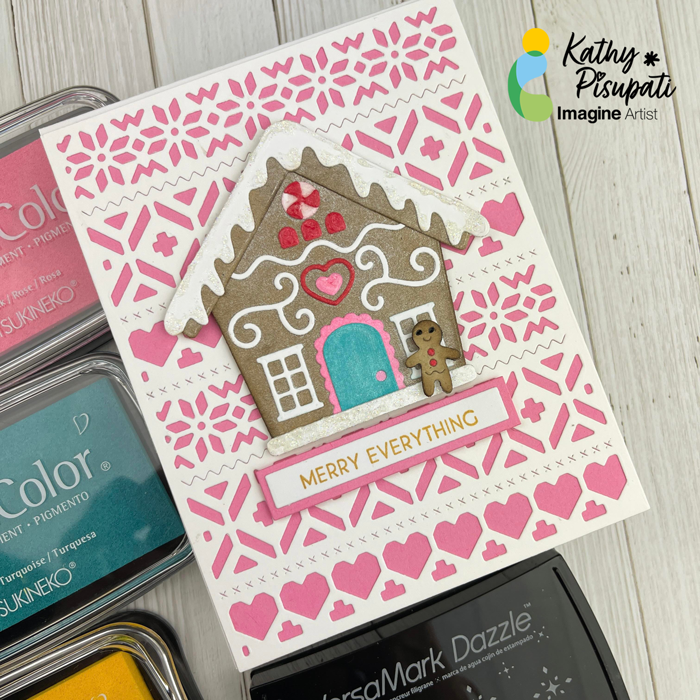
Good morning!  Kathy here, creating art for Imagine Crafts!  Today I have a new tutorial for you.  Have you tried the VersaMark Frost ink?  This was the perfect ink to provide a sugar-like coating to today’s Gingerbread card.  The VersaColor inks make your die-cutting easy and stop the search for the perfect colored scraps!

So today I have a project for you that uses the VersaMark Frost and VersaColor Inks.  So, let’s make a card.

Skill Level: Intermediate

Time to complete: 1 hour

Step 1

You will need a top-folding card base measuring 4 1/4 x 5 1/2“. You will also need a piece of colored card stock measuring 4.25” x 5.5” and another piece of white, layering card stock the same size.

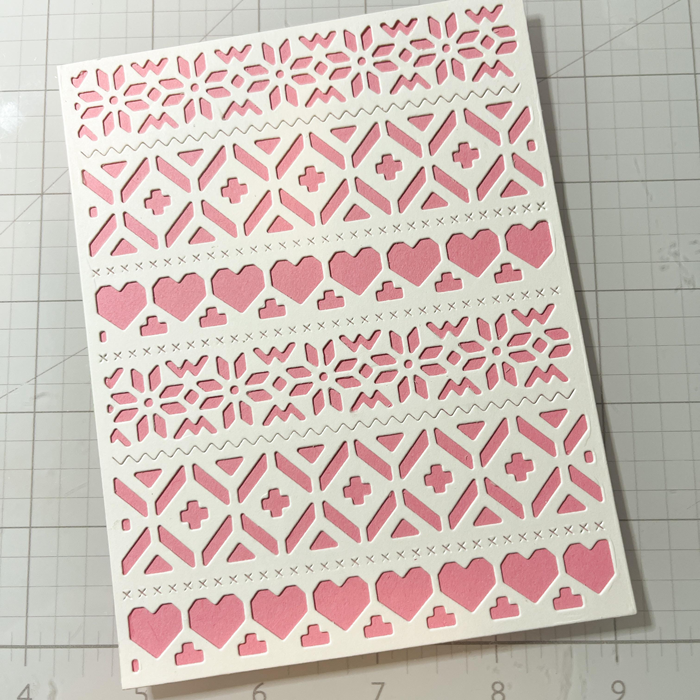
Using Maker’s Movement A2 Sweater Cover plate, die-cut the white card stock and and adhere to the colored card with On-Point liquid glue.  Adhere the entire panel to the card base with Tear-It! Tape.

Step 2

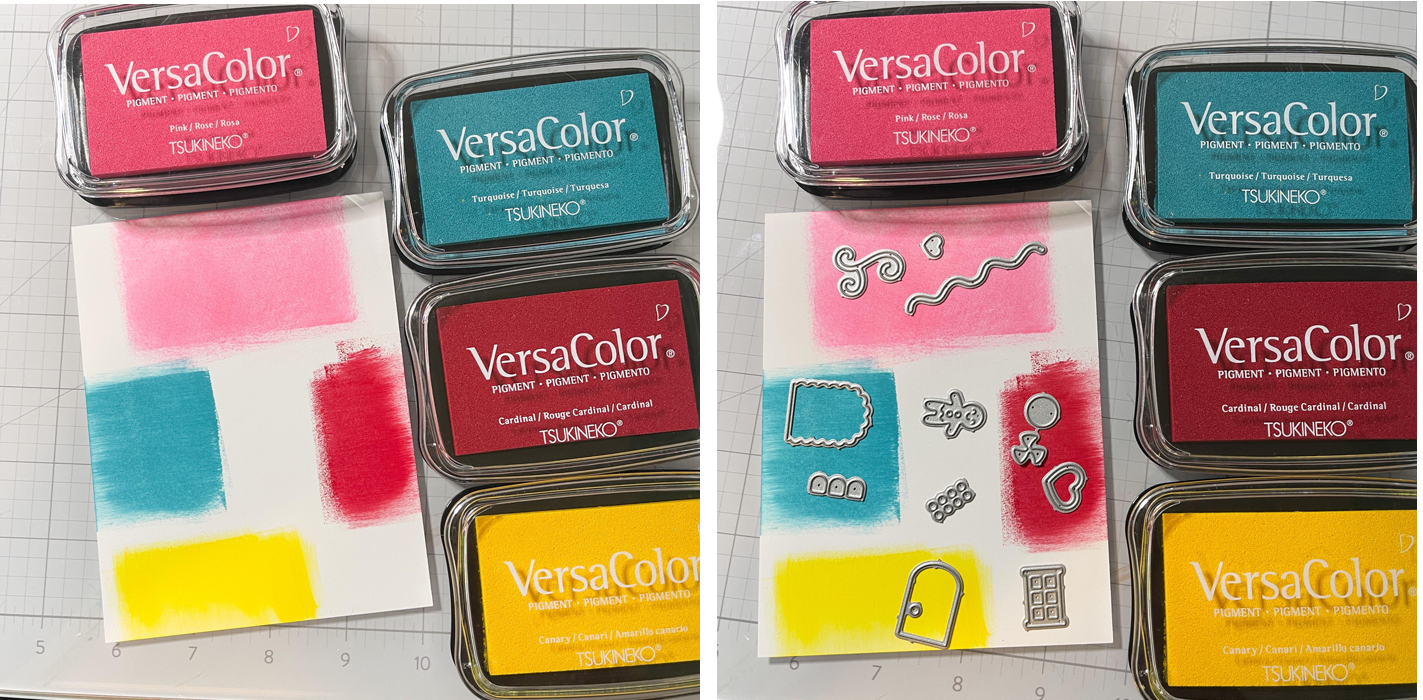
I inked a piece of scrap card stock with a variety of VersaMark Inks.  I allowed this panel to dry.  This is a quick way to small pieces of colored card stock for small die-cutting.

Step 3

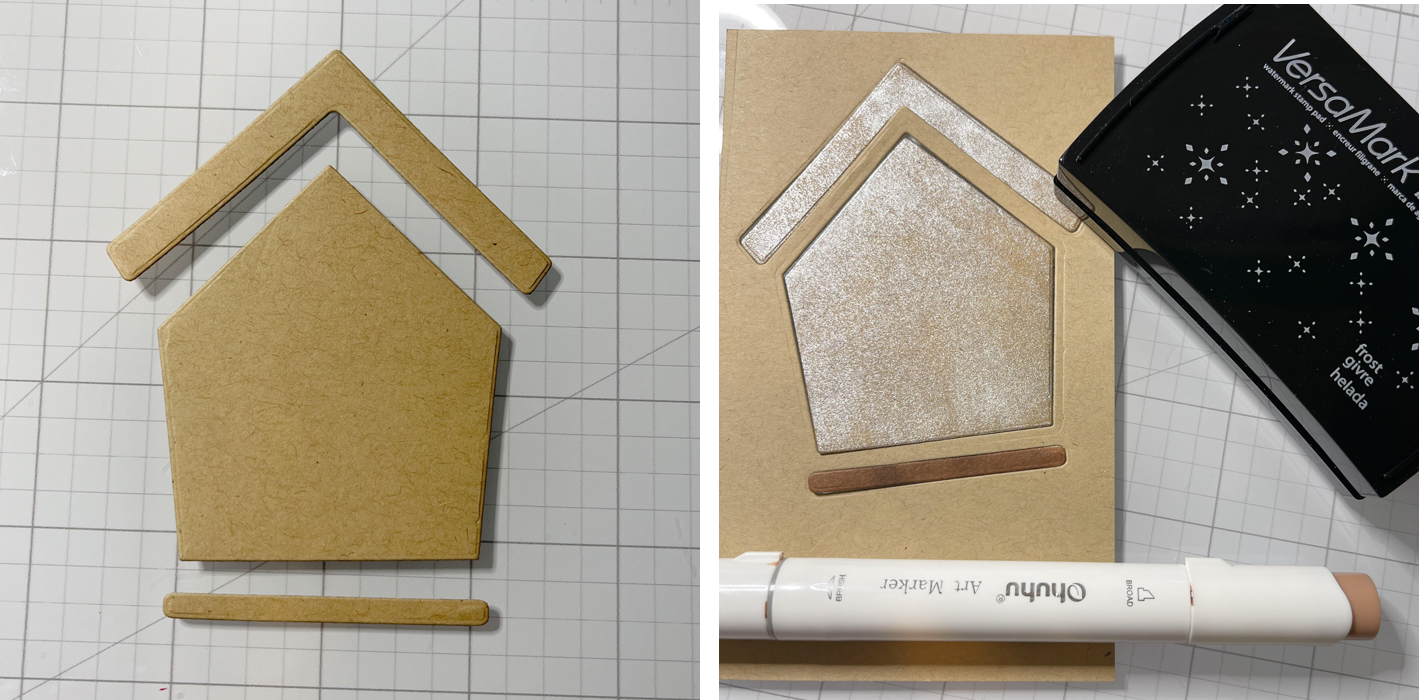
Cut the Gingerbread House from a piece of Kraft colored card stock.  Then use the VersaMark Frost ink to apply a “sugar coating”.  This is what I am calling it.  The picture doesn’t do it justice but it sure looks sugar coated in real life!

Step 4

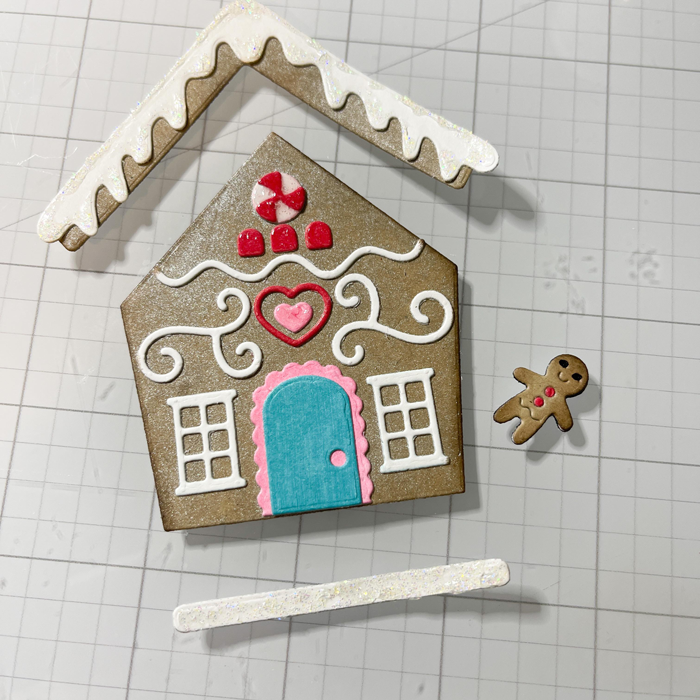
Now it’s time to cut all the cute little pieces from this Gingerbread House set.  I added some Glossy Accents to some pieces, some shimmer pen to others and did a little ink blending around the house and the gingerbread man.  I also added a glitter glue to the snow on the roof and the ground.

Step 5

Stamp a sentiment and add a shadow to the strip. I used Delicata Golden Glitz ink for my sentiment.  Now you can assemble your card.  The house, gingerbread man and sentiment were all adhered with foam tape.

I hope you enjoy this card and the tutorial. Thanks for stopping by I appreciate all of you!

Supplies Used:

Imagine

Imagine Crafts

• VersaColor Pink

• VersaColor Cardinal

• VersaColor Turquoise

• VersaColor Canary

• VersaMark Frost

• Delicata Golden Glitz

• Imagine Sponge Daubers

• Imagine Craft Mat

• On Point Glue

• Tear-It! Tape

Other

• Maker’s Movement Gingerbread House Dies

• LDRS Christmas Sentiments and Coordinating Dies

• Glossy Accents

• Spellbinders Platinum 6 Die-Cutting machine

• Colored card stock

• Neenah Classic Crest Solar White 110lb

• Paper Trimmer

• Teflon bone folder

• Foam Tape

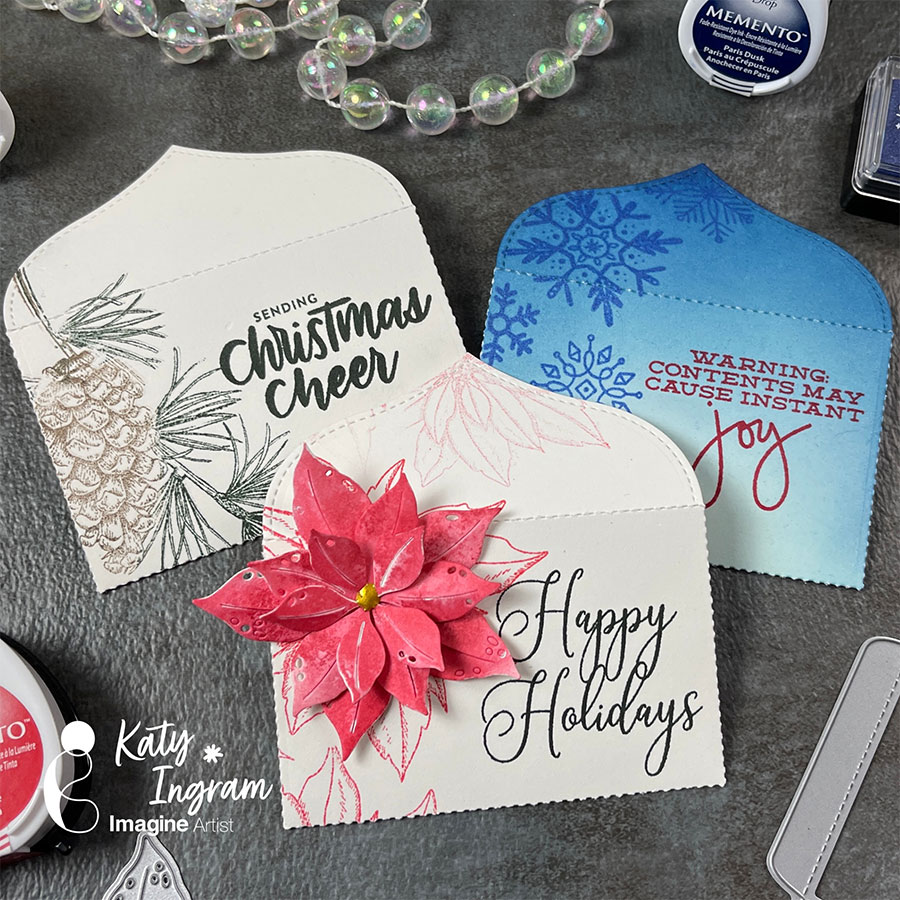
Holiday Gift Card Envelope Holders with Memento and Delicata Inks

By Katy Ingram –

Hello Friends! Katy here and for todays project I am sharing a few simple gift card envelope holders, great for the holidays or really any gift giving occasion. 

In todays video tutorial you will see how easily these envelopes came together using some Memento and Delicata Inks. Using an envelope die makes quick work of this project and will give you more time to enjoy the holiday season. 

I hope you enjoy and are inspired to take those plain gift cards and create an envelope to dress them up. 

Skill: Beginner, Intermediate, Advanced

Time: 10 minutes

Art Supplies

Imagine Products

Snowflake Envelope

• Memento Inks: Summer Sky, Teal Zeal, Nautical Blue and Paris Dusk

• Delicata Ink: Sapphire Blue

Poinsettia Envelope

• Memento Inks: Love Letter, Lady Bug and Rhubarb Stalk

• Delicata Golden Glitz Reinker

Pinecone Envelope

Memento Inks: Rich Cocoa and Northern Pine

• Tear It! Tape

• On Point Glue

Other Products Used

Mama Elephant Venice Envelope Creative Cuts Die

Waffle Flower Layered Poinsettia Die

Simon Says Stamp The Magic of Christmas Stamp Set

Simon Says Stamp Christmas Cheer Stamp Set

Mama Elephant Confetti Stamp Set