How to Create a Lovely Friend Card

2022-Annie-March-700x700

By Annie Collins

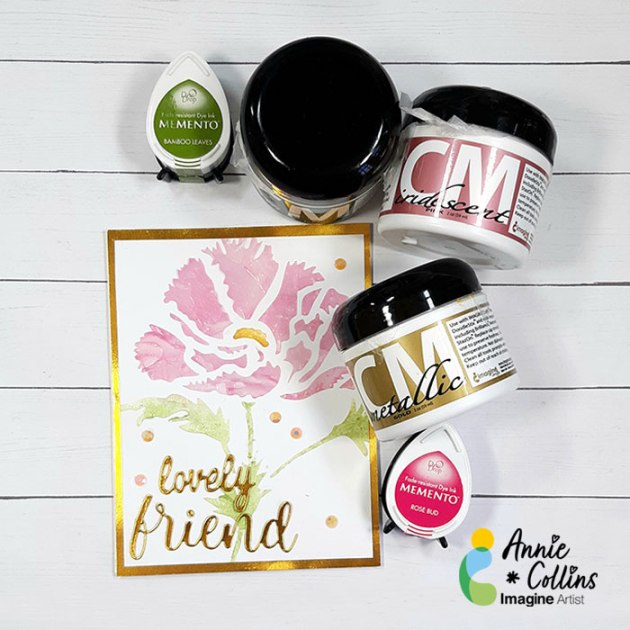
 – Hello Crafty Friends – Annie here with a friend card using some Creative Medium and Memento Inks.

Directions:

Art Supplies:

Imagine

• Creative Medium Iridescent: Green

• Creative Medium Iridescent: Pink

• Creative Medium Metallic: Gold

• Memento Inks: Rose Bud, Bamboo Leaves, Pear Tart

• Tear It! Tape

• On Point Glue

• Palette Knives

• Craft Mat 

Other:

• Memory Box Die: Lovely

• Poppystamp Die: Folksy Script Friend

• Recollections Brand 110# Cardstock: White

• Recollections Brand 80# Foil Cardstock: Gold

• Gems: Gold and Pink

Create A Simple Card Design For Any Occassion


2022-March-Katy-Hello-Spring-700x700

By Katy Ingram –

Hello Friends! Katy here with another quick project for you. Today’s card is super simple and is great for all occasions from just a note to sympathy and everything in between. I initially started off with this “Hello Spring” card, but it quickly rolled into 8 cards and I have several more I can create by using more of those small sentiments we get with most of our stamp sets. I used a single stemmed floral and some ink pad swiping and then a small sentiment. I have a video for you showing just how easy it is and share some stamps from my stash to give you ideas. I also found that stamping over VersaMagic ink with VersaFine Clair will soften the look of the VersaFine Clair ink giving you another way to use both of those inks.

Skill: Beginner, Intermediate, Advanced
Time: 5 minutes

Art Supplies:

Imagine

VersaFine Clair

VersaMagic

Memento

Tear It! Tape 

 
Other Products Used:

•Maker Forte Hello Spring Layering Stamp

Simon Says Stamp Beautiful Flowers 2 Stamp

Maker Forte Eclipse Black Card Stock

Gina K Designs White Layering Card Stock

Lavinia Stamps Multifarious Card Stock


Soft Inking Scrapbook Page with VersaMagic

Peace-700

By Alison Heikkila –

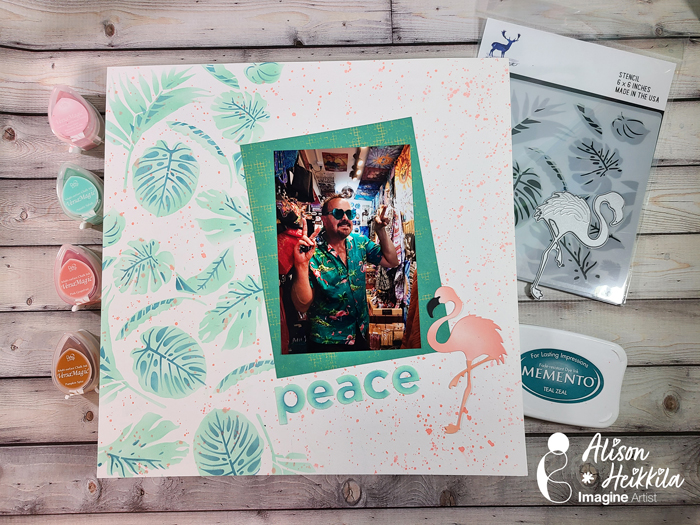
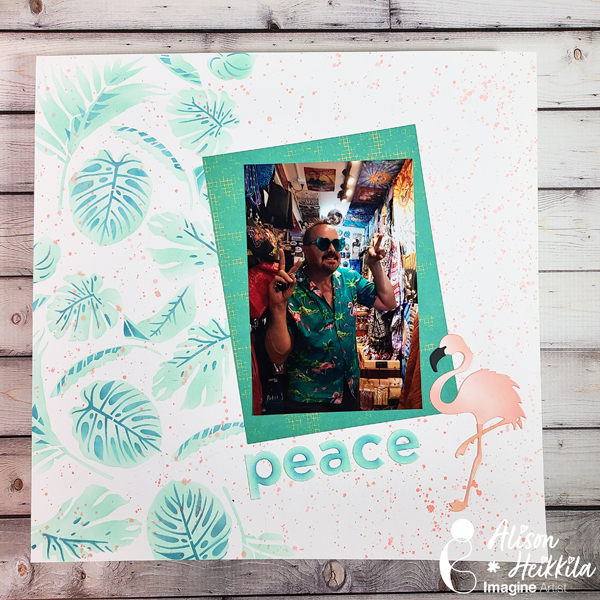
Hello! I love scrapbooking, but truthfully it’s been ages since I’ve made any layouts. I came across this fantastic picture of my husband when we were in Woodstock, NY a couple of years ago, and the inspiration hit. Let me show you how beautifully VersaMagic Ink blends with stencils and die cuts to make a fun page.

Skill Level: Beginner to Intermediate
Time: 45 minutes- 1 hour

Directions:

Peace 1

Step 1:

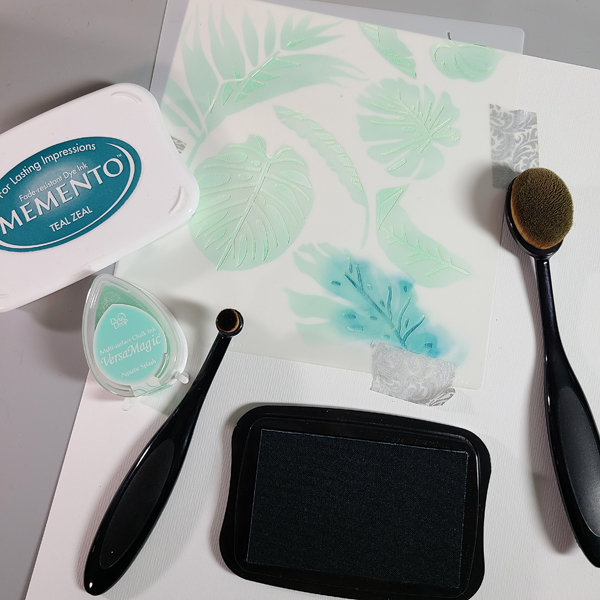
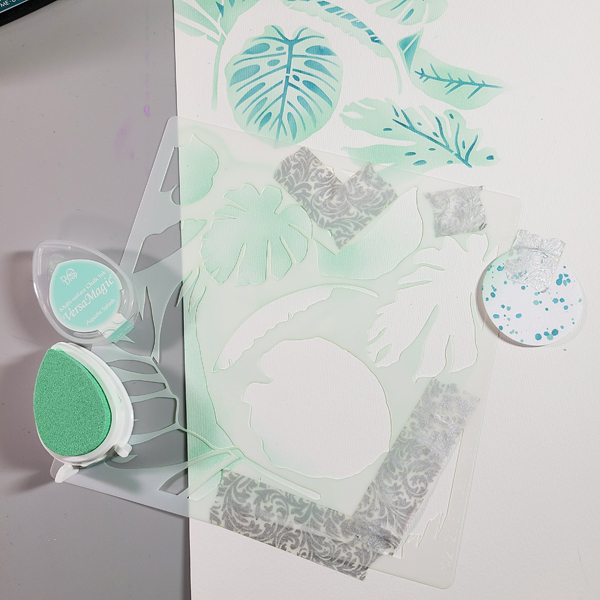
On white 12×12 cardstock, tape down the first layering stencil. I masked off some areas with washi tape, because I didn’t want the foliage to come to a harsh end where the stencil is cut. I only used leaves that were complete or went off the edge of my page.

Step 2:

Ink the leaves with a blending brush and Aquatic Splash VersaMagic Ink.

Step 3:

Add the top layering stencil and mask off any leaves that you don’t need.

Step 4:

Ink Teal Zeal Memento Ink with a blending brush.

Peace 2

Step 5:

Repeat the steps above to create a wide column of the foliage going down the left side of the page. Hint: I used that circle die to give the one leaf a rounded edge, instead of looking like it’s cut off by the edge of the stencil

Peace 3

Step 6:

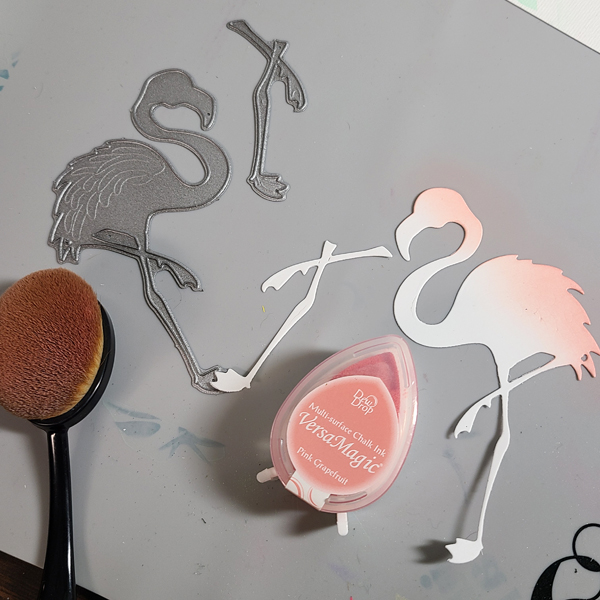
Die cut the flamingo out of white cardstock. Ink blend the body with Pink Grapefruit and a touch of Pixie Dust VersaMagic Inks. Keep the inking soft….don’t overdo the color.

Peace 4

Step 7:

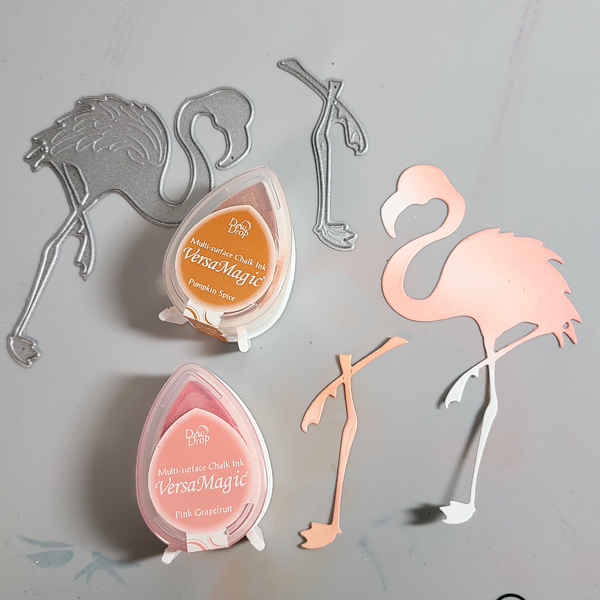
Die cut the legs out of white cardstock. Ink blend with Pink Grapefruit and Pumpkin Spice VersaMagic Inks. The Pumpkin Spice dulls the Pink Grapefruit just enough to make the legs look like the color of actual flamingo legs.

Step 8:

Die cut the front area of the beak with black cardstock.

Step 9:

Glue the flamingo pieces together with On Point Glue.

Peace 5

Step 10:

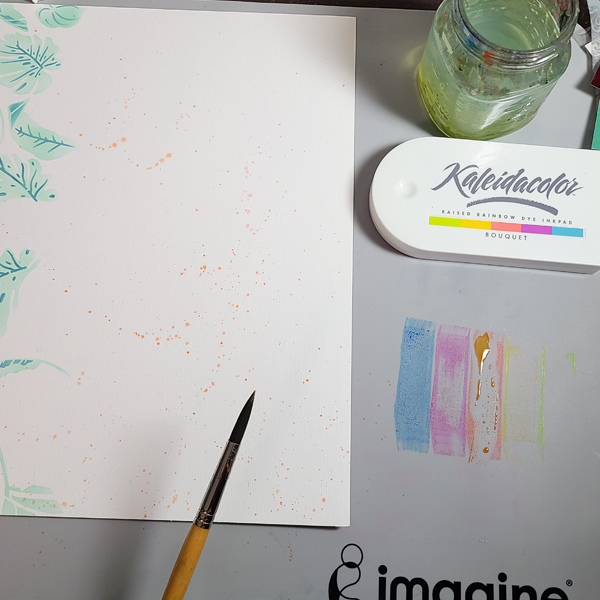
On your craft mat, swipe the Bouquet Kaleidacolor ink. You’ll be using the peachy tone in the middle.

 
Step 11

Wet a brush with water and pick up the peach color from your craft mat. Splatter the color all over the background of your scrapbook page.

Peace 6

Step 12:

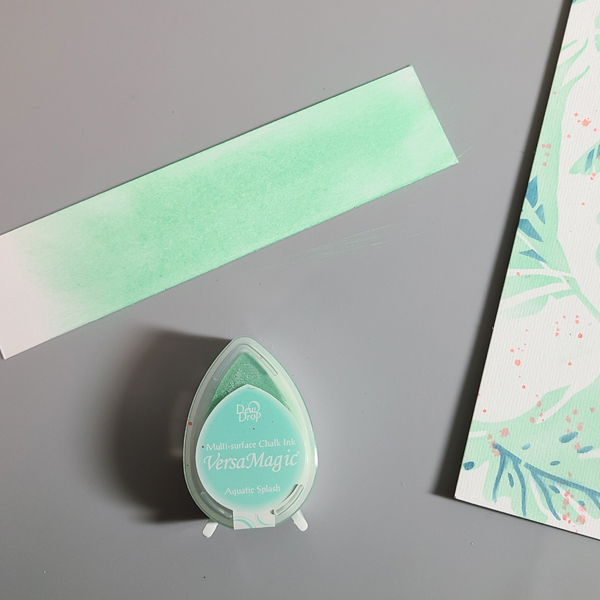
Swipe Aquatic Splash on a piece of white cardstock. Die cut your title from that piece.

Peace 7
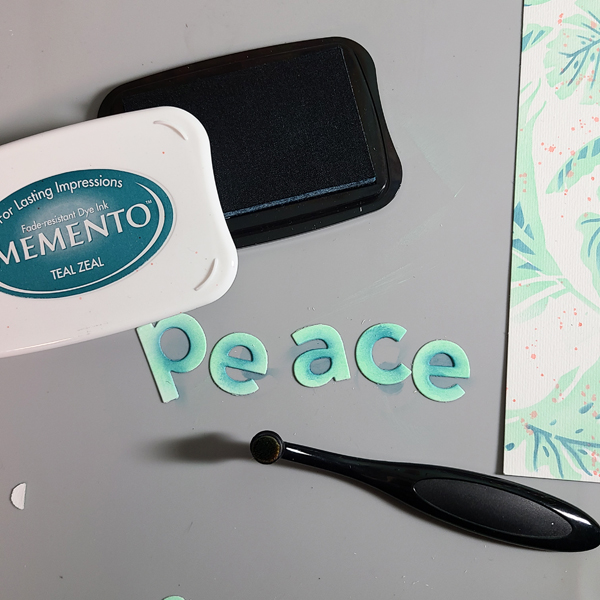
Step 13:

Using a small blending brush, apply Teal Zeal to the centers of the letters. Again, don’t go too heavy with the color.

Step 14:

Cut out a piece of coordinating patterned paper for a mat around your photo.

Peace 8 600

Step 15:

Adhere all layers with On Point Glue.

Peace 9

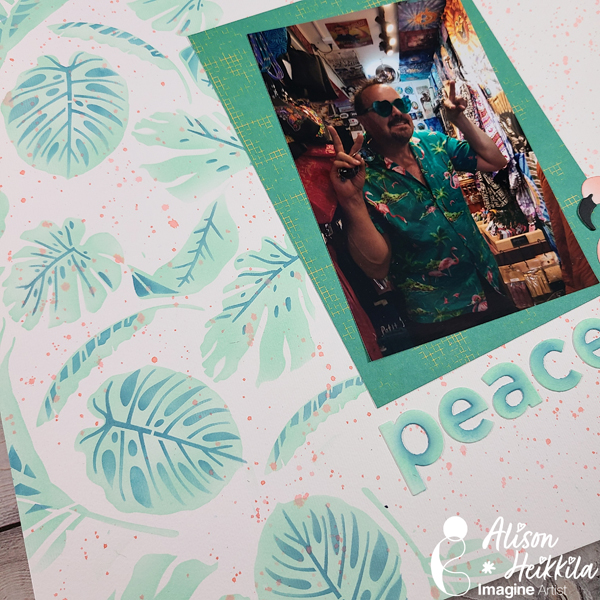
A close-up of the inking.

Art Supplies:

Imagine:

VersaMagic in Pixie Dust
VersaMagic in Aquatic Splash
VersaMagic in Pink Grapefruit
VersaMagic in Pumpkin Spice

Memento in Teal Zeal
Kaleidacolor in Bouquet
On Point Glue
Craft Mat

Other:

Erin Lee Creative: Monstera Layering Set
Erin Lee Creative: Flamingo Builder Die Set
Princeton Snap! Brush Size 10
Alphabet Die Set (the one I used is discontinued)
Blending Brushes
Patterned Paper
12×12 White Cardstock

Create A Quick Set of Ink Blended Note Cards with Embossing Powders

2022-feb-katy-ingram-card-set-IG_700x700


By Katy Ingram –

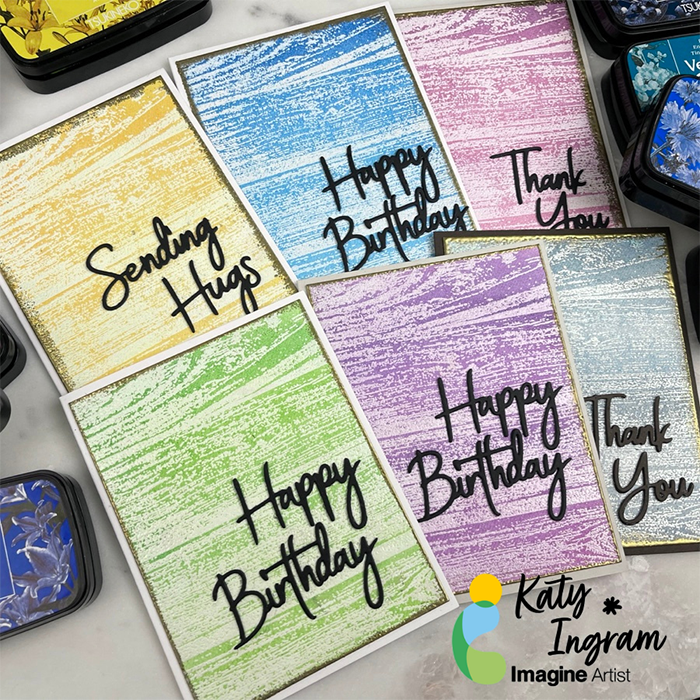
Hello Friends! Katy here with another quick project for you. I don’t know about you, but I am always looking for quick card ideas to save me some time and in today’s video, I have a simple card that is easy to replicate and all you need is some inks (VersaFine Clair in this case) some Mboss embossing powders a background stamp and some word dies. I made 6 cards in about an hour and what I love about them is that they can be used for anyone or any occasion. I hope you enjoy the video. Thanks so much for watching.

Skill: Beginner, Intermediate, Advanced

Time: 25 minutes

Art Supplies:

Imagine

VersaFine Clair

Glamorous 

Monarch

Verdant 

Green Oasis 

Twilight 

Morning Mist 

Charming Pink 

Purple Delight 

Fantasia 

Warm Breeze 

Paradise 

Blue Bell

Cheerful 

Summertime 

VersaMark Dazzle Frost 

VersaMark Ink Pad 

Mboss Embossing Powder – White 

Mboss Embossing Powder – Gold 

Point On Point Glue

Tear It! Tape

 
Other Supplies Used:

Concord & 9th Barnwood Background Stamp

Spellbinders Simply Perfect Mix & Match Sentiments

Fabriano Artistico Cold Pressed Watercolor Paper

Classic Crest Epic Black 130lb Card Stock

Accent Opaque 110 lb Card Stock

Misti Stamping Tool

Kaolin Clay Powder Tool


Make a Valentine’s Day Card for Him

2022-Annie_Collins-Feb_IG

By Annie Collins

 – Hello Crafty Friends – Annie here with a masculine Valentine’s Day card.

Directions:

Art Supplies:

Imagine

• Memento Inks: Dandelion, Cantaloupe, New Sprout, Pear Tart, Summer Sky and Teal Zeal 

• Tear It! Tape

• Sheer Shimmer Craft Spray: Gold

• On Point Glue

• Sponge Daubers 

• Craft Mat 

Other:

• Recollections Brand 110# Cardstock: White

• Recollections Brand 65# Cardstock: Teal

• Strathmore Bristol Smooth Cardstock

• Heidi Swapp Stencil: Heart

• Amazon Brand Stencil: Tye Dye Heart

• Heart Faceted Heart Teal

• Tiny Gold Hearts

Make a Fun Puffed Hearts Card with Radiant Neon Amplify

Puffed-Hearts-1-800

By Alison Heikkila –

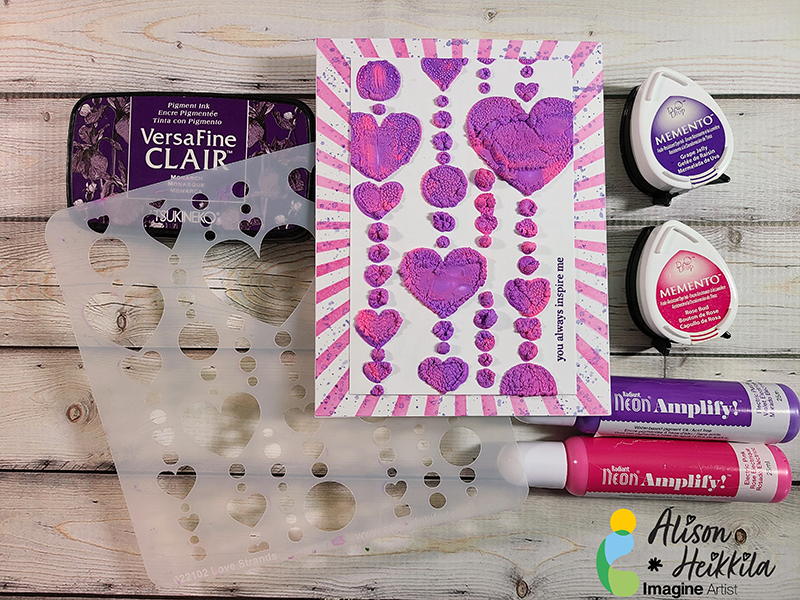
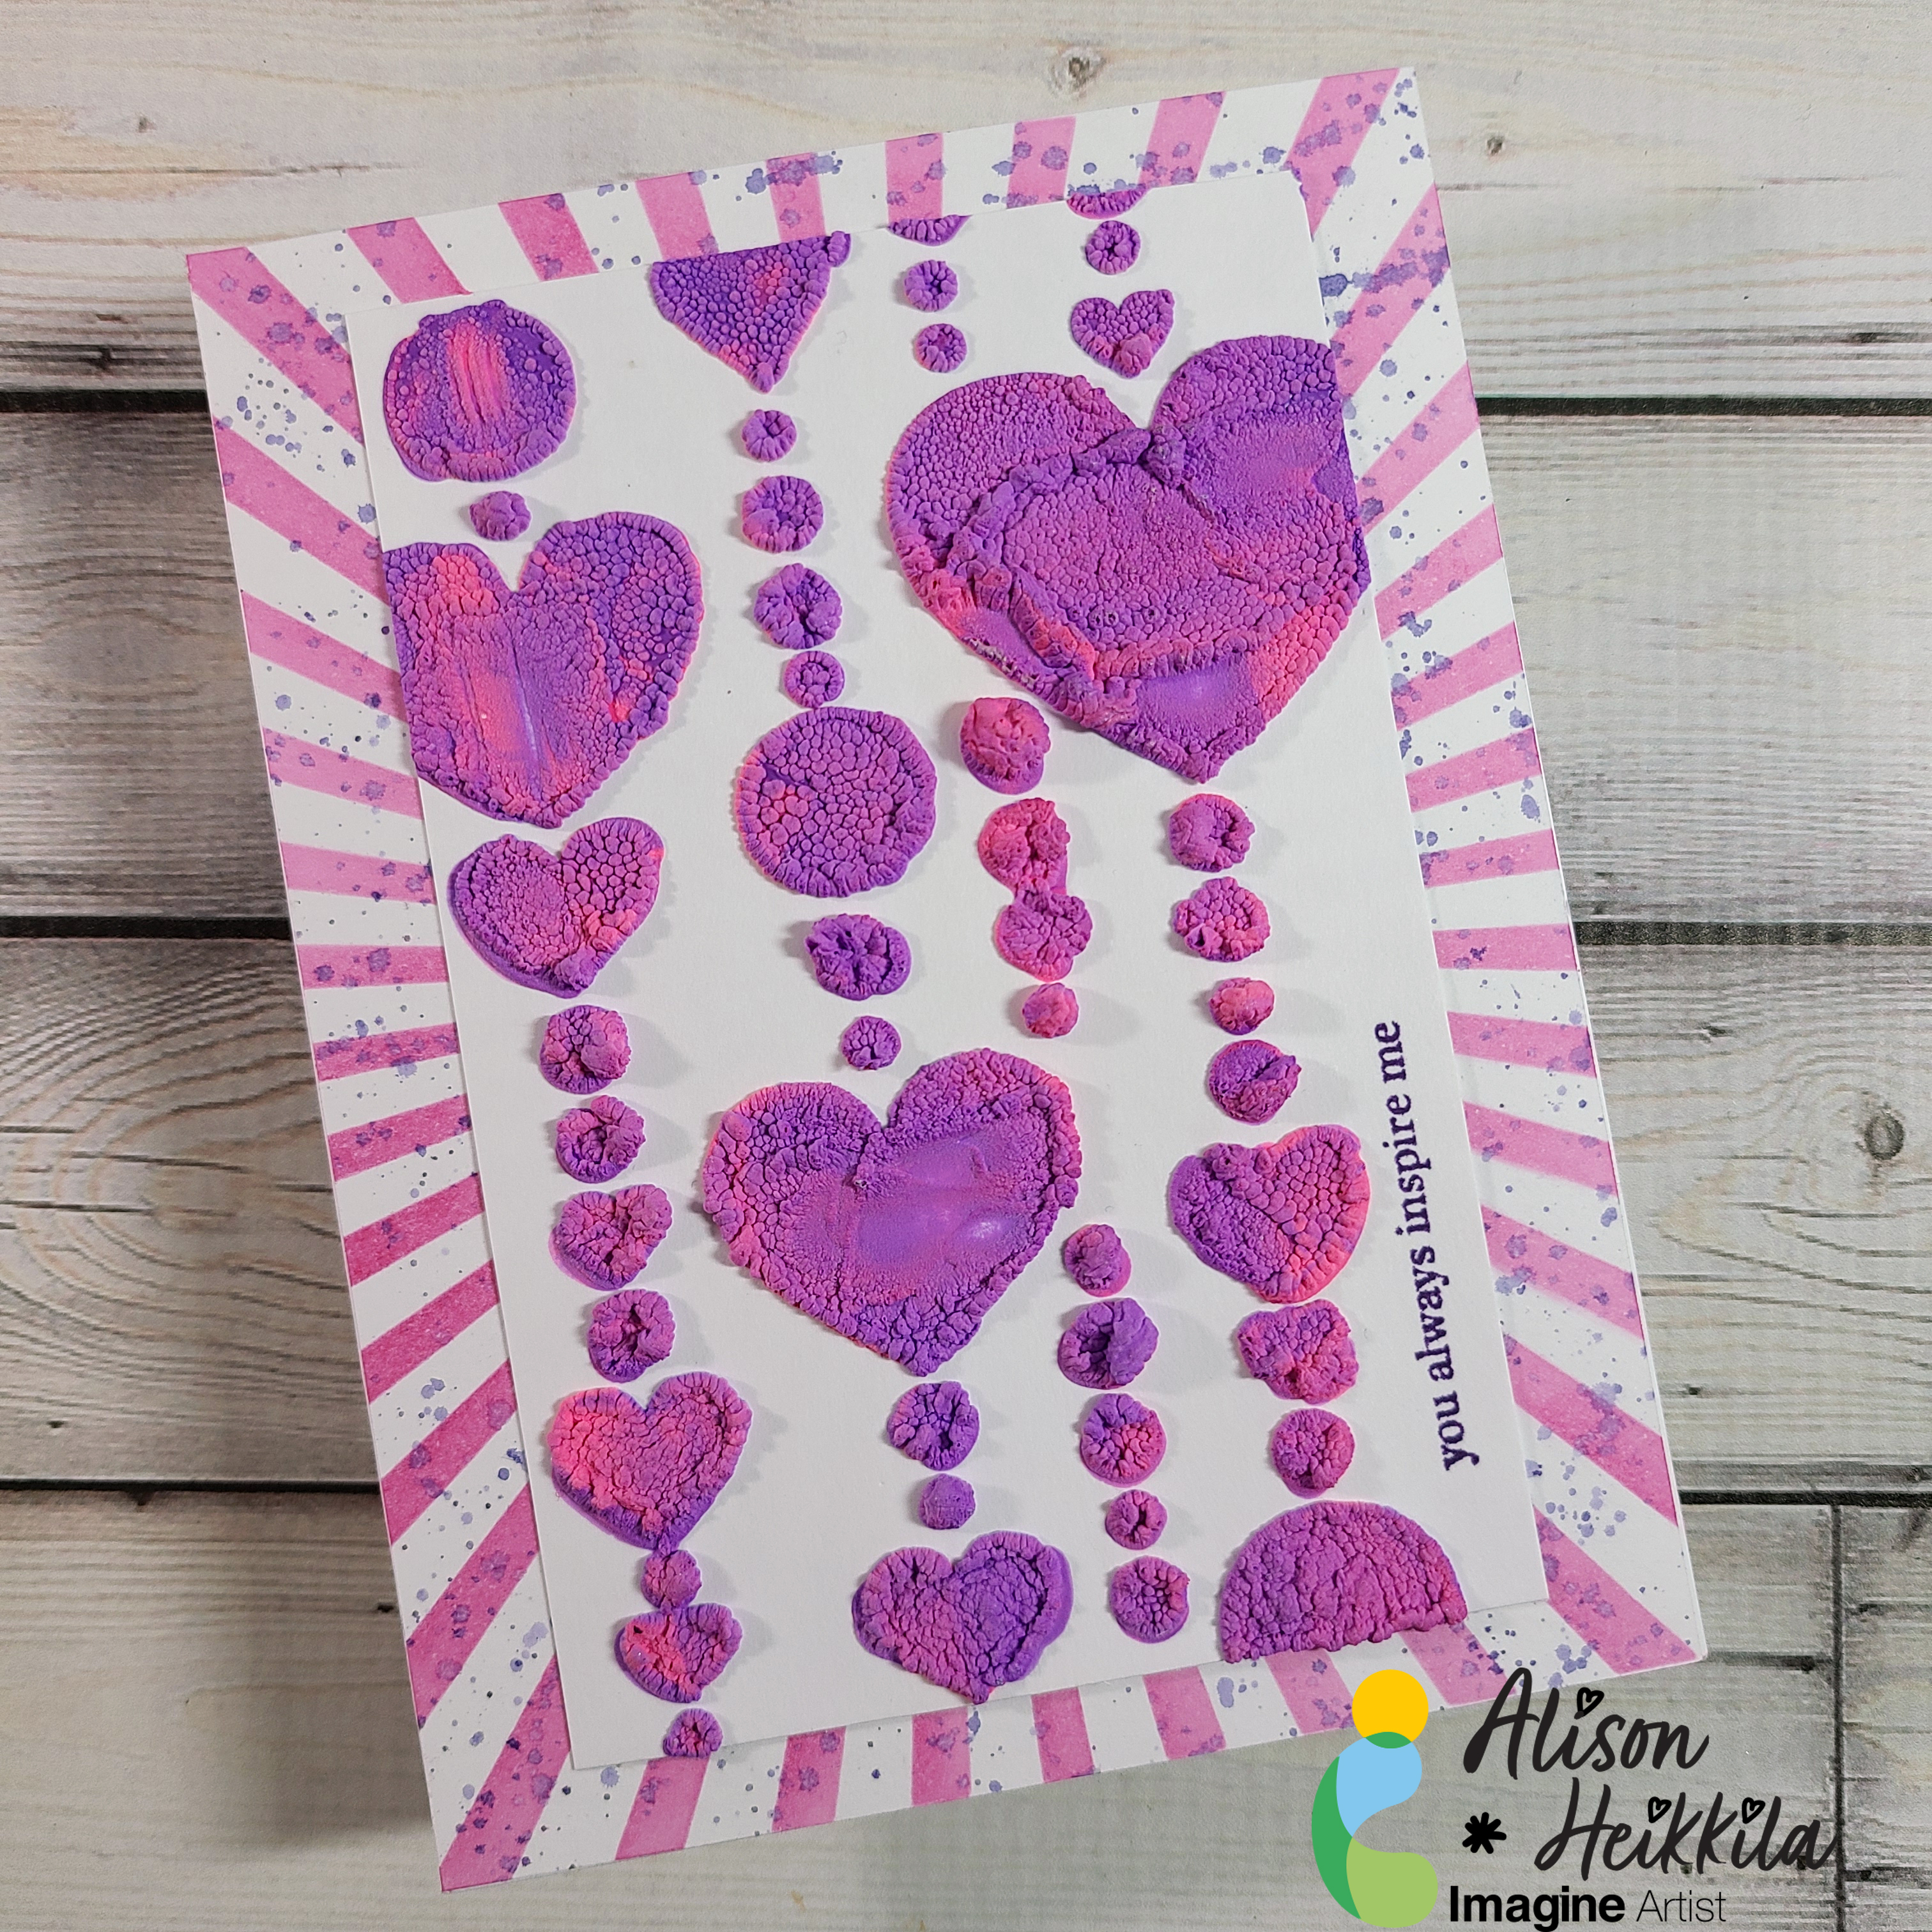
Hello! My latest tutorial for Imagine uses one of the most unique products they make…Radiant Neon Amplify. This stuff is so fun! It’s kind of a runny paint, that when you apply heat to it, it puffs up. I love using Amplify with stencils. Let me show you how.

Skill Level: Beginner to Intermediate
Time: Approx. 20 Minutes, plus drying time

Directions:
Puffed Hearts 2


Step 1:

Tape a piece of cardstock to your work surface. Lay your stencil on top and tape it down. You may want to use something like Pixie Spray to hold the stencil even more, depending on how detailed it is.


Step 2:

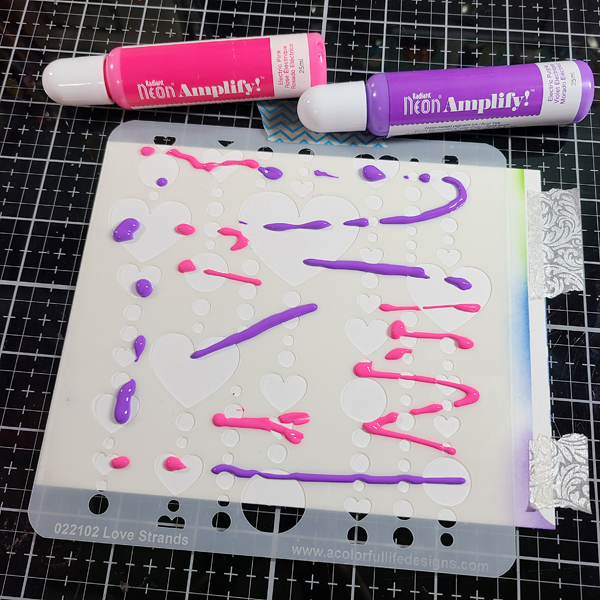
Squirt the Radiant Neon Amplify all over the stencil. I went pretty sparingly at first because I didn’t want to waste the product, but I did need to add more than what’s pictured above.


Puffed Hearts 3

Step 3:

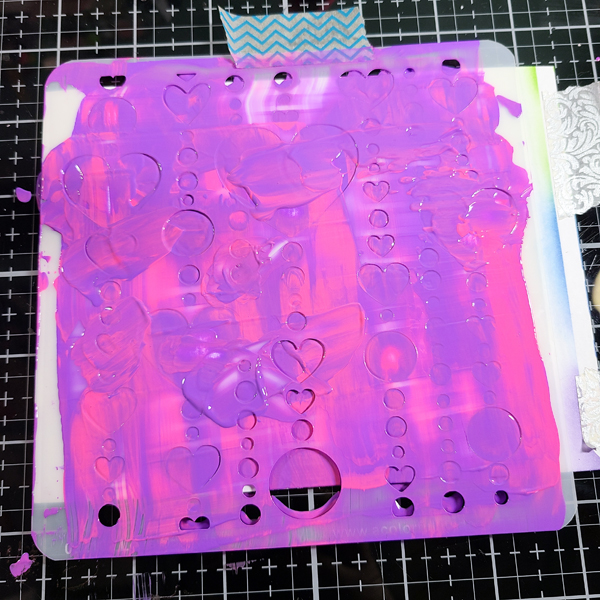
Using a paste spreader or palette knife, spread the Amplify across the surface of the stencil. Don’t press too hard, because you may lift up the Amplify. The thicker you apply the Amplify, the bigger the puffs will be, so keep that in mind.
 

Puffed Hearts 4

Step 4:

Fill in any gaps you may have with more Amplify. Don’t over mix the colors…you want a marbleized look. It should look sort of like mine above.


Step 5:

Carefully remove your stencil from the cardstock and immediately wash it and any other tools you may have used. You don’t want the Amplify to dry on anything except your cardstock.
 

Puffed Hearts 5

Step 6:

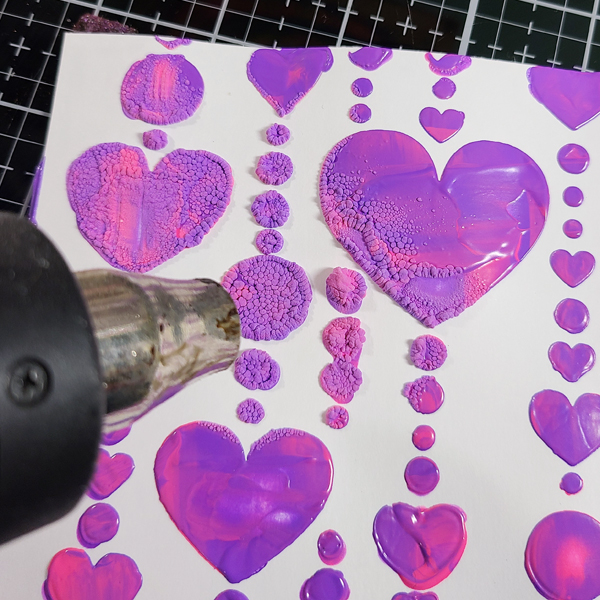
Heat the wet Amplify with a Heat Tool. You will see the shine disappear and it will start to puff up. Again, the thicker areas will have bigger puffs.
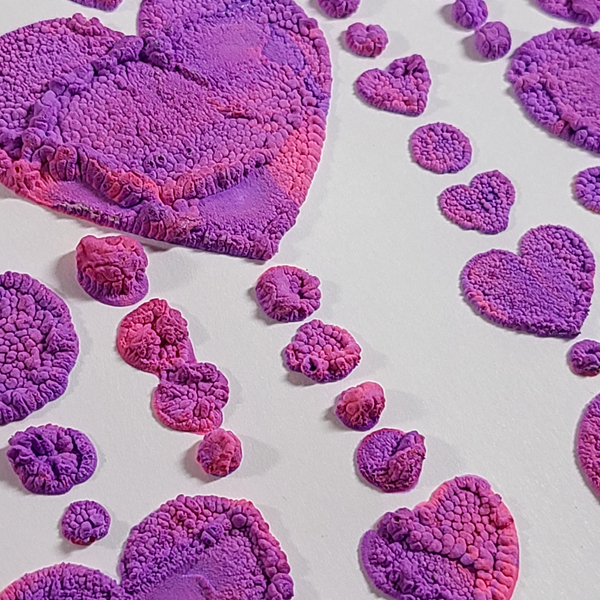
 

Puffed Hearts 6

Step 7:

Trim the panel down to 3 1/4″ x 4 3/4.”
 

Puffed Hearts 7

Step 8:

Cut a piece of Smooth Bristol Cardstock to 4 1/4″ x 5 1/2.” Tape down to work surface.

Step 9:

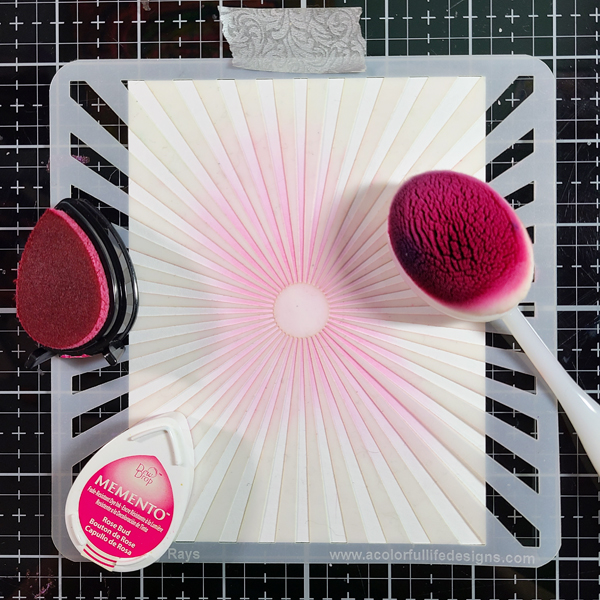
Tape down your second stencil. I also used Pixie Spray for this one, because the rays can move easily.

Step 10:

Apply Memento Ink in Rose Bud using a blending brush. Remove the stencil.
 

Puffed Hearts 8
Step 11:

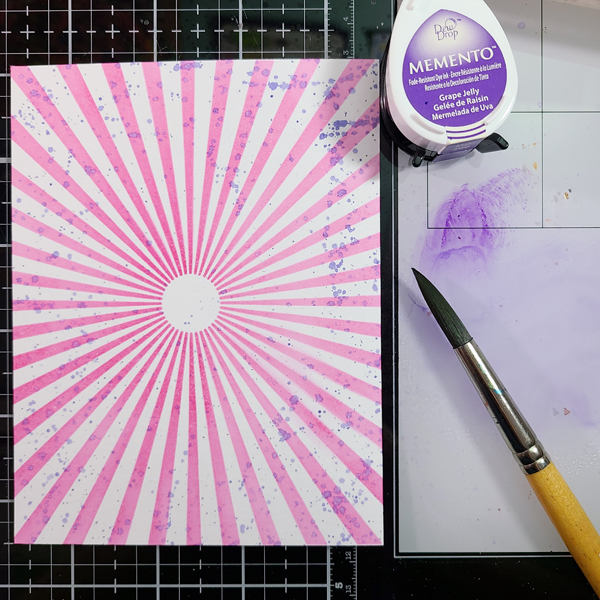
Apply Memento Ink in Grape Jelly to your work surface and spritz a little water on to the ink. Using a brush, flick the color on to your stenciled panel.
 

Puffed Hearts 10

Step 12:

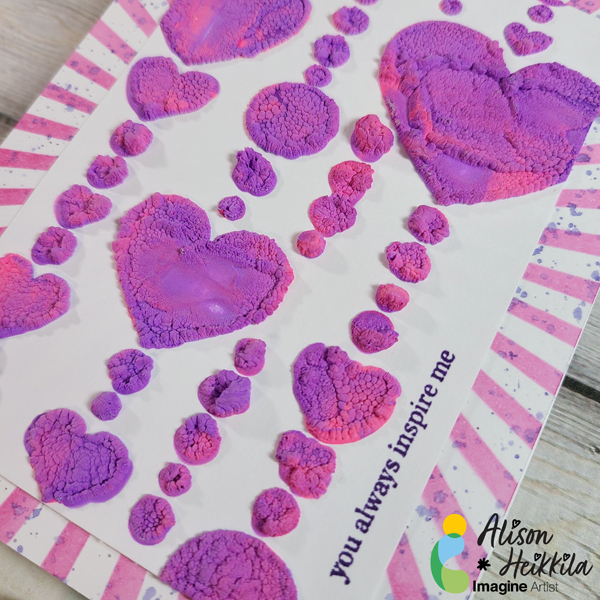
Add a sentiment to the puffed panel with VersaFine Clair Ink in Monarch.


Step 13:

Adhere all layers to your card base.
 

Puffed Hearts 11 Full

I love the texture you get from the Radiant Neon Amplify. It’s so unique and fun! I hope you’ll give them a try. Thanks so much for stopping by. Have an inspiring day!

Art Supplies:

Imagine:

• Radiant Neon Amplify: Electric Purple & Electric Pink
• Memento Ink: Rose Bud & Grape Jelly 
• VersaFine Clair Ink: Monarch 

Other:

• A Colorful Life Designs: Love Strands Stencil & Bitty Rays Stencil
• Mama Elephant: Creativity is Contagious Stamps
• Palette Knife and/or Paste Spreader
• Smooth Bristol Cardstock
• Blending Brushes
• White Card Base
• Heat Tool
• Paint Brush