Make a Valentine’s Day Card for Him

2022-Annie_Collins-Feb_IG

By Annie Collins

 – Hello Crafty Friends – Annie here with a masculine Valentine’s Day card.

Directions:

Art Supplies:

Imagine

• Memento Inks: Dandelion, Cantaloupe, New Sprout, Pear Tart, Summer Sky and Teal Zeal 

• Tear It! Tape

• Sheer Shimmer Craft Spray: Gold

• On Point Glue

• Sponge Daubers 

• Craft Mat 

Other:

• Recollections Brand 110# Cardstock: White

• Recollections Brand 65# Cardstock: Teal

• Strathmore Bristol Smooth Cardstock

• Heidi Swapp Stencil: Heart

• Amazon Brand Stencil: Tye Dye Heart

• Heart Faceted Heart Teal

• Tiny Gold Hearts

Make a Fun Puffed Hearts Card with Radiant Neon Amplify

Puffed-Hearts-1-800

By Alison Heikkila –

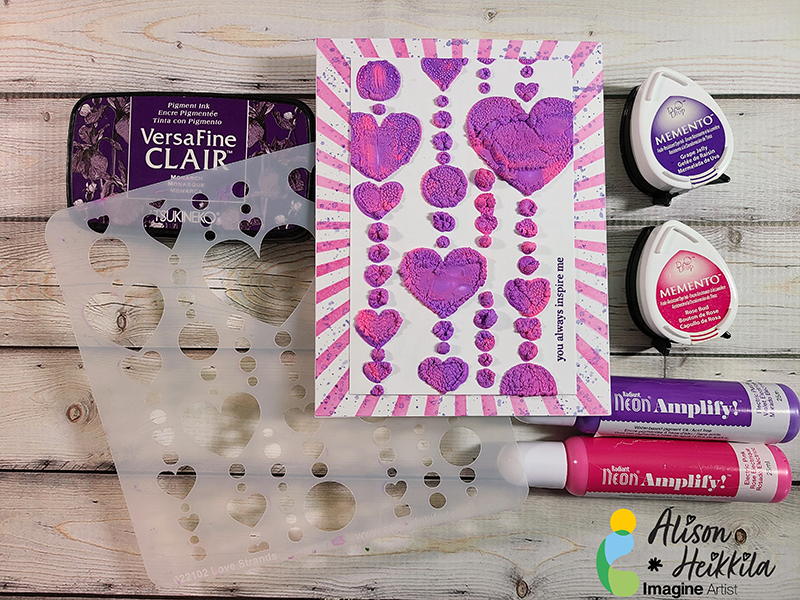
Hello! My latest tutorial for Imagine uses one of the most unique products they make…Radiant Neon Amplify. This stuff is so fun! It’s kind of a runny paint, that when you apply heat to it, it puffs up. I love using Amplify with stencils. Let me show you how.

Skill Level: Beginner to Intermediate
Time: Approx. 20 Minutes, plus drying time

Directions:

Puffed Hearts 2


Step 1:

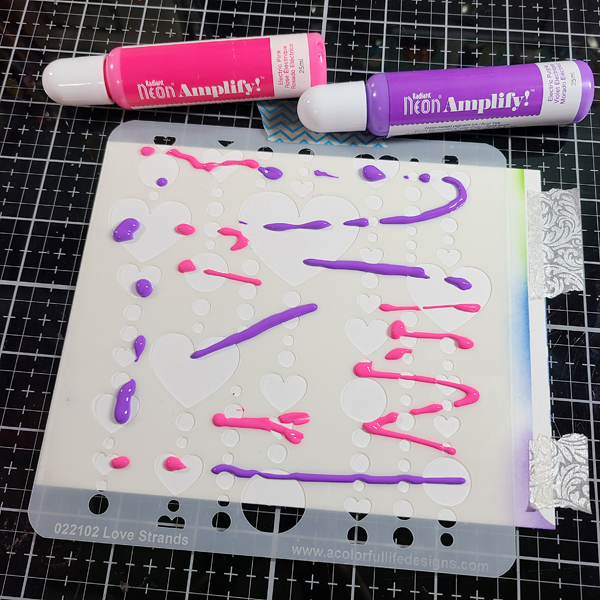
Tape a piece of cardstock to your work surface. Lay your stencil on top and tape it down. You may want to use something like Pixie Spray to hold the stencil even more, depending on how detailed it is.


Step 2:

Squirt the Radiant Neon Amplify all over the stencil. I went pretty sparingly at first because I didn’t want to waste the product, but I did need to add more than what’s pictured above.


Puffed Hearts 3

Step 3:

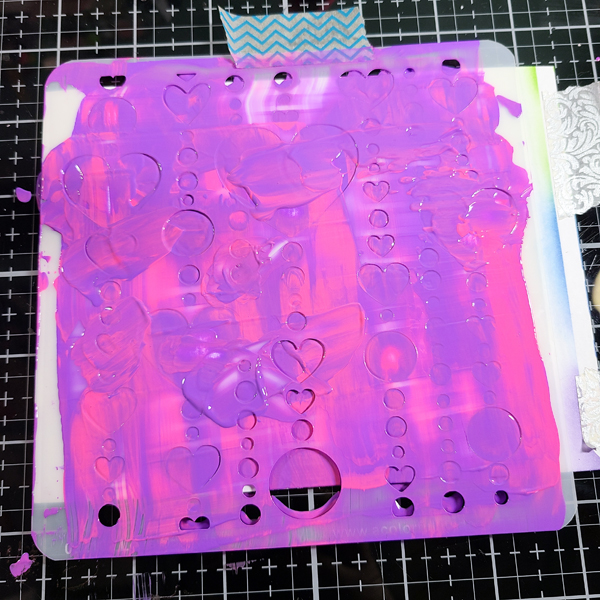
Using a paste spreader or palette knife, spread the Amplify across the surface of the stencil. Don’t press too hard, because you may lift up the Amplify. The thicker you apply the Amplify, the bigger the puffs will be, so keep that in mind.


Puffed Hearts 4

Step 4:

Fill in any gaps you may have with more Amplify. Don’t over mix the colors…you want a marbleized look. It should look sort of like mine above.


Step 5:

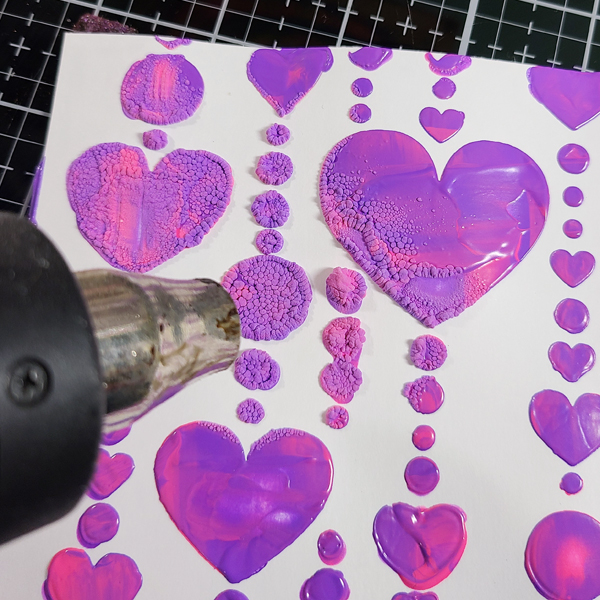
Carefully remove your stencil from the cardstock and immediately wash it and any other tools you may have used. You don’t want the Amplify to dry on anything except your cardstock.


Puffed Hearts 5

Step 6:

Heat the wet Amplify with a Heat Tool. You will see the shine disappear and it will start to puff up. Again, the thicker areas will have bigger puffs.


Puffed Hearts 6

Step 7:

Trim the panel down to 3 1/4″ x 4 3/4.”


Puffed Hearts 7

Step 8:

Cut a piece of Smooth Bristol Cardstock to 4 1/4″ x 5 1/2.” Tape down to work surface.

Step 9:

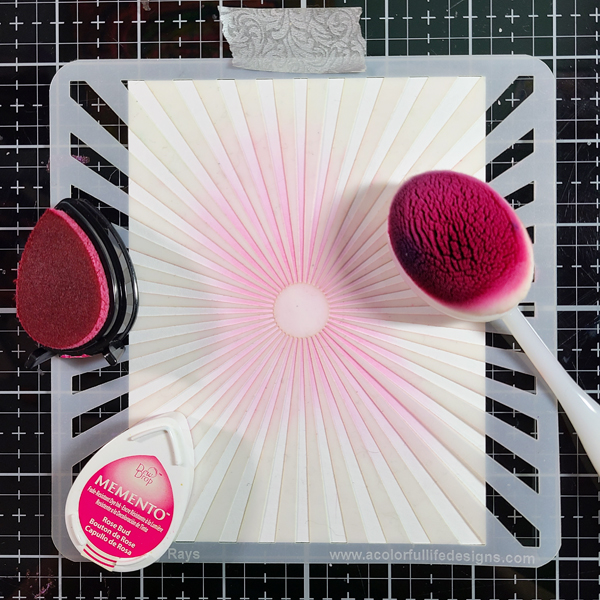
Tape down your second stencil. I also used Pixie Spray for this one, because the rays can move easily.

Step 10:

Apply Memento Ink in Rose Bud using a blending brush. Remove the stencil.
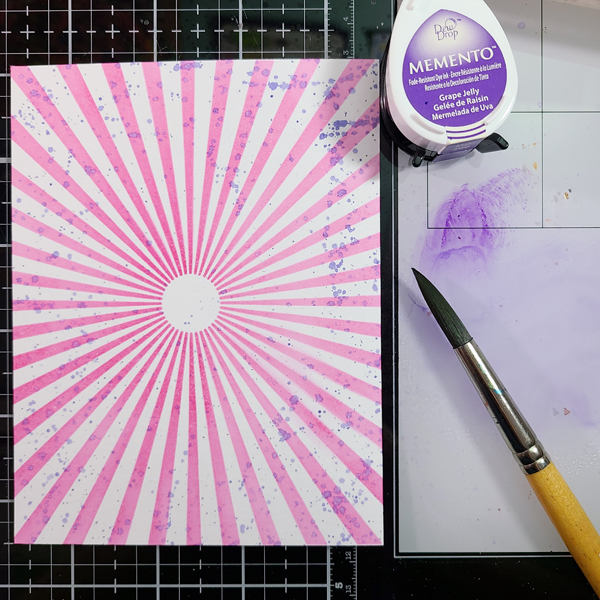
 

Puffed Hearts 8
Step 11:

Apply Memento Ink in Grape Jelly to your work surface and spritz a little water on to the ink. Using a brush, flick the color on to your stenciled panel.
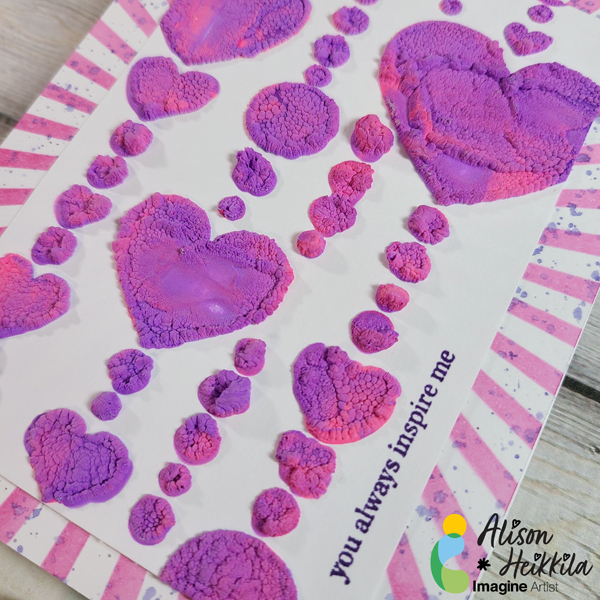
 

Puffed Hearts 10

Step 12:

Add a sentiment to the puffed panel with VersaFine Clair Ink in Monarch.


Step 13:

Adhere all layers to your card base.


Puffed Hearts 11 Full

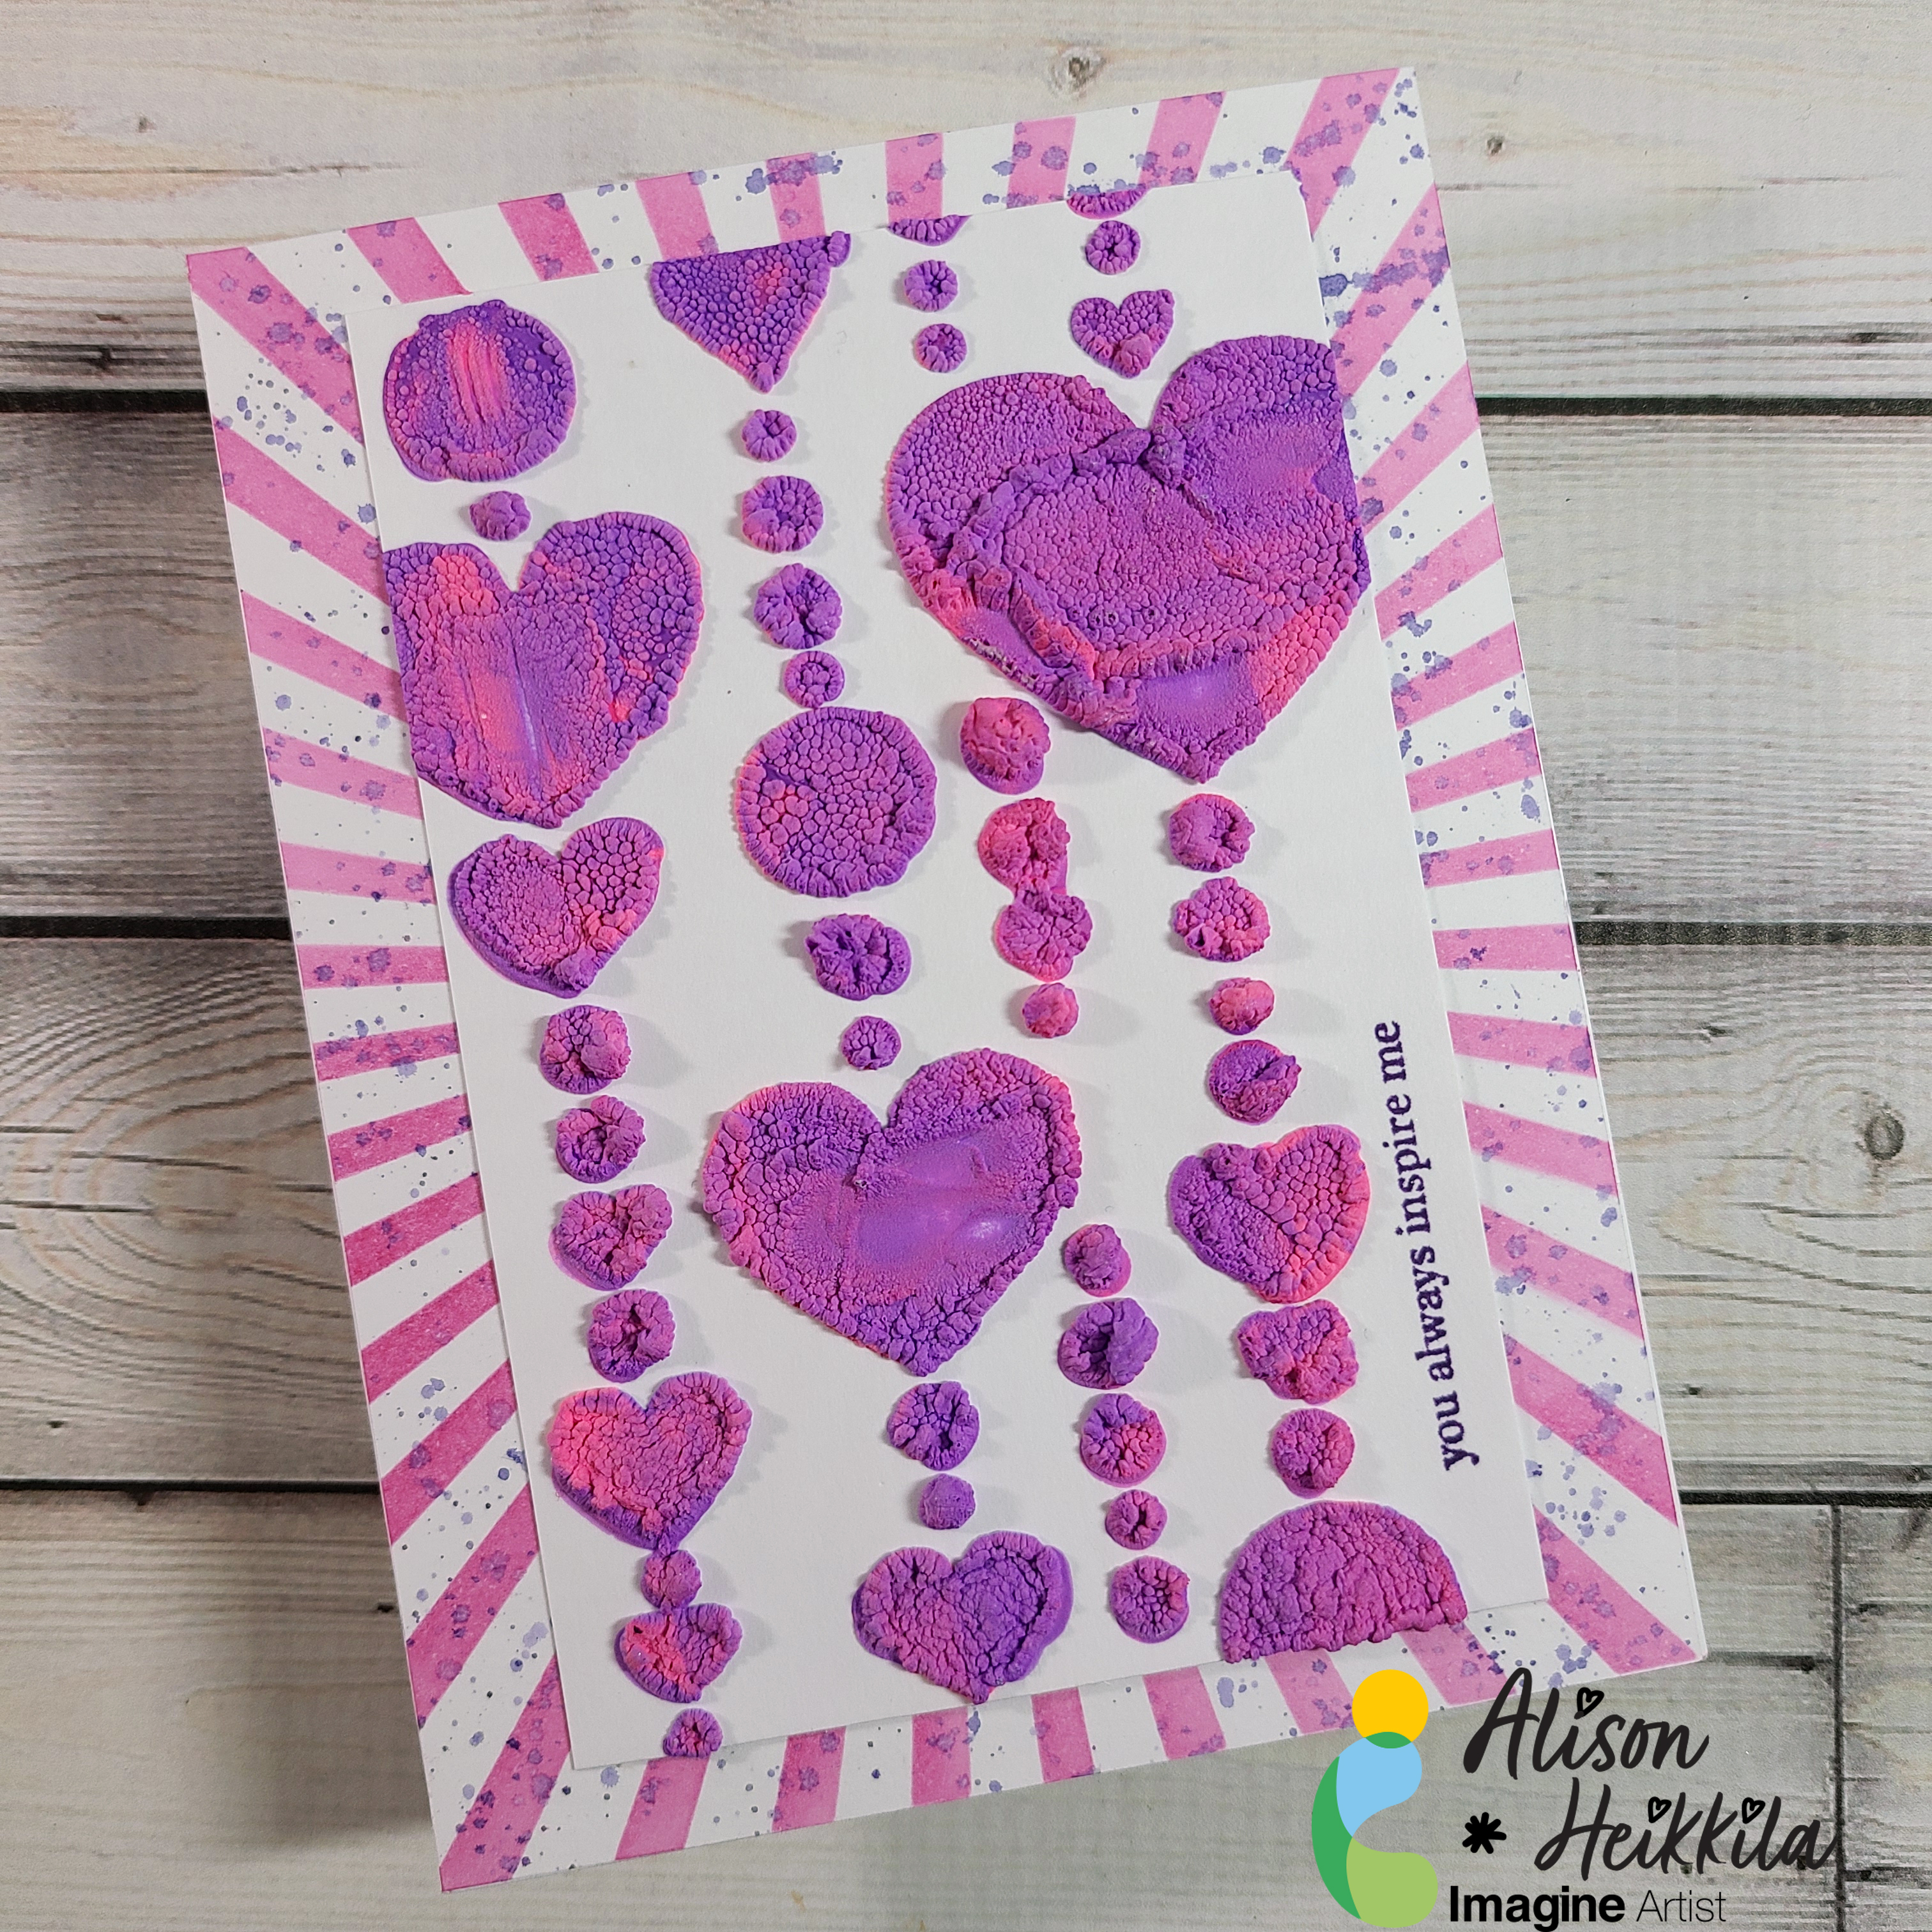
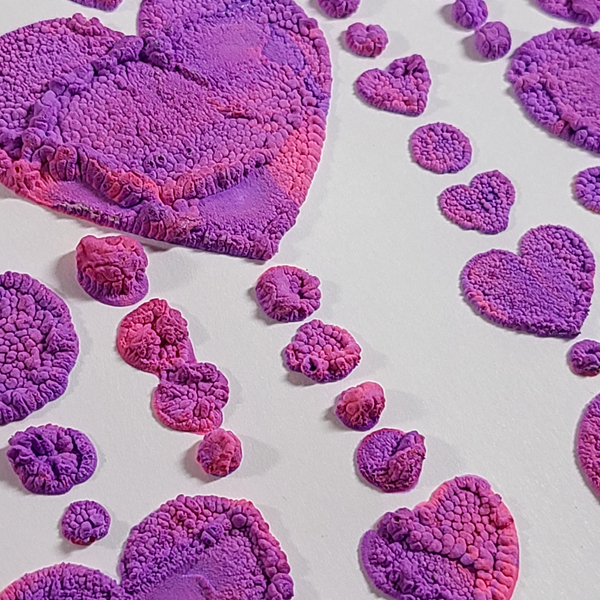
I love the texture you get from the Radiant Neon Amplify. It’s so unique and fun! I hope you’ll give them a try. Thanks so much for stopping by. Have an inspiring day!

Art Supplies:

Imagine:

• Radiant Neon Amplify: Electric Purple & Electric Pink
• Memento Ink: Rose Bud & Grape Jelly 
• VersaFine Clair Ink: Monarch 

Other:

• A Colorful Life Designs: Love Strands Stencil & Bitty Rays Stencil
• Mama Elephant: Creativity is Contagious Stamps
• Palette Knife and/or Paste Spreader
• Smooth Bristol Cardstock
• Blending Brushes
• White Card Base
• Heat Tool
• Paint Brush

Create a Dramatic Anniversary Card with Multi Layers of Metallic Shimmer

2022-Jan-Neva-Anniversary_blog

By Neva Cole –

Today’s tutorial will demonstrate how to create multi layers of texture for a dramatic Anniversary Card.  StazOn, Delicata, and Mboss will add amazing levels of metallic shimmer.

Skill:  Beginner

Time:  1 Hour

Directions:

Step 1
Trim white piece of sturdy cardstock to 4 1/8” x 5 3/8”.  I used the backing of a paper pack, that had one shiny white side.  First, I pressure embossed with Sizzix 3-D Textured Impressions Doodle Triangles.  A makeup sponge was used to spread StazOn Metallic inks from re-inkers in Platinum, Silver and Gold randomly around the surface of the card front.  StazOn dries on the sponge and makes it a one-time use tool. StazOn Jet Black ink is gently tapped over the raised portions of the card panel.  Set aside to dry or heat with a heat gun.
Step 2
Using a stamp from my stash (manufacturer unknown) small hearts were stamped randomly in VersaMark ink and heat embossed in Mboss in Valentine.
Step 3
Memento Luxe in Tuxedo Black is used to stamp Taylored Expressions Simple Strips Background sentiments followed by heat embossing with black embossing powder.  The matching die is used to die cut the entire set and five sentiments are selected for the front of the card.
Step 4
Each sentiment strip is inked with Delicata in Silvery Shimmer, Golden Glitz or Ruby Red with an Ink Dauber.  Since the sentiment is embossed, the ink will not change the color.
Step 5
The sentiment strips are backed with white cardstock with the matching backer die.  The edges are inked with Memento Tuxedo Black and an ink blusher to add definition.
Step 6
A Scribble Heart die by Impression Obsession is die cut from white cardstock.  The die is then inked with Versa Mark ink and heat embossed with Mboss in Valentine.
Step 7
A white card base is trimmed to 5 ½” x 8 ½”.  The edges are inked with Memento Tuxedo Black and an ink blusher.
Step 8
The card base is adhered to textured front with TearIt! Tape.  The Heart is adhered with On Point Glue.  The sentiment strips are adhered with dimension foam tape.  A striking masculine anniversary card goal achieved!

Art Supplies

Imagine
Other
  • Sizzix 3-D Textured Impressions Doodle Triangles
  • Make up sponge
  • Background heart stamp (manufacturer unknown)
  • Taylored Expressions Simple Strips Background Sentiments, Die, and Backer Die
  • Impression Obsession Scribble Heart die
  • Dimensional foam adhesive
  • Black and White cardstock
Neva Cole http://snippetscrafter.blogspot.com/ n.cole@windward-performance.com