Make Lavender Feather Earrings Out Of Clay

by Kyriakos Pachadiroglou

Make these quick and easy jewelry pieces out of lightweight clay. The feathers are colored with Memento markers in Angel Pink and Lulu Lavender colors to create  contrasting but still matching shades. I decided to use markers instead of ink pads as they can easily color in the fine details of the clay feathers. The clay feathers are covered with gold embossing powder around the edge and on the backside to give a faux metallic case for the feather.

Skill: Beginner
Time: 30 minutes + dry time

Directions


Step 1

Press lightweight clay in the feathers mold and set it aside until it is dried.


Step 2

Color the clay feathers with the Memento Angel Pink marker and continue with the Lulu Lavender marker following the pattern of the feather.


Step 3

Press the back side of the feather on the VersaMark inkpad, cover with Imagine gold embossing powder and heat set. Repeat the process with the second feather. To give a bit of extra shine, emboss the edges of the clay feather.


Step 4

Color a couple of same size white feathers with the Memento Lulu Lavender marker. Let them dry well.


Step 5

Cover the clay feathers with the Creative Medium Iridescent Blue to protect the colors and to add effect.


Step 6

Attach earring clasps and jump rings.

See my tutorial on jewelry making for more information on supplies: Want to Learn How to Make Jewelry?

Supplies

Imagine
Other
  • Silicone feathers mold
  • Lightweight clay
  • White Feathers
  • Heat tool
  • Earring clasps
  • Jump rings
  • Pliers

Craft A Time To Celebrate Greeting Card

by Iris Rodriguez

Craft A Time To Celebrate Greeting Card with Walnut Ink and Metallic Gold Creative Medium

Time to get busy and celebrate with this clock themed card! I just love wordplay and puns, don’t you? I’m also fond of clocks. The background for this card was made using Java Walnut Ink. I find the dark matte finish of the Walnut ink to be a great contrast against the gold metallic clock images stenciled with Creative Medium. The rich wood colors in the background really make the gold colors stand out.

Skill: Intermediate
Time: 1 hour

Directions


Step 1

Spray the watercolor paper with water. Then spray on the Java Walnut Ink and use a brush to even out the color. Dry the paper.


Step 2

Stencil the smaller clock patterns with the Gold Metallic Creative Medium using a palette knife. Let the medium dry for about 20 mins. To test if it is dry, lightly touch a small area with your finger, if it’s soft to the touch, it’s still wet.


Step 3

Stencil a different, but larger clock pattern over the first stenciled clocks. Let the medium dry. For stencils with larger openings, use the Multi-Purpose Squeegee. Add the medium onto the Squeegee with the palette knife.


Step 4

Let the medium dry completely. For thicker or larger stenciled patterns, allow the card to dry for a longer time frame (no pun intended), approximately 45 minutes. Test to see if it’s dry before continuing.


Step 5

Stamp a sentiment onto cardstock paper and cut out. Darken the edges with VersaFine Vintage Sepia. Stamp the chipboard gear with Golden Glitz Delicata and emboss with the Clear Embossing Powder. Optional step, color in the outline of the larger clock with a fine black marker, this adds dimension. Assemble the card and add any finishing details you desire.

Supplies

Imagine
Other
  • Watercolor paper
  • Cardstock paper
  • Crafter’s Workshop – Clocks stencil 6 x 6 inches
  • Deco Art-Clocks stencil 12 x 12 inches
  • Creative Embellishments – Chipboard Gear 1.5 inches

Create an Bright Floral Set of Thank You Cards

by Steph Ackerman

Create an Bright Floral Set of Thank You Cards with Fireworks Shimmery Craft Sprays

I love large floral stamps, but because of their size, they don’t always lend themselves to be the center point of a card design. Instead of thinking of stamped images always being in the center today I am doing a split off-set design. Not only do you create an interesting look it is a quick and easy way to create two cards in one crafting session.

Skill: Intermediate
Time: 1 hour + dry time

Directions


Step 1

Cut 2 panels of white cardstock, each 4″ x 5″. Place them side by side on the craft mat. Ink stamp with VersaFine Clair in Nocturne and stamp on both panel simultaneously.


Step 2

Place a stencil in the open/white space to the right of the image. Use molding paste through the stencil to add dimension. Let dry.


Step 3

Using a paintbrush, paint Fireworks Shimmery Craft Spray in Dandelion on the smaller flower. Paint a light layer of Fireworks in Tangelo on the larger flower then use Fireworks in Dandelion to blend the colors. Paint Fireworks in Rich Cocoa in the center of the flowers. Ink the edges of each panel with Brilliance in Sunflower Yellow. Stamp “Thank you” with VersaFine Clair in Nocturne on white cardstock. Use an art dauber to add yellow ink to the sentiments.


Step 4

Mat the panels with yellow cardstock. Create cards from orange cardstock and add the stamped panels to each.


Step 5

Mat the sentiments with yellow cardstock. Add the sentiments to the cards with foam adhesives.


Supplies

Imagine
Other
  • Molding Paste
  • The Crafter’s Workshop – stencil
  • Cardstock – white, yellow, orange
  • Foam Adhesives
  • Paint Brush

Create Two Matching Cards with One Stencil Application

by Kassy Tousignant

Create Two Matching Cards with One Stencil Application

Stencils and Fireworks Shimmery Craft Spray are a match made in heaven! Stencils can be used in so many different ways and here I show you a cool technique to get more use out of your stencils and maybe see them in a different way. I was able to make two cards rather quickly with one ink application.

Supplies

Imagine

Fireworks Shimmery Craft Spray – Grape Jelly
GooseBumps – Sparkle
Creative Medium – Clear
Tear It! Tape
IrRESISTible Pico Embellisher -Tuxedo Black

Other

• Carabelle Studio – stencil
• Prima – Black gesso, Flowers
• Nuvo – Crystal drops
• Fine jute string
• Creative Embellishments – chipboard frames
• Glue Dots
• Cardbase

Create a Lovely Set of Seashell Golden Glow Necklaces

by Roni Johnson


It’s fun to walk along the beach and pick up the shells that have washed ashore. It’s even more fun to take those shells and create a lovely piece of jewelry to hold those fond summer memories for months and years to come.

Skill: Intermediate
Time: 3 hours + dry time

Directions


Step 1

Wash and dry shells to prepare them for the project.


Step 2

Dip a Fantastix into the ink and “paint” it onto the shell.


Step 3

Continue painting the shell with the desired color of All Purpose Inks. Let the ink dry naturally or speed drying using a heat tool.


Step 4

Print desired images on copy or lightweight paper using an ink jet printer. I choose ocean themes to match the shells. Tear away the excess paper so the image fits into the center of the shell.


Step 5

Use your finger to spread a thin layer of Clear, Shimmer or Iridescent Creative Medium on the interior of the shell. Immediately press the image into the shell. Apply a layer of Creative Medium over the image pressing the image down into the grooves of the shell as you go.


Step 6

Apply a second layer of Creative Medium over the image to ensure that it has been sealed and set aside to dry.


Step 7

Use a Fantastix to apply All Purpose Ink in Vegas Gold around the edge of the shell and image. Let it dry naturally. This could take several hours depending on temps/humidity.


Step 8

Use a 5/64th drill bit in a Dremel set on the lowest speed to drill a hole in the top of the shell. Use jewelry pliers to add a jump ring and chain. Add any additional embellishments to make it your own design!

Enjoy!

Supplies

Imagine
Other
  • Printed Images (with an ocean theme)
  • Shell
  • Heat Tool
  • Dremel
  • 5/64th Drill Bit
  • Jewelry Pliers
  • Jump Ring & Chain

Learn the Basics of Stenciling

by Iris Rodriguez

Learn the Basics of Stenciling

Stencils are a great tool to use for creating images and effects on just about any creative project. You can decorate a  journal with them, create card backgrounds and textures, use in your paintings, or in home décor projects. Imagine’s inkpads, inks, sprays, and texture mediums can all be used with stencils. In addition, Imagine has you covered with applicators such as Sponge Daubers, Palette knives, and Stipple brushes. In this article, I’ll discuss some ways to organize, use with different products, proper care and cleaning your stencils.

Organizing Your Stencils

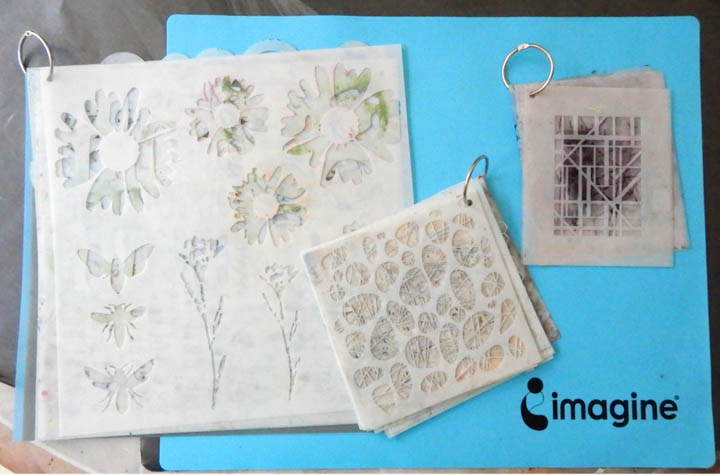
There many ways to organize your stencils. One excellent way is to search crafting, office and home goods stores for options on storage containers. Whichever you choose, it’s important to lay them flat. I think on of the best ways to keep them flat is to use dividers in storage bins or drawers. File folders can be found in office supply stores. Label your dividers by type, theme, or designer. Another way to store stencils in a three-ring binder book inside plastic page protectors. Place color cardstock paper so that you can see the stencil and maximize storage by storing two stencils on one sheet.

If you have an open crafting space then hang stencils with metal hook clips on a rack. I like the idea of hanging my stencils because I can easily go through them and find what I am looking for. I punch a hole in the corners of my stencils and place them in a binder ring.

I have an IKEA wooden shelving unit to store my crafting storage bins. I’ve attached long screws on the side to hang my stencils. Hanging them freed up space and I can easily access them. Some alternatives are to hang them on a clothes hanger with a metal hook or binder clips, store them flat in bins or drawer or hang them on revolving wire three-tier shoe rack with a metal hook or binder clips.

Stenciling with Imagine Inks

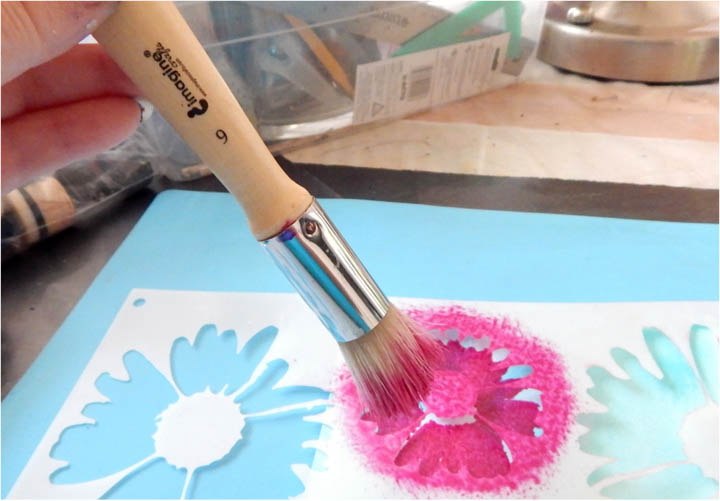
Imagine’s Inkblushers and Sponge Daubers work great with stencils because the soft sponge material presses ink down past the edges of the stencil’s details. The sponges produce sharp edges and finely detailed inking better than most other tool. If you have a highly detailed stencil, the sponge materials are especially handy for getting into small and intricate opening, or getting around the tight areas of the stencil.

Stenciling with All-Purpose Ink and Inkblushers. Add a couple of ink drops to your crafting mat and pounce the Inkblusher over the ink. Inkblushers are highly absorbent and work well with Imagine’s All-Purpose Inks.

Inkblushers can also be used to stencil with acrylic paints. Like with inks, you can get clean edges and good detail. Wash the Inkblusher under running water immediately. If you cannot get to the sink right away, wipe off as much paint as you can and then keep it in water, like your paintbrush water. If left out without being washed, the paint will dry and harden the Inkblusher. Unfortunately, the paint cannot be washed out. However, all is not lost; only the area that had the paint will harden, and not harden the entire sponge. Using your scissors, cut off the piece with the hardened paint and continue to use.

Imagine’s Jumbo Daubers provide fine detailed inking. The handle allows you to have great control and pressure over the stencils. Imagine’s Jumbo Daubers also work great Acrylic paints. Add a few drops of paint to your craft mat, pounce the Dauber on the paint, then pounce the Dauber onto a clean area on your mat. Get the paint evenly on the Dauber and avoid globs of paint. If you get too much paint on the Dauber, it will go under the stencil.

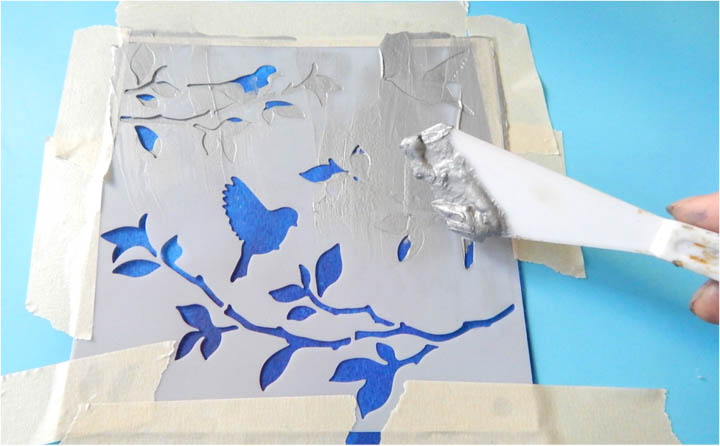
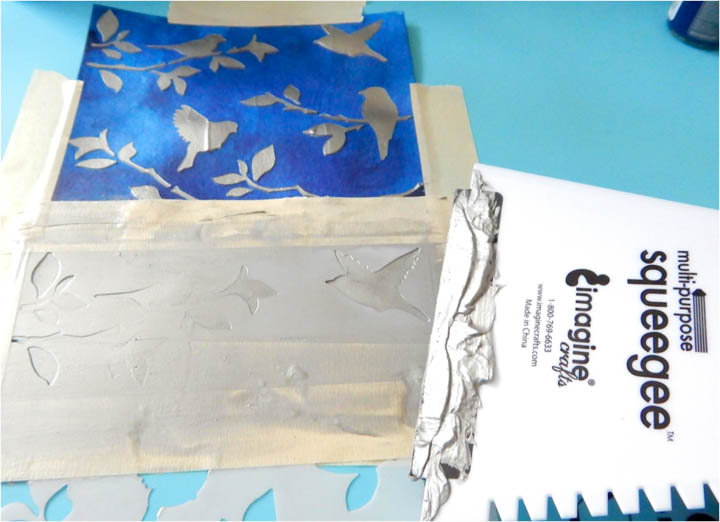
Imagine’s Creative Mediums are smooth acrylic pastes that provide yummy textures for any project. This is where stencils are very different from stamps because you can create an image with texture. Use Imagine’s palette knives and Squeegee to add the Creative Medium. Silver Metallic Creative Medium using a palette knife. Imagine’s Multi-purpose Squeegee has a wider surface; perfect for using with larger stencils with large openings. Use a palette knife to add the medium onto the Squeegee.

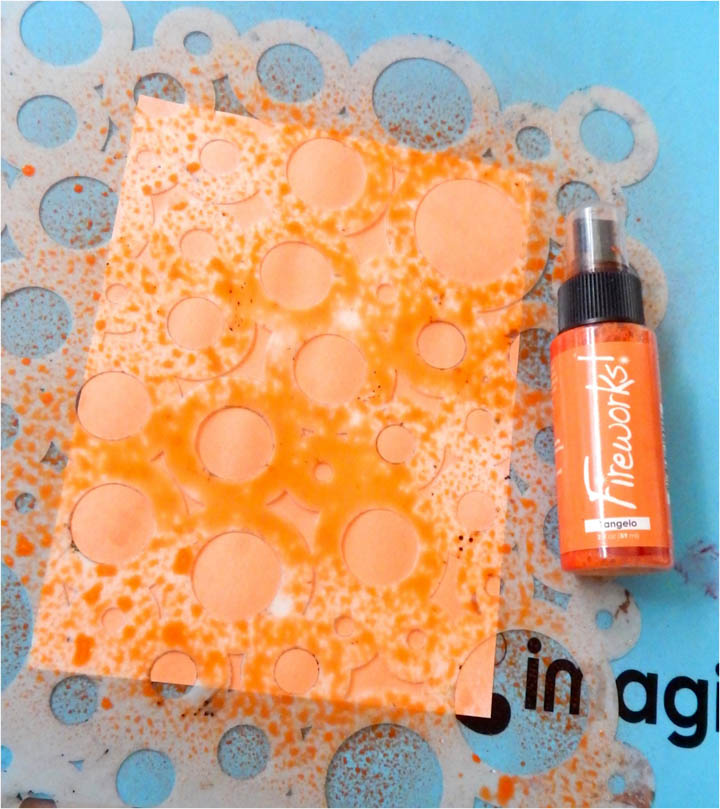
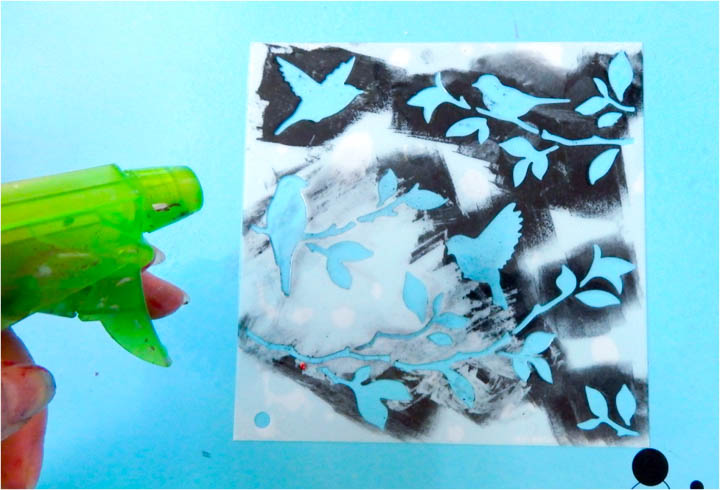
Imagine’s Fireworks Craft Spray makes stenciling a breeze. To get clean patterns, start spraying from the outside edges of the paper and spray inwards. Change up the starting point and spray. By starting from the outside, avoids harsh spray edges or heavy splotches of ink. Clean up is easy, simply wipe off your stencil and craft mat with a dry paper/cotton towel. To double down on the stencil effects you can “stamp” the wet ink from the stencil onto another piece of cardstock.

Create unique effects with Imagine Stipple brushes. These brushes have a flat, firm bristle head for stippling. It can be used on just about any surface. They are great for stenciling on fabric for getting into the grain. This creates patterns of fine dots by pouncing the brush onto the substrate. Scumble by brushing at a slight angle in a random fashion. This creates brushstrokes and because of brush’s firm bristles, it won’t get under the stencil.

Cleaning the Stencils

One of the hardest things about working with stencils is cleaning them. Even so, keeping your stencils clean will help to maintain clean edges, last longer and you’ll have a clean stencil for your next project. The key to success for keeping stencils clean, regardless of the medium, is to clean them immediately with a wet paper/cloth towel or baby wipe. Depending on the medium you will have ink/paint residue.

When using pigment inks, All-Purpose Ink, or dye inks, wipe the stencil immediately with a wet paper/cloth towel, or baby wipe. Since these inks are water-based the stencil will clean up quickly and completely. When using permanent inks, simply wiping the stencil off with water, will not get it clean. Use a stamp cleaner or Rubbing Alcohol to clean your stencil. Imagine’s StazOn All-Purpose Stamp Cleaner works well for cleaning ink off your stencils. Dab the cleaner on the stencil and wipe with a dry paper/cloth towel. The cleaner tends to leave a little bit of an oily residue. Simply wipe it off with a clean wet paper/cloth towel.

Acrylics paints are harder on stencils than inks. Acrylic paint can leave heavy buildup on your stencils and distort the edges. As with inks, clean the stencil immediately after using with a wet paper/cloth towel or baby wipe. Get as much paint off of it, as possible.

Use a cleaning or nail brush and soap to clean your stencils. Mix handwashing/dishwashing or Artist Painter’s type soap with water in a container. Dip the brush and scrub the paint off the stencil. Lay the stencil flat and rub gently, avoid bending the openings.

Sources

http://www.shellybailey.com/2014/03/project-life-2014-title-page-and.html

Source: https://www.sadieseasongoods.com/stencil-storage-magazine-rack/

Source: http://www.arthappy.me/paint-storage-display-idea/

Source: http://www.arthappy.me/paint-storage-display-idea/