Let’s Make a Thank You Card

By

By Kathi Rerek

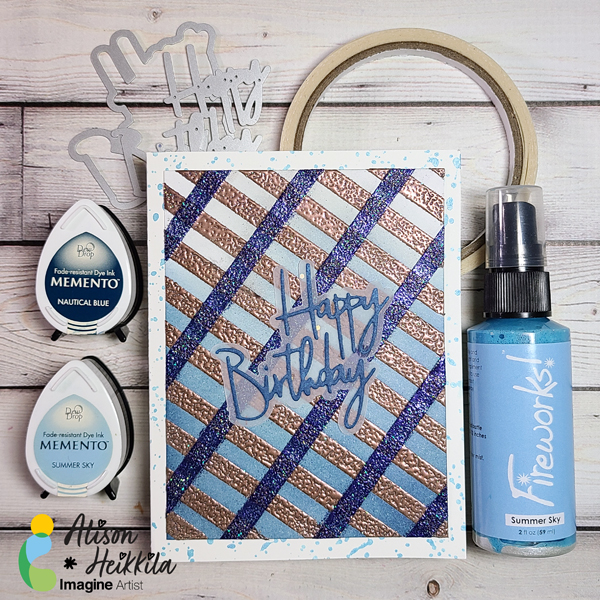
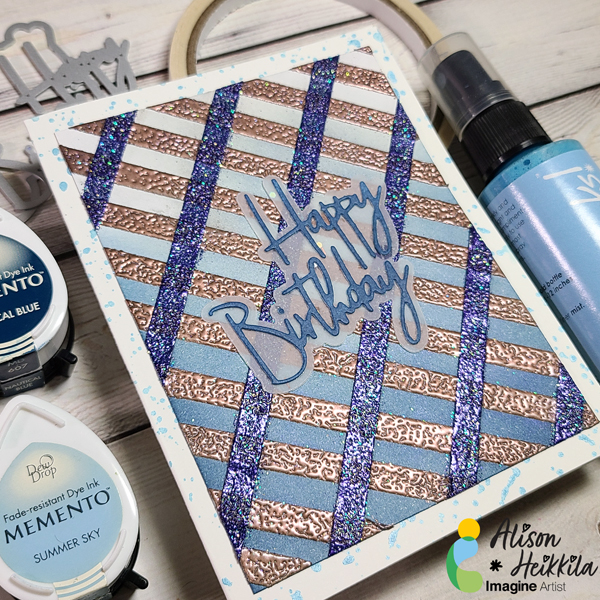
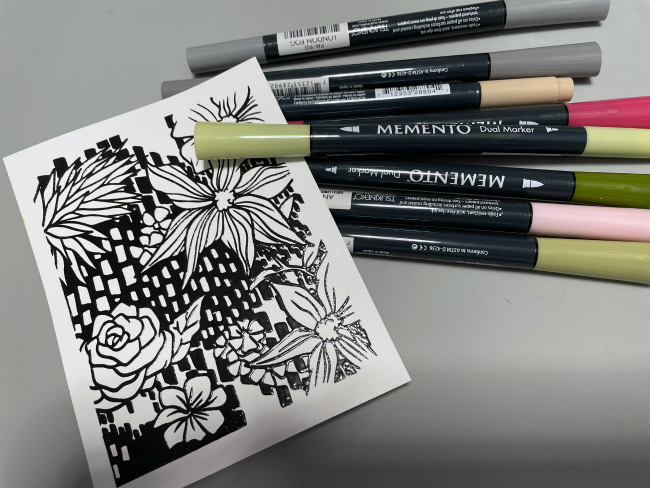
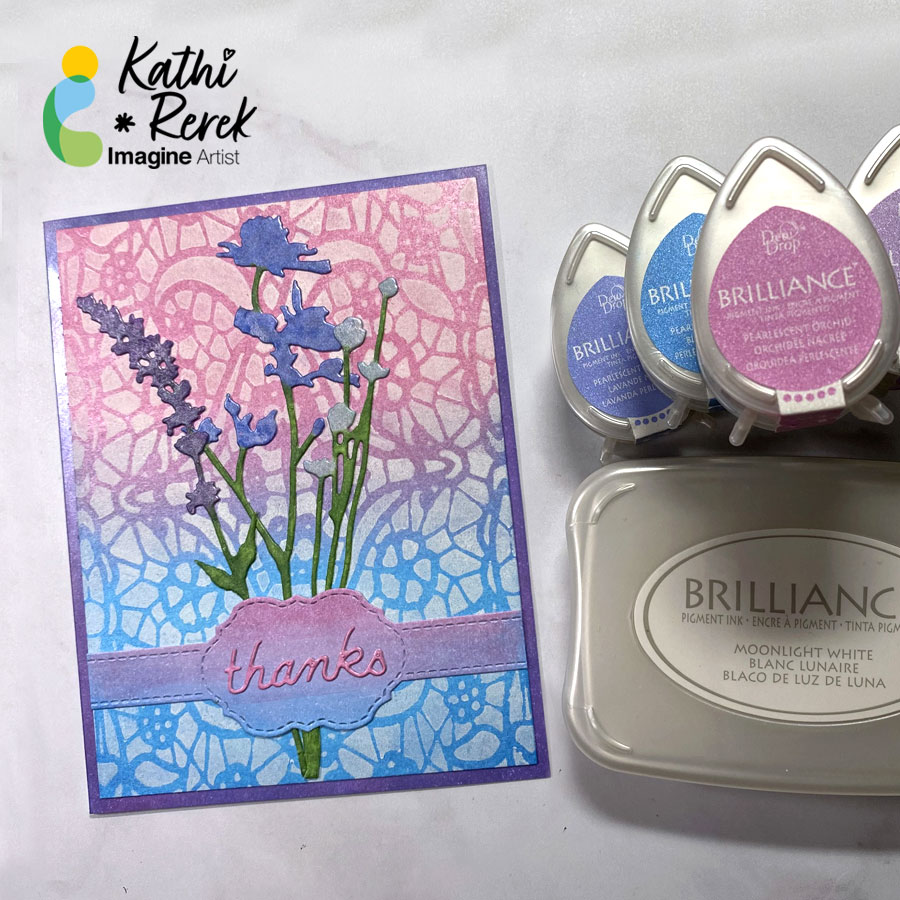
– Greetings! It’s Kathi here. In today’s tutorial, I am going to show you how to create a shimmery Thank You card using multiple Brilliance Ink colors.

Skill: Beginner to Intermediate

Time: 1.5 hours

Directions:

Step 1: 

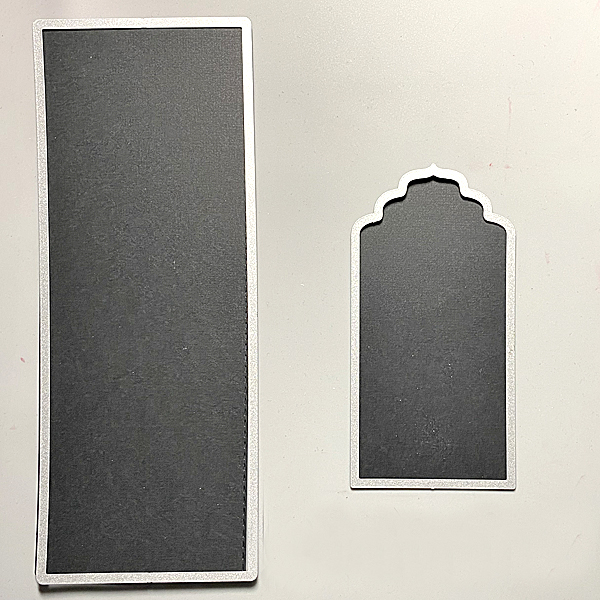
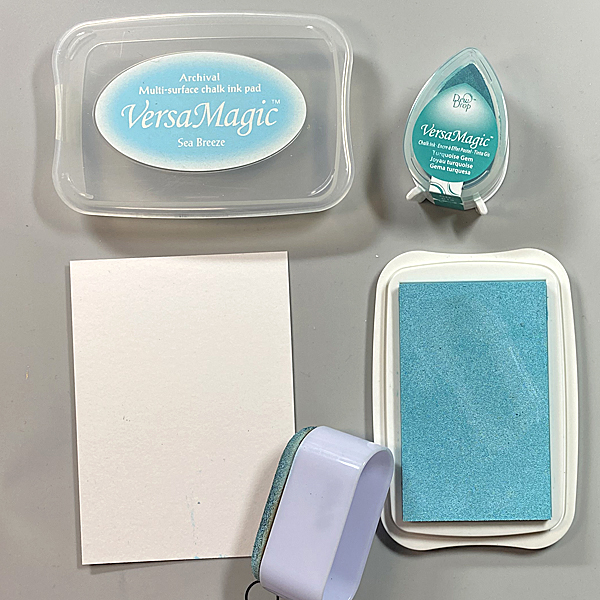
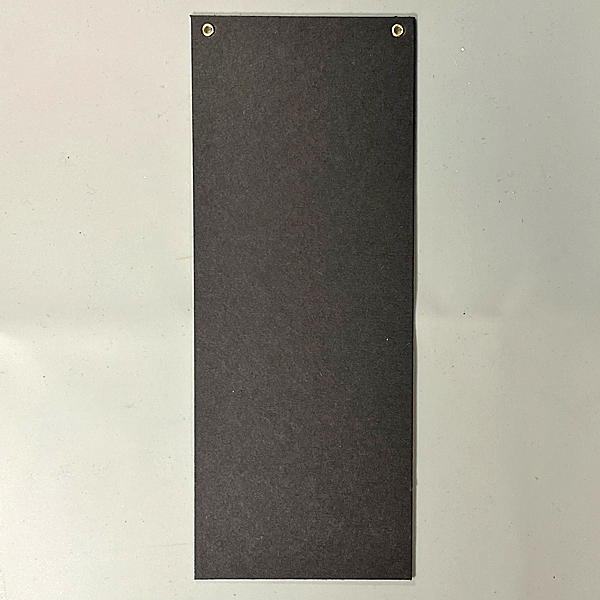
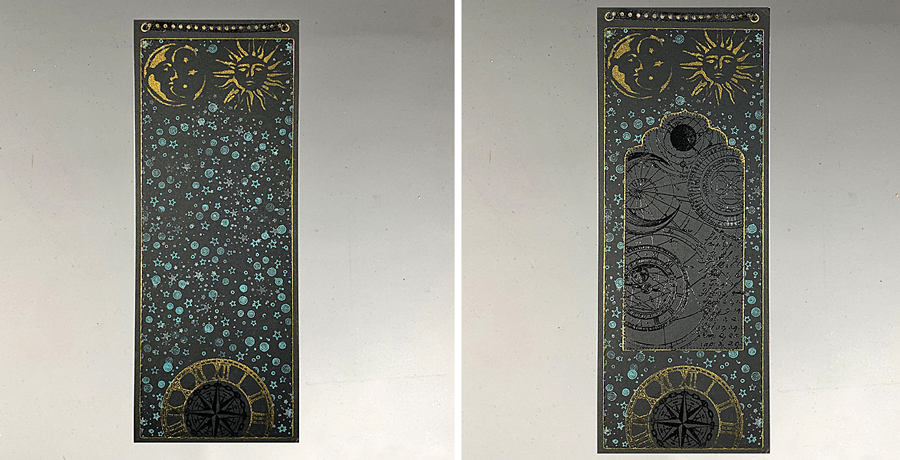
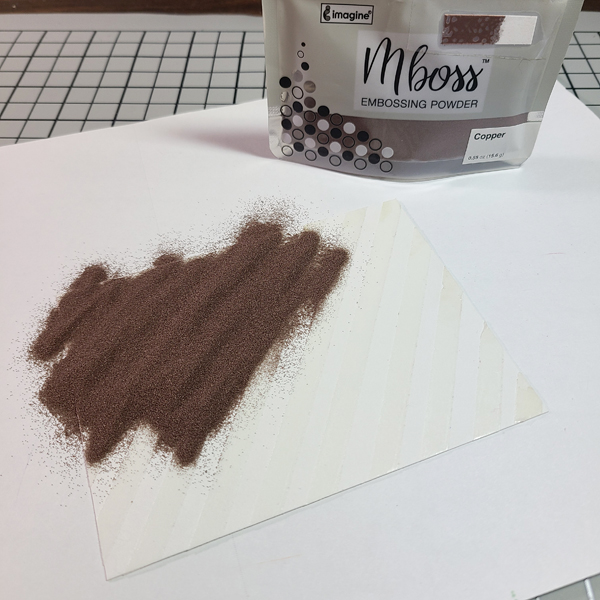
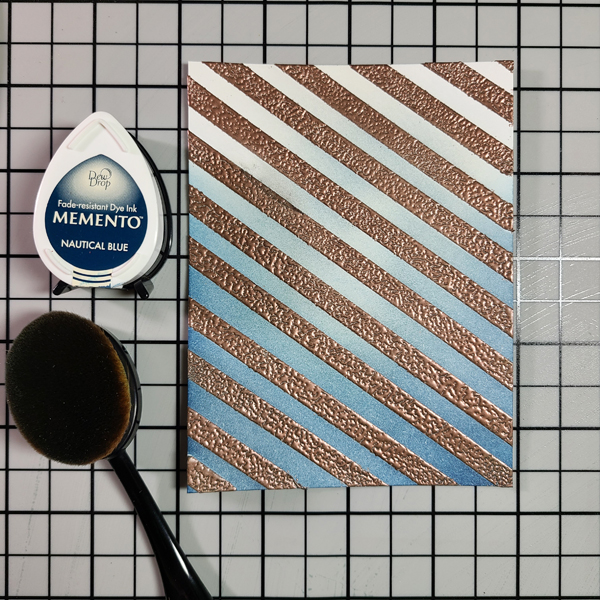
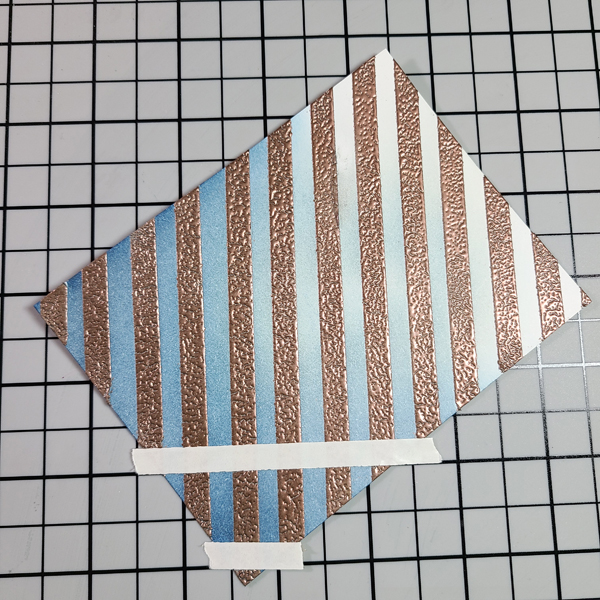
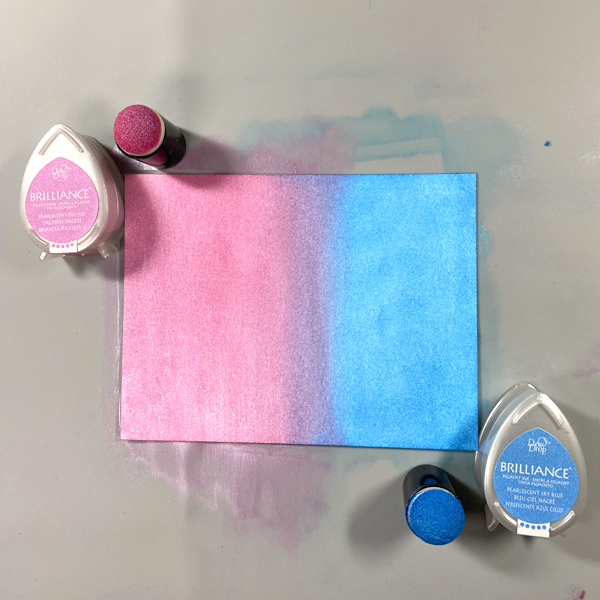
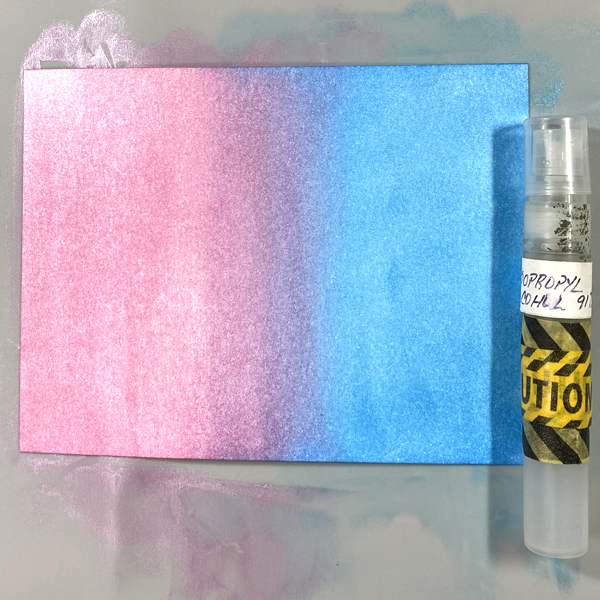
Cut a piece of Mixed Media paper to 4” x 5.25”. Using a Sponge Dauber, apply Sky Blue Pearlescent Brilliance Ink to half of the panel. Use another Sponge Dauber to apply Orchid Pearlescent Brilliance ink to the other side. Blend the two colors of ink in the center. 

Repeat this step with a second piece of paper. Set this piece aside to be used later.

Step 2:

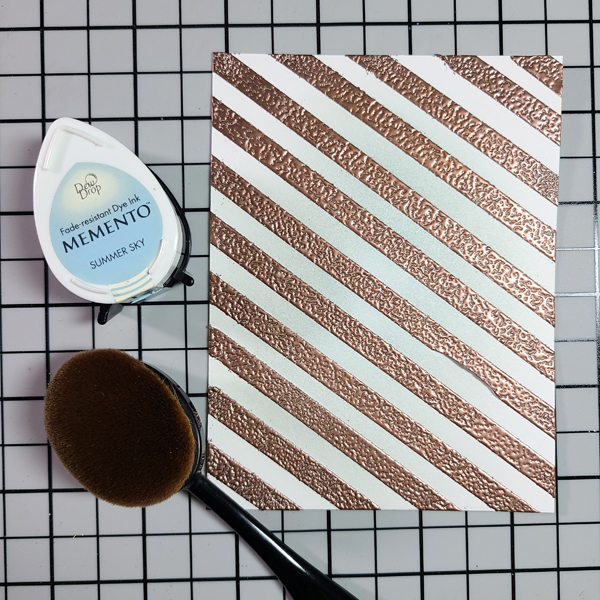
Spray Isopropyl Alcohol onto ink blended paper panel and let sit for a minute. The alcohol will lighten, blend, and add white speckles to the paper. Heat set.

Step 3:

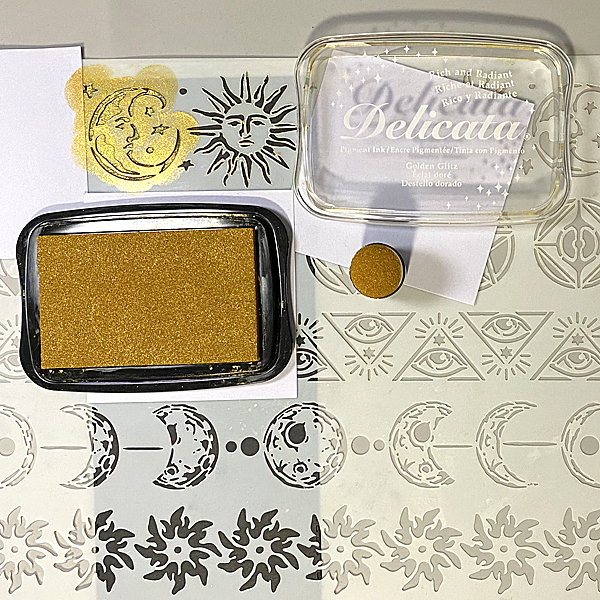
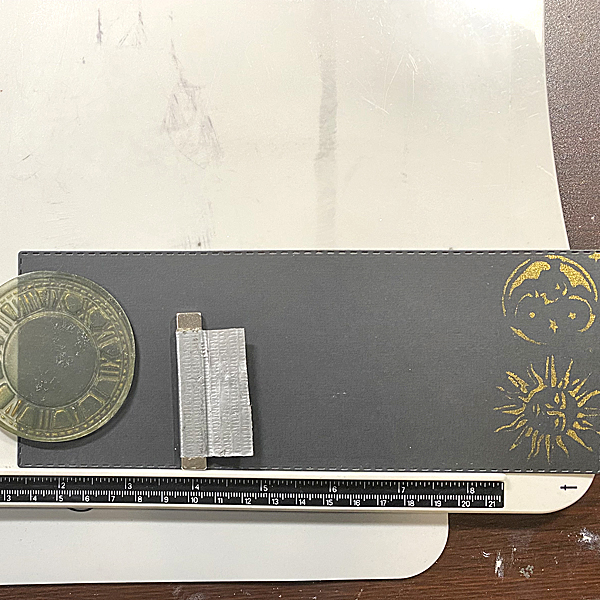
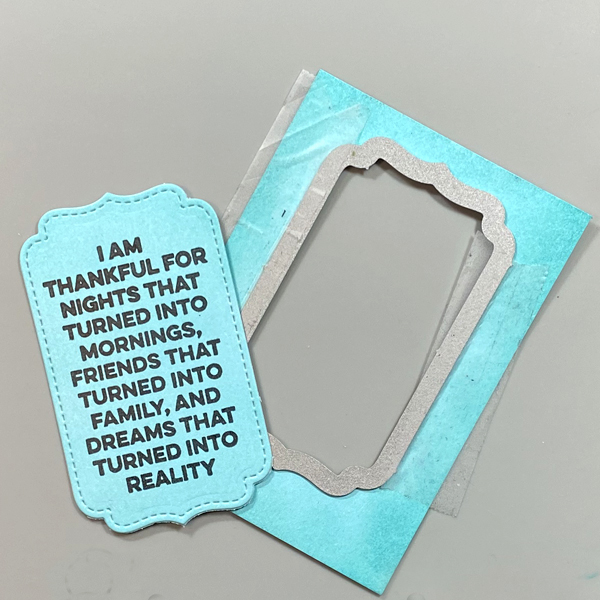
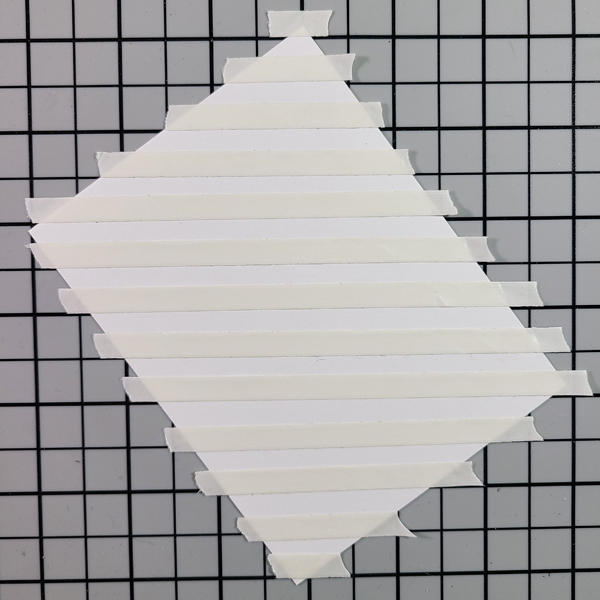
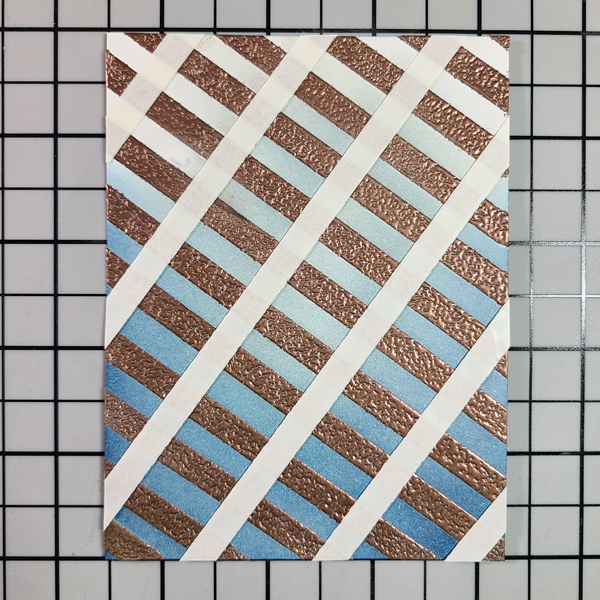
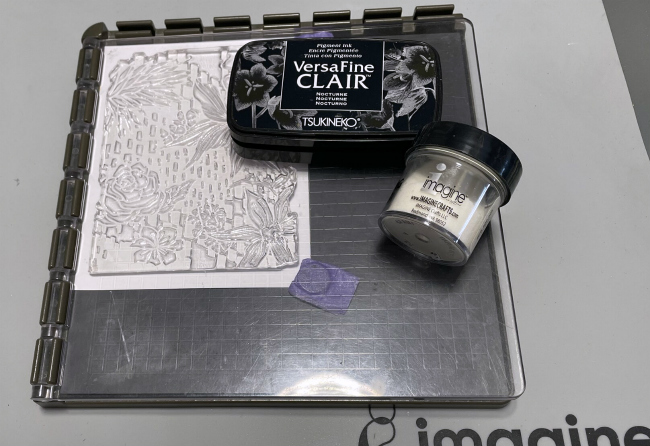
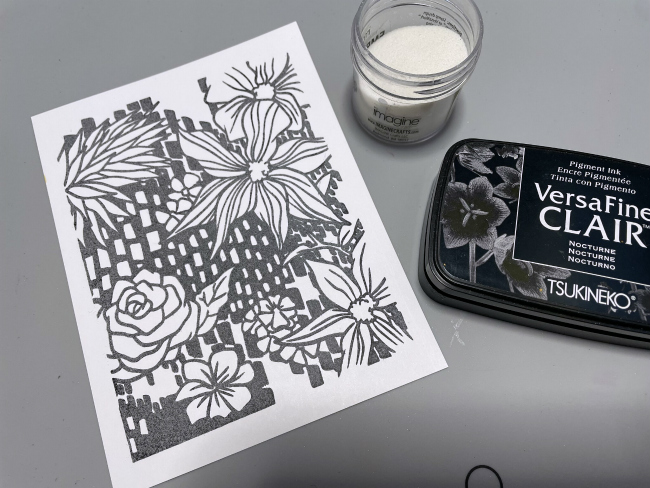
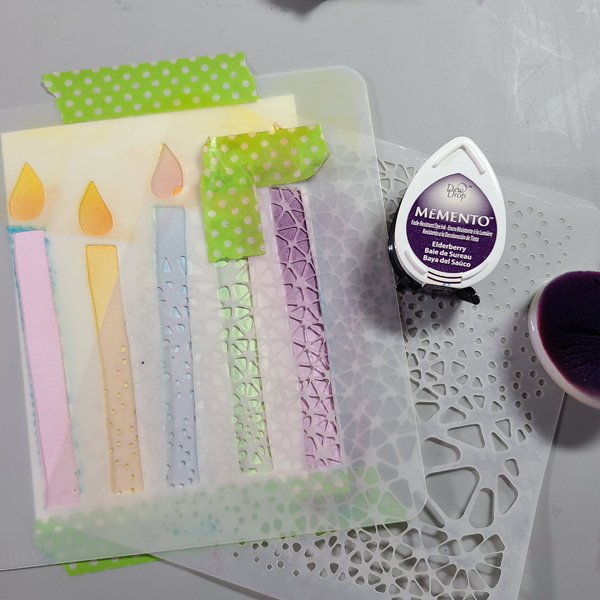
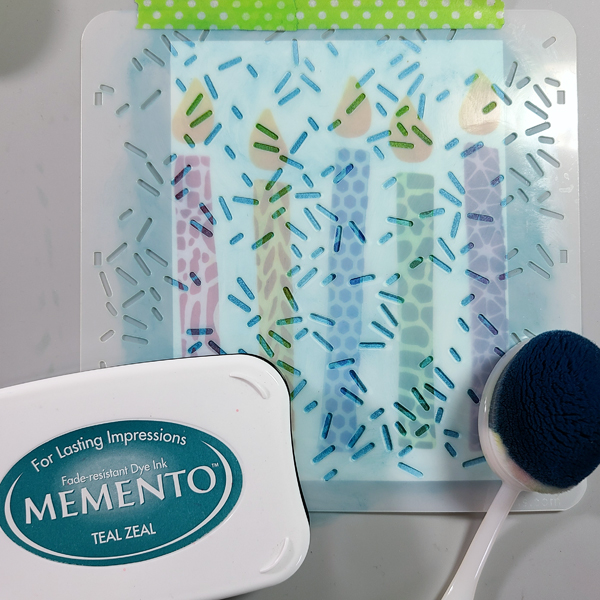
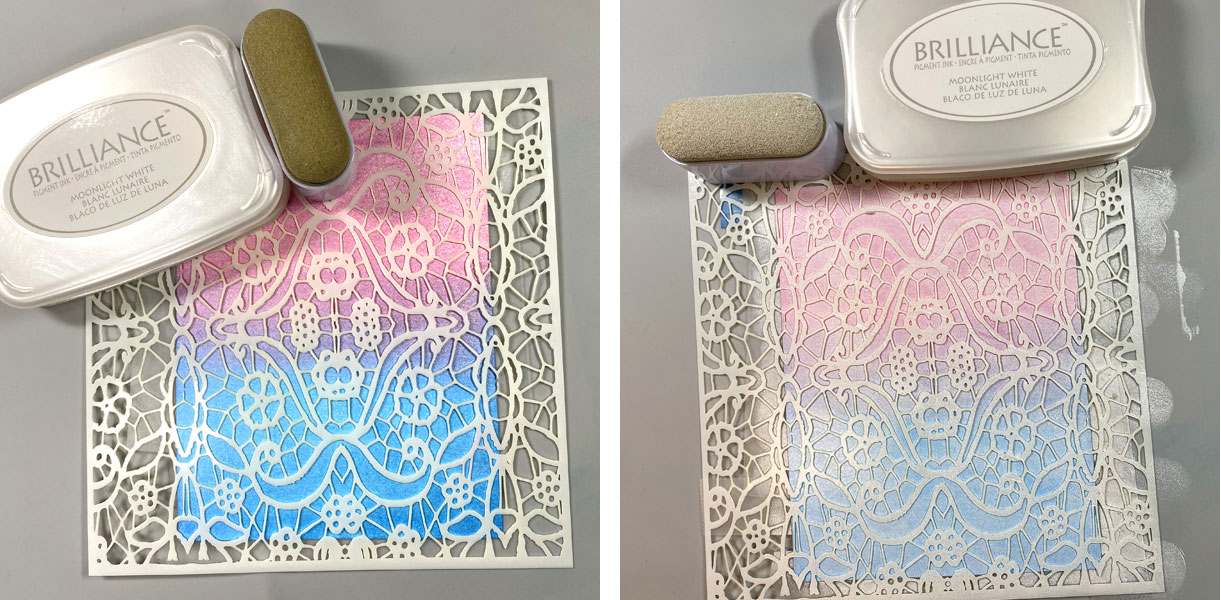
Use Removable Scotch Tape to tape the background panel to the back of the Mosaic Stencil, then use an Ink Sweeper to apply Moonlight White Brilliance ink over the stencil onto panel.

Step 4:

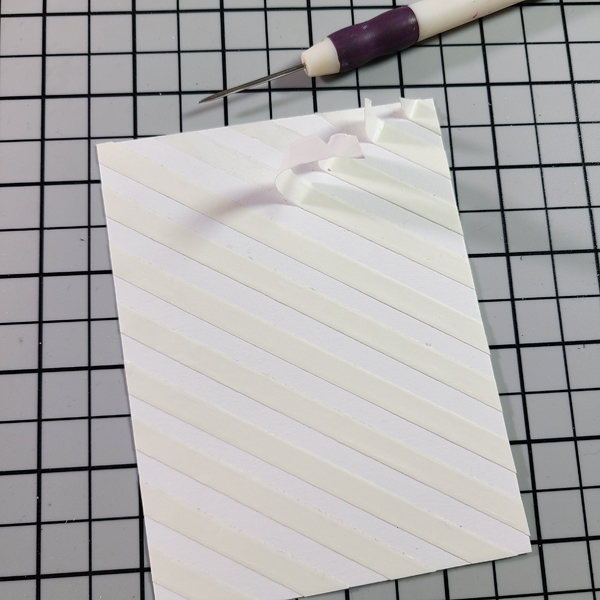
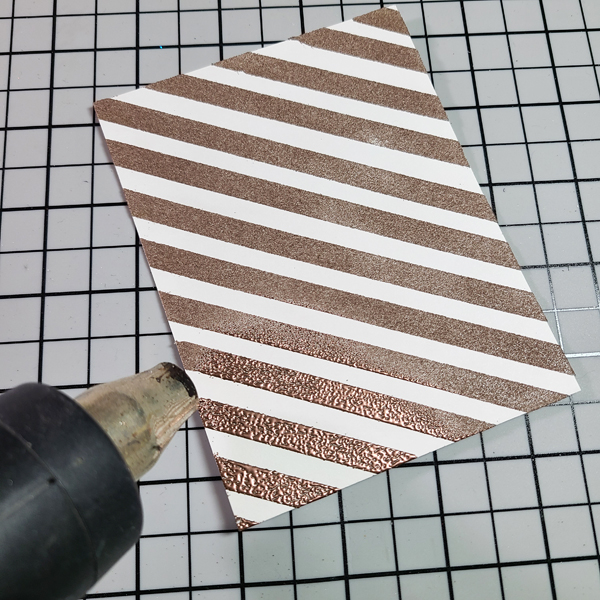
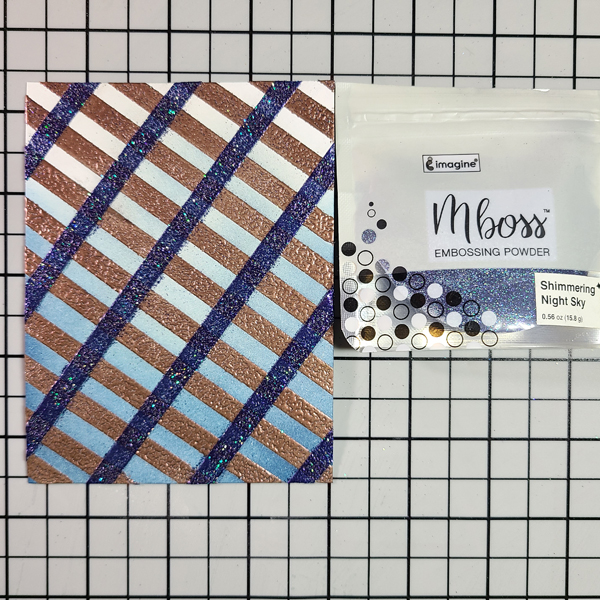
Remove the tape and the stencil. Heat set.

Step 5: 

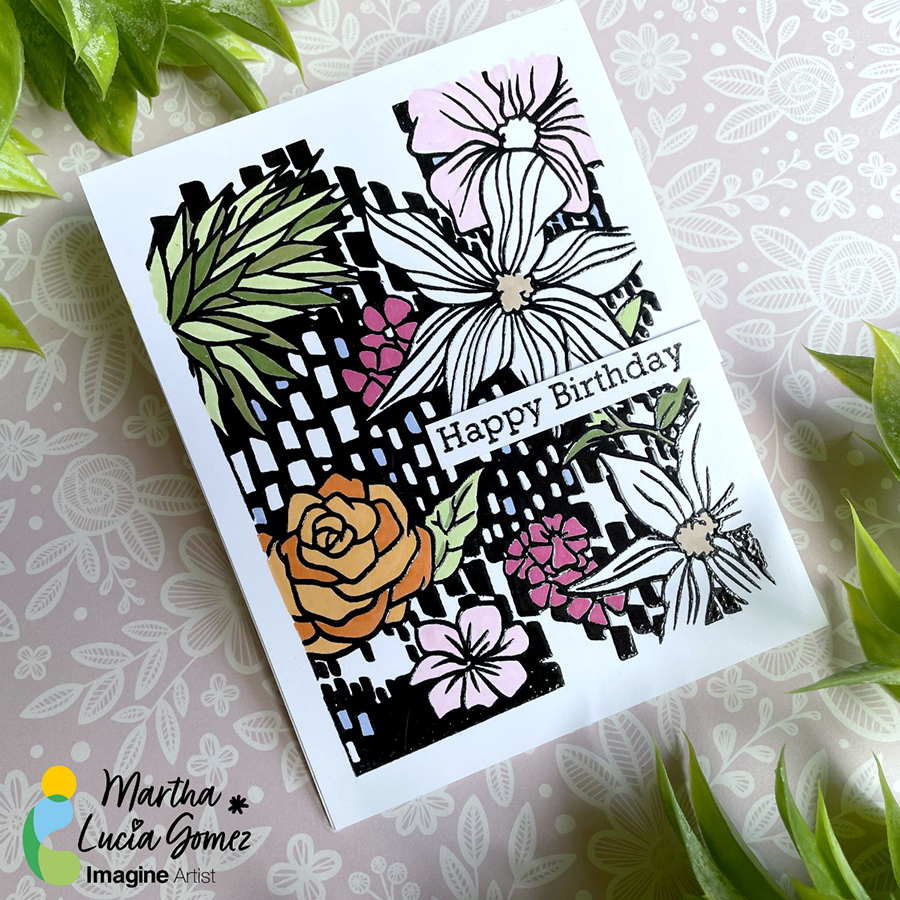
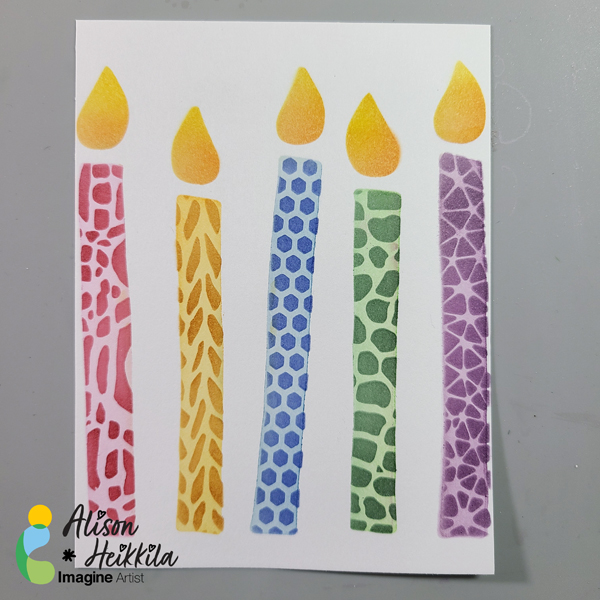
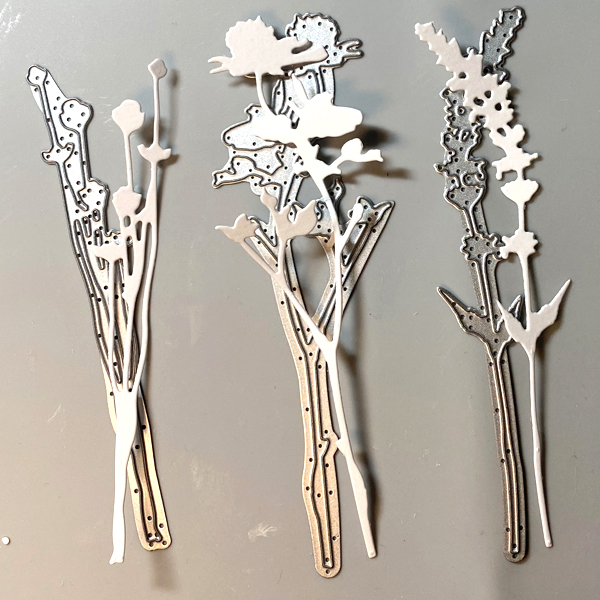
Use three flower dies from the Wildflowers 1 Thinlits Die Set to cut Mixed Media Paper.

Step 6: 

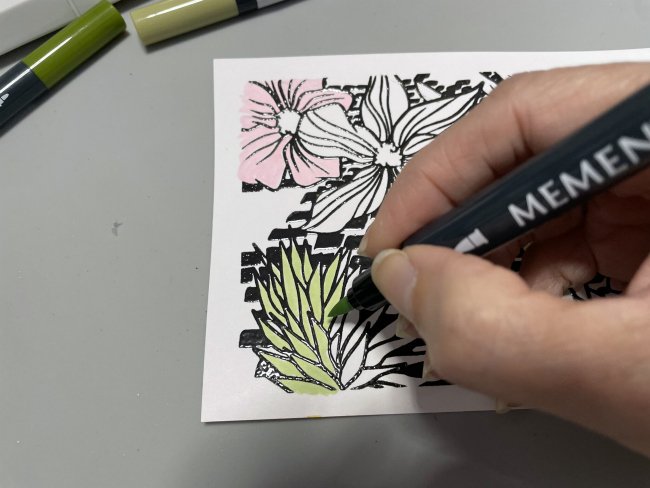
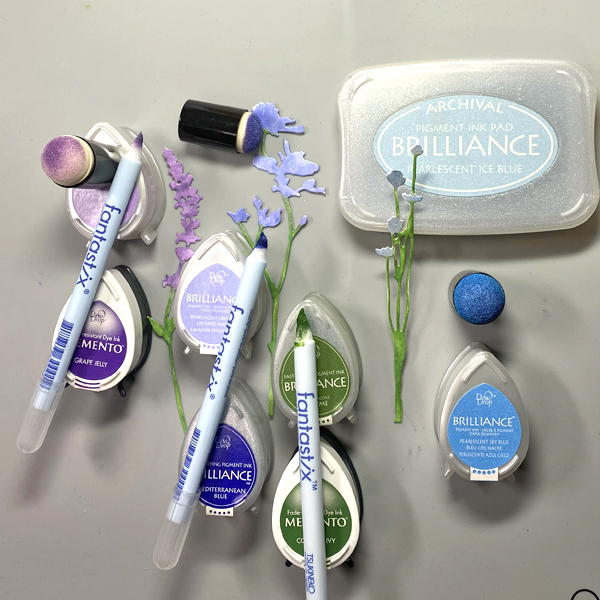
Use Sponge Daubers to apply Pearlescent Purple, Pearlescent Ice Blue, and Pearlescent Lavender to the flowers. Use Fantastix Brush applicators to detail the flowers with Mediterranean Blue Brilliance, Pearlescent Sky Blue Brilliance, Grape Jelly Memento inks. Color the flower stems and leaves with Pearlescent Thyme Brilliance and Cottage Ivy Memento inks.

Step 7:

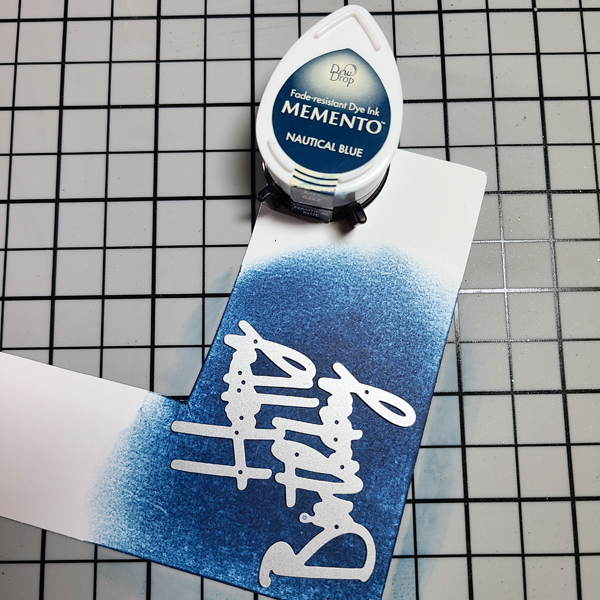
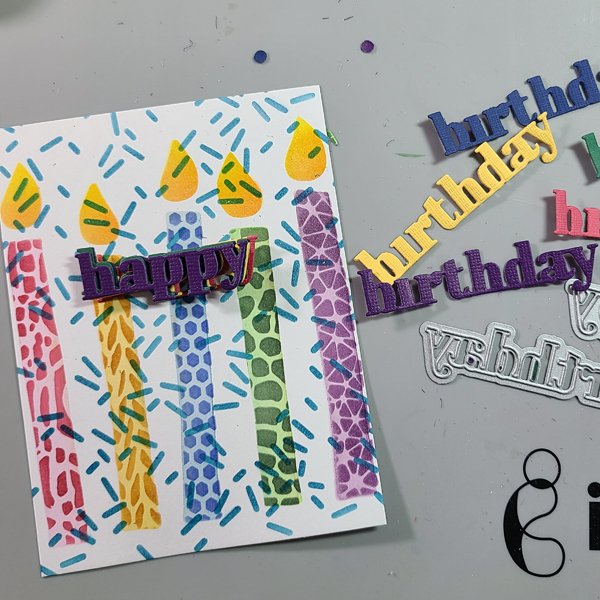
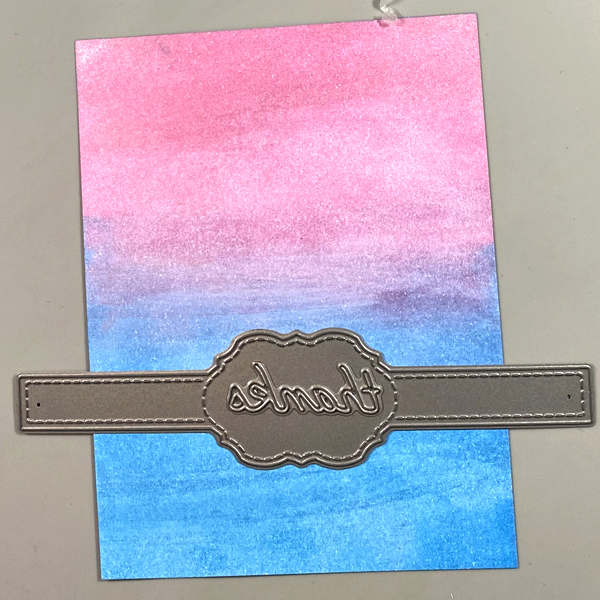
Use the Belly Band and “thanks” dies to cut the extra panel of paper created in Step 1.

Step 8:

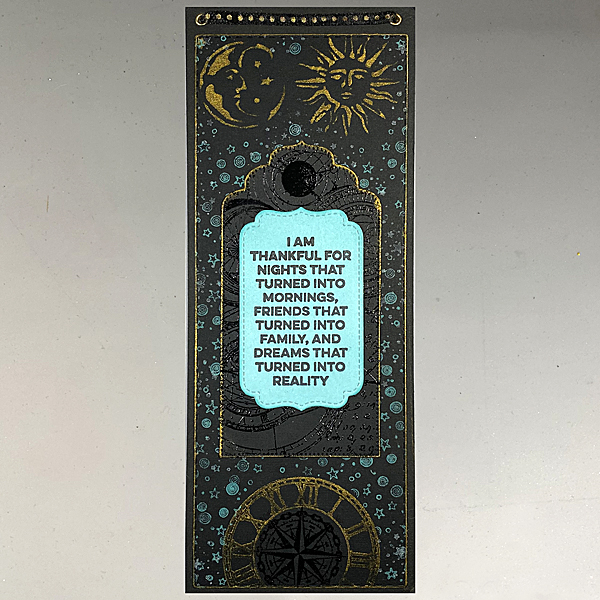
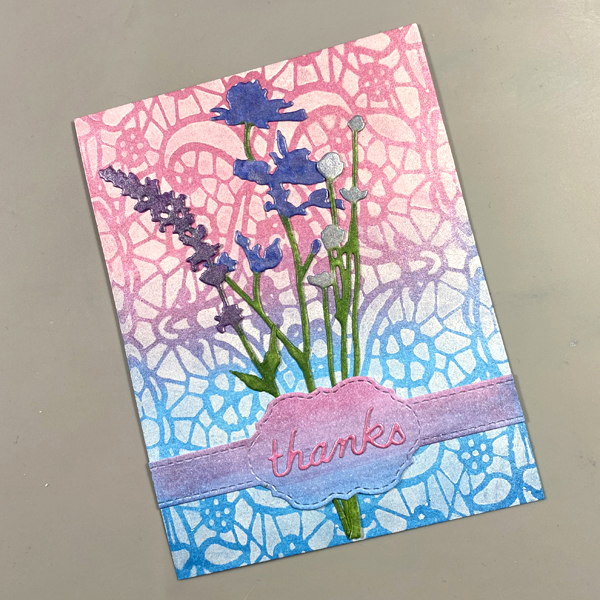
Adhere the flower die-cuts to the stenciled panel. Adhere the Belly Band die-cut over the flower stems. Adhere the “thanks” die-cut to the center ornament of the Belly Band.

Step 9:

Cut a piece of white cardstock in half. Score and fold to form an A2 card. Put a piece of scrap paper inside the card, then use a Sponge Dauber to apply Purple Brilliance ink around the edges of the front of the card. Heat set.
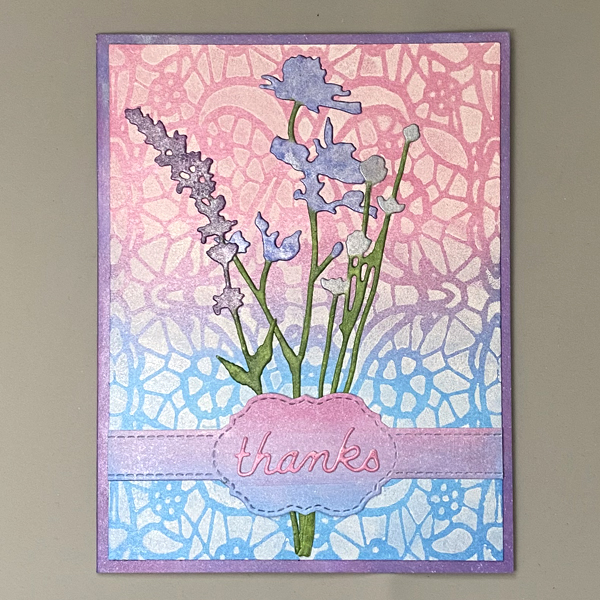
Step 10:
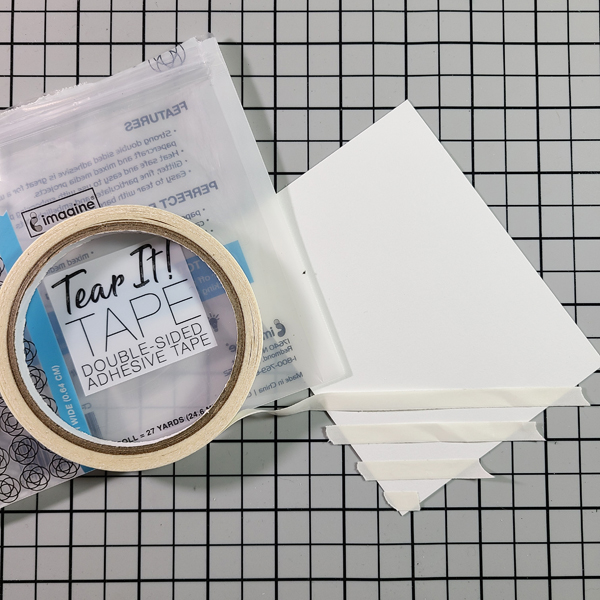
Use Tear It! Tape to adhere the image panel to the card.

Art Supplies:

Imagine:

• Brilliance:

– Pearlescent Sky Blue

– Pearlescent Orchid

– Moonlight White

– Pearlescent Purple

– Pearlescent Ice Blue

– Pearlescent Thyme

• Fantastix Brush Tip

• Memento Ink

– Grape Jelly

– Cottage Ivy

• Sponge Dauber

• Ink Sweeper

• Tear It! Tape

Other:

• Mixed Media Paper by Strathmore

• Solar White Classic Crest Cardstock by Neenah

• Mosaic #54 Stencil by AALL and Create

• Wildflowers 1 Thinlits Flower Dies by Tim Holtz for Sizzix

• Belly Band Die by Frantic Stamper

• “Thanks” die: Source Unknown

• Removable Scotch Tape by 3M

• 91% Isopropyl Alchohol

• Heat Tool

• Big Shot by Sizzix

Let’s Make an Inspirational Quote Wall Hanging

By Kathi Rerek –

Greetings! It’s Kathi here today to share with you a tutorial about how to create an inspirational wall hanging using a favorite quote and your craft supplies. I used Golden Glitz Delicata, Nocturne, VersaFine Clair, and VersaMagic Chalk inks.

Skill: Intermediate

Time: 2 hours

Directions:

Step 1:

Use a Stitched Slimline Die and a Big Tags cutting dies to cut black cardstock for the panels.

Step 2:

Position the moon and sun from the Alchemy Mixed Media Stencil on the top of the large rectangular die-cut. Use removable Scotch Tape to secure the stencil to the back of stencil. Cover the openings around the sun and moon with Post-It Notes. Use a Sponge Dauber to apply Golden Glitz Delicata Ink over the stencil onto the die-cut. Heat set.

Step 3:

Use a magnet to secure the image panel horizontally along the base of a stamping platform. Position the clock from the ATC Coins Clear Stamp Set 6 facedown on the the panel, so that 12:00 is centered and facing the top of the panel.

Step 4:

Ink the clock with Golden Glitz Delicata ink and stamp the clock along the bottom of the tag. Heat set to bring out the lustre.

Step 5: 

Position the compass from the Small Elements Stamp Set 2 facedown inside the circular opening of the clock with the “N” of North at 12:00.

Step 6:

Use Nocturne VersaFine Clair ink to stamp the small compass into the center of the clock image. Cover the stamped image with Clear MBoss Clear and melt the powder with a heat tool.

Step 7:

Use Turquoise Gem VersaMagic ink to stamp the swirls and stars from the Harvest Moon Clear Stamp Set and the stars from the Mini Stars Clear Stamp Set around the perimeter of the die-cut. Repeat using Sea Breeze VersaMagic ink. Heat set.

Step 8:

Edge the panel with Golden Glitz Delicata ink. I slide each edge of the piece along the side of the ink pad to create a strong golden edge. Heat set.

Step 9:

Use repositionable adhesive to secure the black tag die-cut to a piece of scrap paper, then use magnets to secure them to the base of the stamping platform.

Position the Celestial Navigation Clear Stamp 398 and stamp with Nocturne VersaFine Clair.

Step 10:

Cover the stamped image with MBoss. Melt the powder with the heat tool. (MBoss image application not shown)

Step 11:

Use Golden Glitz Delicata Ink to edge the tag.

Step 12:

Using an Ink Sweeper, apply Sea Breeze VersaMagic to a piece of mixed media paper.

Step 13:

Use a Sponge Dauber to apply Turquoise Gem VersaMagic around the edges of the paper, then blend using the Ink Sweeper and Sea Breeze VersaMagic. Heat set.

Step 14:

Secure the inked panel to the base of the stamping platform. Position the Ink and the Dog Mini Cling Stamp 109 stamp and stamp with with Nocturne VersaFine Clair. Heat set.

Step 15:

Use the shaped die from the Small Stitched Envelope die set to cut the sentiment panel.

Step 16:

Cut a piece of black chipboard to 3.5″ x 9″. Punch holes in the top, insert eyelets, and thread ribbon.

Step 17:

Use Tear It! Tape to adhere the rectangular panel to the chipboard.

Step 18:

Then tape the stamped and embossed tag.

Step 19:

Lastly, adhere the quote die-cut.

Thanks for stopping by. I hope this project will inspire you as much as it inspired me!

Art Supplies:

Imagine:

• VersaFine Clair – Nocturne

• VersaMagic – Sea Breeze

• VersaMagic – Turquoise Gem

• Delicata – Golden Glitz

• MBoss – Clear

• Sponge Dauber

• Craft Mat

• Tear It! Tape

Other:

• Crea-Lies: Bigz Tagz Crea-NestLies XXL #6

• Creekbank Creations: Stitched Slimline Dies

• Lawn Fawn: Small Stitched Envelope Lawn Cuts Die Set

• PaperArtsy: Ink and the Dog Mini Cling Rubber Stamp 109

• Lavinia Stamps: Mini Stars Clear Stamps

• AALL and Create: Celestial Navigation Clear Stamp Set 398

• Pink Ink: Harvest Moon Clear Stamp Set

• That’s Crafty: Small Elements Stamp Set 2

• That’s Crafty: ATC Coins Clear Stamp Set 6

• Stamperia: Alchemy Mixed Media Stencil

• Martha Stewart Crafts: Embossing Gun

• Tonic: Tim Holtz Stamping Platform

• Sizzix: Big Shot

Make Your Own Plaid with Tear It! Tape

By Alison Heikkila

Greetings! One of my favorite products from Imagine is Tear It Tape. That may be surprising, considering all of the fantastic inks and colors they offer. But, Tear It! Tape is an exceptional adhesive that has some cool properties you may not be aware of, namely the fact that it is heat safe. That means you can emboss right on top of it, so I decided to make a plaid, embossed background using it. This doesn’t take too long, but you do need to be precise, which is something I don’t normally try to be when I’m crafting.

*Some affiliate links are used in this post. That means that if you shop through these links, I may receive a small compensation, at no cost to you. For more information, please see my Affiliates page, where I also have some coupon codes.

Time to Complete: Approx. 30-45 Minutes
Skill Level: Intermediate to Difficult

Step 1: Lay your Craft Mat with the grid side up. It’s going to be necessary to use it to not only make sure our lines are straight, but also evenly spaced.

Step 2: Lay your cardstock at an angle on the grid. The angle doesn’t really matter.

Step 3: Apply a strip of Tear It! Tape at every horizontal grid line. I placed mine above the line consistently.

The panel will look like this when you’re done.

Step 4: Cut off the excess ends to make the tape flush with the edge of the panel.

Step 5: Begin to partially remove the release paper from the Tear It! Tape. I found it to be easier to only pull it off part of the way, so that I could still move the card around without getting my fingers on the sticky tape. When you finish lifting a bit of each strip, finish pulling off the release paper.

Step 6: Pour Copper MBoss embossing powder on to the panel. I put a piece of copy paper underneath so that I can pour the excess back into the bag. I recommend rubbing your finger across the panel to ensure good coverage of the powder.

Step 7: Shake off the excess powder on to the copy paper, and heat set the powder that’s on the panel.

Step 8: Begin applying Summer Sky Memento Ink in the middle of the card panel using the applicator of your choice. Admittedly, my brush wasn’t thoroughly clean, so my inking doesn’t look exactly like the ink color.

Step 9: Apply Nautical Blue Memento around the Summer Sky Ink, in a “U” shape.

Step 10: Lay the inked panel back on to the grid at a different angle from before and begin laying down more Tear It! Tape. This time, I only applied the tape where the lines were bold, so every inch.

When done applying the tape, this is what the panel should look like.

Step 11: Remove the release paper, sprinkle on Shimmering Night Sky MBoss, shake off the excess, and heat set.

Pro Tip: You may be wondering why we didn’t ink the panel after the second layer of MBoss was applied, instead of before. The Shimmering Night Sky powder has glitter in it, which could cause some drag or pulling on your ink applicators when you blend the ink. To avoid that, inking before applying a sparkly powder is advised. The Copper powder is metallic, so there’s no drag, and excess ink can be buffed away with a cloth or paper towel.

Step 12: To make perfectly coordinated cardstock for your sentiment, ink up a piece of white with Nautical Blue. Die cut the sentiment. Cut the shadow layer from vellum.

Step 13: Shake up the Summer Sky Fireworks Spray, unscrew the bottle and flick the straw on your card base to create splatters. Let dry.

Step 14: Assemble your card with Tear It Tape for the panel, and On Point Glue for the die cut sentiment.

I love how this card came out! It’s got lots of shine, but with a masculine vibe. You can change the powders and ink colors however you like to suit your needs. I love the indigo tones we’ve got going here. I hope that you’ll try making your own plaid. Thanks for stopping by. Have an inspiring day!

Supplies:
Imagine:
Tear It!Tape
Craft Mat
On Point Glue
MBoss Embossing Powder in Copper
MBoss Embossing Powder in Shimmering Night Sky

Memento Ink in Summer Sky
Memento Ink in Nautical Blue
Fireworks Spray in Summer Sky

Other:
Pinkfresh Studio: Classic Words Die Set
Blending Brush (or other ink applicator)
Strathmore Smooth Bristol Cardstock (for focal panel)
White Cardstock for card base

Let’s Make a Floral Happy Birthday Card

By Martha Lucia Gomez

Hello there! Today’s tutorial is about a Birthday Card using a background stamp but adding texture and color. To make this, I used VersaFine Clair Nocturne, Clear Embossing Powder and Memento Markers. 

Skill: Beginning

Time: 45 minutes

Directions:

Step 1:

Take a piece of white smooth cardstock, ink well your background stamp with VersaFine Clair Nocturne Ink and stamp your image pressing hard to obtain a crispy image. You can use any stamping tool. 

Step 2:

Cover the stamped image with Clear Embossing Power or MBoss. Melt the powder with the heat tool.

Step 3:

To enhance the details of the stamp, color it partially with Memento Markers. The VersaFine Clair in is a safe ink to work with these Markers or with any type of Alcohol Markers.

Step 4:

Combine the tones of your markers to have different shadows. In my sample I used Memento Markers in colors Angel Pink, New Sprout, Pistachio, Bamboo Leaves, Rose Bud, Desert Sand, Cantaloupe, Tangelo and Summer Sky.

Step 5:

If you want you can resize the stamped layer and paste it over a card base. You can use Tear It! Tape to paste it. 

Step 6:

In a separate piece of white cardstock stamp the birthday sentiment using the same products used to create the background. I used VersaFine Clair Nocturne and Clear Embossing Powder. 

Finalize your card pasting the sentiment with crafty foam tape.

Art Supplies:

Imagine:

• VersaFine Clair Nocturne

• Memento Markers Angel Pink, New Sprout, Pistachio, Bamboo Leaves, Rose Bud, Desert Sand, Cantaloupe, Tangelo and Summer Sky

• Clear Embossing Powder

• Craft Mat

Other:

• Background Stamps by Richard Garay Designs. 

• Stamping Tool

• Heat Tool.

Techniques to Create Delicate Textures in a Valentine’s Card

By Martha Lucia Gomez

Hello there! Today’s tutorial is about texture without dimensions. Do you know that you can create a flat card with these two ingredients and just one type of ink? Well, the Delicata is the ink that can bring you these possibilities and more. I decided to make this card using two colors of Delicata, Ruby Red and Rose Gold.  

Skill: Beginning

Time: 45 minutes

Directions:

Step 1:

Take a piece of white smooth cardstock and solid stamps to create your design. In my sample, I am using hearts in different sizes and the Love Sentiment. First, ink the sentiment using the Ruby Red Delicata Ink. The Delicata is a pigment ink that dries within minutes on porous papers and never loses the luster. You can also obtain a Metallic touch with it if you don’t emboss the stamped images. 

Step 2:

If you want to obtain more texture and coverage, you can stamp the same image several times. In my sample, I stamped it three times.

Step 3:

To complete the sentiment, you can stamp a complement using the same ink or other ink. On this sample, I used VersaFine Clair Nocturne. On it, you can notice the different textures of both inks and the soft color of the Delicata. 

Step 4:

Now is the time to create more texture. This time, I used Rose Gold Delicata Ink to create it and hearts in different sizes. I stamped them randomly on the upper part of the card.  Using a stamping tool, you can create different tones with the same ink and color, depending of the times that you stamp your image.

 Step 5:

After finalizing the stamping process, I decided to embellish the card with a few loops of red twine. I used a dot of On Point Glue to secure just the knot.  

Step 6:

Due to the dimension created with the twine, I pasted the decorated layer over a red card base using crafty foam tape. And voila, my soft and textured Valentine’s Card is ready!

Thanks for stopping by and don’t forget that you can explore more textures with other colors of Delicata Ink. 

Art Supplies:

Imagine:

• VersaFine Clair Nocturne

• Delicata Ink Ruby Red and Rose Gold

• On Point Glue

• Craft Mat

Other:

• I Love You Stamps by Diamond Press. 

• Stamping Tool

• Crafty Foam Tape.

Make a Birthday Card Using Multiple Stencils

By Alison Heikkila –

Hello! Since birthdays happen all year, it’s good to have a big stash of birthday cards at the ready for whenever you need one. Since I love to use stencils, I thought I would use a bunch of them together with many colors of Memento Inks from Imagine.

*Some affiliate links are used in this post. That means that if you shop through these links, I may receive a small compensation, at no cost to you. For more information, please see my Affiliates page, where I also have some coupon codes.

I chose a light color and a dark color Memento Ink for each candle of the Big Candle stencil. 

Step 1:

Step 1: Use washi or low tack tape to stick down your cardstock and stencil. Mask off any areas that you don’t want your first color of ink on. I masked off the second candle and the flames. 

Step 2:

Ink the candles with the lighter color from the pairs you chose. Be sure to mask off the areas that you don’t want your ink to go.

Step 3:

Mask off the candles so that you can ink the flames. I used Dandelion on the entire flame, and then Tangelo on the lower area of the flame.

Step 4:

Choose the stencils you want to decorate each candle with and ink with the darker shades you chose. You must keep the original candle stencil in place so that you only ink the candle. Slip the patterned stencil under the candle stencil to make inking easy. Be sure to mask off the other areas again! 

This is what the completed candles look like. You can stop here, if you want, but I kept going to make it even more festive!

Step 5:

Ink a stencil that looks like confetti or sprinkles on top of the entire panel.

Step 6:

Die cut your sentiment. First, I was only going to die cut my “happy birthday” out of purple, but I decided to cut one sentiment out of each main candle color so that I can have a stacked, 3D embellishment. You can glue these together with On Point Glue. 

Step 7:

Ink your card base using the lighter colors of Memento Ink, directly from the pad. I worked my way around my palette of colors two times. 

Step 8:

Glue the card front and sentiment on to the card base. Optional: Add sequins or rhinestones to the card front with On Point Glue. 

Here is the finished card! I love how happy it is, and it can easily work for anyone. It’s fun to work with so many colors and so many patterns of stencils, all on one project. I hope that you break out some of your stencils and try this technique! Thanks for stopping by. Have an inspiring day!

Supplies Used:

Imagine:

Memento Ink: Angel Pink, Rhubarb Stalk, Cantaloupe, Peanut Brittle, Summer Sky, Paris Dusk, New Sprout, Northern Pine, Sweet Plum, Elderberry, Dandelion, Tangelo, Teal Zeal

On Point Glue

Other:

A Colorful Life Designs: Big Candles, Milky Way, Cozy Knit, Primative Batik, Crocodile, Teeny Honeycomb, Layered Party 1

Simon Says Stamp: Happy Birthday Die

The Rabbit Hole Designs: Cotton Tail Blending Brushes

Sequins

Washi/Low Tack Tape

White Cardstock