Make a Birthday Card Using Multiple Stencils

By Alison Heikkila –

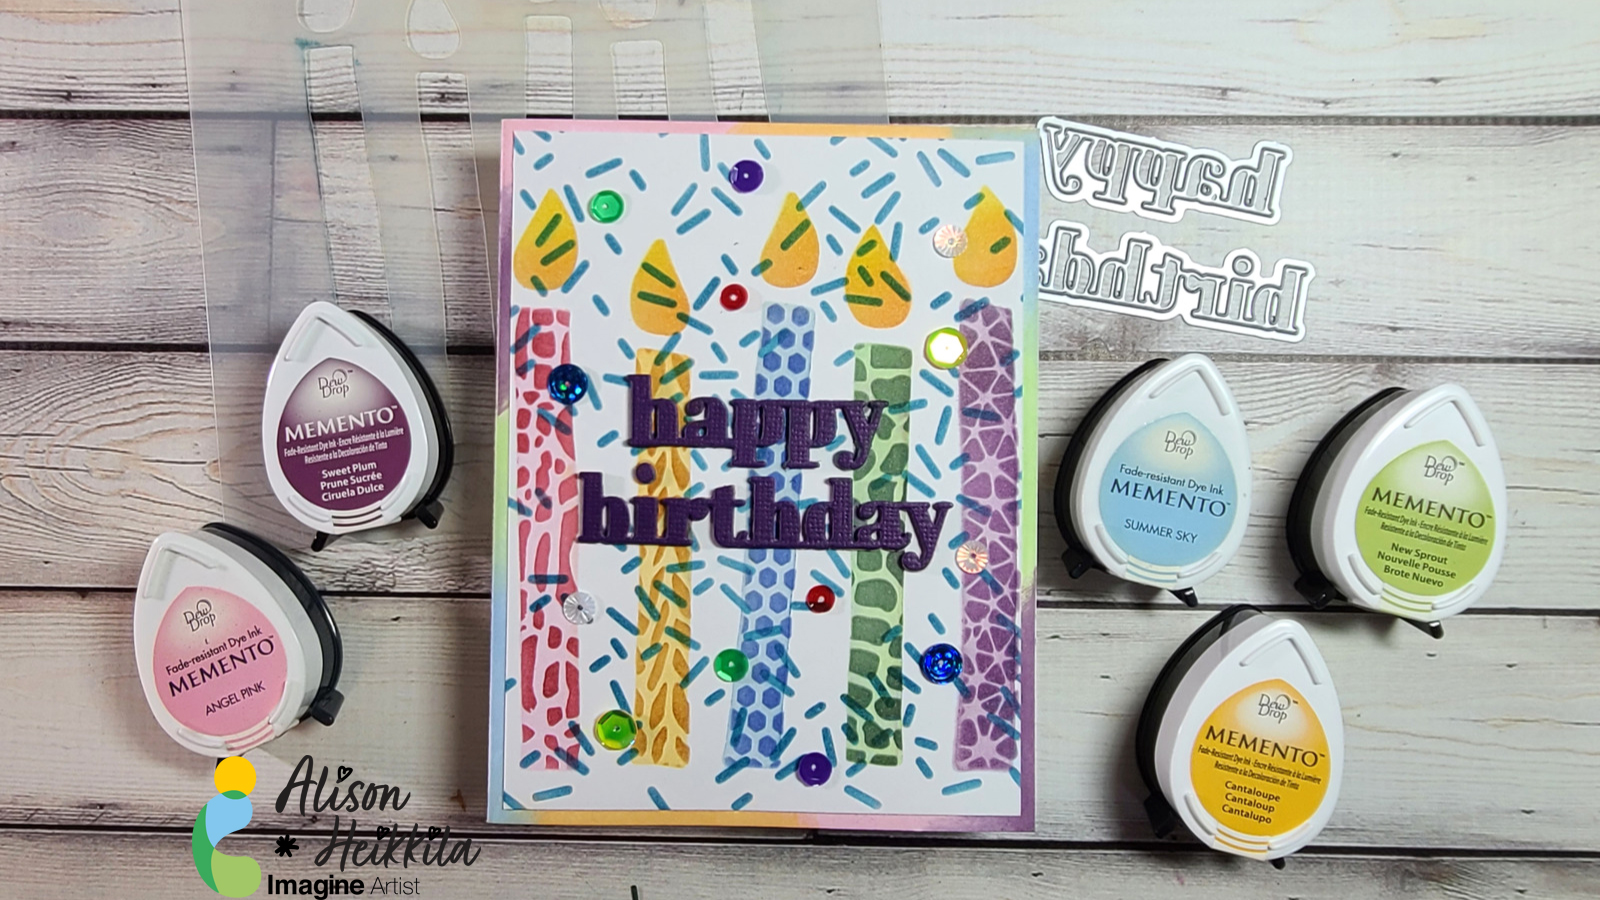
Hello! Since birthdays happen all year, it’s good to have a big stash of birthday cards at the ready for whenever you need one. Since I love to use stencils, I thought I would use a bunch of them together with many colors of Memento Inks from Imagine.

*Some affiliate links are used in this post. That means that if you shop through these links, I may receive a small compensation, at no cost to you. For more information, please see my Affiliates page, where I also have some coupon codes.
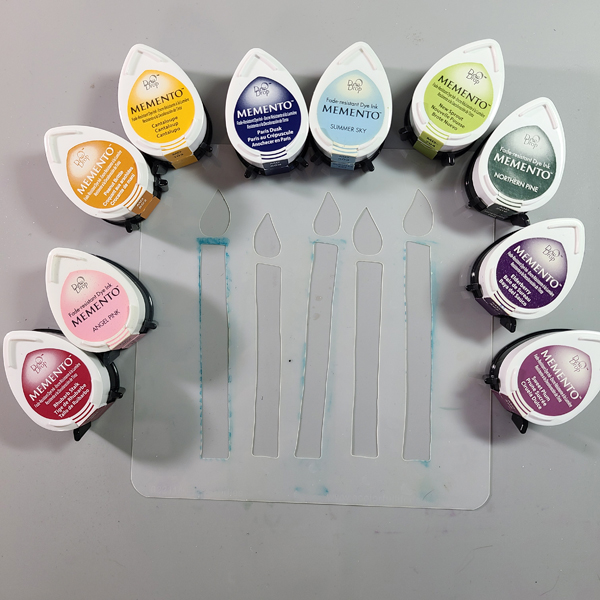
I chose a light color and a dark color Memento Ink for each candle of the Big Candle stencil. 
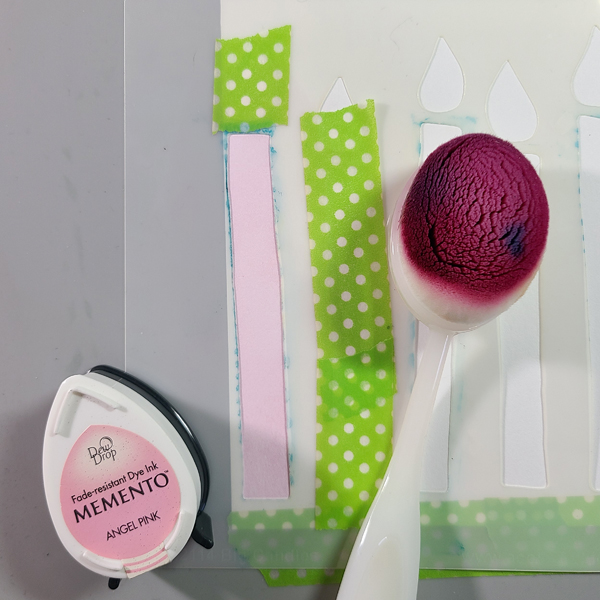
Step 1:

Step 1: Use washi or low tack tape to stick down your cardstock and stencil. Mask off any areas that you don’t want your first color of ink on. I masked off the second candle and the flames. 

Step 2:

Ink the candles with the lighter color from the pairs you chose. Be sure to mask off the areas that you don’t want your ink to go.
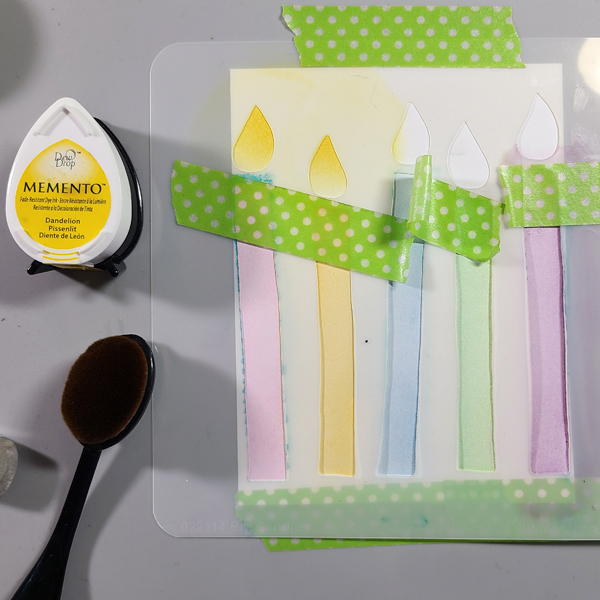
Step 3:

Mask off the candles so that you can ink the flames. I used Dandelion on the entire flame, and then Tangelo on the lower area of the flame.
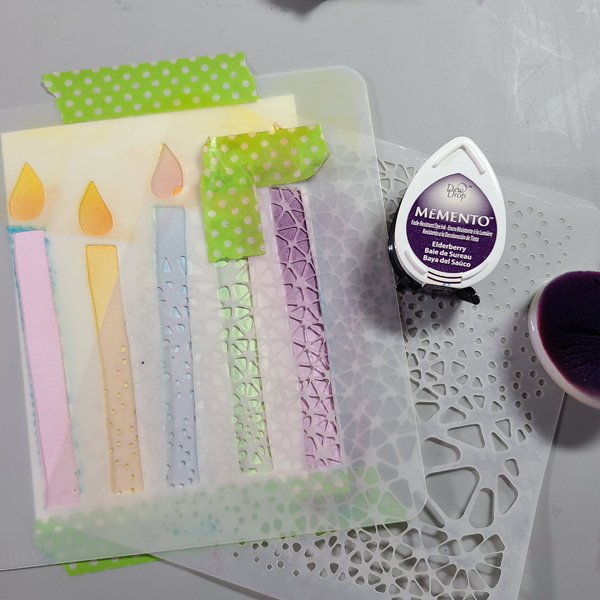
Step 4:

Choose the stencils you want to decorate each candle with and ink with the darker shades you chose. You must keep the original candle stencil in place so that you only ink the candle. Slip the patterned stencil under the candle stencil to make inking easy. Be sure to mask off the other areas again! 
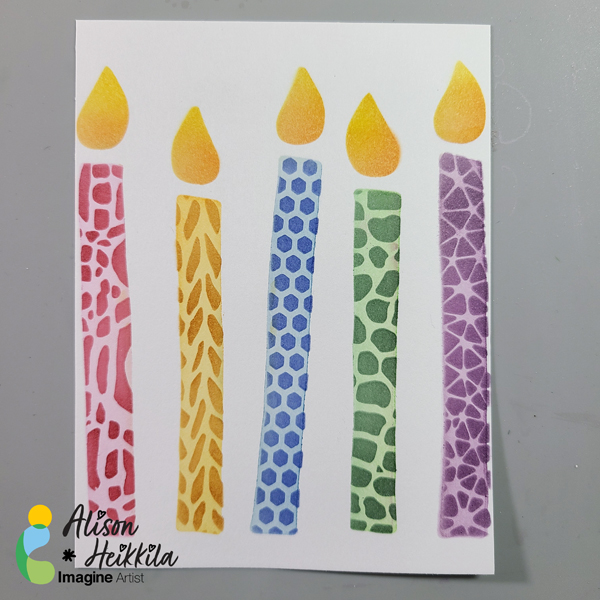
This is what the completed candles look like. You can stop here, if you want, but I kept going to make it even more festive!
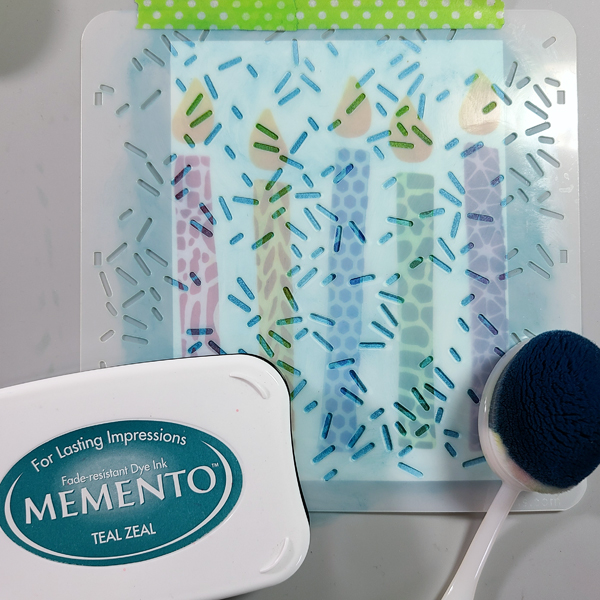
Step 5:

Ink a stencil that looks like confetti or sprinkles on top of the entire panel.
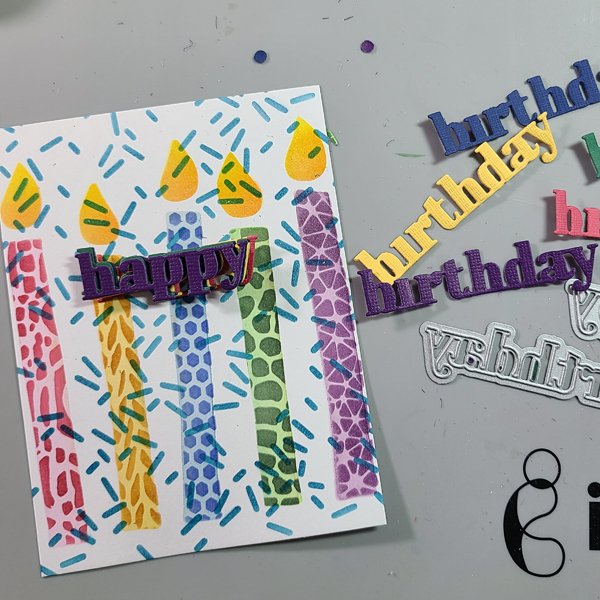
Step 6:

Die cut your sentiment. First, I was only going to die cut my “happy birthday” out of purple, but I decided to cut one sentiment out of each main candle color so that I can have a stacked, 3D embellishment. You can glue these together with On Point Glue. 
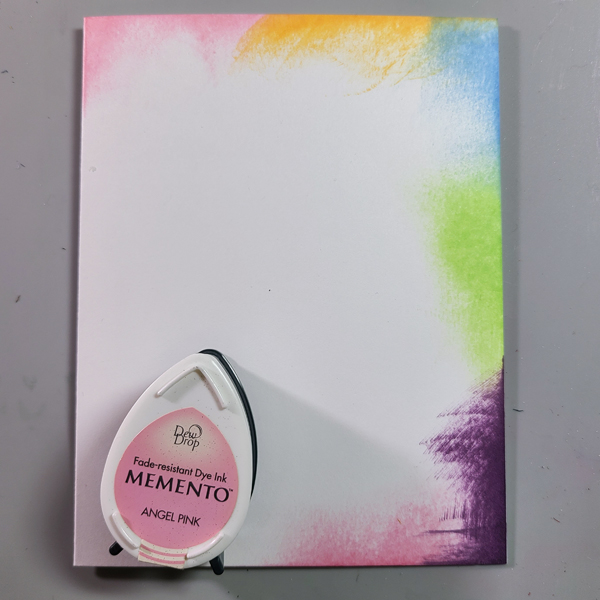
Step 7:

Ink your card base using the lighter colors of Memento Ink, directly from the pad. I worked my way around my palette of colors two times. 

Step 8:

Glue the card front and sentiment on to the card base. Optional: Add sequins or rhinestones to the card front with On Point Glue. 
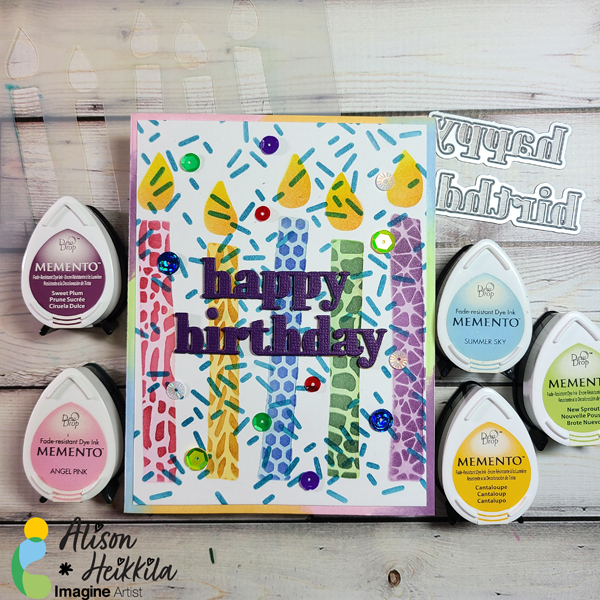
Here is the finished card! I love how happy it is, and it can easily work for anyone. It’s fun to work with so many colors and so many patterns of stencils, all on one project. I hope that you break out some of your stencils and try this technique! Thanks for stopping by. Have an inspiring day!

Supplies Used:

Imagine:

Memento Ink: Angel Pink, Rhubarb Stalk, Cantaloupe, Peanut Brittle, Summer Sky, Paris Dusk, New Sprout, Northern Pine, Sweet Plum, Elderberry, Dandelion, Tangelo, Teal Zeal

On Point Glue

Other:

A Colorful Life Designs: Big Candles, Milky Way, Cozy Knit, Primative Batik, Crocodile, Teeny Honeycomb, Layered Party 1

Simon Says Stamp: Happy Birthday Die

The Rabbit Hole Designs: Cotton Tail Blending Brushes

Sequins

Washi/Low Tack Tape

White Cardstock
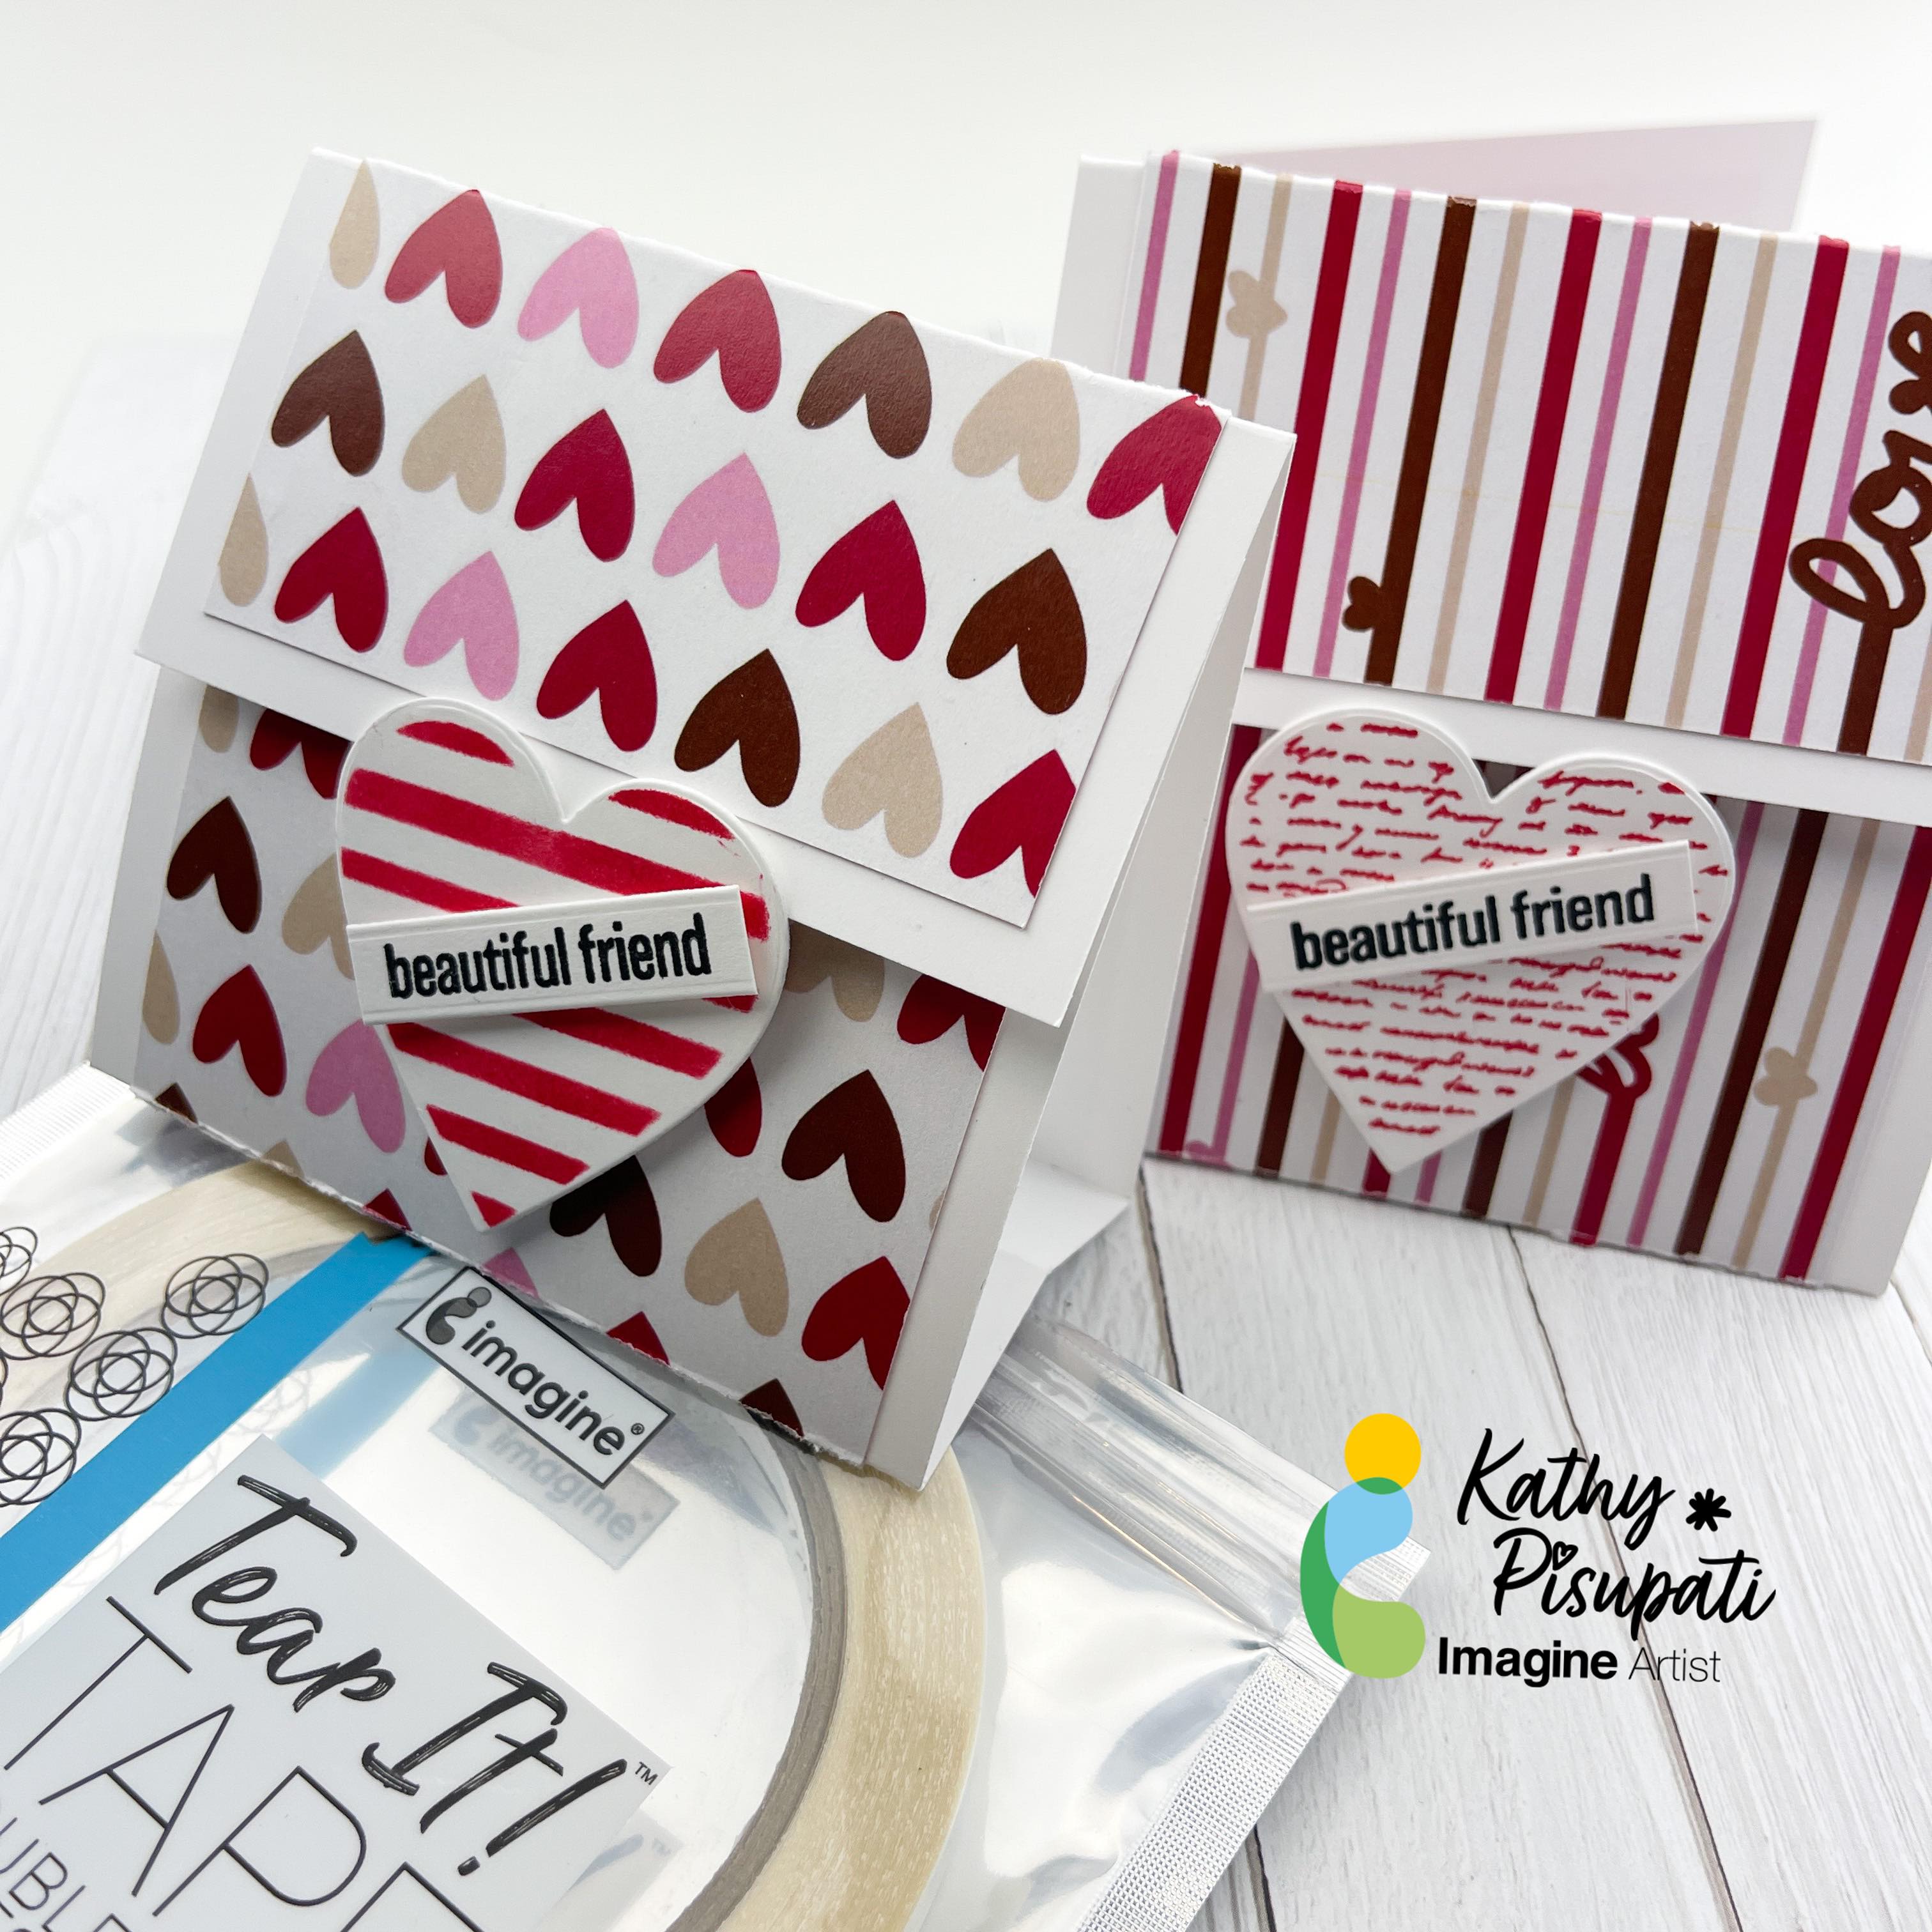
Learn to Make a Valentine’s Day Treat Bag/Gift Card Holder

By Kathy Pisupati –

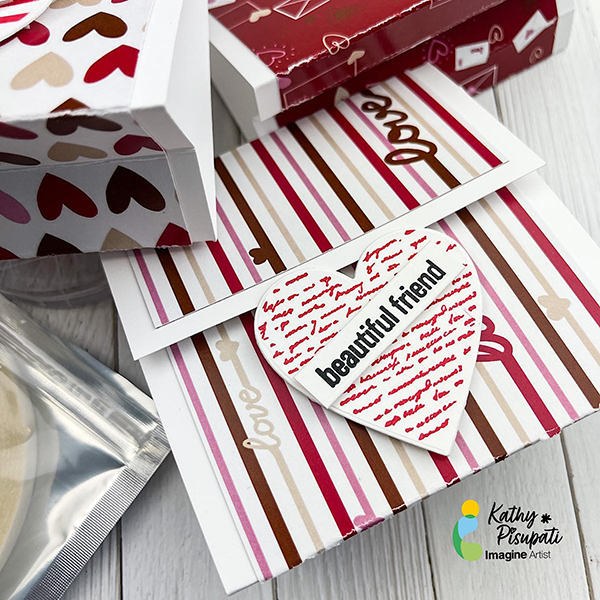
Hello!  Kathy here, creating art for Imagine Crafts!  Today’s project is a treat/gift card holder for Valentine’s Day but it is also about ADHESIVES!  Adhesives aren’t the focus on most tutorials so let’s change that today.

.Skill Level: Easy

Time to complete: 1 Hour

Directions:

Step 1

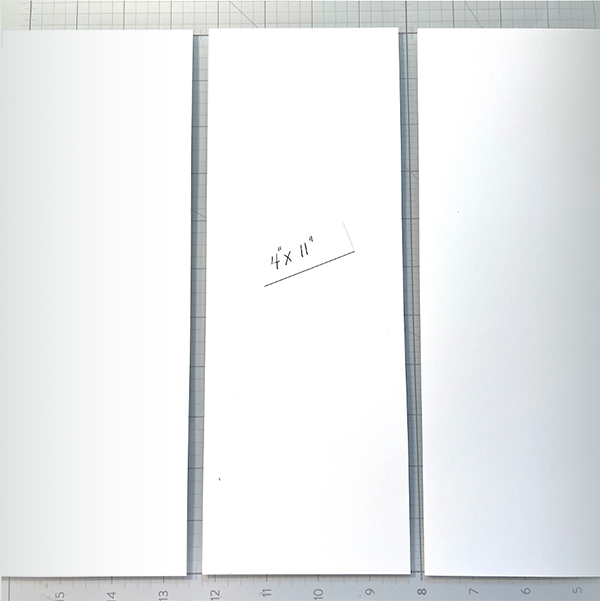
Cut 3 pieces of a layering weight, white card stock to 4” x 11”.  This will be enough for three holders. You don’t need a heavy weight card stock as we will be scoring, folding and adding a layer of patterned paper.

Step 2

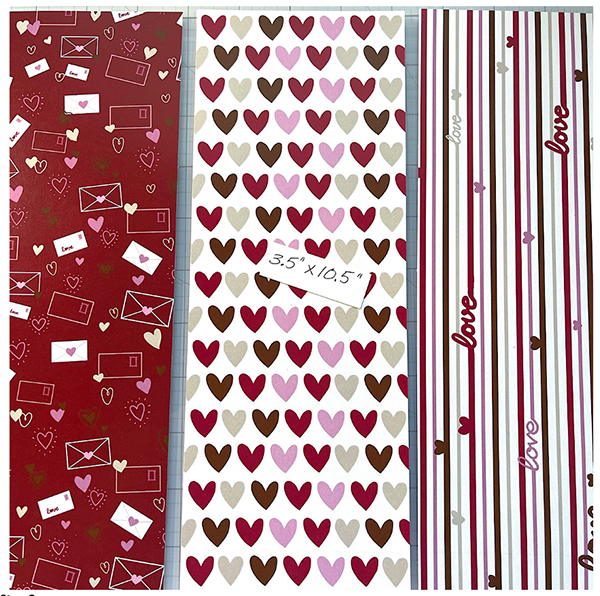
Cut 3 panels of patterned paper to 3.5” x 10.5”.  I had this fabulous patterned  paper from Kat Scrappiness in my stash which is perfect for Valentine’s Day!

Step 3

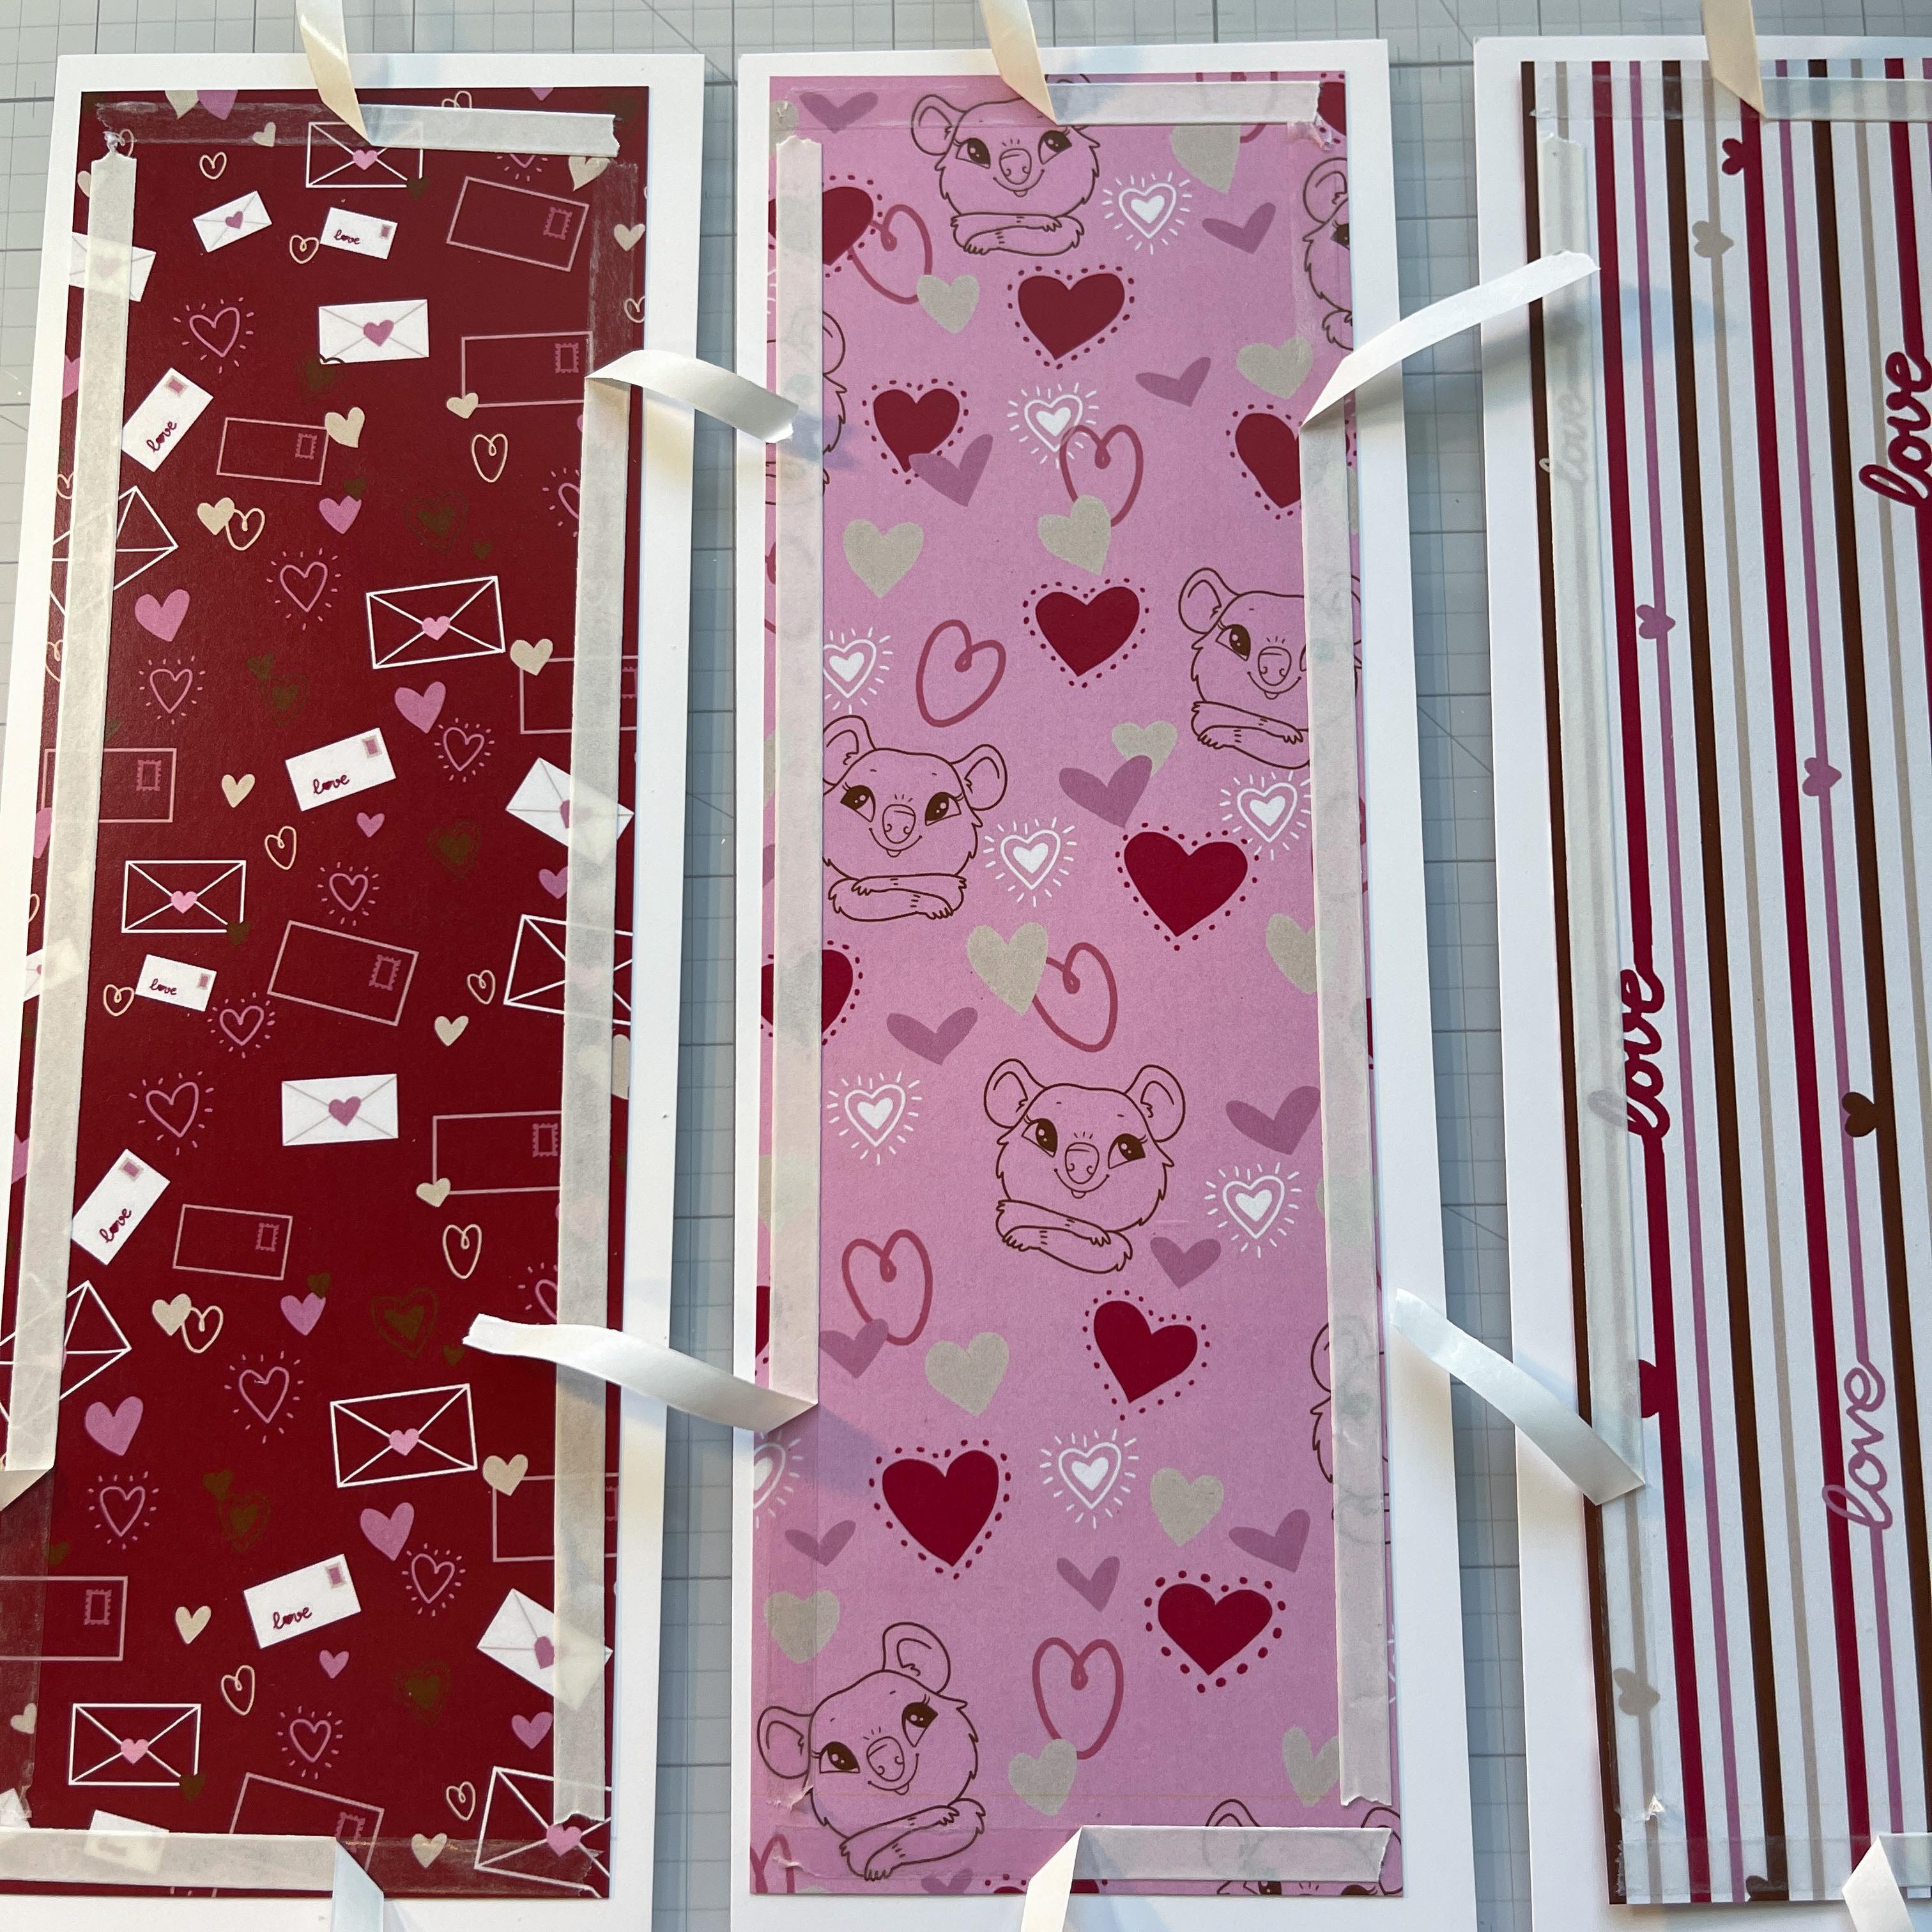
Here is where the adhesive comes in!  You will attach the patterned paper panels to the white card stock.  The Tear It! Tape from Imagine Crafts is SO easy to use.  It is a strong double-sided adhesive AND you don’t need to reach for your scissors every time you want a piece.  Just tear it!  It tears so easy!  We will also be using the On Point Glue and I will give you a tip in a second.  The On Point Glue comes in a small bottle with a micro tip.  The cap of the bottle has a built in pin that fits in the micro tip when you close the cap so it never gets clogged!  No more losing those pins!

Step 4

Add your Tear It! Tape to the back of all four panels on all sides.  Here’s a tip, pull up only a bit of each back and a bit of On Point Glue to the exposed area.  Then flip the panel over and align to your white card panel.  This allows some wiggle room for you to align the panels perfectly!  Once the patterned panel is aligned press down the areas of exposed adhesive and then gently pull the backing paper off from each side.

Step 5

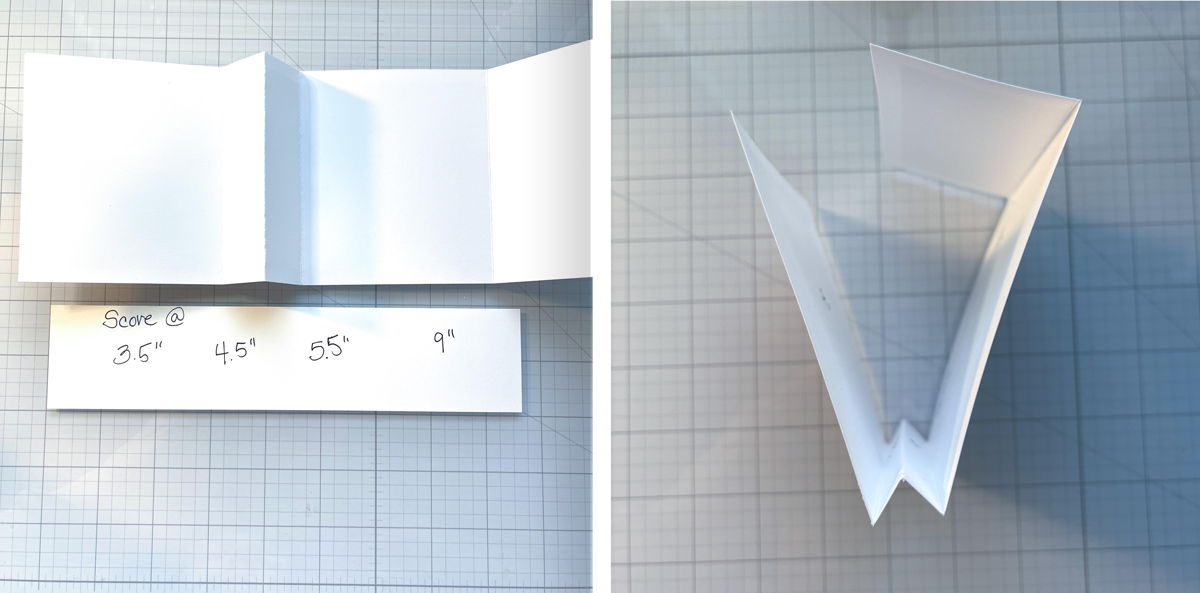
Now it’s time to score and fold.  You will score as indicated above and fold in the manner shown.

Step 6

Now it’s time to add a little decoration!  I used a heart die and coordinating stamps.  I stamped using VersaColor Cardinal ink.  For the sentiment I used VersaFine Clair Nocturne Ink.  Foam tape was added to the lower half of the heart.  The reason for this is so the flap of the holder can tuck under the heart.  I also added foam tape to the sentiment, adding a bit more dimension to the design.  These were SO easy to create and you could change up the design for ANY occasion.  I haven’t put anything inside yet.  A gift card fit perfectly inside, just add some temporary adhesive to the back of the gift card.  You can also adhere a small cellophane bag filled with small treats and adhere it or add a bit of temporary adhesive to the back of a fun-size candy bar!  Perfect for Valentine’s Day and Halloween!

I hope you enjoy this card and the tutorial. Thanks for stopping by I appreciate all of you! Please head over to the Imagine Crafts website to see all the beautiful products. Here is the link IMAGINE CRAFTS.

SUPPLIES

Imagine Crafts

• VersaColor Cardinal

• On Point Glue

• Tear It! Tape

• VersaFine Clair Nocturne

Other

• Kat Scrappiness Patterned Paper

• Heart Die

• Coordinating Heart Stamp/Stencil

• Scor-Pal scoring tool

• Spellbinders Platinum 6 Die-Cutting machine

• Neenah Classic Crest Solar White 110lb

• Paper Trimmer

• Teflon bone folder

• Foam Tape

Learn to Make a “Season’s Greetings” Holiday Card 

By Annie Collins –

Hello Crafty Friends – 

Annie here with a Holiday card made using MBoss and VersaMagic Ink.

Supplies Used:

Imagine:

Mboss Embossing Powder: Shimmering Night Sky

VersaMark Ink

VersaMagic Ink: Sea Breeze, Aspen Mist, & Aegean Blue

Sponge Dauber

Tear It! Tape

On Point Glue

Craft Mat

Other Supplies:

Brutus Monroe: Let It Snow Stamp Set

Brutus Monroe: Mixed Media Stencil 6×6: Snowfall

Recollections brand 110lb Cardstock: White

Recollections Brand 65lb Cardstock: Light Blue

Sequins – Blues & Clear

Quick and Easy Place Cards For Your Holiday Table Setting

Oct-2022_Katy-Ingram_Place-Cards-Group_IG-1

By Katy Ingram –

Hello Friends! Katy here and today I am creating place cards for my Thanksgiving table. Now I know some people may not do this, but I have added a bit of a twist to mine. On the inside I have included some encouraging and uplifting sentiments to let my loved ones know I appreciate and love them and that I am thankful and grateful to have them at my table for the holidays. Just a little something to make them smile this holiday season. 

In today’s video tutorial you will see how easily these cards came together using some Memento Inks and I also share where my inspiration came from. I also mention these would be great tombstones for Halloween!

I cut a piece of heavyweight white card stock 2 3/4 inches wide by 8 inches long and scored at 4 inches and then used the number 8 arch die within the Spellbinders Essential Arches layering dies. 

To create the card simply fold the card at the score line and place the arch of the die a bit above that folded line so the die is off the top of the card stock and then run it through your die cutting machine. 

The video below has all the details. I hope you enjoy and are inspired to add some inspirational place cards at your table this holiday season. 

Skill: Beginner, Intermediate, Advanced

Time: 10 minutes


Art Supplies:

Imagine:

• Memento Inks: 

– Northern Pine

– Peanut Brittle

– Rhubarb Stalk

– Angel Pink

– Sweet Plum

– Elderberry

– Cantaloupe

– New Sprout

• VersaFine Clair – Nocturne 

Other Products Used

• Spellbinders Essential Arches Die Set

• The Greenery Color Spots Stencil Set

• The Greenery Lovely Silhouettes Stamp Set

• Concord & 9th Perfectly Penned Stamp Set

• Blending Brushes

Other Products Used:

Follow Katy Here:

Youtube: https://youtube.com/c/eastwickspaperandink 

facebook: fb.me/eastwickspaper 

Instagram: https://www.instagram.com/eastwickspaperandink/ 

Blog: https://www.eastwickspaperandink.com/

Fall Themed Note Cards Using First and Second Generation Stamping With Memento Inks  

Sept-2022_Katy-Ingram_Fall-Thanks_Group-IG-1

By Katy Ingram –

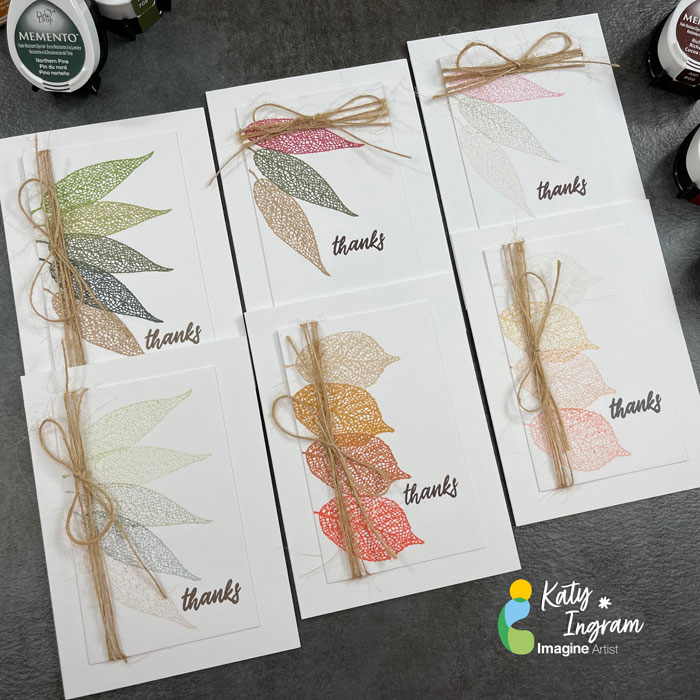
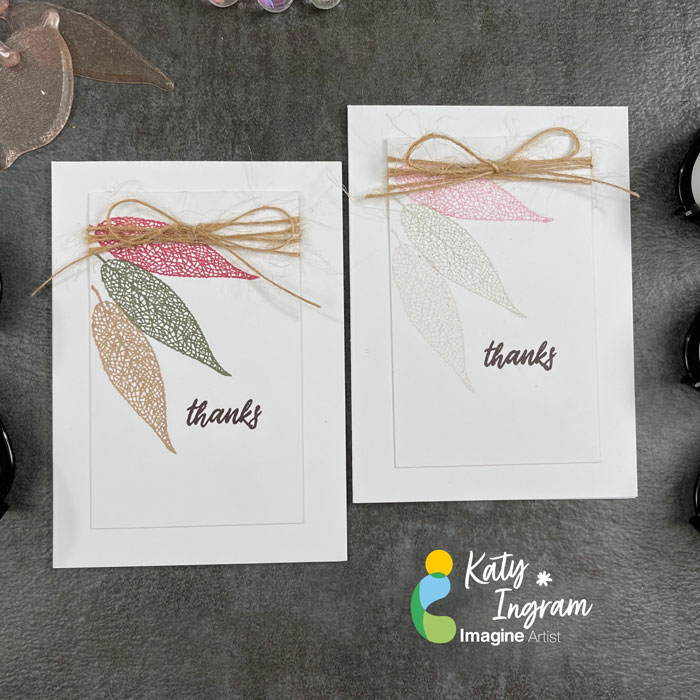
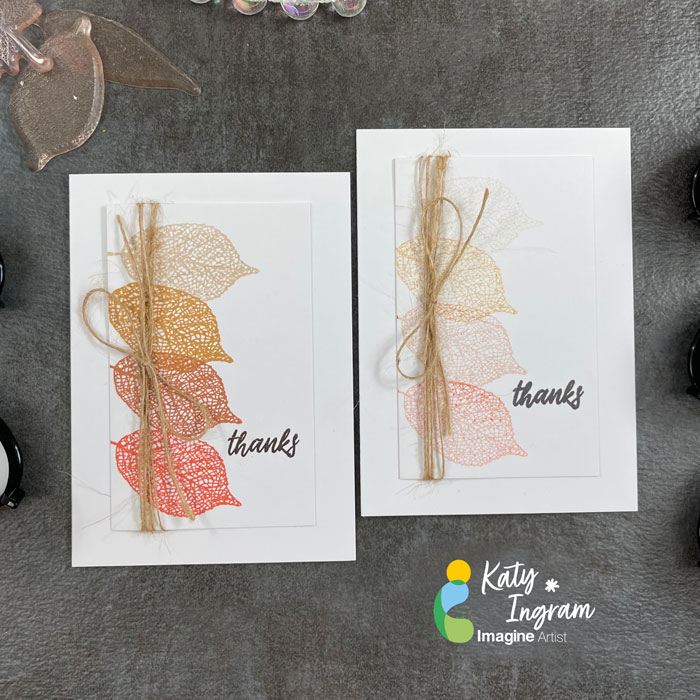
Hello Friends! Katy here and today I am creating some fall themed note cards with second generation stamping. This is a great way to get more from your inks and create a beautiful subtle look to your projects. 

In todays video tutorial you will see both first and second generations stamping with a variety of fall color Memento Inks and a quick way to add interest with a bit of twine. Video has all the details. Thanks for joining me today.

Skill: Intermediate
Time: 10 minutes

Sept-2022_Katy-Ingram_3-leaf-cards_4

Sept-2022_Katy-Ingram_4-leaf-cards_IG-2

Sept-2022_Katy-Ingram_5-Leaf-Cards_IG-3

Art Supplies:

Imagine:

• 5 Leaf Card 

– Memento Inks: Bamboo Leaves, Pistachio, Olive Grove, Northern Pine, Toffee Crunch

“Thanks” Sentiment: Memento Rich Cocoa

• 4 Leaf Card

– Memento Inks: Desert Sand, Peanut Brittle, Potters Clay, Morocco

“Thanks” Sentiment: Stamped with VersaFine Clair Pinecone and Memento EspressoTruffle

• 3  Leaf Card

Memento Inks: Rhubarb Stalk, Olive Grove, Toffee Crunch

“Thanks” Sentiment: VersaFine Clair Pinecone

– Tear It! Tape

Other Products Used:

• Gina K Designs Skeleton Leaves Stamp Set

• May Arts Jute Twine

• MISTI Stamping Tool

• Heavyweight White Cardstock panel 2 1/2 inches wide by 4 inches long

• Heavyweight White Cardstock Base 7 inches by 4 7/8 inches score at 3 1/2 inches on the 7 inch side.

Follow Katy Here:

Youtube: https://youtube.com/c/eastwickspaperandink 

facebook: fb.me/eastwickspaper 

Instagram: https://www.instagram.com/eastwickspaperandink/ 

Blog: https://www.eastwickspaperandink.com/

Gorgeous Wedding Card with Memento and Ink Potion No. 9 


By Katy Ingram –

Hello Friends! Katy here and today I am sharing an easier way to color your own cardstock using Memento Inks andInk  Potion No. 9 blending solution. 

In todays video tutorial I use our newly colored cardstock to create some 3D flowers for a beautiful summer wedding card. Thanks for joining me today. I hope you enjoy.

Skill: Beginner, Intermediate, Advanced
Time: 30 minutes

Art Supplies:

Imagine:

Memento Inks – 

Angel Pink, Rose Bud, New Sprout, Cottage Ivy, Northern Pine, Bamboo Leaves and Dandelion

Ink Potion No. 9

1/4 inch Tear-It! Tape 

Other Products Used:

Spellbinders Double and Single Peonies Die 

Susan’s Garden Tool Kit

Watercolor Paper

PVA Glue or Hot Glue

Heavyweight White Cardstock

Kat Scrappiness Quilted Background Die

Essentials By Ellen Hutson Rectangle Dies

The Greetery Sentiments Suite Love Stamp Set

The Greetery Pretty Postmarks

Clear Box A2 Size  4 1/2 inches x 1 inch x 5 7/8 inches

Follow Katy Here:

Youtube: https://youtube.com/c/eastwickspaperandink 

facebook: fb.me/eastwickspaper 

Instagram: https://www.instagram.com/eastwickspaperandink/ 

Blog: https://www.eastwickspaperandink.com/