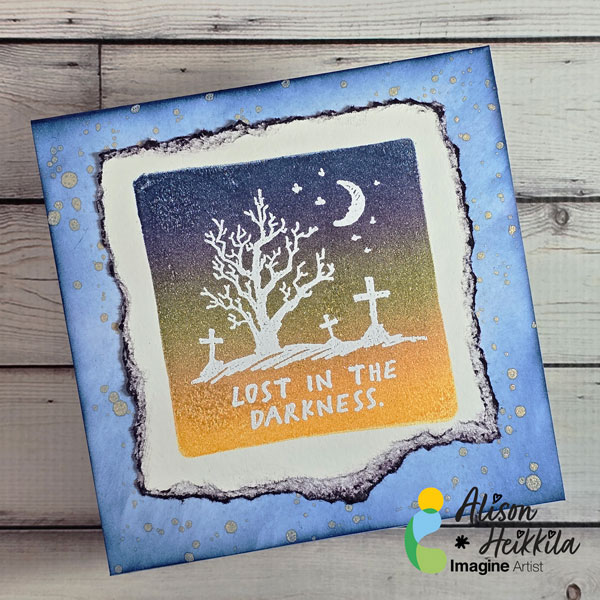
Greetings! Let’s get a little messy and make a spooktacular Halloween card with Fireworks! Sprays. I’ll be using them in 3 different ways on this card. Which way is your favorite?
Skill Level: Beginner-Intermediate Time to Complete: 20-30 Minutes
*Some affiliate links are used in this post. That means that if you shop through these links, I may receive a small compensation, at no cost to you.
The video is below. If it doesn’t play properly, please click HERE.
Making backgrounds like these can be so satisfying. Watching the colors swirl together, then seeing the shimmer after they’re dried….it’s a great way to spend some time, especially if you’re not feeling super crafty. What are some of the ways you would use Fireworks! Spray? Be sure to visit Imagine to see all the beautiful colors they come in. Thanks so much for stopping by. Have an inspiring day!
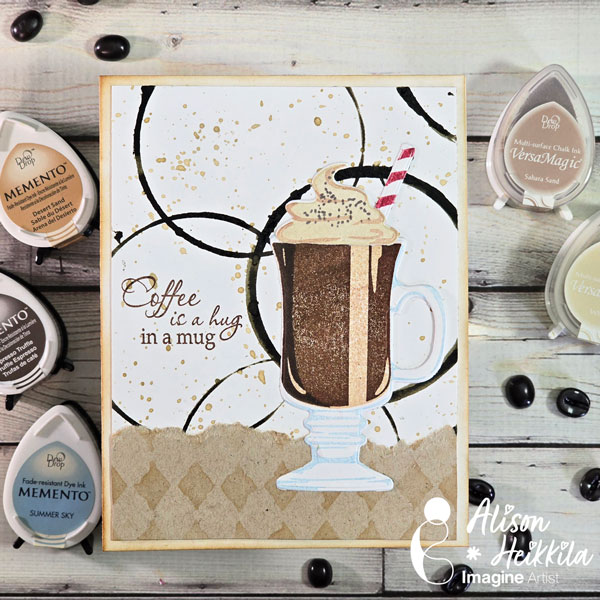
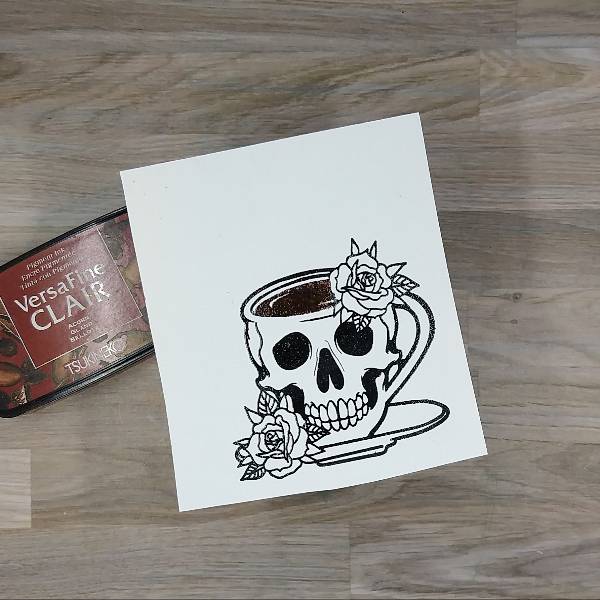
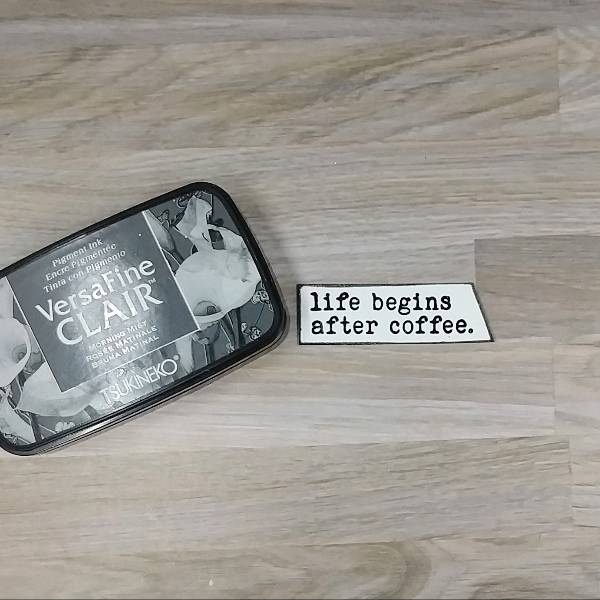
Hello! I’m Alison Heikkila and I have a fun coffee-themed card to share today that uses a bunch of inks from Imagine and an unexpected tool. I hope you get some ideas for how you can create this card in your own way.
*Some affiliate links are used in this post. That means that if you shop through these links, I may receive a small compensation, at no cost to you.
Skill Level: Intermediate Time to Complete: 30 Minutes, plus drying time
That was fun! I hope you enjoyed all of these different techniques. I’ll have another video for Imagine soon. Thanks so much for stopping by. Have an inspiring day!
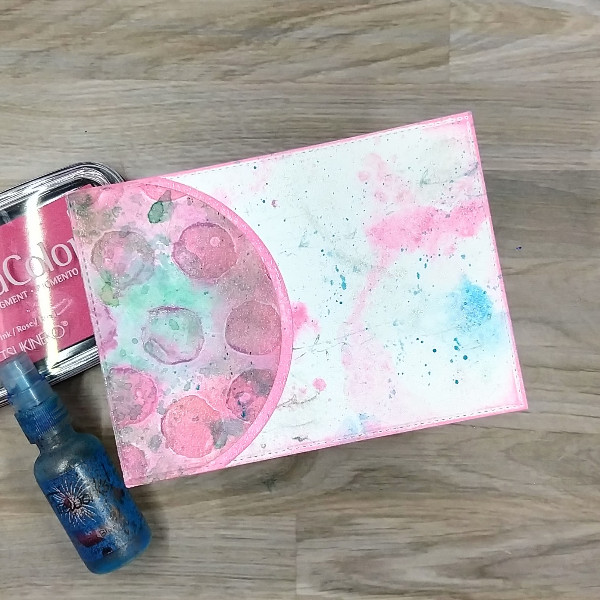
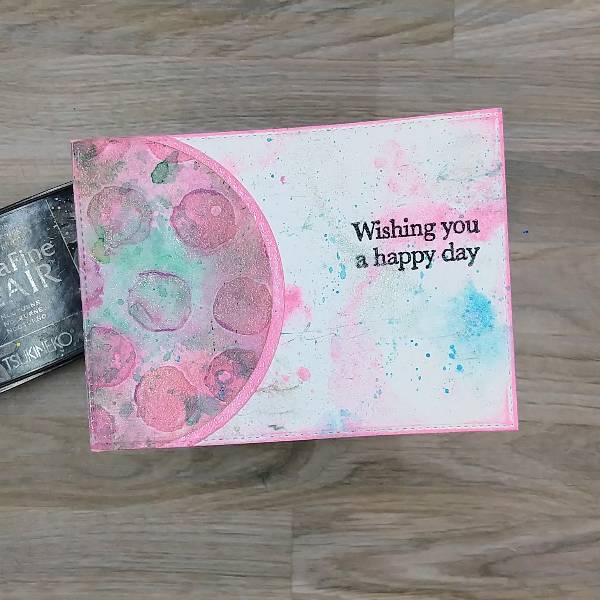
Hello! I’m Alison Heikkila. Kaleidacolor Inks come in beautiful color palettes and help you do some really fun techniques. I love to use my Kaleidacolor Inks with my Gel Press plates. In this case, we’re using one of the Petite Plates to get the look of a watercolored painting without actually watercoloring.
Skill Level: Beginner-Intermediate Time to Complete: 20-30 Minutes
*Some affiliate links are used in this post. That means that if you shop through these links, I may receive a small compensation, at no cost to you.
In today’s post, I made a card featuring earthy colors.
Skill: Intermediate Time: 1.5 hours
Directions:
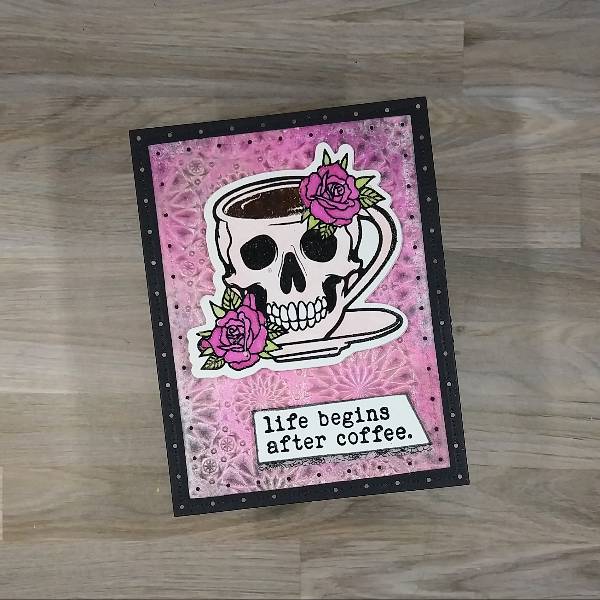
Step 1: Stamp the top part of the main stamped image onto a piece of masking paper with Nocturne VersaFine Clair ink. (If you don’t have masking paper, you can use a sticky note.) Cut out the coffee (or the inside part of the coffee cup) of the masking paper and place it onto a piece of watercolor paper over the corresponding part of the waterpaper.
Step 2: Stamp the coffee cup image onto the watercolor paper with Nocturne VersaFine Clair ink, making sure that the masking paper covered up the coffee in the cup. (Optional step: Heat emboss with clear embossing powder.)
Step 3: Remove the masking paper. Stamp the coffee in the cup with Acorn VersaFine Clair ink. (I chose to mask the cup with the remaining masked paper before stamping.) (Optional step: Heat emboss the coffee with more clear embossing powder.)
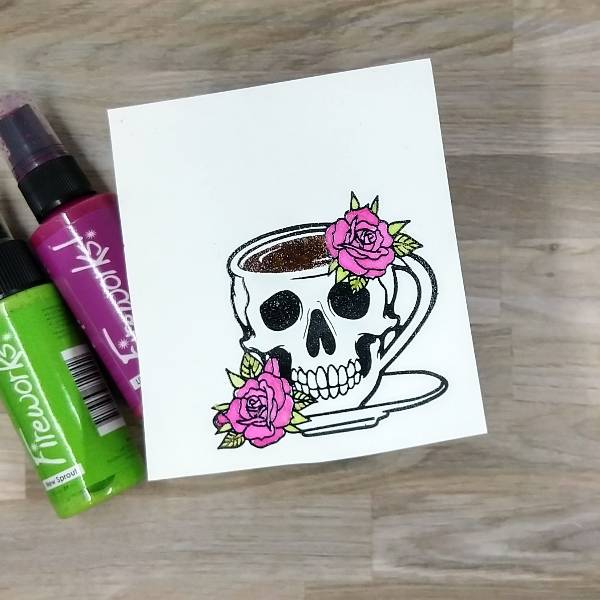
Step 4: Spray Lilac Posies Fireworks! Shimmery Craft Spray onto a piece of acetate packaging and use the spray to watercolor the stamped flowers surrounding the coffee cup. Repeat the process with New Sprout Fireworks! Shimmery Craft Spray to paint the leaves. Repeat the process one more time with Rose Gold Sheer Shimmer Craft Spray to paint the cup and saucer.
Step 4.5: Die cut the coffee cup with the corresponding die. (Sorry that the pictures got messed up and you couldn’t see the pink shimmer paint from the Rose Gold Sheer Shimmer Craft Spray or die cutting the cup. My camera was glitchy. You will see the rosy pink shimmer in the next few steps.)
Step 5: Die cut a piece of black watercolor paper (or black cardstock) for the matte layer of the card.
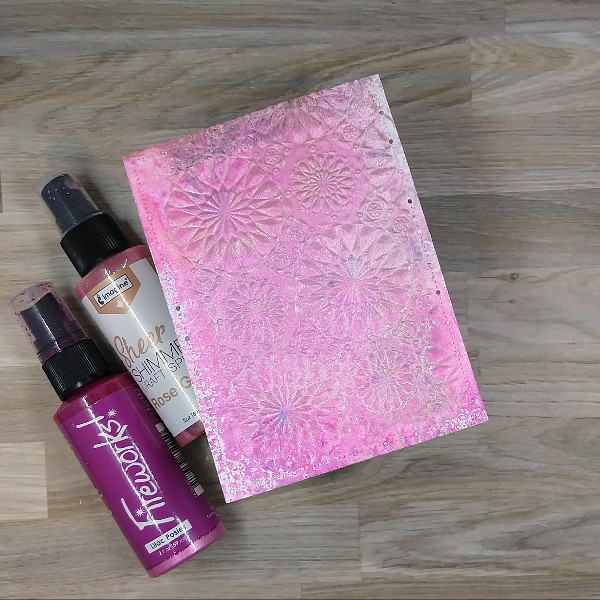
Step 6: Spray Lilac Posies Fireworks! Shimmery Craft Spray and Rose Gold Sheer Shimmer Craft Spray into an embossing folder and emboss a previously die cut watercolor panel. After removing the watercolor panel, spray more Rose Gold Sheer Shimmer Craft Spray around the panel and then allow the panel to dry.
Step 7: Using a sponge dauber, ink blend the edges of the sprayed and embossed panel with Morning Mist VersaFine Clair ink.
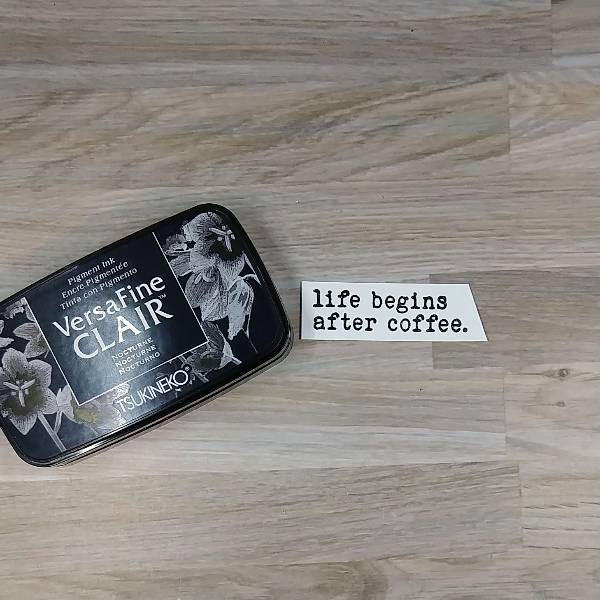
Step 8: Stamp a sentiment on a piece of watercolor paper with Nocturne VersaFine Clair ink. Trim the edges with your paper trimmer. (Optional step: Heat emboss with clear Mboss embossing powder.) Then press the edges of the sentiment into the Nocturne VersaFine Clair ink to create a border.
Step 9: I decided that I wanted to change the color of the border, so pressed the edges of the sentiment into the Morning Mist VersaFine Clair ink pad. (Optional step: Heat emboss with more clear embossing powder.)
Step 10: Glue the two panels together. Glue the coffee cup onto the pink watercolor panel. Attach a piece of black and white washi tape just a little bit smaller than the sentiment strip and then glue down the sentiment strip.
Step 11: Glue sequins on the lower left and upper right corners of the card.
Step 12: Finish the care by gluing the matte layer to an A2-sized white card base.
Other Altenew – Masking Paper – Masking Paper Erin Lee Creative – Stamp set – Coffee or Die Erin Lee Creative – Stamp and die set – Stayin’ Alive Gina Marie Designs – Die set – Big and Little Chain Rectangle die set Legion – Paper – Stonehenge Black Aqua cold press watercolor paper Sizzix – Embossing Folder – Mini Kaleidoscope by Tim Holtz Trinity Stamps – Embellishments – Champagne Twinkle Stardust Rhinestones Black and white washi tape Watercolor paper Paper Trimmer Scissors Glue
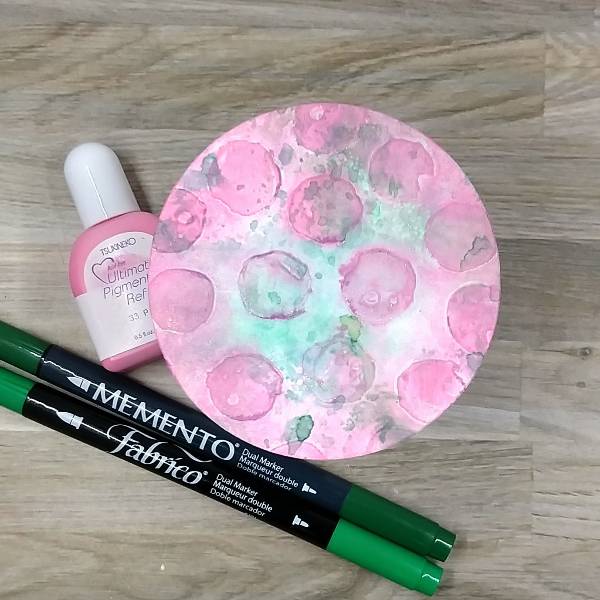
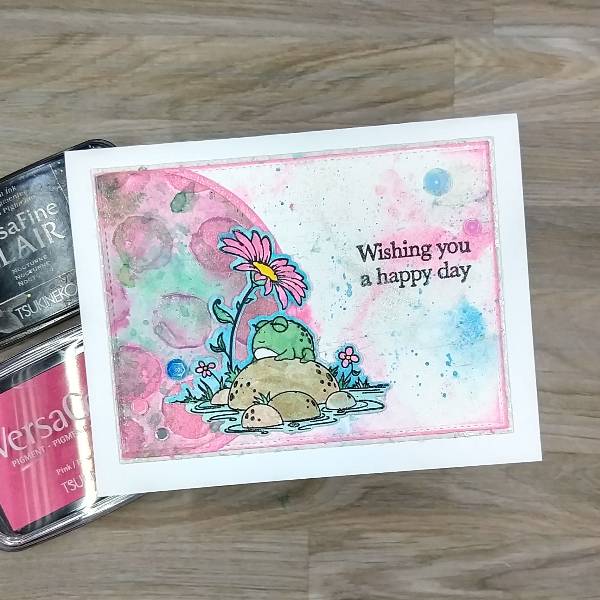
In today’s post, I am sharing a fun, summer card that features some bold colors!
Skill: Intermediate Time: 1 hour
Directions:
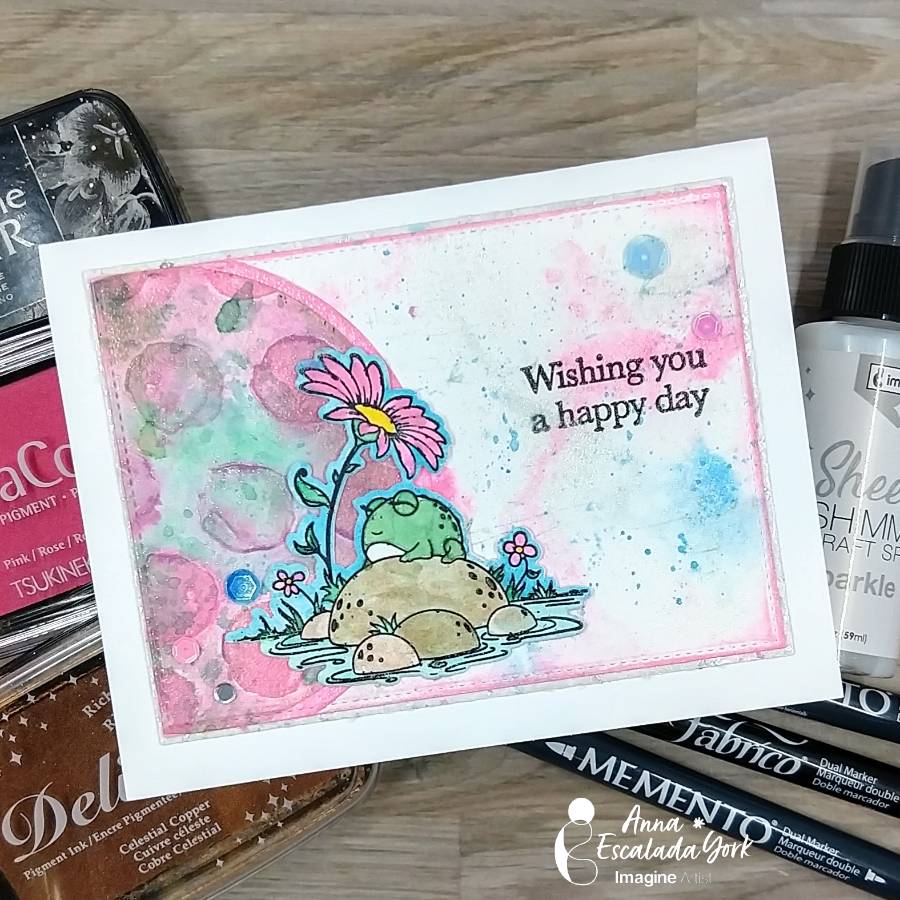
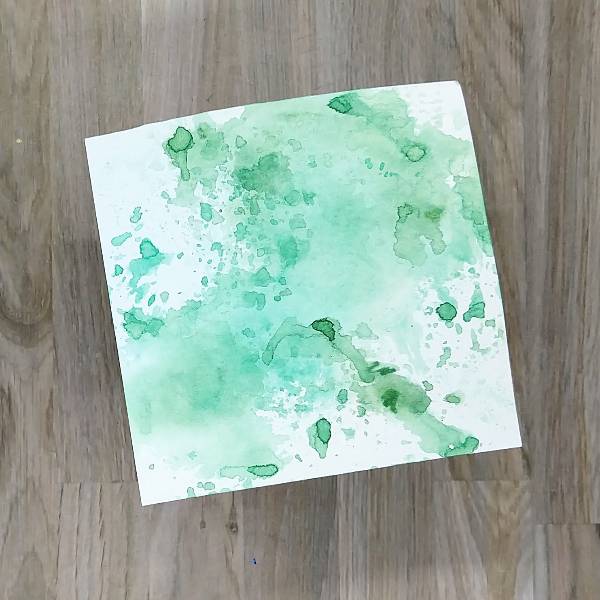
Step 1 Color a piece of acetate packaging with both Cottage Ivy Memento marker and Emerald Fabrico marker and then spraying the acetate with water. Press the acetate onto a piece of watercolor paper multiple times, moving the acetate around so add green color around the watercolor paper. Allow the water to dry.
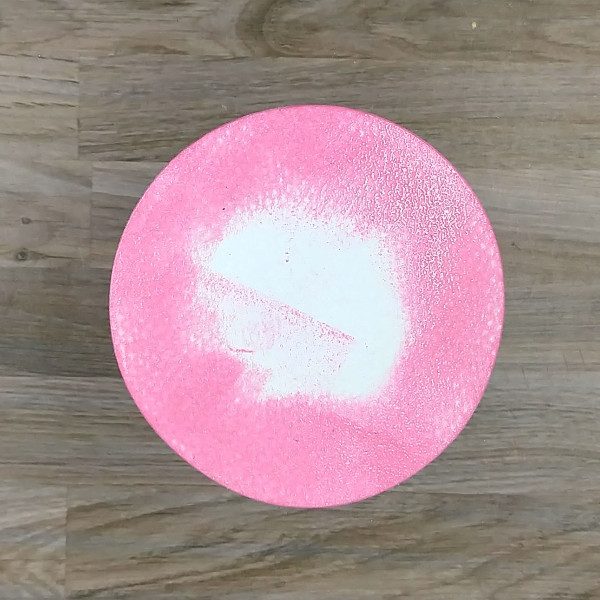
Step 2 Die cut the watercolor smooshed paper with a circular die cut. Add a small dot of Pink Ultimate Pigment Pigment Refill into the raised areas of an embossing powder, and then spray the embossing folder with Sparkle Sheer Shimmer Craft Spray to both help the watercolor paper stay moist (so it won’t tear) while embossing, and to help dilute the condensed pink refill ink. Then sandwich the watercolor paper into the embossing powder and run it through a die cutting machine. After the watercolor paper has dried, ink blend the edge of the circular die cut with Pink VersaColor pigment ink.
Step 3 Die cut another piece of watercolor paper with a slightly larger circular die. Directly press the Pink VersaColor Pigment ink pad onto the watercolor paper. Optional step: Heat emboss the ink with clear embossing powder.
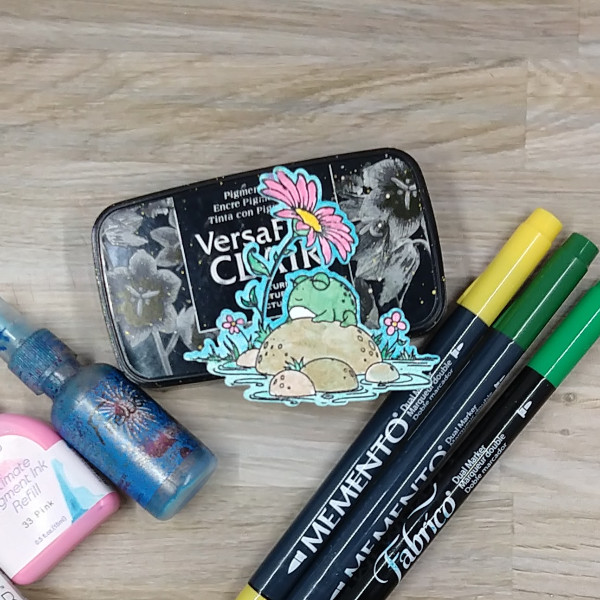
Step 4 (and 4.5) Stamp an image onto watercolor paper with a nature scene with Nocturne VersaFine Clair ink. Heat emboss with clear embossing powder. Using a variety of media to watercolor the image: Celestial Copper Delicata Ink pad mixed with water to color the rocks, Emerald Fabrico marker mixed with water to color the frog and leaves, Bahama Blue Fireworks! Spray to color the sky and water, and Pink Ultimate Pigment Ink Refill to color the flower petals. Finally, color the centers of the flowers with a Dandelion Memento marker.
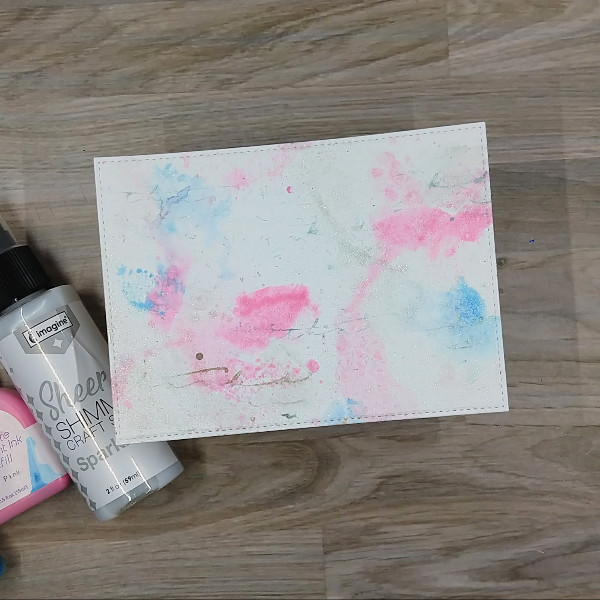
Step 5 Watercolor smoosh some of the leftover inks from the last step to watercolor smoosh a piece of watercolor paper and then spray the whole thing with Sparkle Sheer Shimmer Craft Spray. Use some additional color to stamp a text stamp in my stash to add a little interest onto the panel by pressing the stamp into the acetate instead of an ink pad. Repeat the process a few times until you like the amount of extra interest that is added. After everything dried, die cut the watercolor panel.
Step 6 Glue the two circular die cuts (the embossed panel and the larger pink die cut circle) and then glue it onto the watercolor background panel. After the glue dried, the whole thing was die cut again to trim the circular die cuts. The edges were ink blended with more Pink VersaColor Pigment ink. Splatters of the remaining Bahama Blue Fireworks! Spray from the acetate packaging were added to the panel as well.
Step 7 Stamp a sentiment with Nocturne VersaFine Clair ink.
Optional step: Heat emboss with clear embossing powder.
Step 8: Die cut sparkly white paper with a slightly larger rectangular die. Glue the main (frog) stamped and die cut image onto the top panel, glue the matte (sparkly larger panel) behind the top panel and then glue everything onto an A2-sized white card base. Glue sequins to the card base.
Hi everyone! Are you ready to celebrate the Fourth of July? I made a sparkly, light-up card to celebrate the occasion. It’s been a while since I heat embossed with colorful embossing powders and I truly miss this simple and fun technique. Be sure to check out the supply list at the end to see the colors I used!
Skill Level: Advanced Time: 1 hour
Step 1: Stamp one image from MFT’s Festive Fireworks set with VersaMark ink pad. Then pour on embossing powder with the color of your choice. Repeat the steps if you would like to use different colors of embossing powders, making sure to heat set the powder before moving on to the next color. The colors I used today are Mboss – Valentine, Lucky Stars, Princess Party, and Shimmering Night Sky (not pictured here).
Step 2: Use Brilliance – Galaxy Gold ink pad to stamp the layering images. I used a stamp positioning tool so that I could restamp a couple of times and get good ink coverage. The gold stamped images look so well against the black background, don’t you think?
Step 3: I decided to add interactive elements to make this card even more festive! I used Chibitronics LED light stickers to create the light up circuit. If you are interested in making a light up card, feel free to check out the step-by-step video tutorial on my YouTube channel “Craft with Jessica V. Lin” and search for “How to Make a Fireworks Light Up Card with BLACK Cardstock”.
Step 4: For some finishing touches, I splattered some Sheer Shimmer Craft Spray to the background. I used the brush-over-acrylic-block flicking method, but you could use the spray nozzle to add a fine mist of shimmer as well. Then I adhered some sequins with On-Point Glue, and that completes the card!