By Kyriakos Pachadiroglou
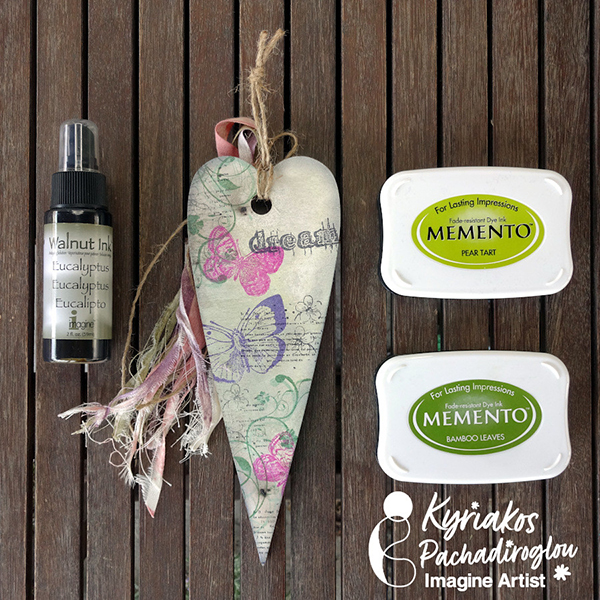
Make a distressed heart-shaped plywood ornament with Walnut Inks. Color with Memento inks for a smooth result and decorate with stamps and StazOn inks for a sharp and bleedless design.
Skill: Beginner
Time: 1 Hour
Directions:
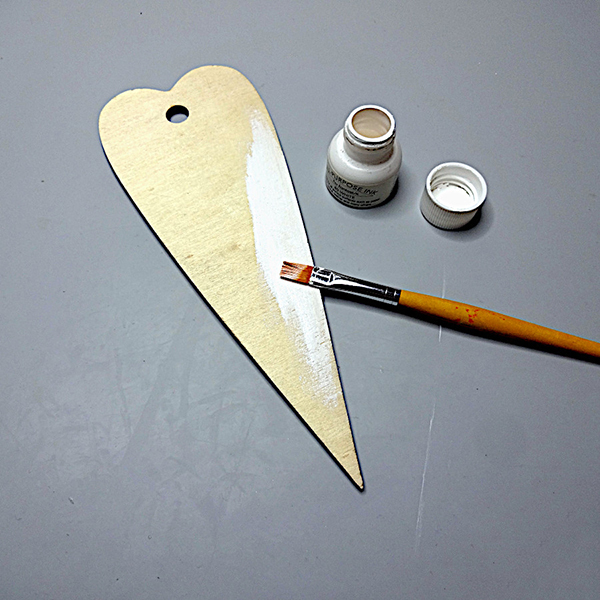
Step 1
Paint the plywood shape with All-Purpose White ink color. Let it dry well.
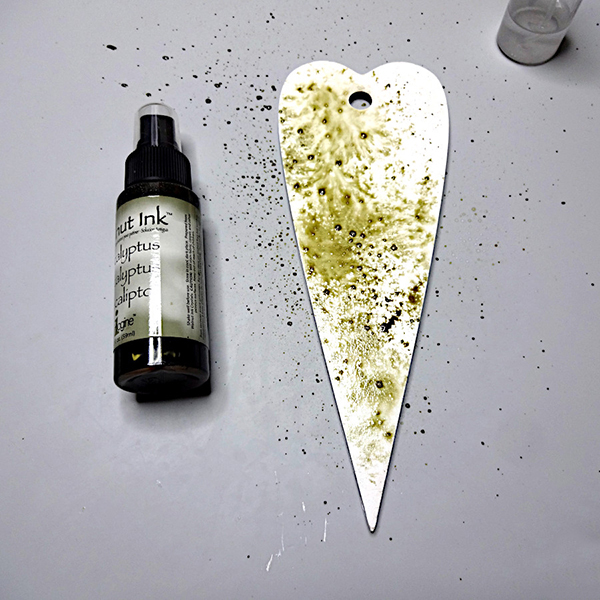
Step 2
Sprinkle drops of the Walnut Ink Eucalyptus, add very few Walnut Ink Crystals and spray with water to dilute further. Dry well.
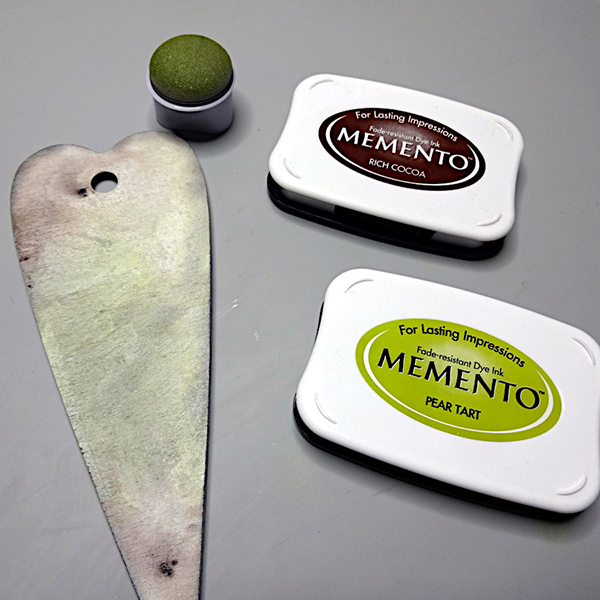
Step 3
Use a Sponge Dauber to smoothly add color with Memento Rich Cocoa and Pear Tart ink pads.
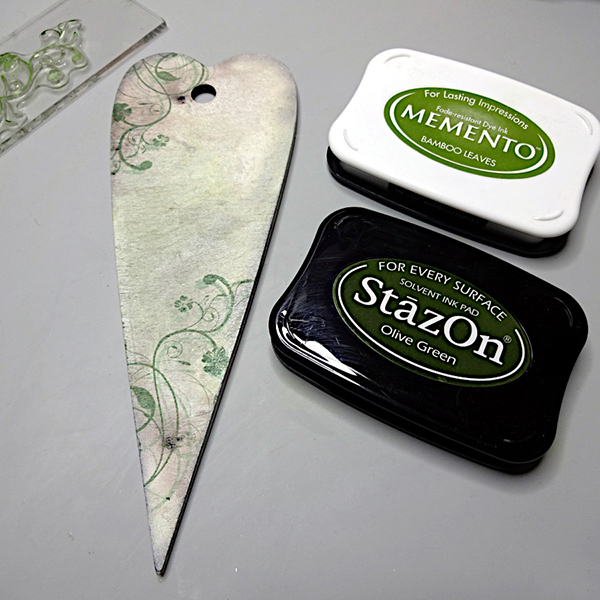
Step 4
Stamp the foliage first with the Memento Bamboo leaves and then stamp on top, slightly offsetting to the first design, with StazOn Olive Green.
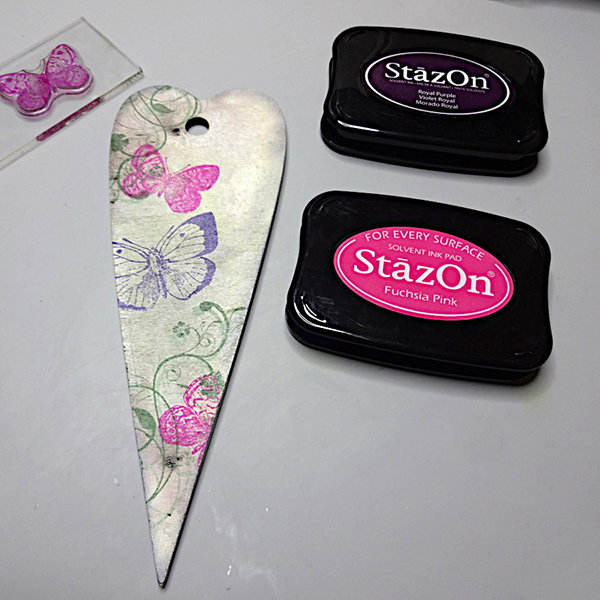
Step 5
Stamp butterflies with StazOn Fuchsia pink and Royal Purple ink pads.
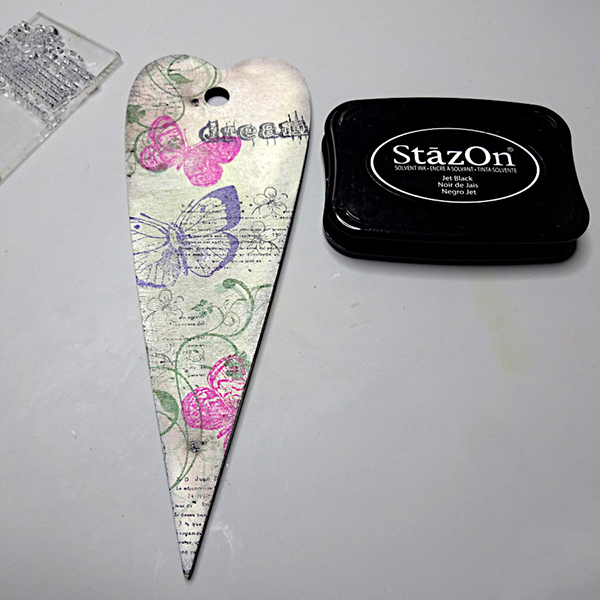
Step 6
Add a sentiment with StazOn Jet Black.
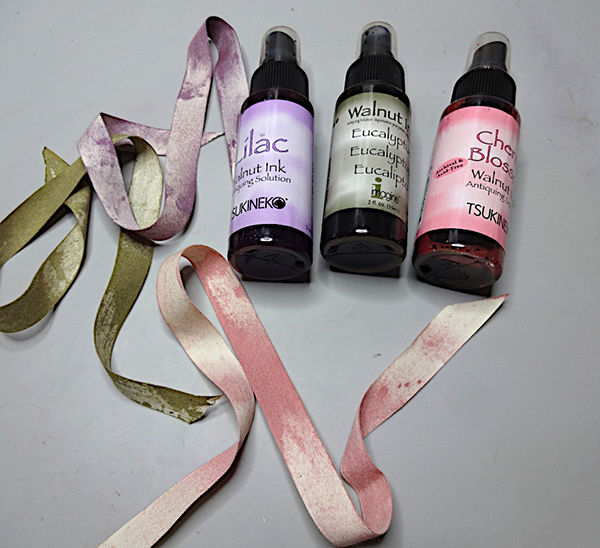
Step 7
Cut 12″ long pieces of the cotton ribbon and spay with the Walnut Inks Eucalyptus, Lilac and Cherry Blossom. Let them dry.

Step 7
Tie the cotton ribbons on the heart shape.
Art Supplies:
Imagine
Walnut Ink – Eucalyptus, Lilac, Cherry Blossom
Memento – Pear Tart, Rich cocoa, Bamboo Leaves
StazOn – Olive Green, Fuchsia Pink, Royal Purple, Jet Black
Other
Plywood Heart Shape
Kaisercraft – Tigerlily Stamps
½” Cotton Ribbon