Use Different Stamps to Create a Cute Scarecrow Scene

by Steph Ackerman

I love mixing and matching stamps to build scenes on cards and for this time of year I decided to create a Harvest Blessings theme. Using a few (or several) colors of inks and different cardstock, you can create a wide variety of cardmaking or scrapbook projects. As we head into fall, I decided to combine a scarecrow stamp with pumpkin stamps and a faux brick background to create a fall scene.

Skill: Beginner
Time: 30 minutes

Directions


Step 1

Stamp the scarecrow with VersaFine Clair in Nocturne on a white panel. As I needed a mask for the next step, I stamped a second scarecrow and fussy cut it.


Step 2

Place the scarecrow mask on the main image. Stamp two different sized pumpkins by the scarecrow’s stake. Stamp the pumpkins again and fussy cut them to be used as masks in the next step.


Step 3

Place the masks on the main images. Stamp the brick wall with VersaFine Clair in Pinecone over the masked images.


Step 4

Cut the stamped panel to 4″ x 5 1/4″. Using a water brush, add color to the images with assorted colors of Memento. Quickly wash Delicata in Celestial Copper on the brick background.


Step 5

Use Memento Markers to add additional color to the grass and straw stamped images. Mat the panel with brown cardstock. Create a card from brown cardstock and add a checked background. Adhere the stamped panel to the card with foam adhesives, slightly off-center. Stamp the sentiment with VersaFine Clair in Nocturne. Die cut and ink edges with VersaFine Clair in Pinecone. Mat with a larger die and add to the card.


Step 6

To finish, add Shimmer irRESISTible to the pocket and along the pumpkin veins for dimension and shimmer.


Supplies

Imagine
Other
  • Joy Clair Stamps – Broken Brick Background Stamp
  • Authentique pattern paper
  • Bazzill Cardstock
  • Spellbinders – Oval dies
  • Die-cut Machine
  • Waterbrush
  • Acrylic Block
In this Issue of Scrapbook Affairs with Jowilna Nolte

Today’s blog post is not a tutorial. We are just happy to share some love for our Artist in Residence Jowilna Nolte who is the featured artist in Scrapbook Affairs. We love the colors and illumination in this tag-making project using VersaFine Clair! See the page clipping below to see how Jowilna makes all sorts of projects with this fabulous ink.

Here is a sneak peek at one of the pages in the Scrapbook Affairs. In the image below see how Jowilna uses VersaFine Clair in so many different ways.

See more craft tutorials from Jowilna:

Use VersaFine Clair to create a Lavender Card

Design a Live Wild & Free Card

Create a Dazzling Raspberry Red Scrapbook Layout

Shop VersaFine Clair


Participate in our Youtube Challenge

by Kassy Tousignant

LABOR DAY GIVE-A-WAY

Head over to our YouTube Channel! Comment and subscribe on this video by the end September 3rd, 2018 (midnight) for a chance to win $30 worth of ink products by Imagine.

In today’s video, Kassy’s shows how to ink a canvas with All-Purpose Ink. The colors in this mixed media piece are vibrant and the ink can be used well on canvas surfaces. Kassy shows you a few different techniques using the All-Purpose Ink on this canvas to highlight it’s versatility and stunning colors. This art piece is inspired by a small resin face embellishment and text that inspires why a person should “Be” creative.

Skill: Advanced
Time: 1 hour + dry time


Supplies

Imagine
Other
  • White Gesso
  • Arteza – Canvas panel
  • Prima – stencil
  • Relics & Artifacts – resin face
  • Brush
  • Ink dropper
  • Spray bottles
  • Heat tool

Check Out This Fun Mixed Media Door Hanger Project

by Steph Ackerman

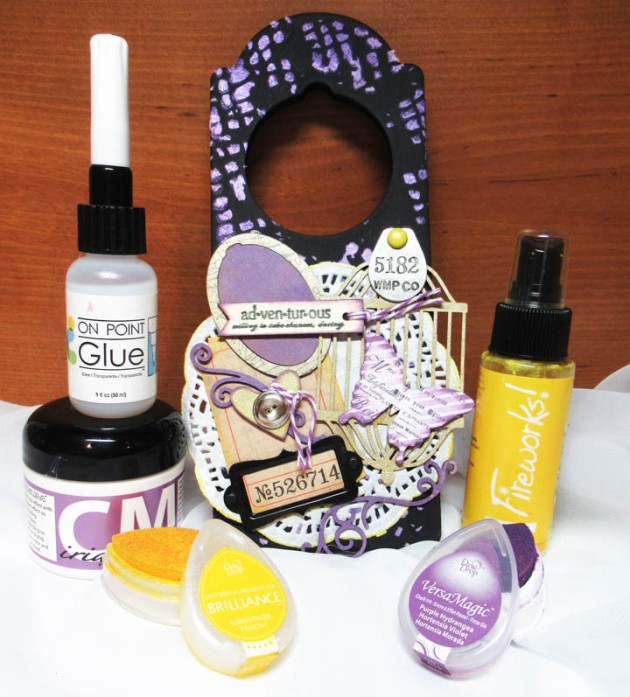
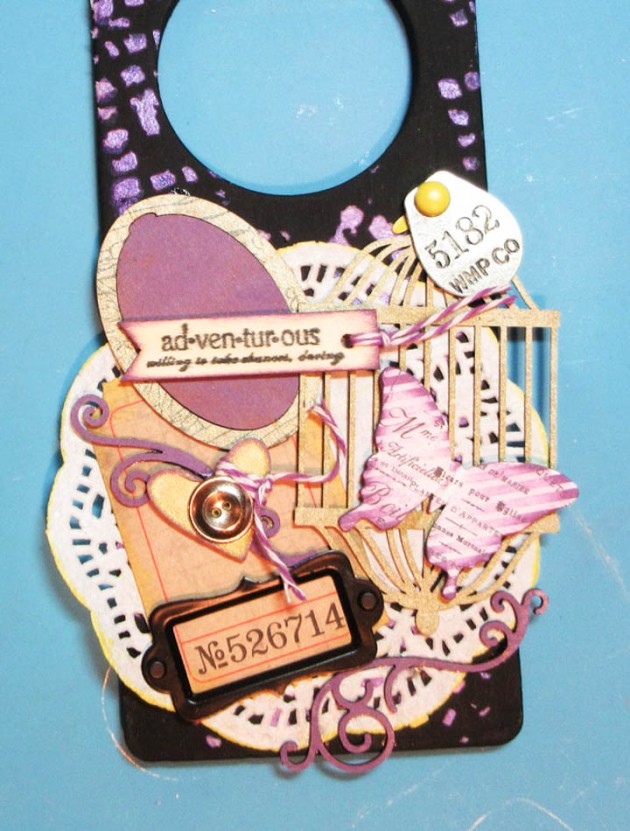
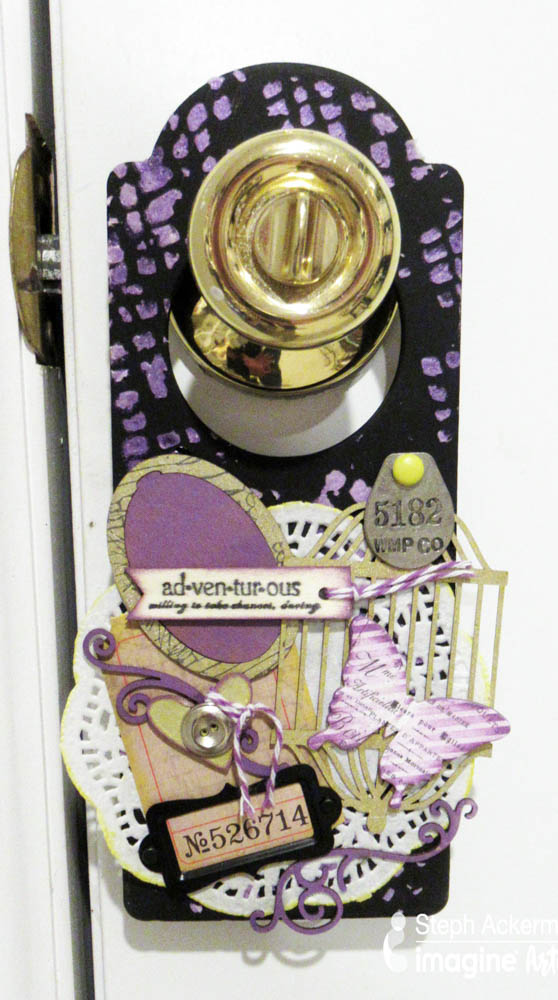
Mixed media projects consist of a variety of projects in all shapes and sizes. Mixed media means you can mix an assortment of products to create a one of a kind piece of artwork. So decide on your base, grab some items from your stash, several colors of ink, a stencil and let your imagination flow. Create with no expectations and see what happens. In today’s tutorial, I put together a beautiful door hanger in a lavender and dandelion color scheme.

Skill: Intermediate
Time: 1 hour + drying time

Directions


Step 1

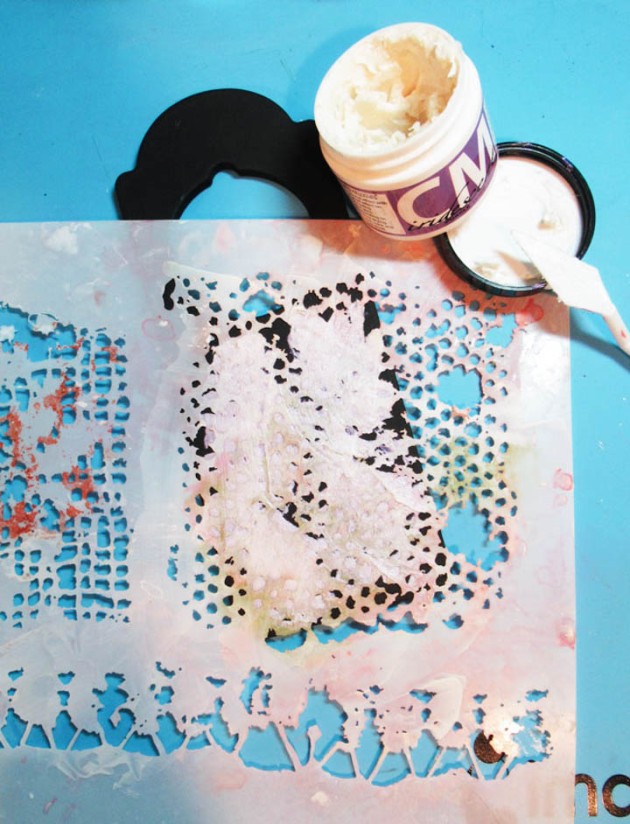
Paint door hanger with black gesso; alternatively use a black door hanger. Place stencil on top. Use Creative Medium with a palette knife randomly about the door hanger. Allow to dry thoroughly.


Step 2

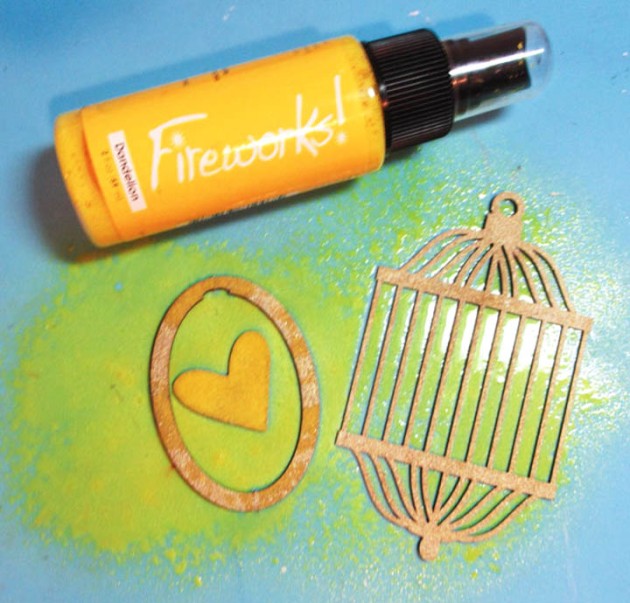
Ink assorted chipboard elements with VersaMagic in Purple Hydrangea and Brilliance in Sunflower Yellow, or choose the ink colors that speak to you.


Step 3

Add shimmer by spritzing several chipboard elements with Fireworks Shimmery Craft Spray in Dandelion.


Step 4

Stamp a phrase using VersaFine Clair in Nocturne on a wood sign. Ink a portion of the image stamp with VersaFine Clair in Nocturne and stamp around the oval chipboard element.


Step 5

Using the doily as the base, determine the position of each element. Use On Point Glue to adhere the elements. Glue doily to door hanger. Wrap twine around the heart and adhere. Add twine to the stamped tag and adhere.

Supplies

Imagine
Other
  • Door Hanger
  • The Crafter’s Workshop – Stencil
  • Unity Stamp Co. – Stamp
  • Paper Doily
  • Metal, chipboard elements
  • Black Gesso
  • Twine

Create a Beautiful Lavender Mosaic with Ink and Stencils

by Roni Johnson

Create a Beautiful Lavender Mosaic with Ink and Stencils

There are so many fun techniques that you can use with stencils. So many techniques that I couldn’t decide which one to use so I decided to see how many I could incorporate into a single creation! Of course, these don’t include everything you could do with a stencil but it’s a pretty good start to get the creative juices flowing. Try the entire project or perhaps just a few stenciling techniques!

Skill: Beginner
Time: Individual Techniques 2-15 minutes each or Entire Canvas 2 hours

Directions


Step 1

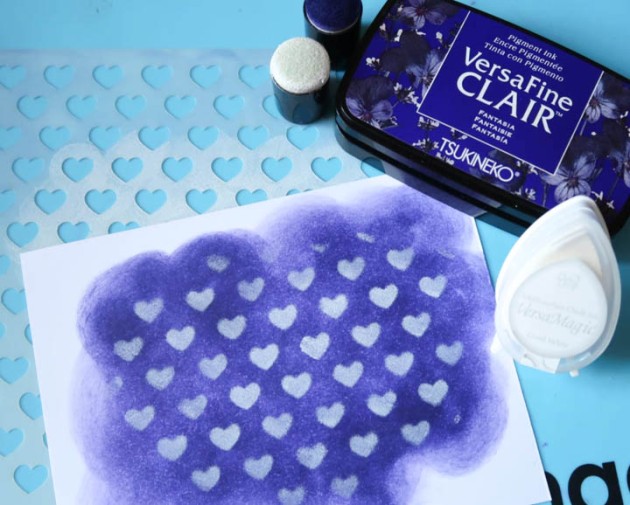
Beginning with the easiest technique, sponge a single color of ink through the stencil.


Step 2

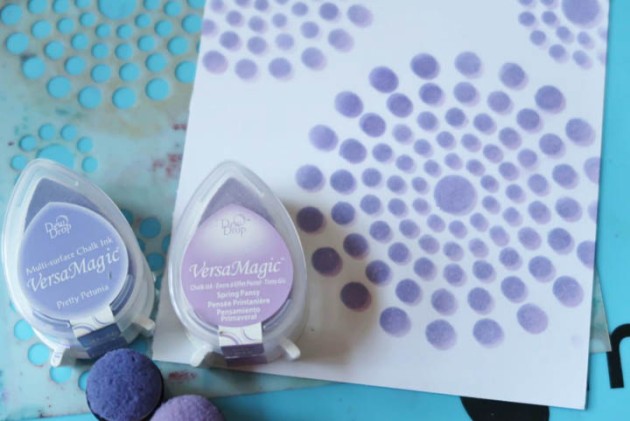
Randomly sponge 2 or more inks through a stencil. Here I used Memento which is a dye ink and VersaMagic which is a pigment ink.


Step 3

Sponge a pigment ink over a stencil; remove the stencil; sprinkle with embossing powder and heat to set. The second example was made by flipping the inked stencil onto a piece of cardstock to transfer the excess pigment ink. It was then sprinkled with embossing powder as well.


Step 4

Spray Fireworks Shimmery Craft Spray in Lulu Lavender over a stencil. Flip the wet stencil onto a fresh sheet of cardstock for a reverse impression.


Step 5

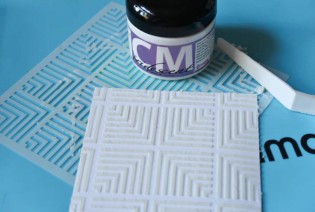
Spread Creative Medium over a stencil using a palette knife and carefully remove the stencil; set aside to dry. Before the medium dries press the stencil over onto a fresh sheet of cardstock to remove the excess Creative Medium from the stencil. This makes a grungy reverse image of the stencil.


Step 6

Use a pen or marker to trace the stencil onto cardstock. Doodle inside of the traced image. Sponge ink overall or select areas of the stenciled image for added interest.


Step 7

Position stencil over cardstock. Stamp the desired image over the stencil and smudge the excess ink off the stencil into the individual sections of the image.


Step 8

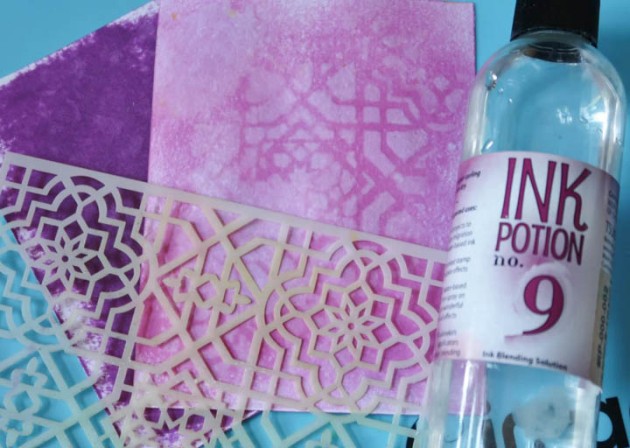
Sponge or brayer ink onto a sheet of cardstock. Place stencil over inked cardstock wet a sponge dauber with Ink Potion No.9 and pounce the dauber over the stencil. Remove the stencil and heat to speed drying.


Step 9

Sponge a dark color of ink over a stencil. Slightly shift the stencil to one side, ink with a lighter color of ink. Close up of the shifted stenciled pattern.


Step 10

Sponge dark ink over a piece of cardstock. Position the stencil over the inked cardstock and sponge white ink over the surface. Heat emboss with white embossing powder for a more pronounced difference.


Step 11

Brayer ink through a stencil, use a Kaleidacolor ink pad for a fun, vibrant look.


Step 12

Pounce desired colors of ink on craft mat; spritz with water or Ink Potion No.9. Create a monoprint by pressing the cardstock into the ink mixture, set aside to dry. Once the monoprint has dried, brayer ink over a stencil, press the inked stencil over the monoprint for an interesting contrast.


Step 13

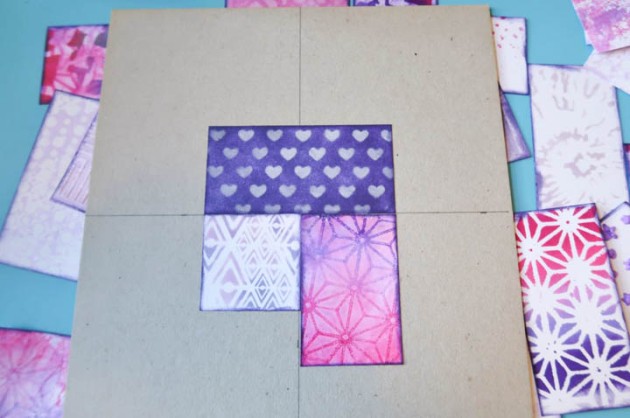
To create the canvas, trim the stenciled samples into 2” x 2”; 2” x 3” and 2” x 4” pieces. Ink the edges with VersaFine Clair Fantasia and a sponge dauber. Adhere each piece in a random pattern onto a piece of thick book board or cardboard. Embellish as desired.

Supplies

Imagine
Other

Make a Mixed Media Happy Birthday Tag

by Melissa Andrew

Make a Mixed Media Happy Birthday Tag

Do you have a birthday event coming up? Need a special papercraft to show you care? Today, I share a number of techniques on creating a mixed media project using some of my favorite Imagine products including Fireworks Spray and Versamagic Chalk Ink. Fireworks Shimmery Craft Spray and VersaMagic are so versatile and I show you how to use this product in a number of ways in today’s video.

Supplies

Imagine
Other
  • Altenew – Leaf Burst Stencil
  • Whimsy Stamps – Make It Crafty Chipboard
  • Seam Binding – white
  • Sheer Ribbon – white
  • Jute String – navy blue
  • Twine – brown