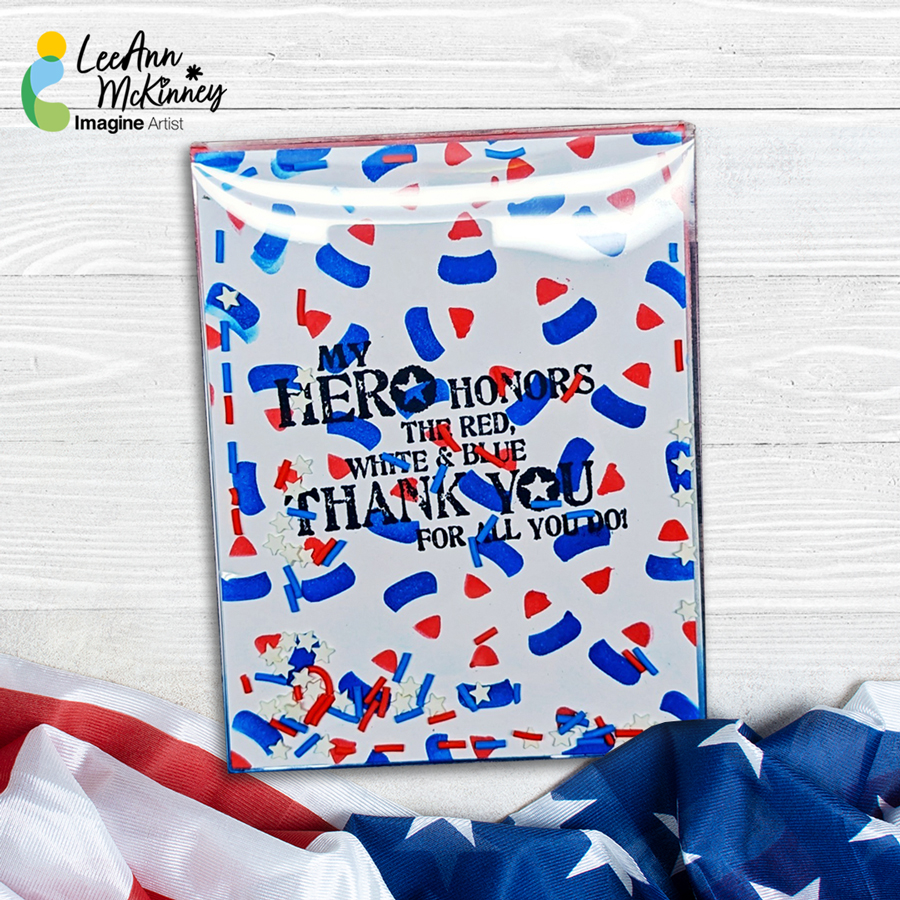
– Howdy friends and fellow crafters, LeeAnn here and today I have to share with you a fun and easy shaker card that I made using paper, a layering stencil, a shaker pocket and some shaker bits.
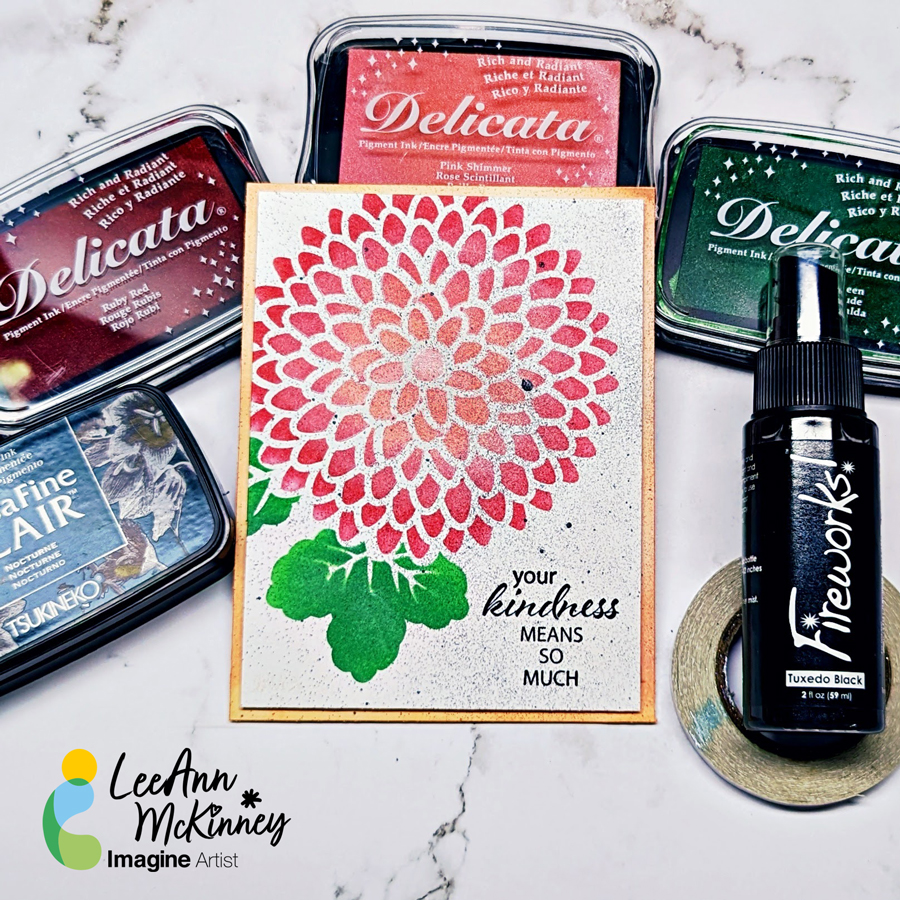
Hi there friends and fellow crafters, LeeAnn here with a fairly easy, beginner level card that anyone can do with a stencil, some inks and a few blender brushes.
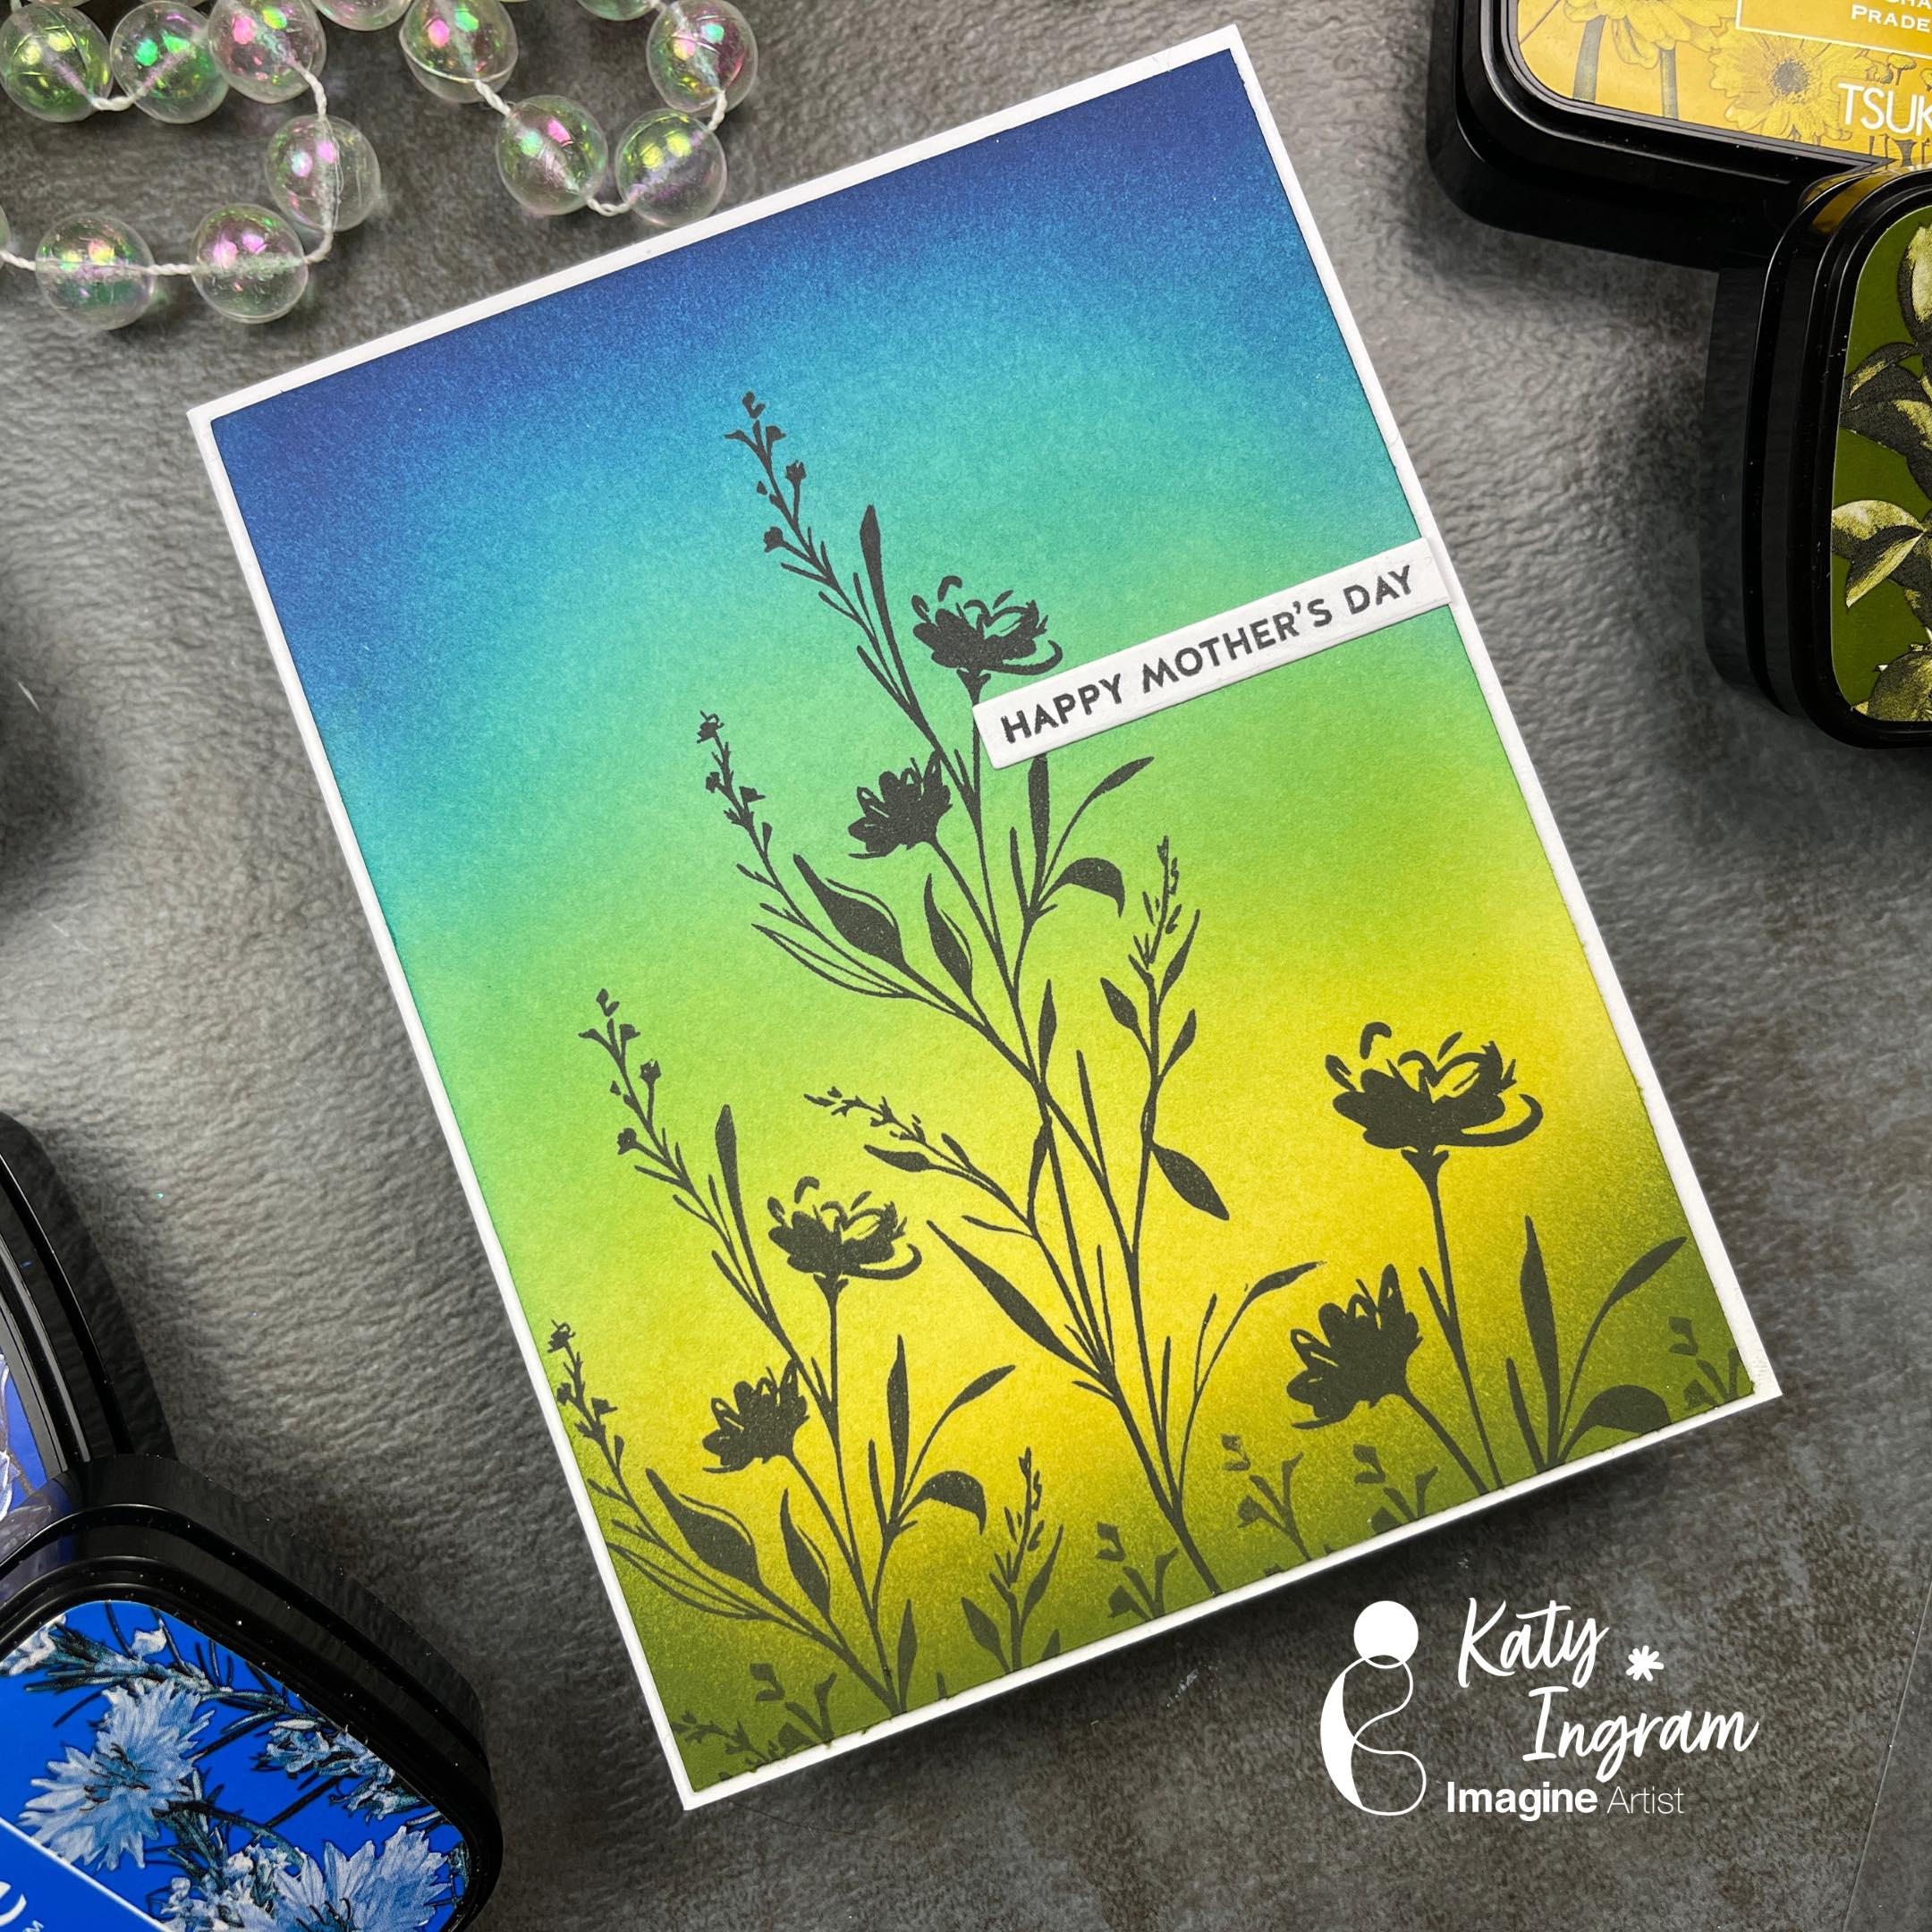
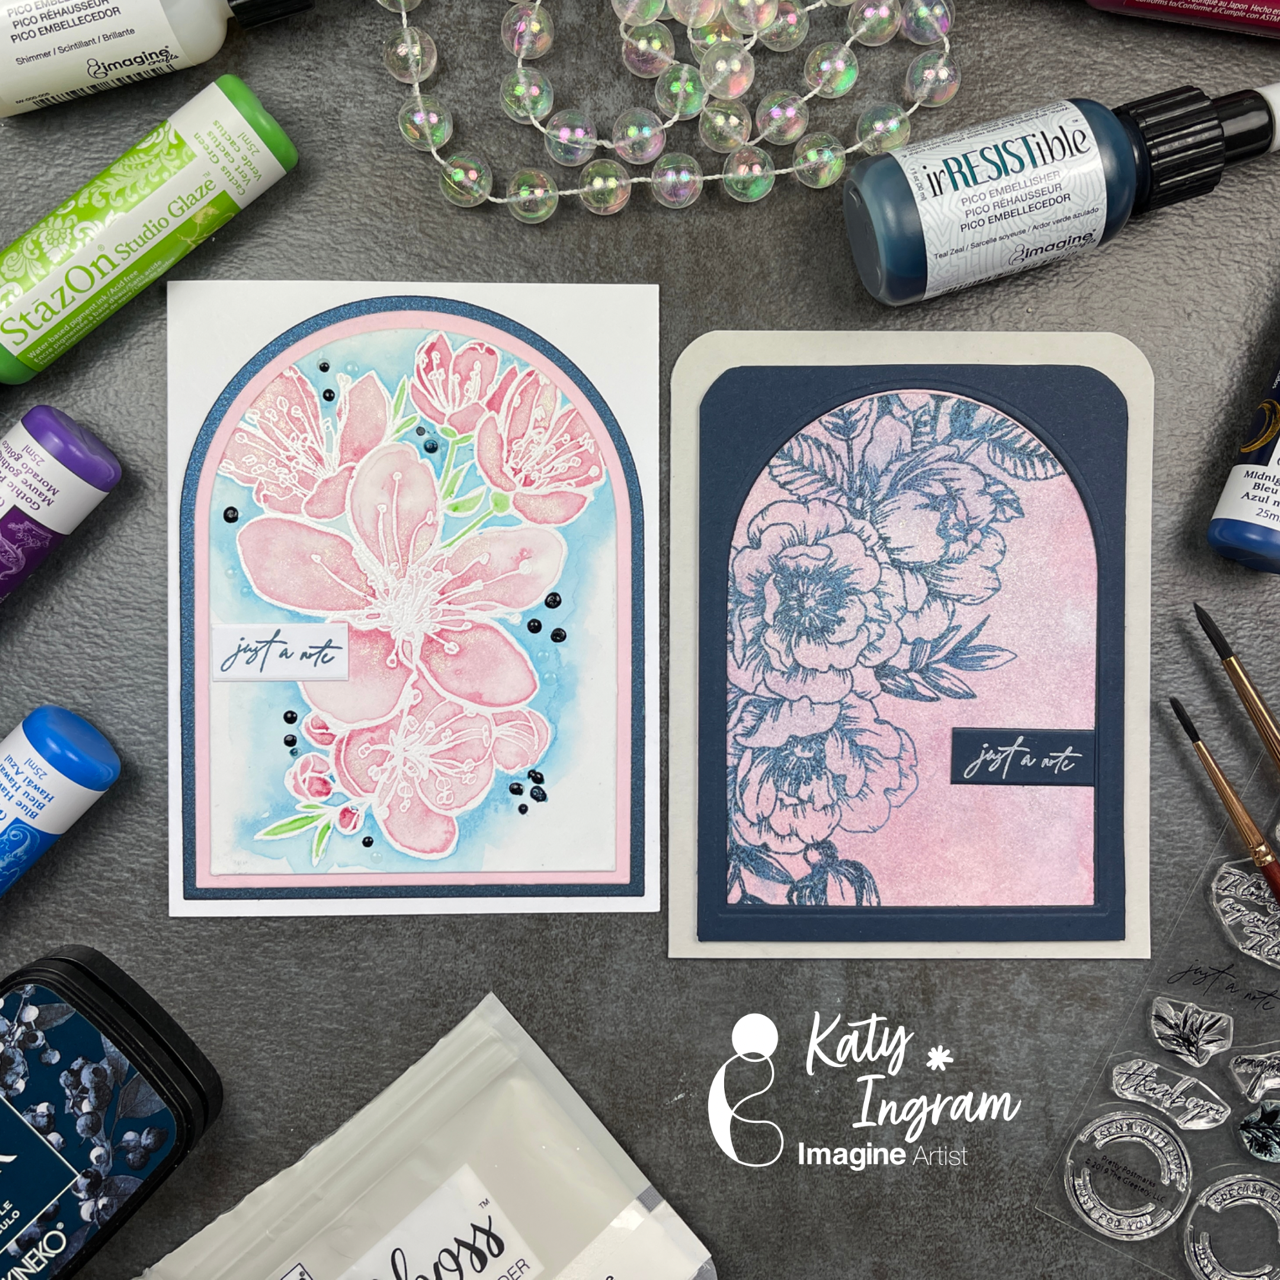
Hello Friends! Katy here and today I am excited to share a really cool color combination using VersaFine Clair inks.
In today’s video tutorial, I am sharing how I use 5 unlikely VersaFine Clair ink colors to create a beautiful background for silhouette stamps and turn it into a clean and simple Mother’s Day Card. Video has all the details.
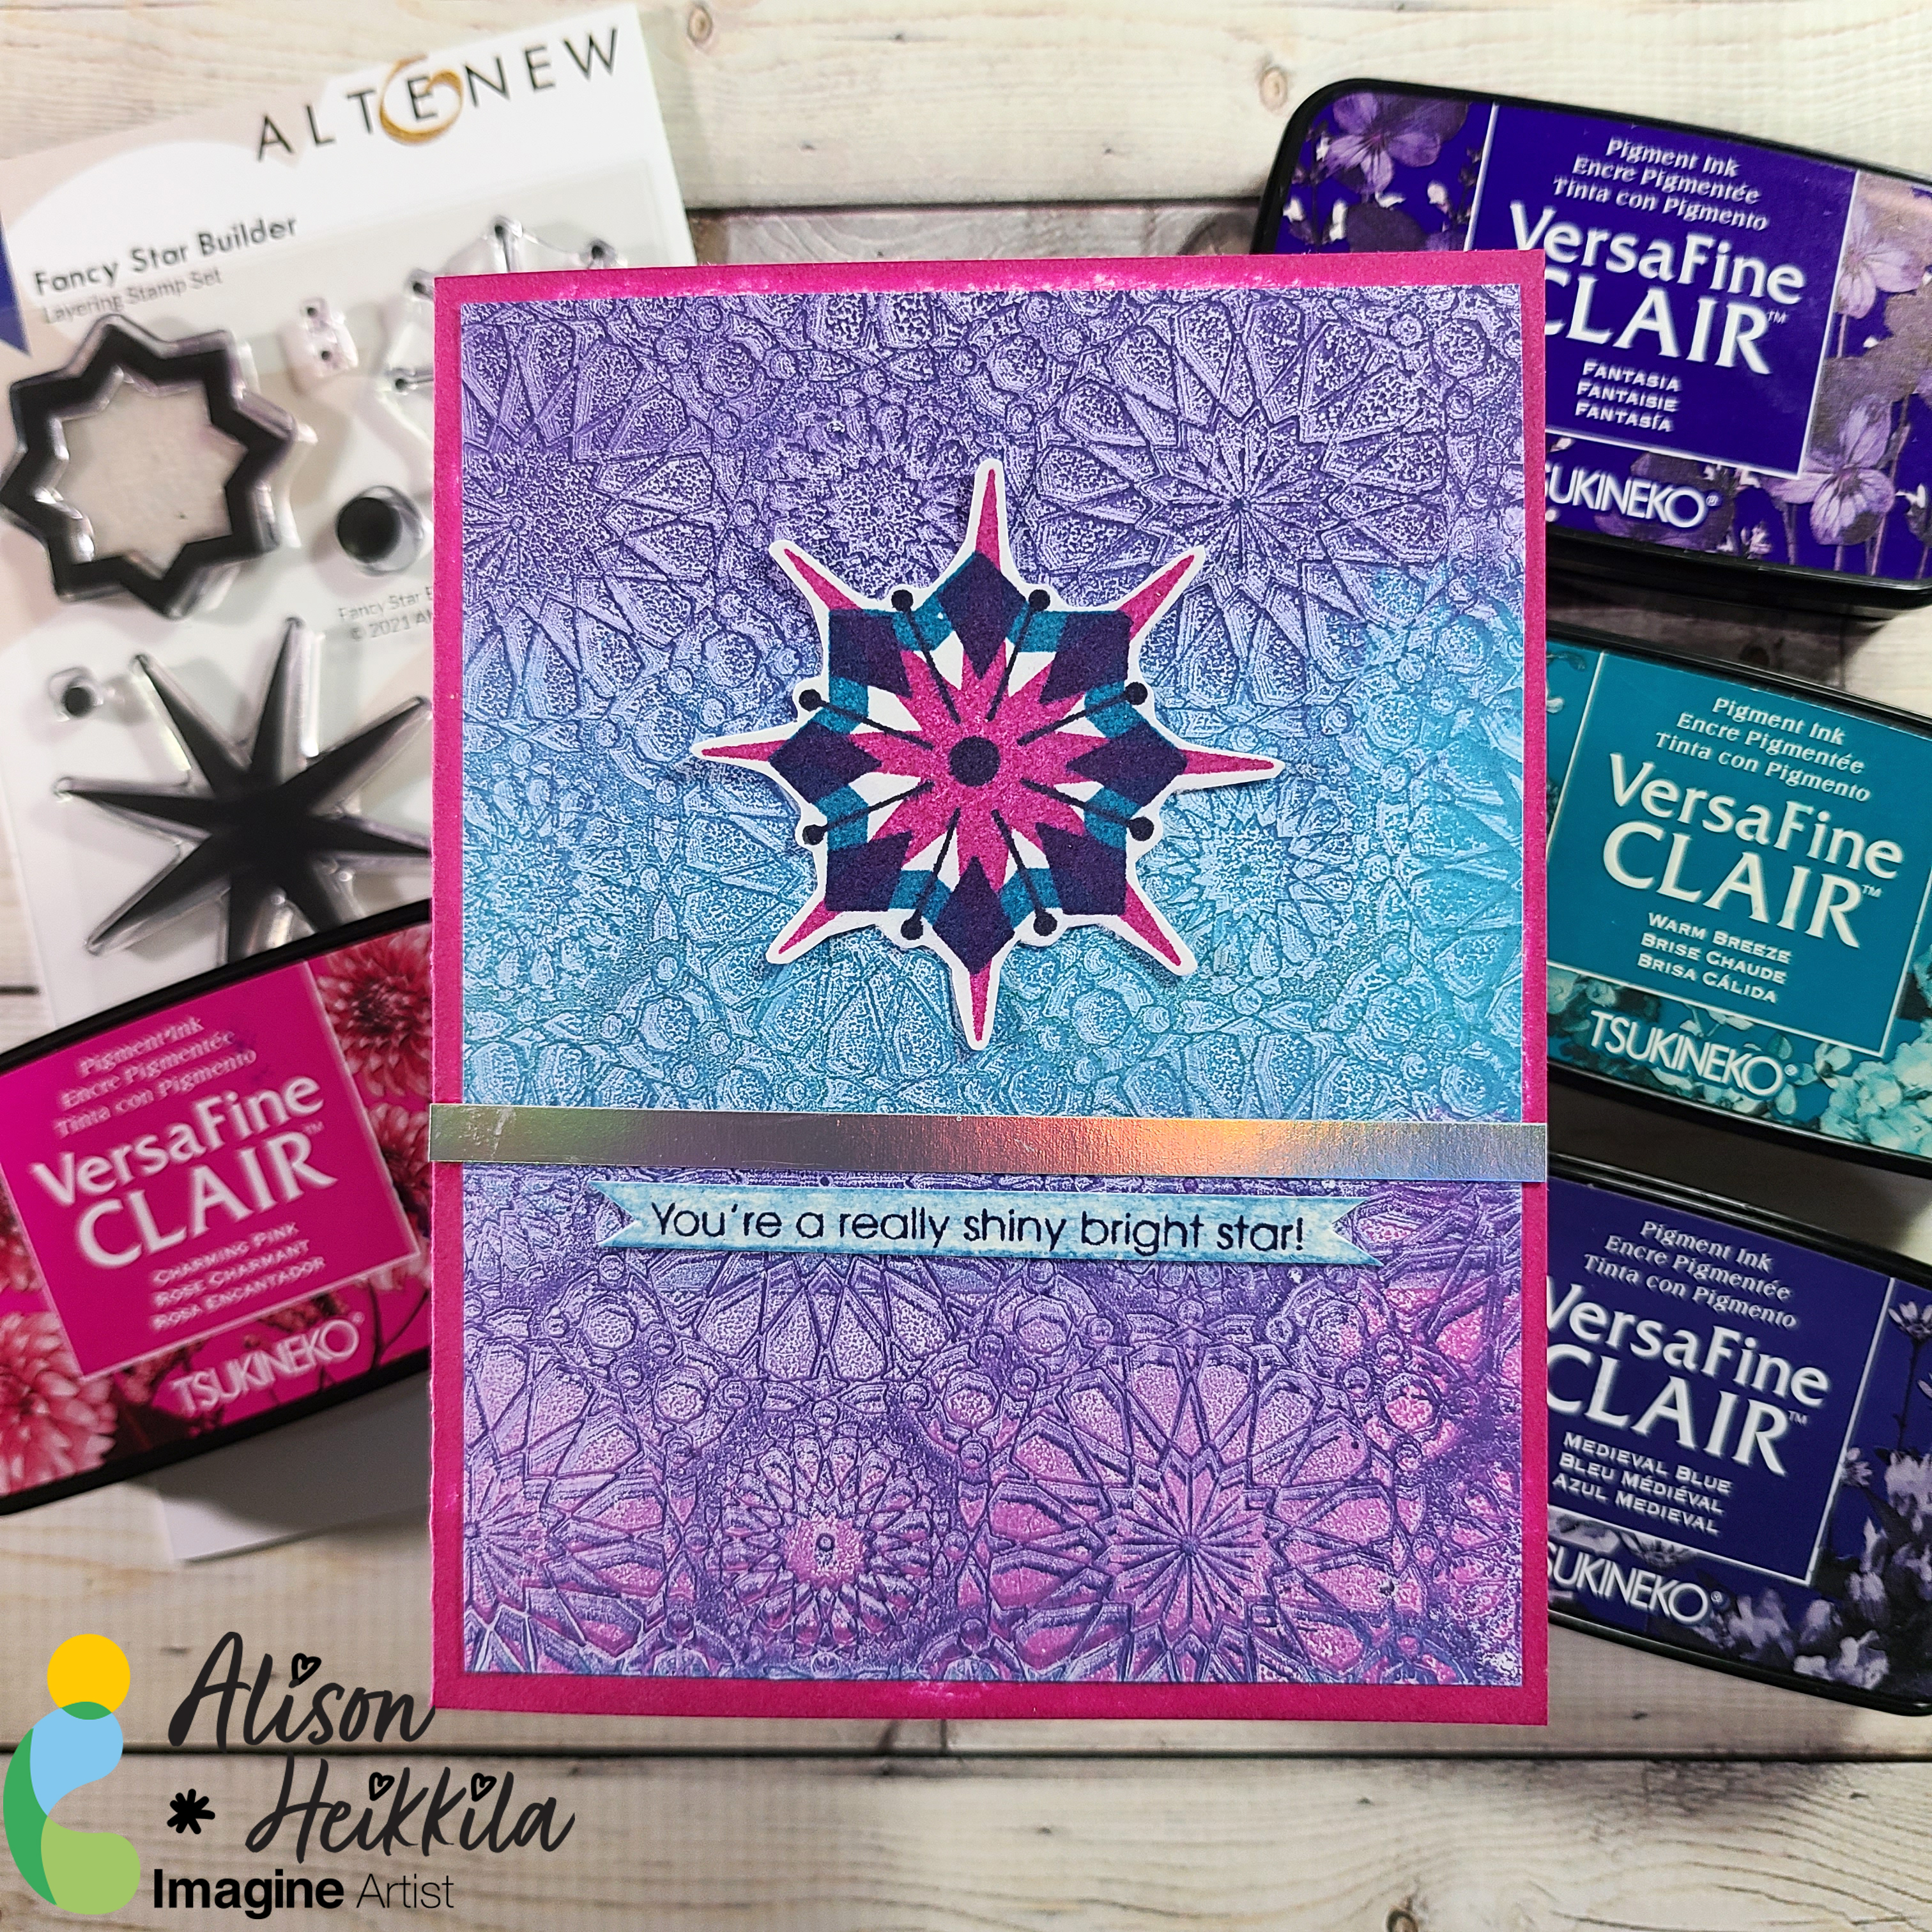
Hello! @AlisonHeikkila here and today and we’ll be focusing on a couple of fun ways to use VersaFine Clair Inks. I love experimenting with different ways to use inks, so I decided to play on my Gel Press Plate and use a detailed 3D Embossing Folder. VersaFine Clair Inks are also great with layering stamps because you can get such crisp images.
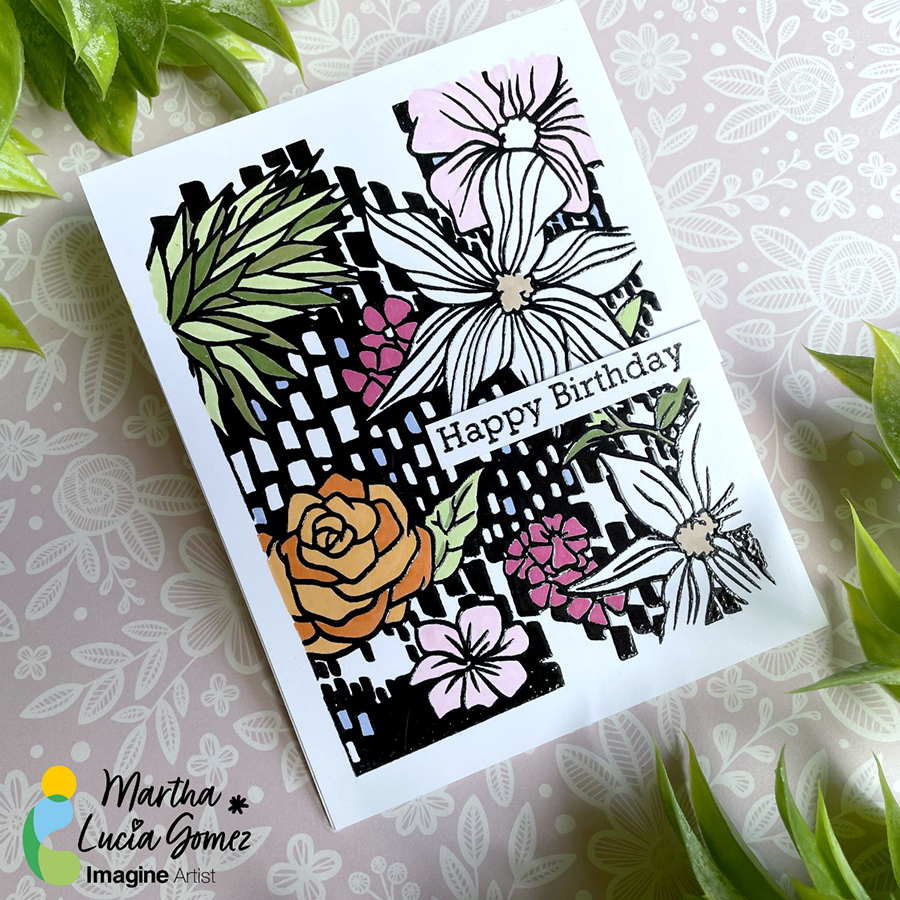
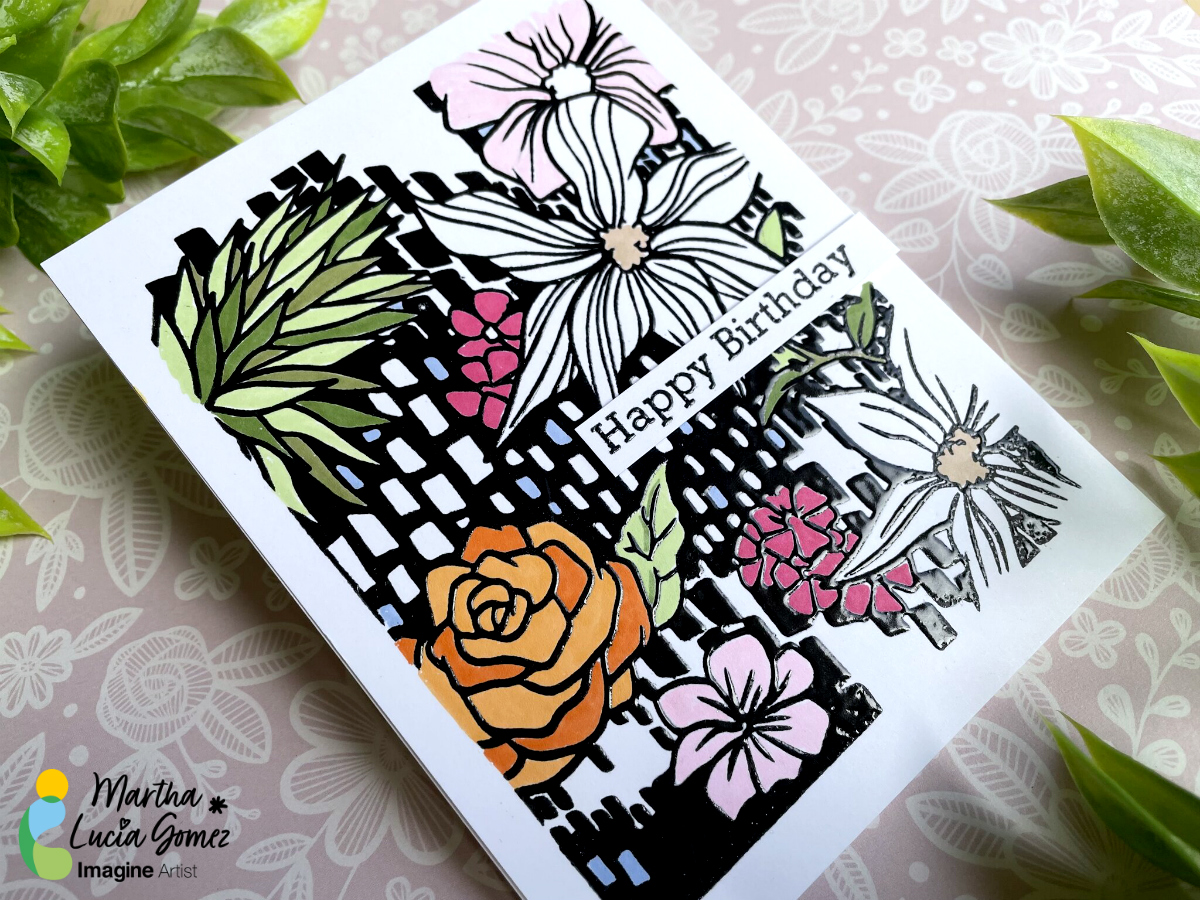
Hello there! Today’s tutorial is about a Birthday Card using a background stamp but adding texture and color. To make this, I used VersaFine Clair Nocturne, Clear Embossing Powder and Memento Markers.
Skill: Beginning
Time: 45 minutes
Directions:
Step 1:
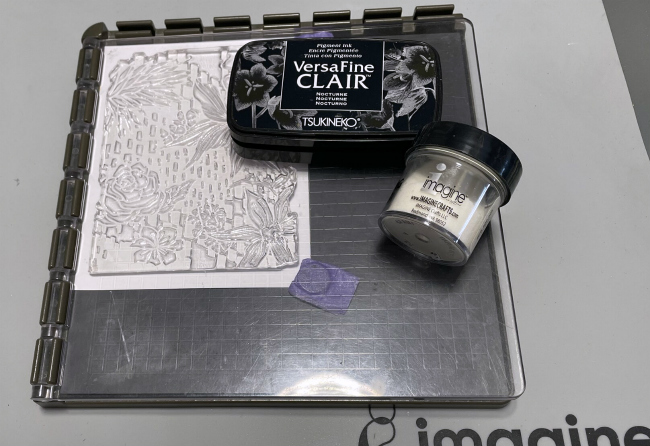
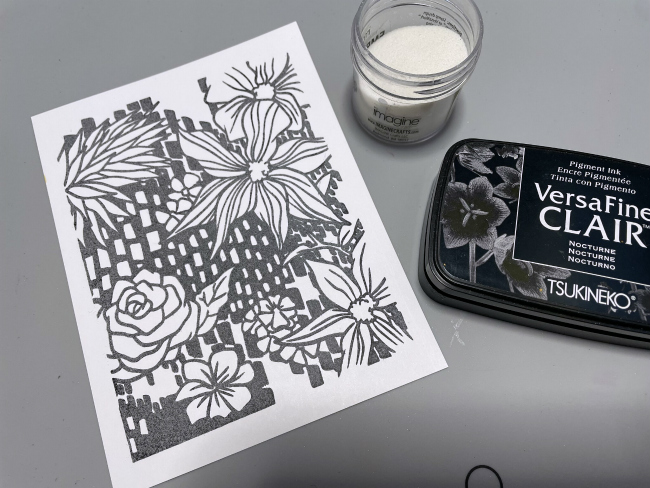
Take a piece of white smooth cardstock, ink well your background stamp with VersaFine Clair Nocturne Ink and stamp your image pressing hard to obtain a crispy image. You can use any stamping tool.
Step 2:
Cover the stamped image with Clear Embossing Power or MBoss. Melt the powder with the heat tool.
Step 3:
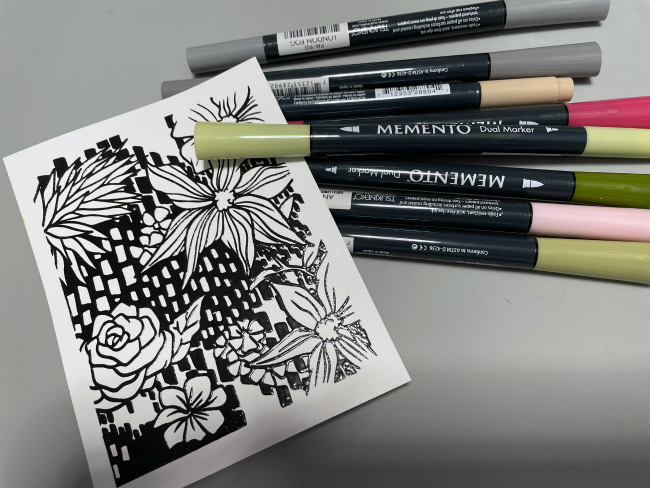
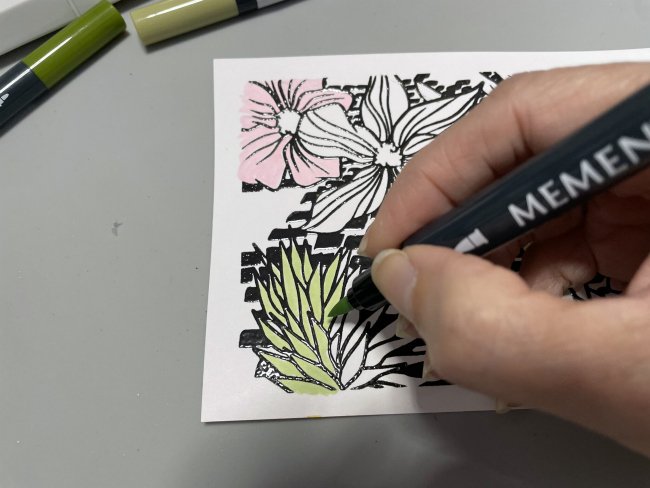
To enhance the details of the stamp, color it partially with Memento Markers. The VersaFine Clair in is a safe ink to work with these Markers or with any type of Alcohol Markers.
Step 4:
Combine the tones of your markers to have different shadows. In my sample I used Memento Markers in colors Angel Pink, New Sprout, Pistachio, Bamboo Leaves, Rose Bud, Desert Sand, Cantaloupe, Tangelo and Summer Sky.
Step 5:
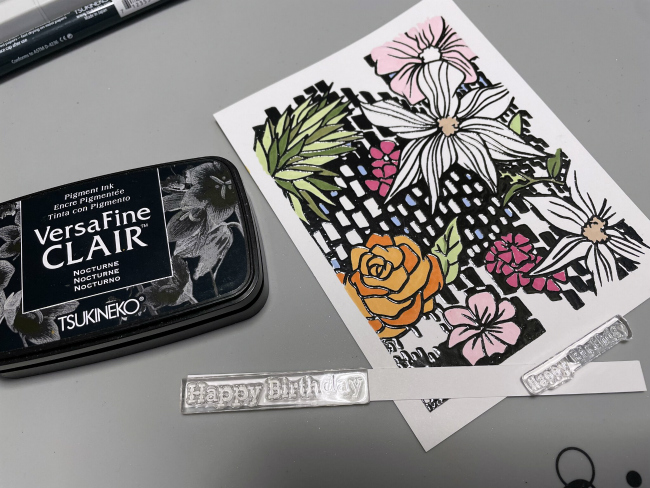
If you want you can resize the stamped layer and paste it over a card base. You can use Tear It! Tape to paste it.
Step 6:
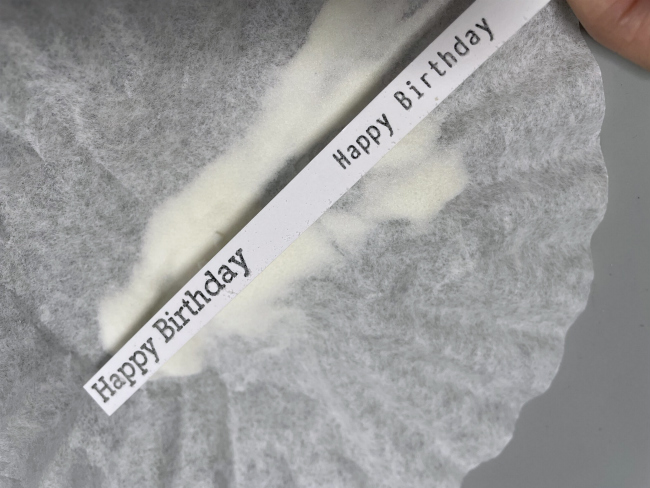
In a separate piece of white cardstock stamp the birthday sentiment using the same products used to create the background. I used VersaFine Clair Nocturne and Clear Embossing Powder.
Finalize your card pasting the sentiment with crafty foam tape.
Hello Friends! Katy here and today I am sharing two ways to watercolor with StazOn Studio Glaze.
In today’s video tutorial I am sharing two watercolor techniques. The first is traditional watercoloring with a watercolor brush and the second technique is the popular ink smooshing technique. Both are great ways to use StazOn Studio Glaze and I hope you hive it a try. Check out the video to see the process in action. I hope you enjoy and thanks for stopping by.