Create A Quick Set of Ink Blended Note Cards with Embossing Powders

2022-feb-katy-ingram-card-set-IG_700x700


By Katy Ingram –

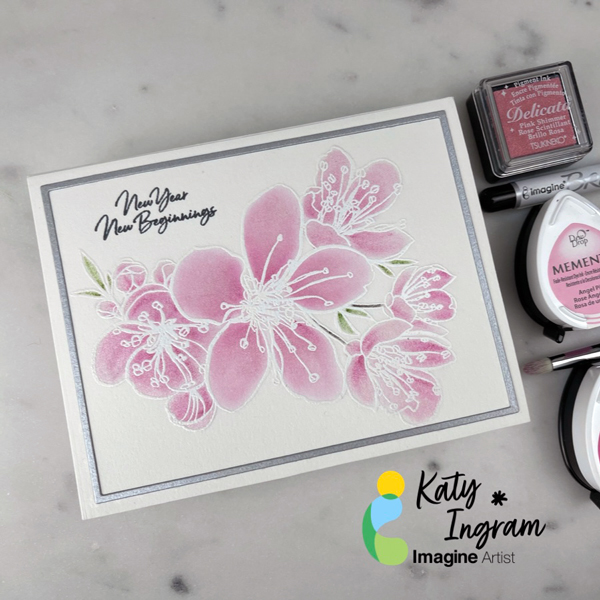
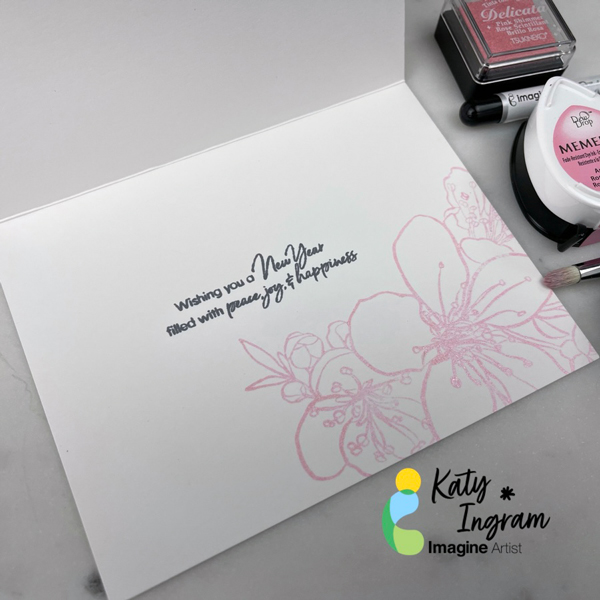
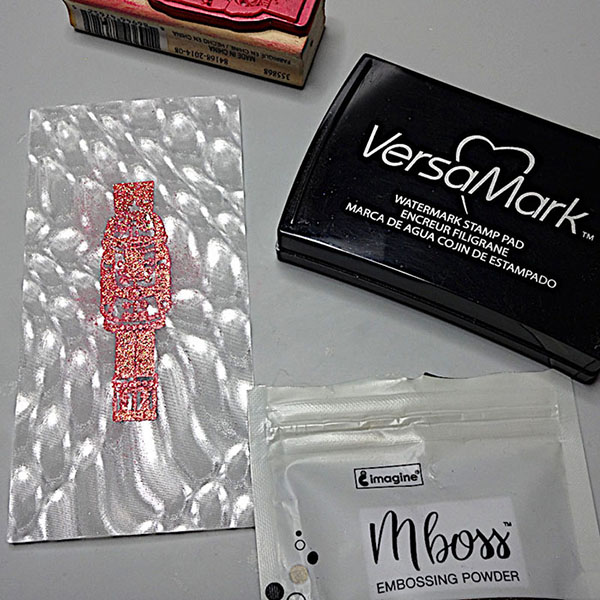
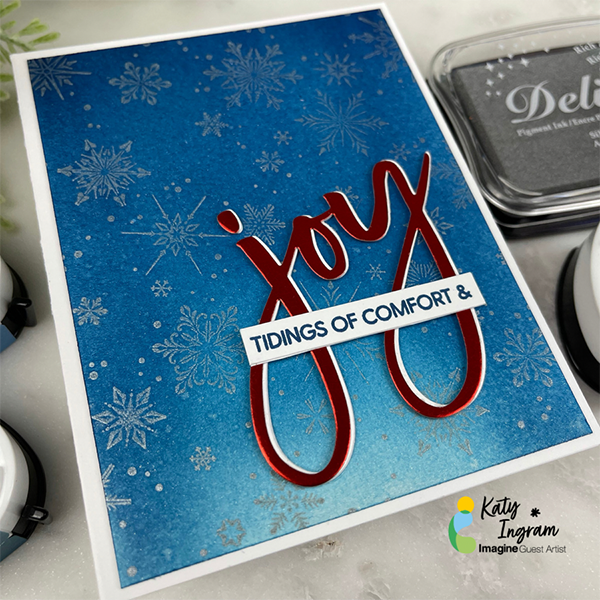
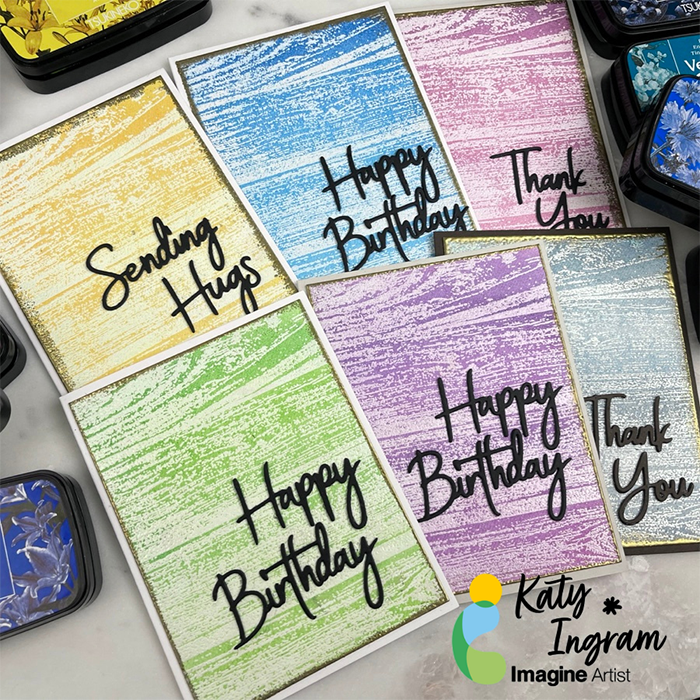
Hello Friends! Katy here with another quick project for you. I don’t know about you, but I am always looking for quick card ideas to save me some time and in today’s video, I have a simple card that is easy to replicate and all you need is some inks (VersaFine Clair in this case) some Mboss embossing powders a background stamp and some word dies. I made 6 cards in about an hour and what I love about them is that they can be used for anyone or any occasion. I hope you enjoy the video. Thanks so much for watching.

Skill: Beginner, Intermediate, Advanced

Time: 25 minutes

Art Supplies:

Imagine

VersaFine Clair

Glamorous 

Monarch

Verdant 

Green Oasis 

Twilight 

Morning Mist 

Charming Pink 

Purple Delight 

Fantasia 

Warm Breeze 

Paradise 

Blue Bell

Cheerful 

Summertime 

VersaMark Dazzle Frost 

VersaMark Ink Pad 

Mboss Embossing Powder – White 

Mboss Embossing Powder – Gold 

Point On Point Glue

Tear It! Tape

 
Other Supplies Used:

Concord & 9th Barnwood Background Stamp

Spellbinders Simply Perfect Mix & Match Sentiments

Fabriano Artistico Cold Pressed Watercolor Paper

Classic Crest Epic Black 130lb Card Stock

Accent Opaque 110 lb Card Stock

Misti Stamping Tool

Kaolin Clay Powder Tool


New Ink Blending Technique Using Eyeshadow Brushes With Memento and Delicata Inks


2022-jan-katy-new-year-new-beginnings-Blog

2022-jan-katy-new-year-new-beginnings-inside-Blog-2

By Katy Ingram –

Hello Friends! I am so excited to be back with you for another year of card making and crafting here at Imagine Crafts. I know for many, Valentine’s Day cards are in full swing, but I thought it would be fun to start the year off with something a bit different. However; this card can also be turned into a Valentine or a Mother’s Day card which gives you some versatility. In todays video I show you how to use eyeshadow brushes to color your images using Memento and Delicata Inks. I hope you enjoy the video. Thanks so much for watching.

Skill: Beginner, Intermediate, Advanced
Time: 25 minutes


Art Supplies:

Imagine

• Memento Ink Pad – Angel Pink 

• Memento Ink Pad – Rose Bud

• Memento Ink Pad – Gray Flannel 

• Memento Ink Pad – Bamboo Leaves 

• Memento Ink Pad – Espresso Truffle 

• Memento Ink Pad – Rich Cocoa 

• Delicata Ink Pad  – Pink Shimmer 

• VersaMark Ink Pad 

• Mboss Embossing Powder – White 

• On Point Glue 

• Brushstix Chisel Tip 

Other Products Used:

• Ellen Hutson – Mondo Sakura Stamp Set

• Waffle Flower – New Beginnings Stamp Set

• Ellen Hutson – Essentials Rectangles Die Set

• Waffle Flower – A2 Layering Rectangle Die Set

• Stathmore 500 Series – Hot Pressed Watercolor Paper

• Stardream Metallic Silver

• Accent Opaque 110 lb Card Stock

• Misti Stamping Tool

• Couture Creations Precision Stamp Press

• Kaolin Clay Powder Tool


Easy to Make Christmas Napkin Holders

2021-Dec_19-kyriakos-xmas-table-decoration-main-wide-wm

By Kyriakos Pachadiroglou –

Stamp on Vertigo sheets to make sparkling napkin rings using Mboss Valentine embossing powder. Repeat stamping on white card stock to make little tags to decorate your festive table.


Skill: Beginner

Time: 1 Hour


Directions:

2021-dec-kyriakos-xmas-table-decoration-step1

Step 1

Cut 2 ½ x 5 in pieces of the Vertigo sheets and stamp with VersaMark watermark ink.

Cover with Mboss Valentine embossing powder and heat set.


2021-dec-kyriakos-xmas-table-decoration-step2

Step 2

Use an ink blusher to color around the stamped image with the StazOn Studio Glaze gold.


2021-dec-kyriakos-xmas-table-decoration-step3

Step 3

Stamp stars with the StazOn Black Cherry ink pad.


2021-dec-kyriakos-xmas-table-decoration-step4

Step 4

Punch one hold at the middle left and right long side edges and place satin ribbon.


2021-dec-kyriakos-xmas-table-decoration-step5
Step 5

Stamp the nutcracker stamp on white card stock with VersaMark watermark ink pad. Cover with Mboss Valentine embossing powder and heat set. Cut around. Repeat with the Mboss Sparkling Champagne Embossing Powder. 


Art Supplies:

Imagine

StazOn – Black Cherry

VersaMark – Original

StazOn Studio Glaze – Gold

Mboss – Valentine, Sparkling Champagne

Vertigo Sheet – Pebbles

Ink Blushers

Other

• Nutcracker Stamp

• Heat Tool

• Gold Satin Ribbon

• White Card Stock

• Hole Punch


Make Wooden Stamped Christmas Tree Ornaments

2021-dec-kyriakos-wooden-stamped-ornaments-square-IG

By Kyriakos Pachadiroglou –

Make wooden sign board style ornaments for your Christmas tree, colored with white All-Purpose ink and stamped Christmas designs with StazOn ink. Simple and easy to make.


Skill: Beginner

Time: 1 Hour

Directions:

2021-dec-kyriakos-wooden-stamped-ornaments-step1

Step 1

Place 6 wooden sticks next to each other. Cut two wooden sticks a bit longer than the total width of the above six ones. Place Tear It! Tape on the two and attach on the rest and create a sign board.


2021-dec-kyriakos-wooden-stamped-ornaments-step2

Step 2

Color the sign boards with white All-Purpose Ink and both sides.


2021-dec-kyriakos-wooden-stamped-ornaments-step3

Step 3

Stamp your favorite Christmas stamps using the StazOn Black Cherry ink pad, which will dry quickly and won’t bleed on the wood.


2021-dec-kyriakos-wooden-stamped-ornaments-step4

Step 4

Distress the edges with Memento Rich Cocoa ink pad.


2021-dec-kyriakos-wooden-stamped-ornaments-step5
Step 5

Add rhinestones using the On Point Glue.


2021-dec-kyriakos-wooden-stamped-ornaments-step6
Step 6

Wrap Baker’s twine on one side and some on the top to hand the ornament.


Art Supplies:

Imagine

• StazOn – Black Cherry

• Memento – Rich Cocoa

• All-Purpose Ink – White

• Sponge Daubers

• Tear It! Tape

• On Point Glue


Other

• Wooden sticks

• Christmas themed stamps

• Bakers twine

• Rhinestones


How To Create A Winter Background With Memento Inks

Katy Ingram_Winter Sky_IG

By Katy Ingram –

Hello and welcome! Katy here with a new video. Today I have a new way of ink blending to share with you that anyone can do. I know may people struggle with ink blending in general and the technique I share with you in the video couldn’t be simpler to replicate and is a bit easier on the hands and wrists. I also talk a bit about the difference between hot and cold pressed watercolor paper for those that may not know and for a change of pace I used Memento inks to do my ink blending and created a beautiful crisp winter night sky. I hope you find these tips helpful and I hope you enjoy the video. Thanks so much for watching.

Skill: Beginner, Intermediate, Advanced
Time: 35 minutes

Art Supplies:

Imagine

• Delicata Silvery Shimmer
• Memento Inks – Summer Sky, Bahama Blue, Teal Zeal and Nautical Blue
• On Point Glue
• Tear it! Tape
• Sheer Shimmer Spritz in Sparkle 

Other Products Used:

• Gina K Designs Delicate Snowflakes Background Stamp
• Waffle Flower Oversized Joy Stamp and Die Set
• Red Foil Cardstock
• Accent Opaque 100 & 120 lb cover cardstock
• Strathmore 500 Series Hot Pressed Watercolor Paper
• Blending Brushes
• Fiskars Wire Guide Trimmer


Wow your Dinner Guests with Stylist Hand Stamped Autumn Leaves

leaves-table-650

By Kyriakos Pachadiroglou –

Gather large leaves and stamp them with your favorite stamps and StazOn inks. Protect the leaves with the Creative Medium for a long lasting result. Decorate a holiday table, make an autumn wreath, add them to gift bags or to any seasonal project.

Skill: Beginner

Time: 1 Hour


Directions:

2021-nov-kyriakos-stamped-leaves-step1

Step 1

Gather leaves that are not completely dry. If they are not flat enough, use paper towels, spray with water and carefully press to flatten.


2021-nov-kyriakos-stamped-leaves-step2

Step 2

Cover the leaves on both sides with Creative MEDIUM using an Ink Blusher.


2021-nov-kyriakos-stamped-leaves-step3

Step 3

Stamp with StazOn Jet Black ink and your favorite stamp.


2021-nov-kyriakos-stamped-leaves-step4

Step 4

Add some color by distressing lightly with StazOn Black Cherry ink pad.


2021-nov-kyriakos-stamped-leaves-step5
Step 5

Stamp the thank you sentiment and tear the paper on all sides to make tags.


2021-nov-kyriakos-stamped-leaves-step6
Step 6

Distress the tags with MEMENTO Rich cocoa.


Art Supplies:

Imagine

• StazOn – Jet Black, Black Cherry

• MEMENTO – Rich Cocoa

• Creative MEDIUM – Clear

• Sponge Daubers

• Ink Blushers


Other

• Large Leaves

• Precious Remembrance School Stamp Set

• Kaiserkraft – Tea at Elsie’s Stamp Set

• Natural Color Heavy Card Stock