Monochromatic Christmas Card

by Nadine Carlier

Monochromatic Christmas Card by Nadine Carlier IC

Creating a monochromatic card was easy when using some Delicata Celestial Copper and Copper Embossing powder. Watch my video below to see exactly how I did it.  Enjoy!

Skill: Intermediate
Time: 15 minutes

Supplies

Imagine
Other

Visit our YouTube Channel for more inspirational videos and subscribe to get updates when we post new videos.

Learn How to Decorate Your Own Holiday Ornaments

by Steph Ackerman

Learn How to Decorate Your Own Holiday Ornaments

As we get closer to the holidays, it’s always fun to do handmade projects or get the kids involved with decorating the Christmas tree. This year, why not create Christmas ornaments for friends and family members. All you need are a set of glass ornaments and a selection of amazing colors of StazOn Studio Glaze to complete this project.

Skill: Beginner
Time: 1 hour + drying time

Directions


Step 1

Remove the hanger from each ornament and put aside. Holding the ornament with 2 fingers, start by creating a zig-zag pattern using StazOn Studio Glaze in Gold.


Step 2

Add dots of color using StazOn Studio Glaze in St. Valentine, Silver, and Orange Zest. Continue adding dots of color around the ornament.


Step 3

Place another ornament on a dowel or craft stick and add StazOn Studio Glaze in St. Valentine, Emerald City, and Orange Zest in random patterns. Use a finger to mix the colors together creating a swirly pattern.


Step 4

Add rings of color on another ornament and mix them together creating another swirly pattern.


Step 5

Continue painting the ornaments with Studio Glaze until you have decorated all the ornaments you need.


Step 6

Using the RInea 3D Hyacinth die set, die cut assorted colors of Rinea Foils. Add Tear It Tape to the bottom edge of the die.


Step 7

Put the hanger back in each ornament. Remove the backing from the Tear It Tape, then wrap the foil around the ornament top.


Step 8

Use a craft pick to curl the foil strips and continue decorating as you wish.


Supplies

Imagine
Other

Learn How to Create a Daisy Flower With Dewlets

by Arjita Sepaha Singh

For today’s card, I used the new Dewlets Die to create a beautiful paper daisy. I used the die to cut out a few petals and adhered it on the card panel with the On Point Glue. Then I created a striped pattern on the card base using washi tape and VersaFine ink. To jazz up the flower I added tiny dots using the Pico embellisher, which is super shiny and dimensional. I finished the card with a sentiment “Wish Big”. This is a perfect project to be done with kids.

Skill: Beginner
Time: 30 minutes

Supplies

Imagine
Other
  • Foam Tape
  • Washi Tape
  • Acrylic Blocks
  • Big Shot Die Cutting Machine
  • Cardstock
  • Cardbase

See How to Make Earrings with Rinea Foil

by Kyriakos Pachadiroglou

See How to Make Earrings with Rinea Foil

To be a star yourself, you need extra star shine in your jewelry! Crafting a pair of supersize star shape earrings is easy with Imagine Sheet Metal and the Starstruck foiled paper from Rinea. The Sheet Metal star frames that are created with dies, keep inside the double-sided foiled paper that shows on both sides of the earrings with no extra work. Tear It Tape is a great tool to attach the metal pieces and the paper together. A liquid glue that may leak on in the center. To gift the star shape earrings, create a small pocket with more Rinea foil paper and a small sentiment stamped with VersaFine Clair ink. See how I did it! 

Skill: Advanced
Time: 40 minutes

Directions

Imagine's Sheet Metal using a 2.5-inch and a 1.75-inch star dies
Step 1

Die cut four star-shaped frames from Imagine’s Sheet Metal using a 2.5-inch and a 1.75-inch star dies.

Die cut 2 Rinea foil paper stars
Step 2

Die cut 2 Rinea foil paper stars using a 2-inch wide star frame.
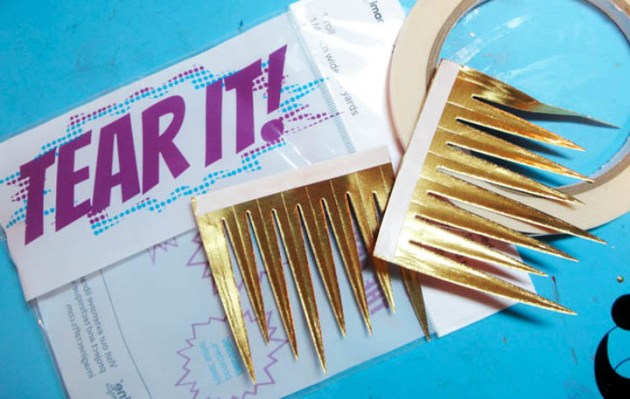
Tear It Tape around the Sheet Metal star frame
Step 3

Place Tear It Tape around the Sheet Metal star frame on the back side of it.

Rinea foil paper star
Step 4

Set the Rinea foil paper star. It will leave space around it so you can easily glue the second-star frame.

Punch a small hole and add a large jump ring and an earring hook
Step 5

Punch a small hole and add a large jump ring and an earring hook. Repeat on the second earring.

5x5 piece of cardstock
Step 6

Score a 5×5 piece of cardstock at the lower 2-inch mark, place Tear It Tape on the short sides and fold to make a pocket.

Rinea foil, place Tear It Tape and glue on the folded side
Step 7

Cut a 1×5 inch piece of Rinea foil, place Tear It Tape and glue on the folded side.


Step 8

Punch two hole on the main card, leaving 1 ½ in from each side.

Stamp the "Wish" sentiment stamp with VersaFine Clair Purple Delight ink
Step 9

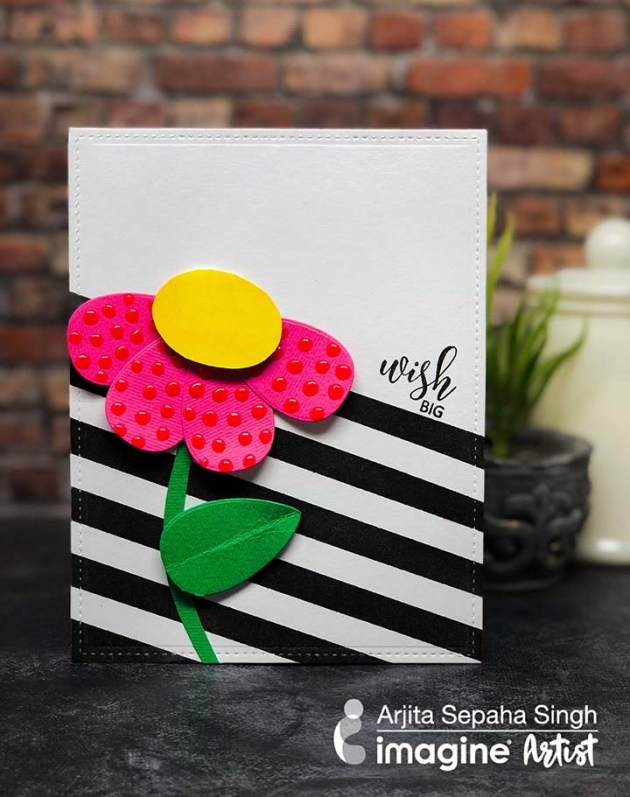
Stamp the “Wish” sentiment stamp with VersaFine Clair Purple Delight ink and cut along.


Step 10

Set a star of Sheet Metal that previously removed to make the frame and the “Wish” stamped paper cutting on the front of the card using Tear It Tape.

make a set of star earrings with a matching wish gift card

Supplies

Imagine
Other
  • Rinea – Starstruck Violet foiled paper
  • 5 x 5 white cardstock
  • Star shape dies
  • Die cutting machine
  • Jump rings and earring hooks
  • Hole punch
  • Crackerbox & Suzy – Wish stamp

Learn How to Make a Holiday Card with a Gel Press and All-Purpose Ink

by Kassy Tousignant

Winter is right around the corner and I love when the snow covers the landscape! When I received the Frosted sampler pack of Rinea papers, I couldn’t resist making a winter card with a cute penguin stamp. I didn’t have white Creative Medium to make my snowflake background, so I mixed some All-Purpose Ink in the clear Creative Medium and achieved great results! I created a wintery background with Doodlestix, a Gelli Press, All-Purpose Inks, and Fireworks sprays from Imagine.

Skill: Advanced
Time: 1 hour + dry time

Directions

Supplies

Imagine

• StazOn – Blue Hawaii
• All-Purpose Ink – White, Blue Bayou, Sky Mist
• Creative Medium – Shimmer, Clear
• IrRESISTibles Pico embellisher – Shimmer
Fireworks Shimmery Craft Spray – Bahama Blue
Tear It! Tape
Doodlestix
Palette knife

Other

• Rinea Paper – Frosted variety pack
• Stacking metal dies – circle
• Vellum paper
• Unity Stamp Co – Penguin stamp
• Glitter
• Ribbon
• Echo Park – Snowflake stencil
Gel Press
• Pipette
• Wooden snowflake
• Cardstock – white

Use a Ghosting Technique to Create a Unique Christmas Card

by Martha Lucia Gomez

Use a Ghosting Technique to Create a Unique Christmas Card

Hello everyone! Ghosting technique was one of the first techniques that I learned in cardmaking crafts and today I am sharing with you a lovely way to incorporate this ghosting technique in a Christmas Gingerbread Card. To realize this technique you only need glossy card stock and VersaMark ink to stamp the ghost image. In my project, I am using a Chevron Background from Recollections, but let me show you the process!

Skill: Intermediate
Time: 1 hour

Directions


Step 1

Take a piece of white glossy card stock and ink your stamp or stamps with VersaMark Ink and stamp directly over the glossy side and set this piece aside for a few minutes so the ink can dry.


Step 2

On a regular piece of cardstock, stamp the holiday-themed images that you want to use to decorate your card. I used a gingerbread image from a Stampin Up Set. I stamped the images with Memento Luxe Peanut Brittle and Clear Embossing Powder that I activated with the heat tool. Then I cut the gingerbread with the corresponding die cut.


Step 3

When the glossy card stock was totally dry, I sponged several times in circular motion with Desert Sand Memento Ink. If you want you can also use a brayer to create the resist effect.


Step 4

To finalize the card, I resized the glossy layer and created a gold mat using Gold Starstruck Rinea Foiled Paper and pasted this layer directly over the Cherry Cobbler card base. Then I cut the sentiment Merry Christmas using the same Gold Starstruck Rinea Foiled Paper with a Gina Marie Design Die Cut and pasted it over the chevron background and pasted the gingerbread using dimensional dots or tape. You can use any type the stamps to create this technique, not necessarily background stamps, all depends on the theme that you wanted to use in your card.

Supplies

Imagine
Other
  • Stampin Up – Scentsacional Season Stamp Set & die cut (retired)
  • Recollections – Chevron Background
  • Stampin Up – Cherry Cobbler Card Stock, White Glossy Card Stock
  • Rinea Foiled Paper – Gold Starstruck
  • Gina Marie Designs – Merry Christmas die cut
  • Dimensional tape or dots