Hello! I’m Alison Heikkila. Let’s make a playful scrapbook page using Memento Inks from Imagine with die cuts and stencils. There are so many ways you can use these inks, and I’ll share a couple of them in today’s video.
Skill Level: Beginner-Intermediate Time to Complete: 60 Minutes
*Some affiliate links are used in this post. That means that if you shop through these links, I may receive a small compensation, at no cost to you.
The video is below. If it doesn’t play properly, please click HERE.
I am so happy that I finally got this wonderful photo on a page. I enjoyed being playful with the elements I used. Please visit Imagine for more ideas on creative ways to use their products. Thanks so much for stopping by. Have an inspiring day!
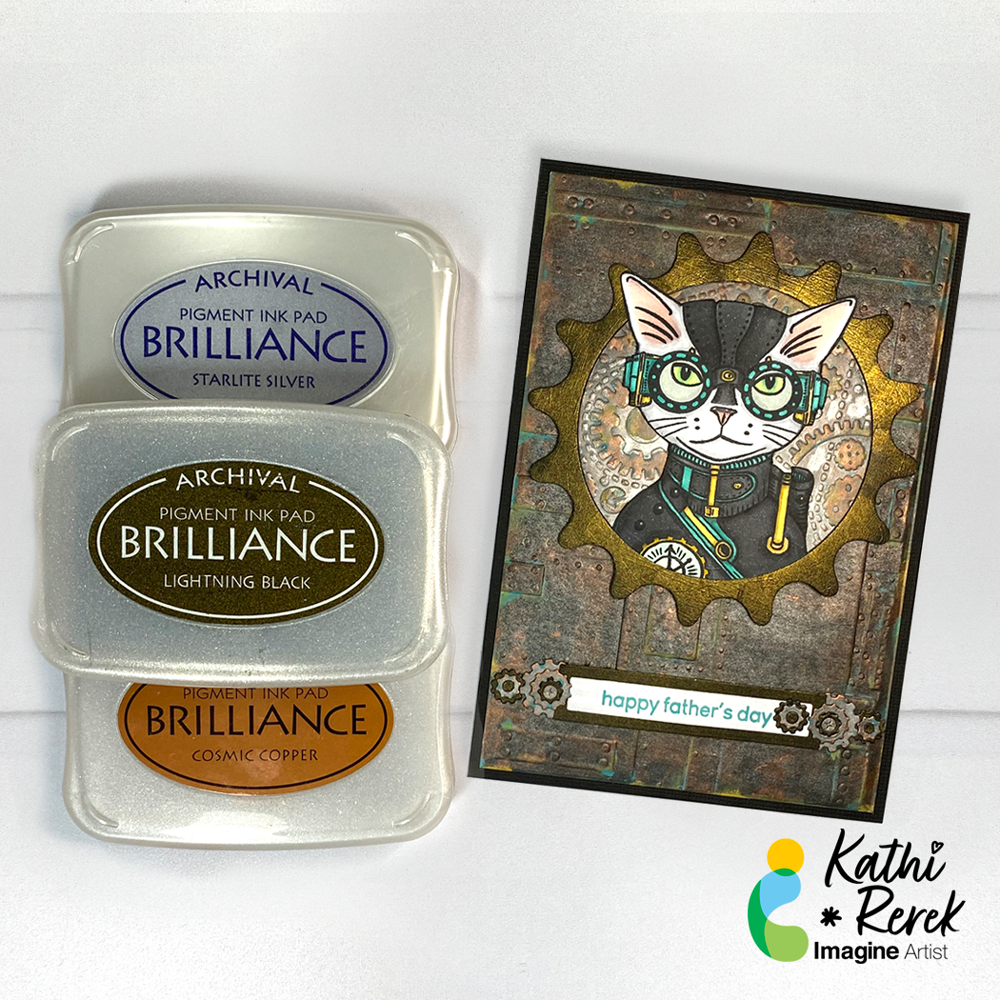
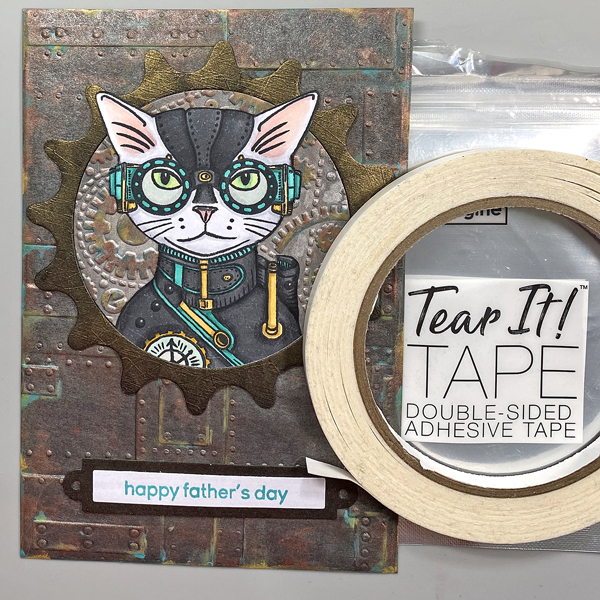
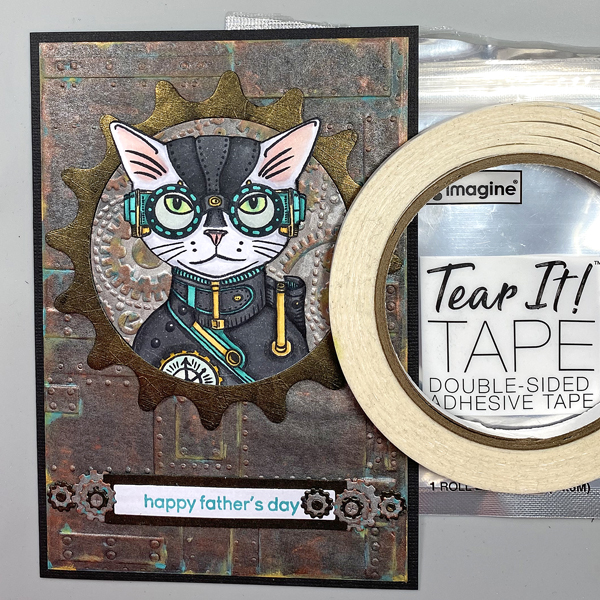
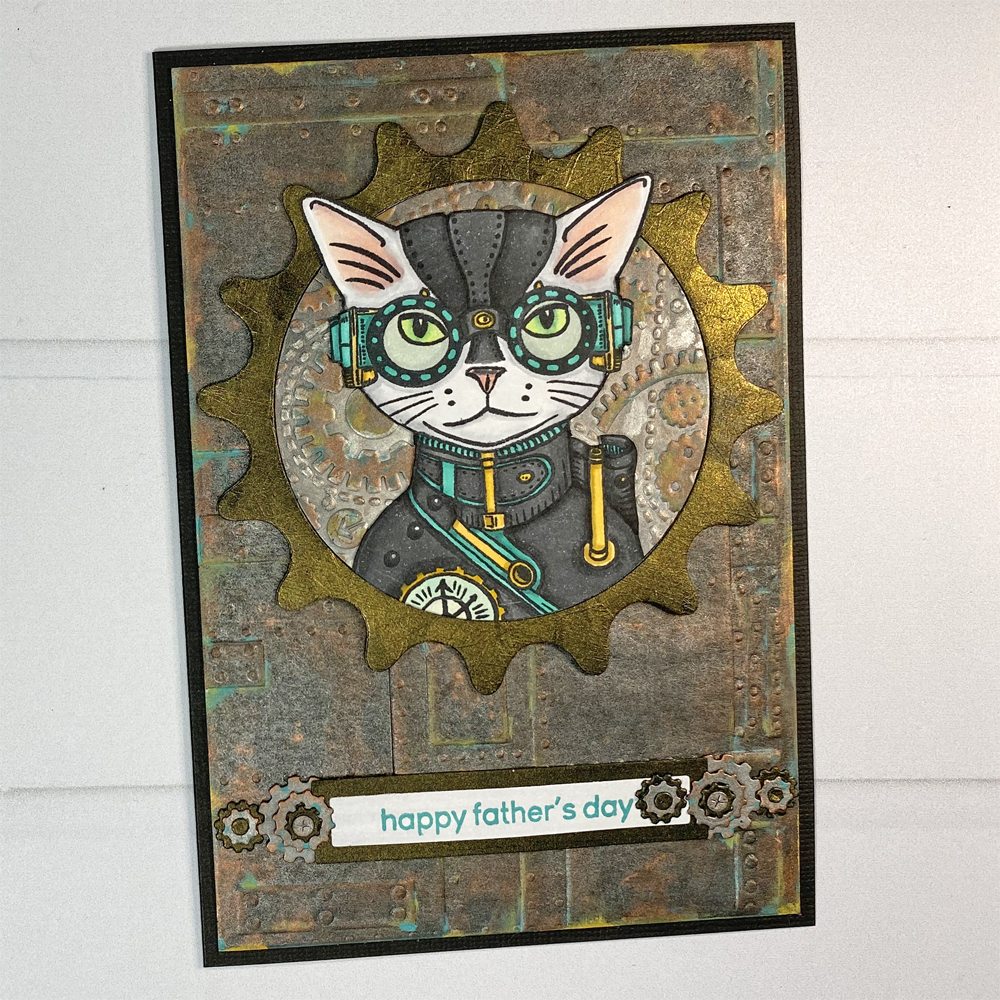
I’m continuing my experimentation with Metallic Brilliance Inks with this Father’s Day card using two of my favorite themes – cats and Steampunk!
Skill Level: Advanced Time: 2.5 Hours
Directions:
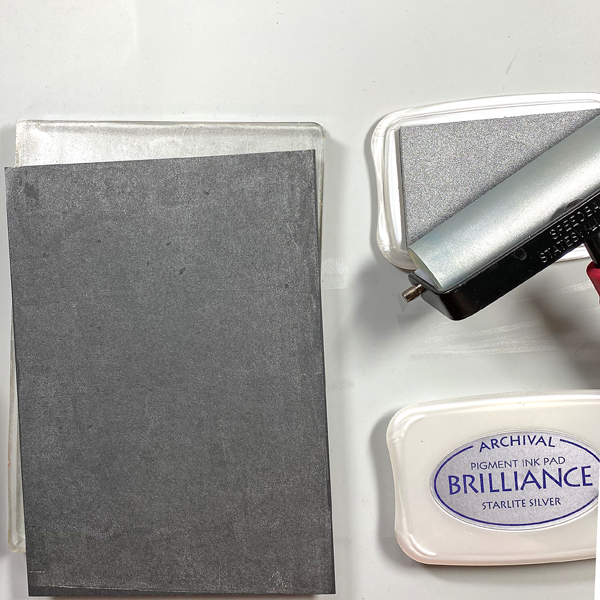
Step 1: Use a brayer to apply Starlite Silver Brilliance Ink to a 5” x 7” Gel Press. Place a piece of black mixed media paper onto the Gel Press. Smooth the back of the paper to transfer the in and pull a print.
Step 2: Repeat Step 1 to enhance the coverage.
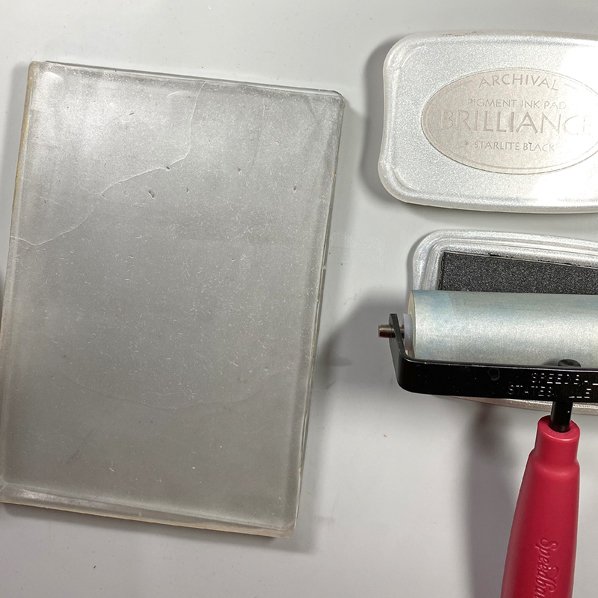
Step 3: Clean the brayer, then use it to apply Starlite Black Brilliance ink to the Gel Press. Place the print back onto the Gel Press inked side down. Smooth the back of the paper, then pull the print. Heat set the inked paper, then clean the brayer and the Gel Press.
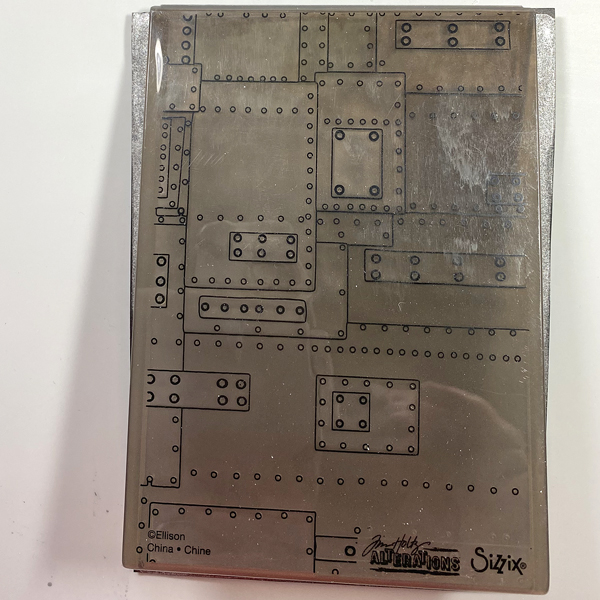
Step 4: Place the inked black mixed media paper into the Foundry 3D Alterations Embossing Folder. Spritz the back of the paper with water. Close the folder and run it through a die-cut machine.
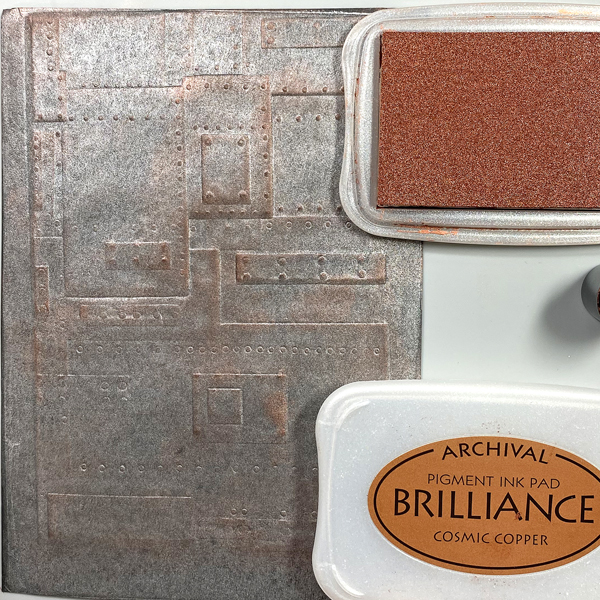
Step 5: Use a Sponge Dauber to apply Cosmic Copper Brilliance Ink to the high points of the embossed paper. Heat set.
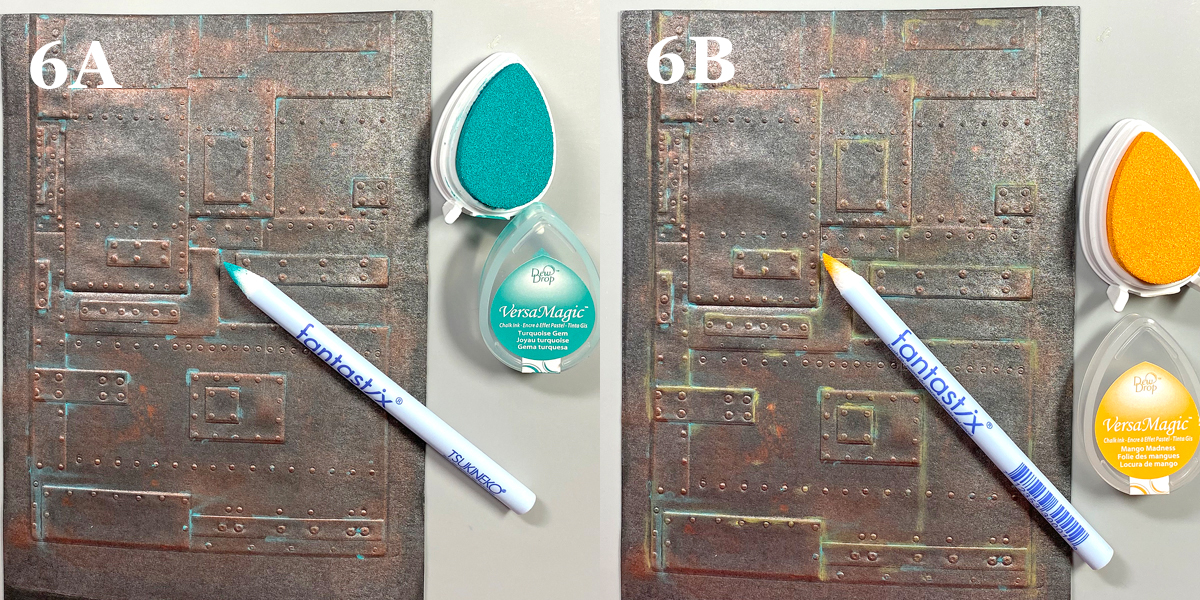
Steps 6A and 6B: Use Fantastix to apply Turquoise Gem VersaMagic Ink randomly to the high points of the embossed paper (6A). VersaMagic Ink has a matte chalk finish which comes out when it’s heat embossed.
Use another Fantastix to Apply Mango Madness VersaMagic Ink randomly to the high points of the embossed paper (6B). Heat set the panel and set aside.
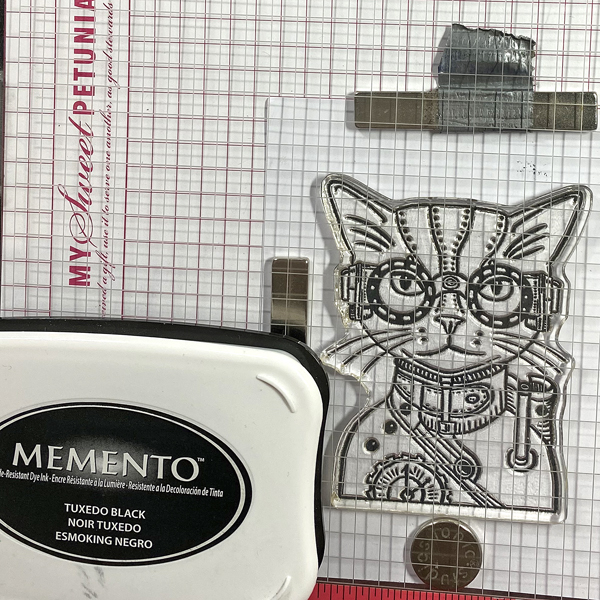
Step 7: Use Tuxedo Black Memento Ink to stamp the cat from the Steampunk Pets Clear Stamp Set onto white cardstock.
Step 8: Fussy-cut the image and use Copic markers to color it. Use a dark marker to edge the cut image. Set aside.
Step 9: Use the largest die from the Sprightly Sprockets Shapeabilities Die Set to cut black mixed media cardstock two times. You will end up with two cogs and two circles.
Step 10: Sponge Lightning Black Brilliance Ink over one of the cog die-cuts and one of the circles. Heat set both.
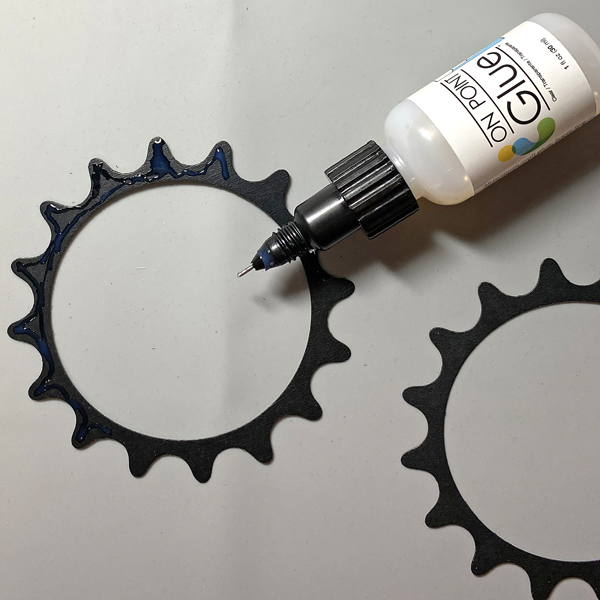
Step 11: Use On-Point Glue to adhere the inked cog atop the other one.
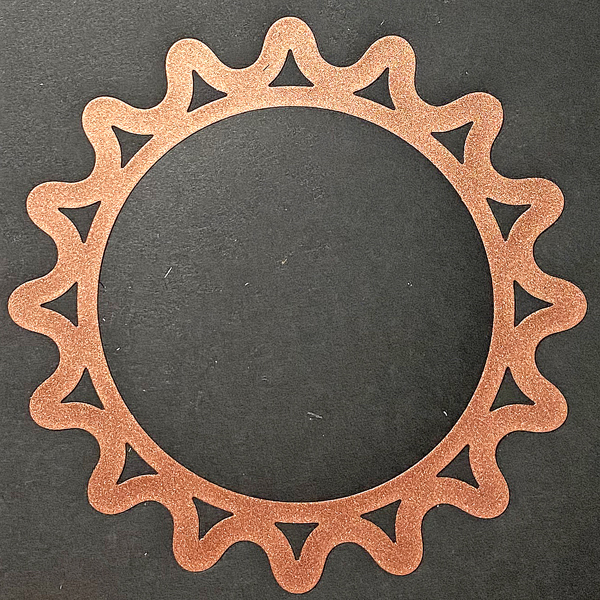
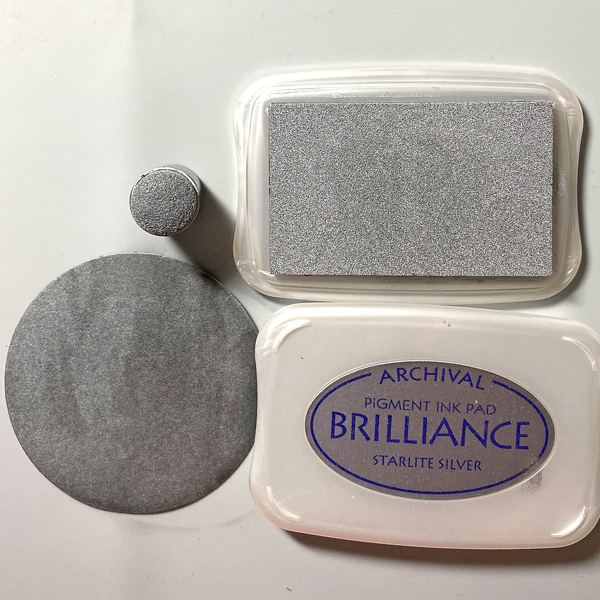
Step 12: Use a Sponge Dauber to apply Starlite Silver Brilliance ink to one of the circles from Step 9. Heat set.
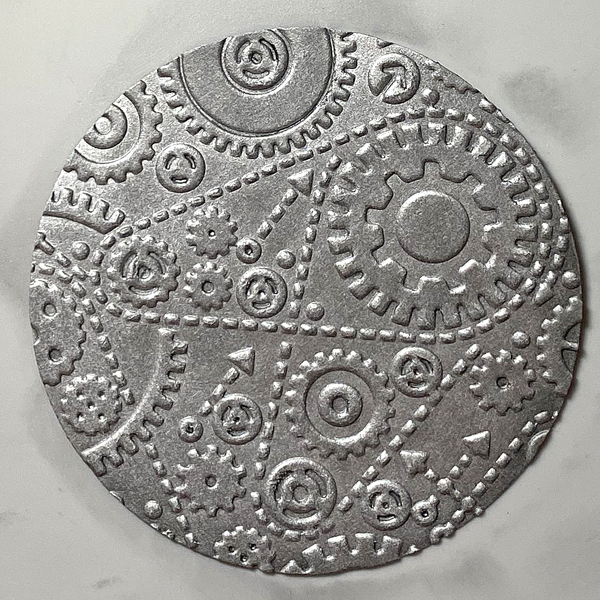
Step 13: Place the silver-inked circle into the Gears Alterations Folder and run it through a die-cut machine.
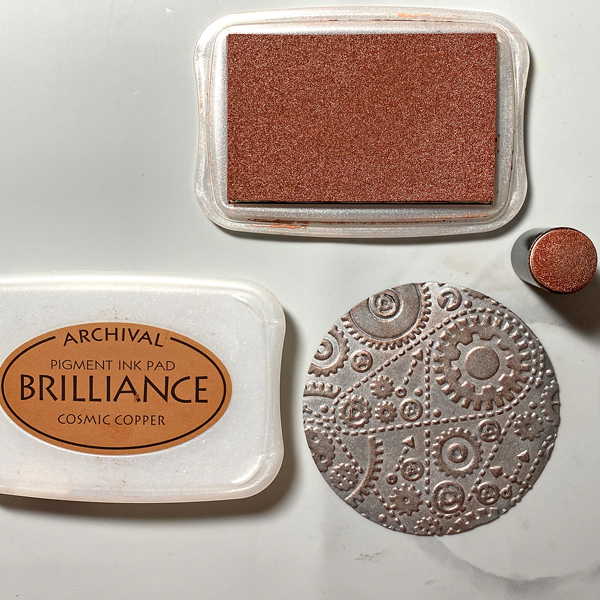
Step 14: Use a Sponge Dauber to apply Cosmic Copper Brilliance Ink to the high points of the embossed circle. Heat set.
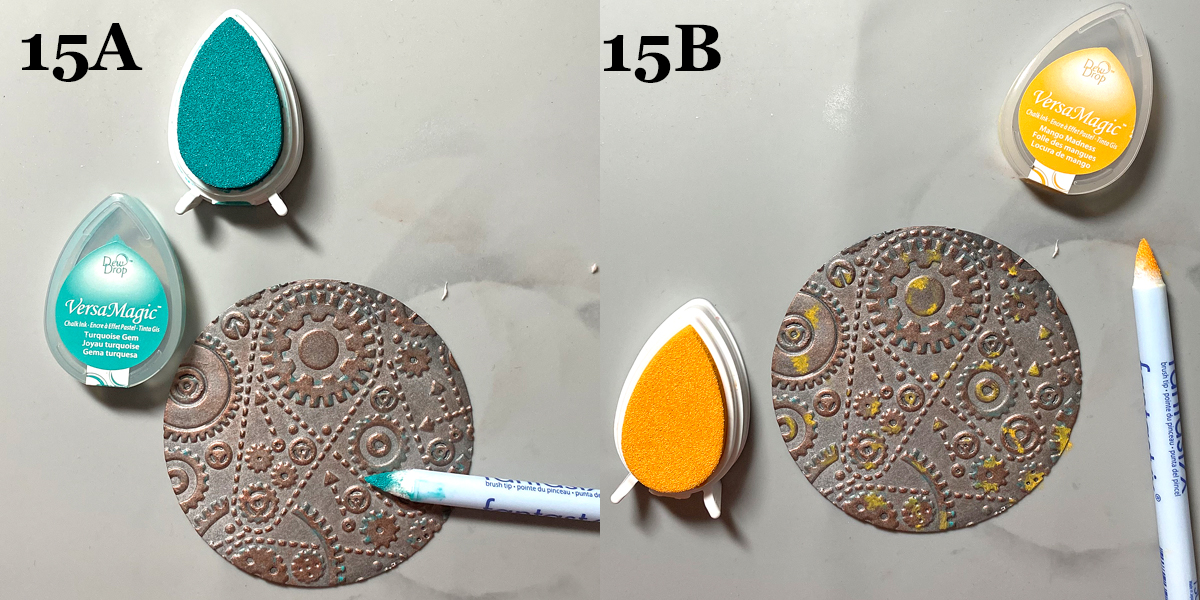
Steps 15A and 15B: Use Fantastix to apply Turquoise Gem VersaMagic Ink randomly to the high points of the embossed paper (15A).
Use another Fantastix to Apply Mango Madness VersaMagic Ink randomly to the high points of the embossed paper (15B).
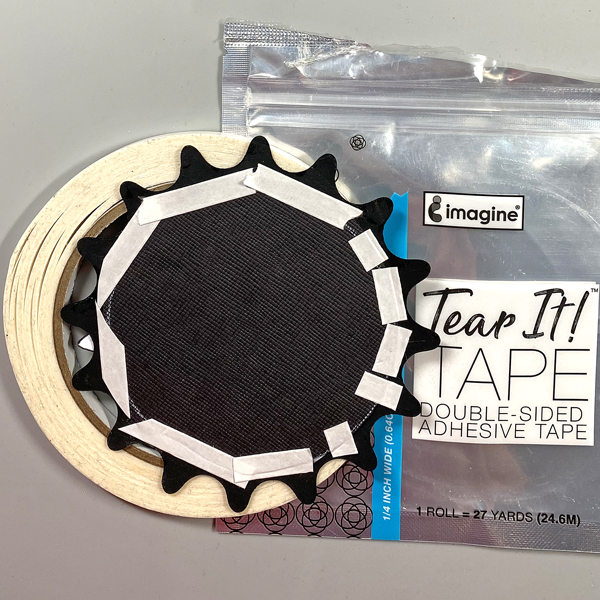
Step 16: Use Tear It! Tape to adhere a slightly larger circle to the back of the stacked cog die-cuts.
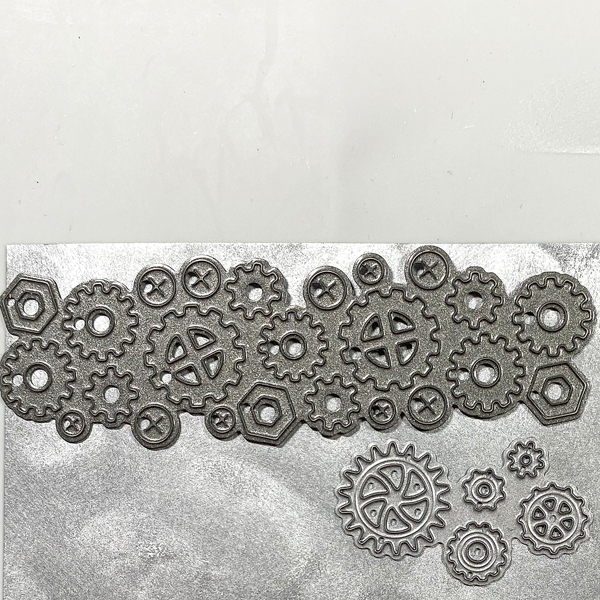
Step 17: Use a Sponge Dauber to apply Starlite Silver Brilliance Ink to a strip black mixed media paper. Sorry that there’s no photo. Use cog dies to cut the silver-inked black paper.
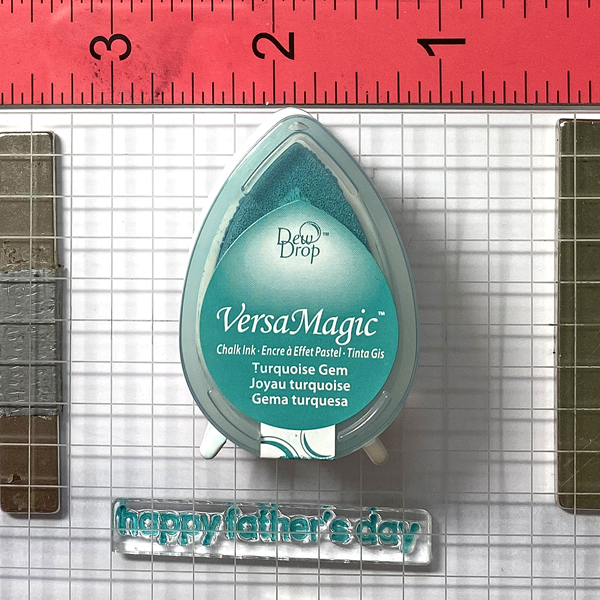
Step 18: Use a C2 Copic marker to color a piece of white cardstock. Use magnets to secure the colored cardstock onto a stamping platform. Place the “Happy Father’s Day” sentiment stamp facedown on the colored cardstock. Ink the stamp with Turquoise Gem VersaMagic Ink and stamp. Repeat inking and stamping if necessary to attain a good impression. Remove the stamped cardstock from the stamping platform and heat set the ink.
Step 19: Use a rectangle die to cut the sentiment. Use the matching nameplate die to cut the Lightning Black circle. Adhere the sentiment die-cut atop the nameplate die. Sorry that there’s no photo.
Step 20: Use Tear-It! Tape to adhere the embossed circle and the Steampunk Cat onto the cog die-cut. Use the tape to adhere the sentiment as shown.
Step 21: Use On Point Glue to adhere the gears, cogs, and screws to the sentiment die-cut.
Step 22: Cut black cardstock to 10” x 7”. Score at 5” and fold to form a 5” x 7” card. Use Tear-It! Tape to adhere the image panel to the front of the card.
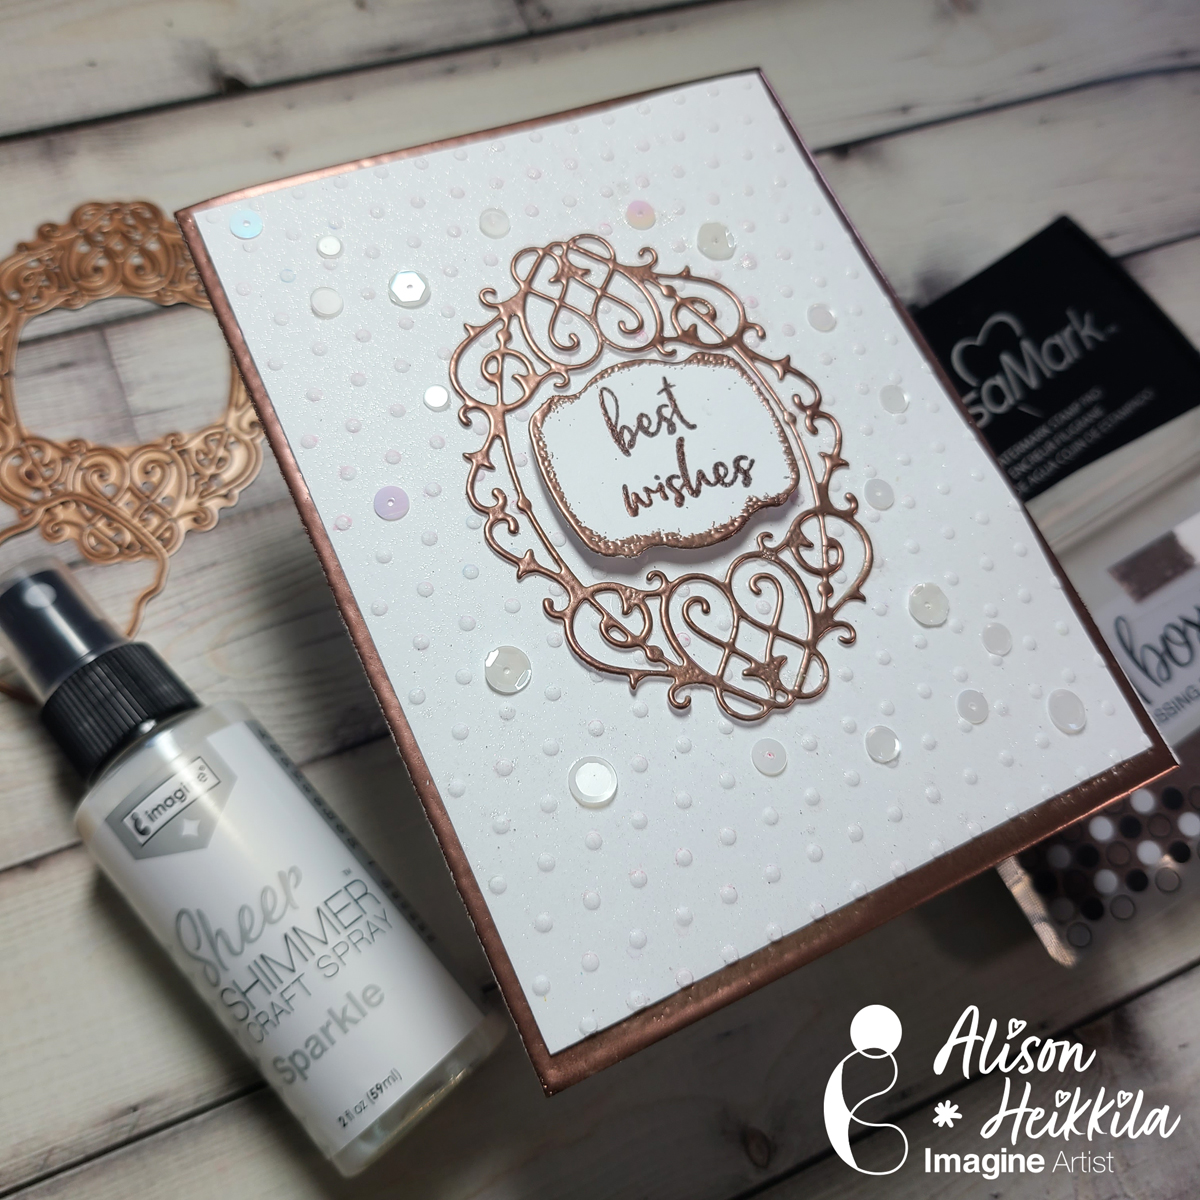
Hello! My latest video for Imagine is a wedding-themed card, though it can certainly be used for other occasions too. We’re going to use embossing powder in a few ways on this card, and they’re all fairly simple to do.
*Some affiliate links are used in this post. That means that if you shop through these links, I may receive a small compensation, at no cost to you.For more information, please see my Affiliates page, where I also have some coupon codes.
Skill Level: Intermediate Time to Complete: 30 minutes
Hello crafty friends! Mother’s Day is coming up soon. Sending out a handmade card is a way to show your love to a lovely mother figure in your life. Today, I would like to share with you how to make this Mother’s Day CAS card using Imagine Crafts products and stamps.
Skill: Beginner Time: 15-20 minutes
Direction:
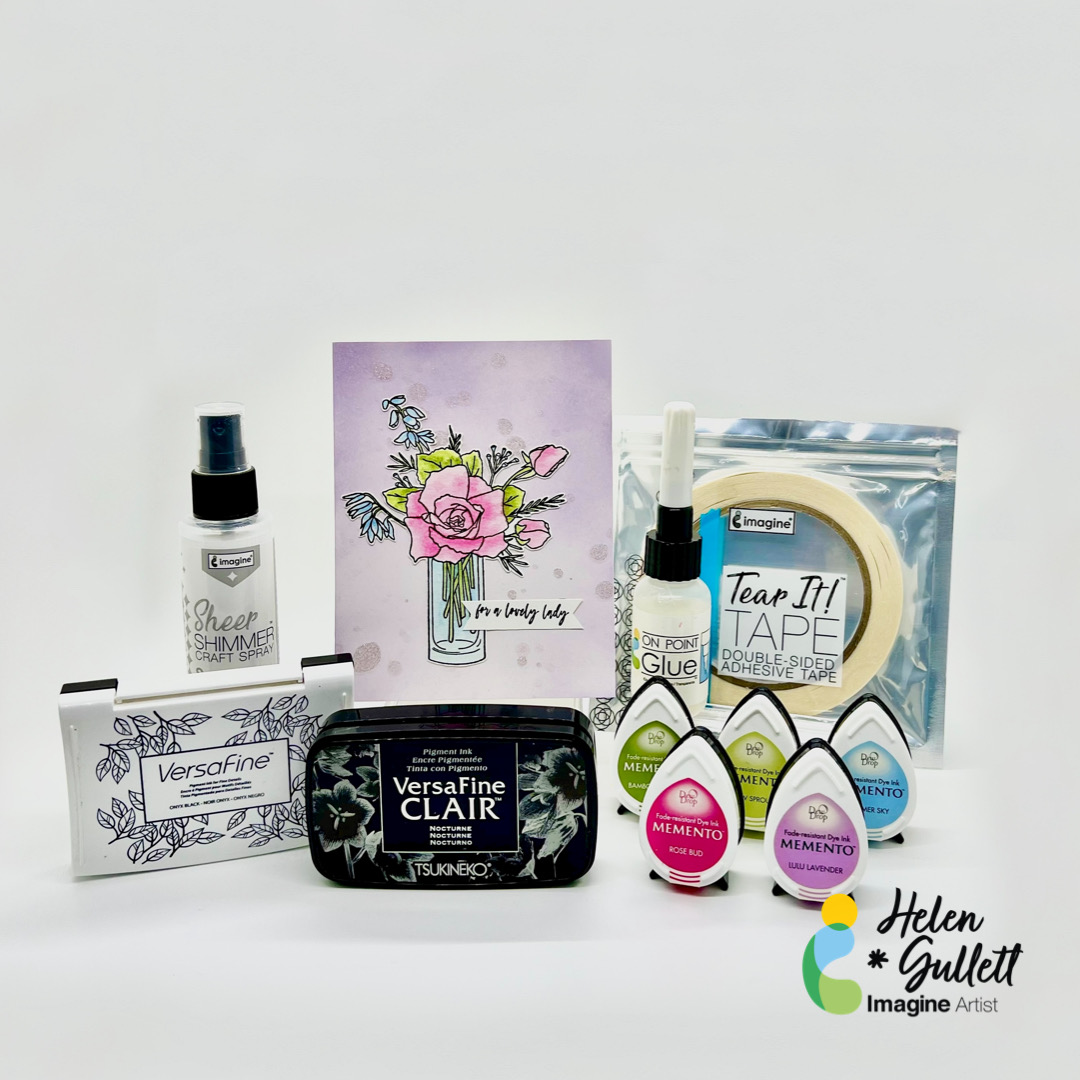
Step 1 Cut a piece of watercolor paper into 6 inch x 5 inch size. This size fits on my stamping tool. Then, stamp the image on the watercolor paper with Versafine Onyx Black ink pad.
Step 2 Dab some of the Memento DewDrop Inks (Rose Bud, Bamboo Leaves, New Sprout, and Summer Sky) on the craft mat.
Add a couple drops of water from the waterbrush on the ink to turn it into watercolor paint. Pick up the ink with the waterbrush and paint the flower and vase.
Dry the painted image with a craft heat gun.
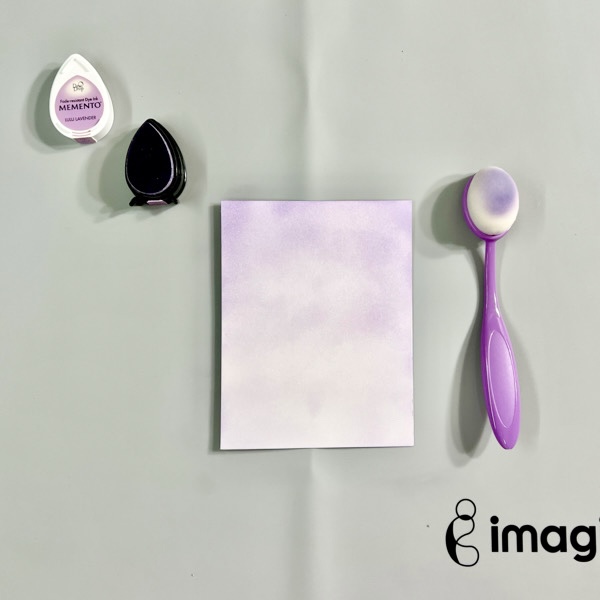
Step 3 On a piece of white cardstock, add some of the Lulu Lavender ink using the blending brush. Build up the color from darker to lighter to create the gradient look on the background.
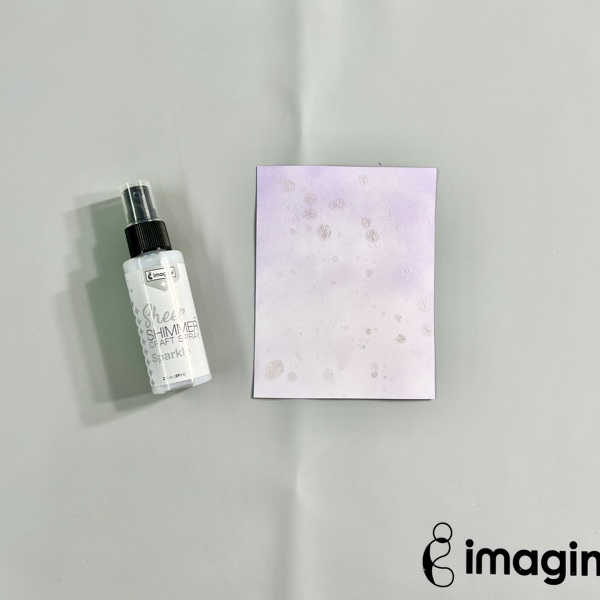
Step 4 Once done with adding color on the cardstock, lightly spray some of the Sparkle Sheer Shimmer Craft Spray. And then use a small flat brush, add some extra splatter on it for more texture.
Using a craft heat gun, dry the background panel.
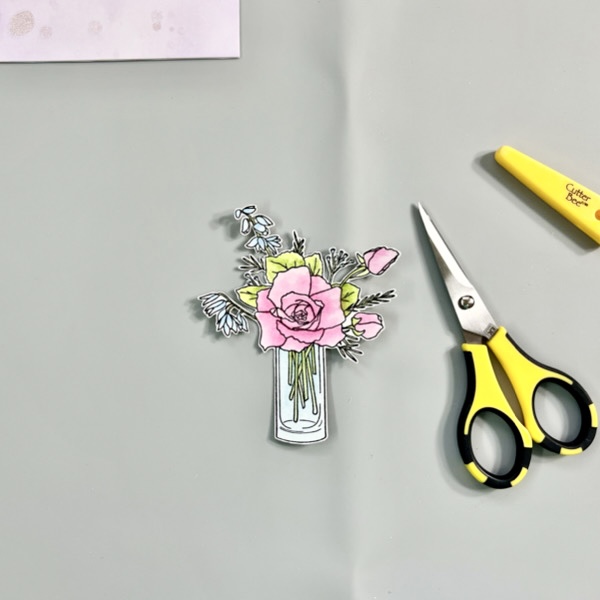
Step 5 Fussy cut the flower with micro-tip scissors. Optional: you can use a die if you use a stamp set that has a matching die set.
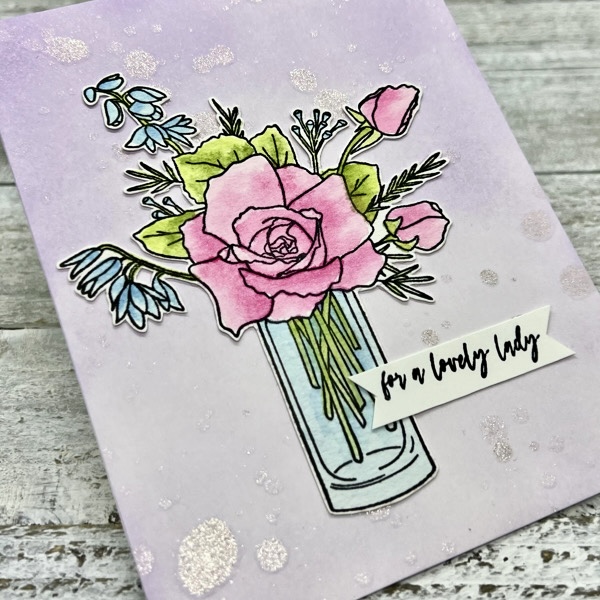
Step 6 Stamp the sentiment on a white cardstock using the VersaFine Clair Nocturne, dry the ink with a craft heat gun, and then cut it into a sentiment banner with scissors or paper cutter.
Step 7 Add the background panel on an A2 card base using the Tear It! Tape. Add the flower and sentiment to the card using the On Point Glue.
That’s my project for today. Hopefully, you’ll like this project and give it a try. Thanks so much for stopping by our blog today. Have a wonderful day!
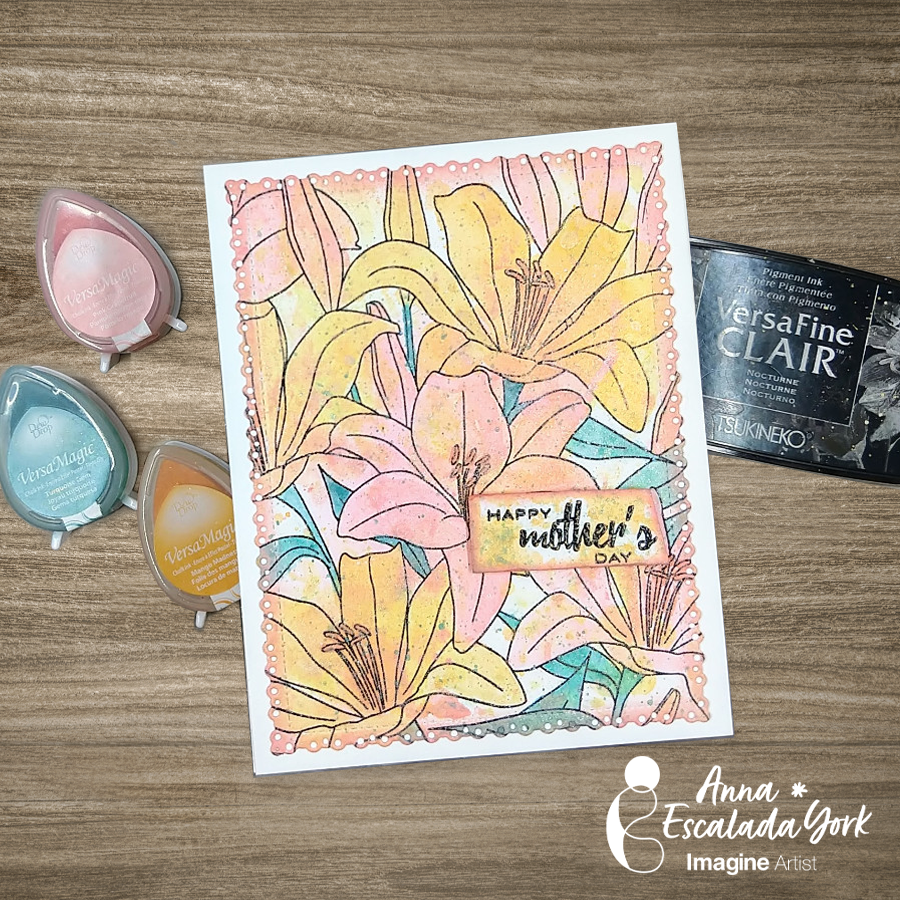
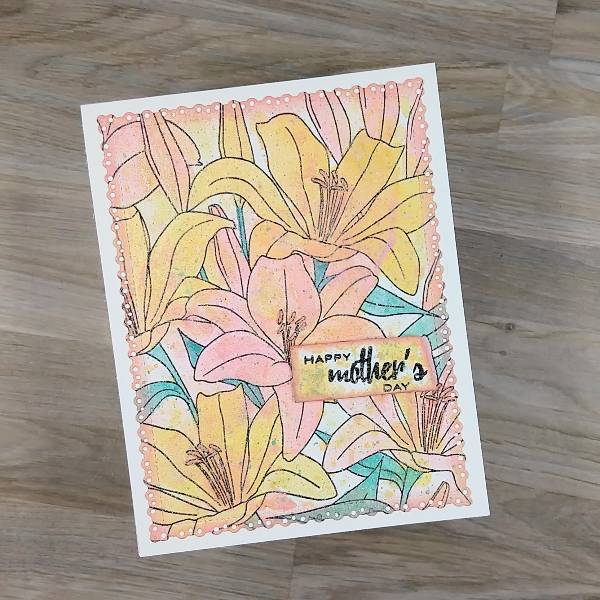
In today’s tutorial, I am sharing the card I made for my mom for Mother’s Day, using sprays and ink mixed with Sheer Shimmer spray to watercolor the images.
Skill: Intermediate Time: 1.5 hours
Directions:
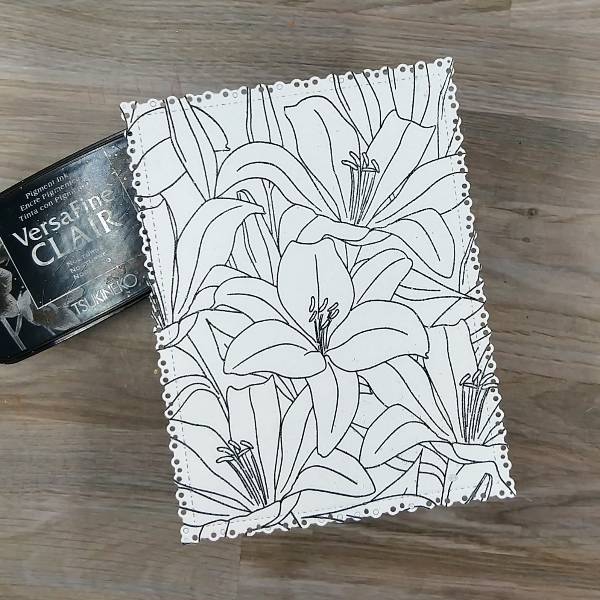
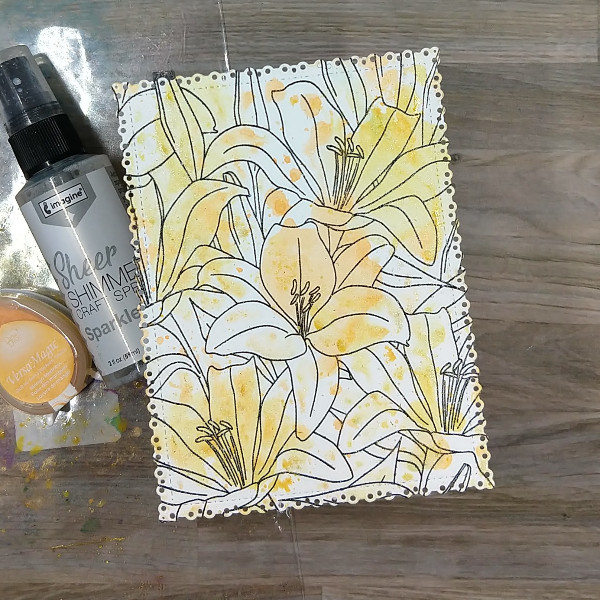
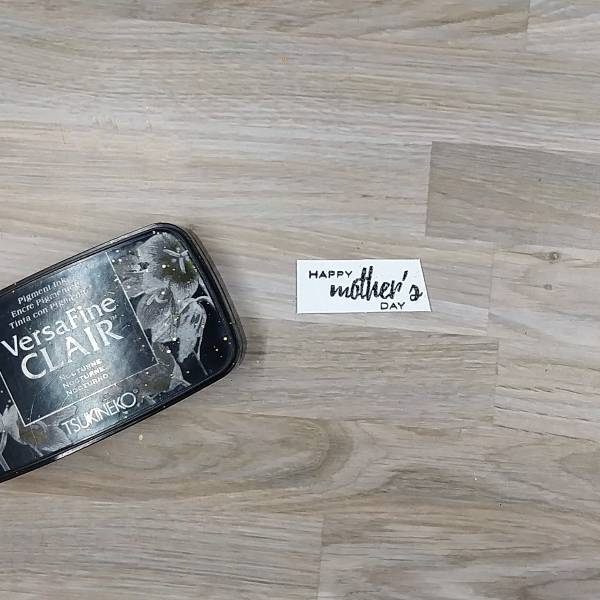
Step 1: Use a die cut to create a watercolor paper panel and then stamp a large flower stamp with Nocturne VersaFine Clair Ink. Heat emboss with clear embossing powder
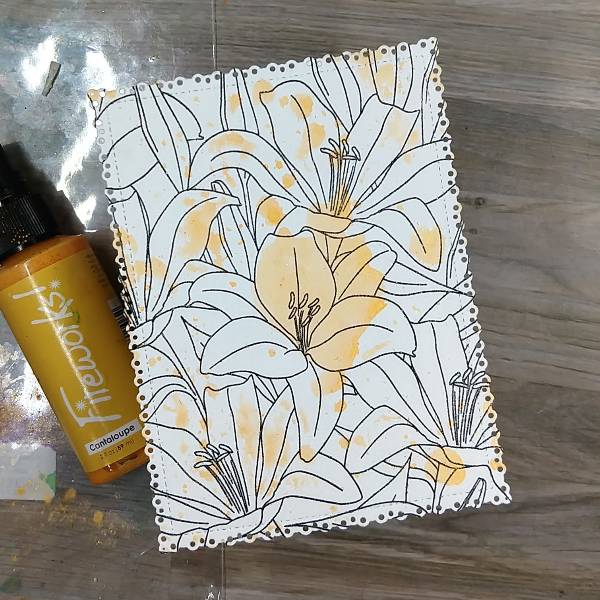
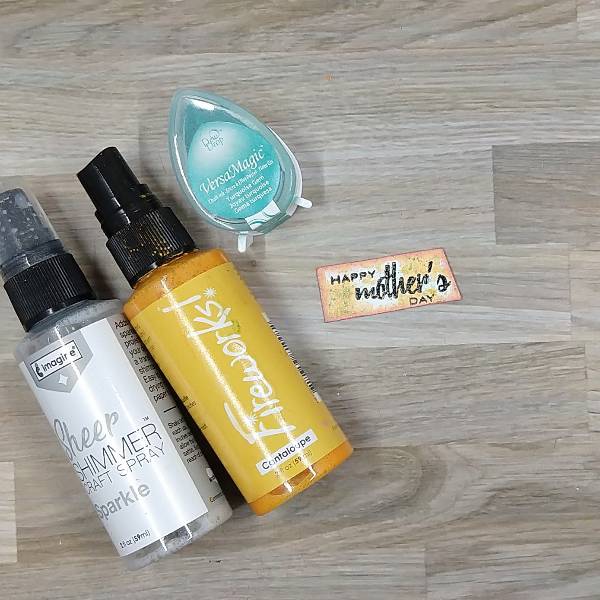
Step 2: Spray Cantaloupe Fireworks! Spray onto a piece of scrap acetate packaging, and press the sprayed acetate onto the stamped panel, making sure to get spray on multiple parts of the stamped panel. Let dry.
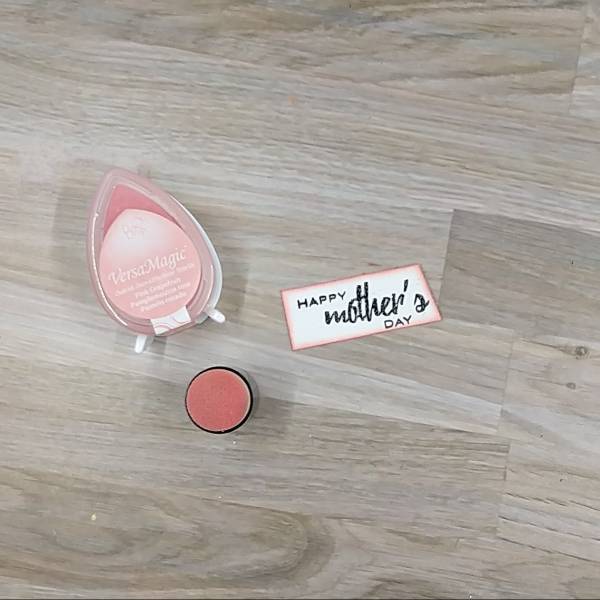
Step 3: Press the Mango Madness VersaMagic Chalk Ink pad onto the acetate packaging. Then spray Sparkle Sheer Shimmer Craft spray onto the ink to give it a watery consistency. Then press this color of yellow ink onto the stamped panel to add interest and a variety of colors. Let dry.
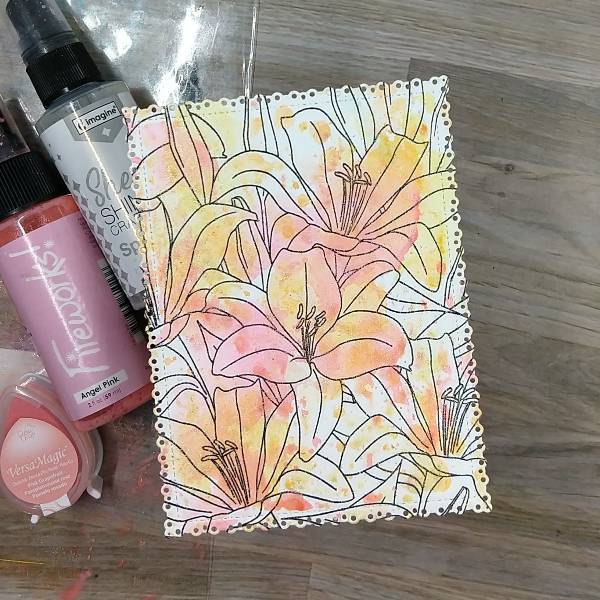
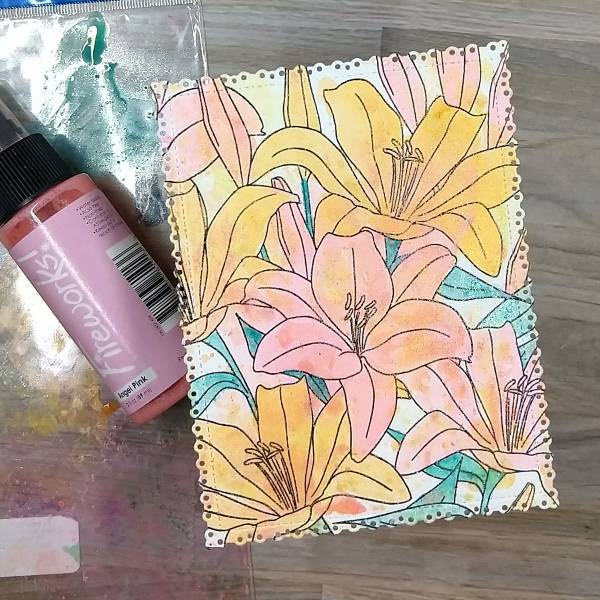
Step 4: Repeat the process with pink inks. Spray Angel Pink Fireworks! Spray onto the acetate packaging and press the packaging onto the stamped panel. After the spray dried, press Pink Grapefruit VersaMagic Chalk Ink onto the acetate and spray it with more of the Sparkle Sheer Shimmer Craft spray and press that onto the stamped panel as well. Again, let dry.
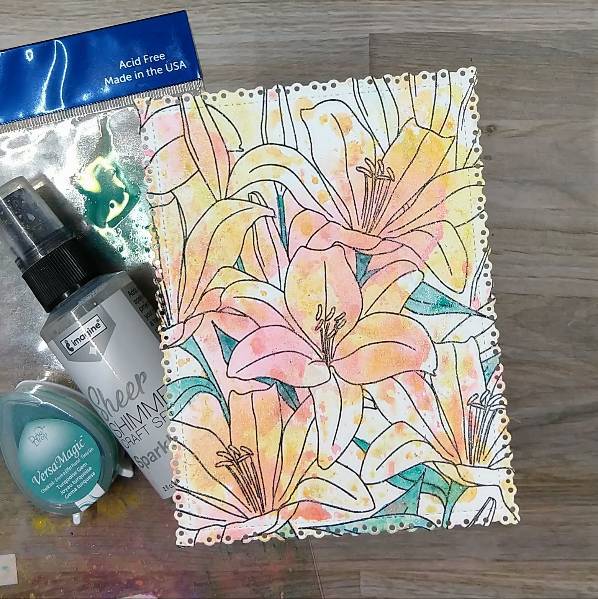
Step 5: Press the Turquoise Gem VersaMagic Chalk Ink pad onto the acetate packaging and spray the ink with more of the Sparkle Sheer Shimmer Craft Spray to create a watercolor consistency. Then use a thin paintbrush to paint the leaves and stems of the flowers turquoise. Let dry.
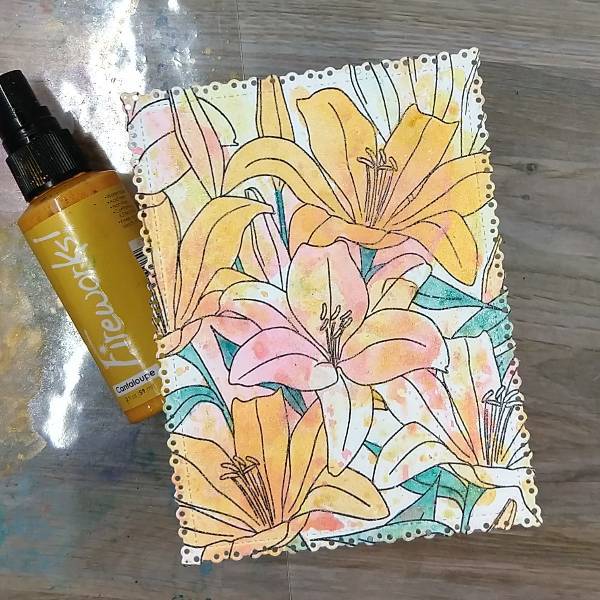
Step 6: Spray more of the Cantaloupe Fireworks! Spray onto the acetate packaging and use the spray to watercolor about half of the flowers yellow. Let dry.
Step 7: Spray more of the Angel Pink Fireworks! Spray onto the acetate packaging and then paint the rest of the flowers pink. Again let the spray dry.
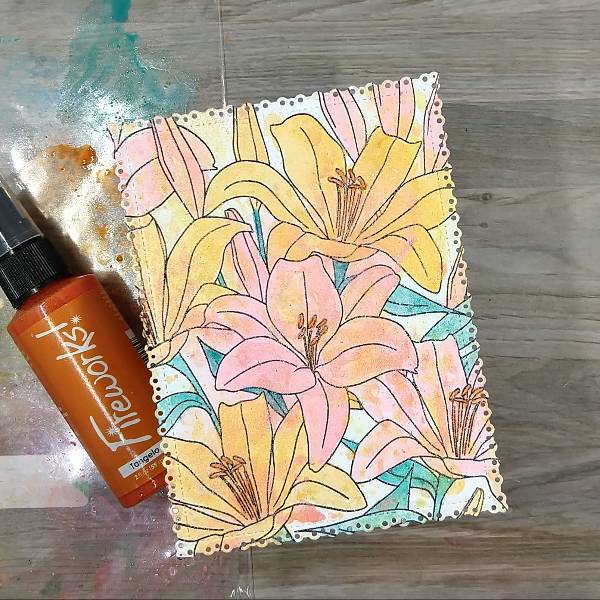
Step 8: Spray Tangelo Fireworks! Spray onto the acetate packaging, and use it to paint the anthers and filaments (center parts) of the flowers. Let dry.
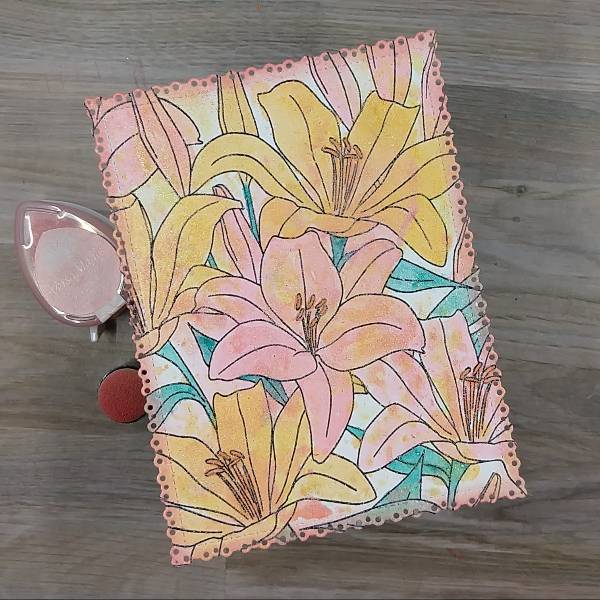
Step 9: Use an ink dauber to ink blend the edges of the panel with Pink Grapefruit VersaMagic Chalk Ink. (I ended up touching up the leaf on the bottom edge by painting a second layer of the Turquoise Gem VersaMagic Chalk Ink mixed with water to make sure the turquoise color wasn’t lost.)
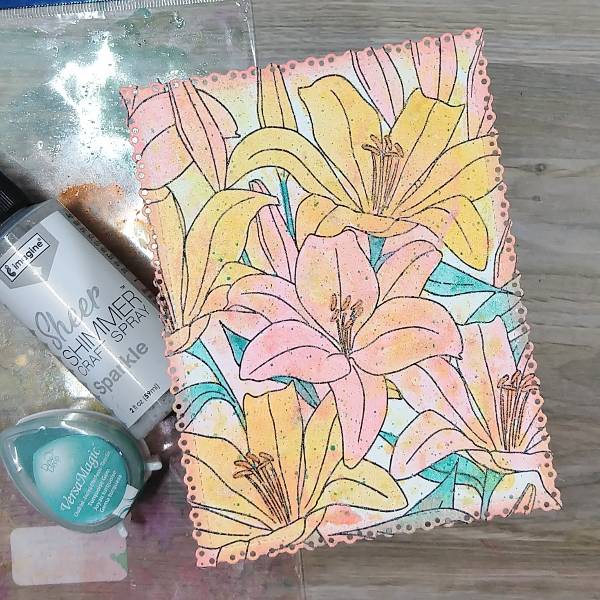
Step 10: Press the Turquoise Gem VersaMagic Chalk Ink pad onto the acetate packaging and spray the ink with more of the Sparkle Sheer Shimmer Craft Spray to create a watercolor consistency a second time. (In my case, I had leftover from step 5, so I used that.)
Hold a paintbrush saturated with the turquoise watercolor parallel to the panel and tap it against your finger. Repeat if needed and let dry.
Step 11: Stamp a sentiment onto a piece of watercolor paper with Nocturne VersaFine Clair ink. Heat emboss with clear embossing powder and trim with scissors or a paper trimmer.
Ink blend around the edges of the stamped layer with more of the Canary VersaColor ink with an ink dauber.
Step 12: Use an ink dauber to ink blend the edges of the sentiment strip with Pink Grapefruit VersaMagic Chalk ink.
Step 13: Spray one part of the acetate packaging with Cantaloupe Fireworks! Spray and press Turquoise Gem VersaMagic onto another part of the acetate before spraying it with more Sparkle Sheer Shimmer Craft spray. Alternate pressing the sentiment strip into both colors of spray before splattering the strip with more of the turquoise ink. Let dry.
Step 14: Glue the panel onto an A2-sized white card base and attach the sentiment onto the card with some foam tape for dimension to finish the card.
Other • Altenew – Stamp – Extra Special stamp set • Altenew – Tape – Instant Dimension Foam Tape • Gina Marie Designs – Die – Pleated Lace Rectangles die set • The Ton Stamps – Stamp – Lily Fields • Clear embossing powder Scissors • Glue
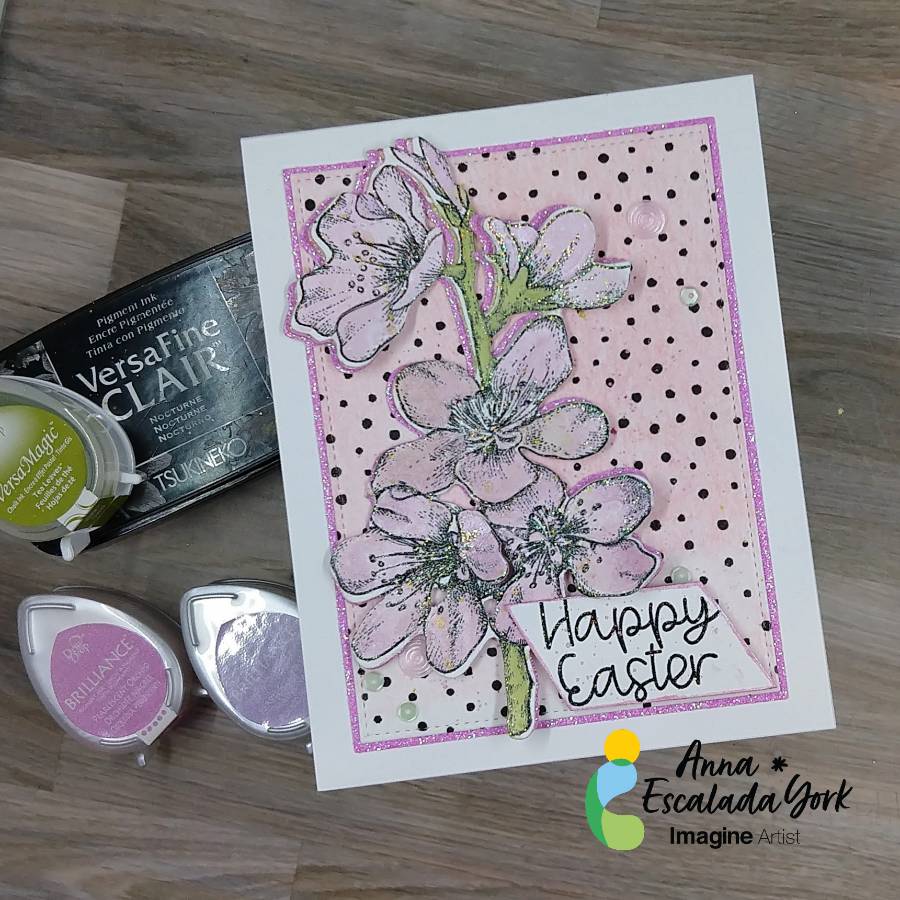
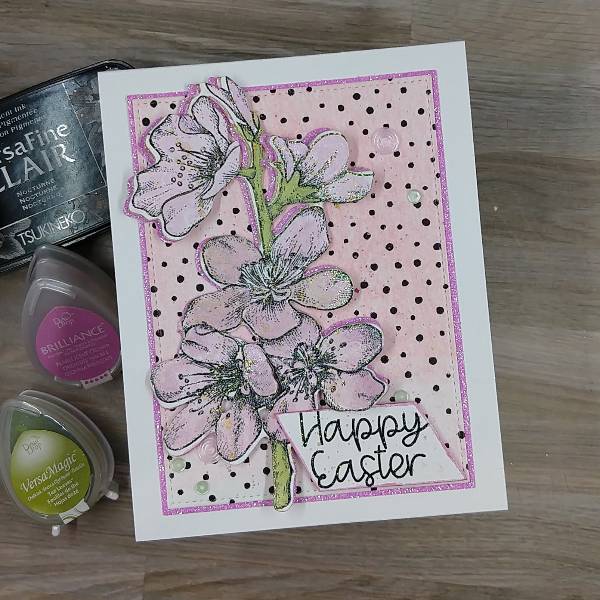
– In today’s tutorial, I will show you how to use Brilliance Pigment Ink and VersaMagic Chalk Ink to watercolor an image. This is a wonderful way to stretch your supplies and possibly try a new technique. In addition, I will share some mistakes I made along the way while making this card.
Skill: Intermediate Time: 1.5 hours
Directions:
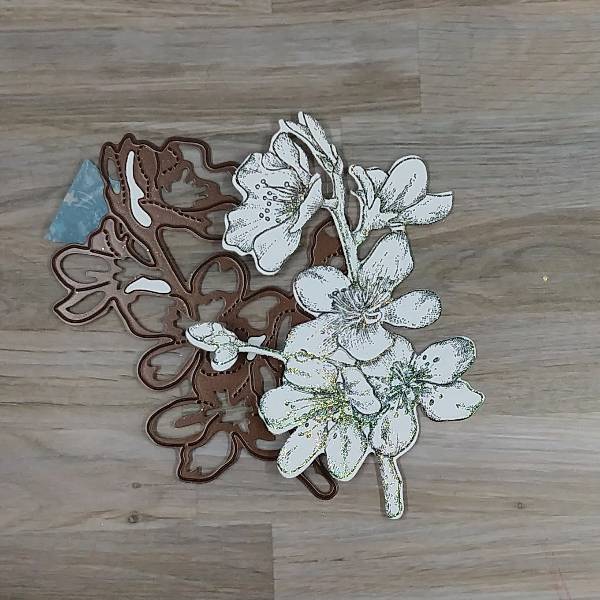
Step 1: Using a stamping platform, stamp the floral image with Nocturne VersaFine Clair ink. Optional step: Heat emboss with a clear or holographic embossing powder. I did this because I didn’t want to wait for the VersaFine Clair ink to dry.
Step 2: Die cut the floral image with the corresponding die. I was “off” in the die cutting and so some of the stamped image was cut off. You can mostly see this on the singular bud on the left side of the image. Not shown: Using the same die to die cut a piece of pink glitter cardstock.
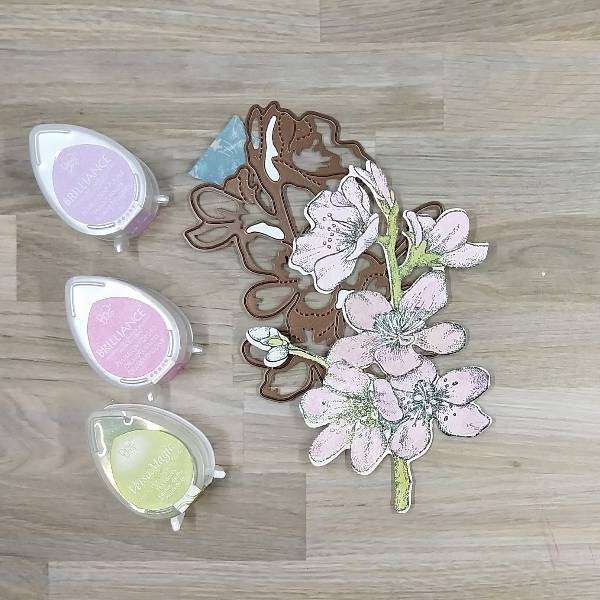
Step 3: Press the Pearlescent Orchid Brilliance Dew Drop pad onto a piece of acetate packaging and spray with Sparkle Sheer Shimmer Spray. On another part of the same acetate packaging (or possibly a palette or other non-porous surface, press the Pearlescent Purple Brilliance Dew Drop pad onto the surface and spray with more of the Sparkle Sheer Shimmer Spray. You should have two areas of color that you can mix with the spray to use as a watercolor.
Paint each flower or bud with a single layer of Pearlescent Orchid Brilliance Ink mixed with the Sparkle Sheer Shimmer Spray. Let the watercolor dry. Add some Pearlescent Purple Brilliance Ink mixed with the Sparkle Sheer Shimmer Spray to the edges of the petals to add some dimension and interest.
Repeated the process for the stems. Press the Tea Leaves VersaMagic Chalk Ink pad onto a piece of acetate and Spray the ink with more of the Sparkle Sheer Shimmer Spray. Use a paintbrush to paint the stem green. Let dry. If desired, repeat the process to amplify the intensity of the green watercolor. Let dry.
Not pictured: Gluing the pink glitter cardstock die cut behind the flower so that it can be seen on the left side of the floral image.
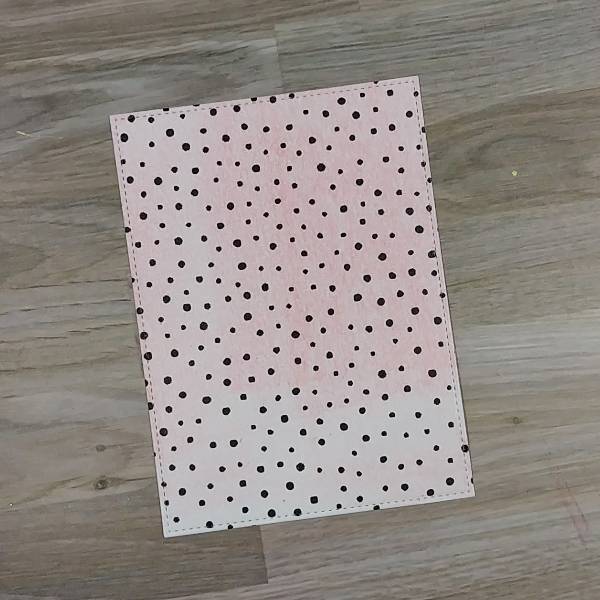
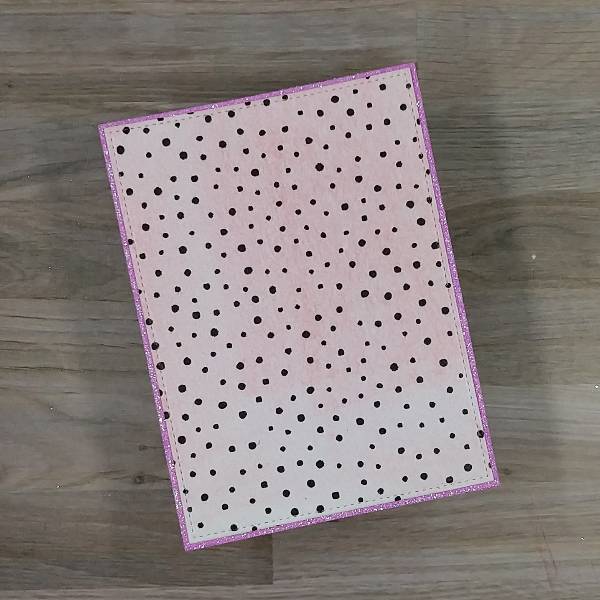
Step 4: Place a piece of wide washi tape over a piece of cardstock for the background panel before die cutting that cardstock. (I used a leftover piece of cardstock that had some leftover pink gel press printing on it so that you can see a little of the pink through the washi tape). Don’t have washi tape? Use a piece of patterned paper.
Step 5: The die cut set that was used to make the panel allows for two layers if desired. To make the matte layer, use a slightly larger die to die cut a piece of pink glitter cardstock and then glue the two panels together. Set them aside to dry.
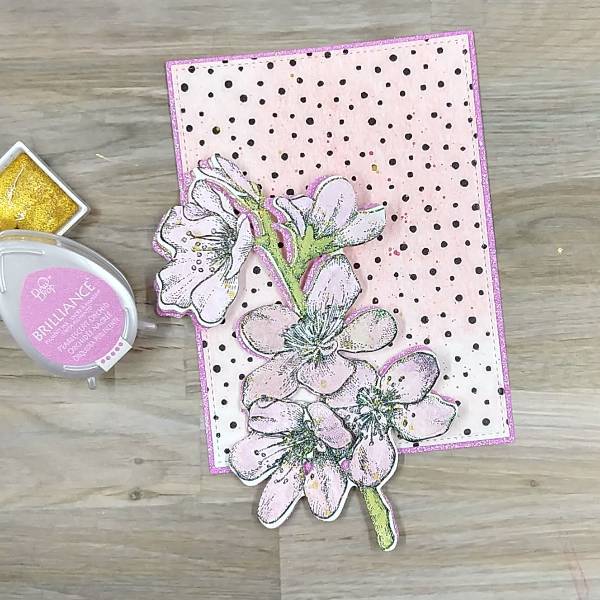
Step 6: Press more of the Pearlescent Orchid Brilliance Ink Dew Drop onto the acetate packaging and spray more of the Sparkle Sheer Shimmer Spray onto the ink to create more watercolor and splatter both the floral image and the background with the orchid colored watercolor. To splatter, extend your finger parallel to the paper and tap a brush that has the Orchid watercolor on it multiple times. To create a more uniform splatter, move the paint brush or the paper around so that the splatter is added to a variety of places.
Spray more of the Sparkle Sheer Shimmer Spray (or water) into the gold watercolor pan and then tap the paintbrush across the floral image and panel a second time. Let dry.
As you can see in the picture, between step 3 and now, the singular bud on the left was trimmed from both the stamped layer and the pink glitter cardstock so the die cutting mistake was eliminated.
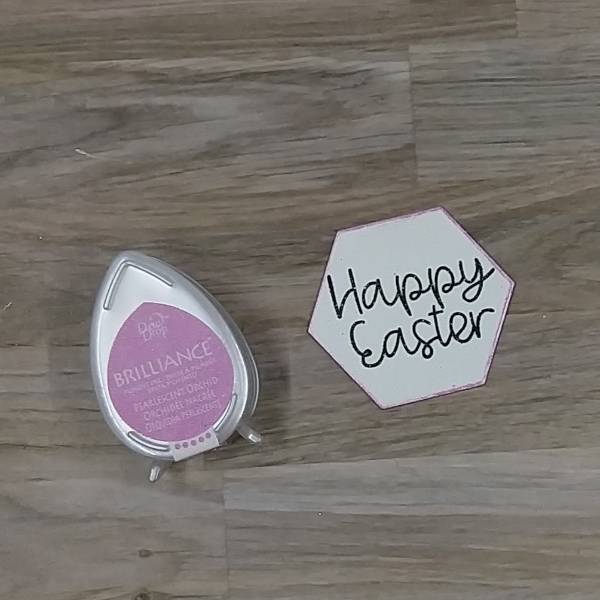
Step 7: Stamp the sentiment with Nocturne VersaFine Clair ink. Optional step: Heat emboss the ink with holographic embossing powder to eliminate drying time. (I originally was going to use this die cut sentiment, but later realized that it wouldn’t fit. I also forgot to take pictures of the sentiment I trimmed with my paper cutter and ended up adding to the card. So please use your imagination.)
Step 8: On the sentiment that you see on the finished card, I trimmed the sentiment with my paper trimmer. The one picture above was die cut with a hexagon die. Regardless of how you end up shaping your sentiment (using a trimmer or a die), press the edges of the sentiment into the Pearlescent Orchid Brilliance Dew Drop pad to add color to the edges. Set aside to dry.
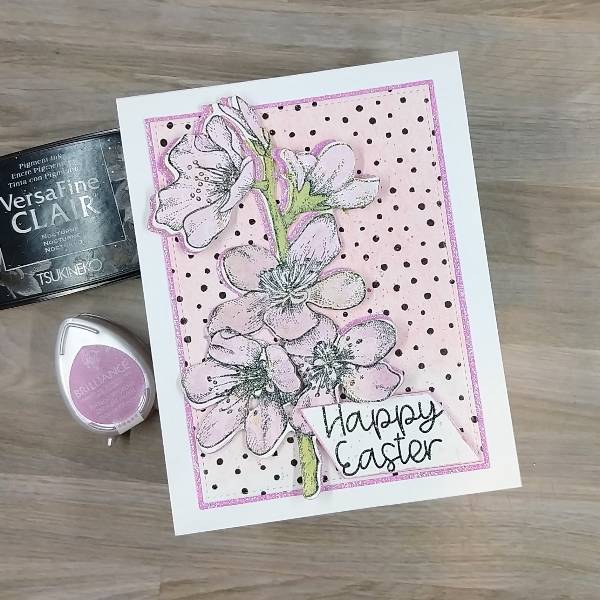
Steps 9 and 10: Time to glue! Glue the flower on the left third of the background panel. Then glue the panel onto an A2-sized white card base.
For step 10, attach foam tape behind the sentiment except on the upper left corner (since that will be overlapping with the floral image. Attach the sentiment to the lower right corner of the panel.
Step 11: Add pink and green sequins onto the card–on the lower left corner, close to the sentiment, and on the upper right corner of the card panel.