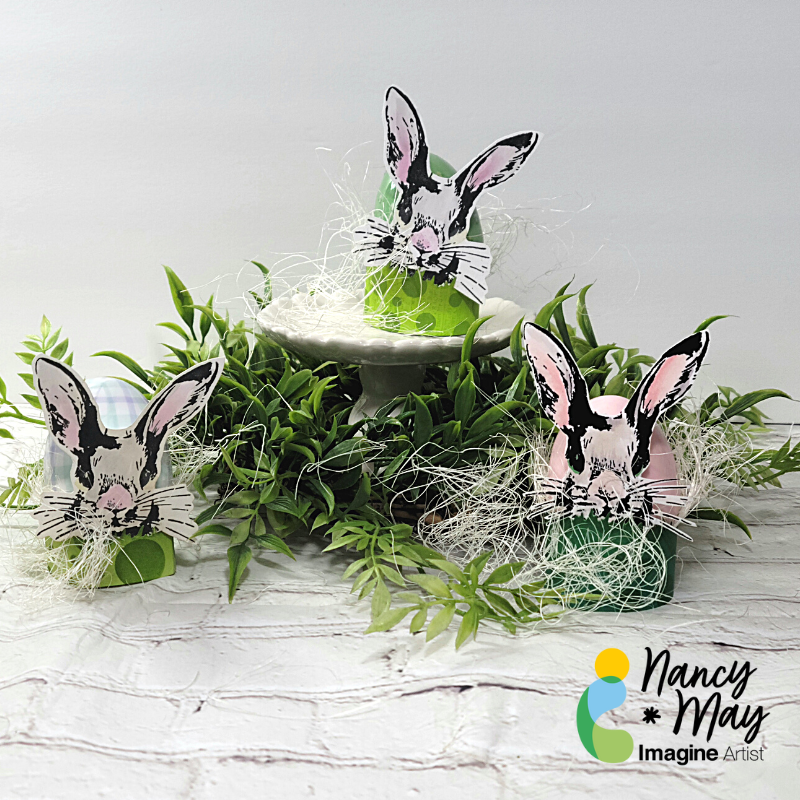
Hey y’all. I am going to share how you can create simple Easter egg holder rings that you can use to create an Easter display to match your style, your décor, etc. The sky is the limit! Let get to it!
~Nancy
==============
Skill: Beginner (but adaptable to more advanced learners)
Hello! Since birthdays happen all year, it’s good to have a big stash of birthday cards at the ready for whenever you need one. Since I love to use stencils, I thought I would use a bunch of them together with many colors of Memento Inks from Imagine.
*Some affiliate links are used in this post. That means that if you shop through these links, I may receive a small compensation, at no cost to you.For more information, please see my Affiliates page, where I also have some coupon codes.
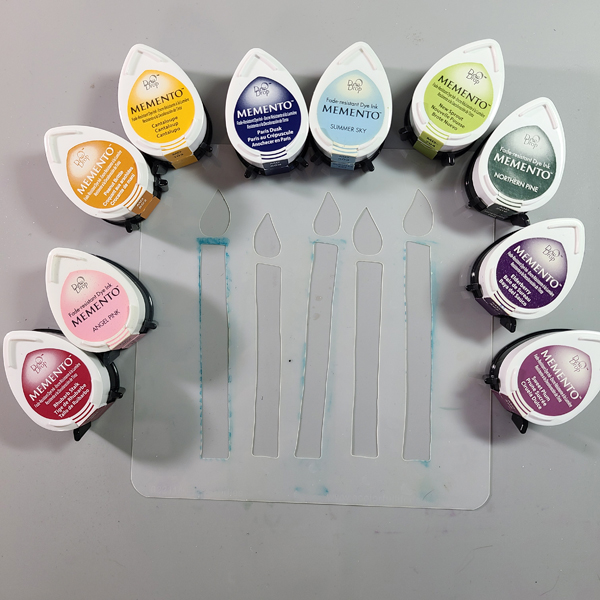
I chose a light color and a dark color Memento Ink for each candle of the Big Candle stencil.
Step 1:
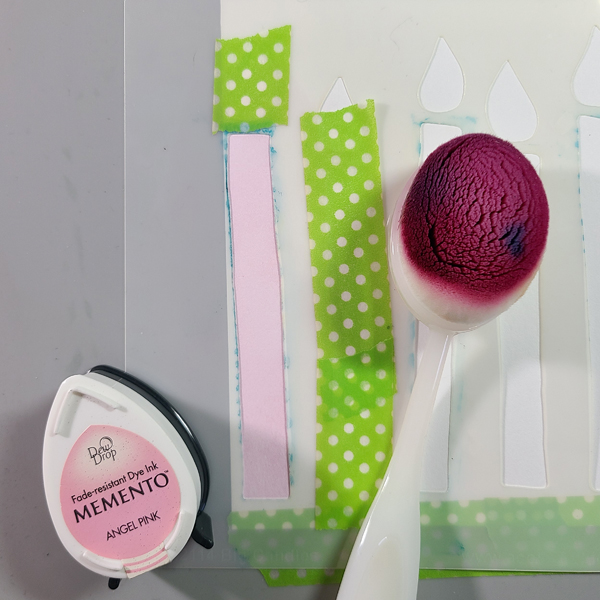
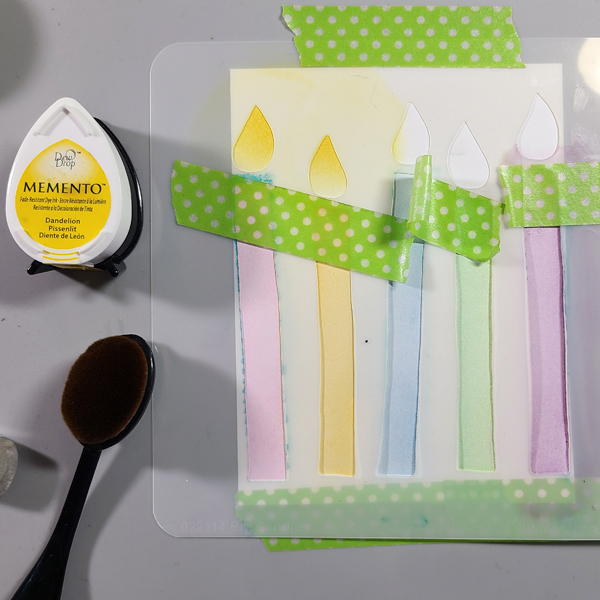
Step 1: Use washi or low tack tape to stick down your cardstock and stencil. Mask off any areas that you don’t want your first color of ink on. I masked off the second candle and the flames.
Step 2:
Ink the candles with the lighter color from the pairs you chose. Be sure to mask off the areas that you don’t want your ink to go.
Step 3:
Mask off the candles so that you can ink the flames. I used Dandelion on the entire flame, and then Tangelo on the lower area of the flame.
Step 4:
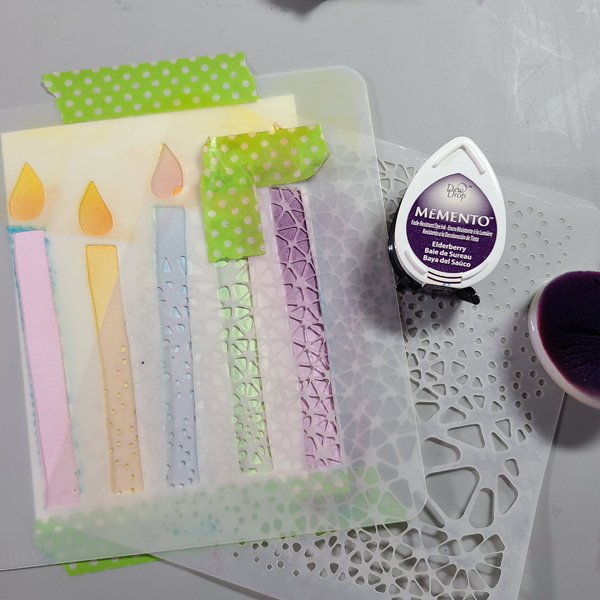
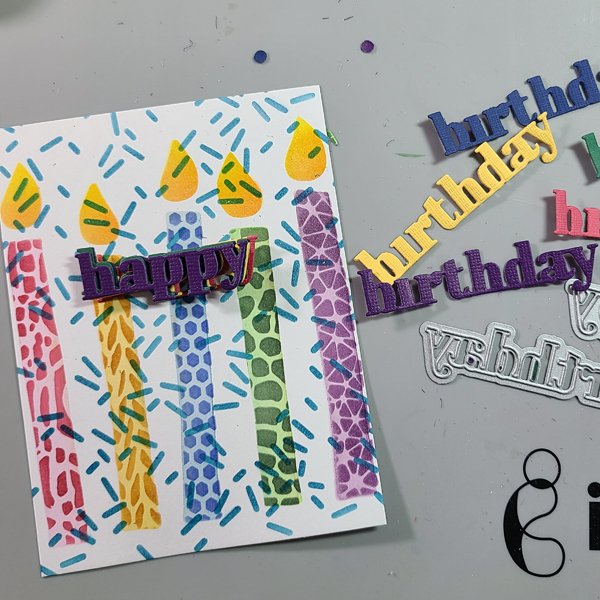
Choose the stencils you want to decorate each candle with and ink with the darker shades you chose. You must keep the original candle stencil in place so that you only ink the candle. Slip the patterned stencil under the candle stencil to make inking easy. Be sure to mask off the other areas again!
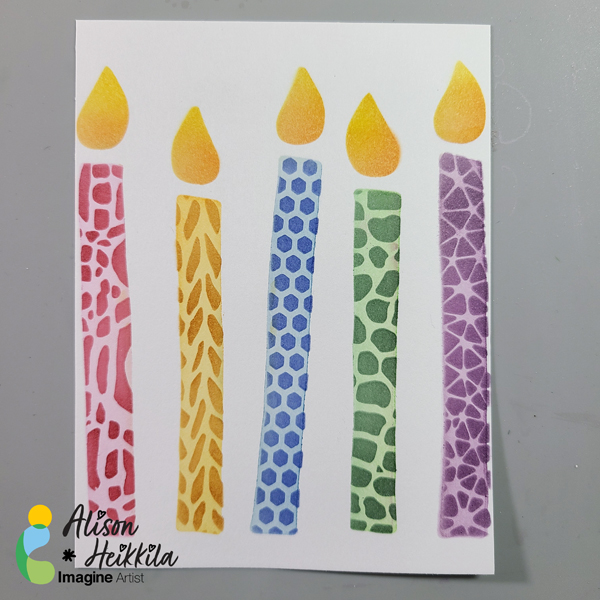
This is what the completed candles look like. You can stop here, if you want, but I kept going to make it even more festive!
Step 5:
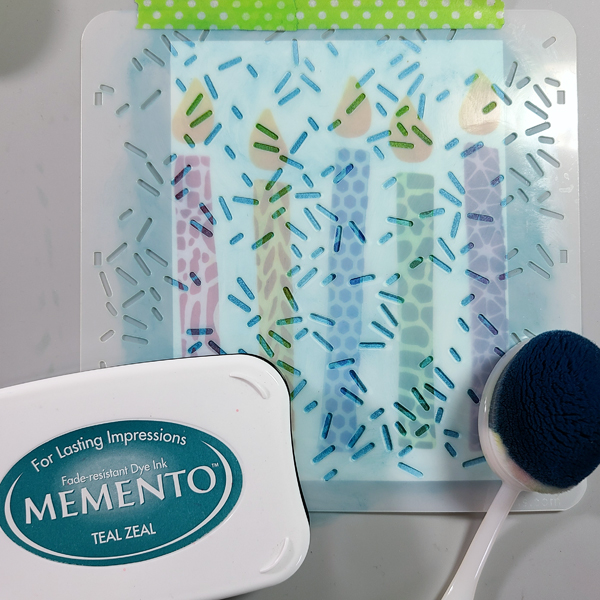
Ink a stencil that looks like confetti or sprinkles on top of the entire panel.
Step 6:
Die cut your sentiment. First, I was only going to die cut my “happy birthday” out of purple, but I decided to cut one sentiment out of each main candle color so that I can have a stacked, 3D embellishment. You can glue these together with On Point Glue.
Step 7:
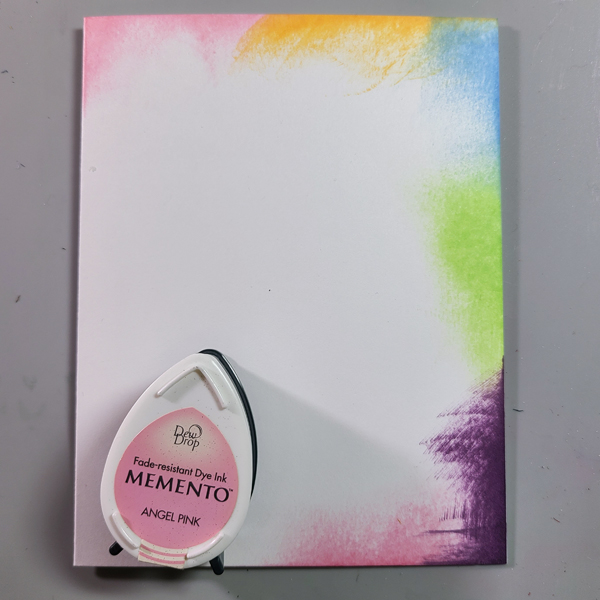
Ink your card base using the lighter colors of Memento Ink, directly from the pad. I worked my way around my palette of colors two times.
Step 8:
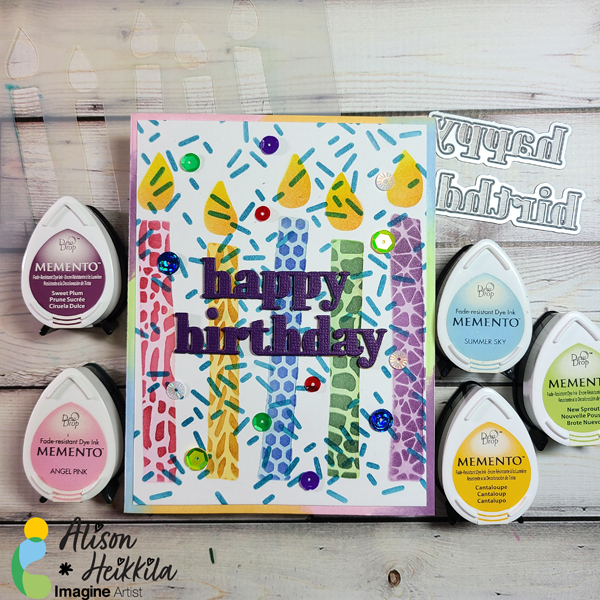
Glue the card front and sentiment on to the card base. Optional: Add sequins or rhinestones to the card front with On Point Glue.
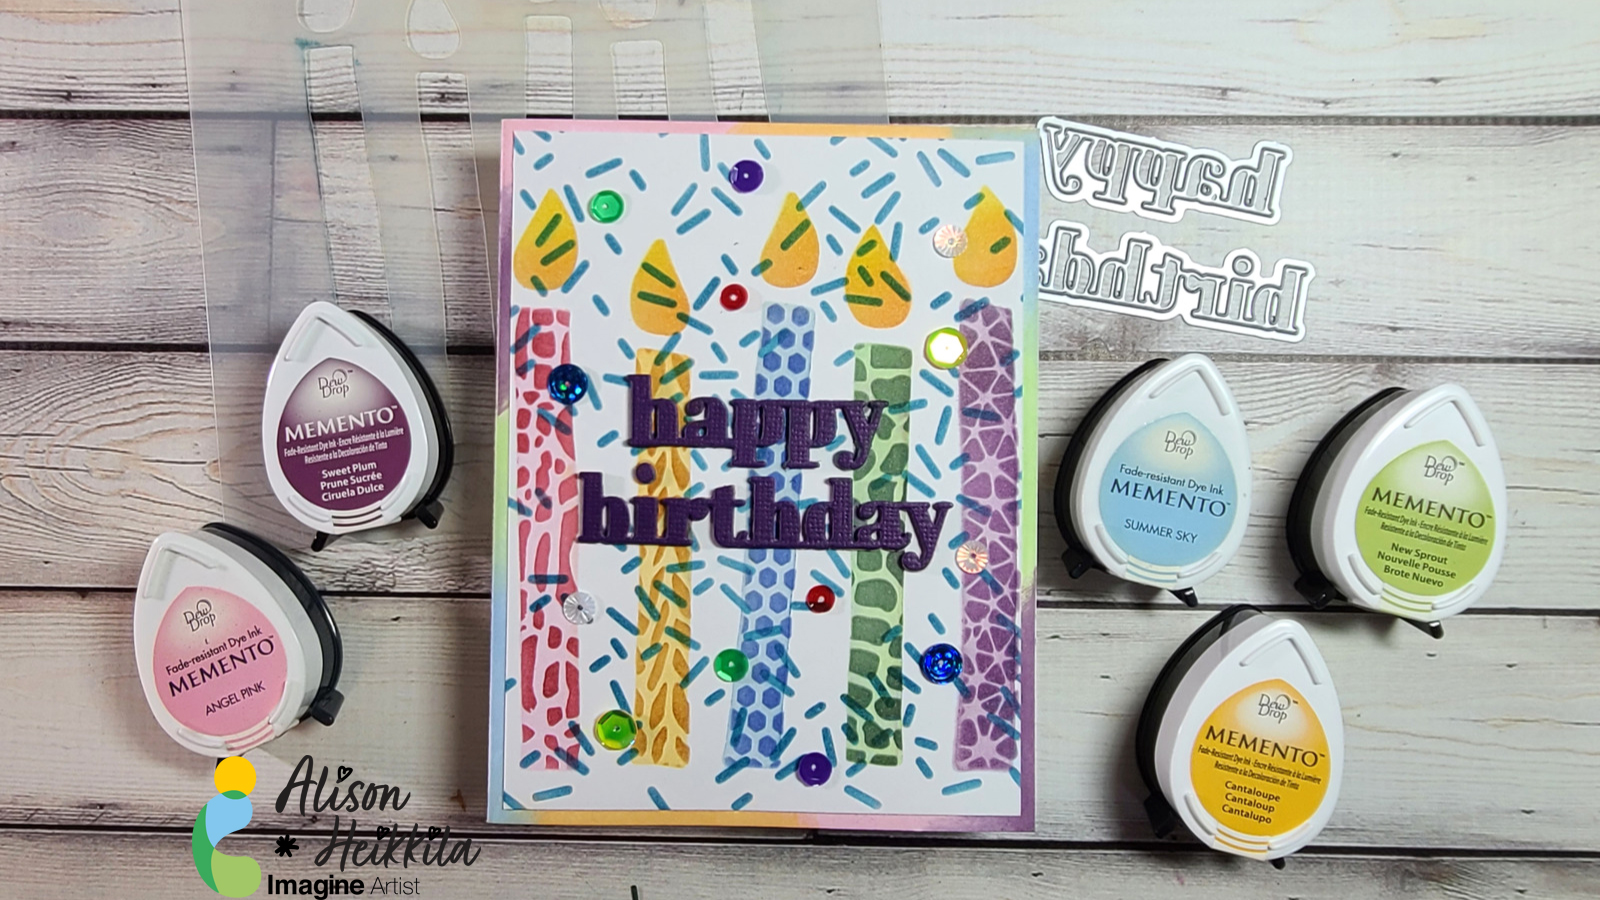
Here is the finished card! I love how happy it is, and it can easily work for anyone. It’s fun to work with so many colors and so many patterns of stencils, all on one project. I hope that you break out some of your stencils and try this technique! Thanks for stopping by. Have an inspiring day!
Vertigo is a beautiful translucent material to use in creating projects, in today’s tutorial, I am sharing tips and hints to make your project shine! The perfect ink for this box is StazOn, as it is the only ink that will dry on Vertigo and other plastics.
Skill: Intermediate
Time: 1 hour
Directions:
Step1:
Vertigo can be cut with scissors OR with a simple die. Complex dies do not work well with most plastics, Vertigo included. This particular box needed 8.5” by 5” section of Vertigo, 12” x 12” sheets can be purchased directly from Imagine Crafts website. Recycled packaging may be substituted for Vertigo, however the results will not have the stunning effect the the patterns that Vertigo provides. The Pebbles pattern of Vertigo was used for my box.
Step 2:
Place a few drops ink from StazOn Blazing Red inker on a plastic surface to use as a palette. On the INSIDE of the box use a cotton swab to color each of the pebbles from the center out. A little goes a long way with the translucent colors.
Step 3:
Metallic StazOn ink is slightly less translucent than the other colors. To capture more shimmer, apply a drop or two of StazOn Metallic Gold on the INSIDE of the box and move the ink with a cotton swab to color around the pebbles.
Step 4:
Continue to add StazOn Metallic Gold ink to cover the remaining areas of the inside of the box. Set aside to dry, as the Metallic ink is a bit thicker and takes a longer to dry.
Step 5:
Using StazOn Jet Black, stamp the “Merry Christmas” sentiment on the OUTSIDE of the box. This keeps the interior of the box ink from lifting and to have the correct orientation.
Step 6:
Tear It! tape is perfect to hold the bottom of this gift box together. Assemble box and determine the best placement for the Tear It! tape. Unfold box and add Tear It! tape, my project called for five sections to hold the box in shape.
Remove Tear It! Tape liner and assemble gift box.
Decorate with matching ribbon and fibers to close the top and keep your gift secure.
Hello Friends! Katy here and for todays project I thought I would used a variety of products with some die cuts to create an ornament for the Christmas tree.
In todays video tutorial I explain each layer of the ornament starting with the snowy background which uses the Creative Medium with a snowflake stencil, once dried I applied the Brilliance Ink in Pearlescent Orchid, Pearlescent Purple, Pearlescent Lavender and Pearlescent Sky Blue and was blown away. Check out the video for all the details on how this ornament came together.
creating art for Imagine Crafts! Today I have a new tutorial for you. This is an OLD technique it is still fun, but messy! What do you need? A fabulous VersaColor Ink and some painter’s tape or any masking tape!
Skill Level: Intermediate
Time to complete: 1 hour
Step 1
You will need a top-folding card base measuring 4 1/4 x 5 1/2“. You will also need another white panel measuring 3.75” x 5”. Grab your masking tape and a VersaColor ink. I used Cardinal. At this point you can put on some gloves if you want but I didn’t. I swiped the ink across a 5”piece of tap. I then laid the tape across the white card stock panel, put a piece of copy paper over it and pressed. I repeated this stripe 4 times. I like the texture of the stripe.
Step 2
Next I smushed some of the Cardinal ink on my glass mat, added water and with a paint brush I splattered the panel. I did the same with some gold water color paint. Finally, I spritzed the Sheer Shimmer Craft Spray in Sparkle all over the panel. Can you see the shimmer? It is pretty!
Step 3
Next, I cut the panel with a die and added a piece of red stock to the back. The red card stock is 1/4’’ larger than the striped panel. Adhere with some On Point liquid glue.
Step 4
Now cut a hole from the panel and the red card stock you used for the frame.
Step 5
Cut a panel of white card stock slightly smaller than your main panel. Add liquid glue to the back of the red circle. Use your main panel as a guide, place over the white panel and press your circle into place.
Step 6
Cut a slightly larger circle from acetate or old packing and glue to the back of the main panel. Add foam tape all around and add flat embellishments to the center. I used gold confetti from Kat Scrappiness.
Step 7
Die-cut a few of the medium sized snowflakes from the Kat Scrappiness Snowflake Trio and glue together. Then I used the Sheer Shimmer Craft Spray and spritzed the snowflake. I also splattered it with gold water color paint. It was still a bit too white so I pressed the snowflake into my Delicata Golden Glitz ink pad.
Step 8
Cut a circle frame using the die you used for the front panel and a slightly smaller one. Glue this inside the cut out on top of the acetate. Adhere the snowflake on top of the acetate and allow to dry. Add a sentiment, I used the Christmas Stack Sentiment from LDRS Creative with the Sentiment Stack Shadow. I glued these together and then popped it up with foam tape. I also added a few of the gold confetti around the outside of the card and some dots to the frame with a gold gel pen. I added foam tape to the back of the panel and adhered to an A2 top-folding, white card base.
I hope you enjoy this card and the tutorial. Thanks for stopping by.