Make a Purple “Good Vibes” Shimmery Greeting Card

by Jowilna Nolte

Make a Purple "Good Vibes" Shimmery Greeting Card

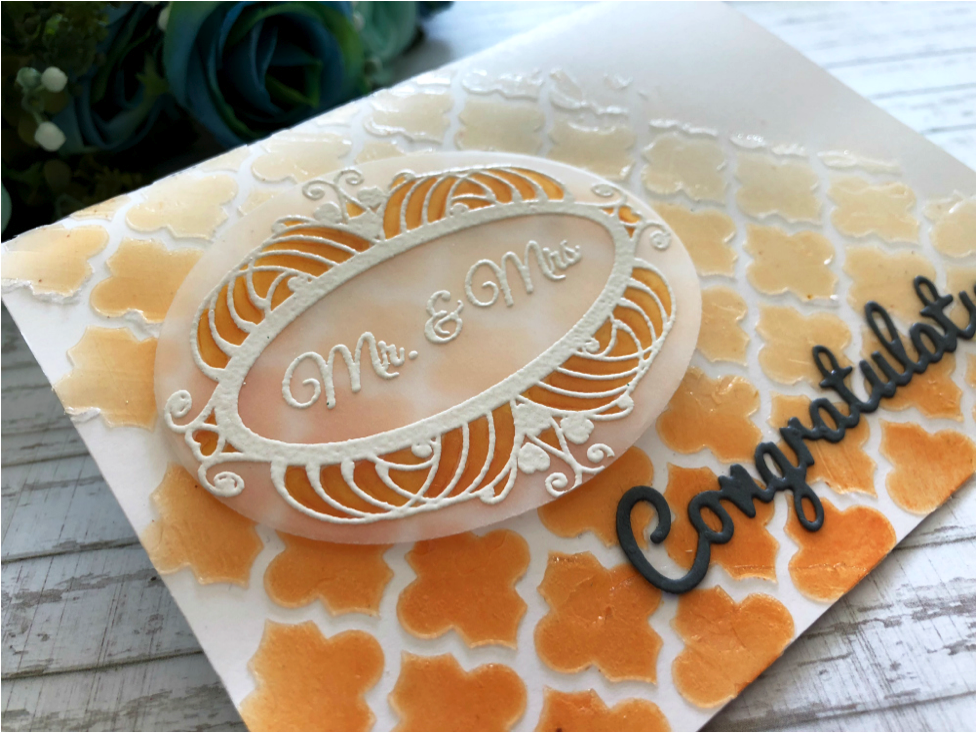
Creating subtle interest on cards and other projects is easy with the amazing products from Imagine and Tsukineko. I have been experimenting and creating purple background ombre effects using VersaFine Clair and Memento Luxe ink pads as well as some older favorites like Creative Medium and All-Purpose Inks. Take a look at how to make this card.

Skill: Beginner
Time: 30 minutes

Directions


Step 1

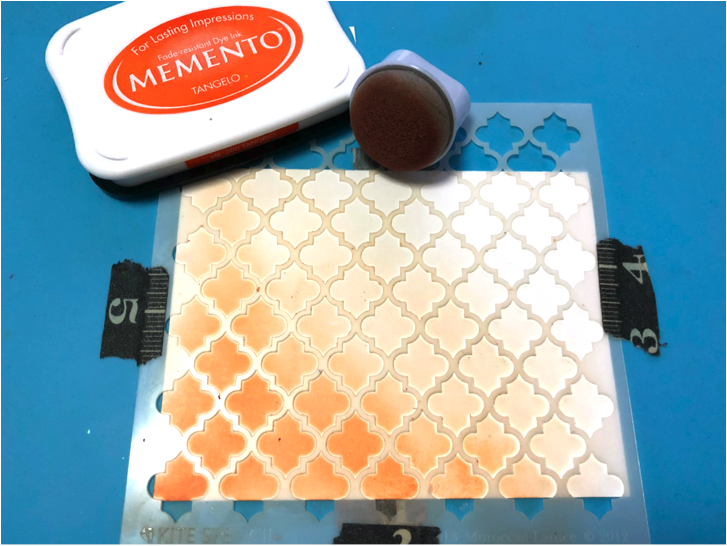
Use a jumbo dauber and blend a pattern through a stencil using Memento Luxe Sweet Plum.


Step 2

Continue the same pattern using a darker shade of ink like Memento Luxe Elderberry.


Step 3

The blending creates a perfect ombre effect going from light to dark. Did you know that Memento Luxe has superior blending qualities? It makes for the most amazing blended effects with its creamy effortless application.


Step 4

Add a slight shimmer to the blended effect by adding Creative Medium in Shimmer over the blended pattern.


Step 5

To create a shade of purple, mix a couple of drops of All-Purpose Ink in Orchid Odyssey into the Creative Medium.


Step 6

Paint the colored Creative Medium over the pattern and leave to dry. The end result is a subtle shade of purple removing the bright white background, but also adding a beautiful shimmer to the card.


Step 7

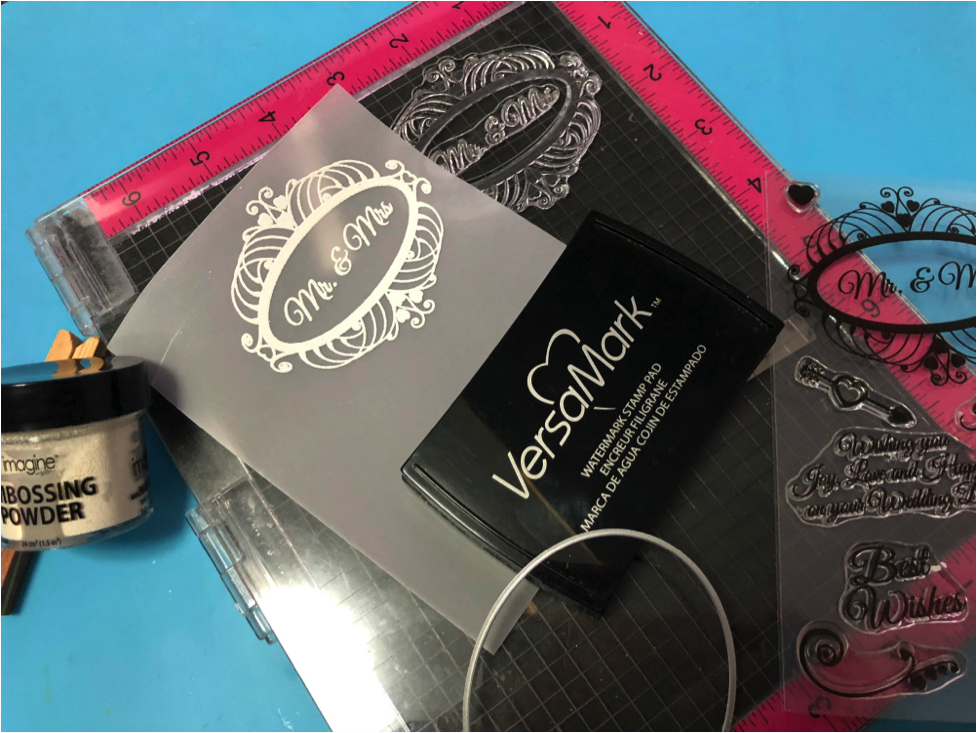
Use VersaFine Clair Monarch and stamp the “Good Vibes” sentiment onto white cardstock and cut it out.


Step 8

Stamp the sentiment again but directly onto the stenciled background and sprinkle with glitter embossing powder. Heat set the embossing powder to give a beautiful shimmering sentiment on the shimmering background.


Step 9

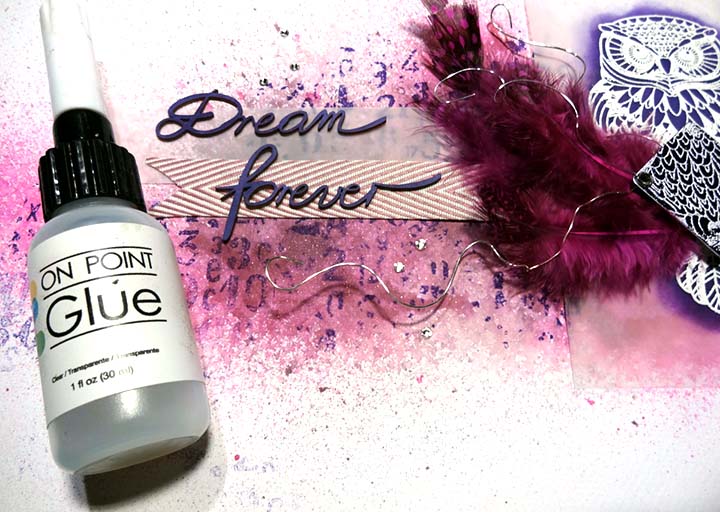
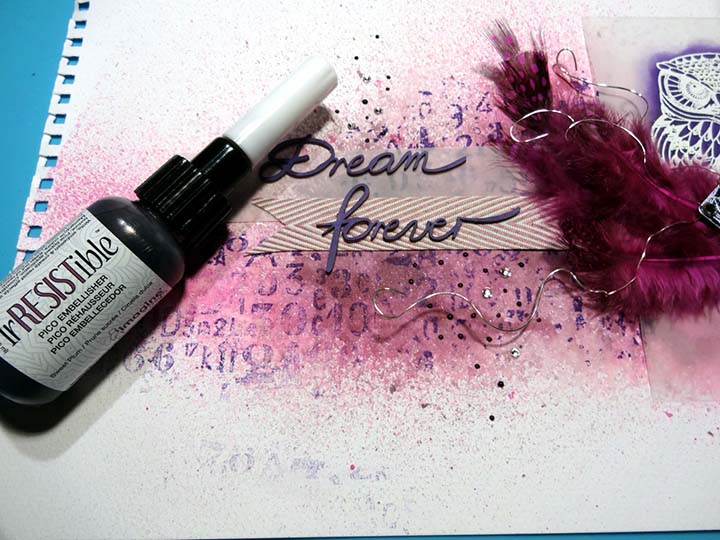
Layer the stamped sentiment slightly off-set from the embossed sentiment onto the card using foam tape for added dimension. The embossed sentiment below makes the stamped sentiment really stand out and creates loads of interest. Add irRESISTible Neon Purple splats to finish off your card.

Supplies

Imagine
Other
  • Cardstock – White
  • Kaisercraft – Good Vibes stamp
  • Sewing machine
  • Jowilna Nolte – stencil
  • Embossing Powder
  • Heat Gun
  • Paintbrushes
  • Palette
  • Pipette

See What Craft Supplies Our Artists Recommend for Weddings

See What Craft Supplies Our Artists Recommend for Weddings

There are so many kinds of craft projects that would successfully create a DIY wedding. We see all sorts of fabulous ideas on Pinterest and highlights from crafter’s blogs that blow our minds. We decided to ask our Artists in Residence (and some members of the Imagine team) to recommend their favorite Tsukineko or Imagine products to use in wedding cardmaking and crafting. Here is what they had to say!

Product Recommendations

3 Votes for Delicata!

Steph Ackerman

I recommend Delicata in Celestial Copper and Imagine’s Embossing Powder in Clear. This metallic pigment ink creates a beautiful effect on vellum. For further detail add a touch of color with Memento Markers to coordinate with the colors of the bridal party. The full-size inkpad should be enough to create a large number of cards and this ink has an inker available. So if you are creating more than usual then purchase the inker with the large inkpad.

Nadine Carlier

Delicata in White Shimmer and Imagine’s Embossing Powder in Iridescent on black cardstock is a great combo. For a video tutorial, I created this gorgeous black and white themed wedding invitation card. If you need the extra shimmery wedding then spray some Sheer Shimmer Spritz Sparkle. Watch Nadine’s video.

Jowilna Nolte

I recommend using All-Purpose Ink Pale Mint Green and Delicata in White Shimmer on top, all on a pearly cardstock. One lovely stamping technique I recommend for making an invitation would be to use a layered stamp set like you would find in the Altenew collection.

Shop Delicata


3 Votes for Embossing Powders!

Jennifer Vanderbeek

Gold and silver embossing powder is the best way to bring a touch of elegance. If you don’t have time to DIY it all, a touch of gold or silver embossing on your paper goods can elevate purchased items with a bit of pizazz.

Melissa Andrew

I really love Imagine’s Embossing Powders on vellum. I love a beautiful soft look for weddings and a gorgeous embossing powder on or under vellum is simple yet stunning. The beautiful colors, gold or silver, are the perfect colors to represent long-lasting love. They seem to compliment any colors a bride would choose. VersaMark ink is a great ink for embossing because of it’s tacky qualities. 

Arjita Sepaha Singh 

For an Indian wedding, perspective red is the color! Red is considered auspicious and adding Imagine’s Embossing Powder in Gold will be like a match made in heaven.

Shop Embossing

2 Votes for Creative Medium!

Kyriakos Pachadiroglou

I recommend Creative Medium in any of the Iridescent colors as a great way to create backgrounds that are not visible at first sight, giving an elegant and festive style with a distinctive glamour.

Martha Lucia Gomez

I enjoy Creative Medium in Clear and created a floral design using a watercolor technique with Fireworks Shimmery Craft Spray and Memento dye inks. See the full tutorial for this card. 

Shop Creative Medium

2 Votes for Sheer Shimmer Spritz!

Roni Johnson

For wedding projects, there’s nothing I like more than Sheer Shimmer Spray to add a touch of elegance, sparkle, and shine. It comes in 6 different colors, perfect to match any theme the bride and groom have chosen. Sheer Shimmer Spray can make plain white sparkle and they make colored backgrounds really pop! 

Marcie McCabe

My recommendation is Sheer Shimmer Spray in Sparkle and Fireworks Craft Spray in the colors of the wedding party. 

Shop Sheer Shimmer Spray


1 Vote for Fireworks Sprays

Iris Rodriguez

I recommend Fireworks Shimmery Craft Sprays for crafting in wedding decor. It can be hard to match the right colors for wedding decor. Since Fireworks is available in 24 colors and is a dye-based ink, you can choose one of the colors or blend colors to make the desired color. For example, to make a simple cork place card holder (in photo above), add a paper flower embellishment and color it with Fireworks! It’s elegant, inexpensive and personal. To make a zero waste wedding, make a wreath by attaching all remaining cork place card holders and flowers to a frame.

Shop Fireworks!

2 Votes for VersaFine Clair

Kassandra Tousignant

I recommend a delicate floral background stamp on paper with Sheer Shimmer Spray in Sparkle. In the photo above, I layered the paper with an acrylic sheet on top stamped with VersaFine Clair inked “It’s Your Special Day” sentiment. 

 Amanda Harryman

For those who don’t want to emboss, but want a touch of that elegant look, I would recommend Delicata in Golden Glitz or Silvery Shimmer depending on colors or preferences. I can also say that I would recommend VersaFine Clair in Nocturne, or other wedding colors, to use for the return address stamp on invitations since it will stamp the details clearly, and be smudge-proof quickly.

Shop VersaFine Clair

Create a Leather Effect on a Gift Tag using GooseBumps Texture Spray

by Arjita Sepaha Singh

I wanted to create leather texture effect which can be used on gift tags. I sprayed Imagine’s Walnut inks on paper tags and allowed them to dry completely. Next, I added Goosebumps Texture Spray to create the randomness and variety in texture and color. Then I added more intense color sprays and crumbled the tags. This gave a cool leather-like texture and I finished the tags by adding a gold heat embossed flower and sentiment.

Skill: Intermediate
Time: 1 hour + dry time

Supplies

Imagine
Other
  • Heat gun
  • Altenew – Stamp set
  • Somerset cardstock
  • Misti Stamp Tool
  • Double-sided foam adhesive


Learn How to Design a “Dream Forever” Mixed Media Page

by Kyriakos Pachadiroglou

Learn How to Design a "Dream Forever" Mixed Media Page

Owls are mysterious nocturnal birds and to honor their unique characters I decided to make a scrapbook or art layout using a combination of colors and techniques. Combining different kinds of inks, I colored a background in deep purple shades. Walnut Ink lowers the intense hue of Fireworks in Lilac Posies on the background.

The owl almost appears to glow as it is embossed on a piece of tracing paper that has Memento Grape Jelly colored on its back side. To further contrast the design, a piece of Sheet Metal is used to enhance the owl and adds shine and detail. I love this design and feel it can be used in so many different ways. Make a card, a scrapbook page or adjusted to make a cover on a book.

Skill: Intermediate
Time: 1 hour

Directions


Step 1

Spray the A4 watercolor page with Ink Potion No 9, Fireworks Shimmery Craft Spray in Lilac Posies and Walnut Ink in Lilac, in this order, from about 8-inch distance. Two sprays of the color inks are enough. Let them dry or use a heat gun to speed up the process.


Step 2

On a 3 ¼ x 5 ½ inch tracing paper stamp with the owl design with the VersaMark, cover with Imagine’s White Embossing Powder and heat set.


Step 3

Turn the tracing paper at the back and using a sponge dauber cover the owl design with the Memento Grape Jelly ink pad. Let it dry and repeat for a deeper color.


Step 4

Use a sponge dauber to cover the SHEET Metal in a diamond shape with the StazOn Royal Purple. Let Dry.


Step 5

Press the SHEET metal diamond shape on the rubber owl stamp that is covered with VersaMark. Cover with the Imagine’s White Embossing Powder and heat set.


Step 6

Color the chipboard words with a sponge dauber and the Memento Grape Jelly ink pad.


Step 7

Stamp the A4 watercolor page with the Memento Grape Jelly ink pad and the numbers stamp.


Step 8

Cut a 6 x 1-inch tracing paper stripe and a 5-inch long chevron ribbon. Use the On Point Glue to set them in the center of the page and continue with the owl embossed design.


Step 9

Cut 5 – 6 inch long pieces of jewelry wire, twist together and curve them.


Step 10

Use the hot glue gun to set the feathers, the wires, and the SHEET Metal in a diamond shape on the owl design.


Step 11

Glue the chipboard words and add rhinestones.


Step 12

Make small dots to embellish further and add texture with the irRESISTIble Pico Embellisher in Sweet Plum. Trim to desired size.

Thank you for stopping by the Imagine blog and if you enjoyed this tutorial then please comment below or share on social media! 

Supplies

Imagine
Other
  • Feathers
  • Stamperia – Owl stamp
  • Studio Light – Instructional Numbers stamp
  • A4 watercolor page
  • Jewelry wire
  • Chevron ribbon
  • Tracing paper
  • Rhinestones
  • Decorative chipboard words
  • Heat gun
  • Hot glue gun

Create a Beautiful “Mr & Mrs” Congratulations Card

by Martha Lucia Gomez

Create a Beautiful "Mr & Mrs" Congratulations Card

Stenciling with color and texture always makes for a stunning project. This concept is perfect for wedding cards as it keeps the look elegant and still unique. Make something special for the happy couple with just one design element and two different products: Memento and Creative Medium. Take a look at how to do it!

Skill: Intermediate
Time: 1 hour + dry time

Directions


Step 1

Secure the stencil over cardstock and using a jumbo dauber apply the Memento ink in circular motions. Try to create an ombre effect or gradient of color. Leave the stencil and paper where it is for step 2.


Step 2

Now apply Creative Medium Clear over the inked area. Not only will it add texture, but you will notice how it will intensify the color when it is dry. When you finish this step, remove the stencil immediately and wash with warm water. Let this dry completely before finalizing the card.


Step 3

On a piece of vellum stamp the wedding sentiment or image using VersaMark and White Embossing Powder. I used two images included in the stamp set Wedding Wishes by Joy Clair. Then I cut the stamped image with one Nesting Oval Infinity Die from Hero Arts and colored some details of it using colored pencils that match the Tangelo Memento ink.


Step 4

To finalize the card, paste the stamped oval using double-sided foam tape. To avoid seeing it through the vellum I put the foam under the embossed area. I also complimented the design with a Congratulations die cut word that I adhered using On Point Glue.

Supplies

Imagine
Other
  • Cardstock
  • Vellum
  • Kite – Moroccan Lattice Stencil
  • My Sweet Petunia – MISTI
  • Heat tool
  • Hero Arts – Nesting Oval Infinity Die
  • Joy Clair – Wedding Wishes Stamp Set
  • Congratulations Die Cut
  • Double sided foam tape or Dimensionals
  • Prismacolor – Colored pencils

See How to Make Great Wedding Crafts for a Beautiful DIY Wedding

We are wrapping up a week of Wedding Craft inspiration and thought we would do a little recap. Please pin this page as a reference or share on facebook. We encourage you to pull from these design ideas and mix and match them to create what you need. For example, Kyriakos table decor almost matches Kassy’s banner perfect. With a little tweaking on each design, you could easily create a full array of decor for a wedding.


Create a Matching Wedding Set – the Invitation, Favor Box & Placecards by Roni Johnson.

As always, Roni outdid herself by creating three dynamic matching papercraft projects featuring a free download for a favor box. Using the Imagine’s Color of the Month (and Pantone’s color of the year) Ultraviolet as inspiration for the color scheme.

A Simple, Elegant and Inexpensive Wedding Table Setting by Kyriakos Pachadiroglou

Kyriakos has a knack for jewelry and table decor. He certainly shows off this knowledge in this post where he creates a pull tab card, napkin ring, cutlery placeholder and wine glass placeholder for a lovely DIY shabby chic style. One super fun element we love in this design is the doily stamp. Yes.. that is a stamp not as an actual paper doily.

How to Make Wedding Flowers from Coffee Filters by Jennifer Vanderbeek

We are so impressed with how these paper flowers turned out! Since Jennifer is one of our video artists, you will have the luxury of seeing for yourself how these are handcrafted. Take a minute to watch this YouTube video to see how she designed these bouquets.

Create An Elegant “Always & Forever” Wedding Sign by Steph Ackerman

We like the rich purple flowers that literally pop off this banner style sign. See how Steph used Creative Medium in Iridescent Purple to match flowers to “Always & Forever” text.

Use a Cute Lovebirds Theme in Wedding Decor by Elina Stromberg

We appreciate this lovebird design as a theme for a wedding. Elina goes through a couple different color schemes and design ideas to show off how to use one stamp in a variety of ways.

Learn How to Make a Shabby Chic Wedding Banner by Kassy Tousignant

And if you have not watched this video yet then please do! Kassy goes through all the steps of creating this Shabby Chic Mr. & Mrs. Banner.