Thanksgiving Card Tutorial: Ink Blend Directly on Your Stamps

By Katy Ingram

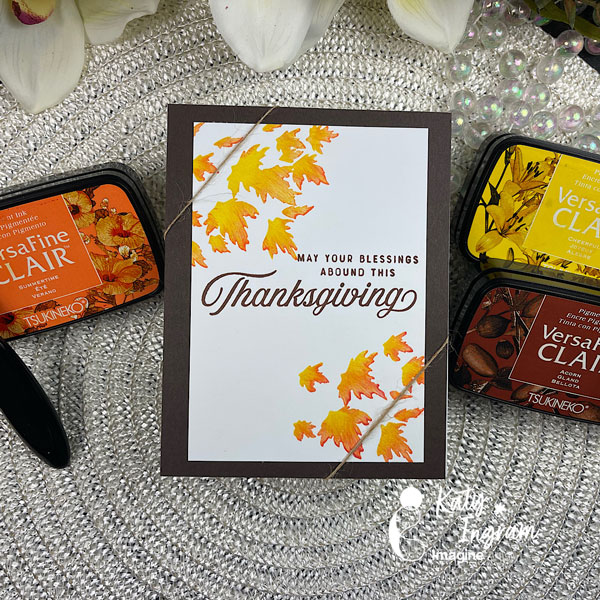
Hello Friends! Katy here with another quick project. In today’s video I create a simple Thanksgiving card and I share with you an easy way to ink blend directly on your stamp. This is a great technique to use on your silhouette stamps and a great way to change up the color from just basic black.

Video has all the details. Thanks for watching.

Skill: Beginner, Intermediate
Time: 15 minutes 

Art Supplies

Imagine Products

• VersaFine Clair
– Summertime
– Cheerful
– Strawberry
– Acorn
• On Point Glue 

Other Products Used

• The Greetery Autumn Sketches stamp set
• White Cardstock
• Brown Cardstock
• Twine
• Stamp positioner tool
• Skinny detail blending brush

Fall Thank You Card Using VersaFine Clair on Dark Cardstock

By Katy Ingram

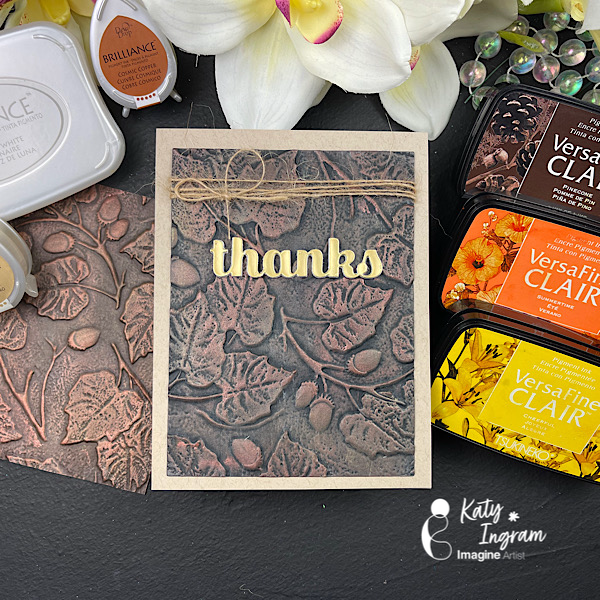
Hello Friends! Katy here with another quick project. I love trying new things with my inks and embossing folders and in todays video I used my VersaFine Clair with some Brilliance pigment inks in Cosmic Copper and Galaxy Gold and Moonlight White, with a 3D embossing folder.

Video has all the details. Thanks for watching.

Skill: Intermediate
Time: 15 minutes

Art Supplies

Imagine Products

VersaFine Clair https://www.imaginecrafts.com/versafine-clair

  • Acorn
  • Cheerful
  • Summertime

Brilliance https://www.imaginecrafts.com/brilliance

  • Galaxy Gold
  • Cosmic Copper
  • Moonlight White

Other Products Used

Affiliate links used at no additional cost to you. Thank you for your support
Tim Holtz/Sizzix Acorn 3D Embossing Folder https://ldli.co/e/lmn50p2 
Gina K Dark Chocolate Cardstock https://ldli.co/e/lmn50p2  
Black Cardstock https://ldli.co/e/lmn50p2
Kitchen Sponge https://amzn.to/4f72Ka4
Double Sided Adhesive 5 inch wide https://amzn.to/455H6OS
Double Sided Adhesive 1/2 inch https://amzn.to/4m9cKlc
Matte Gold Cardstock https://amzn.to/4f3H5zn

Fall Birthday Wishes with VersaFine Clair

By Ceal Pritchett

Hello everyone,
It’s Ceal, here. I am so ready for fall to be here and today I am sharing a fall birthday card with you.

Skill: Beginner to Intermediate
Time: 30 to 45 minutes

Directions:

Gather your supplies. For this card you will need a stencil of choice, several colors of ink, and embossing folder and sentiment stamp.

Step 1:
The stencil set I used has four different layers. The first stencil in step one is to use Shady Lane to color the stems.

Step 2:
Using layer 2 of the stencil set and Purple Delight, color the flowers.

Step 3:
Using the third layer of the stencil and Chianti, color the flowers.

Step 4:
Using the fourth layer of the stencil and Golden Meadow, color in the flower centers and buds.

Step 5:
Add gold splatter using a watercolor paint, I used Fine Tec metallic.

Step 6:
Run the finished panel through the machine using an embossing folder. Add finished panel to the card base.

Step 7:
Finish card by adding a sentiment

Supplies:

Imagine Supplies
VersaFine Clair
– Nocturne
– Shady Lane
– Golden Meadow
-Purple Delight
– Chianti
On Point Glue

Other Supplies
Boho Botanicals Layering Stencil – Taylored Expressions
Halftone Dots Stencil – Taylored Expressions
Timeless Greetings Stamp/dies – Taylored Expressions
Grip Mat – Simon Says Stamp
Blending Brushes – Simon Says Stamp

Blend Delicata Inks to Make a Beautiful Fall Florals Wedding Card

By Jessica Lin

Skill: Intermediate
Time: 1 hour

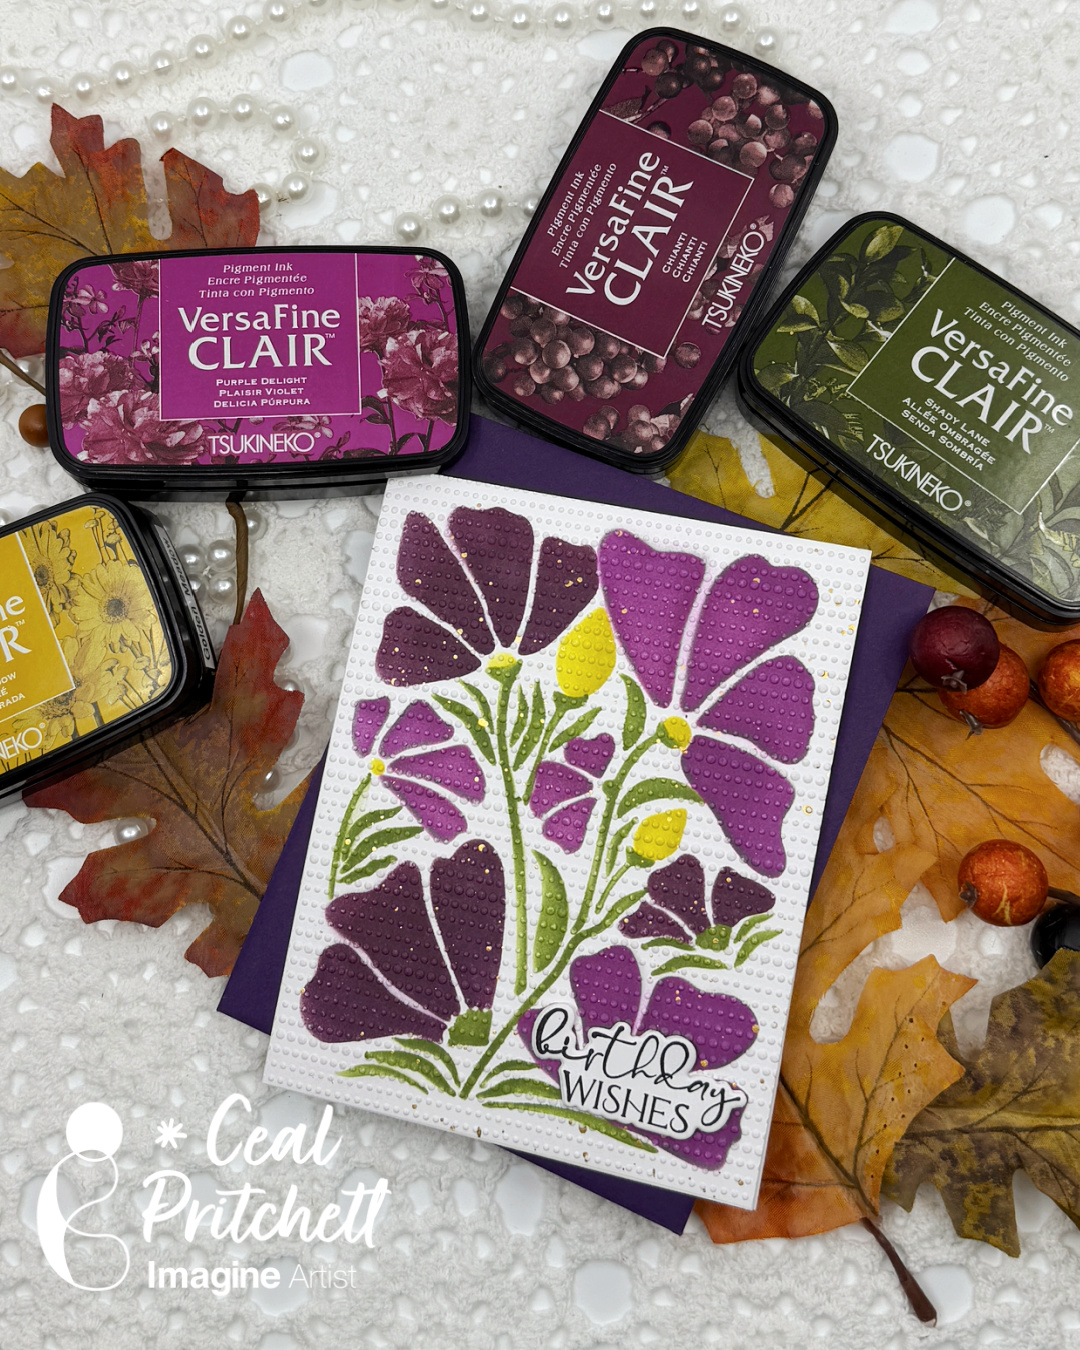
Hi everyone! It’s Jessica here. Fall is right around the corner and I have a fall floral card to share with you today. I decided to do some layered ink blending using shimmery Delicata ink pads. They are pigment-based and mostly used for stamping. However, they ink blend beautifully, too! Be sure to check out the shimmery effects of these ink pads at the end of this post.

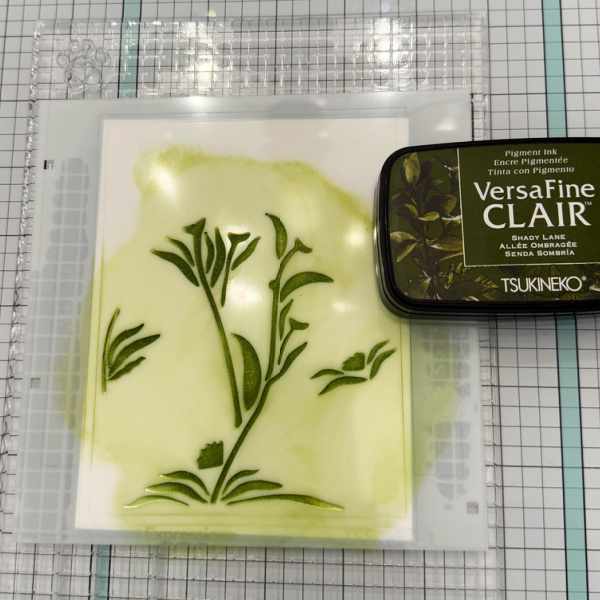
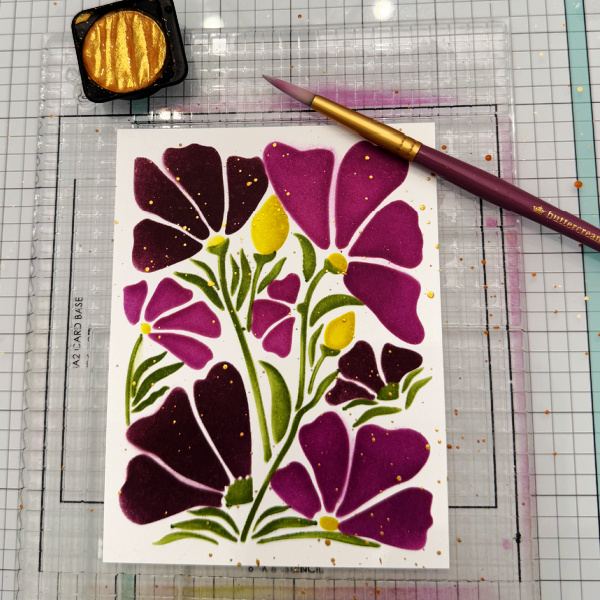
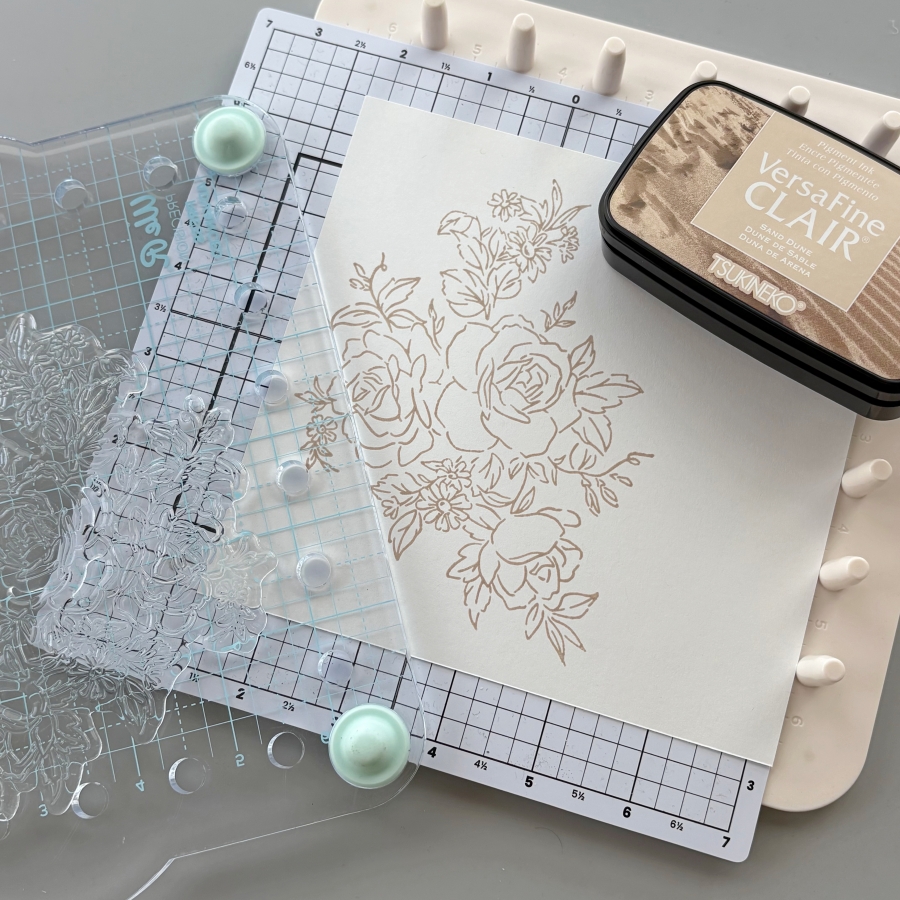
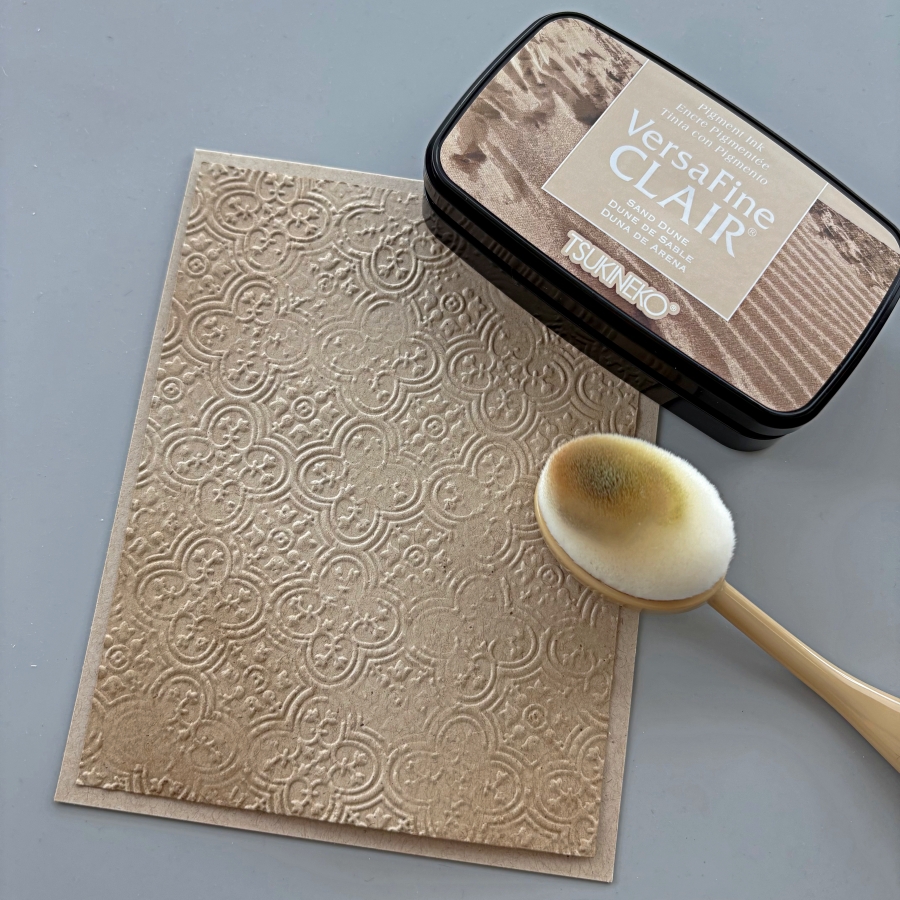
Step 1:
Stamp the large floral image from Stampin’ Up’s Layers of Beauty set with VersaFine Clair Sand Dune ink pad. This color is becoming my favorite for stamping outlines. The soft, neutral tone creates an entirely different feel compared to black image outlines.

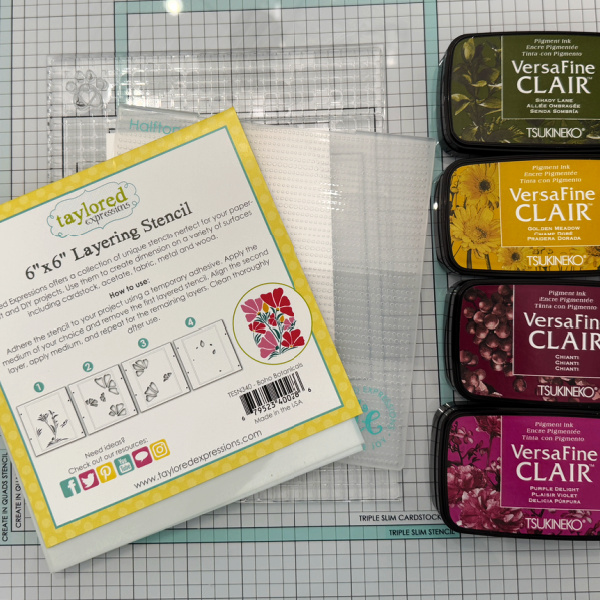
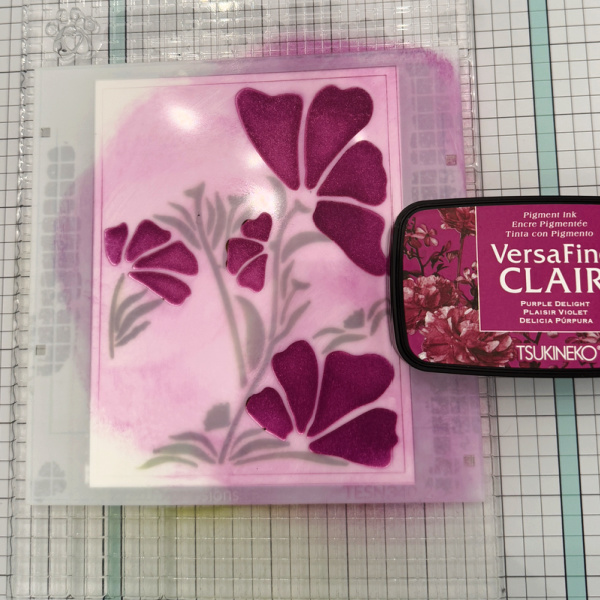
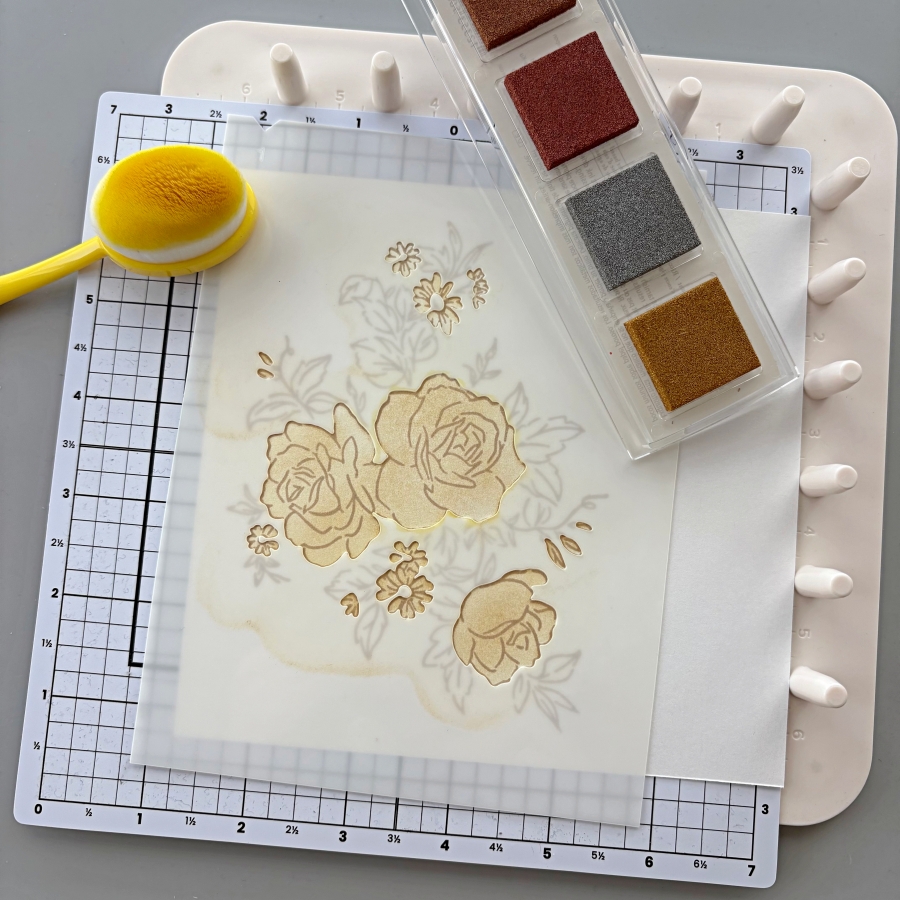
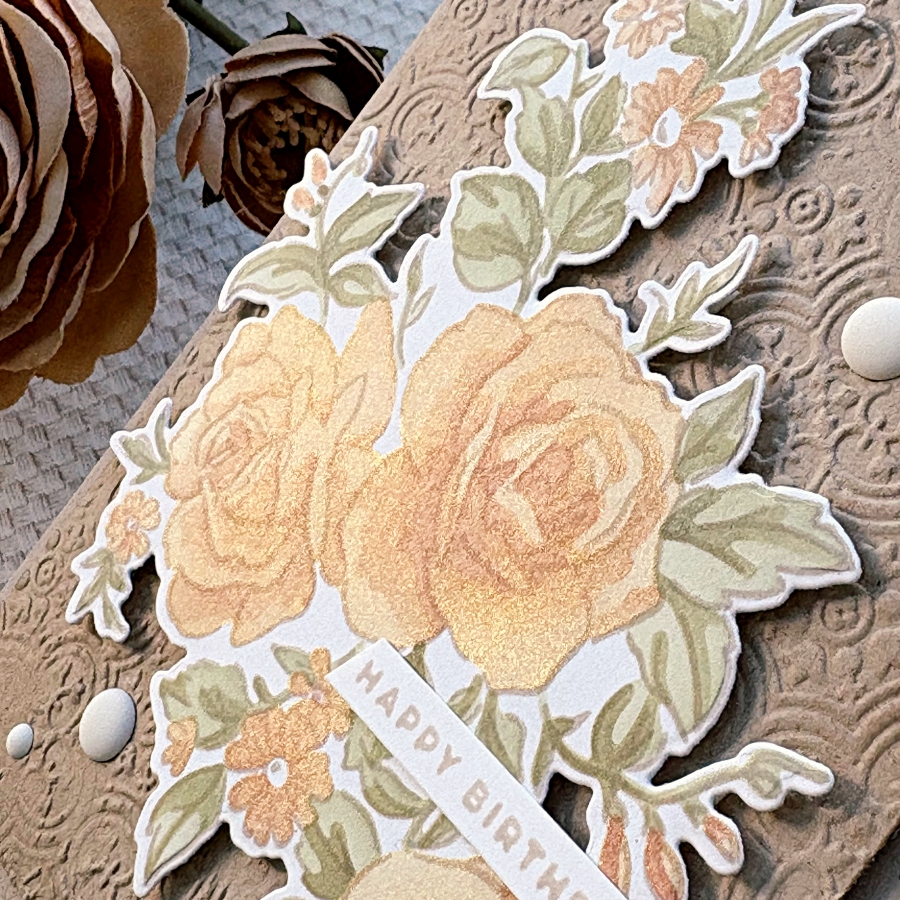
Step 2:
This particular stamp set coordinates with the Layers of Beauty decorative masks. I started with stencil 1 and ink blended with Delicata Golden Glitz. You could use the full size ink pad or the Quartet ink pad, which includes Golden Glitz, Silvery Shimmer, Celestial Copper, and Bronze Burst.

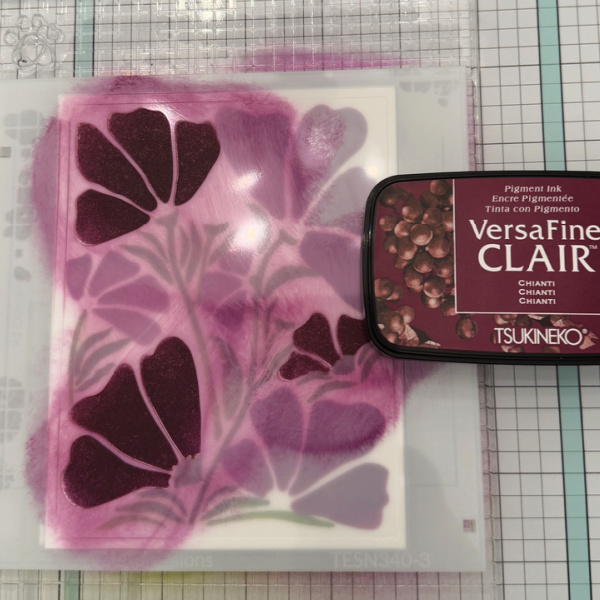
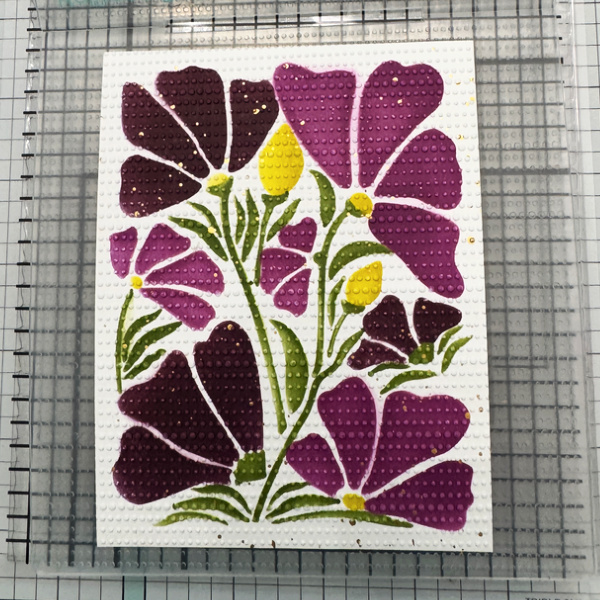
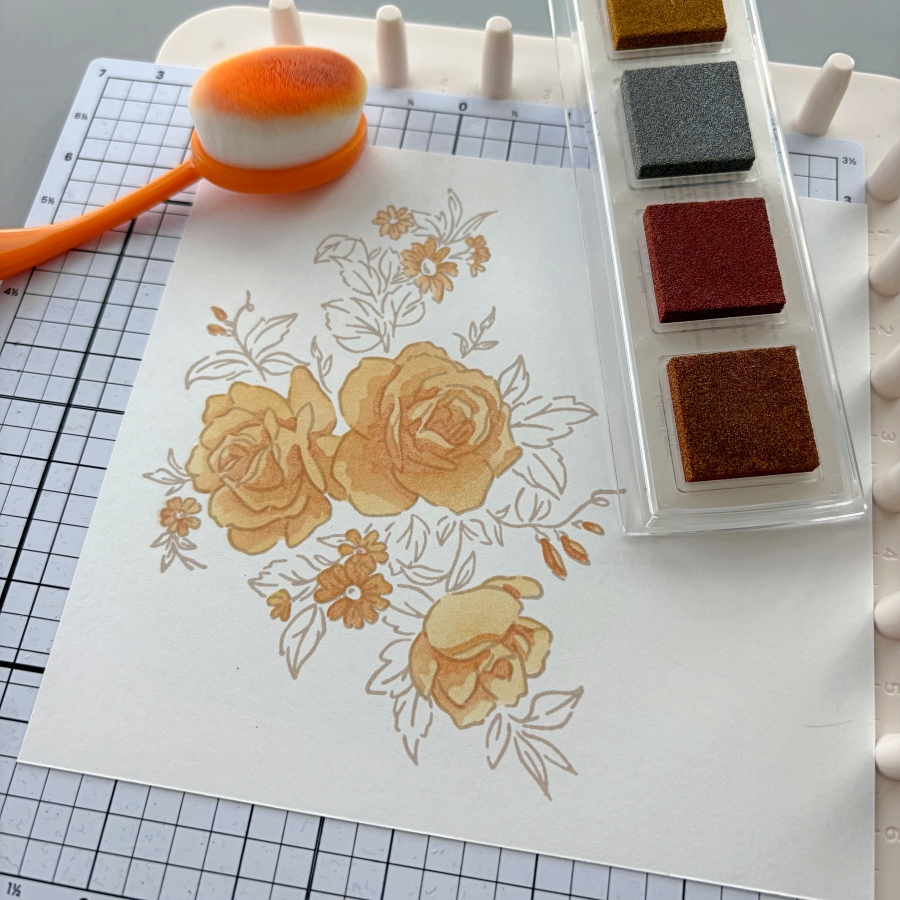
Step 3:
For stencil 2 and 3, I ink blended Bronze Burst and Celestial Copper. These two shades are similar, with Celestial Copper having a redder hue. I thought they contrasted too strongly against the golden base layer, so I ink blended Bronze Burst lightly to the base layer as well.

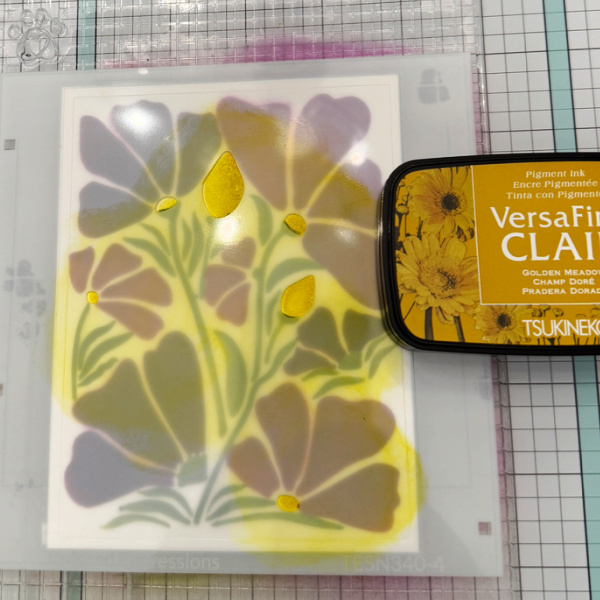
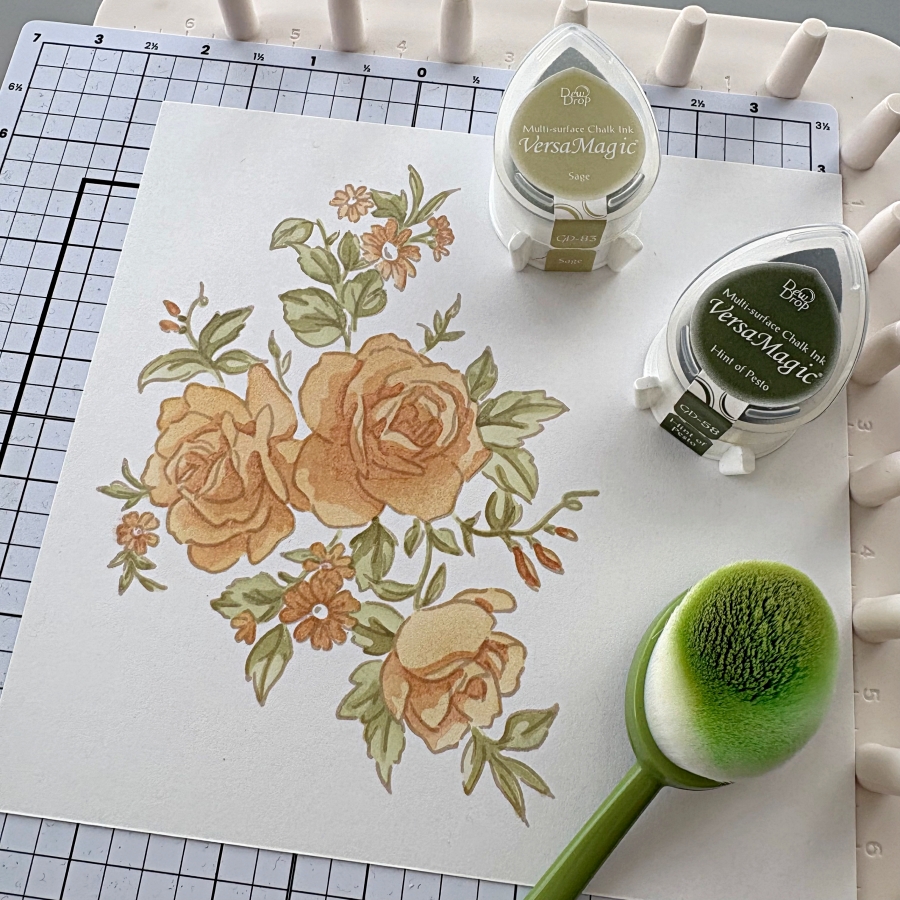
Step 4:
For the leaves, I ink blended VersaMagic Sage for stencil 4 and Hint of Pesto for stencil 5. Once the ink blending is completed, I die cut the floral image and mounted the back with foam tape.

Step 5:
I prepared a card base using Neenah Desert Storm cardstock. Then I embossed a 4’’ x 5 ¼’’ panel with Stampin’ Up’s Distressed Tile embossing folder. To create some background depth, I ink blended the corners of the embossed panel with VersaFine Clair Sand Dune ink pad.

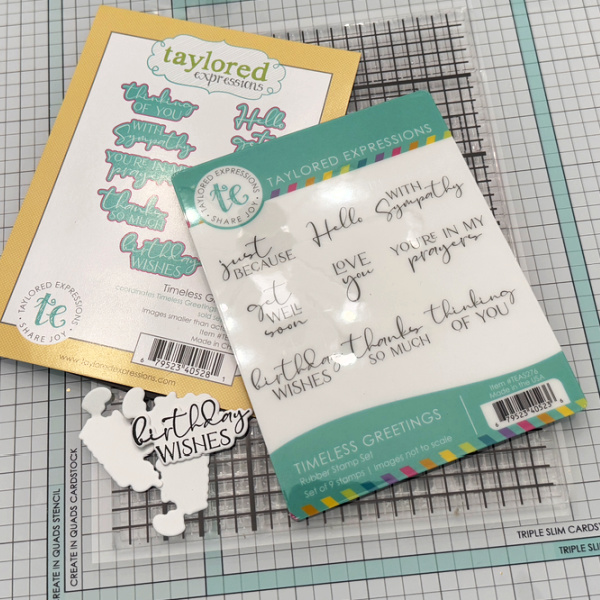
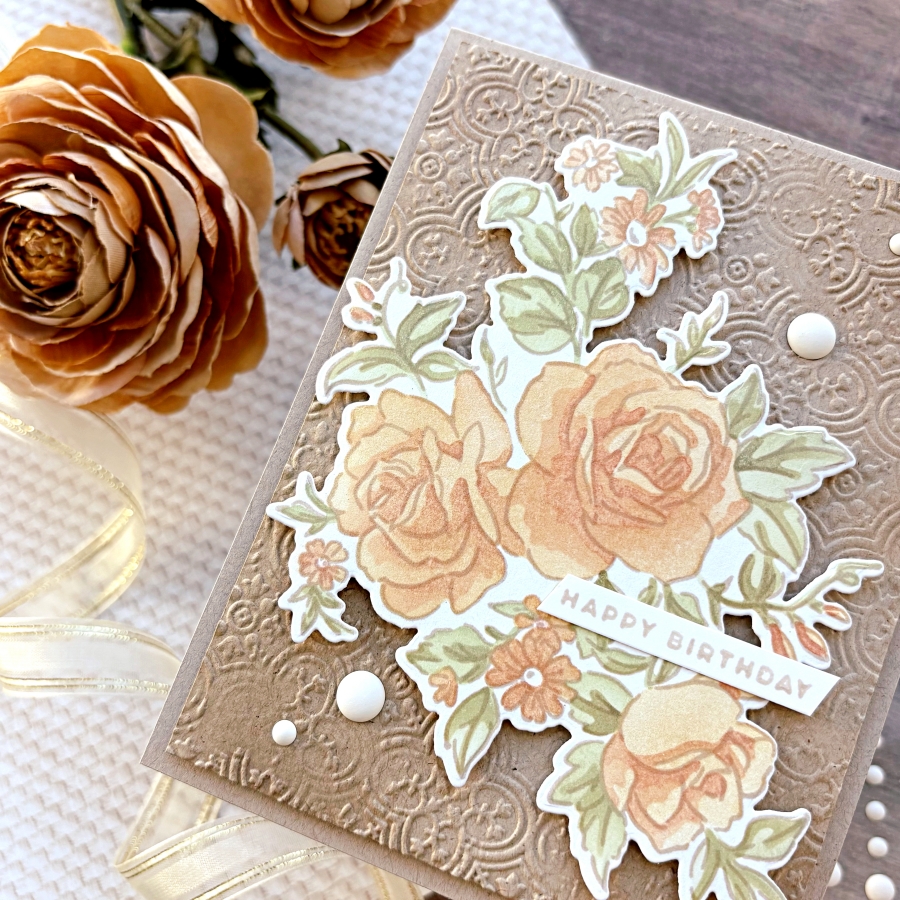
Step 6:
Finally, I stamped the sentiment with VersaFine Clair Sand Dune ink pad and added matte white enamel dots from The Rabbit Hole Designs.

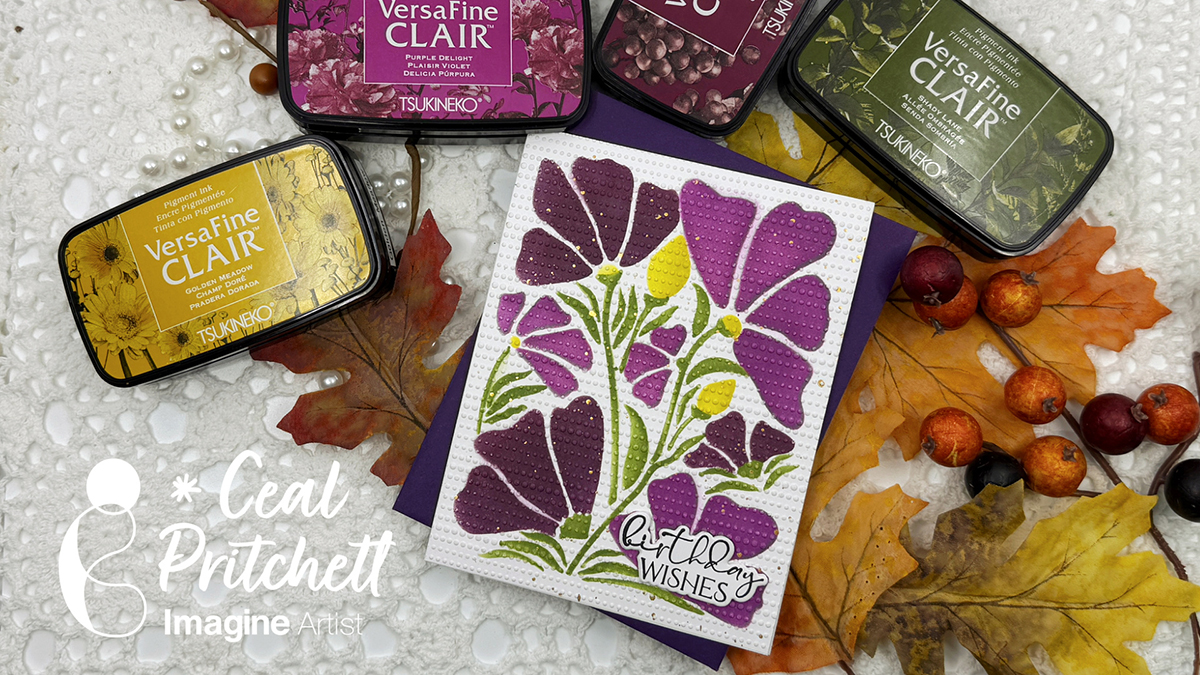
Here’s the finished card! I tried to capture the shimmery effects of the Delicata ink pads but the photo does not do it justice. It’s mesmerizing and so pretty in real life, I hope you will give ink blending with Delicata ink pads a try!

Craft Supplies:

Imagine Supplies:

Other Supplies:

  • Stampin’ Up! – Stamps, Die, Mask bundle – Layers of Beauty
  • Stampin’ Up! – Embossing Folder – Distressed Tile
  • Neenah – Paper – Desert Storm
  • Foam Tape

Ink-Painted Sunflower Card using Brushstix

By Tracy Fear

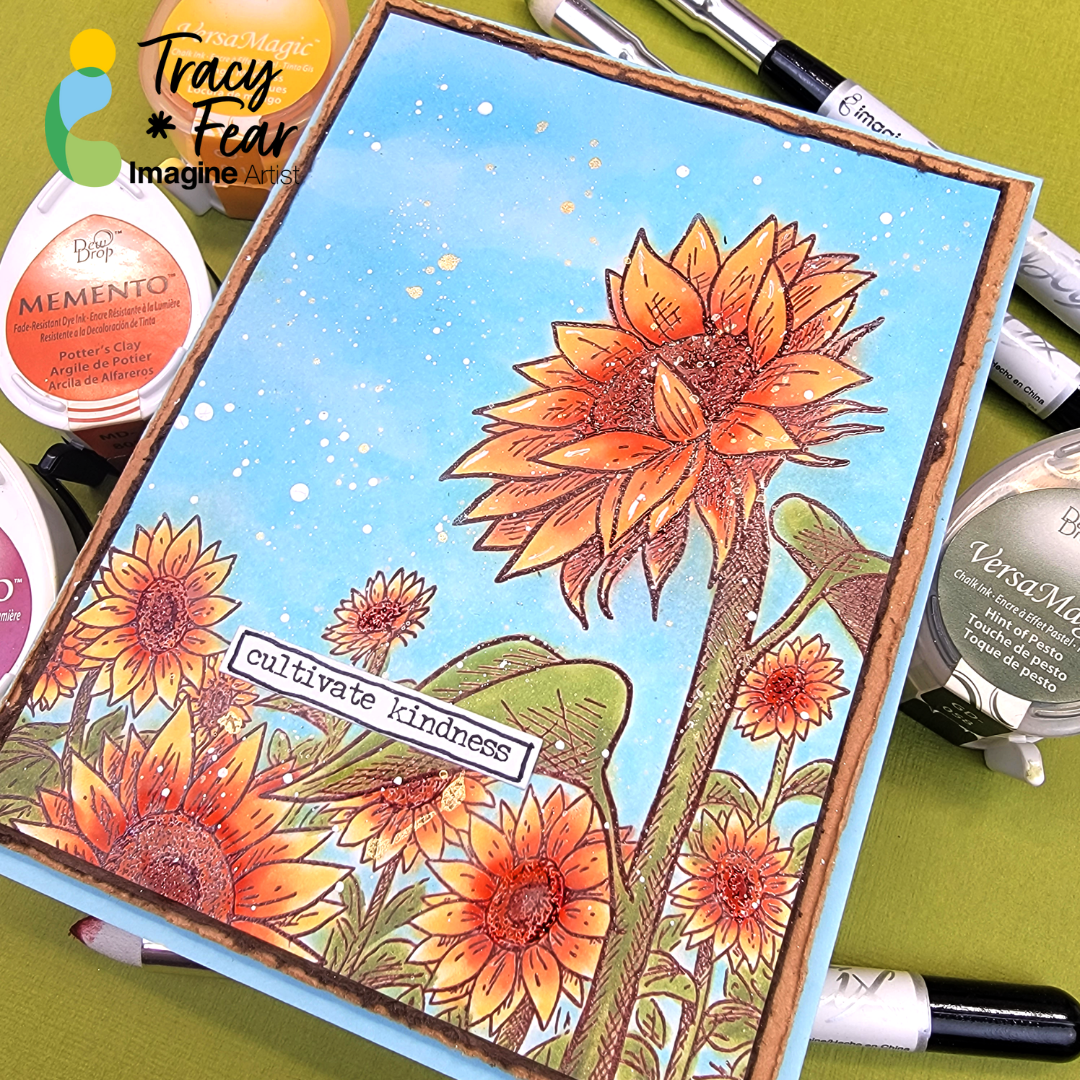
Hello Friends! Tracy here and today I am delighted to share this tutorial about how to color with your inks and using Brushstix to get into those tiny places!

Tracy

Skill: Intermediate
Time: 30 Minutes to 90 Minutes

Art Supplies

• Stamping Platform
• Glue
• Paint Brush
• White Paint
• Gold Splatter Paint
• Scene Stamp
• Small Blending Brushes

Imagine Products
• VersaFine Clair in Acorn
• Versamark Ink
• Memento Inks
– Tangelo
– Morocco
– Potter’s Clay
– Rubarb Stalk

• Versa Magic Inks
– Hint of Pesto
-Mango Madness
-Tea Leaves
-Jumbo Java
-Sea Breeze

• BrushStix

Other Products Used
• Sunflower Stamp from Blue Knight Rubber Stamps
• 120lb paper in white
• Misti tool
• PVA Adhesive 

ALTERNATIVE PRODUCTS THAT CAN BE USED TO RECREATE SOMETHING SIMILAR
Any Inks

Create a Thank You Card in Warm Autumn Colors

By Alison Heikkila

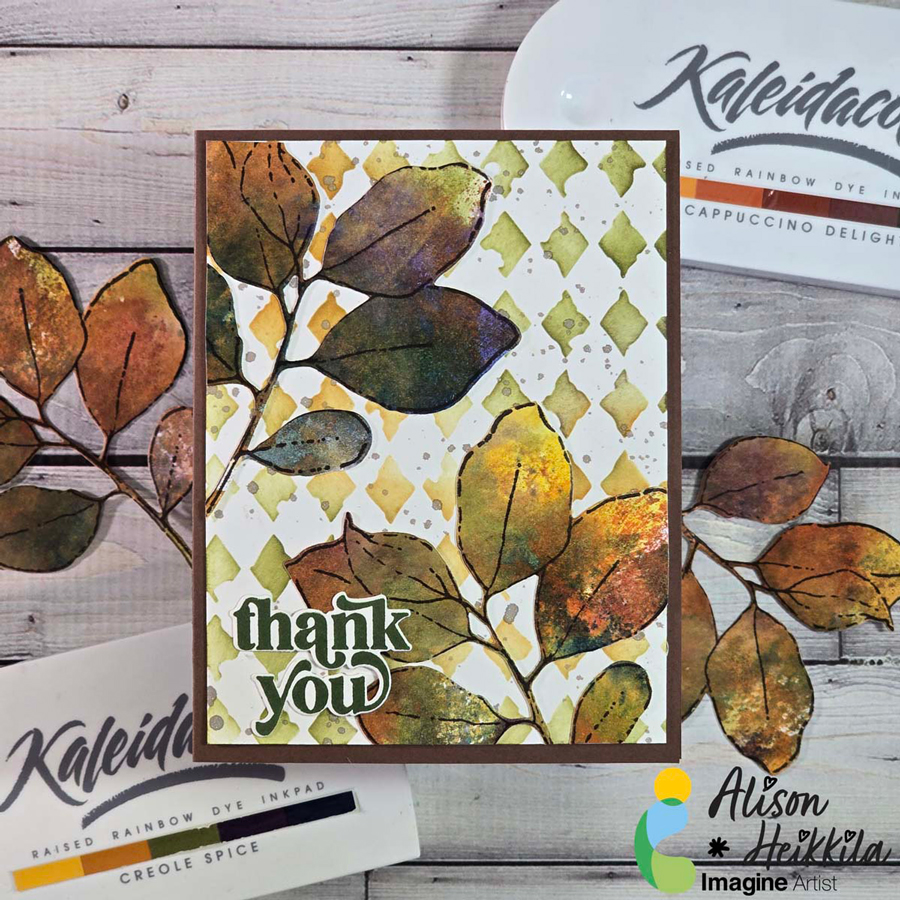
Hello! Alison Heikkila here, and my latest project for Imagine started as a Thanksgiving card, but it morphed into one that can be used at any time of year. I think it’s beautiful, and it’s got some really simple techniques that help you get fantastic results without a lot of products.

Skill Level: Beginner
Time to Complete: 20 Minutes

*Some affiliate links are used in this post. That means that if you shop through these links, I may receive a small compensation, at no cost to you.

Here is the YouTube video. If it doesn’t play properly, please click HERE.

Supplies:
Imagine:
Kaleidacolor Inks in Creole Spice and Cappuccino Delight
Fireworks! Spray in Rich Cocoa
VersaFine Clair Ink in Pinecone
VersaFine Clair Ink in Shady Lane

Other:
Sizzix and 49 & Market: Painted Leaves Stamp and Die Set
A Colorful Life Designs: Messy Harlequin Stencil
Pinkfresh Studio: Perfect Sentiment Stamp
Pinkfresh Studio: Perfect Sentiment Die
Strathmore: Smooth Bristol Cardstock
Bearly Arts Glue
The Rabbit Hole Designs: Cotton Tail Blending Brushes
Piece of clear acetate
Ivory and Brown Cardstock

I’m so pleased with the foliage. I really love these colors together. I hope you’ll give this a try! Please visit Imagine for more ideas on creative ways to use their products. Thanks so much for stopping by. Have an inspiring day!