Another Tie-Dye Technique Using Kaleidacolor

By Linh @LVHandcrafted

– Hello friends! This is Linh (or LV Handcrafted on all the socials). Today I have a new video up on the Imagine Crafts YouTube channel showing how to create your own Tie-dyed backgrounds! This is SO amazing! And now I want all the colors of the Kaleidacolor ink pads.  Because they already come with 5 beautiful colors, you can quickly and easily whip up these fun tie-dyed backgrounds. The pre-made color combos are amazing but you can always buy a blank Kaleidacolor ink pad and make your own color combination like my rainbow one!

Skill: Beginner

Time: 5 minutes

Supplies Used

Imagine:

Kaleidacolor

  • Kaleidacolor – Caribbean Sea
  • Kaleidacolor – Berry Blaze
  • Kaleidacolor – Uninked ink pad
  • Dye Reinker – Crimson, Tangerine, Daffodil, Lime, Crystal Blue

Other Products Used

  • Lawn Fawn – “Thanks so much” die
  • The Greeting Farm – “Happy Birthday” die

Gel Press with Kaleidacolor and Fireworks! Shimmery Craft Sprays

By Alison Heikkila

Hello! Alison Heikkila here and I have a new YouTube video for Imagine today. We are going to start off with a little experimenting with a Gel Press, and then we’ll move on to finish a card. I love to try different inks and techniques on the Gel Press, and even if they don’t work out as I had hoped, the monoprints can always be used at a later date in a different way.

Skill: Intermediate-Advanced
Time to Complete: 30 minutes

Art Supplies

Imagine:

Kaleidacolor Inks: Caribbean Sea
Ink Potion No. 9
Fireworks! Shimmery Craft Spray: Danube Blue
Sheer Shimmer Spritz: Copper
On Point Glue

Other:
Gel Press: 6×6 Plate
A Colorful Life Designs: Messy Harlequin Stencil
Speedball: 6” Brayer
Navigator 28lb. Copy Paper
Pinkfresh Studio: Classic Words Die Set
Strathmore Smooth Bristol Cardstock
Recollections: 110lb. White Cardstock
Recollections: Blue Foil Cardstock
Bearly Arts Glue
Sheet Music, Paintbrush, Copper Sequins
Optional: 8×8 Acrylic Stamp Block

That’s it for me today. Thanks so much for stopping by. Have an inspiring day!

Floral Birthday Card Using Fireworks!

By LV Handcrafted

Hello friends! This is Linh (or LV Handcrafted on all the socials). Today I’m playing with Fireworks! I start off by using what would normally be used to create a shaped 3D flower and I cut it out of a scrap piece of cardstock to use as a stencil.  I lined that over black cardstock and sprayed the Grape Jelly Fireworks! Then I rotated the flower stencil to offset the petals. I sprayed the Lulu Lavendar Fireworks! And without shifting the stencil, I sprayed a bit of the Lilac Posies.  What’s fabulous about these Fireworks! sprays is they are opaque and as you can see are gorgeous even on black cardstock. They have a beautiful shimmer and shine!

Skill: Intermediate

Time: 25 minutes

Supplies Used

Imagine:

• Fireworks! Juicy Purples

• On Point Glue

Other Products Used:

• Spellbinders Glimmer Sentiment

• Spellbinders Gerber Daisy Die

• Nuvo Drops – Silver

• Astrobright 80lb Black Cardstock

• Hammermill 100lb white card stock (card base)

Learn How VersaFine Clair Performs on a Gel Plate

By Nancy May –

Hey y’all. Today I am using VersaFine Clair inks in the colors Verdant and Pinecone, to see what kind of results I’ll get on a gel plate. Later I create a set of 5×7 cards using my take on a Spring color palette. I’ll do this by incorporating the color Charming Pink VersaFine Clair ink to several of the gel plate prints.

~Nancy May

Skill: Beginner, Intermediate

Time: 90 minutes

Products used: 

Imagine 

• VersaFine Clair Ink Pad – Verdant

• VersaFine Clair Ink Pad – Pinecone

• VersaFine Clair Ink Pad – Charming Pink

• Sponge Dauber

• Sheer Shimmer Spray – Sparkle

• Delicata Ink Refill – Pink Shimmer

Other 

• Studio Light/Art By Marlene – Stencil – Artsy Arabia MASKBM11

• Sweet N Sassy – Stencil – Script

• Simon Says Stamp (SSS) – Die – Etched Tall Leaf Spray

• Simon Says Stamp – Die – Dahlia Stem 

• Penny Black – Die – Berry Flourish

• Penny Black – Die – Cherry Blossom

• Paper Roses – Die – Little Foliage 1

• Paper Roses – Die – Little Foliage 2

• The Stamp Market – Stamps and Dies – Gorgeous Greetings

• Gel Press – Gel plate – 5×7

• Speed Ball – Brayer – 6”

Make Your Mboss’ing up a Notch with Double Embossing!

By LV Handcrafted

Hello friends! This is Linh (or LV Handcrafted on all the socials). Why buy colored cardstock or specialty card when you can make your own! 

Skill: Intermediate

Time: 20 minutes

To make solid color cardstock, 

Step 1.

Swipe a panel of white card stock with VersaMark watermark ink. It might be hard to tell if you have good coverage, if you tilt your card panel, you should be able to see a shiny surface where you have inked. 

Step 2.

Before the ink dries, pour any colored Mboss powder.  Knock off any excess into the original zip-sealed bag. 

Step 3.

Then using a heat gun, melt the embossing powder on your panel. And there you have it! Your very own shiny solid color cardstock.  

Repeat Steps 1-3 If you missed some spots or if you want some areas to be a little darker. Be careful not to overheat your card.

To take your new cardstock to the next level…

Step 1.

Swipe your embossed panel with VersaMark watermark ink again.

Step 2.

Before the ink dries, pour either Mboss Sparkle Powder or Mboss Iridescent Powder over your panel. Knock off any excess into the original zip-sealed bag. 

Step 3.

Then using a heat gun, melt the embossing powder on your panel.  Be careful not to overheat your card. Now you’ve taken a plain Mboss powder and given it some extra shine! 

Supplies Used

Other Products Used

  • My Favorite Things Big Birthday Die
  • CC Designs Kawaii Force Stamp
  • Hammermill 100lb white card stock

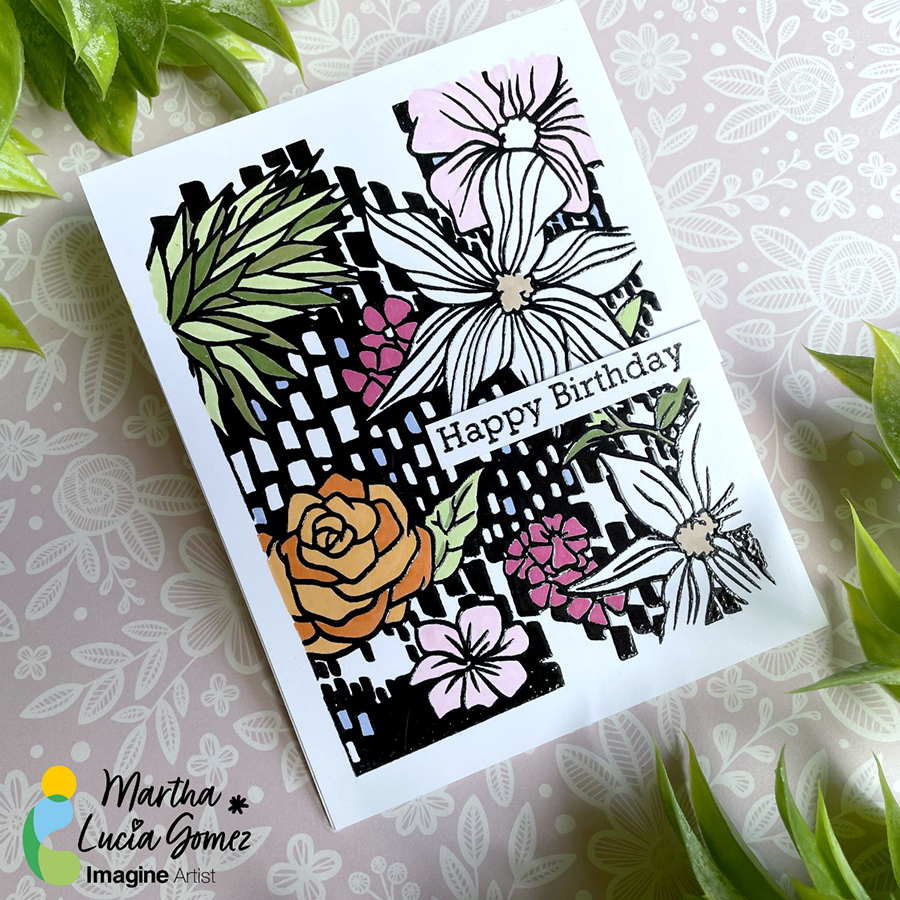
Let’s Make a Floral Happy Birthday Card

By Martha Lucia Gomez

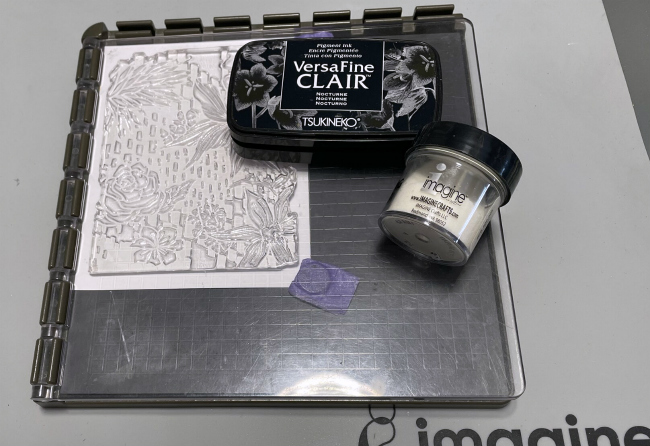
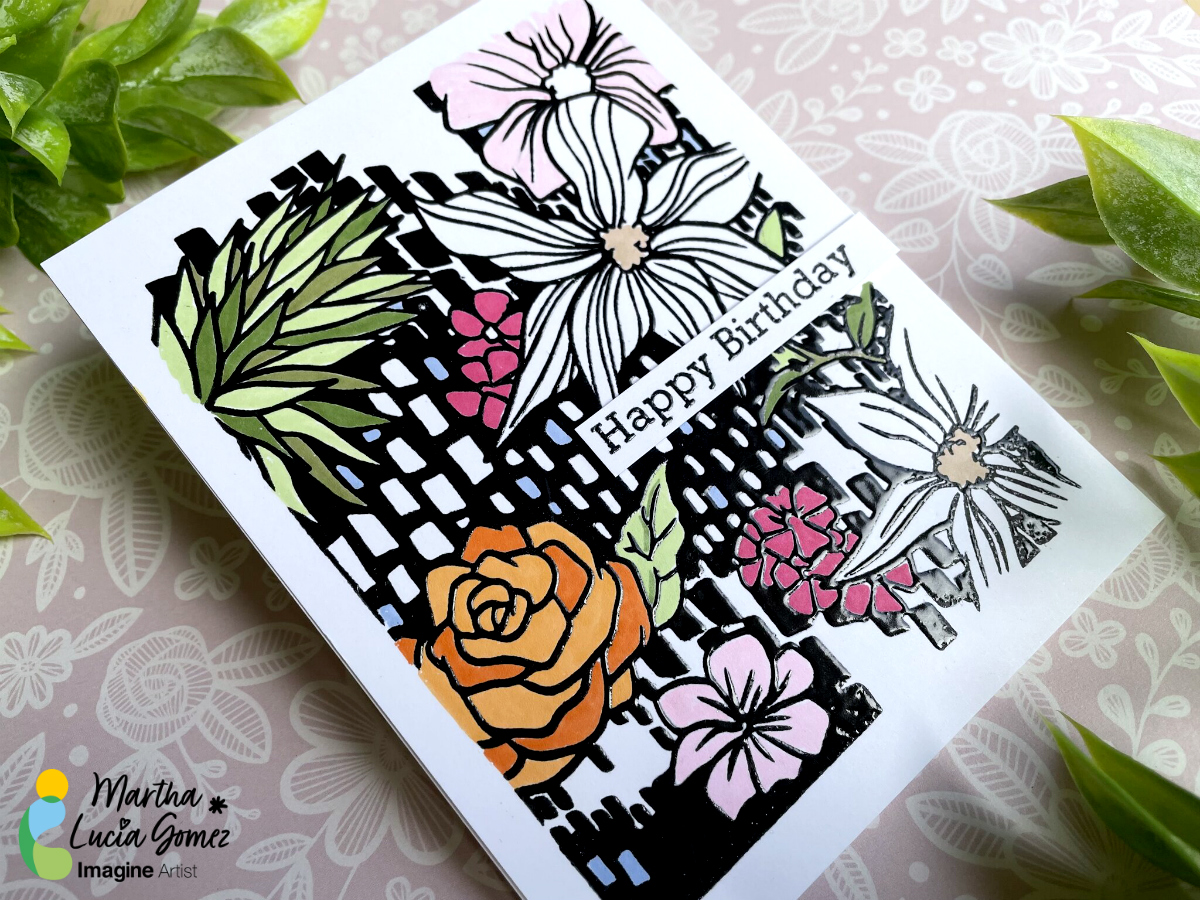
Hello there! Today’s tutorial is about a Birthday Card using a background stamp but adding texture and color. To make this, I used VersaFine Clair Nocturne, Clear Embossing Powder and Memento Markers. 

Skill: Beginning

Time: 45 minutes

Directions:

Step 1:

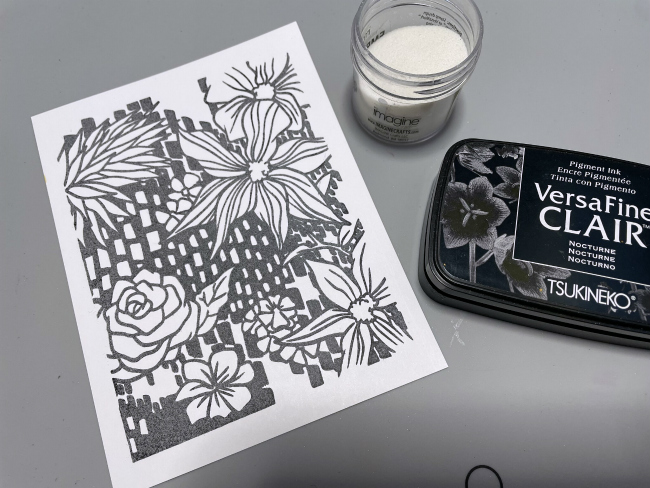
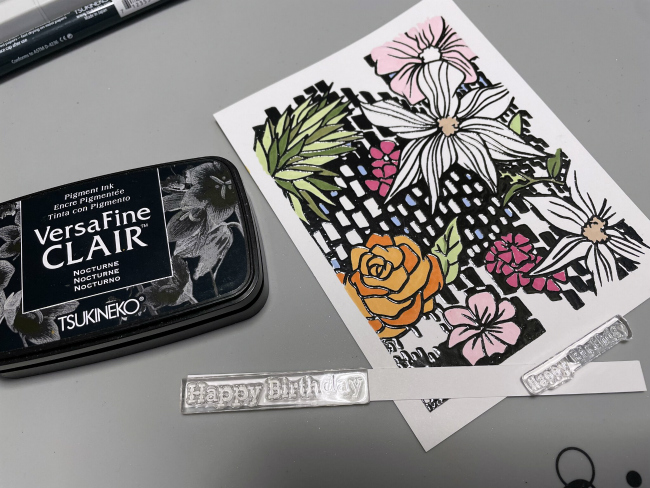
Take a piece of white smooth cardstock, ink well your background stamp with VersaFine Clair Nocturne Ink and stamp your image pressing hard to obtain a crispy image. You can use any stamping tool. 

Step 2:

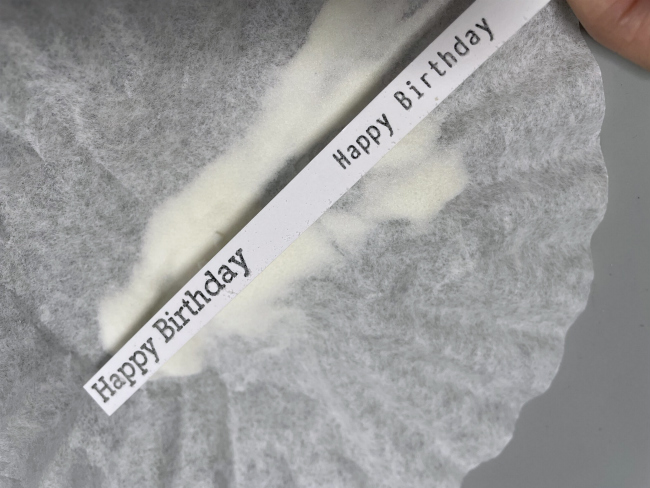
Cover the stamped image with Clear Embossing Power or MBoss. Melt the powder with the heat tool.

Step 3:

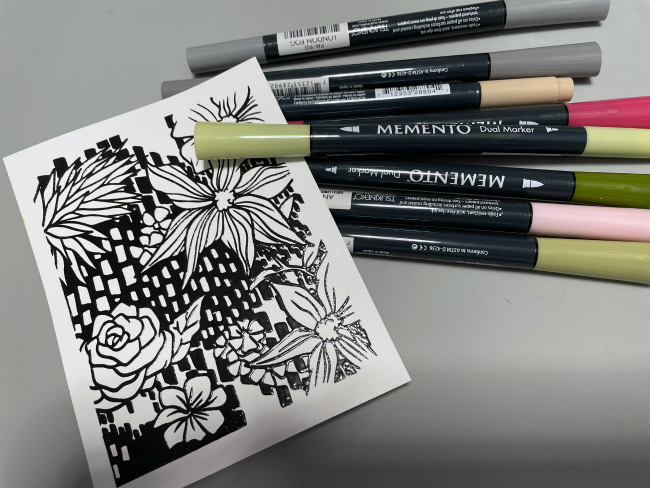
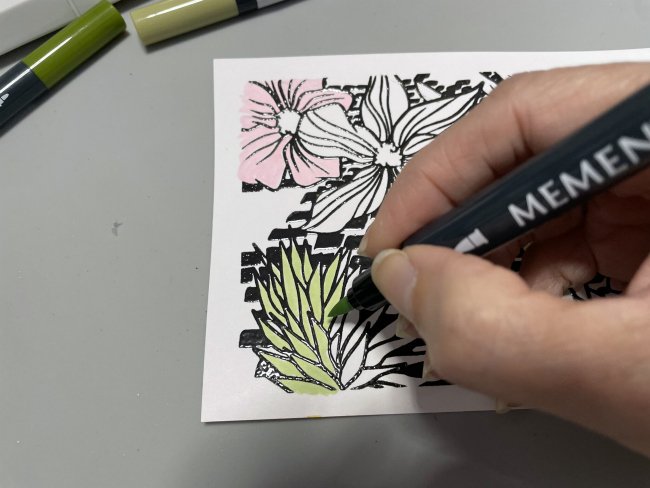
To enhance the details of the stamp, color it partially with Memento Markers. The VersaFine Clair in is a safe ink to work with these Markers or with any type of Alcohol Markers.

Step 4:

Combine the tones of your markers to have different shadows. In my sample I used Memento Markers in colors Angel Pink, New Sprout, Pistachio, Bamboo Leaves, Rose Bud, Desert Sand, Cantaloupe, Tangelo and Summer Sky.

Step 5:

If you want you can resize the stamped layer and paste it over a card base. You can use Tear It! Tape to paste it. 

Step 6:

In a separate piece of white cardstock stamp the birthday sentiment using the same products used to create the background. I used VersaFine Clair Nocturne and Clear Embossing Powder. 

Finalize your card pasting the sentiment with crafty foam tape.

Art Supplies:

Imagine:

• VersaFine Clair Nocturne

• Memento Markers Angel Pink, New Sprout, Pistachio, Bamboo Leaves, Rose Bud, Desert Sand, Cantaloupe, Tangelo and Summer Sky

• Clear Embossing Powder

• Craft Mat

Other:

• Background Stamps by Richard Garay Designs. 

• Stamping Tool

• Heat Tool.