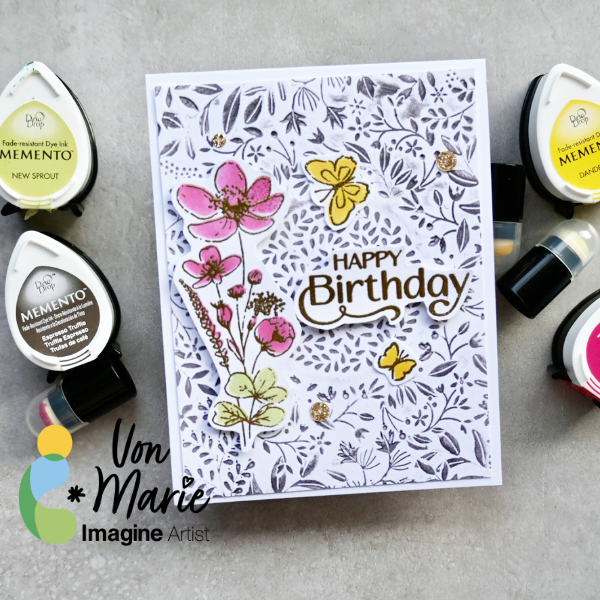
Hello everyone. Von Marie here with my newest video using colorful inks to use with stencils. Memento inks are really perfect for inking and stamping. I used Memento Dew inks to stencil some pretty florals and leaves. The video will have more details. I hope you enjoy. Thank you for watching.
Skill: Intermediate Time: 45 Mins.
Products Used:
• 100lb white Hammermill Paper • A2 Card Base • Glass Board and magnets • Glue • Die-cutting Machine • Heat Tool • Foam Tape • Scissors • Sequins
• Simon Says Stamp Butterfly Blossoms Stamp and Coordinating Stencils
• Simon Says Stamp Splendid Leaves Circle Frame Embossing Folder
• Kat Scrappiness Platinum Gold Glitter Sequins
ALTERNATIVE PRODUCTS THAT CAN BE USED TO RECREATE SOMETHING SIMILAR Any stamps, inks, and or Embossing Folder. You can watch how to create this Birthday Card Click Here
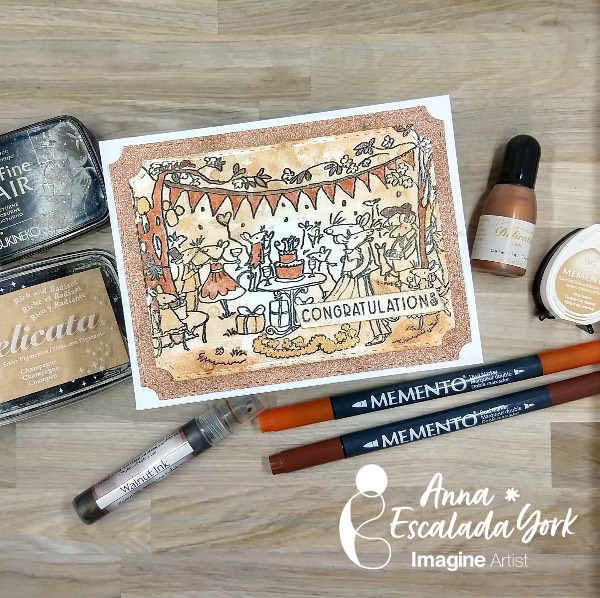
Before making this card, I had no idea all of the different winter wedding color palates there are! I needed to make a winter wedding card, and decided to use some products in a new way (at least for me). Before I share how I made this card, I wanted to share a winter wedding color palate that inspired me:
Skill: Intermediate Time: 2 hours
Directions:
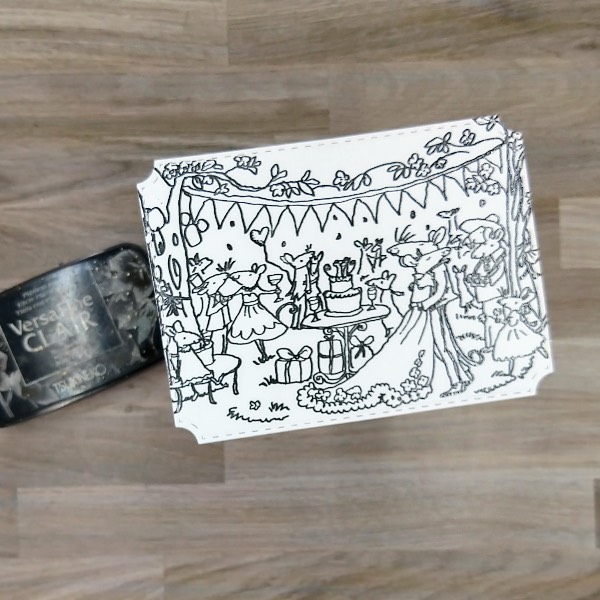
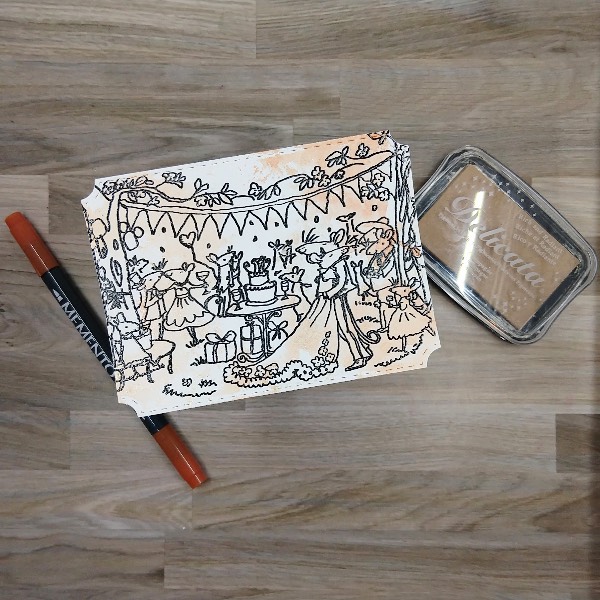
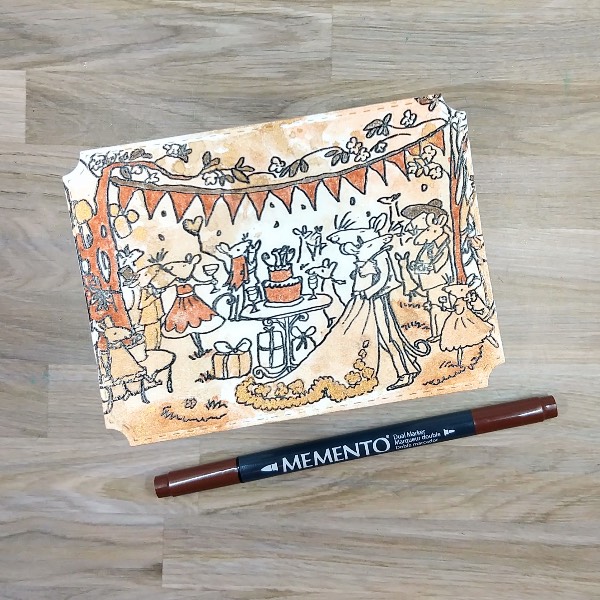
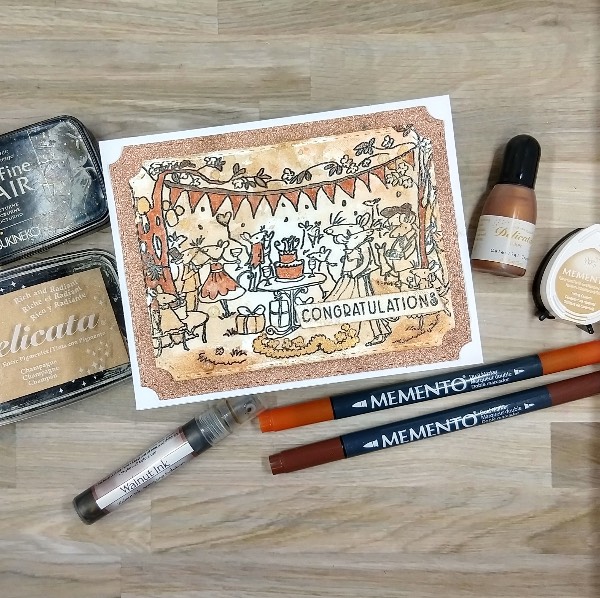
Step 1: I stamped a large wedding scene stamp on a die cut piece of watercolor paper with Nocturne VersaFine Clair ink and then heat embossed it with clear embossing powder.
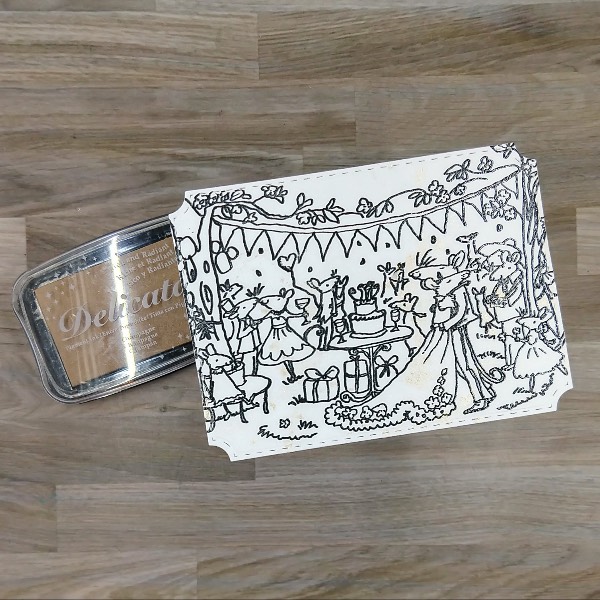
Step 2: Press a Champagne Delicata ink pad onto a piece of acetate packaging and then mix with water. Press the acetate onto the stamped wedding image. (This is very hard to see in the image, but there is a faint sheen on the wedding dress and in other parts of the panel.) Allow to dry.
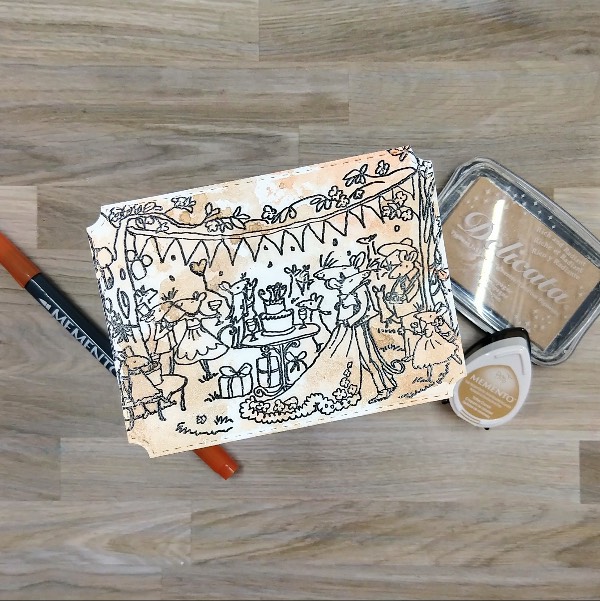
Step 3: Watercolor smoosh the panel with a second layer of the Champagne Delicata ink. Then scribble Potter’s Clay Memento Dual Marker onto the acetate and spray with water. Then press the acetate onto the panel. Allow these layers of color to dry on the panel.
Step 4: Press the Toffee Crunch Memento ink pad onto the same acetate, spray with more water and then watercolor smoosh the panel again.
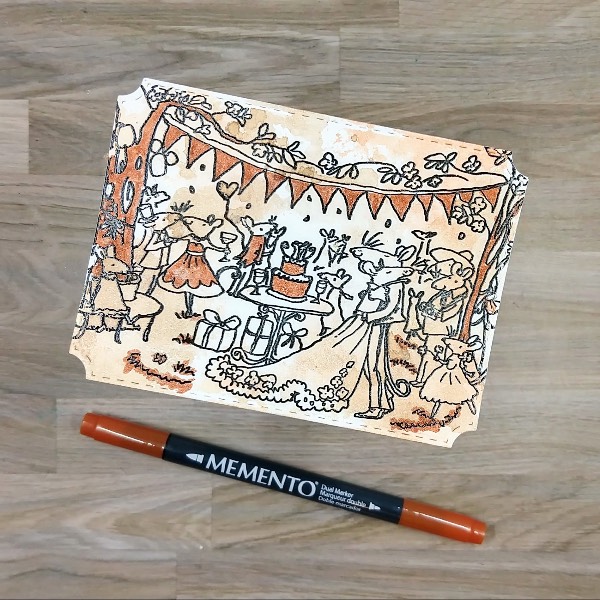
Step 5: Color in parts of the panel with Potter’s Clay Memento Dual Marker.
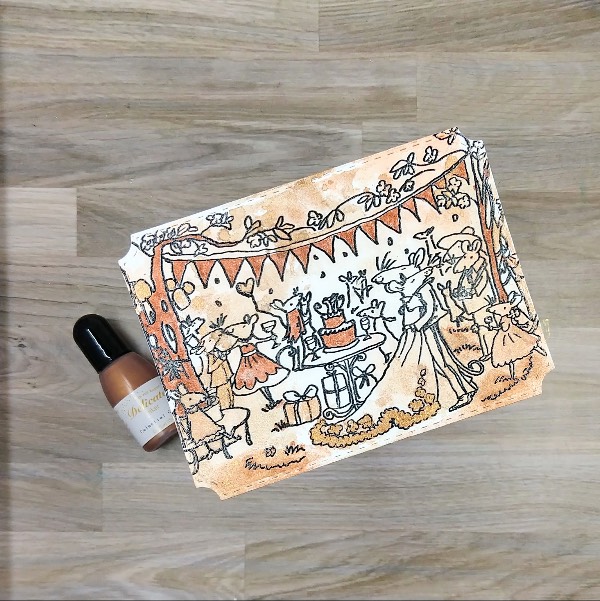
Step 6: Add a small amount of Celestial Copper Delicata Inker onto the same acetate packaging and use a small paintbrush to mix with water to thin out the reinker. Then use the paintbrush to paint the trim of the bride’s dress, some of the presents, and some other images with the coppery mix.
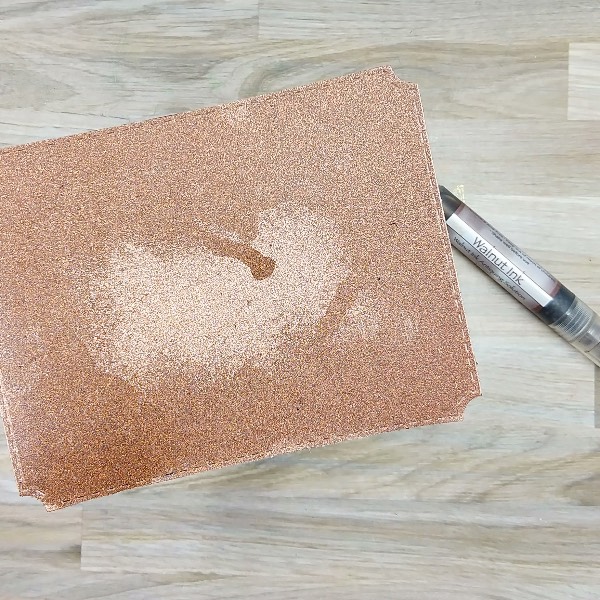
Step 7: Spray Walnut colored Walnut Ink Antiquing Solution onto die cut glitter cardstock to make it darker. (Please note that the panel took a long time to dry. The next time I do this, I plan on adding embossing powder to help it dry more quickly.
Step 8: Color the tree leaves, the pennant ribbon and a couple of the hats with Rich Cocoa Memento Dual Marker.
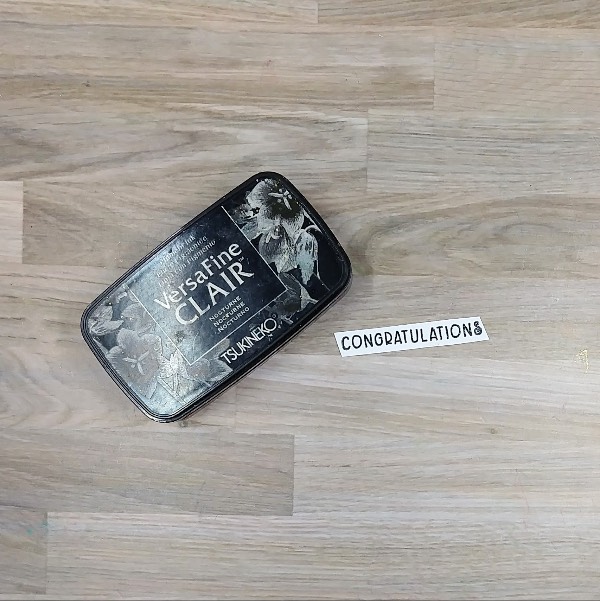
Step 9: Stamp the sentiment from the same stamp set with Nocturne VersaFine Clair ink and heat emboss with clear embossing powder. Trim the sentiment into a thin strip with the edges at an angle.
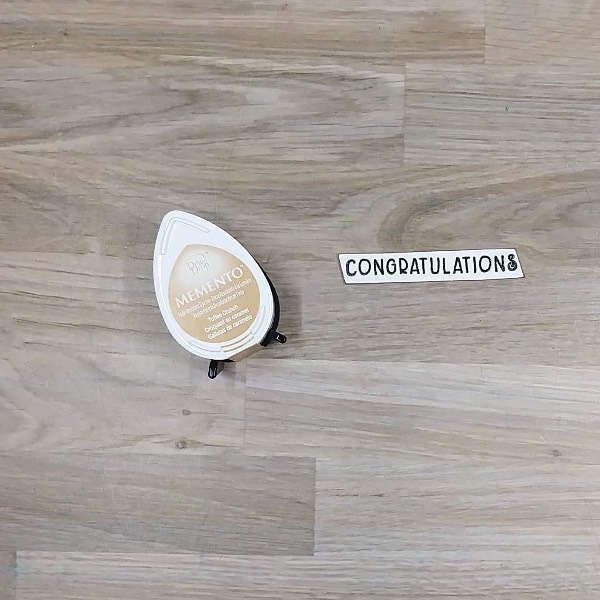
Step 10: Press the edges of the sentiment strip into a Toffee Crunch Memento ink pad to color the borders.
Step 11: Press a Champagne Delicata ink pad onto the acetate packaging and then spray with water. Watercolor smoosh the sentiment strip and allow to dry.
Step 12: Assemble the card. Glue 2 strips of scrap cardstock behind the sentiment and glue the sentiment on the lower right corner of the stamped panel. Then glued the stamped panel onto the sprayed glitter cardstock panel. Glue the whole thing onto an A2-sized white card base.
Glue gems on the bottom left and upper right corners of the card.
Other • Colorado Craft Company – stamp set – Happily Ever After by Anita Jeram • Pink and Main – die set – Notched Corners • Trinity Stamp Company – embellishments – Champagne Twinkle Stardust Rhinestone mix • A2-sized white card base • Clear Embossing Powder • Watercolor paper • Glitter cardstock • Die cutting machine • Paper trimmer Scissors • Glue
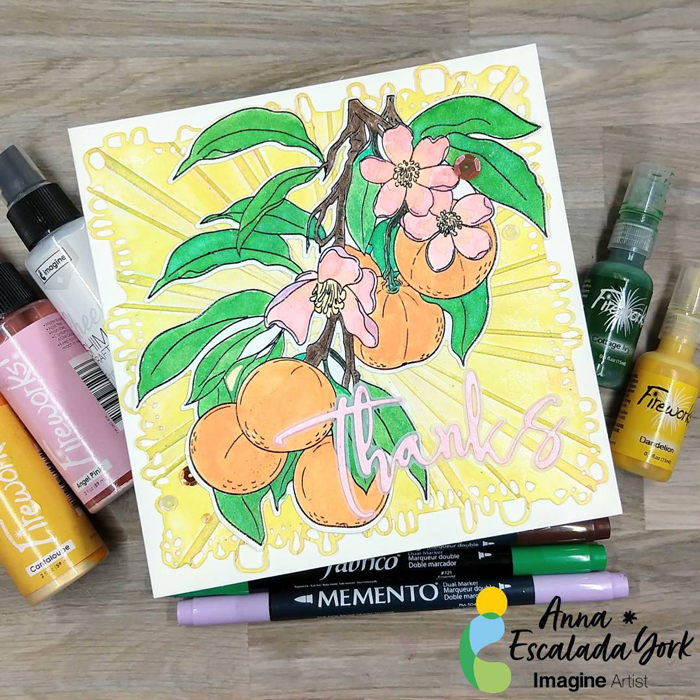
To me, Thanksgiving is mostly about food but also an excuse to say thank you to those people who are a part of my personal and professional life. So I decided to make a thank you card to let people know that I am grateful for them. I decided to use some paper scraps because I always have too many and to enhance them with sprays or ink to transform them. At first, I was planning on making one card with a lot of leaves, but changed my mind after die cutting the leaves, so ended up making two.
Skill: Intermediate Time: 1.5 hours
Directions:
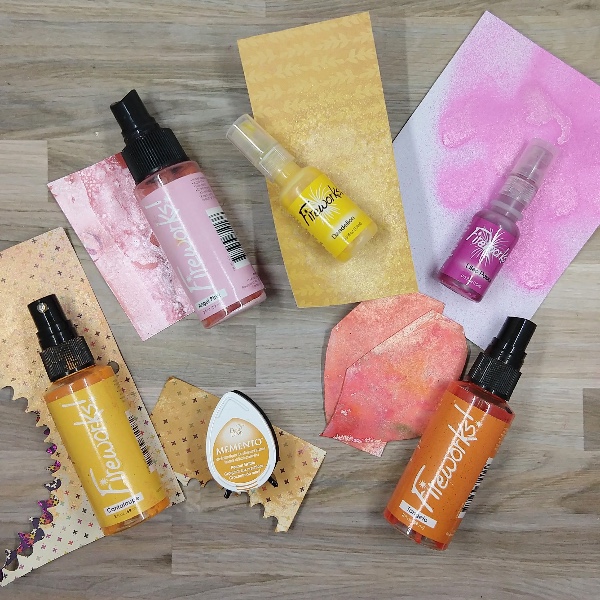
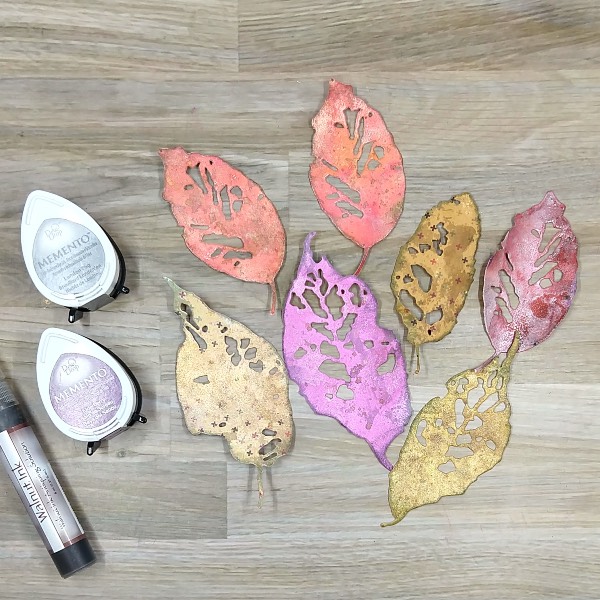
Step 1: Pull out some scraps of paper from your stash and a variety of sprays and ink. Spray the scraps with the sprays. My scraps were colored with Cantaloupe, Angel Pink, Dandelion, Lilac Posies, and Tangelo Fireworks! Craft Sprays as well as Peanut Brittle Memento Ink. After the spray dried, die cut the scraps of paper with leaf dies. Reserve some of the sprayed paper for later.
Step 2: Press Walnut Ink colored Walnut Ink Antiquing Solution as well as Elderberry Memento ink onto acetate packaging. Add water to the different parts of the acetate and splatter the die cut leaves with the Elderberry Memento ink. Then watercolor smoosh the leaves with both the Elderberry Memento ink and the Walnut Ink Antiquing Solution. After the leaves dried, rub the edges of the leaves with the London Fog Memento ink pad. Allow everything to dry again.
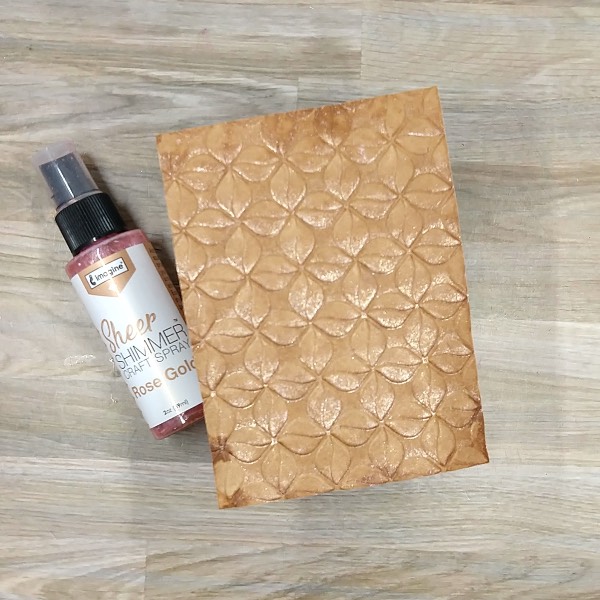
Step 3: Trim a piece of kraft cardstock with a paper trimmer to about 5 x 3.75 inches. Then spray Rose Gold Sheer Shimmer Craft Spray directly into an embossing folder. Place the kraft cardstock panel into the embossing folder and then run the whole thing through a die cutting machine.
Allow the panel to dry.
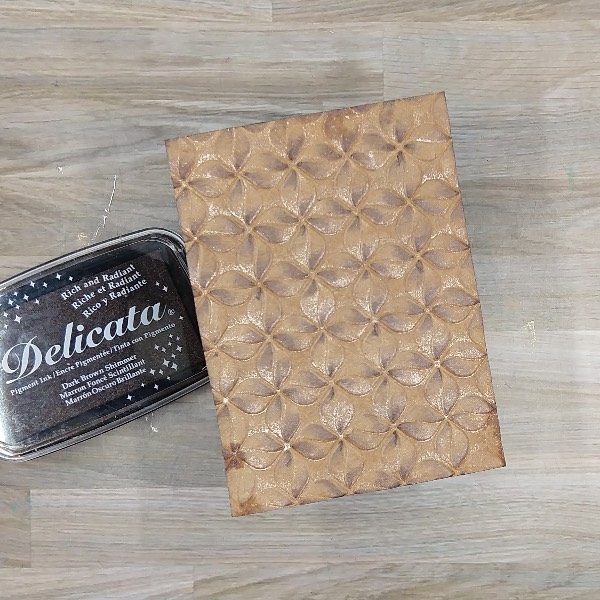
Step 4: Use Dark Brown Shimmer Delicata ink to add some color to the panel by brushing the panel lightly across the embossed paper. The raised part of the embossed panel will pick up the dark brown ink, while the other areas will be untouched. Then press the edges with the same Dark Brown Shimmer Delicata ink panel to add color to the border.
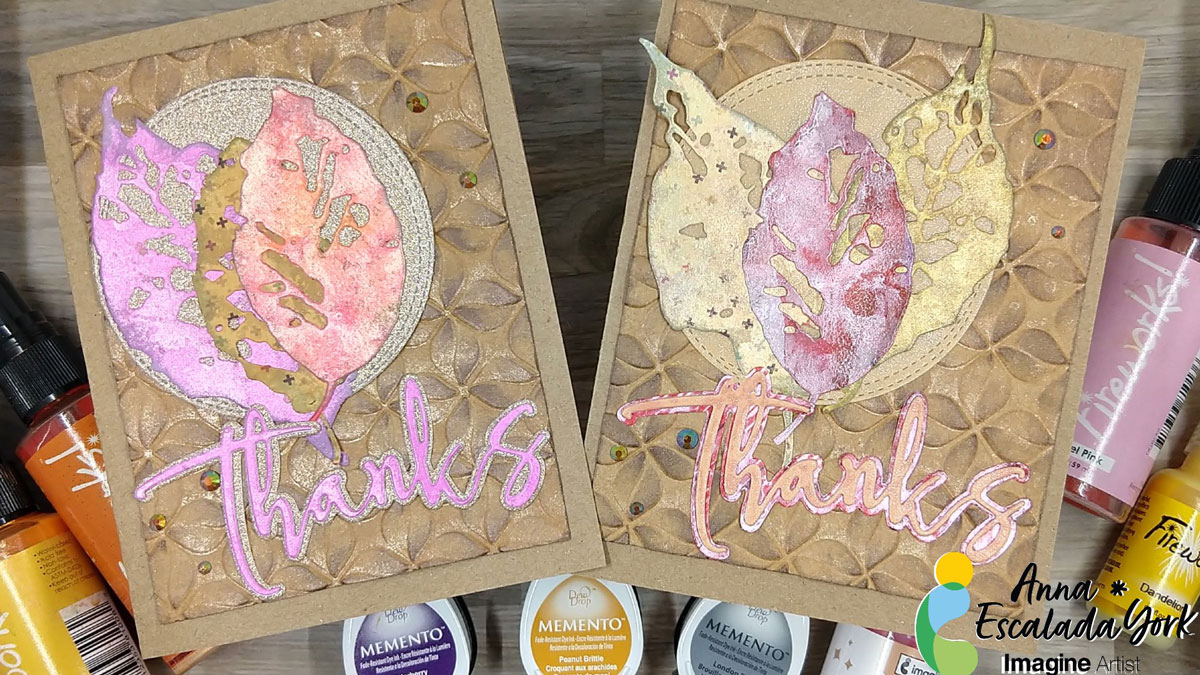
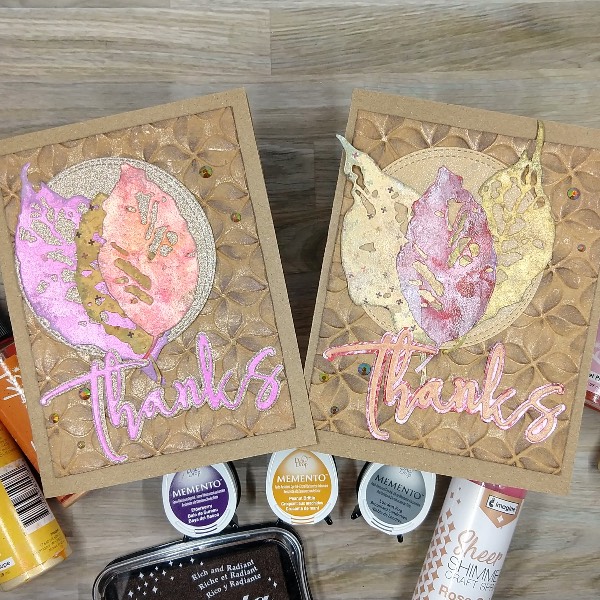
Step 5: I die cut a scrap piece of rose gold glitter cardstock with a stitched circle die as well as the shadow die of a two-layer sentiment die. In addition, I die cut another piece of the lilac (purple) sprayed cardstock from step 1 with the top layer of the two-layer sentiment die. I also die cut two pieces of scrap cardstock with the same sentiment die. The layers of the sentiment die were glued together to give dimension and then they were glued on the rose gold shadow die cut.
Then the card was assembled. I glued three of the leaves onto the glitter cardstock die cut circle and then glued the whole thing onto the embossed panel. Next, the sentiment was glued onto the panel. Sequins were glued onto the panel. Finally, the whole thing was glued onto a kraft cardbase.
A second card was made with the leftover die cut leaves in the same manner. The only changes were that I used a light orange vellum and some more of the sprayed scrap paper from step 1 to create the die cut circular background and the sentiment.
• Alex Syberia Designs – die set – Large Thanks • HAI Supply – embellishments – Cola Crystalline gems • Simon Says Stamp – Embossing folder Modern Loop • Sizzix – die set – Leaf Fragments by Tim Holtz • Circular die • A2-sized kraft card base Clear Embossing Powder Kraft cardstock • Glitter cardstock • Light orange sparkly vellum • Patterned paper scraps and magazine pages • Die cutting machine • Paper trimmer Scissors • Glue
I used to be intimidated by the idea of multimedia cards, but all they are cards that have different types of products. This card features stamping, watercoloring with sprays and Amplify! Ink, and embossing.
Skill: Intermediate Time: 2 hours
Directions:
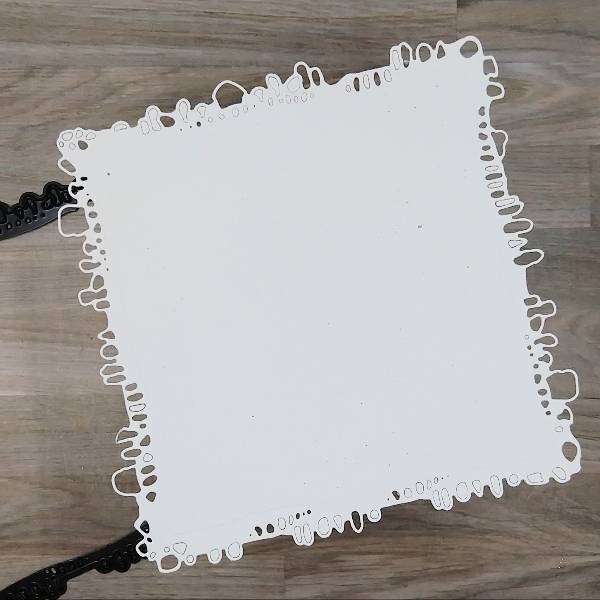
Step 1: Die cut a piece of watercolor paper.
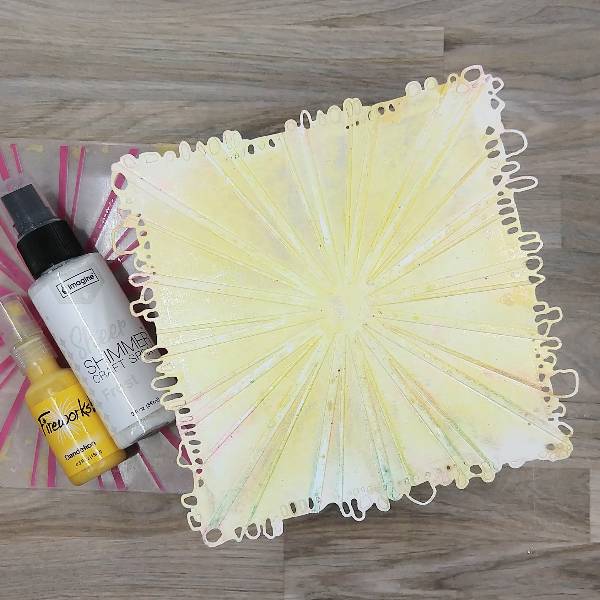
Step 2: Spray Dandelion Fireworks! Shimmery Craft Spray onto the center part of an embossing folder and Frost Sheer Shimmer Craft Spray around the edges. Place the die cut watercolor panel in the embossing folder. (The folder had some residual color from a previous project, but it will be covered up later.)
Step 3: Rub a Sunflower Yellow Brilliance Ink pad over the edges of the embossed watercolor panel.
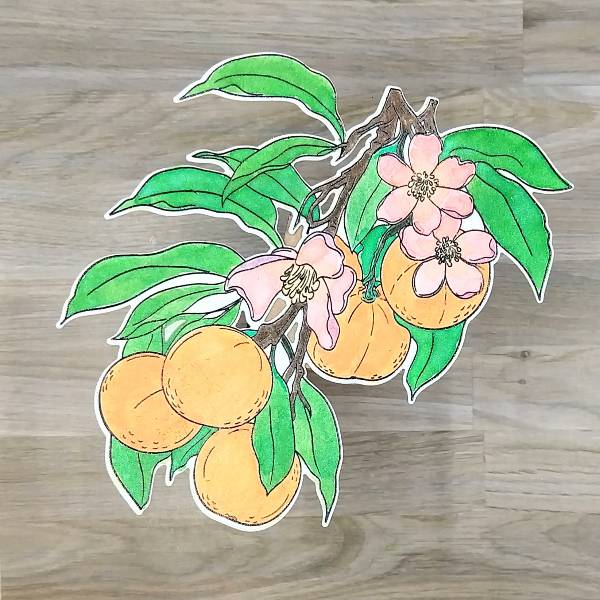
Step 4: Stamp the main image onto another piece of watercolor paper with Nocturne VersaFine Clair ink. Heat emboss with clear embossing powder.
Step 5: Use a variety of sprays and other media to color in the image.
The leaves were watercolored with Cottage Ivy Fireworks! Shimmery Craft Spray.
The green stems were colored with Emerald Fabrico Dual Marker.
The small branches were colored in with Rich Cocoa Memento Dual Marker.
The flowers were watercolored with Angel Pink Fireworks! Shimmery Craft Spray on the petals. After the petals dried, the center of the flower and the center part of the petals were water colored with Cantaloupe Shimmery Craft Spray. Finally, the outside parts of the petals were colored with Lulu Lavender Memento Dual Marker.
Electric Orange Radiant Neon Amplify! pigment ink and Cantaloupe Shimmery Craft Spray were mixed on a piece of scrap acetate and was watercolored onto the tangerines.
Step 6: Die cut the image with the corresponding die.
Step 7: Press Angel Pink Memento Dye Ink onto a scrap of watercolor paper. After the ink dries, spray Angel Pink Fireworks! Shimmery Craft Spray onto the same scrap of watercolor paper and allow it to dry.
Step 8: Die cut the pink watercolor paper with a thanks sentiment die and a piece of vellum with the sentiment’s shadow die.
Step 9: Glue the tangerine image onto the embossed watercolor background panel. Then glue the sentiment die cut to the vellum shadow sentiment die cut. Glue the sentiment onto the panel as well.
Step 10: Glue the panel onto a 6” by 6” square cardbase. Glue sequins on the lower left and upper right parts of the panel to finish the card.
AALL & Create – die set – Nature’s Doily Alex Syberia Designs – die set – Large Thanks die Altenew- die set – Tangerine Grove Altenew- stamp set – Tangerine Grove Catherine Pooler – sequin mix – València Sequin Mix Pink & Main – Embossing Folder – Sun Ray Clear Embossing Powder 6” by 6” cardbase Watercolor paper Vellum Die cutting machine Scissors Glue
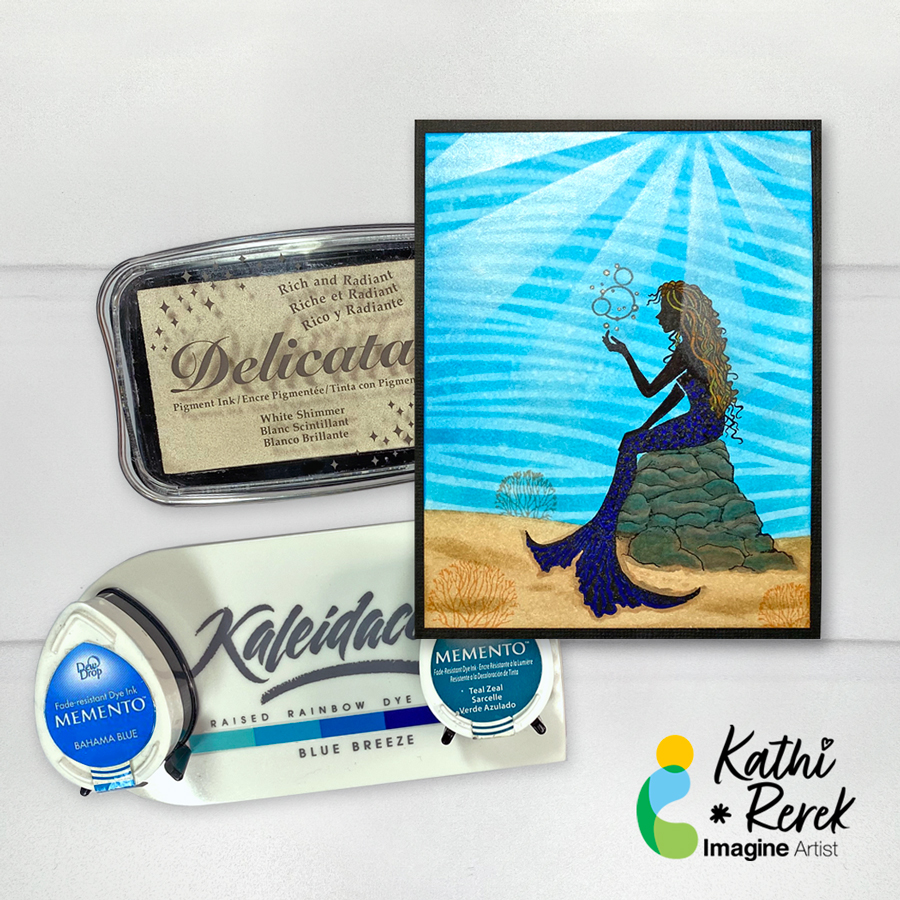
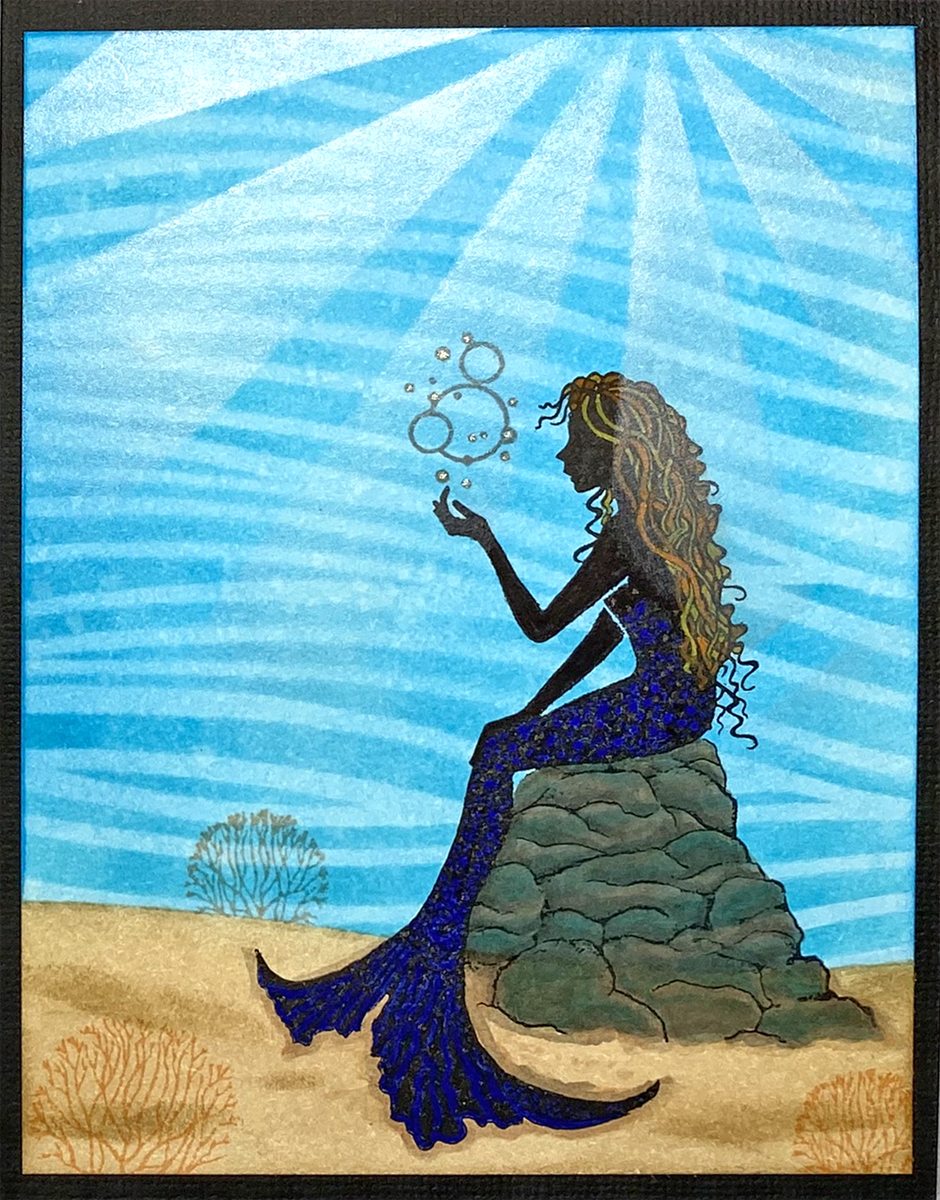
It’s summer, which makes me want to go to the beach to cool off in the ocean and pretend I’m a mermaid. Let’s make a card that fulfills those dreams using inks, stencils, and stamps!
Skill Level: Intermediate Time: 1.5 hours
Instructions:
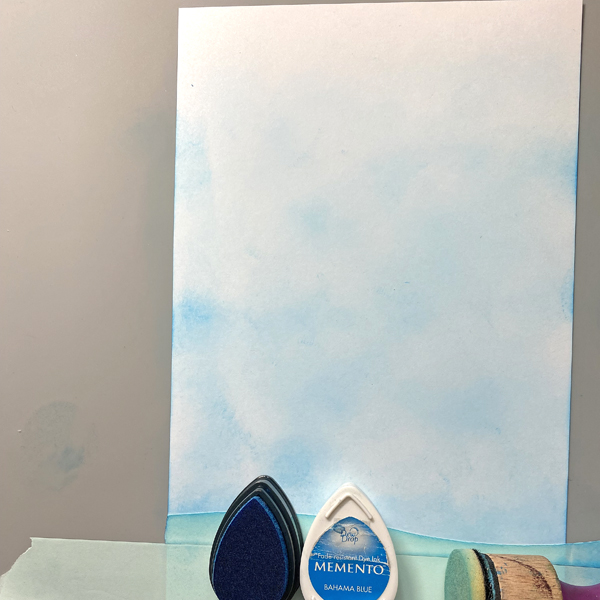
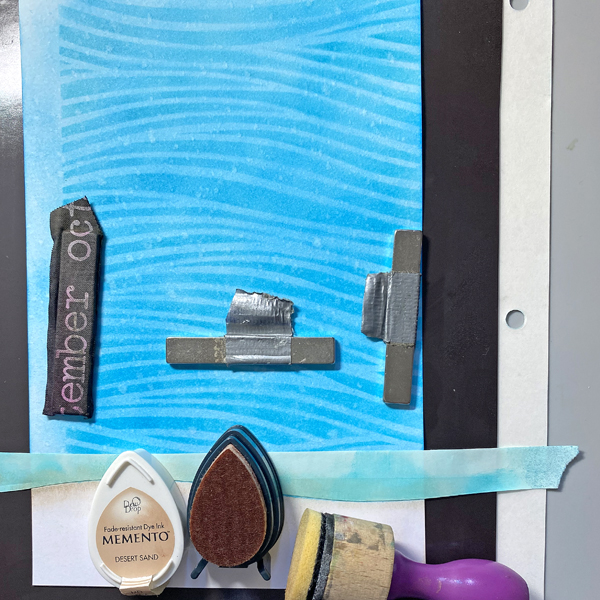
Step 1: Use a craft knife to cut a piece of Low-tack tape in a curved pattern. Place the tape at the bottom of a 5.5” x 8.5” piece of white cardstock (no photo).
Lightly apply Bahama Blue Memento Ink to the white area of the cardstock.
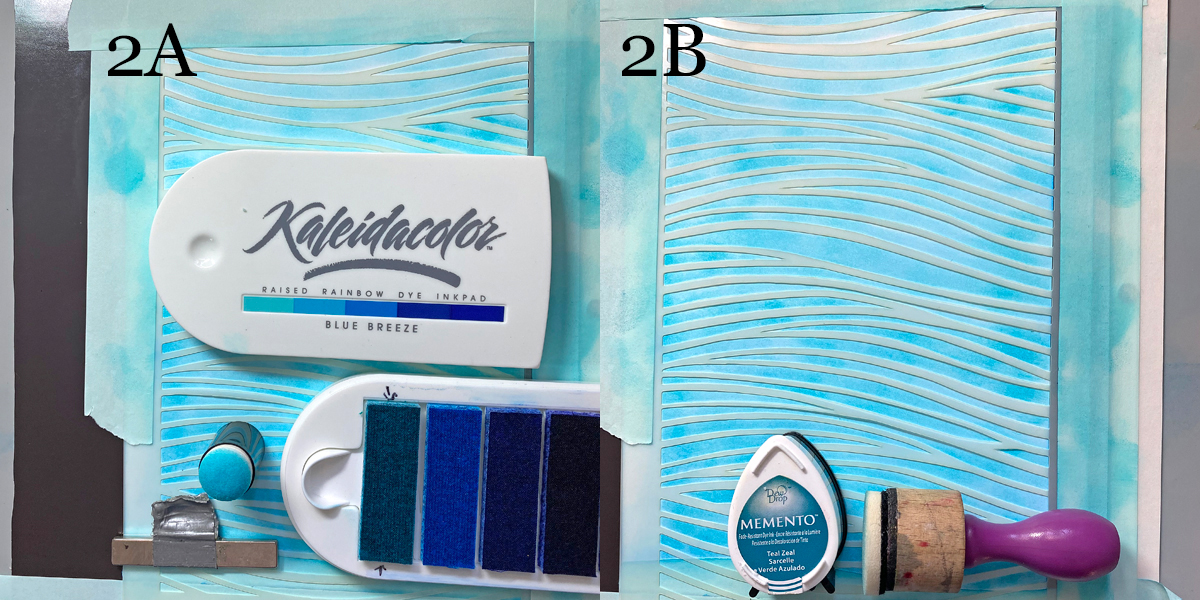
Steps 2A & B: Place a magnetic page onto the craft mat. Use low-tack tape to secure the cardstock panel to the magnetic page. Use magnets and low-tack tape to secure the Currents Stencil to the cardstock panel. Use a Sponge Dauber to apply the lightest blue ink from the Kaleidacolor Blue Breeze Ink pad over the stencil onto the cardstock panel (2A). Randomly apply Teal Zeal Memento Ink over the stencil onto the cardstock to deepen the colors.
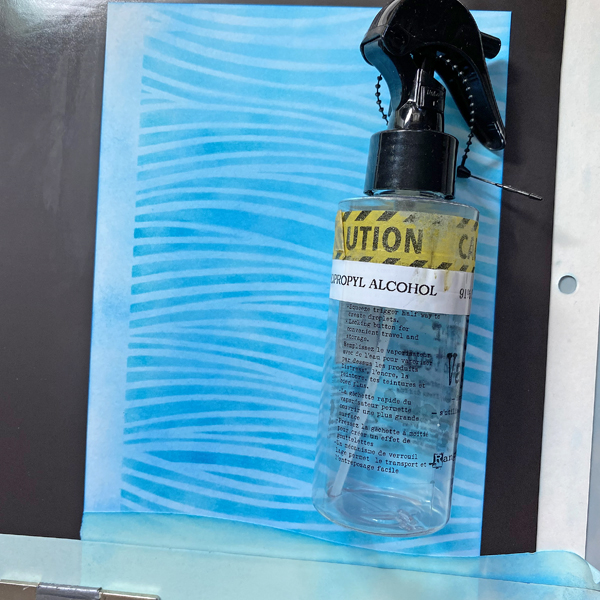
Step 3: Remove the stencil, then spritz the panel with 91% Isopropyl Alcohol to blend the inks and add white splatters and splotches.
Step 4: Remove the low-tack tape and replace with the negative part of the tape cut in Step 1. Sponge Desert Sand Memento Ink over the tape onto the image panel to create the sea floor. Remove the tape.
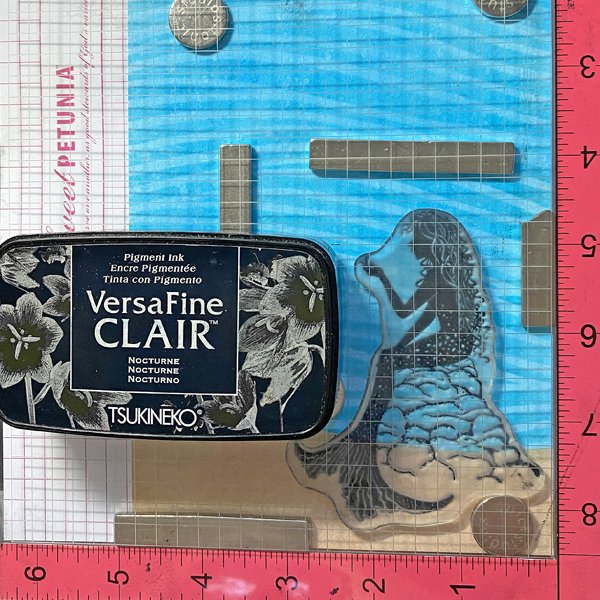
Step 5: Place the panel onto the base of a stamping platform and secure with magnets. Position the mermaid stamp from the Guinevere Clear Polymer Stamp Set so that it’s face down along the lower right side of the image panel. Press the platform’s lid onto the back of the stamp, lift, and ink the stamp with Nocturne VersaFine Clair Ink. Stamp. Re-ink and stamp again if necessary to attain a good impression.
Remove the panel and thoroughly heat set the ink.
Step 6: Use Copic markers to color the mermaid’s rocky throne. Usually I don’t use Copic markers with any ink other than Memento, but since I had duplicate markers, I gave it a shot and it worked! Sorry! No photos!
Step 7: Use Triplus pens to color the mermaid’s hair. Use Marine and Black Stardust Glitter Gel Pens to add detail the mermaid’s scales. The ink of both pens work well with most inks. Sorry! No photos again!
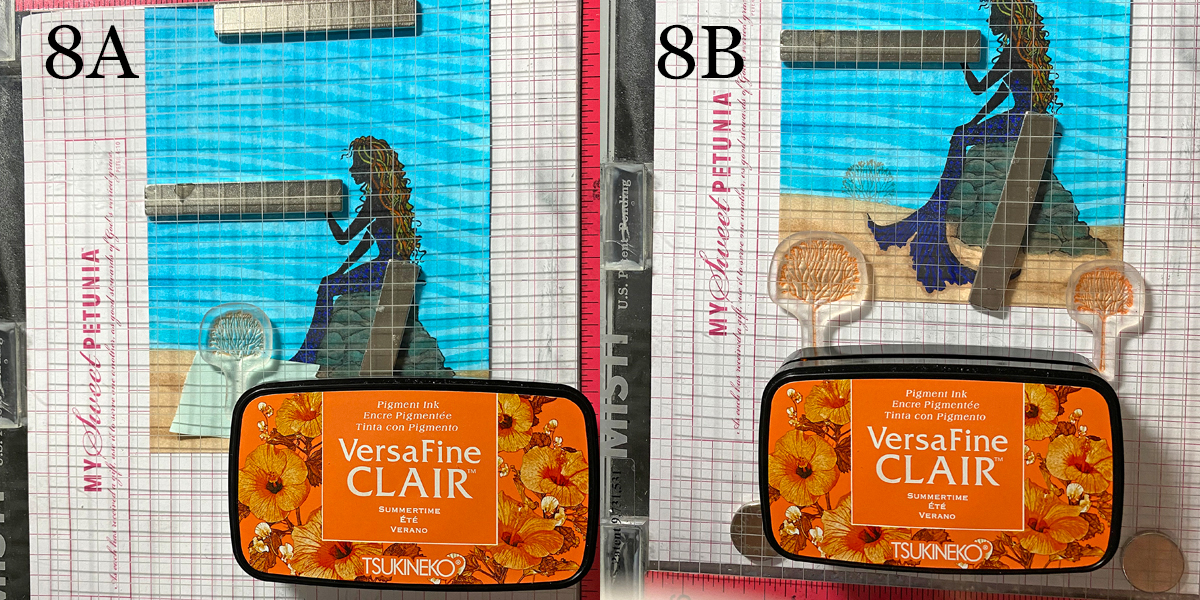
Steps 8A & B: Place the image panel back onto the base of the stamping platform and secure with magnets. Use low-tack tape to cover the top of the ocean floor to the left of the mermaid.
Position the mid-sized Skeleton Tree stamp from the Skeleton Tree Clear Stamp Set facedown on the top left. Press the lid of the platform onto the back of the stamp and lift. Ink the stamp with Summertime VersaFine Clair Ink and stamp (8A). Remove the tape.
Remove, clean and dry the stamp. Reposition the mid-sized Skeleton Tree stamp so that it’s facedown on the bottom left of the image panel. Position the smallest Skeleton Tree Stamp from the facedown on the bottom right of the image panel
Press the lid into the back of the stamps and lift. Ink both stamps with Summertime VersaFine Clair Ink and stamp (8B). Remove the stamps from the platform.
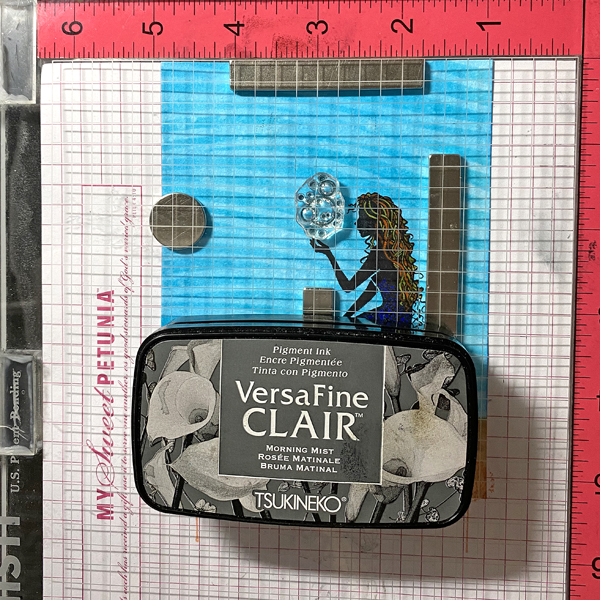
Step 9: Position the bubbles stamp from the Faerie Clear Polymer Stamp Set facedown on the image panel slightly above the mermaid’s outstretched hand. Press the lid into the back of the stamps and lift. Ink the stamp with Morning Mist VersaFine Clair Ink and stamp. Remove the panel from the platform. Heat set the panel.
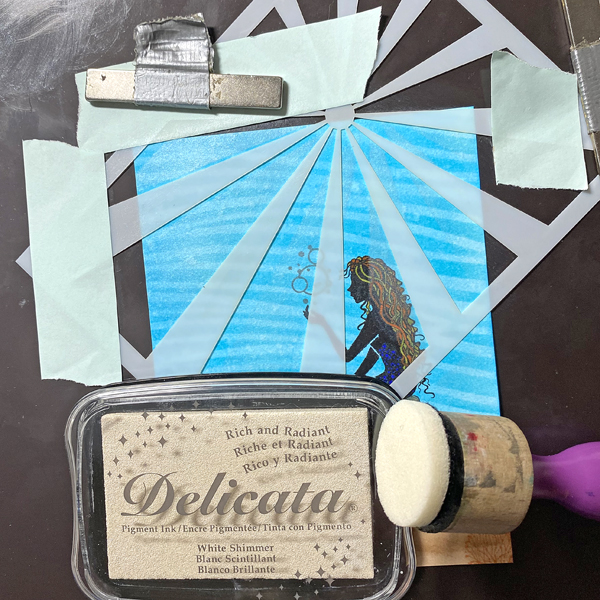
Step 10: Place the image panel back onto the magnetic page. Use magnets and low-tack tape to secure the Sunshine Small Stencil over the image panel as shown. Sponge White Shimmer Delicata Ink over the stencil onto the image panel. Remove the panel and heat set.
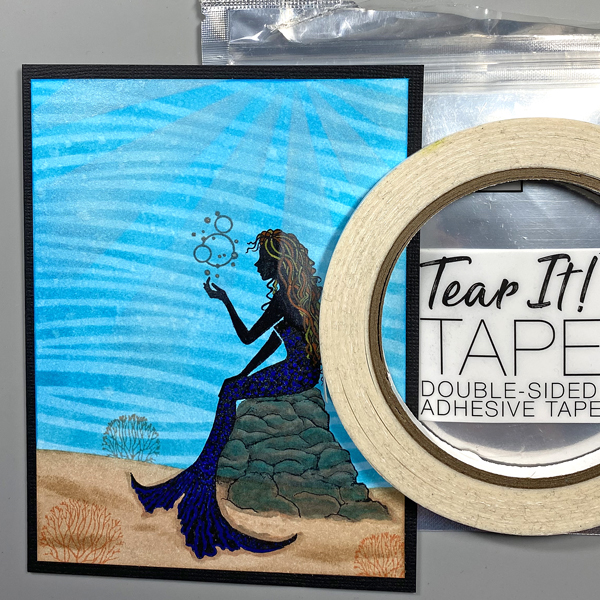
Step 11: Use Tear-It! Tape to adhere the image panel to a black A2 card.
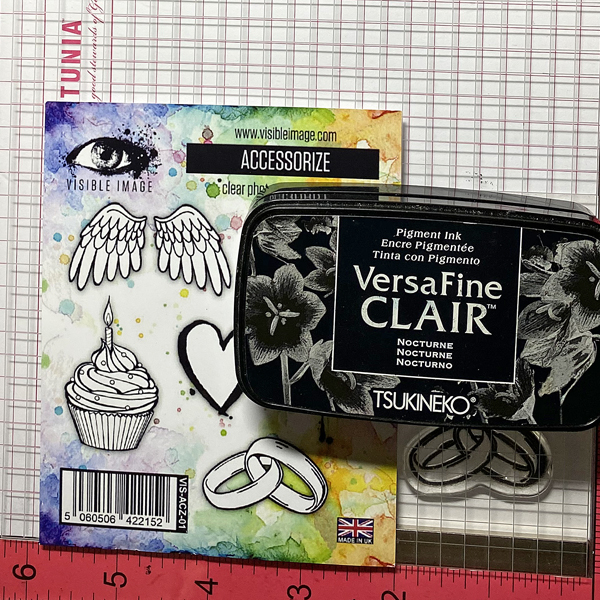
Let’s make a summer wedding card with Memento and Golden Glitz Delicata Inks!
Skill Level: Intermediate Time: 1.5 hours
Instructions:
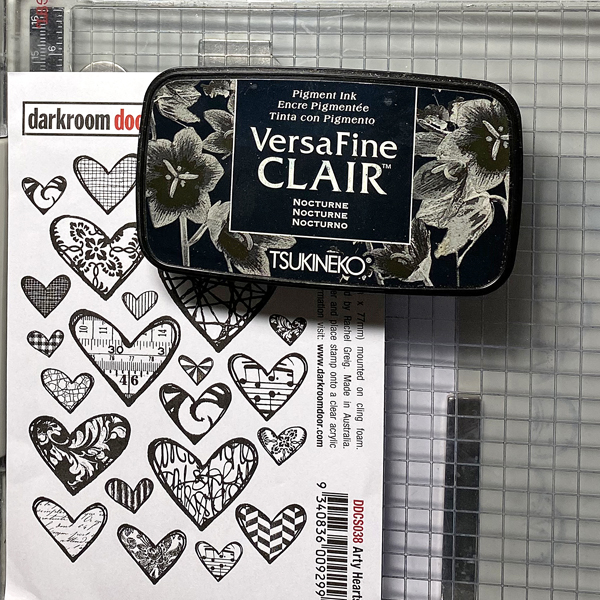
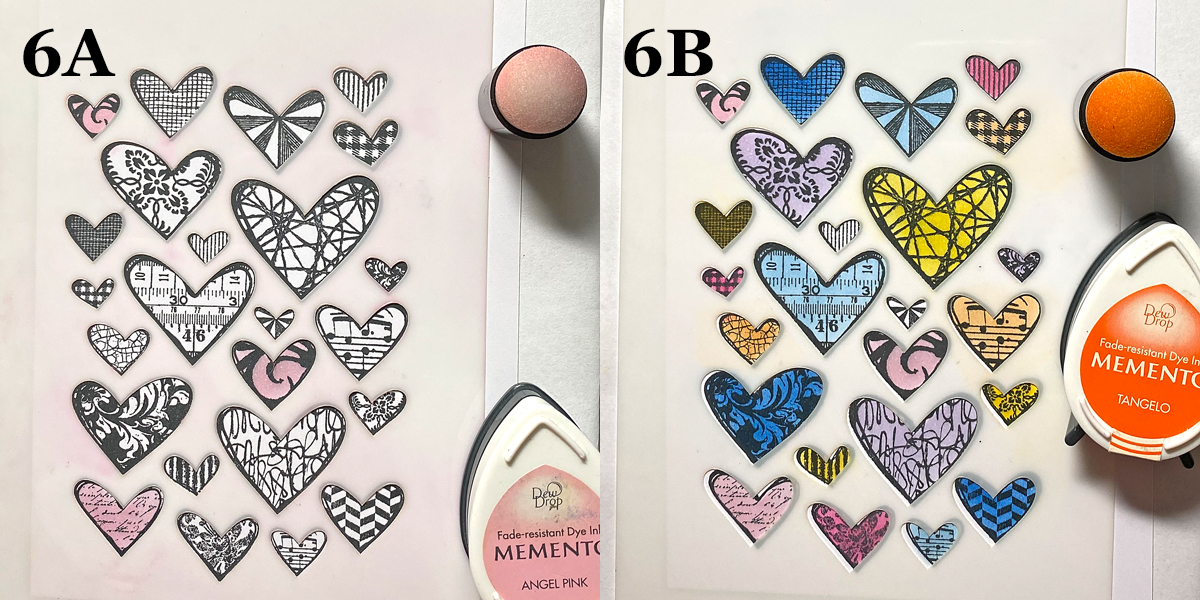
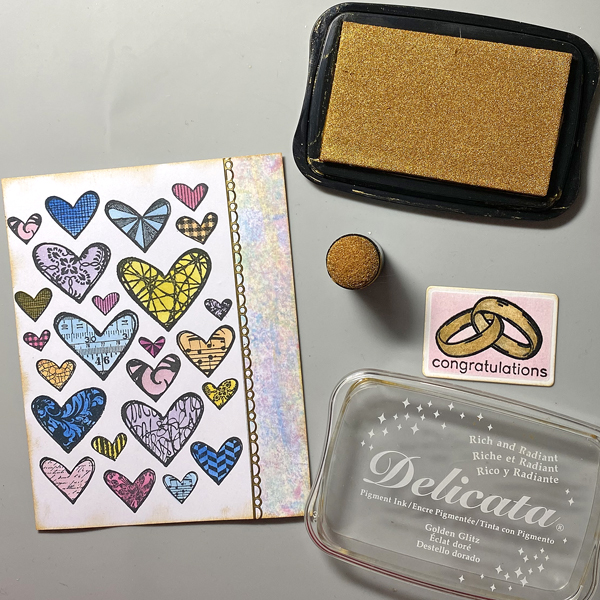
Step 1: Use a stamping platform and VersaFine Clair Nocturne Ink to stamp the Arty Hearts Collage Cling Stamp onto white cardstock.
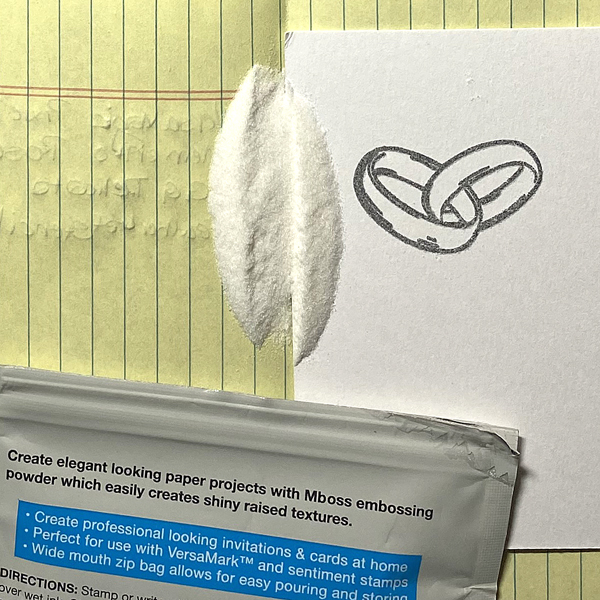
Step 2: Use a stamping platform and VersaFine Clair Nocturne Ink to stamp the wedding rings from the Accessorize Clear Stamp Set twice — once onto 140 lb. Mixed Media Cardstock and once onto repositionable label paper.
Step 3: Apply Clear MBoss Powder to the stamped image, dump the excess back into the packet, and heat set the image.
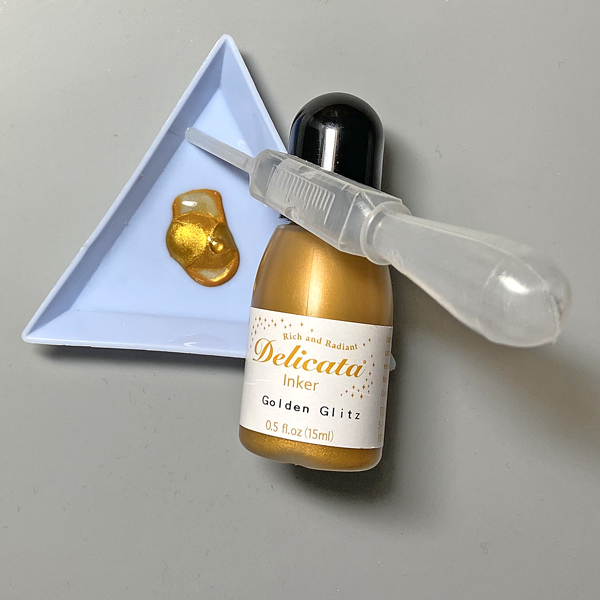
Step 4: Add a few drops of Golden Glitz Delicata Ink to a small container. Dilute with a few drops of water.
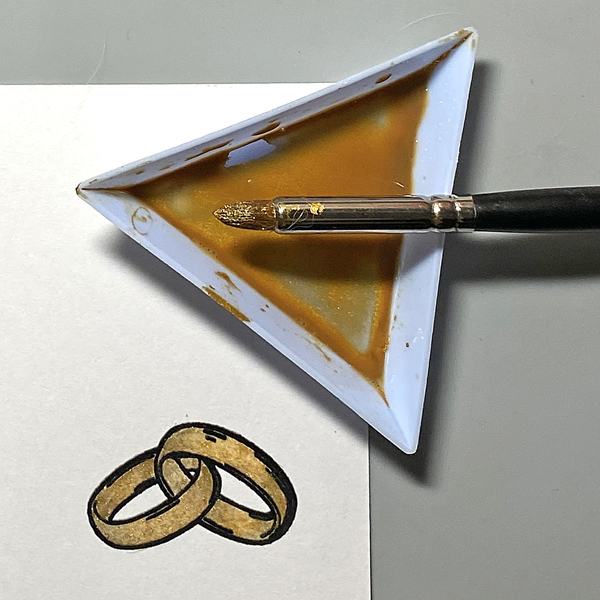
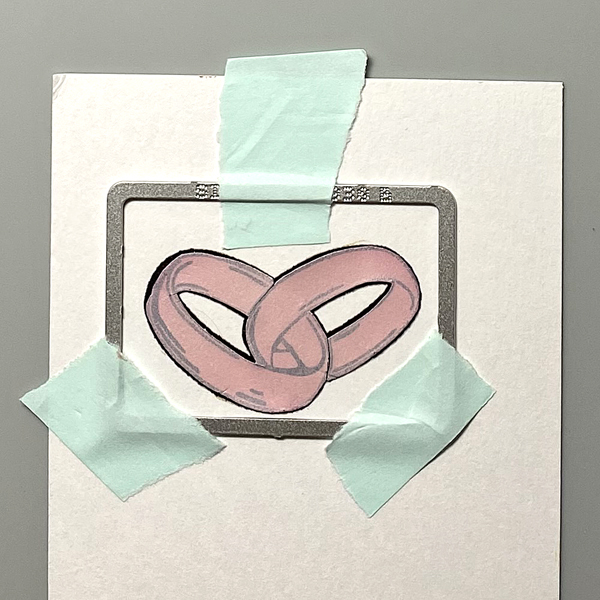
Step 5: Use a brush to paint the wedding rings with diluted Golden Glitz Delicata ink. Set aside.
Step 6: Place the Arty Hearts Stencil over the image stamped in Step 1. Use Sponge Daubers to apply Angel Pink, Rose Bud, Summer Sky, Danube Blue, Lulu Lavender, Lilac Posies, Dandelion, and Tangelo Memento through the stencil onto the stamped hearts on the image panel. Set aside.
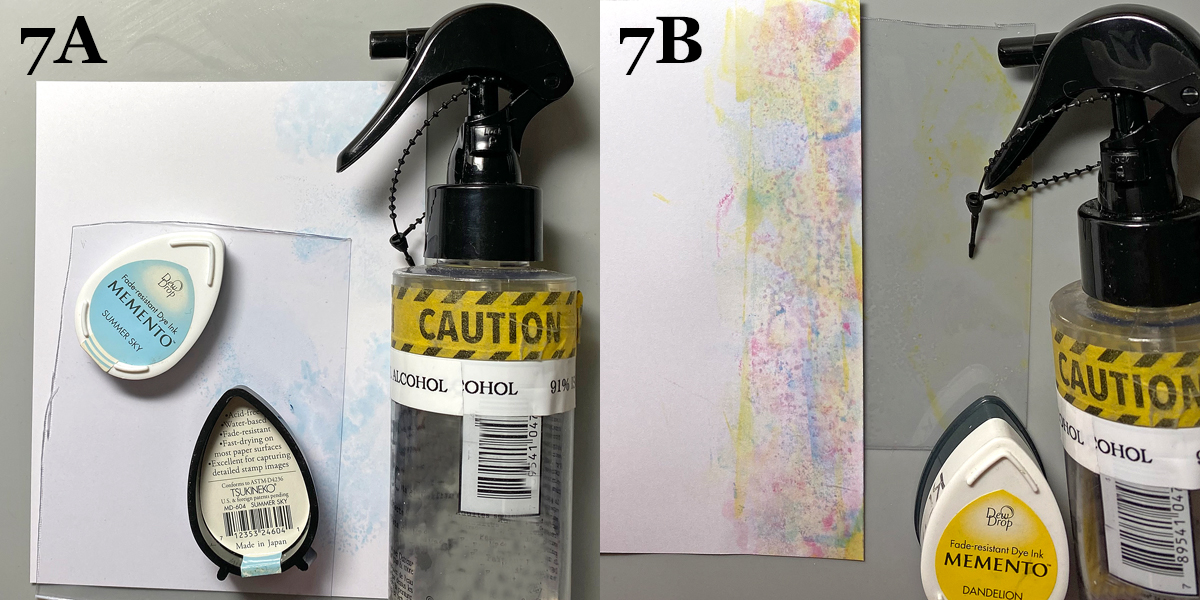
Steps 7A and 7B: Smoosh Summer Sky Memento Ink onto a piece of acetate packaging. Mist the acetate with 91% Isopropyl Alcohol, then smoosh onto the right side of a piece of white cardstock.
Clean the acetate, then repeat this process using Angel Pink, Rose Bud, Danube Blue, and Dandelion Memento Inks until you’re happy with the ink coverage on the panel.
Safety Note: Please be sure to have good ventilation via an open window to minimize your exposure to alcohol fumes.
Step 8: Fussy-cut the sticker paper version of the Wedding Rings from Step 2. Place atop the image. Use low-tack tape to secure the small rectangle die from the Specimen Thinlits Die Set onto the image panel. Run the die through your cutting machine.
Step 9: Keeping the image panel in the die, use a Sponge Dauber to apply Angel Pink Memento Ink over the die onto the die-cut, which will leave a thin white border around the pink
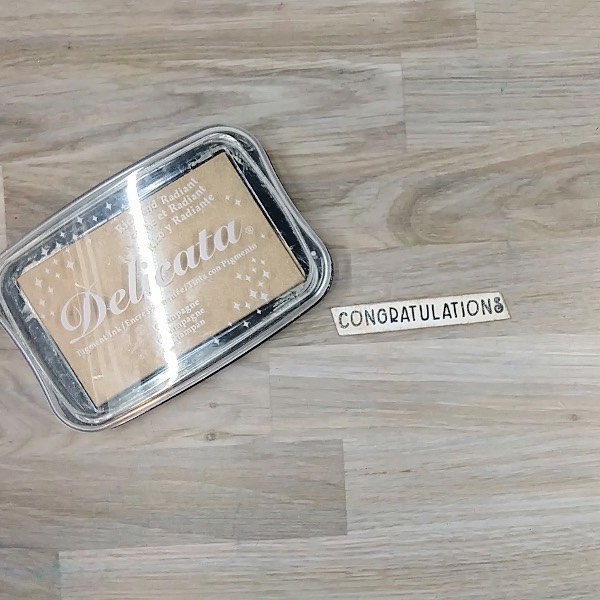
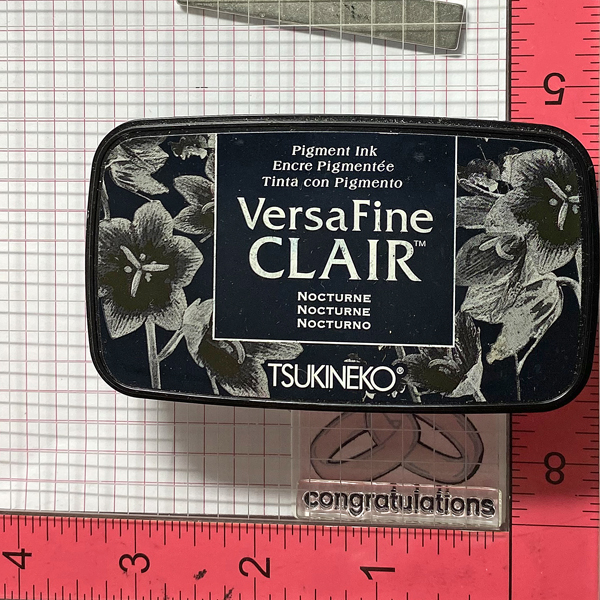
Step 10: Place the die-cut onto the base of a stamping platform. Ink the “Congratulations” stamp from the More Classic Sentiments Clear Stamp Set with Nocturne VersaFine Clair and stamp. Re-ink and stamp again if necessary to attain a good impression.
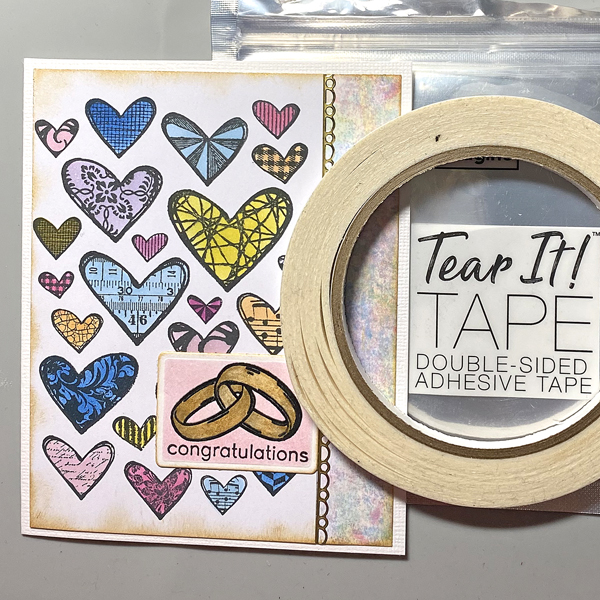
Step 11: Adhere the heart-stamped and stenciled panel (Steps 1 and 6) onto the left side of the smooshed ink panel (Step 7). Add a foil border sticker to cover the seam.
Use a Sponge Dauber to edge the heart image panel and the rings/sentiment die-cut with Golden Glitz Delicata Ink.
Step 12: Use Tear It! Tape to adhere the card front to a white A2 card.