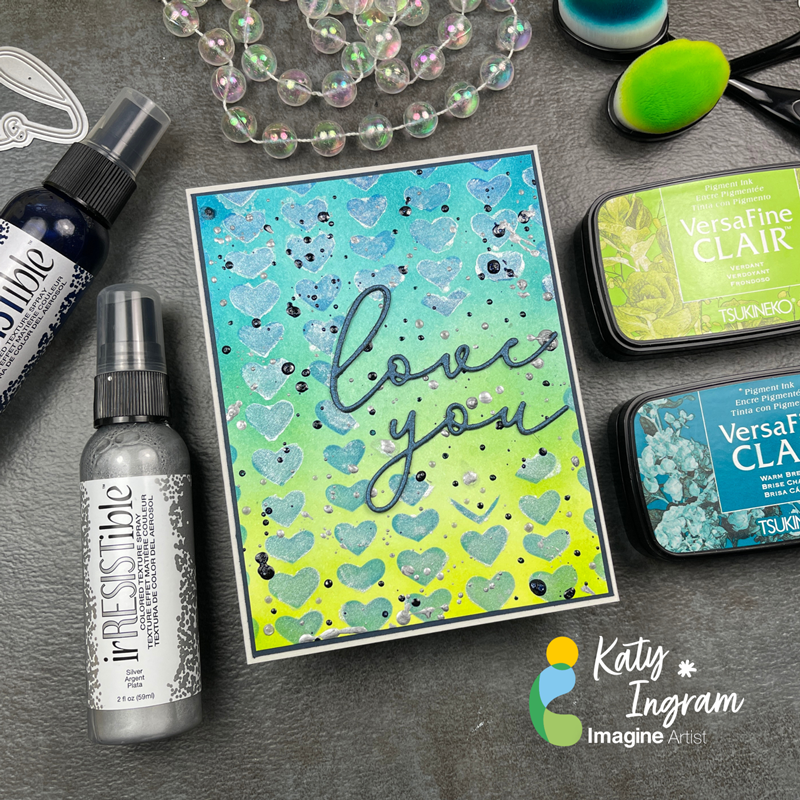
Hello Friends! Katy here and today I am using a variety of products to create this Love You card.
In today’s video tutorial I do some ink blending with VersaFine Clair Verdant and Warm Breeze. I haven’t used these two colors for ink blending before and they blended really well and the colors coordinate perfectly together. I used a heart stencil with VersaFine Clair Paradise to blend over the ink blended panel and then added some Sheer Shimmer Stix in Frost for a bit of shimmer. I also pulled out some irRESISTible Spray in Paris Dusk and Silver to create some splatter. I finished the panel off by die cutting the words love and you with some metallic blue cardstock. Check out the video to see the process in action. I hope you enjoy and thanks for stopping by.
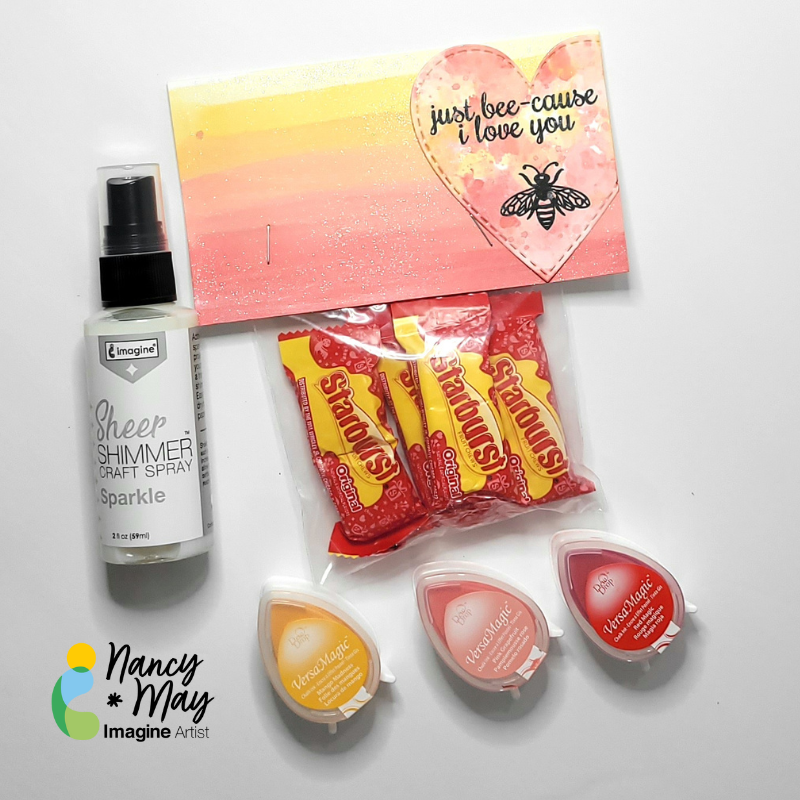
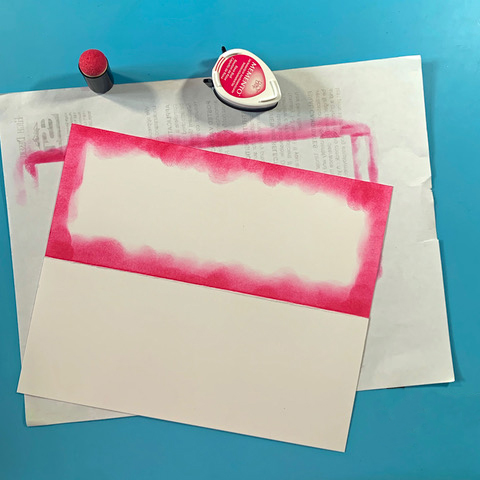
In today’s crafting tutorial, we are going to take a quick look at the faux dip dying technique we have been seeing everywhere. We will use VersaMagic Dew Drop ink pads in three analogous colors to obtain that lovely ombre. I love this project for Valentine’s Day but really you can use it for any day, theme, and you can use the technique for a variety of projects.
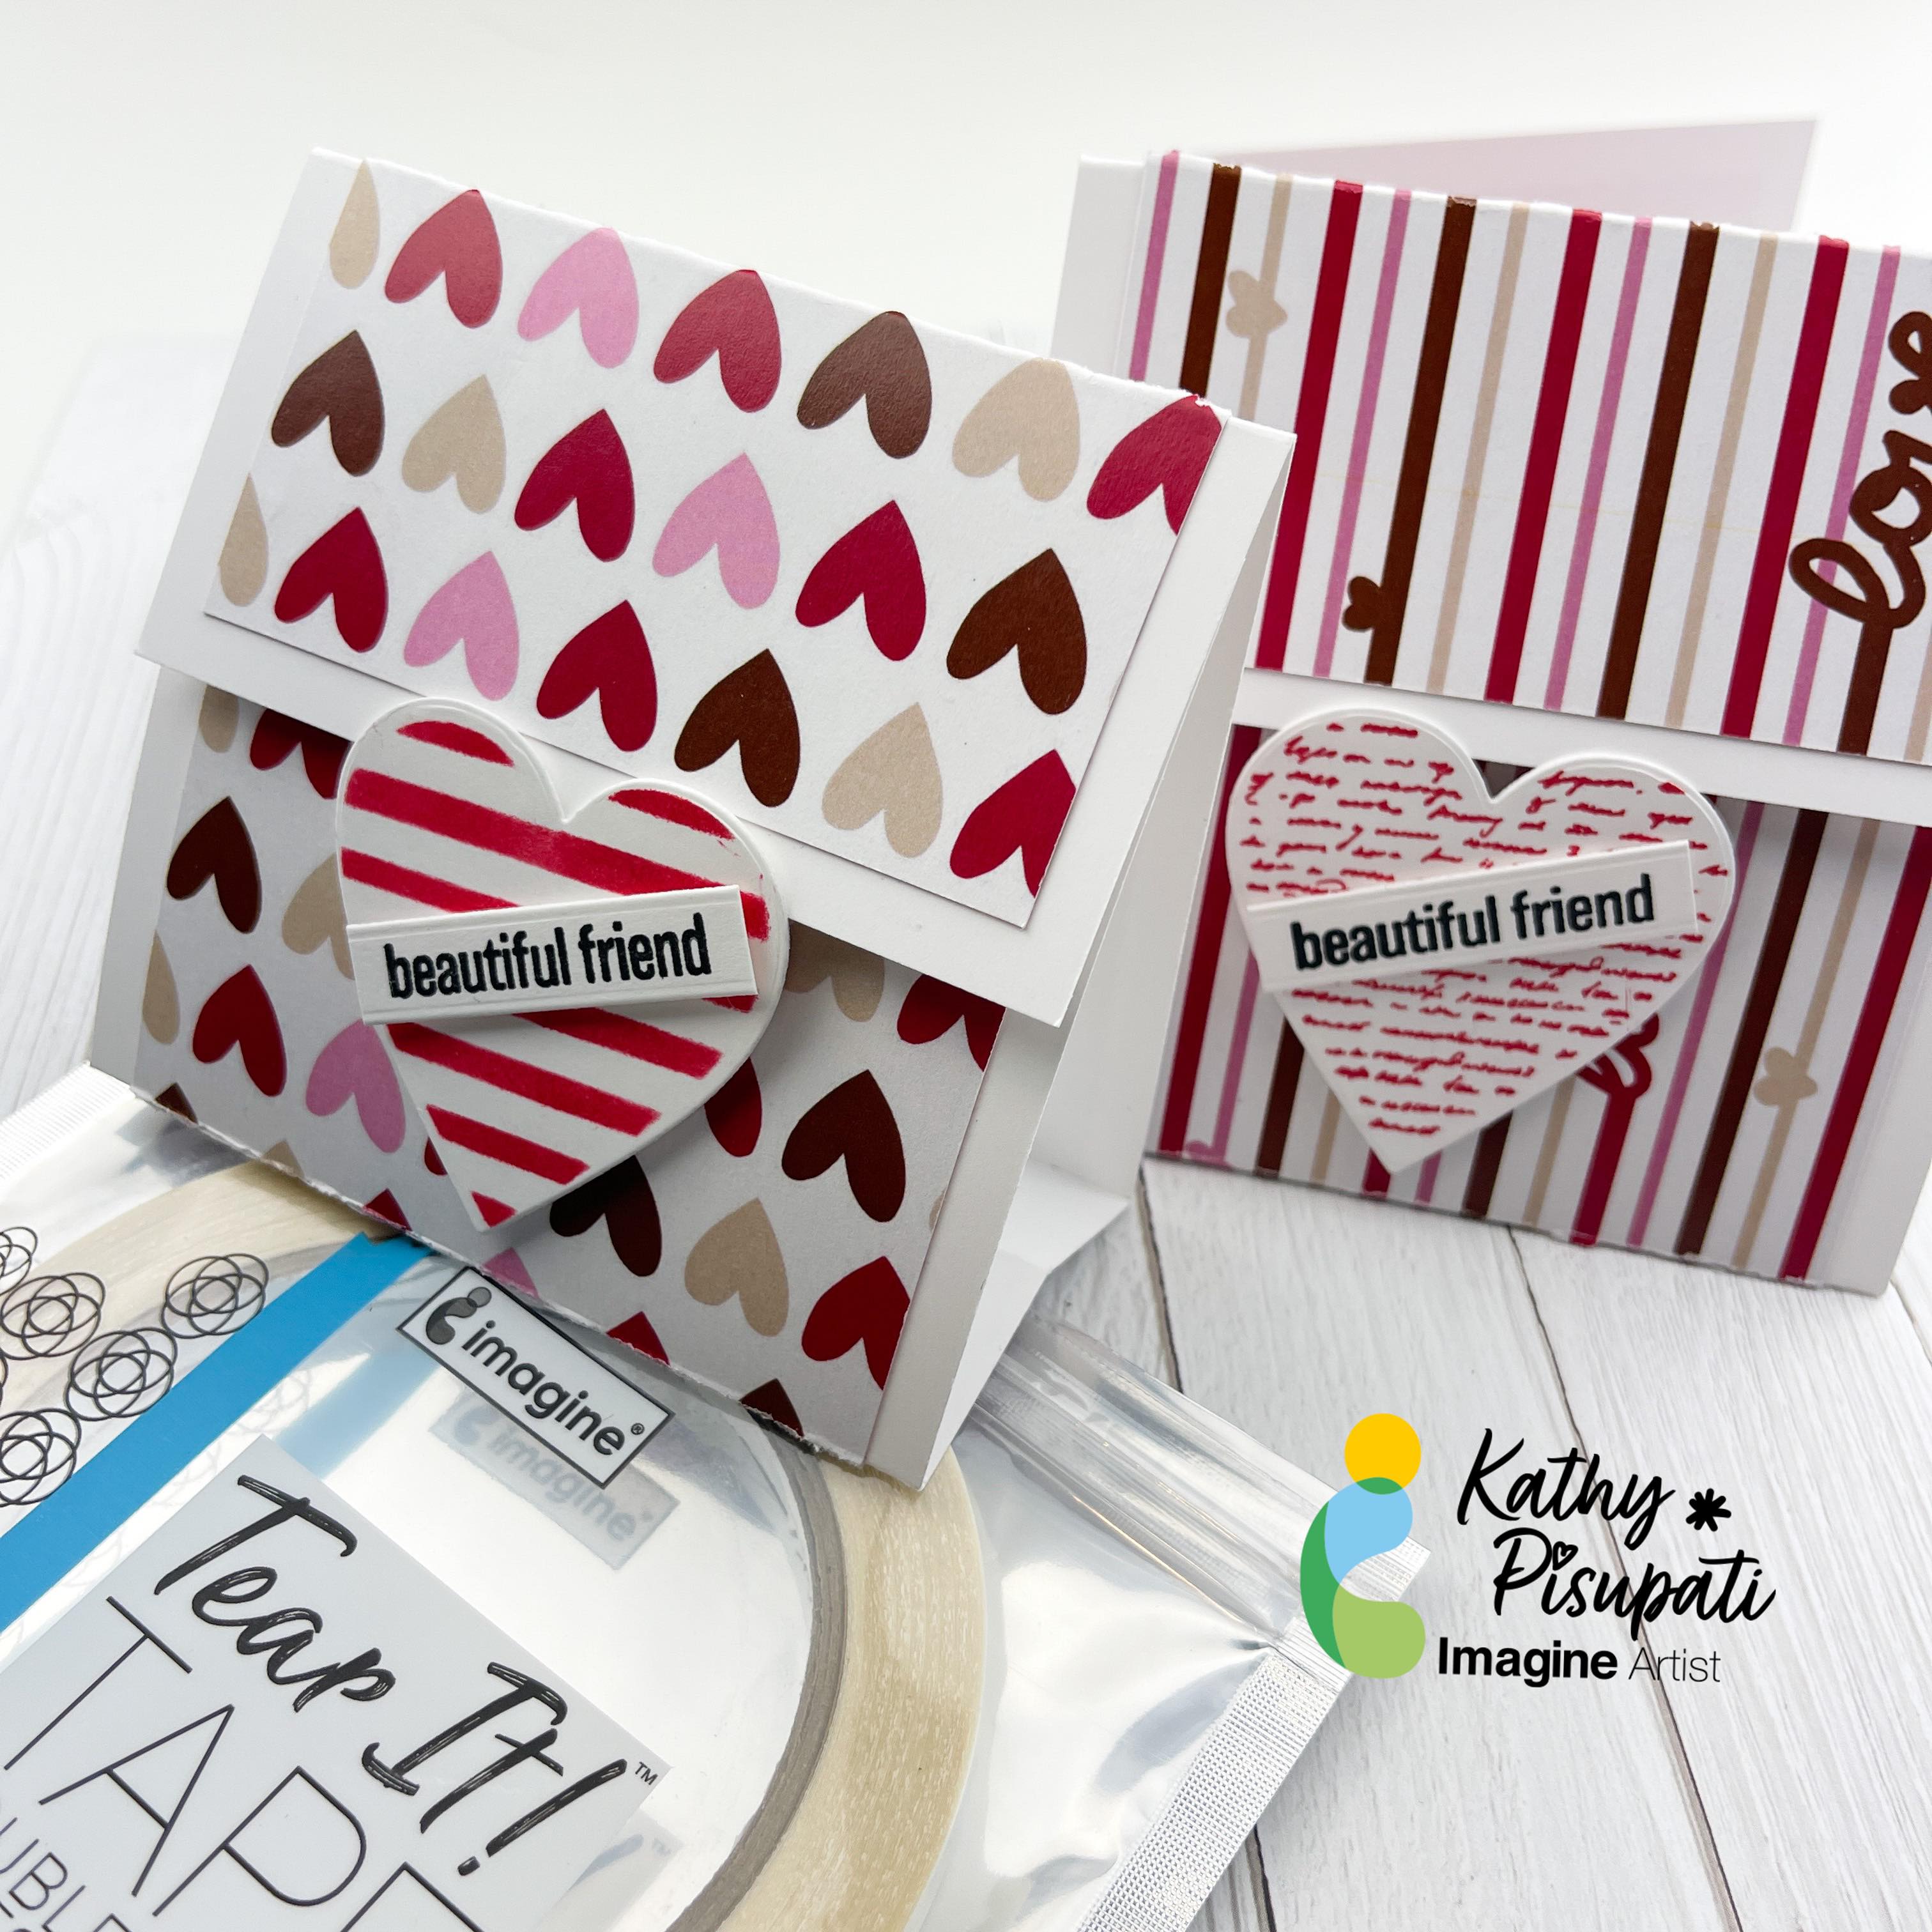
Hello! Kathy here, creating art for Imagine Crafts! Today’s project is a treat/gift card holder for Valentine’s Day but it is also about ADHESIVES! Adhesives aren’t the focus on most tutorials so let’s change that today.
.Skill Level: Easy
Time to complete: 1 Hour
Directions:
Step 1
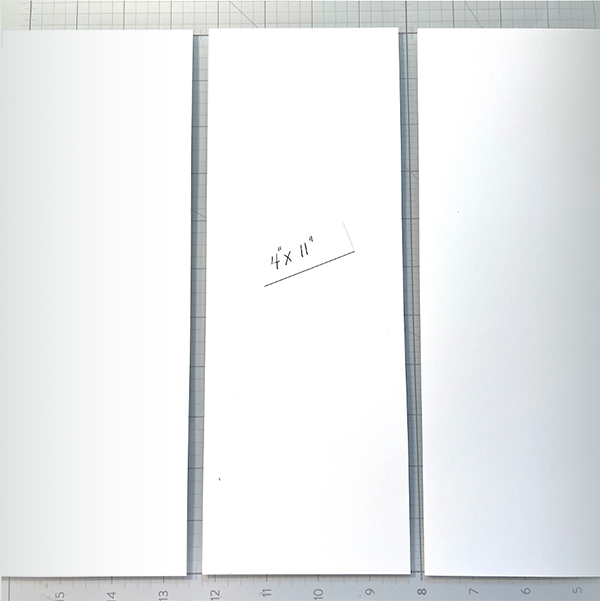
Cut 3 pieces of a layering weight, white card stock to 4” x 11”. This will be enough for three holders. You don’t need a heavy weight card stock as we will be scoring, folding and adding a layer of patterned paper.
Step 2
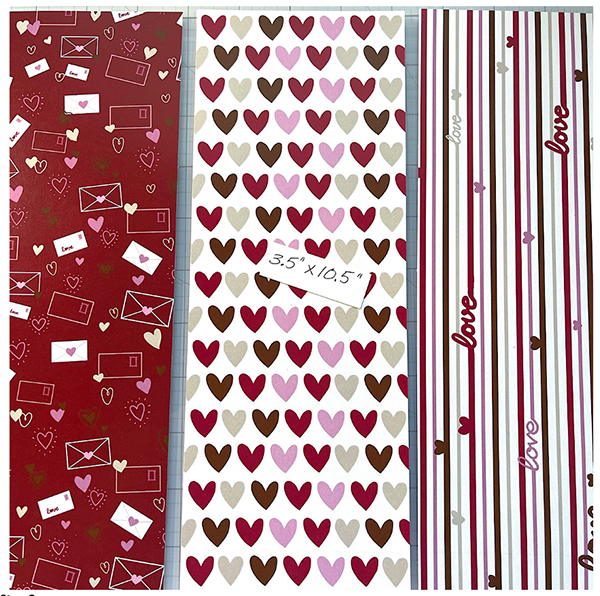
Cut 3 panels of patterned paper to 3.5” x 10.5”. I had this fabulous patterned paper from Kat Scrappiness in my stash which is perfect for Valentine’s Day!
Step 3
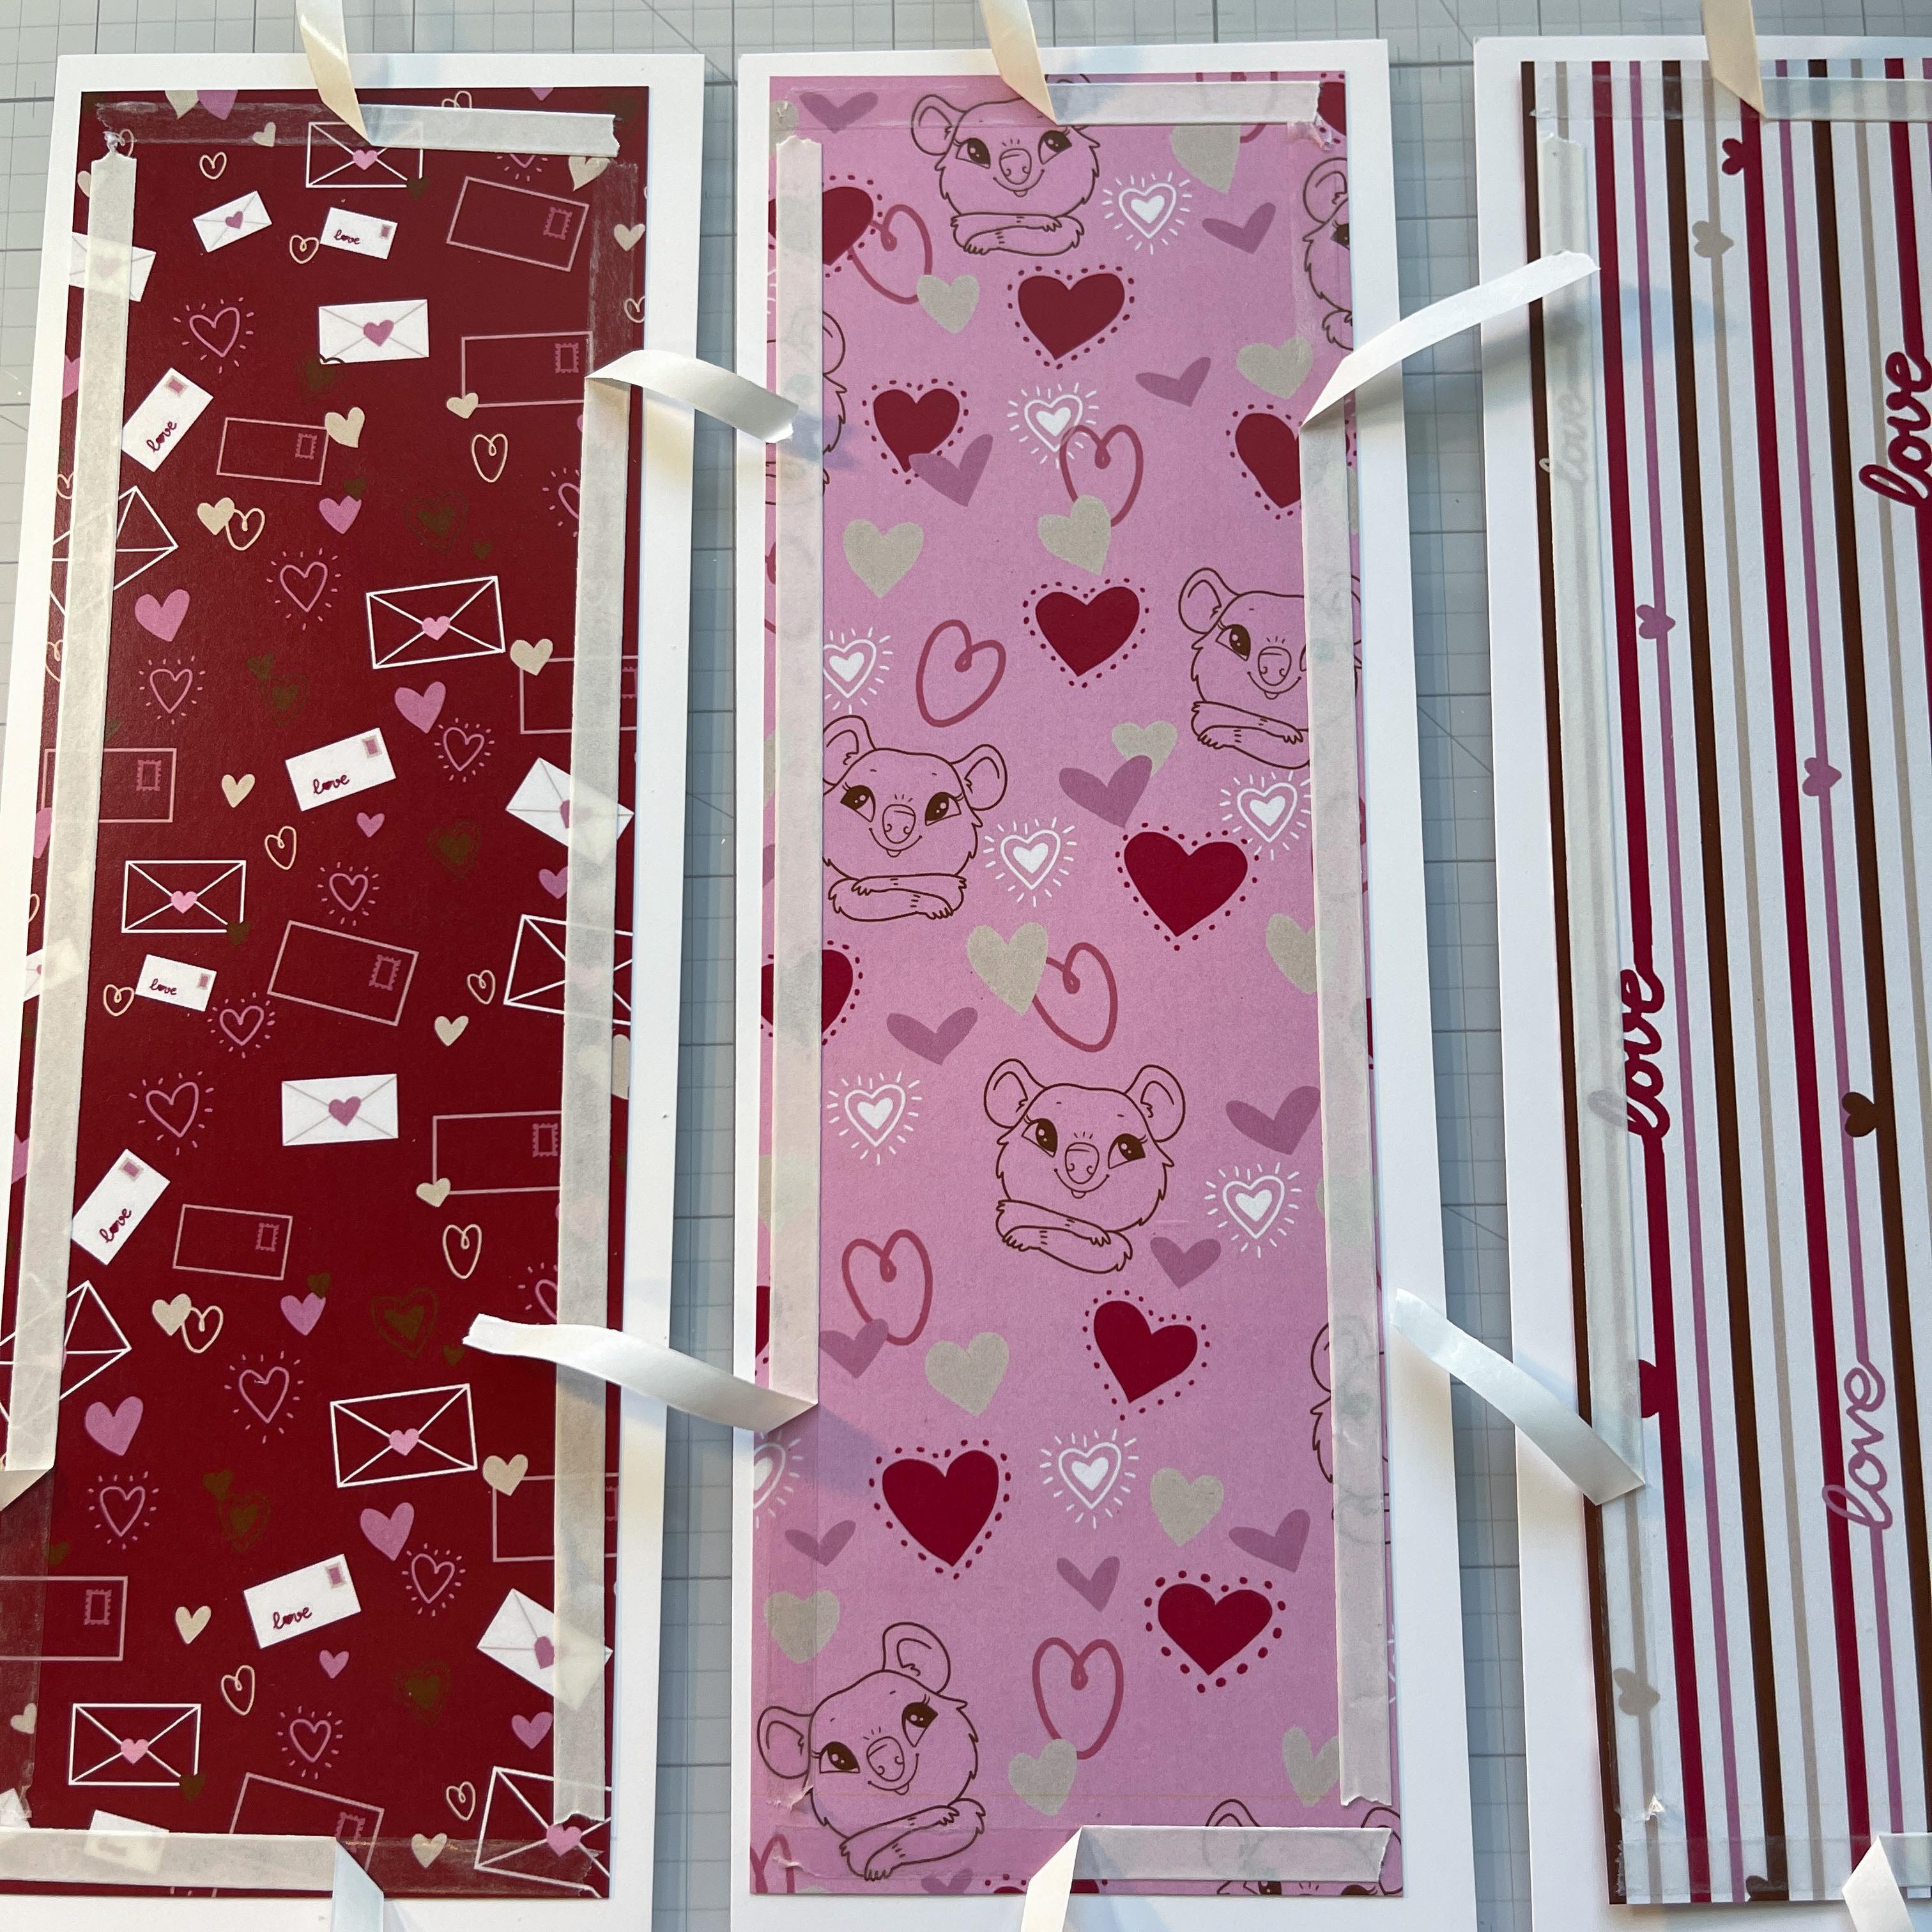
Here is where the adhesive comes in! You will attach the patterned paper panels to the white card stock. The Tear It! Tape from Imagine Crafts is SO easy to use. It is a strong double-sided adhesive AND you don’t need to reach for your scissors every time you want a piece. Just tear it! It tears so easy! We will also be using the On Point Glue and I will give you a tip in a second. The On Point Glue comes in a small bottle with a micro tip. The cap of the bottle has a built in pin that fits in the micro tip when you close the cap so it never gets clogged! No more losing those pins!
Step 4
Add your Tear It! Tape to the back of all four panels on all sides. Here’s a tip, pull up only a bit of each back and a bit of On Point Glue to the exposed area. Then flip the panel over and align to your white card panel. This allows some wiggle room for you to align the panels perfectly! Once the patterned panel is aligned press down the areas of exposed adhesive and then gently pull the backing paper off from each side.
Step 5
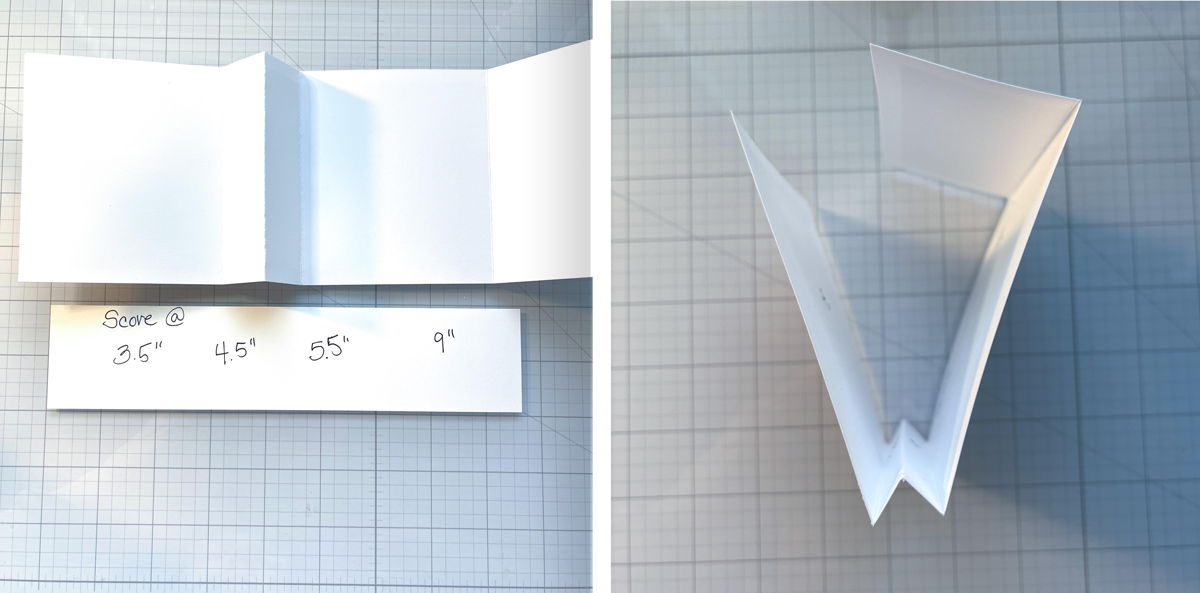
Now it’s time to score and fold. You will score as indicated above and fold in the manner shown.
Step 6
Now it’s time to add a little decoration! I used a heart die and coordinating stamps. I stamped using VersaColor Cardinal ink. For the sentiment I used VersaFine Clair Nocturne Ink. Foam tape was added to the lower half of the heart. The reason for this is so the flap of the holder can tuck under the heart. I also added foam tape to the sentiment, adding a bit more dimension to the design. These were SO easy to create and you could change up the design for ANY occasion. I haven’t put anything inside yet. A gift card fit perfectly inside, just add some temporary adhesive to the back of the gift card. You can also adhere a small cellophane bag filled with small treats and adhere it or add a bit of temporary adhesive to the back of a fun-size candy bar! Perfect for Valentine’s Day and Halloween!
I hope you enjoy this card and the tutorial. Thanks for stopping by I appreciate all of you! Please head over to the Imagine Crafts website to see all the beautiful products. Here is the link IMAGINE CRAFTS.
– Hey there friends, LeeAnn here with a fun project that the idea will work any time of year, but this one especially is for Valentine’s Day. I did direct ink to paper, and blending Rose Bud, Love Letter and Angel Pink Memento Dye Ink in dew drop form.
I then ran the panel through my Big Shot with a die that embossed stitching into the background and made the perfect a2 cut around the panel. I then did direct to paper with VersaMark which I the poured Gold Mboss and then took my heat tool to melt it. After using my Big Shot to cut out the sentiment with the embossed panel and 3 layers of white, I cut the shadow layer out of vellum.
Then I used On Point Glue to adhere the layers together, and attached to the card panel, I used Tear It Tape to attach the panel with my card base. I followed that up with a few drops of On Point Glue to adhere some flat backed Gold Pearls to my panel and spritzed it with Sparkle Simmer Spray. With that this 20 minute video was complete (actually 6 video’s spliced together) I sped it up and cut the messy parts and you now have more time to enjoy the rest of your day. Thank you for watching, and I would love to see what you make that perhaps this project inspired you with.
Today I am sharing how to make a Slimline Valentine using Memento inks. Slimline cards are very trendy. This is a great quick and easy card that can be given to the special guy in your life for Valentine’s Day.
Skill: Beginner
Time: 30 minutes
Directions:
Step 1
A great thing about slimline cards is that you only need a single sheet of 8.5” x 11” cardstock for the card and card front. Trim cardstock to 7” x 8.5” and score to make a card base of 3.5” x 11. It will fit in a standard A10 envelope. Use a Sponge Dauber and Memento Rose Bud to ink the outer 0.5” of the card base.
Step 2
Trim the remaining cardstock to 3.25” x 8.25”. Edge with Memento London Fog. Stamp a background in Memento Angel Pink with a small Valentine’s themed image. I used an ancient Rollergraph heart stamp. It is very subtle but adds just a bit of depth to the card.
Step 3
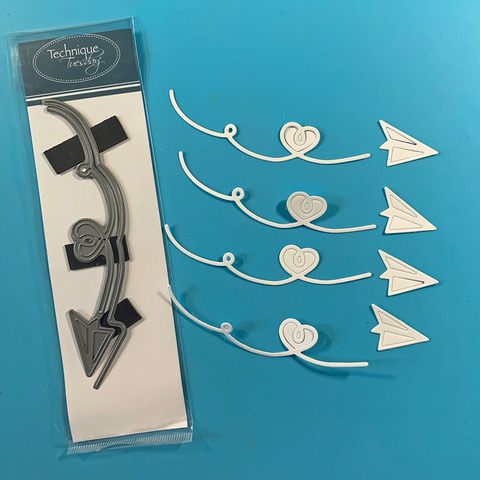
Die-cut four layers of cardstock with the Technique Tuesday Paper Airplane on the Border Die.
Step 4
Ink one loop with a sponge dauber and Memento Rose Bud. Ink one airplane in Memento London Fog. Ink one airplane leaving the cutout section in place when inking with Memento Tuxedo Black.
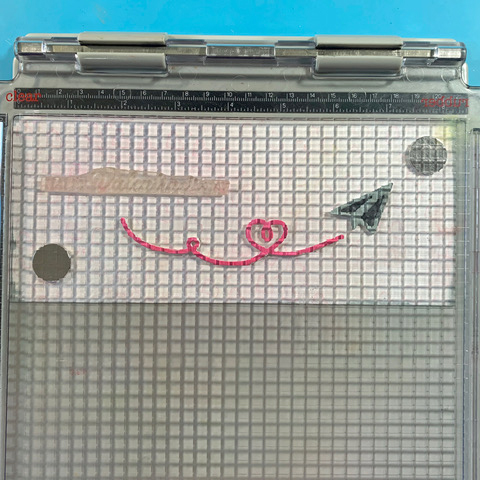
Step 5
Layer the loops together with dots of On Point Glue, the lower photo shows the very small dots of glue, a little goes a long way! Lightly press together to create a raised die-cut.
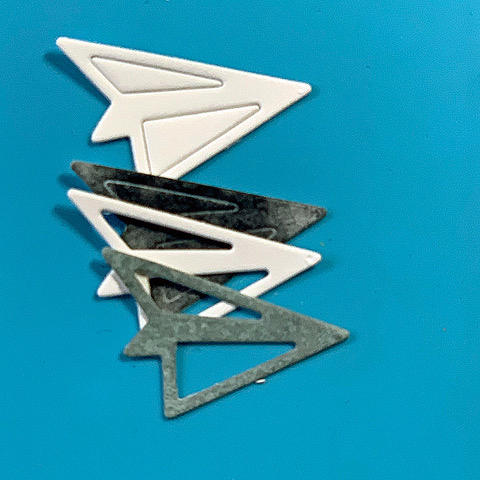
Step 6
Using On Point Glue, layer the Memento Tuxedo Black airplane over one white airplane. Layer the third airplane with the cutouts removed over the Memento Tuxedo Black airplane. Layer the Memento London Fog airplane with cutouts removed on top.
Step 7
Stamp sentiment image in Memento London Fog. I placed all the elements on the card to decide the position before using a stamp positioner to stamp the sentiment.
Step 8
Adhere the card front to the base using Tear It! tape.
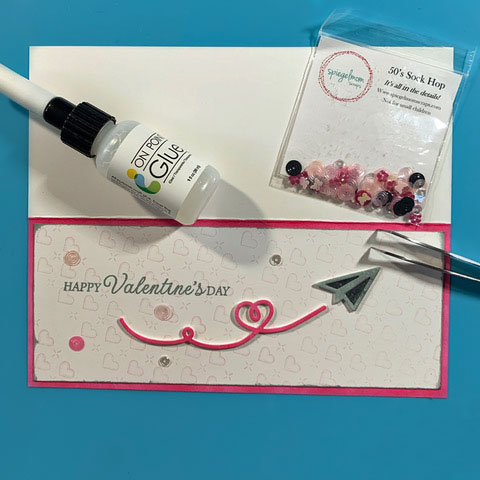
Step 9
Adhere die cuts and sequin embellishments with On Point Glue.