Make a Birthday Card with Walnut Ink and VersaFine

by Arjita Sepaha Singh

Make a Birthday Card with Walnut Ink and VersaFine

It is so easy to create a quick and beautiful background with Walnut Ink! I used Walnut Ink sprays to create a blended background in this super quick birthday card. I love the muted tones of the Walnut Ink, but these steps can be done with Fireworks as well for a shimmery and bright look. I used a few silhouette stamps of flowers and stems with VersaFine Ink and finished the card with a sentiment stamped on a kraft card strip. This is a super quick card using very little supplies and can be mass-produced with ease.

Skill: Intermediate
Time: 30 minutes


Supplies

Imagine
Other
  • Watercolor paper
  • Cardstock – black, kraft
  • MISTI Stamping Tool
  • Penny Black – stamps
  • Stencil

Use Shades of Lavender to Create a Mixed Media Card

by Jowilna Nolte

Use Shades of Lavender to Create a Mixed Media Card

Use shades of Lavender inks to create a vintage Mixed Media panel. Layer upon layer of inks and stenciled patterns make for an interesting mixed media project with a fun twist. Take a look at how I created this panel in a few easy steps.

Skill: Advanced
Time: 30 minutes

Directions


Step 1

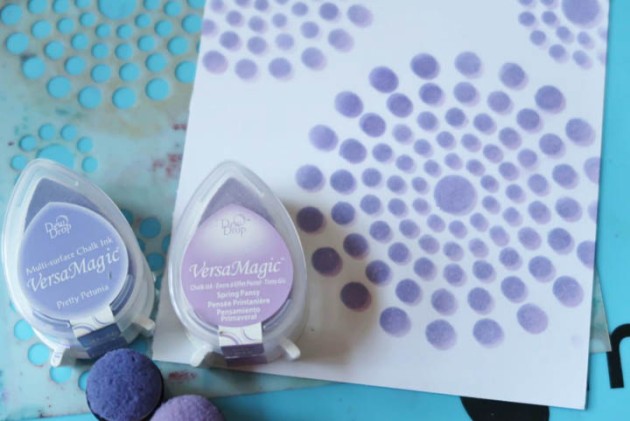
Combine 2 different circle stencil designs with each other and blend the circles onto smooth white cardstock using a finger dauber.


Step 2

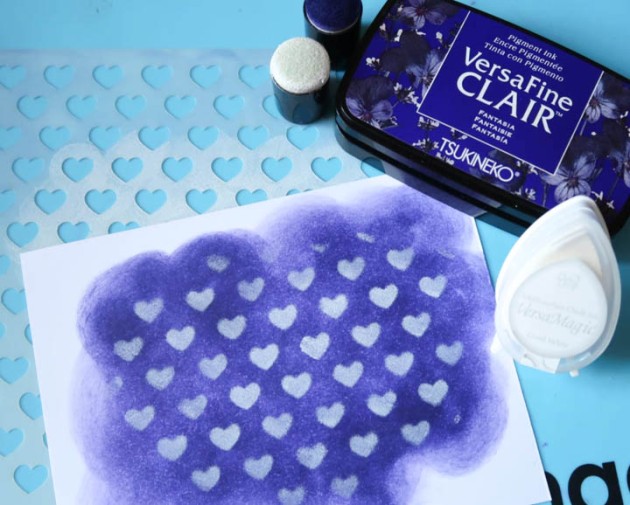
Layer a third stencil over the circles and stencil a darker pattern using VersaFine Clair Fantasia.


Step 3

Use a squeegee and apply a thin layer of Sweet Plum irRESISTible Pico Embellisher over the stenciled background. Add a few drops of the irRESISTible onto the cardstock and smooth it out using the squeegee.


Step 4

Adhere a cutout image onto the right-hand side of the mixed media panel. Use VersaFine Clair and add some texture patterns onto the background in the corners. Tap the ink onto the cardstock using a finger dauber.


Step 5

Use 3 more colors of VersaFine Clair inks and sponge in the corners to create texture and patterns. Add cut out elements and finishing touches to your mixed media panel.

Supplies

Imagine

Other

  • Cardstock – White
  • Jowilna Nolte – Stencil
  • Short Cuts Craft
  • Embellishments

Create an Bright Floral Set of Thank You Cards

by Steph Ackerman

Create an Bright Floral Set of Thank You Cards with Fireworks Shimmery Craft Sprays

I love large floral stamps, but because of their size, they don’t always lend themselves to be the center point of a card design. Instead of thinking of stamped images always being in the center today I am doing a split off-set design. Not only do you create an interesting look it is a quick and easy way to create two cards in one crafting session.

Skill: Intermediate
Time: 1 hour + dry time

Directions


Step 1

Cut 2 panels of white cardstock, each 4″ x 5″. Place them side by side on the craft mat. Ink stamp with VersaFine Clair in Nocturne and stamp on both panel simultaneously.


Step 2

Place a stencil in the open/white space to the right of the image. Use molding paste through the stencil to add dimension. Let dry.


Step 3

Using a paintbrush, paint Fireworks Shimmery Craft Spray in Dandelion on the smaller flower. Paint a light layer of Fireworks in Tangelo on the larger flower then use Fireworks in Dandelion to blend the colors. Paint Fireworks in Rich Cocoa in the center of the flowers. Ink the edges of each panel with Brilliance in Sunflower Yellow. Stamp “Thank you” with VersaFine Clair in Nocturne on white cardstock. Use an art dauber to add yellow ink to the sentiments.


Step 4

Mat the panels with yellow cardstock. Create cards from orange cardstock and add the stamped panels to each.


Step 5

Mat the sentiments with yellow cardstock. Add the sentiments to the cards with foam adhesives.


Supplies

Imagine
Other
  • Molding Paste
  • The Crafter’s Workshop – stencil
  • Cardstock – white, yellow, orange
  • Foam Adhesives
  • Paint Brush

Create a Vibrant Art Journal Page to Tell Your Story

by Iris Rodriguez

Create a Vibrant Art Journal Page to Tell Your Story

Have you ever been attracted a shape, a pattern, an image, a technique and you don’t know why? For me, it’s been Asemic writing and abstract figures. Asemic writing is a wordless form of writing. It makes words look real, but it’s not meant to be read. This is a perfect way to express that you can write your own story every day and that nothing is set in stone. Imagine’s irRESISTible Pico Embellisher is a very fine mark-making tool and a medium perfect for Asemic writing. See how I make this vibrant journal page.

Skill: Intermediate
Time: 1.5 hours

Directions


Step 1

Spray the watercolor paper with water. Then brush on the All-Purpose Ink in Rose Pink, and Tropical Lagoon. Also, Brush on Fireworks Shimmery Craft Spray in Dandelion. Do not blend or the colors will turn into a mud color. Rather color in separate areas. You can lightly blend the edges with a brush. Dry the paper.


Step 2

Use an InkBlushers to stencil in patterns with VersaFine Clair in Tulip Red, Monarch and Warm Breeze. You can use any stencil pattern you happen to have.


Step 3

To get a dimensional look, like you see on the top right of the of the image above, stencil the shape with a dark color, then place the stencil over the same area and slightly offset it, stencil a lighter color ink.


Step 4

The Dina Wakley stencil contains the positive and negative shapes. The cutout (positive) piece is considered a mask. Place the mask on the substrate. Make an outline with the VersaFine Clair in Nocturne using a Sponge Dauber.


Step 5

Continue to add to the shadows around the silhouette.


Step 6

Place a few drops of All-Purpose Ink in White onto your craft matt and pounce the Inkblusher into it and color inside the silhouette. This ink is opaque, so a couple of drops is more than enough. This will make the silhouette standout, while slightly making out the color and patterns underneath.


Step 7

Make Asemic writing marks inside the silhouette with the IrRESISTible Pico Embellisher in Tuxedo Black. It helps if you think of several parts of a phrase, song, poem and abstractedly and write it out.


Step 8

On a piece of white cardstock paper, stamp out a sentiment, then cut it out. Glue onto the page. Draw a frame with the black IrRESISTible Pico Embellisher for added interest.

Thank you! If you would like to learn more about stenciling then please see a full tutorial: Learn the Basics of Stenciling

Supplies

Imagine

Other

  • Watercolor paper
  • Crafter’s Workshop – Rebekah Meier stencil; Star and Flower
  • Dyan Reaveley’s Dylusions Arrows stencil
  • Dina Wakley Casey & Penelope stencil
  • Alphabet stamps

Watch a Video on Watercoloring with Memento Markers & VersaFine Clair

by Melissa Andrew

Watch a Video on Watercoloring with Memento Markers and VersaFine Clair!

Pets are the best! It is often that a dog or a cat is not simply a dog or cat but a member of the family. In today’s tutorial, I create a card with a pet theme using Memento Markers, VersaFine Clair, and clear embossing powder. The combination of these three craft items and the pet imagery really makes a gorgeous and simple creation. Memento Markers are versatile water-based markers so you can watercolor with them, add fine detail and create stunning backgrounds. Join me as I show you how.


Supplies

Imagine
Other
  • Whimsy Stamps – Shaker Maker Banner Die Set, An Unbreakable Bond
  • Paper Trimmer
  • Heat Tool
  • Canson Watercolor Paper
  • Cardstock – White

Send Unconditional Love to Someone Special

by Kyriakos Pachadiroglou

Send Unconditional to Someone Special. Use StazOn Studio Glaze in Gold and Radiant Neon Amplify in White.

With summer being a wedding season, making a special card to give is a great way to spread the meaning of love. A golden heart, precious and rare, on a puffy layer of blooming flowers, surrounded by the flow of gold and, of course, the definition of how love should be, give an elegant style. The corrugated paper used helps create the flow of gold with the irRESISTible Pico Embellisher Gold, which is also used to paint the plaster heart. The Radiant Neon Amplify in White fills the gaps around the heart with a soft texture and the paper flowers give more dimension and focus to the card. Enjoy!

Skill: Intermediate
Time: 1 hour + dry time

Directions


Step 1

Cut a piece of corrugated paper to 5 x 5 inches. Keep the corrugated paper at an incline and pour irRESISTible Pico Embellisher Gold color and let the wet medium run down the length of the cardboard. The needle-like nozzle helps to set color among the flutes. Set aside and allow to fully dry.


Step 2

Cut the corrugated paper down to 4 x 4 inches. Remove a 2 x 2-inch square piece from the center of the board, set 3/4 inch from the top and 1 inch from the left and right sides, creating a frame.


Step 3

Use a small heart-shaped mold and plaster (or white clay) to create a heart embellishment. When it dries, color it with the irRESISTible Pico Embellisher in Gold.


Step 4

Punch small flowers and shape them with an embossing stylus (alternative use small die cut flowers or petals).


Step 5

Color the tips of the flowers with Delicata Golden Glitz inkpad.


Step 6

Place double-sided foam tape to the back of the corrugated paper frame and place it on a 5 x 5 card base. Do the same with the heart and place it in the center of the square window frame.


Step 7

Use the Radiant Neon Amplify in White and make dots around the heart.


Step 8

Use the On Point Glue to set the paper flowers among the Radiant Neon Amplify in White.


Step 9

Radiant Neon Amplify reacts to heat to create a puffy popcorn-like texture. Use the heat tool to activate the dots to create this puffy texture. Repeat with more dots if necessary to cover the surface. Use the StazOn Studio Glaze Gold color (or the Gold irRESISTible Pico Embellisher again) to decorate the center of the flowers.


Step 10

Stamp a 2 x 1-inch piece of white cardstock with the unconditional stamp and the VersaFine Clair Nocturne. Distress edges with Delicata Golden Glitz.


Step 11

Stamp a small piece of white cardstock with the love stamp and the VersaFine Clair Tulip Red inkpad. Distress edges with Delicata Golden Glitz.


Step 12

Use double-sided foam tape to mount the “unconditional” definition piece, add a small piece of black ribbon and glue. Add the stamped “love” piece, add flowers and any additional embellishments. If you are happy with the card as I was then you can stop here and the design is finished!

Supplies

Imagine
Other
  • Corrugated paper – white
  • Plaster
  • Heart-shaped mould
  • Flower punch
  • Cardstock – white
  • Double-sided foam tape
  • 5 x 5 cardbase
  • Heat tool
  • Kaisercraft – Furry friends stamp