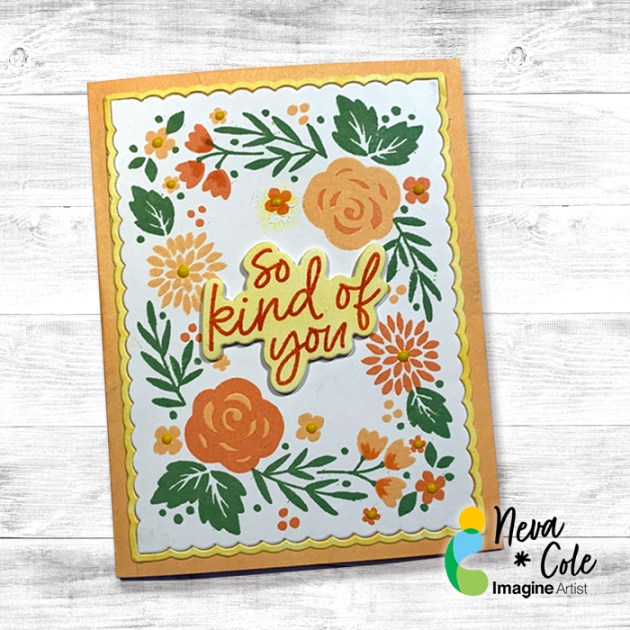
Triple-Step Stamped Card Made Simple with Memento Ink

Feb_22_Neva_SoKindofYouCard_IG_2

By Neva Cole 

See how to use the Memento ink line to created a cohesive matching layered card in just a few steps.  The beauty of this particular method is you may make a number of cards depending on your needs in more than one color scheme as shown in the bonus step.  Finishing touches use irRESISTible Pico Embellisher, VersaMark Clear ink, and Embossing Powder.

Skill:  Beginner

Time:  30 Minutes plus drying time.

Directions:
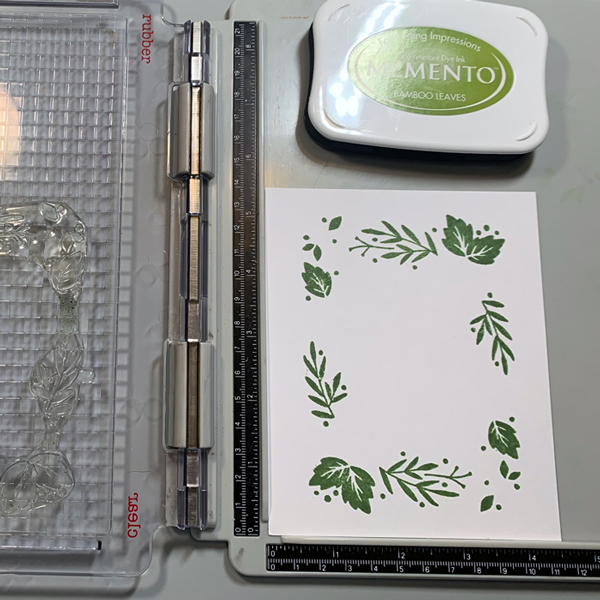
Feb_22_Neva_SoKindofYou_Step_1
Step 1

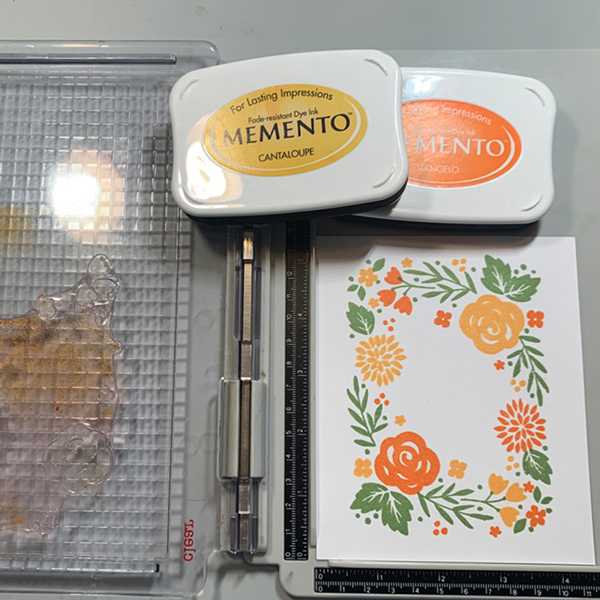
Trim white cardstock to 4.25″ x 5.5″, this will allow a quicker placement in step 2 on the stamp platform.  Center Image “A” from the Concord & 9th Triple-Step Floral Frame Stamp on the white cardstock and then adhere to the stamp platform.  Ink Image “A” with Memento Bamboo Leaves.  Double or triple stamp the image to create even darker images.  (If doing multiple cards, continue stamping Image “A” until you have your desired quantity.)
Feb_22_Neva_SoKindofYouCard_Step_2

Step 2

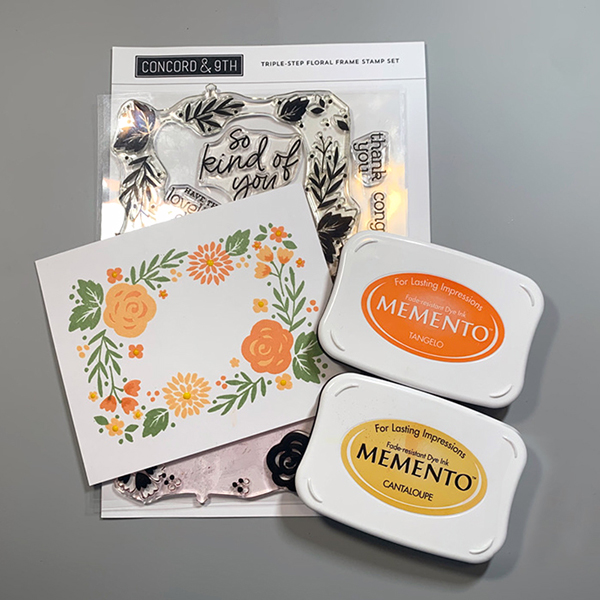
Place Image “B” from the Concord & 9th Triple-Step Floral Frame Stamp on the white cardstock so the small tulip shaped flowers line up with the stems.  Look directly down through the stamp to judge the placement of the stamp.  In this version Memento Cantaloupe is stamped first.  Turn the image 180 degrees and double check image placement, then stamp in Memento Tangelo.  (If doing multiple cards, continue stamping Image “B” until you have your desired quantity.)
Feb_22_Neva_SoKindofYou_Step_3

Step 3

The stamp set has two stamps that will add the center of the roses and an additional layer to the small tulip shaped flowers.  Use the same method as Step 2 for placement.  If the center of the rose is slightly off, stamp again until the white area is inked.
Feb_22_Neva_SoKindofYou_Step_4

Step 4–Bonus

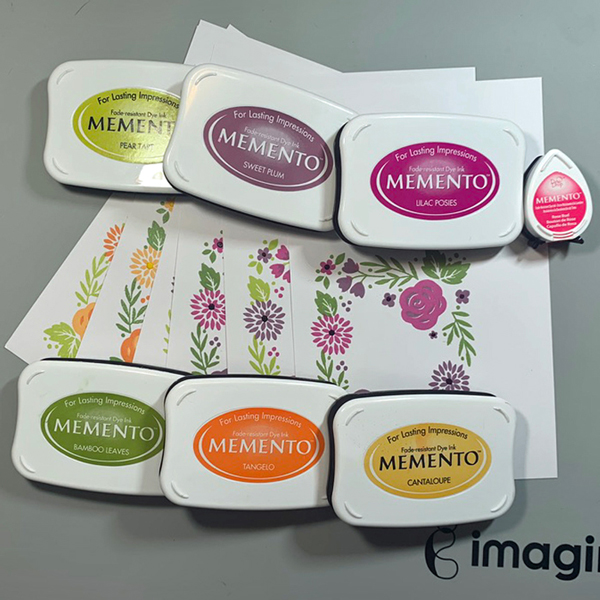
Shown are the additional card fronts stamped during my session of triple-stamping.  Once the layering stamps were in place I like to make multiple stampings for future use.
Feb_22_Neva_SoKindofYouCard_Step_5-B

Step 5

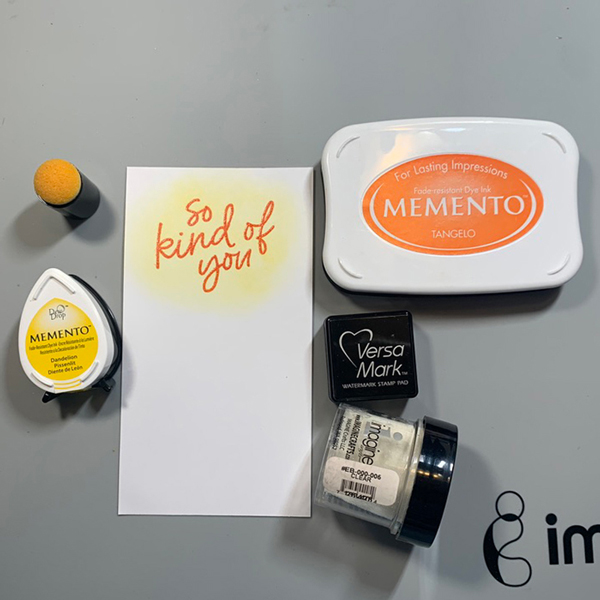
Stamp “So Kind of You” in Memento Tangelo using a stamp platform.  Stamp over the image with VersaMark Clear ink and heat emboss with clear embossing powder.  Use an ink blusher with a light hand to color around the image, the embossed sentiment will resist the ink.  This sentiment has a matching die to allow you to die cut before adhering to your card front.
Feb_22_Neva_SoKindofYouCard_Step_6

Step 6

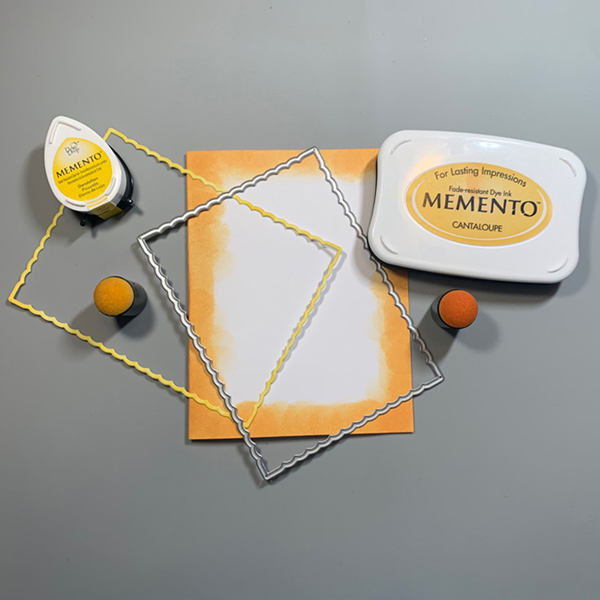
Trim white cardstock to 5.5″ x 8.5″ and fold in half to create an A2 card base.  Ink the edges using an ink dauber with Memento Cantaloupe.  The card front die also creates a very narrow border, this one is inked with Memento Dandelion using an ink dauber.
Feb_22_Neva_SoKindofYouCard_Step_7

Step 7

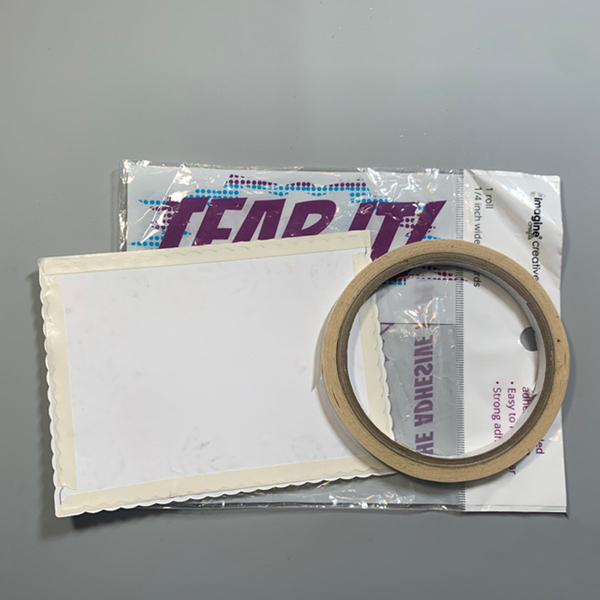
Place the card front face down and align the Dandelion border to the card front.  Carefully place Tear It! tape around all four edges of the card front.  Take time to “catch” the border without having the Tear It! tape show on the front.
Feb_22_Neva_SoKindofYouCard_Step_8

Step 8

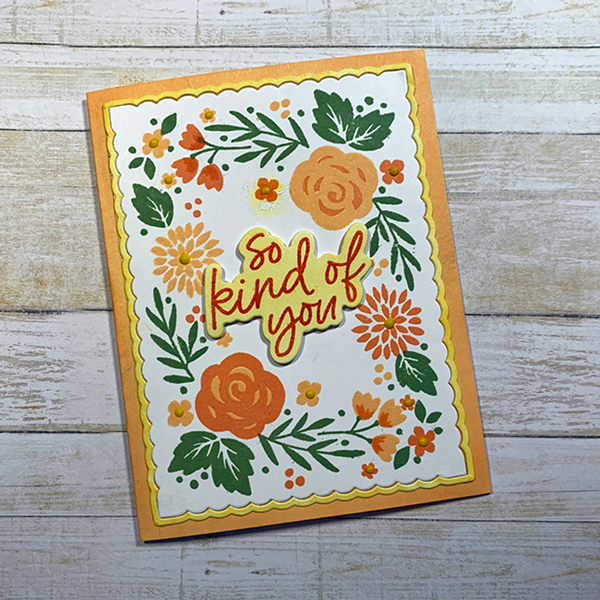
Adhere card front to card base and add the die cut sentiment with dimensional foam adhesive.
Feb_22_Neva_SoKindofYouCard_Step_9

Step 9

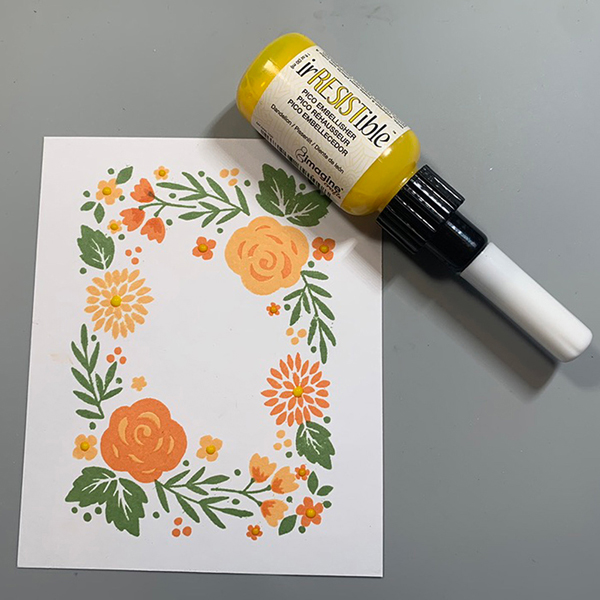
Learn from my mistake!  Add the irRESISTible Pico Embellisher in Dandelion AFTER the card is assembled to the center of the flowers besides the roses.  The irRESISTible Pico Embellisher will retain the rounded shape after drying.  When I die cut the card front after adding the irRESISTible Pico Embellisher the dots were flattened.  However it was an easy rescue as another layer of the irRESISTible Pico Embellisher added the rounded dimension back to the flower centers!

Art Supplies

Imagine
Other
  • Concord & 9th Triple-Step Floral Frame stamp and die
  • White cardstock
  • Dimensional foam adhesive
  • Stamp platform

Create A Quick Set of Ink Blended Note Cards with Embossing Powders

2022-feb-katy-ingram-card-set-IG_700x700


By Katy Ingram –

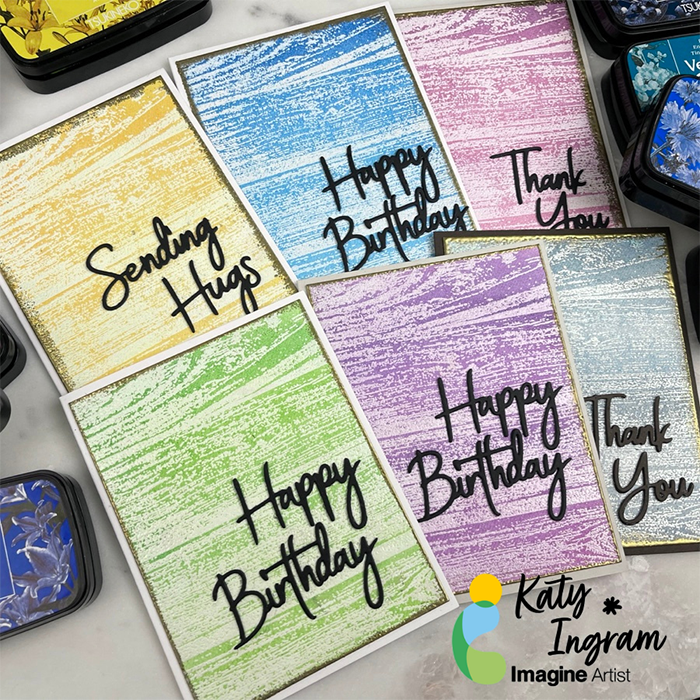
Hello Friends! Katy here with another quick project for you. I don’t know about you, but I am always looking for quick card ideas to save me some time and in today’s video, I have a simple card that is easy to replicate and all you need is some inks (VersaFine Clair in this case) some Mboss embossing powders a background stamp and some word dies. I made 6 cards in about an hour and what I love about them is that they can be used for anyone or any occasion. I hope you enjoy the video. Thanks so much for watching.

Skill: Beginner, Intermediate, Advanced

Time: 25 minutes

Art Supplies:

Imagine

VersaFine Clair

Glamorous 

Monarch

Verdant 

Green Oasis 

Twilight 

Morning Mist 

Charming Pink 

Purple Delight 

Fantasia 

Warm Breeze 

Paradise 

Blue Bell

Cheerful 

Summertime 

VersaMark Dazzle Frost 

VersaMark Ink Pad 

Mboss Embossing Powder – White 

Mboss Embossing Powder – Gold 

Point On Point Glue

Tear It! Tape

 
Other Supplies Used:

Concord & 9th Barnwood Background Stamp

Spellbinders Simply Perfect Mix & Match Sentiments

Fabriano Artistico Cold Pressed Watercolor Paper

Classic Crest Epic Black 130lb Card Stock

Accent Opaque 110 lb Card Stock

Misti Stamping Tool

Kaolin Clay Powder Tool


Make a “Sending My Love” Card for your Valentine

2022-LeeAnn-January-700x700

By LeeAnn McKinney

– Hey there friends, LeeAnn here with a fun project that the idea will work any time of year, but this one especially is for Valentine’s Day. I did direct ink to paper, and blending Rose Bud, Love Letter and Angel Pink Memento Dye Ink in dew drop form.

I then ran the panel through my Big Shot with a die that embossed stitching into the background and made the perfect a2 cut around the panel. I then did direct to paper with VersaMark which I the poured Gold Mboss and then took my heat tool to melt it. After using my Big Shot to cut out the sentiment with the embossed panel and 3 layers of white, I cut the shadow layer out of vellum.

Then I used On Point Glue to adhere the layers together, and attached to the card panel, I used Tear It Tape to attach the panel with my card base. I followed that up with a few drops of On Point Glue to adhere some flat backed Gold Pearls to my panel and spritzed it with Sparkle Simmer Spray. With that this 20 minute video was complete (actually 6 video’s spliced together) I sped it up and cut the messy parts and you now have more time to enjoy the rest of your day. Thank you for watching, and I would love to see what you make that perhaps this project inspired you with.


Art Supplies

Imagine:

• Memento Love Letter 

• Memento Angel Pink

• Memento Rose Bud 

• VersaMark Watermark Ink

• Mboss Gold 

• On Point Glue 

• Tear It! Tape 

• Sheer Shimmer Sparkle 

• Craft Mat 

• Miscellaneous  Stamp Cleaner  

Other Products:

• Kat Scrappiness Sending My Love Die with Shadow

• Kat Scrappiness Stitched Hearts Coverplate Die


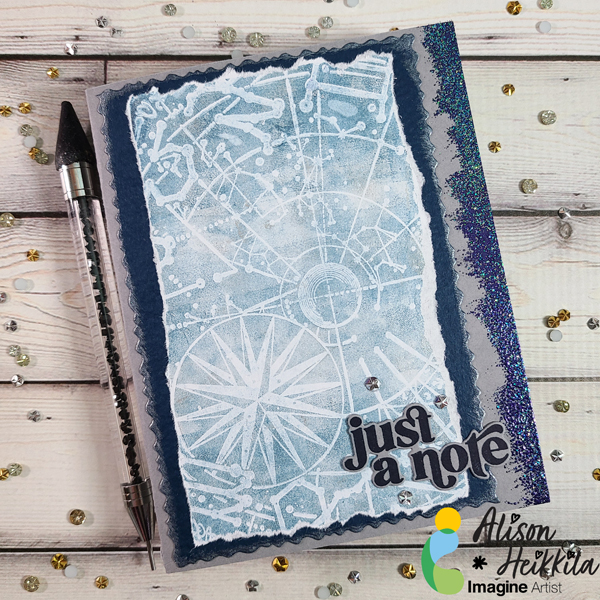
Learn How to Make an Astrological Card

Astrological-Chart-Card-1200

By Alison Heikkila –

Hello! It’s time for my newest post for Imagine, as an official part of the 2022 Design Team. After the hustle and bustle of the holidays, many of us are wiped out, or even burnt out from making cards and gifts all season. Because of that, I decided to come up with a fast card that doesn’t take a ton of effort, but looks like it did because of the layering.

Skill Level: Beginner
Time: 15 to 20 Minutes

Directions:

Astrological Chart Card 2

Step 1:

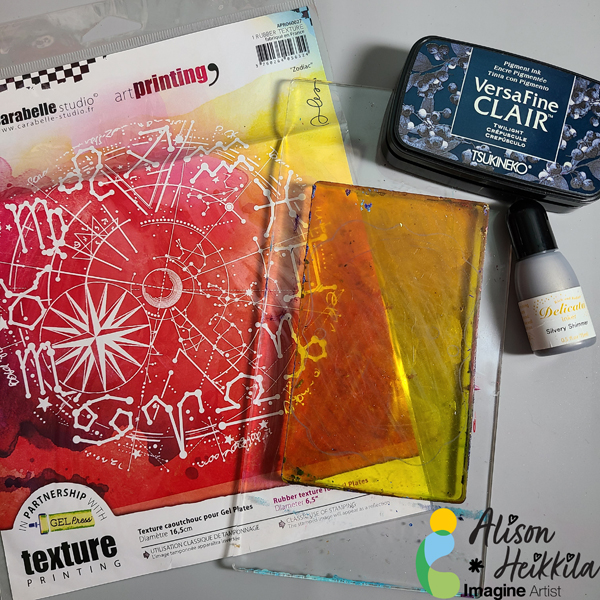
Adhere your 3″ x 5″ Gel Press to an acrylic block. While you can adhere it to your work surface, but if it’s attached to a block, you can control where it goes on your printing plate.


Astrological Chart Card 3

Step 2:

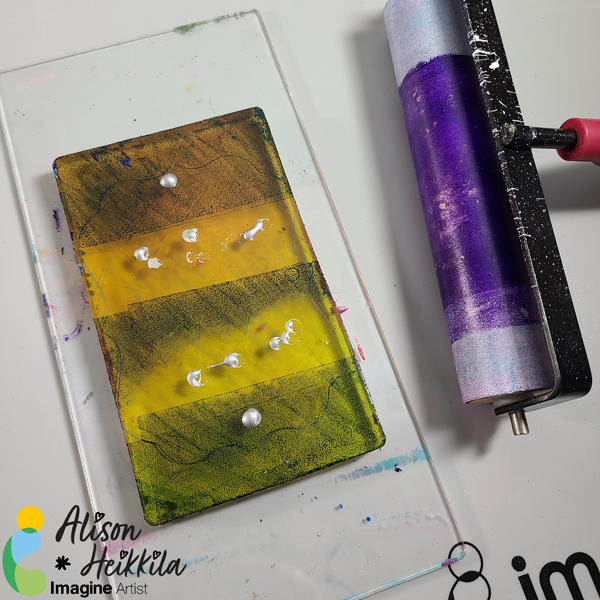
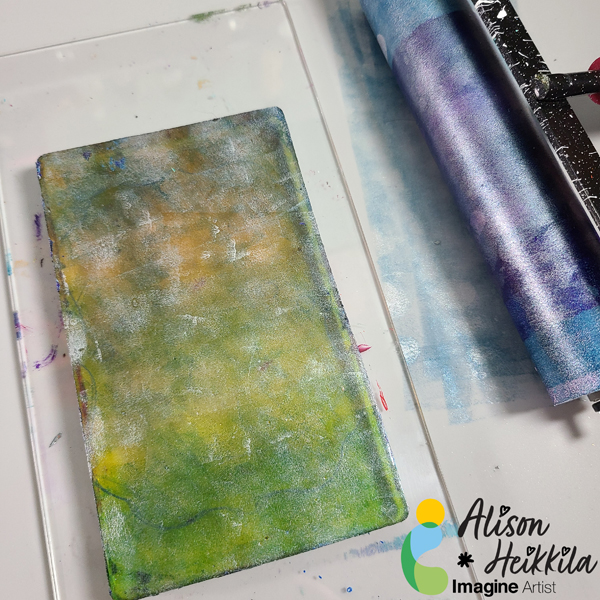
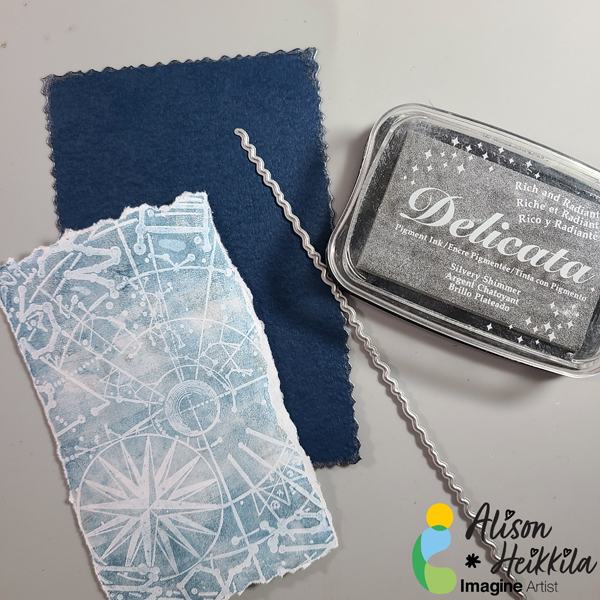
Apply Versa Fine Clair Ink in Twilight to the Gel Press Plate. I applied it in rows, but you can do it however you like.

Step 3:

Squeeze on a bit of Silvery Shimmer Delicata reinker. You don’t need too much.


Astrological Chart Card 4

Step 4:

Using a brayer, roll the colors together. Try not to overmix them.


Astrological Chart Card 5

Step 5:

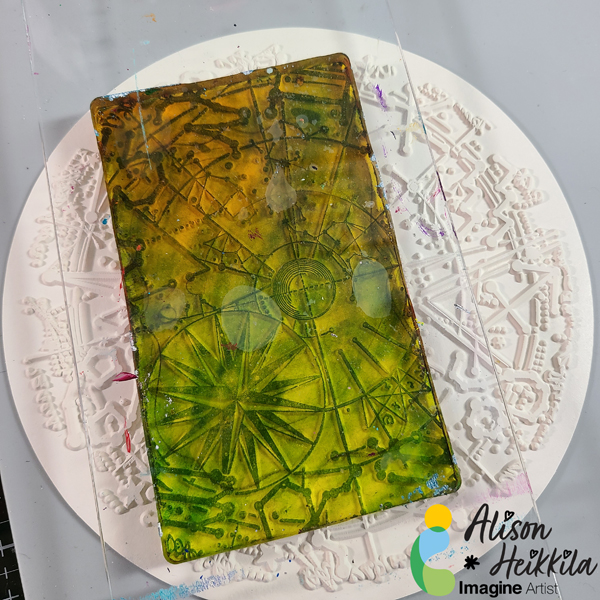
While the inks are still wet, flip the Gel Press Plate on to the printing plate. Since it’s on an acrylic block, you can place the Gel Plate wherever you want easily. Press the Gel Press into the printing plate firmly.

Step 6:

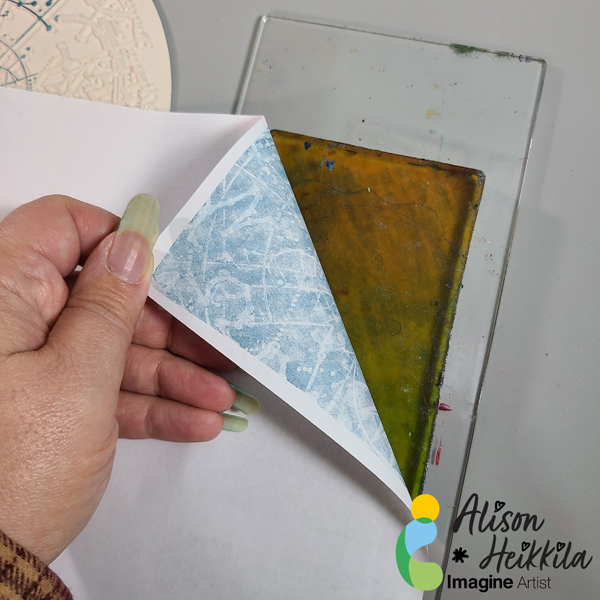
Flip the Gel Press back over, and lay a piece of copy paper on top. This will create your print. Press the paper firmly and evenly all over the plate to get a good transfer.


Astrological Chart Card 6

Step 7:

Carefully peel back the paper to reveal your print. You can place the paper back down before you peel up the entire thing if you feel that you need to transfer the ink more.


Astrological Chart Card 7

Step 8:

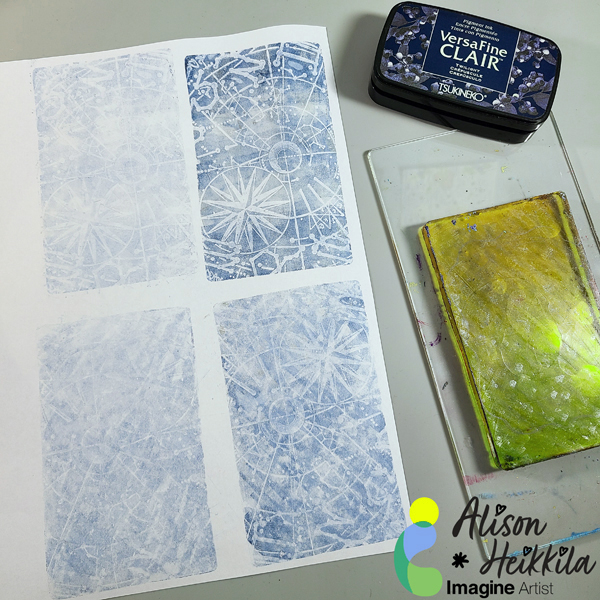
After I made 3 more prints, I chose the one I wanted to use on my card. I went with my first print, which is the upper right. I tore the edges around the print instead of trimming it smoothly.


Astrological Chart Card 8

Step 9:

Using an edger die, trim a piece of navy colored cardstock to create a mat around your print.

Step 10:

Using Silvery Shimmer Delicata Ink, ink up the edges of the die cut mat.


Astrological Chart Card 9

Step 11:

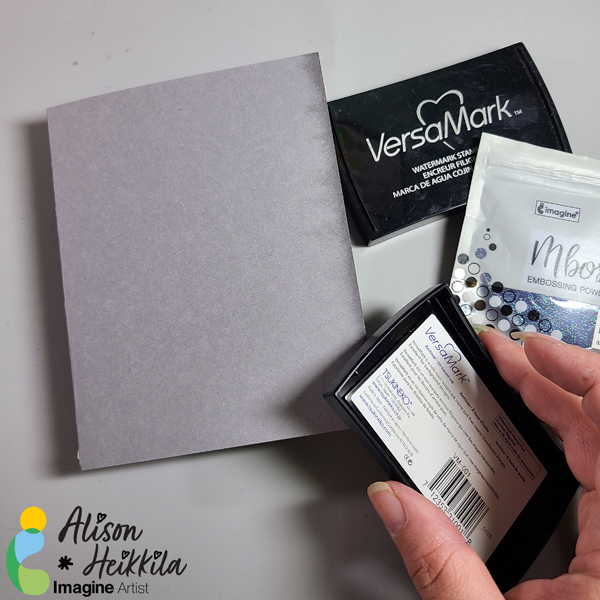
On a gray card base, ink the right side with VersaMark ink. Try to not make it even, so that it has a more organic feel.

Step 12:

Sprinkle Mboss in Shimmering Night Sky on to the wet ink. Shake off excess, and heat set with a heat tool.


Astrological Chart Card 10

Step 13:

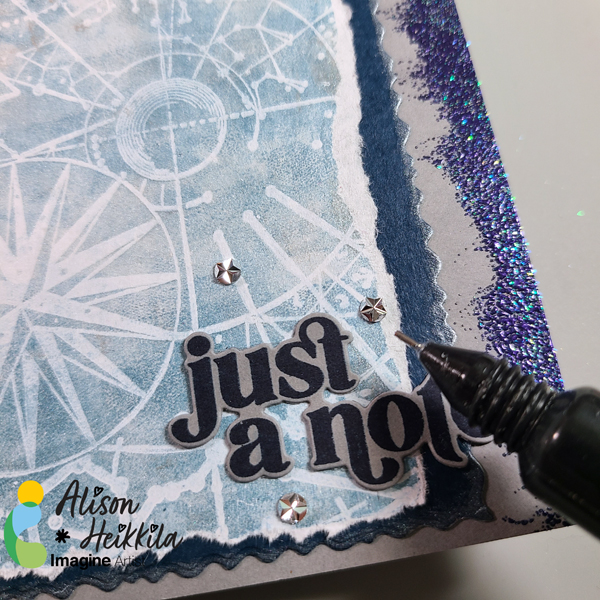
Adhere your layers. I added a stamped and die cut sentiment, as well as some jewels. For the jewels, I used On Point Glue.


Astrological Chart Card 11 600

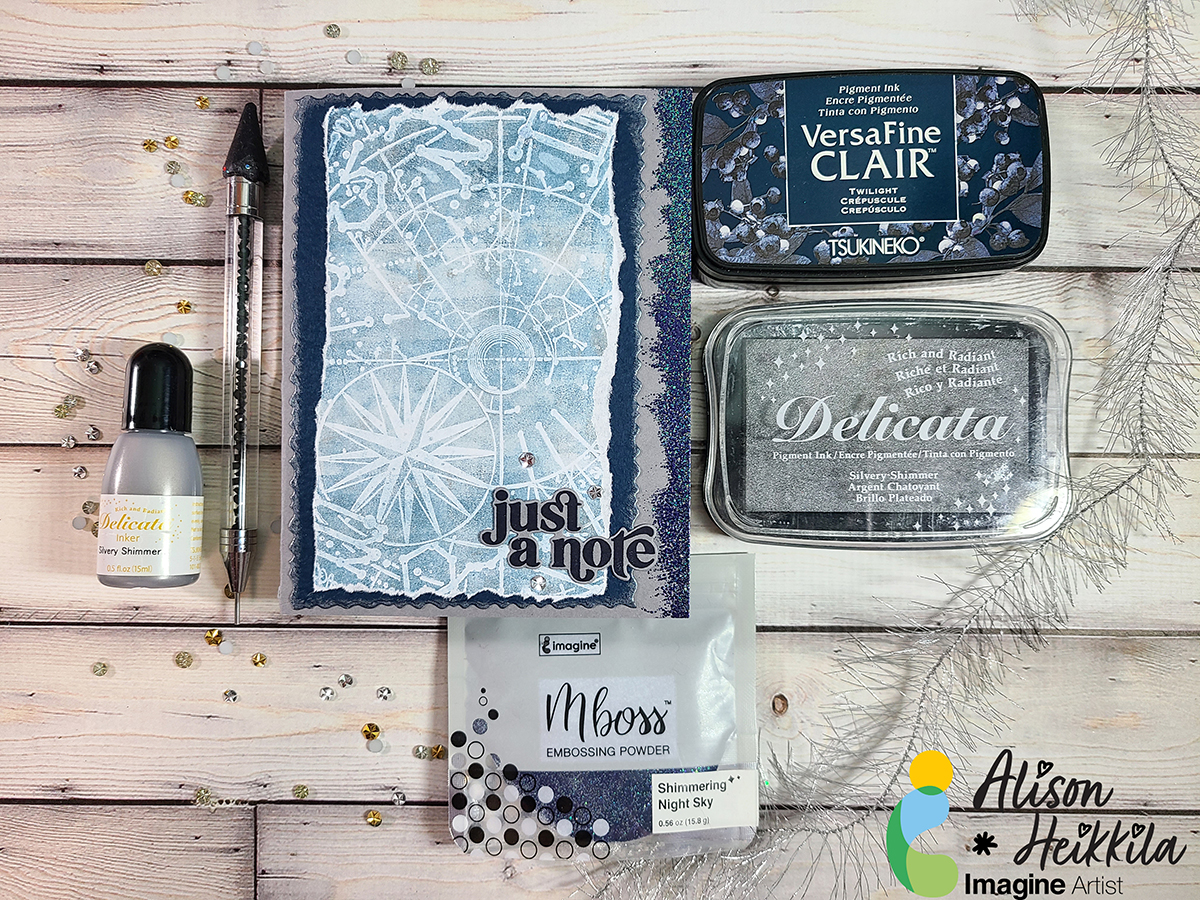
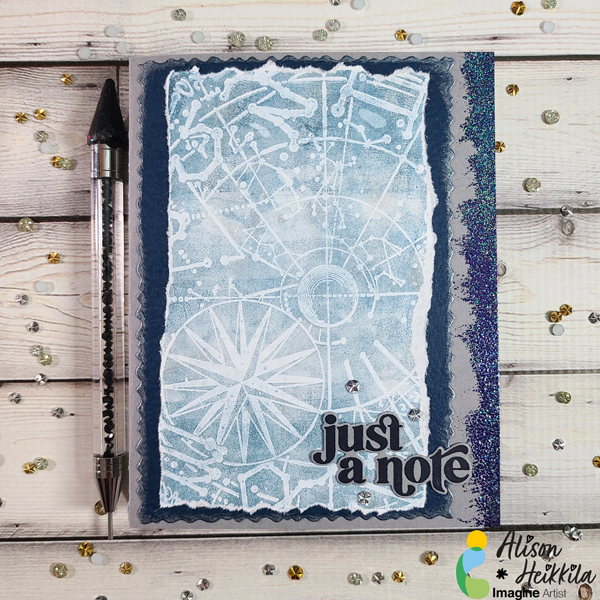
The finished card has lots of shine and cool texture. Using your inks and reinkers on a Gel Press Plate gives you the ability to mix colors from different lines and get beautiful, soft effects.


Astrological Chart Card 13 600

Again, using all of these layers may make it seem that this card took a lot of time, but it really didn’t because making the print is such a fast process. And you can choose to use a larger Gel Press Plate to cut down on some of the layers.


Art Supplies:

Imagine:

• VersaFine Clair Ink in Twilight
• Delicata Ink Pad & Reinker in Silvery Shimmer
• VersaMark Ink Pad
• MBoss in Shimmering Night Sky
• On Point Glue
• Craft Mat

Other:

• Gel Press: 3″ x 5″ Plate
• Carabelle Studio: Zodiac Printing Plate
• Speedball: Brayer
• Stampendous: Deckle Die Set, Slim Acrylic Handle
• Pinkfresh Studios: Perfect Sentiments stamp & die set
• Doodles Paper Playground: Silver Starburst Rhinestones
• Gray card base, white copy paper, navy cardstock
• Heat Tool

Create Elegant Heart Embossed Holiday Cards

2021-Lee_Ann_Dec_Blog

By LeeAnn McKinney –

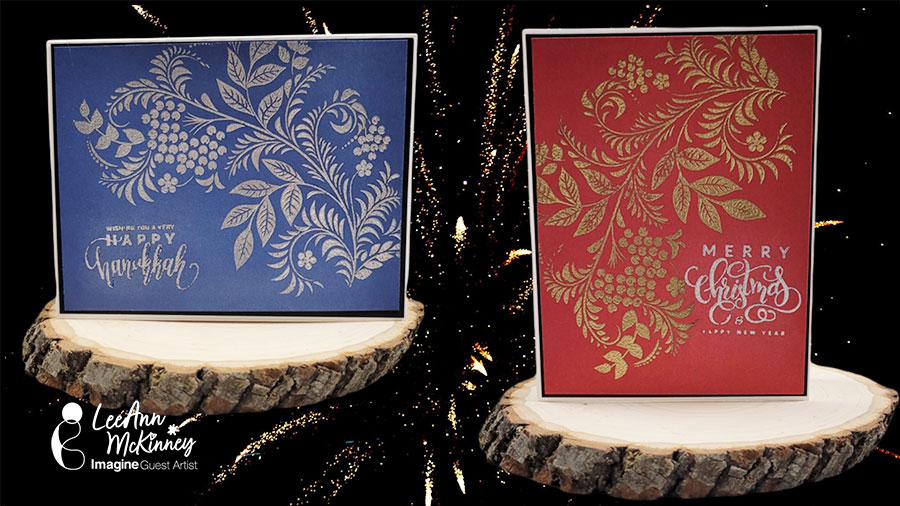
Hi there friends and fellow crafters, LeeAnn here. Today I am making 2 cards using one of my favorite techniques… HEAT EMBOSSING. So for the next 5 minutes please relax, and watch as I make these 2 cards. Actual crafting time was 17 minutes not counting the cutting of the cardstock which I did before turning on the camera.


Art Supplies

Imagine:

• Craft Mat

• Tear it! Tape

• Mboss

• VersaMark Watermark Ink


Other Supplies Used:

• CARD STOCK 8.5 X 11- White- Layering Weight – Gina K Designs

——— https://ldli.co/e/43kgz90 [ ginakdesigns.com ]

• STAMPS- Holiday Tapestry – Gina K Designs

• CARD STOCK 8.5 X 11- Black Onyx- Heavy Weight – Gina K Designs

• CARD STOCK 8.5 X 11- Red Velvet- Heavy Weight – Gina K Designs

• CARD STOCK 8.5 X 11- Blue Denim- Heavy Weight – Gina K Designs


Create Fall Inspired Cards With VersaFine Clair Inks

November_2021_Katy-Ingram_Fall-Inspired_700x700

By Katy Ingram –

Hello and welcome! Katy here with a new video. Many of you may have noticed from my last couple videos that I use VersaFine Clair Inks a lot and that I love to ink blend with them. Today’s video is no exception. I used two VersaFine Clair Inks that blend beautifully and create the most amazing burnt orange color that is perfect for Fall. In the video I also talk a bit about how to have better success with your ink blending by using Hot Pressed Watercolor Paper and I also show you a simple way to create sentiment strips that are fool proof. I hope you find these tips helpful and I hope you enjoy the video. Thanks so much for watching.

Thanks For Watching.

Skill: Intermediate, Advanced
Time: 30 minutes

Art Supplies:

Imagine

• Delicata Golden Glitz

• Versafine Clair Inks Cheerful, Glamorous and Chianti.

• On Point Glue

• Sheer Shimmer Spritz in Gold

Other Products Used:

• Gina Marie Designs Tribal Stitched Nested Rectangle Dies
• Honey Bee Large Thanks Die set
• Concord & 9th Lace Leaf Stamp & Die Set
• The Greetery Sentiment Suite Thank You stamp set
• Waffle Flower Oversized Hugs Stamp Set
• Altenew Leaf Burst Stencil
• Strathmore 500 Series Hot Pressed Watercolor Paper.
• Gina K Designs Dark Chocolate Cardstock