You Are My Lucky Star Hologram Embossed Greeting Card

by Kassy Tousignant

You Are My Lucky Star Hologram Embossed Greeting Card

Imagine has released a new, innovative design in embossing powder packaging! It is in a resealable bag! It is so easy to use and clean up after. The gusseted bottom allows it to stand independently on your surface and won’t tip over easily. The fact that you can pinch the bag while you are pouring the powder onto your project allows for greater accuracy too. I used the Hologram MBoss powder on this star card and it really makes the focal point pop!

Skill: Intermediate
Time: 30 minutes

Directions

Supplies

Imagine

VersaFine Clair in Nocturne

VersaFine Clair in Paradise

VersaFine Clair in Cheerful

Fireworks Shimmery Craft Spray in Bahama Blue

Fireworks Shimmery Craft Spray in Paris Dusk

VersaMark

Tear It Tape

Mboss Embossing Powder
Hologram

Jumbo Dauber

Other
  • Cardstock – White
  • Altenew – Stamp and die
  • Embossing buddy
  • Foam adhesive
  • Blue string
  • Watercolor paper

Sparkle And Shine With This Jellyfish Theme Birthday Card

by Jowilna Nolte

Sparkle And Shine With This Jellyfish Theme Birthday Card

Thinking back when I did my first heat embossing, it was pure magic. That feeling of amazement and wonder hasn’t left but has been ignited once again with the amazing Mboss from Imagine. The new embossing colors are simply amazing and really are over the top beautiful! You have to get some for your stash to experience true magic! Take a look at how I used mine for a fun color-blocked effect.

Skill: Intermediate
Time: 30 minutes

Directions


Step 1

Tape off areas using washi tape on a white cardstock panel.


Step 2

Use your VersaMark inkpad and ink the taped off sections only by tapping the ink pad onto the cardstock.


Step 3

Use the Mboss packet and sprinkle the powder over the inked areas. Peel off the washi tape and then heat set the Embossing Powder using a heat gun.


Step 4

Use StazOn Pigment Piano Black and stamp Happy Birthday sentiment onto a blank area of the embossed panel.


Step 5

Stamp elements onto white cardstock and cut out. Add a little color using Memento Markers.


Step 6

Adhere the stamped elements onto the embossed panel with On Point Glue. Add diamanté and finishing touches.

Supplies

Imagine

Other

  • White cardstock
  • Washi tape
  • Joy Clair stamps
  • Diamanté and/or sequins

Create A Beautiful Hologram Flower Outline With Mboss

by Melissa Andrew

Create A Beautiful Hologram Flower Outline With Mboss

Today I am sharing the fabulous new Hologram Mboss embossing powder from Imagine. This fabulous embossing powder is fine for detailed stamping but also sparkles with colors of the rainbow. In this video, I show you how to stamp, emboss and fill in with a watercolor technique. The Memento inks are perfect for creating the peachy blended look.

Skill: Intermediate
Time: 1 hour

Directions

Supplies

Imagine
Other
  • LDRS Creative – If Friends Were Flowers stamp set
  • Whimsy Stamps – Card Builders Window die set
  • Antistatic tool
  • Paper Trimmer
  • White Card
  • Bristol Smooth cardstock
  • MISTI Stamping Platform
  • Gemini Jr. Die Cut machine
  • 6 round paintbrush
  • Spray bottle

Learn How To Color Jewelry Charms With Embossing Powder

by Kyriakos Pachadirolgou

Learn How To Color Jewelry Charms With Embossing Powder

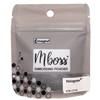
With summer being just around the corner, be ready by making a sea-themed bracelet for your vacation swag. Use the Mboss embossing powders to cover metallic charms, such as starfish, seahorses, and anchors, to add color to them. This tecnique is simple and not too demanding to make; match it to your color palette of choice and add even more Mboss-ed charms.

Skill: Advanced
Time: 1 hour

Directions


Step 1

Press the metallic sea-themed charms on the VersaMark watermark ink pad, cover with the different colors of Mboss embossing powders and heat set. The VersaMark is a tacky ink and will stick to the metal charms long enough to receive the embossing powder.


Step 2

Cut 3 x 10 inch long pieces of the wax cord (you will adjust the length of the bracelet later) and secure them at one edge.


Step 3

Add just a small drop of On Point Glue to the other edge of the cords to keep them from fringing.


Step 4

Start adding beads and the charms you covered with Mboss Embossing Powder in step one to each of the three cords.


Step 5

When you have about 2 inches of the cords filled with beads and charms, place all cords through a large hole bead. This will give your bracelet some nice structure, but it is an optional step. Repeat steps four and five until you have around 7 inches of bracelet.


Step 6

Continue adding beads and charms and at 7 inches long secure the edges and add the closing caps. Adding a chain to once cap will make the the length of the bracelet adjustable. Add the hook to the other cap.

Never made jewelry before? Click here to see a post about some basics of jewelry making.

Supplies

Imagine
Other
  • Heat tool
  • Glass and metallic beads
  • Sea themed metallic charms
  • Jewelry clasps, hooks, lobster locks, chain
  • Waxed purple cord
  • Pliers

See How to Make a Unicorn Holographic Card with Watercoloring + Embossing Powder

by Arjita Sepaha Singh

See How to Make a Unicorn Holographic Card with Watercoloring + Embossing Powder

For Today’s card, I used a few Memento Dual-tip Markers and the gorgeous Mboss Embossing powder by Imagine. I did a very light freehand sketch of a unicorn on some watercolor paper and colored the hair, ears, and flower using the Memento Markers. I used a brush and some Ink Portion No 9 to blend the dyes and to get a watercolored look.

Once the paper was completely dry I painted the horn and ears with a fine brush and VersaMark ink. I poured the Hologram Mboss and melted it with the heat gun. I finished the card by adding a sentiment “Rainbow, Glitter & Unicorns” in black. The card is super simple to create and the sparkle you get is amazing. This is a cute card for baby shower invites or a birthday card, even for a kid.

Skill: Advanced
Time: 1 hour

Directions

Supplies

Imagine
Other
  • Watercolor paper – Arches Cold Press
  • Heat tool
  • MISTI stamping platform
  • Cardstock – white, pink
  • White gel pen

3 Techniques using the VersaMark Ink Pad with Mboss Embossing Powder

by Jessica Lin

3 Techniques using the VersaMark Ink Pad with Mboss Embossing Powder

Hi everyone! Today’s video highlights the VersaMark ink pad, which I’m sure most of you have heard of. (If not, come join the party!) It’s the sticky, clear ink that makes heat embossing super fun and easy. But did you know that you could also stamp with the VersaMark ink pad, and even use the “direct-to-paper” technique? Click on the video and learn how you can stretch the use of your VersaMark ink pads by using it 3 different ways. Two of the techniques are paired with Imagine’s new Mboss Embossing Powder. These two products are a match made in heaven!

Skill: Intermediate
Time: 1 hour

Directions

Supplies

Imagine
Other

• Cardstock
• Card base
• Die cut machine
• Stamping tool or platform
• Scissors
• Heat Tool
• Adhesive sheet
• Bone folder