Decorate Your Home for the Holidays with Clay Ornaments

by Kyriakos Pachadiroglou

Decorate Your Home for the Holidays with Clay Ornaments

Light-weighted, these Christmas ornaments can be hung anywhere in the house to decorate during the festive holiday season. Use any Christmas theme casting mold to make the ornaments and if you don’t have any, a flat layer of clay with some cookie cutters can work too. They are easy to make and coloring is a breeze with All-Purpose Ink and StazOn Pigment inks.

Skill: Beginner
Time: 1 hour (excluding clay dry time)

Directions


Step 1

If you are creating the clay pieces yourself then allow clay of the Christmas shapes to fully dry. If you are using premade shapes then you are ready to start. Using a paintbrush, color the surface of the ornaments with All-Purpose Ink Poppy Red and Lemon Yellow. Premix the two colors or lay first the Poppy Red and add a layer of Lemon Yellow after. Let them dry.


Step 2

Cover the embossed details of the shapes with All-Purpose White to create a distressed or antique look. The easiest way to apply the color is by using a finger and lightly tapping on the embossed areas. Let them dry.


Step 3

Press the crystals directly on the StazOn Pigment ink pad, let them sit a bit to allow the ink to dry well and repeat for a good coverage. Cover on the backside only.


Step 4

Use a hot glue gun to set ribbons on the clay shapes, add beads and crystals.

Supplies

Imagine
Other
  • Fimo casting mold – Christmas shapes
  • White clay
  • Ribbons
  • Silver color beads
  • Chandelier crystals
  • Hot glue gun

Quick & Easy: Create a Simple and Beautiful Collage on a Wooden Leaf


by Lori Warren

New to collage and mixed media?  Then this project is for you! Create a simple and beautiful collage on a wood leaf that can be used in card making and home décor projects.


StazOn Pigment
in Piano Black

Sheer Shimmer Stix in Gold

Tissue Paper

Stamp Set

StazOn Cleaner

Creative Medium

Wooden Leaves

Flat Paint Brush

Directions

Separate the top layer of a patterned paper napkin and tear it into large sections. The thin tissue paper is perfect for this project.

Using a flat paint brush, adhere the torn napkin pieces to wood leaf with Creative Artist Medium in Clear. Creative Medium is a light acrylic paste and can perform a lot like Modge Podge paste for this collage. What makes Creative Medium different than Mod Podge is that it is thick enough to form a stiff structure as well. So if you are using Creative Medium with a stencil then the shapes of the stencil will maintain their shape. Paint the Creative Medium layer on the wood shape first. Then lay the tissue paper down and apply another layer on top of the paper. Allow drying.

Stamp a fall theme saying or sentiment onto the leaves with StazOn Pigment in Piano Black. Use the StazOn stamp cleaner to clean your stamps once you are finished. Since the surface has the Creative Medium layer StazOn is the best choice here. Other ink brands might rub off or smear.

Apply Gold Sheer Shimmer Stix to edges of the leaf. The Shimmer Stix is a dauber top applicator and needs to be shaken well before use. The liquid shimmer should apply much like a marker. Test on a separate piece of paper before applying.

Repeat the process with different leaf-shaped.

Color of the Month for October is Chili Pepper

Color of the Month for October is Chili Pepper

Color of the Month for October is Chili Pepper! We see this color as a rich dark red. This richness can be a true red with a hint of brown. We feel that the Fall is a great time to indulge in warm rich colors and this is the perfect match. Some of our ink brands that represent this color are StazOn in Claret, Delicata in Ruby Red, Memento Ink in Rhubarb Stalk and VersaFine Clair in Chianti.

We challenged our artist with this beautiful color as well as the use of Fabric in their projects. So stay tuned for crafty goodness this month.

Here is a Sneak Peek!

Embroidery Hoop Colored with All-Purpose Ink by Iris Rodriguez

Denium & Stamping on Fabric by Kyriakos Pachadiroglou

Farm Harvest Stamp on Fabric by Roni Johnson


Use a Yogurt Container as a Clay Template

by Iris Rodriguez

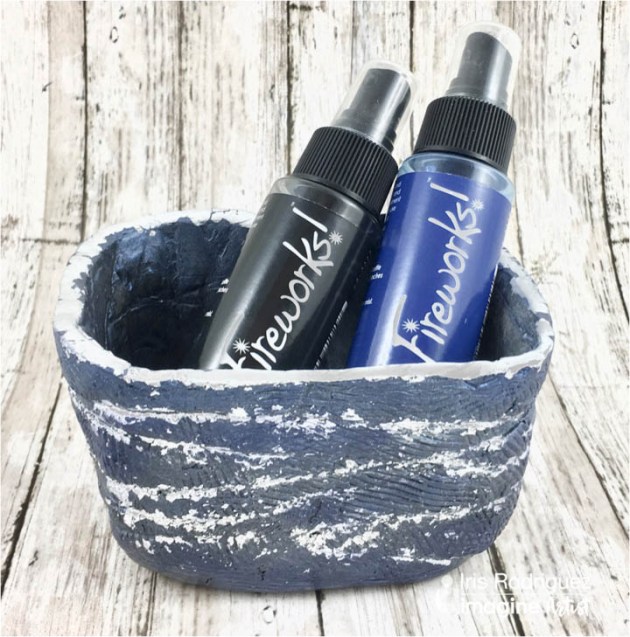
Want to make a decorative and functional bowl but do not know where to start? In this tutorial, I show you how to shape a color a bowl with Activa Self Hardening clay and color with Fireworks Sprays. I found that Fireworks plays well with porous or paper clay. The Activa clay is a nice porous clay that takes pigment inks and craft sprays nicely. I blended together Summer Sky, Danube Blue and Tuxedo Black in Fireworks Craft Sprays. Check it out!

Skill: Intermediate
Time: 1 Hour to make the bowl, 2 days total for bowls to air dry

Directions


Step 1

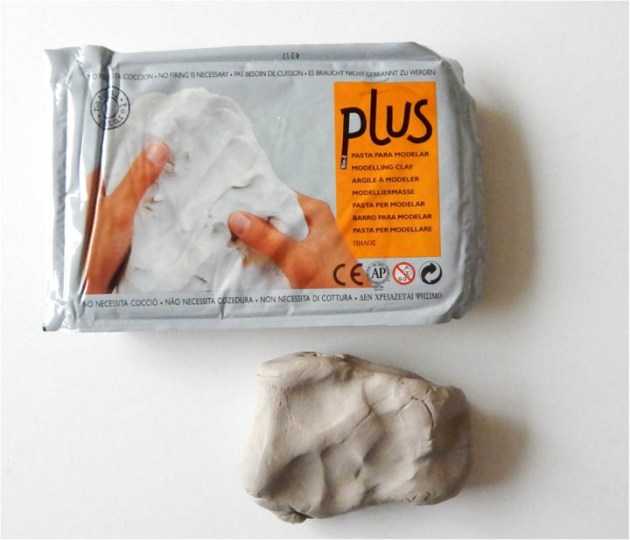
For this project, I used Activa Plus clay. In case you’re not familiar with this clay, I will describe its properties. It is an air-dry clay. It is fine, moist, malleable, firm, but not hard. Keep the clay moist by spraying a little water, which also makes it softer. When the clay is wet, it is a beige like color, and when dry it turns off white color. The rate that it dries will depend on the thickness of the project and room temperature. The drier the room, the faster it dries. It is highly porous, which is nice, because it takes just about any kind of medium for coloring onto the clay, such as Imagine’s dye/pigment inks and craft sprays. For this project, I used Fireworks Craft Sprays. Use a wooden board or another non-porous surface to work with this clay.


Step 2

Condition the clay by wedging the clay or just rolling it around.


Step 3

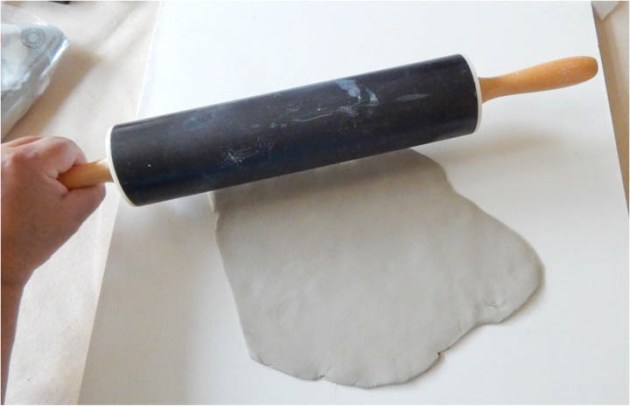
Roll out a sheet of clay. You can use a pin roller or use a clay roller.


Step 4

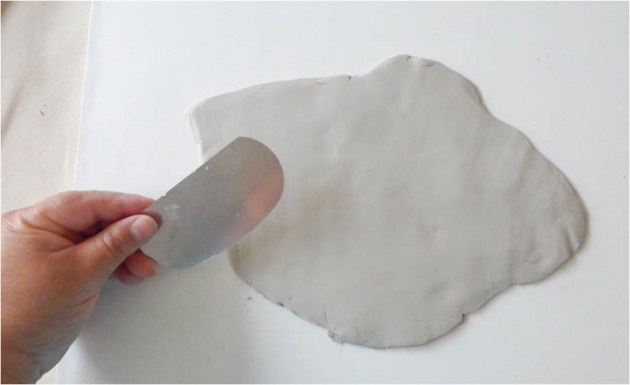
The clay is usually very smooth when it’s rolled out. If it is not, then smooth out the clay with your fingers, rib tool or another smooth-edged tool.


Step 5

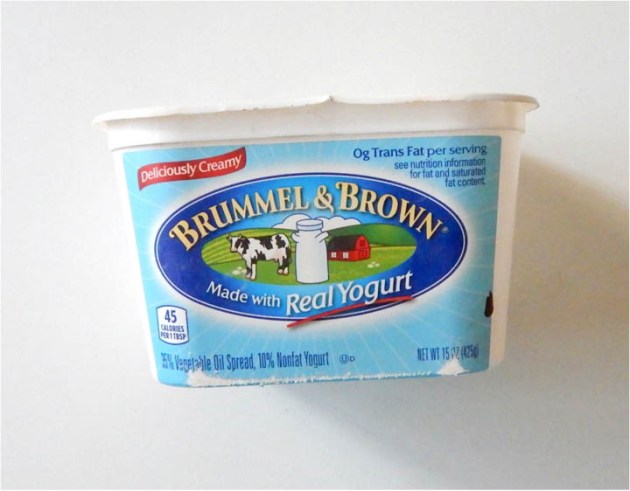
Now we will create a makeshift mold for the bowl shape. I used a small plastic yogurt container.


Step 6

The clay will stick to the plastic. Add newspaper and tape it down with masking tape. Masking tape is ideal; it’s porous and the clay will not stick to it. We could just use the masking tape, but the newspaper with the tape comes off easier as one unit.


Step 7

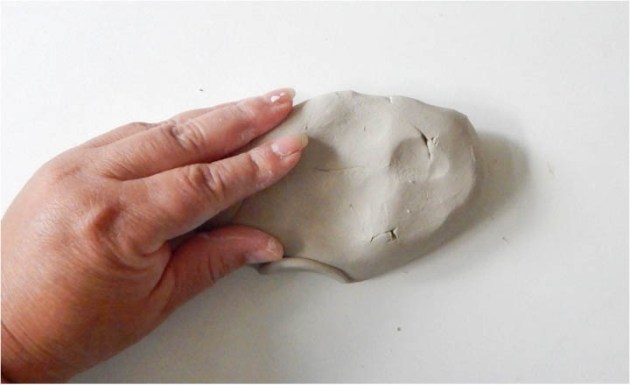
Drape the clay over the container.


Step 8

Smooth the clay onto the container. Cut the rim with a knife.


Step 9

Add texture to the clay with a jagged rib tool or another textured object.


Step 10

This is optional. Wrap hemp string around the bowl, to add additional texture. Allow the clay to dry for one day.


Step 11

At the start of day 2. The clay will be slightly moist. Because the clay will slightly shrink when it gets completely dry, you risk the clay cracking while the clay is wrapped around the container. Take out the mold while it’s moist. The container comes off easier while the clay is moist; you can maneuver the clay without it breaking or distorting. If you get cracks, wet your finger and smooth it out.


Step 12

Let the clay dry for another day. To determine if it’s dry, take a look at the natural clay color; it will turn an off-white when dry. Also, if the clay feels cold then it’s still wet.


Step 13

Cut off the help string.


Step 14

Spray one layer of the Summer Sky Fireworks! Craft Spray. Allow it dry completely. The color will dry lighter. If you add additional layers allow it dry completely before adding more Craft Spray. If you spray too much at once, it will begin to weaken or activate the clay. Also, by waiting for each layer to dry, you can determine the color intensity that you’ll want. Use a heating tool to speed up the drying process.


Step 15

Spray one layer of the Danube Fireworks! Craft Spray. Allow the clay to completely dry before adding more layers. Use a heating tool to speed up the drying process.


Step 16

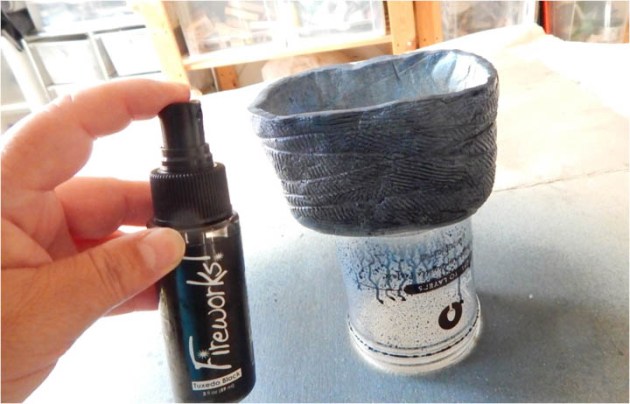
Spray one layer of the Tuxedo Black Fireworks! Craft Spray. Allow the clay to completely dry before adding more layers. This spray will look very dark when wet, but when it dries you’ll get a Navy or Prussian Blue type color. Use a heating tool to speed up the drying process.


Step 17

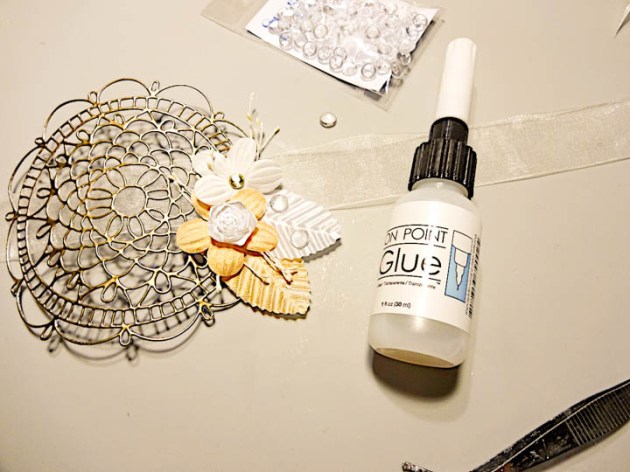
Add On Point Glue. Adhere to the silver leaf. It is very important to seal the bowls. The clay is porous, therefore liquids can weaken or activate the clay. The sealer makes it look purposely finished. You can use a spray sealer like 3M/Krylon or brush on a water-based varnish or polyurethane.

Supplies

Imagine

Other
  • Activa Plus Self Hardening Clay – White
  • Modeling clay tools – smooth rib tool, knife, textured rib tool
  • Rolling pin
  • Silver Leaf
  • Hemp string
  • Wooden board
  • Sealer (spray, polyurethane)

 Learn How to Mix Mediums to Create a Home Décor Birdhouse

by Lori Warren

 Learn how to mix mediums to create a home décor bird house

A great aspect of Imagine products is that they pair very nicely with other mixed media mediums.  This project features the use of StazOn Pigment ink, Creative Medium and Fireworks! sprays along with acrylic paint and varnish to complete a mixed media home decor project.

Skill: Advanced
Time: 2 hours

Directions


Step 1

Adhere pieces of corrugated paper to a pre-made wood birdhouse with Creative Medium.


Step 2

Spray birdhouse with Fireworks sprays. Allow drying.


Step 3

Mix Rich Cocoa Fireworks! spray with matte varnish, apply to the birdhouse. Allow drying.


Step 4

Sponge on Chocolate Brown StazOn Pigment to portions of the birdhouse.


Step 5

Coat with another layer of matte varnish. Allow drying.


Step 6

Dry brush texture with white gesso.


Step 7

Stamp flower images onto tissue paper with StazOn Pigment, Snow White.


Step 8

Tear stamped tissue into pieces and arrange onto birdhouse.


Step 9

Adhere stamped tissue with matte varnish.


Step 10

Stamp smaller flower images (with StazOn Pigment, Piano Black) directly onto birdhouse.


Step 11

Add white paint splatters.


Step 12

Use the same techniques on wooden bird element.


Step 13

Adhere bird element to the birdhouse and tie fibers to top.

Supplies

Imagine
Other
  • Waffle Flower Stamps – In Every Way Stamp Set, Pretty Foliage Stamp Set
  • Bark Wood – Birds
  • Wood Bird House
  • Fibers
  • Corrugated Cardboard
  • DecoArt Americana – White Gesso
  • DecoArt Americana – DuraClear Matte Varnish
  • Tissue Paper

Learn How to Make a Napkin Ring from a Waffle Flower Doily Die-cut

by Kyriakos Pachadiroglou

Learn How to Make a Napkin Ring from a Waffle Flower Dolly Die-cut

The fine detailed Doily die from Waffle Flower is versatile to use beyond card making. Covered with Mboss embossing powder in Gold, it gives the look of a true metallic made piece that works as the main body of the napkin ring. By choosing from any of the colors of the Mboss embossing powder you can match your table theme. Simple and easy to make, this napkin ring shows excellent around a white cloth napkin.

Skill: Beginner to Intermediate
Time: 1 hour per four pieces

Directions


Step 1

Die-cut a doily circle with the Waffle flower die. Waffle Flower dies work with any brand of machine such as Spellbinders or Sizzix.


Step 2

Press the VersaMark watermark ink pad on the die-cut dolly, cover with the Mboss gold embossing powder and heat set. Repeat once more to create a thick texture.


Step 3

Glue the organza ribbon to the middle back of the gold embossed dolly cut.


Step 4

Color the white leaves and flowers with Sheer SHIMMER STIX gold.


Step 5

Use the hot glue gun to set the flowers and the leaves onto the doily.


Step 6

Add the flower embellishments with the On Point Glue.

Supplies

Imagine
Other
  • Waffle FlowerDoily Circle die
  • White cardboard
  • Organza ribbon
  • Satin flowers and leaves
  • Sparkletz embellisments
  • Die-cutting machine
  • Heat tool
  • Hot glue gun