Hi everyone! I’m so excited to share the new Sheer Shimmer Stix with you! These handy, little guys come with dauber heads, so you can apply shimmer easily without the mess of a spray. We also have a new Rose Gold color and it’s *absolutely* gorgeous. Check out my video and see how you can use them to “watercolor” these images within 3 minutes!
For my card today I wanted to create a dreamy background and for that, I used a few Memento Inks and a Jumbo Dauber to add a well-blended background. Next, I added a few spatters of Sheer Shimmer on the card to add the beautiful shine. I stamped the critters using Nocturne VersaFine Clair ink and quickly colored them with few Memento Markers and water. I fussy cut the images and adhered it on the inked card panel. I finished the card with a sentiment in black.
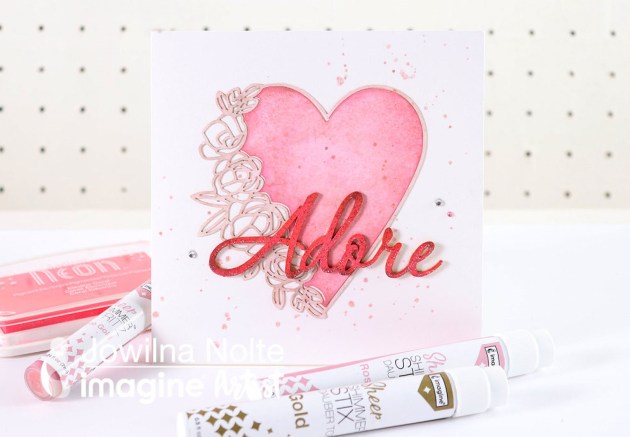
The new Sheer Shimmer Stix shows the range of products from Imagine and how the control of the dauber adds just the right amount of shimmer and shine to any crafting projects. Take a look at how this die-cut element is transformed into the star of the show with a few strokes of genius using the clever new Shimmer Stix.
Skill: Advanced Time: 20 minutes
Directions
Step 1
Use a pre-cut heart or download the cut file from the link in the products list below and cut with a Cricut machine. Create the die-cut heart and take it apart. Use a jumbo dauber and blend Radiant Neon Coral around the outside edges.
Step 2
Use the Rose Gold Sheer Shimmer Stix to add shimmer over the inked heart.
Step 3
Use the same Shimmer Stix to add color and shine to the outside of the die-cut heart. Leave to dry.
Step 4
Ink a chipboard sentiment using Radiant Neon Coral ink pad.
Step 5
Ink the chipboard sentiment with VersaMark ink pad and sprinkle with glitter embossing powder. Heat the powder until fully melted with your heat gun. Use On Point Glue to adhere the outside and the inner of the die-cut heart to the front of your folded card.
Step 6
Use Rose Gold Sheer Shimmer Spritz to add colored splats to the background of your card and leave the ink drops to dry. Adhere the embossed sentiment to the front of the card and finish off diamanté. The shimmer created by the embossed sentiment and that of the Sheer Shimmer Stix and Spritz makes for an amazing shiny card.
We are so excited to tell you about a new product that will be hitting the market soon—not only is Sheer Shimmer going to be available in Rose Gold, but also in an all-new easy applicator! Sheer Shimmer Stix can be held like a pen to swipe the dauber top applicator over a project surface to effortlessly and cleanly apply the elegant sheer shimmer you already love.
Sheer Shimmer Stix Color Swatches:
Quick Facts about Shimmer Stix
Same elegant Sheer Shimmer effect as the sprays
Swipe-on application for controlled results
Stix dauber top allows for quick, uniform, large surface area application
Keep your eye on the blog all month where our artists are going to show you some awesome technique ideas for this new product and the announcement they are ready to order!
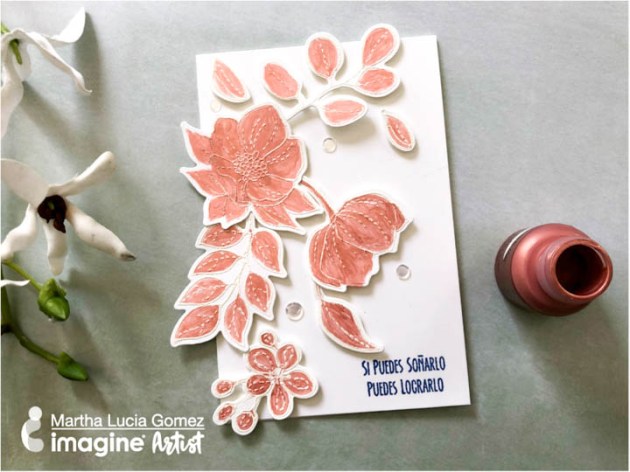
Hello dear friends! Today, I have a very special card that I made just using the new All-Purpose Ink in Rose Gold from Tsukineko. All-Purpose ink comes in a variety of colors including metallics which is perfect for this project. Rose Gold is a trending color and can easily use it in all my creations and thanks to Imagine we have many options to use. Take a look at my card:
Skill: Intermediate Time: 30 minutes
Directions
Step 1
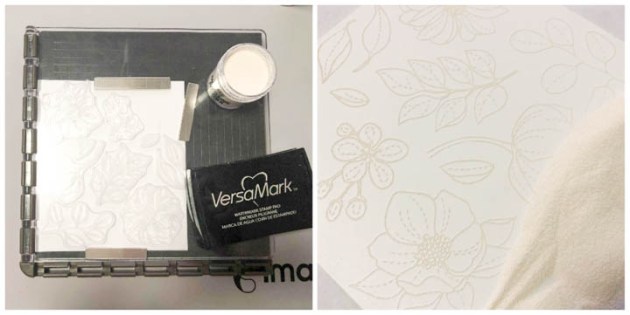
To create my card, I used whisper white card stock, embossing powder and VersaMark ink. I stamped the flowers over whisper white card stock too using VersaMark and White Embossing Powder. I melted the powder with the heat tool and then started my painted or coloring process with All-Purpose Ink Rose Gold.
Step 2
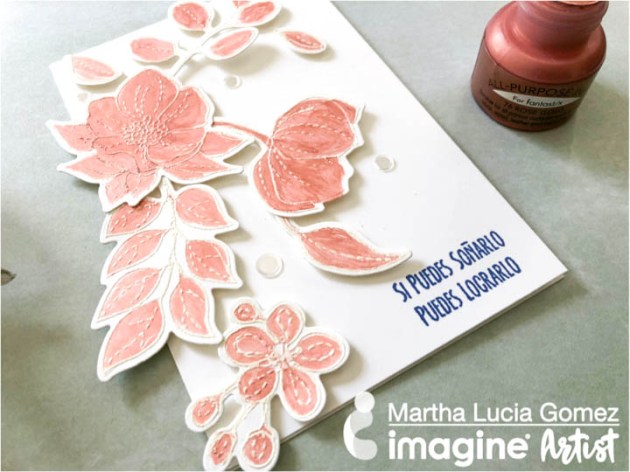
To color the flowers I used a paintbrush but you can also use Fantastix to have the same result. I cut my card in regular size but after finish it, I changed my mind and decided to reduce the width of the card and show off some of the flowers that I used. After coloring the flowers and leaves, I cut all of them with my scissors and arranged them on the left side of the card. During this process, I changed my mind on how I used some parts of the flowers on the left side.
Step 3
To have the card on normal size, I just cut the right side border about 3/4″ of an inch. I pasted all the flowers with double-sided foam tape and added white sequins with On Point Glue. To finalize the card, I stamped with Memento Paris Dusk a Spanish sentiment from the stamp set Vive Ama Sueña from Latina Crafter. Simple, easy and beautiful!
Who wants to “Make things happen” in 2019? I sure do and that is what inspired me to make this 4” x 6” Art Journal page featuring a variety of Imagine products. The tutorial includes how to use your Craft Mat to create a watercolor background effect with irRESISTible sprays as well as how to create a watercolor palette for detail coloring with Memento inks.
Skill: Beginner Time: 1 hour
Directions
Step 1
Apply VersaFine Clair (Medieval Blue & Teal Zeal) to a 4” x 6” Art Journal panel with Jumbo Daubers.
Step 2
Spray panel with Ink Potion No. 9 and encourage the ink to blend.
Lay the panel, facedown, into the wet ink and lift. Set aside and allow to dry.
Step 5
Spray Teal Zeal irRESISTible ink directly onto the panel in a few key areas. Allow to dry.
Step 6
With VersaFine Clair in Nocturne, randomly stamp script across the panel.
Step 7
Spray Art Journal Panel with Sheer SHIMMER Craft Spray in Sparkle. Allow to dry.
Step 8
Stamp the four-butterfly image (from the Tim Holtz Alterations French Flight stamp/die set) on to the panel with VersaFine Clair in Nocturne. Stamp the image just off center and then to the left of the panel.
Step 9
From the same Butterfly stamp set, stamp the large butterfly image into a piece of white cardstock with VersaFine Clair in Nocturne.
Step 10
Apply three colors of Memento (Morocco, Teal Zeal, Elderberry) directly onto your Craft Mat and then add water; use like you would watercolors to paint the butterfly image. Allow to dry.
Step 11
Spray the butterfly image with Sheer SHIMMER Spray in Sparkle. Allow to dry.
Step 12
With the coordinating die from the stamp set, die cut the butterfly image.
Step 13
Adhere black thread, in a circle pattern, underneath the butterfly and then mount to panel with double-sided foam tape (directly over the previously stamped image).
Step 14
With a paintbrush, apply GooseBumps Clear Texture Spray to butterfly. Allow to dry.
Step 15
Edge panel with VersaFine Clair in Nocturne and then embellish with adhesive pearls.
Step 16
Add sticker sentiment “Make It Happen” below the colored butterfly.
Step 17
Add the pages, back panel and metal rings to transform this project into an art journal.