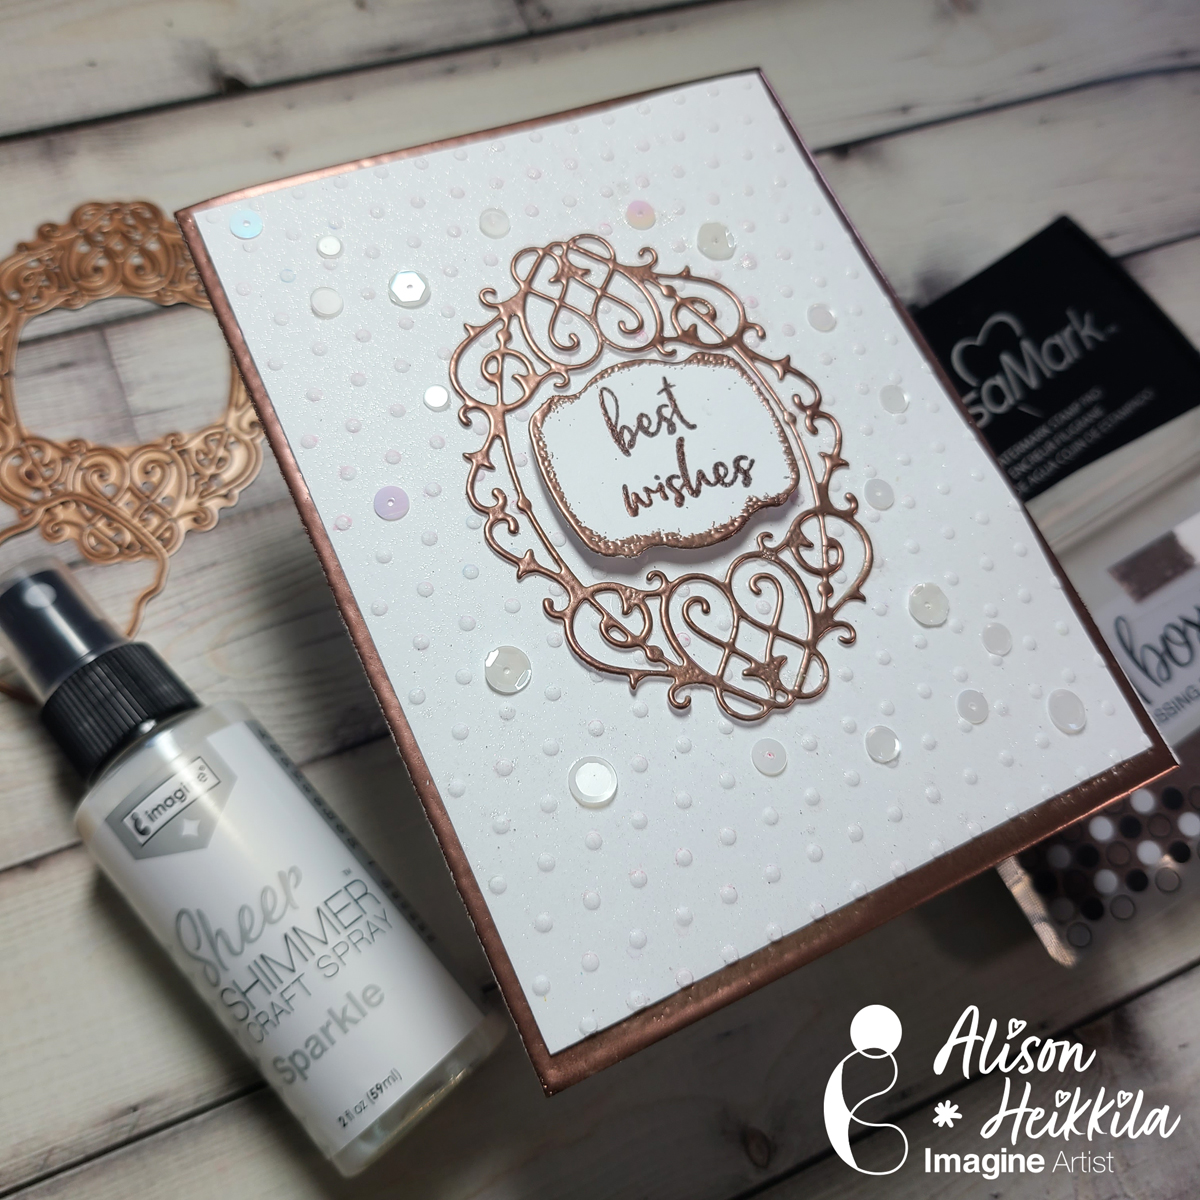
Hello! My latest video for Imagine is a wedding-themed card, though it can certainly be used for other occasions too. We’re going to use embossing powder in a few ways on this card, and they’re all fairly simple to do.
*Some affiliate links are used in this post. That means that if you shop through these links, I may receive a small compensation, at no cost to you.For more information, please see my Affiliates page, where I also have some coupon codes.
Skill Level: Intermediate Time to Complete: 30 minutes
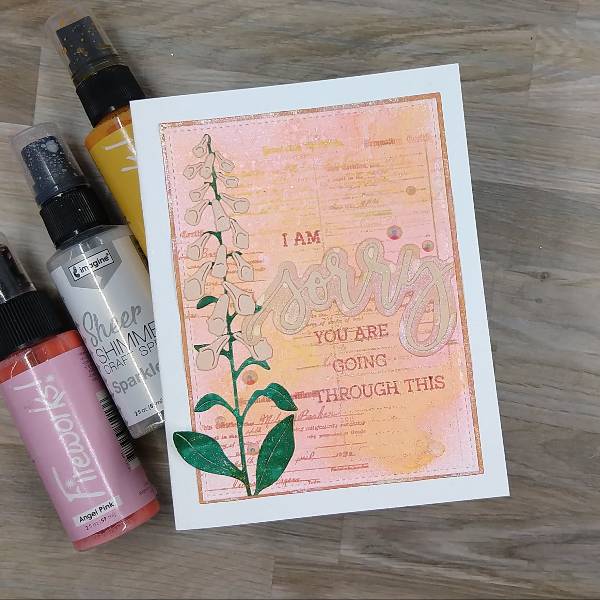
In today’s blog post, I will show you how to incorporate sprays and markers to change or enhance the color of colored cardstock to help you stretch your supplies.
Skill: Advanced Time: 2 hours
Directions:
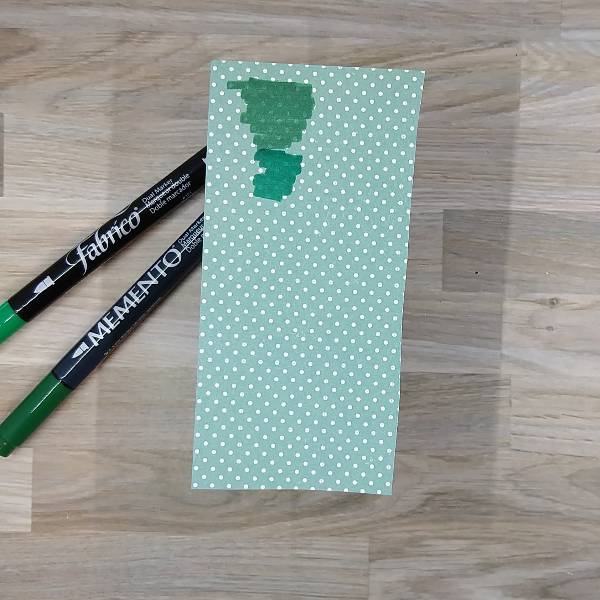
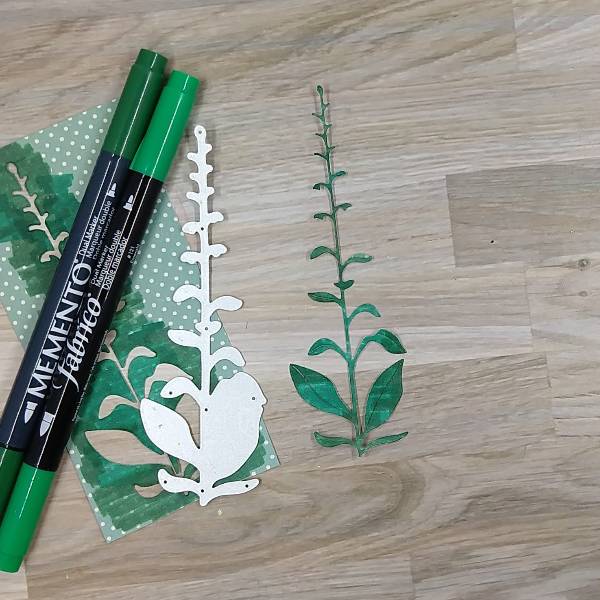
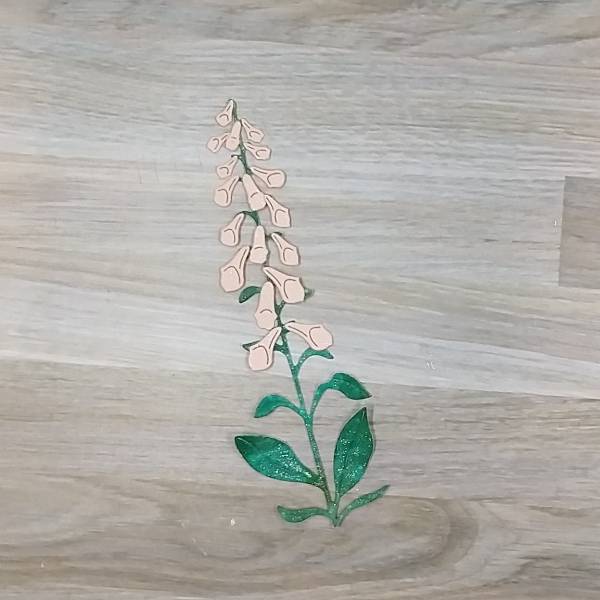
Step 1: Color a piece of teal or green patterned paper with green markers–College Ivy Memento marker and Emerald Fabrico marker.
Step 2: Die cut the colored patterned paper to form the leaves of the flower die cut. Optional step: Spray the colored patterned paper with Sparkle Shimmer Spray.
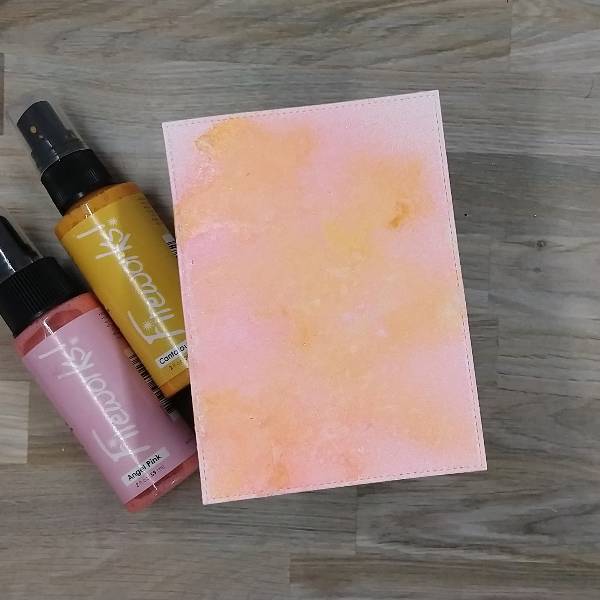
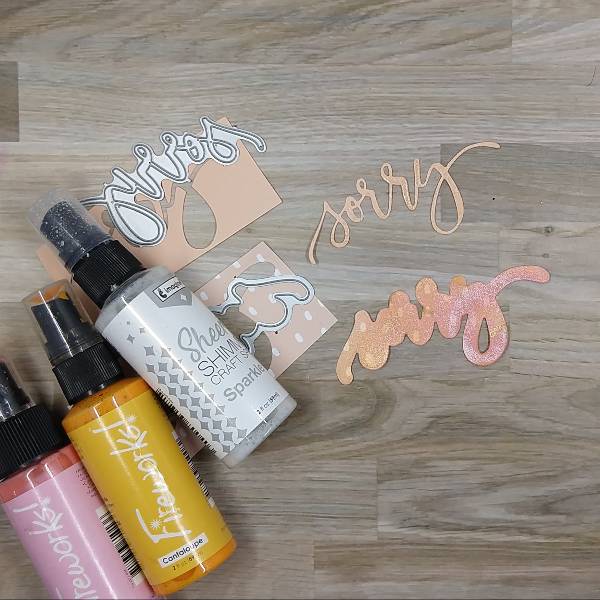
Step 3: Spray a die cut panel of watercolor paper with Angel Pink and Cantaloupe Fireworks! Sprays. After it dried, I sprayed both sprays again. This combination of the two colors almost achieved the peach fuzz color.
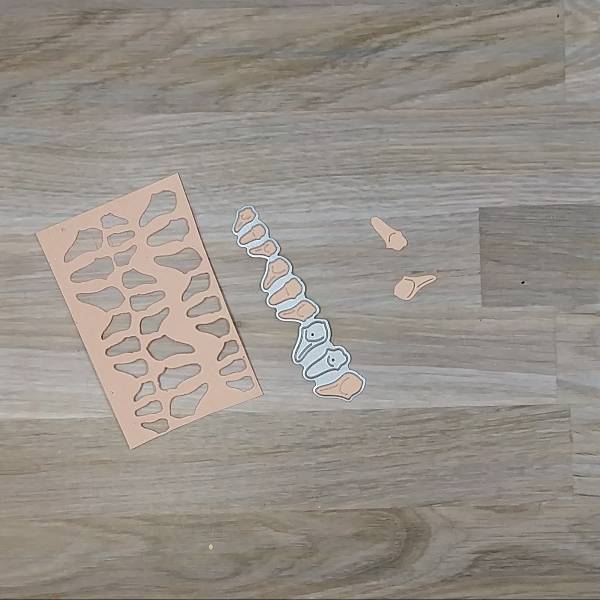
Step 4: Using a piece of peach cardstock, die cut the small flowers for the floral die cut three times.
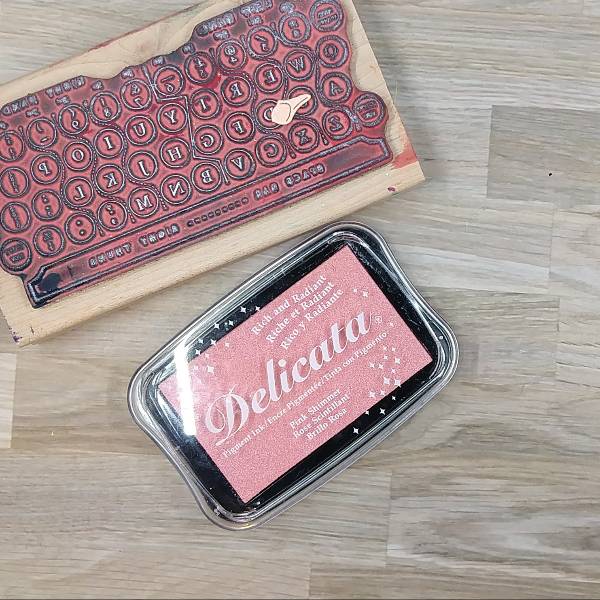
Step 5: Stamp Pink Shimmer Delicata ink onto the flowers using a stamp. (On the card, you can see a little shine on the flowers, but it ins’t visible in pictures.)
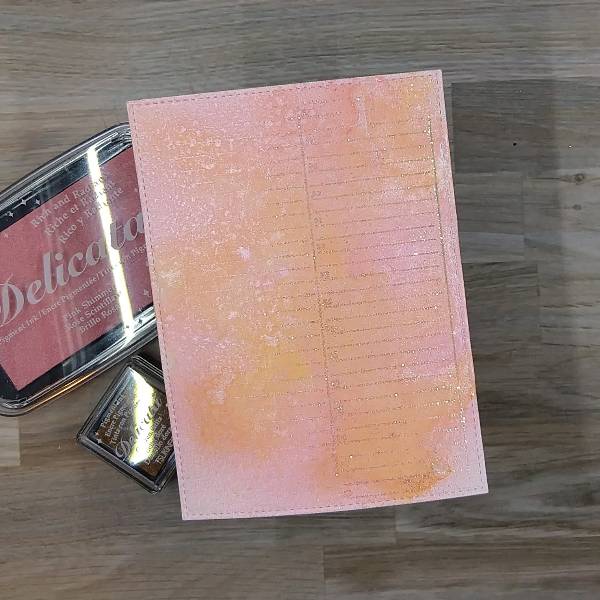
Step 6: Add Pink Shimmer and Gold Glitz Delicata Ink onto parts of a large background stamp. Make sure to leave parts of the stamp uninked (such as the lower left corner of the stamp). Optional step: Add holographic embossing powder onto the stamped image.
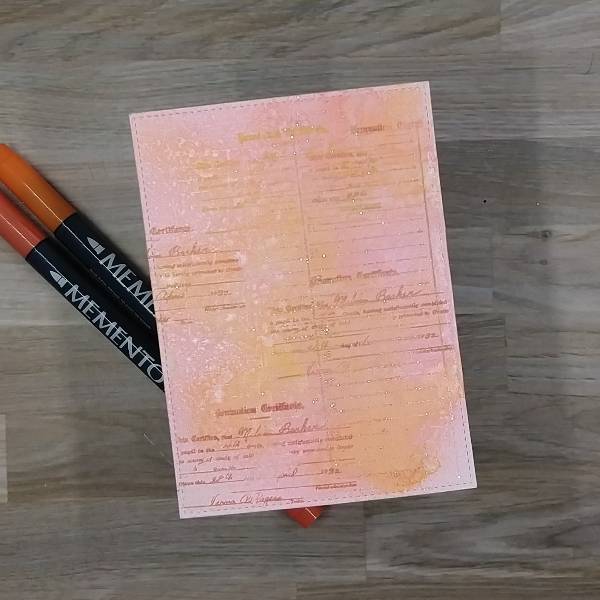
Step 7: Use Tangelo and Morocco Memento markers to color a smaller stamp and repeatedly stamp card base to add texture.
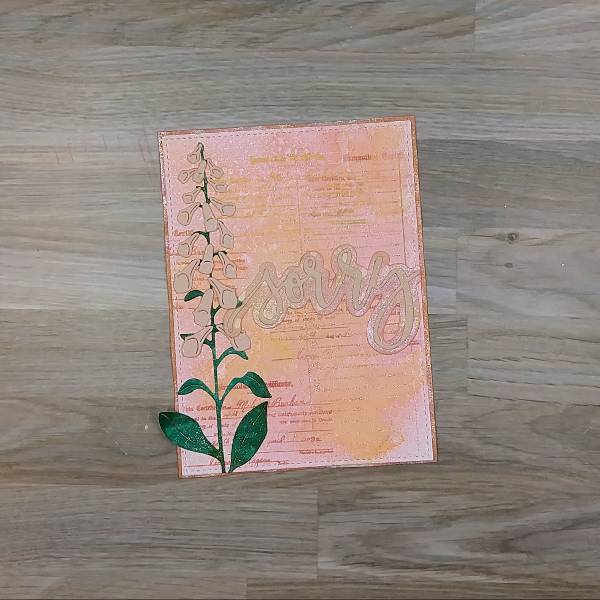
Step 8: Die cut the main sentiment out of more of the peach colored cardstock and the shadow die out of some peach patterned paper. Spray the sentiment with Sparkle Sheer Shimmer spray and the shadow paper with Cantaloupe and Angel Pink Fireworks! sprays. After the sprays dry, glue the two layers together.
Step 9: Glue the floral die cut pieces together.
Step 10: Create the matte layer of the card by die cutting a piece of orange patterned paper and then spraying it with more of the Cantaloupe and Angel Pink Fireworks! Sprays and Sparkle Sheer Shimmer spray to mute the bold orange color.
Step 11: Glue the floral die cut and the sentiment onto the upper card base. Trim off the right edge of the sentiment so that it doesn’t overhang the upper card panel. Then glue the matte (orange) panel behind the upper panel.
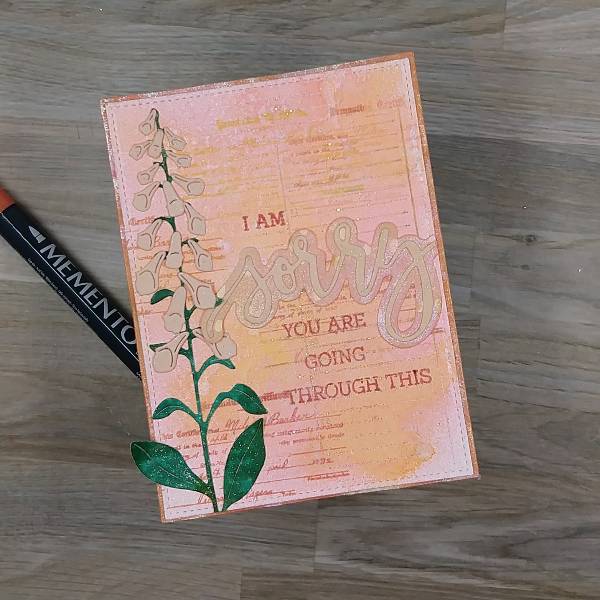
Step 12: Stamp the sub sentiments with by coloring them again with more Morocco Memento marker. (The sub sentiments came in 3 parts “I am,” “you are” and “going through this.” Since the last sentiment wouldn’t fit on the card without a little help, I performed “stamp surgery” where the stamp was cut before stamping to create two smaller stamps. If you are uncomfortable with this, you can mask part of the stamp and stamp the sentiment a couple of times if you are trying to create something similar.)
Step 13: Glue the card panel onto an A2-sized white card base and then glue a few rhinestones around the flowers and the sentiment.
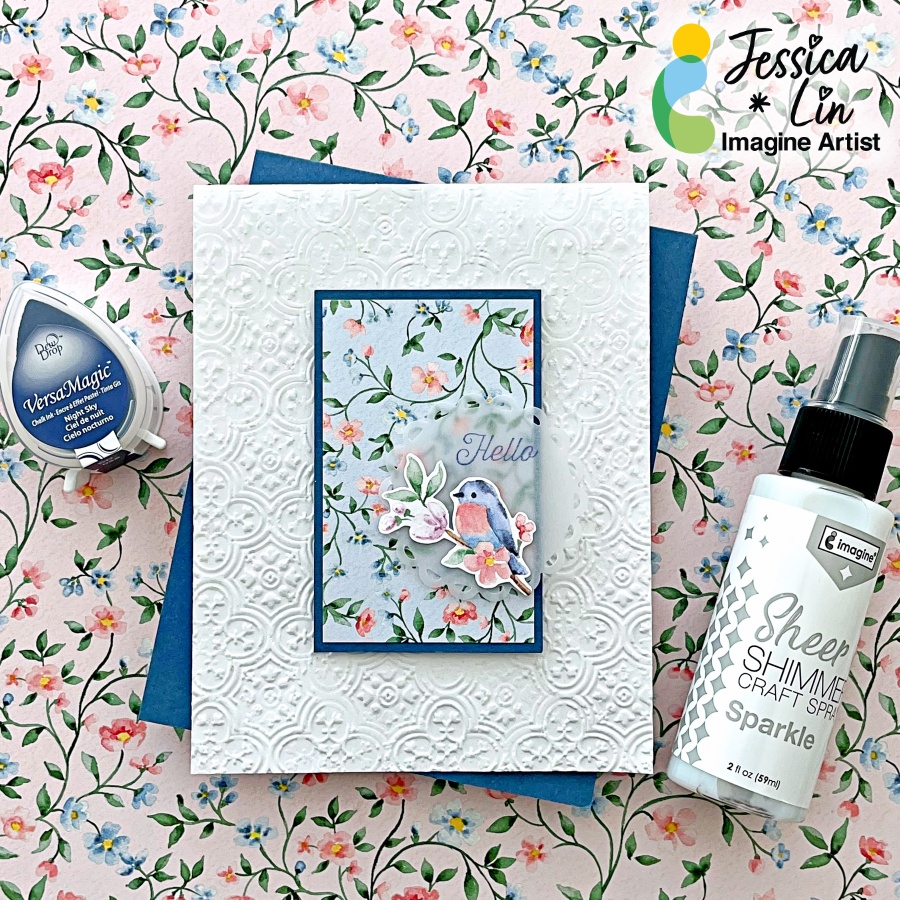
Let’s create a simple Easter card using some pretty patterned paper! The pastel colors and floral designs are too pretty to cover up! So I decided to stamp the sentiment on a piece of vellum. Stamping on vellum is tricky; but the VersaMagic ink pads work wonderfully. They don’t bead up and dry beautifully without fuzzy edges. Keep reading to see the final result!
Skill: Intermediate Time: 30 minutes
Directions:
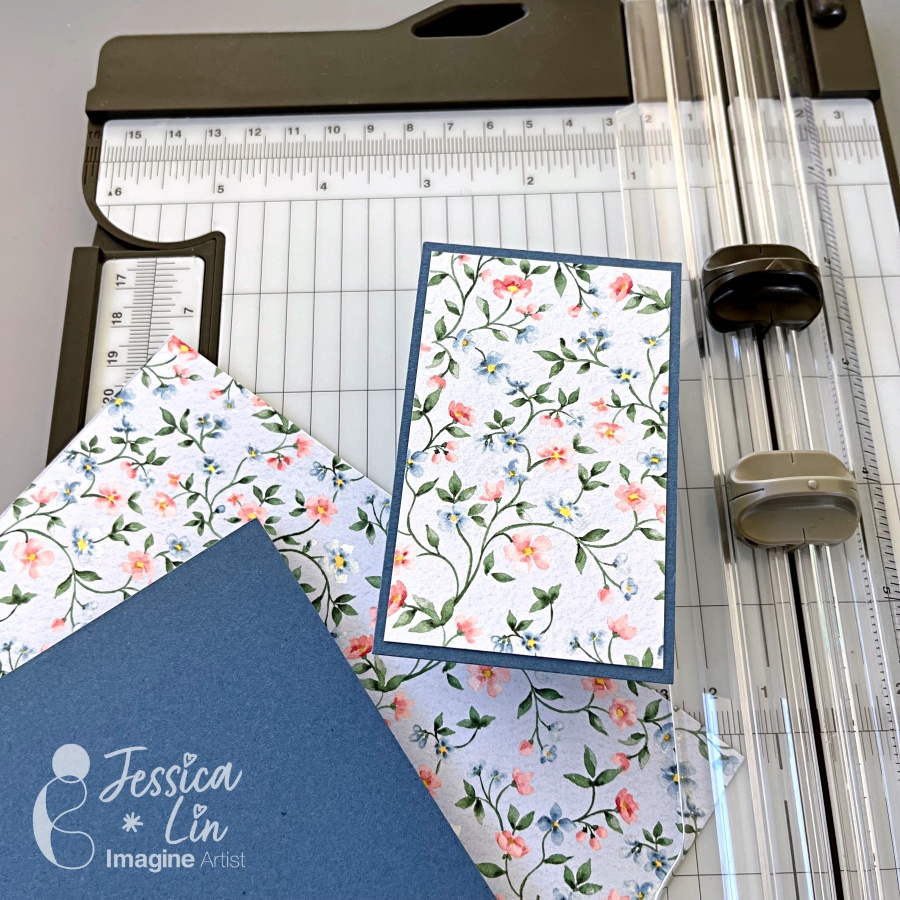
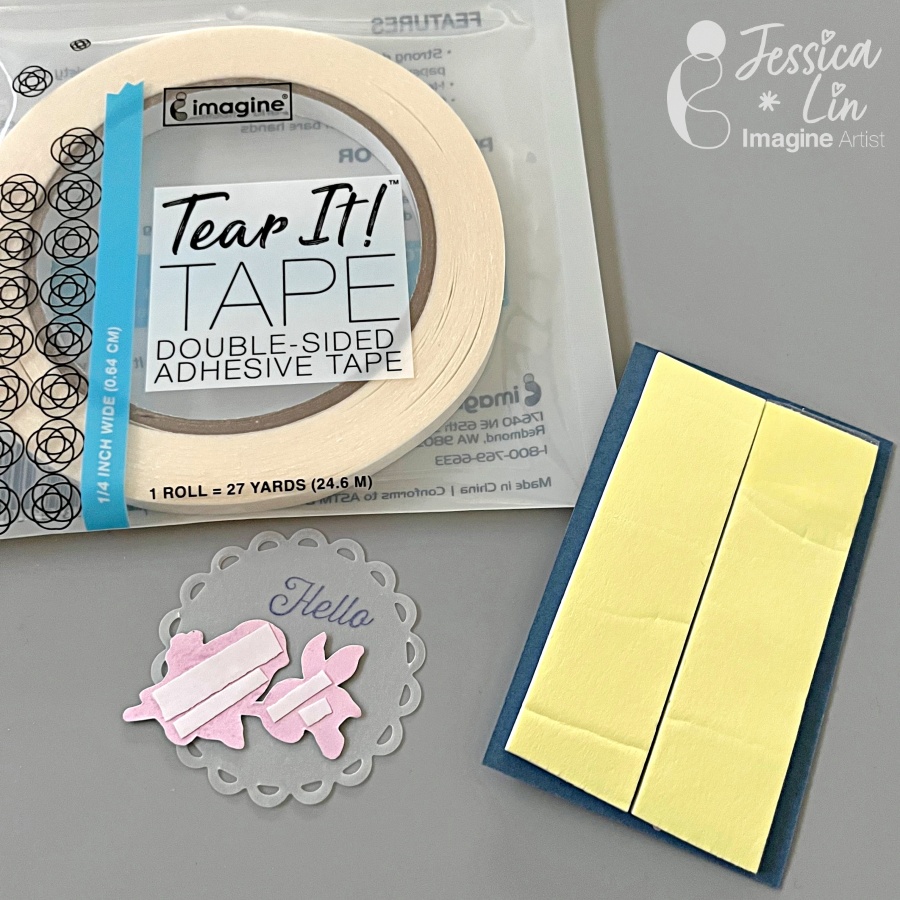
Step 1: Trim a piece of patterned paper to 3 3/16’’ x 1 15/16’’ and a piece of matching cardstock to 3 6/16’’ x 2 2/16’’. I used Flight & Airy paper pack which coordinates with Misty Moonlight cardstock. Adhere the two pieces together with Tear It! Tape.
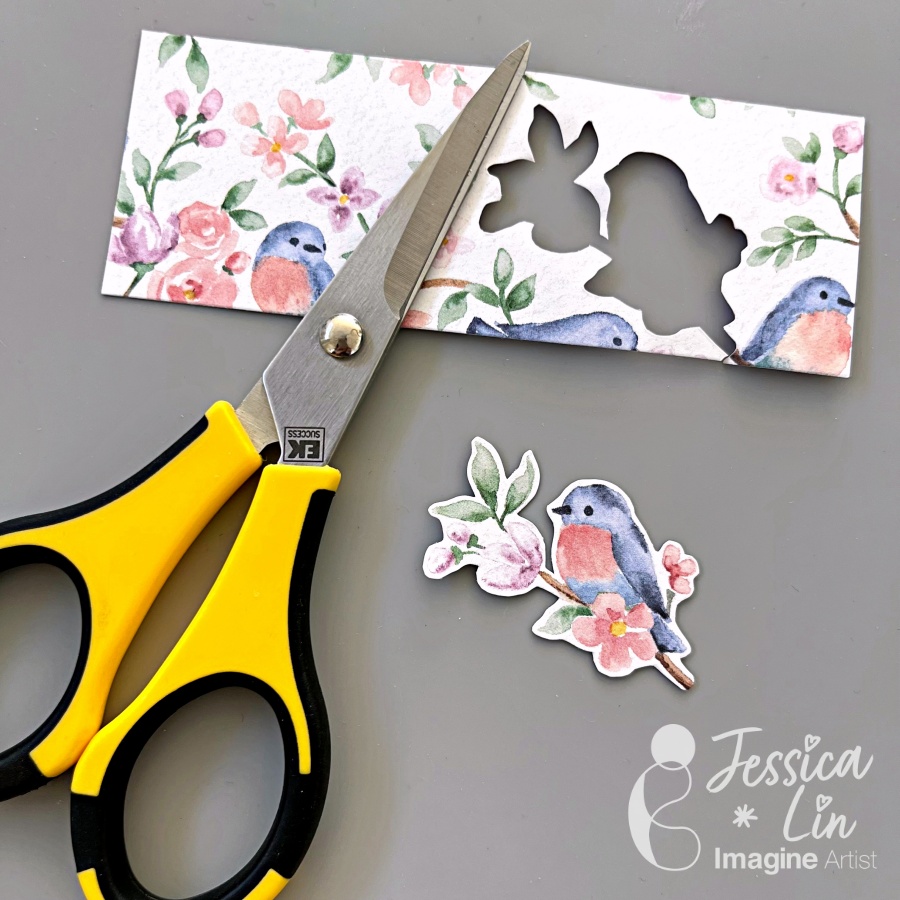
Step 2: Use stamps or, in my case, patterned paper to create a focal image. Fussy cut around the image with a pair of paper snips. These scissors are sharp and my favorite for fussy cutting!
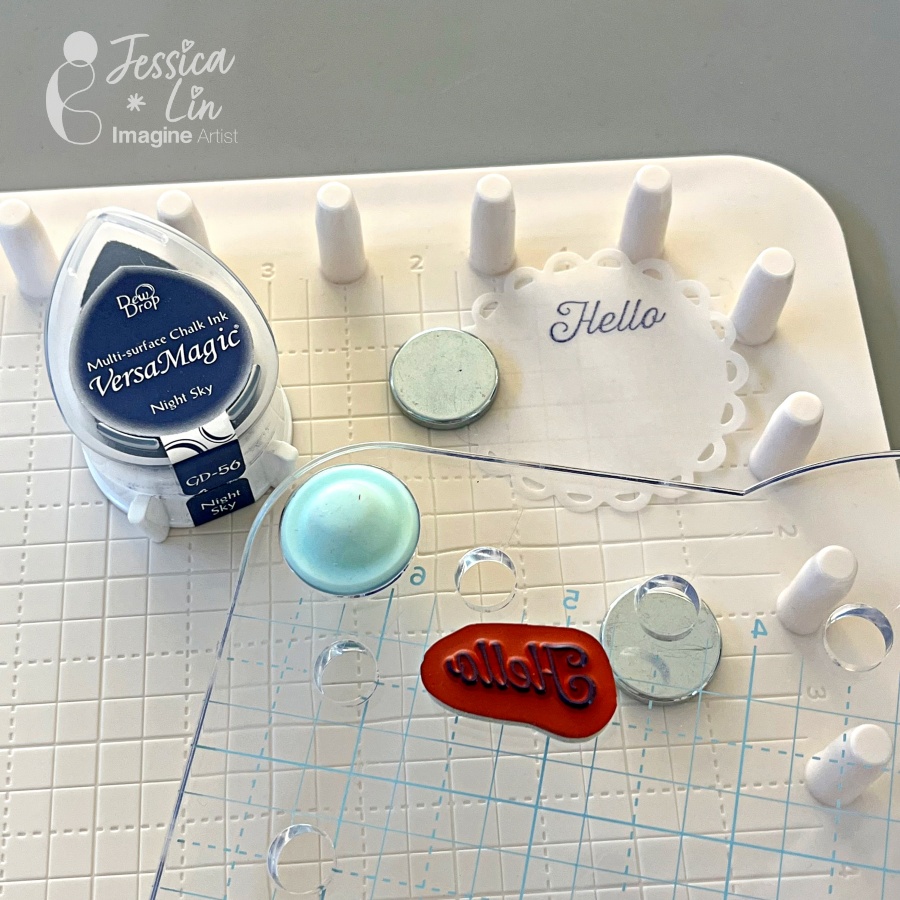
Step 3: Die cut a piece of vellum with a circular die of your choice. I used Spellbinders Lacey Circle dies with the Stampin’ Up! Mini Cut and Emboss Machine.
Step 4: Stamp a small sentiment using VersaMagic Night Sky ink pad. The image is crisp and clear after stamping, so I didn’t need to restamp with the We R Precision Press.
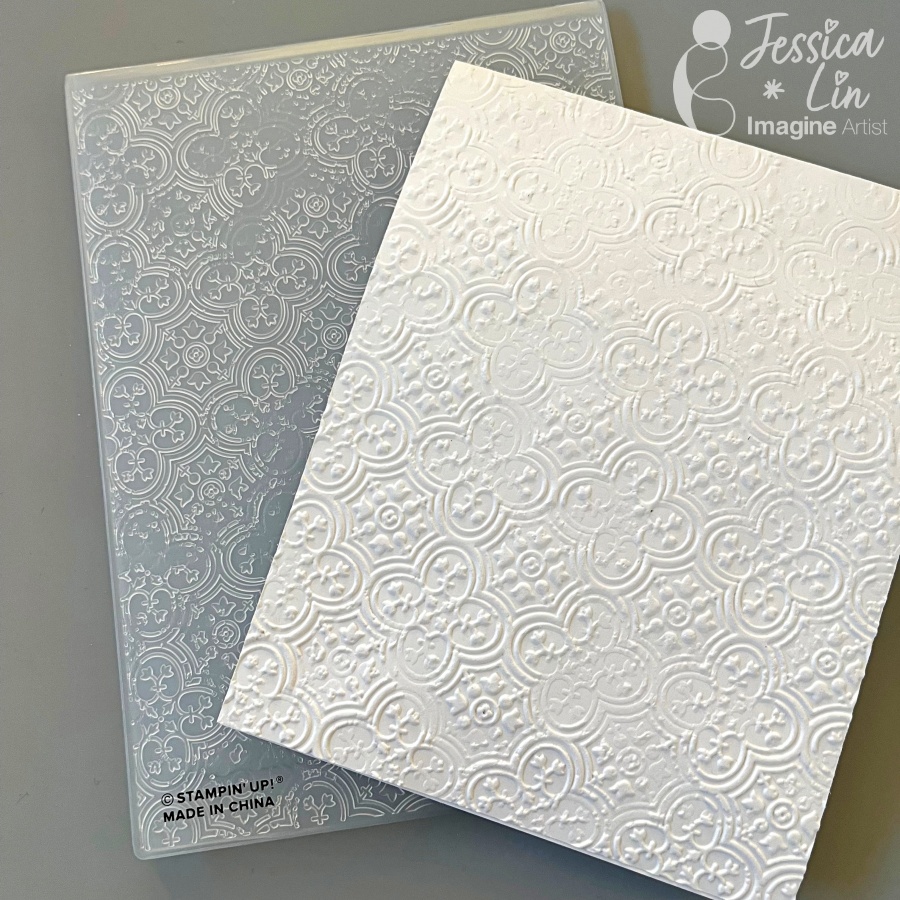
Step 5: Emboss the card front with any embossing folder to add interest to the background. The Distressed Tile embossing folder is simply gorgeous!
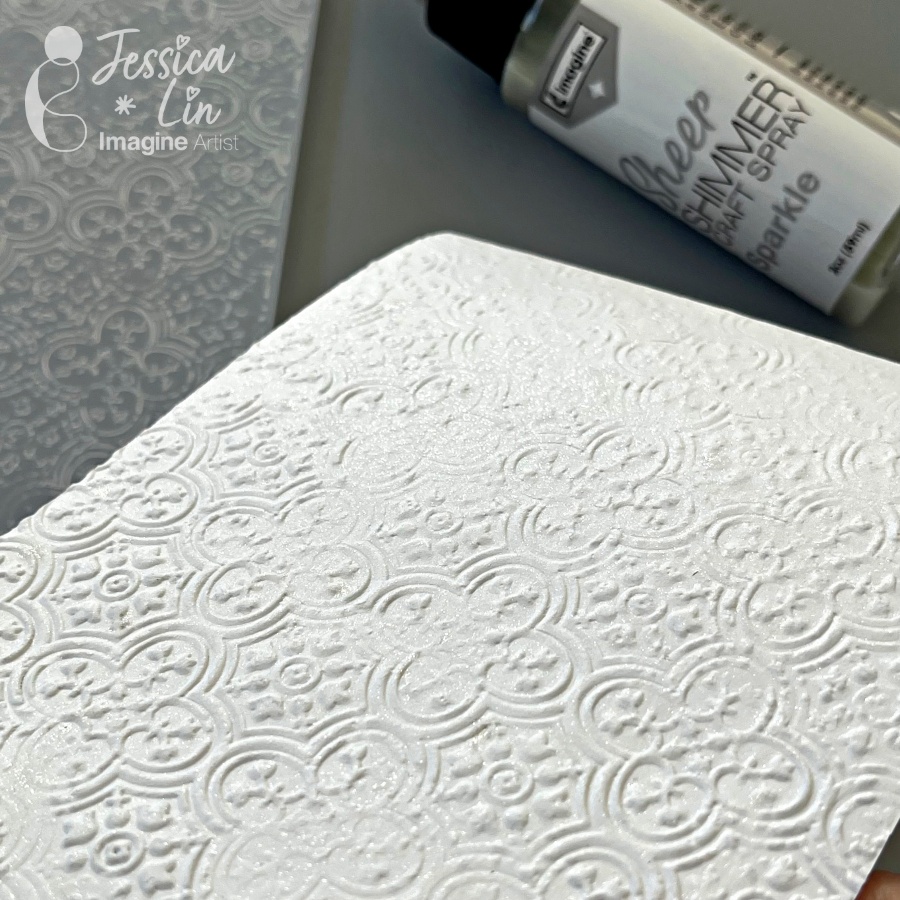
Step 6: To add a wow factor, lightly spray the whole panel with Sheer Shimmer in Sparkle. It adds just the right amount of glitter mist to elevate your project.
Step 7: It’s time to assemble everything together! Apply Tear It! Tape and foam tape to the back and adhere them to the embossed card front. When adhering vellum pieces to your project, remember to only apply tape and/or glue in areas where it would be hidden. Otherwise the adhesive will show through the translucent vellum paper.
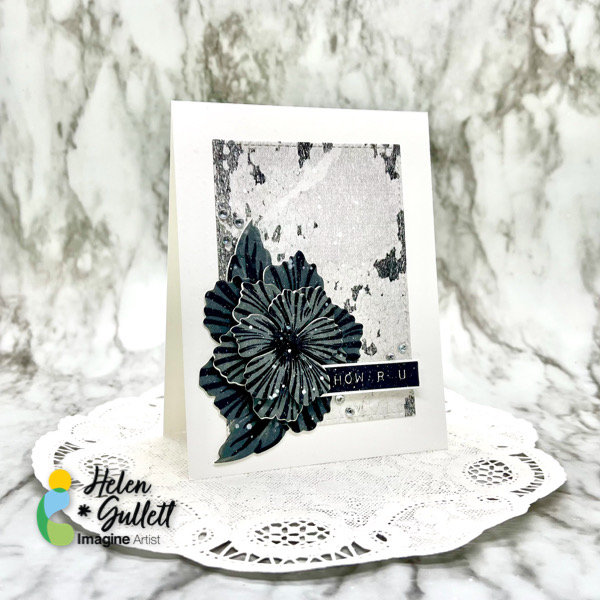
Hi everyone! Helen is here. I am super excited today to share with you all my very first project as one of the new Imagine Artists in Residence!!! I have been a big fan of Imagine Crafts products since I started making crafts. I made this monochromatic card. It is clean-and-simple yet has some layers to create an encouragement card or any occasion card.
Directions:
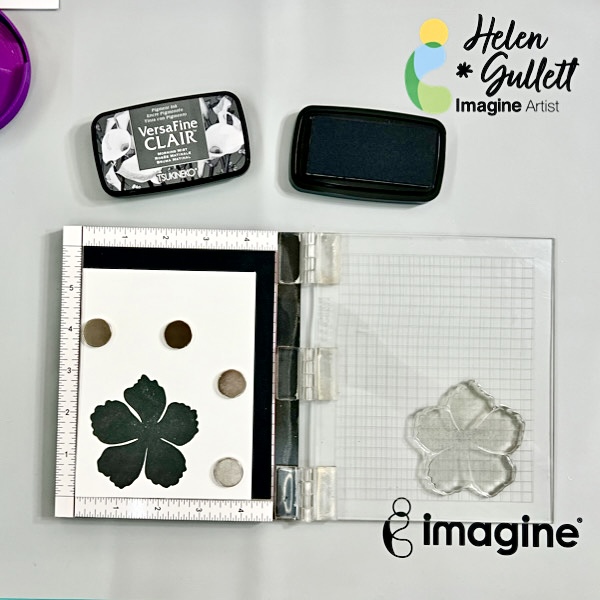
Step 1 Stamping the sentiment labels. Arrange the stamp labels you want to use on the stamping tool and then stamp them on a piece of white cardstock with VersaFine Clair Nocturne ink pad. Stamping tool will help to get great second stamping for bold result. After stamping, dry the ink with craft heat gun and then trim them using the paper trimmer.
Step 2 Using the stamping tool, stamp the solid image of the flower (the first layer base of the layering flower stamps) using the VersaFine Clair Morning Mist ink pad on the white cardstock. Use the pressure tool to press the inked stamp to the cardstock to get even and better transfer ink. This pressure tool is very handy to use when stamping big images. But you can always stamp it again if needed.
Step 3 Line up the second layer of the flower stamp image on top of the solid stamped image. Make sure you position it in the right direction. Grab the stamp using the lid of the stamping tool and then ink it with VersaFine Clair Nocturne ink pad and then stamp it. Use the pressure tool to press the inked stamp to the cardstock to get even and better transfer ink. You can always stamp it again if needed.
Step 4 Grab the last part of the layering flower stamps, position it in the center of the stamped flower and then stamp it using the VersaFine Clair Nocturne ink pad. For this center part, I stamped it 3 times to get darker stamped image. You still can use the pressure tool to press the inked stamp to the cardstock to get even and better transfer ink.
Repeat these steps: 2, 3, and 4 for the leaves.
After stamping the images, use the StazOn All-Purpose Stamp Cleaner Dauber Top to clean the ink of all the clear stamps.
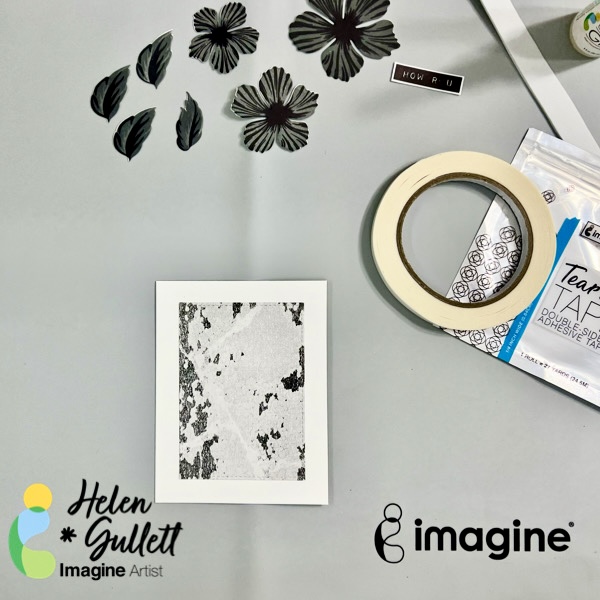
Step 5 Cut all the flowers and leaves using the matching thin metal dies using the die cutting machine. And then after that, you can cut the pattern paper also with one of the Stitched Rectangle Dies to make a background mat for the flowers.
Step 6 Make a white card base out of the 8.5-inch x 11-inch 110lb white cardstock you cut into 2 pieces using the paper trimmer, using score in the middle of the cardstock, and then fold it into a card.
Put some of the Tear It! Tape on the back for the pattern background mat and then add it to the card base. This tape is strong and permanent, so make sure you position it at the center of the card lightly and then press it down.
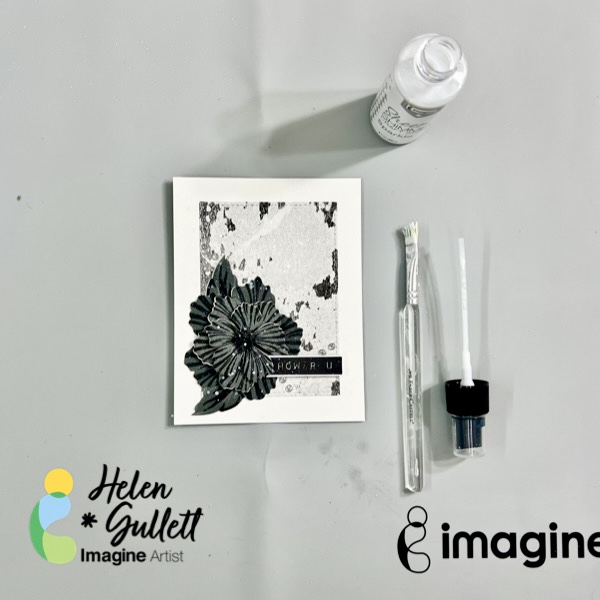
Step 7 This is the time we arrange all the stamped flowers and leaves. Using the On Point Glue to add the first layer of the flower and leaves on the card. This glue gives you a few seconds of its drying time so you can position the flower and leaves to the spot where you like it. Then press them down and hold them down for a few seconds for the glue to dry permanently.
Step 8 For the second and third layers, we will use foam tape for extra dimension to the flower. I made the foam tape out of white fun foam and Tear It! Tape. I put pieces of the foam tape on the petals of the flowers and added them to the base flower. And then, add one of the sentiment labels to the card with foam tape, too.
Step 9 Add some splatters of the Sheer Shimmer Craft Spray on the card using the spray bottle nozzle and flat brush (or fan brush). Add also some white paint splatters on it for more texture.
Dry the splatters on the card with a craft heat gun by moving the heat lightly around the top.
It is optional, you can embellish the card with some clear gems or other embellishment you like.
Look at those layers on a CAS style card! That’s my first project to share with you. Thanks for stopping by the blog today!
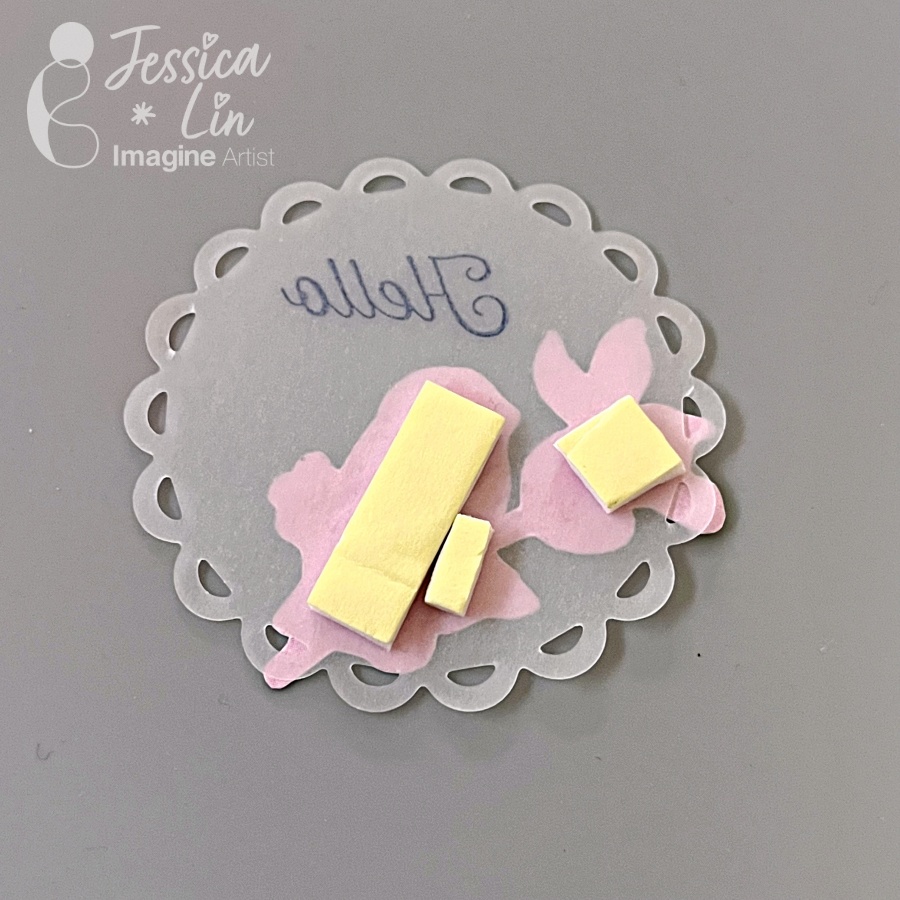
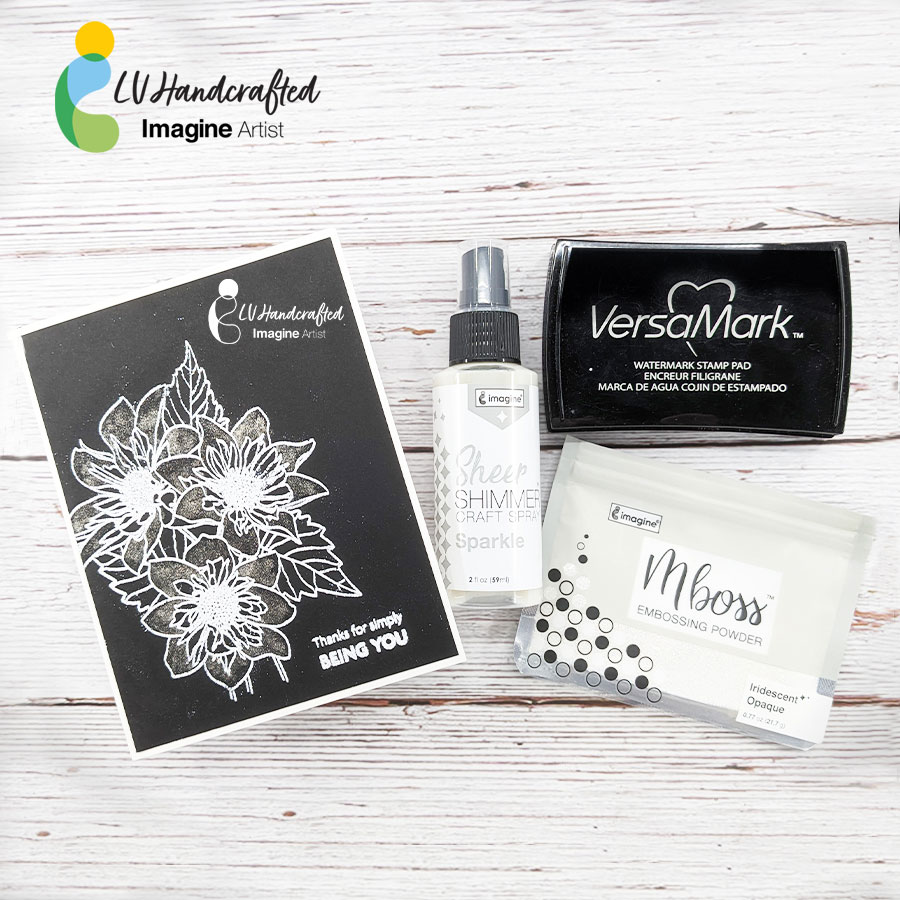
Hello friends! This is Linh (or LV Handcrafted on all the socials). Here’s a fun way to use Shimmer Sprays — paint with them! Shimmer Sprays are translucent, but the gorgeous glitter in them shine beautifully on dark card stock! I used the Sparkle Sheer Shimmer spray, which paired perfectly with the Iridescent Opaque Mboss powder. The combination of the two add a striking, sparkle to any card!
Hello! Alison Heikkila here and I have a new YouTube video for Imagine today. We are going to start off with a little experimenting with a Gel Press, and then we’ll move on to finish a card. I love to try different inks and techniques on the Gel Press, and even if they don’t work out as I had hoped, the monoprints can always be used at a later date in a different way.
Skill: Intermediate-Advanced Time to Complete: 30 minutes