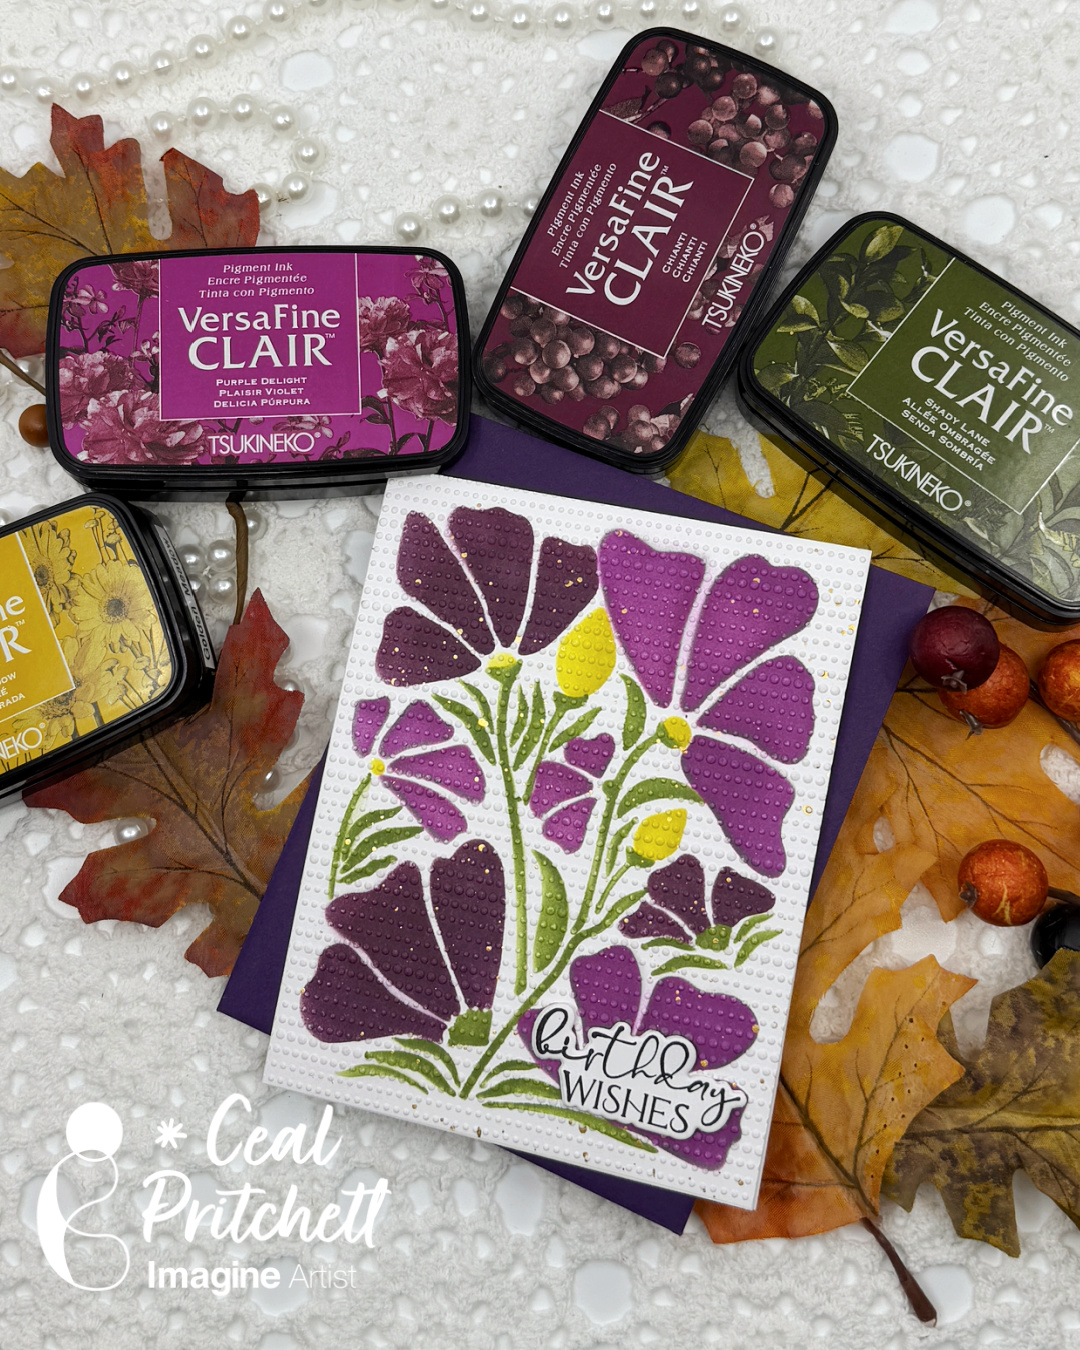
By Anna Escalada York
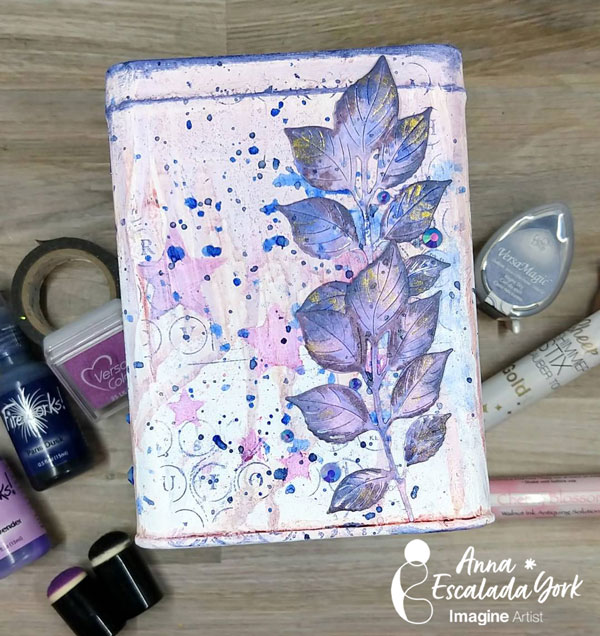
I’ve had a small metal tea box that I’ve wanted to repurpose into a mixed media piece for a while, so I took some time on a rainy day to make it happen.
Skill: Advanced
Time: 1 hour active time, 6+ hours (drying between layers)
Directions:
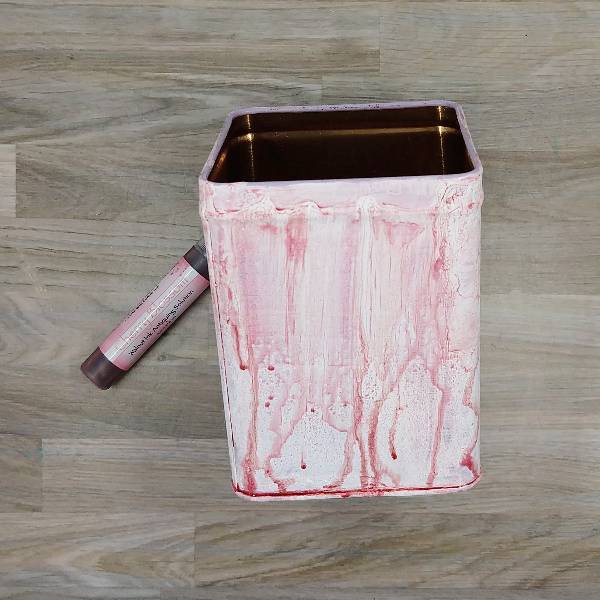
Step 1:
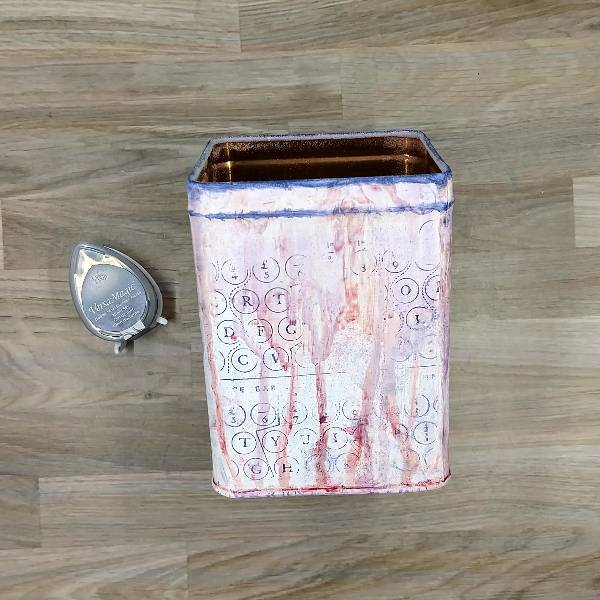
After applying two coats of gesso around all four sides of a tea tin, spray the top of the tin with Cherry Blossom Walnut Ink Antiquing Solution and allow it to drip down the sides of the tin. Set aside to dry.
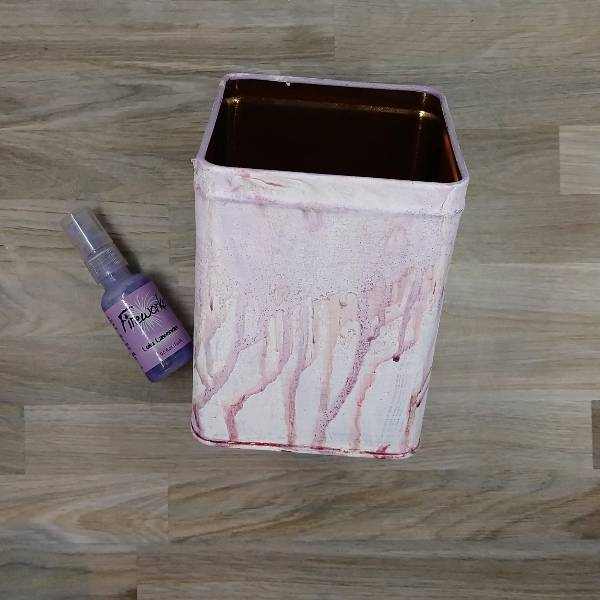
Step 2:
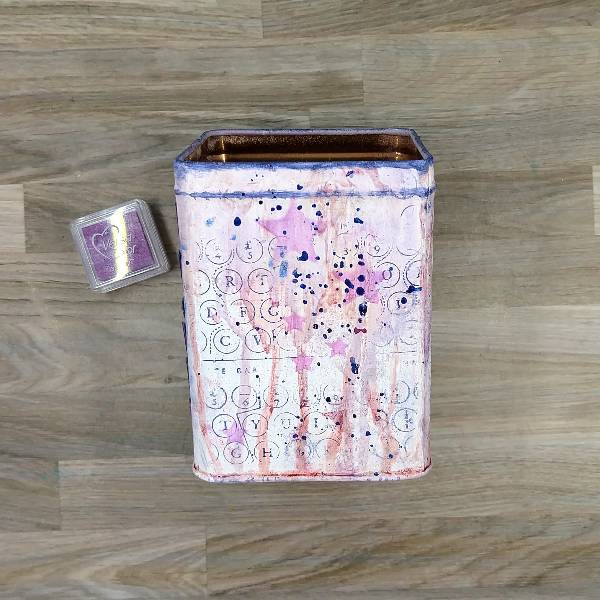
Spray all four sides of the tin with Lulu Lavender Fireworks! Craft Spray and allow to dry.
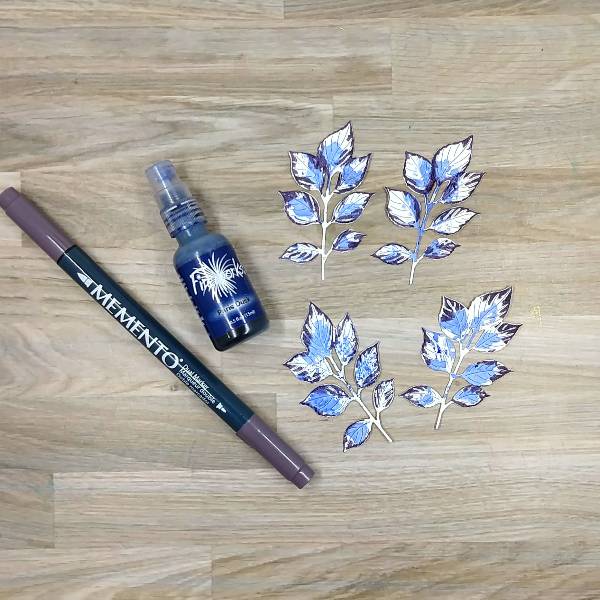
Step 3:
While the tin was drying, die cut four leaf clusters out of watercolor paper. Then randomly add Paris Dusk Fireworks! Craft Spray to the centers of each leaf with the stick of the spray nozzle and color the outsides of the leaves with Elderberry Memento Dual Marker.
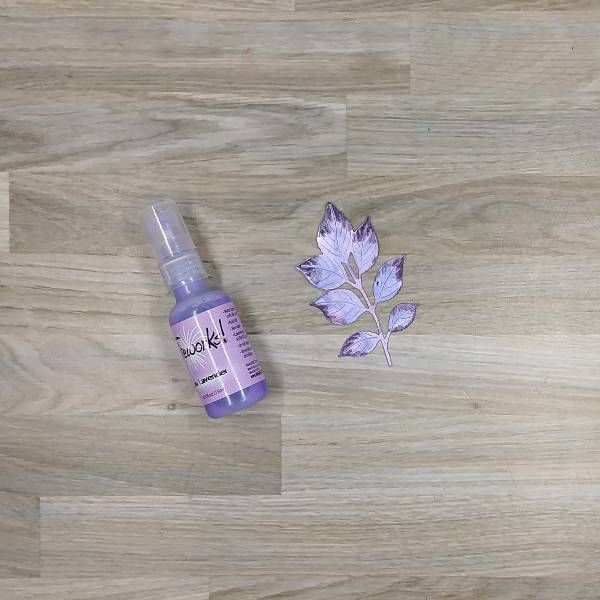
Step 4:
Spray each of the 4 leaf clusters with Lulu Lavender Fireworks! Craft Spray and allow to dry.
Step 5:
Partially stamp each of the four sides of the tin with Night Sky VersaMagic ink on a background stamp. (I used an old woodblock typewriter stamp.) Then press the ink pad along the top edge of the tin and the raised rib as well. Heat emboss the top rim of ink with clear embossing powder.
Step 6:
Ink blend Lilac VersaColor ink through a stencil on all four sides of the tin using a sponge dauber. (Not pictured was splattering more of the Paris Dusk Fireworks! Craft Spray onto each of the four sides as well.) Then allow everything to dry.
Step 7:
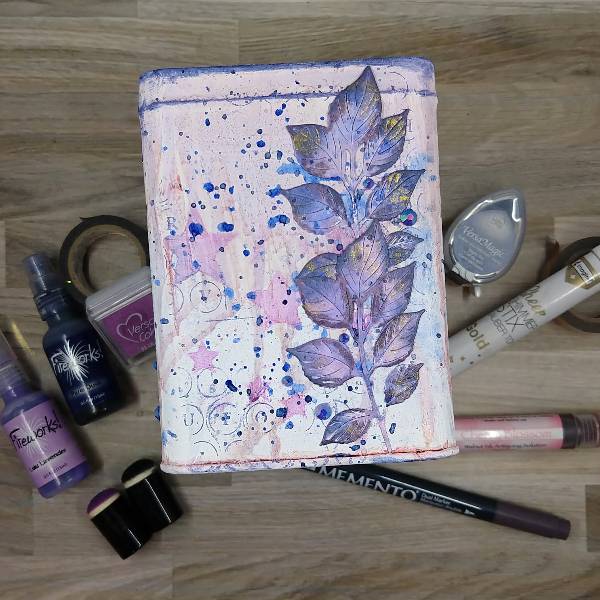
Glue two of the leaf cluster dies (one on top of the other) along the right edge of two of the sides of the tin.
Not pictured was the step after this where I decided to use my sponge daubers to ink blend some more of the Night Sky VersaMagic ink along some of the edges of the leaves while they were glued down, nor using my Gold Sheer Shimmer Stix Dauber Top to add some gold to the leaves as well.
Splatter the tin with more Paris Dusk Fireworks! Craft Spray. Allow it to dry. Then glue dark blue gems around the leaf clusters to finish the box on the two slides with leaves.
Art Supplies
Imagine
Fireworks! – Lulu Lavender and Paris Dusk
Memento Dual Marker – Elderberry
Sheer Shimmer Stix Dauber Top – Gold
VersaColor ink – Lilac
VersaMagic ink – Night Sky
Walnut Ink Antiquing Solution – Cherry Blossom
Sponge Daubers
Other
AALL & Create – stencil – Lotza Starz 6″x6″ stencil
Golden – Gesso Semi-Opaque Acrylic Primer
Scrappy Tails Crafts – embellishment mix
Simon Says Stamp – die cut – Autumn Leaf Branch
Old typewriter woodblock stamp in my stash
Clear Embossing Powder
Watercolor paper
Foam paint brush (for the gesso)
Die cutting machine
Glue