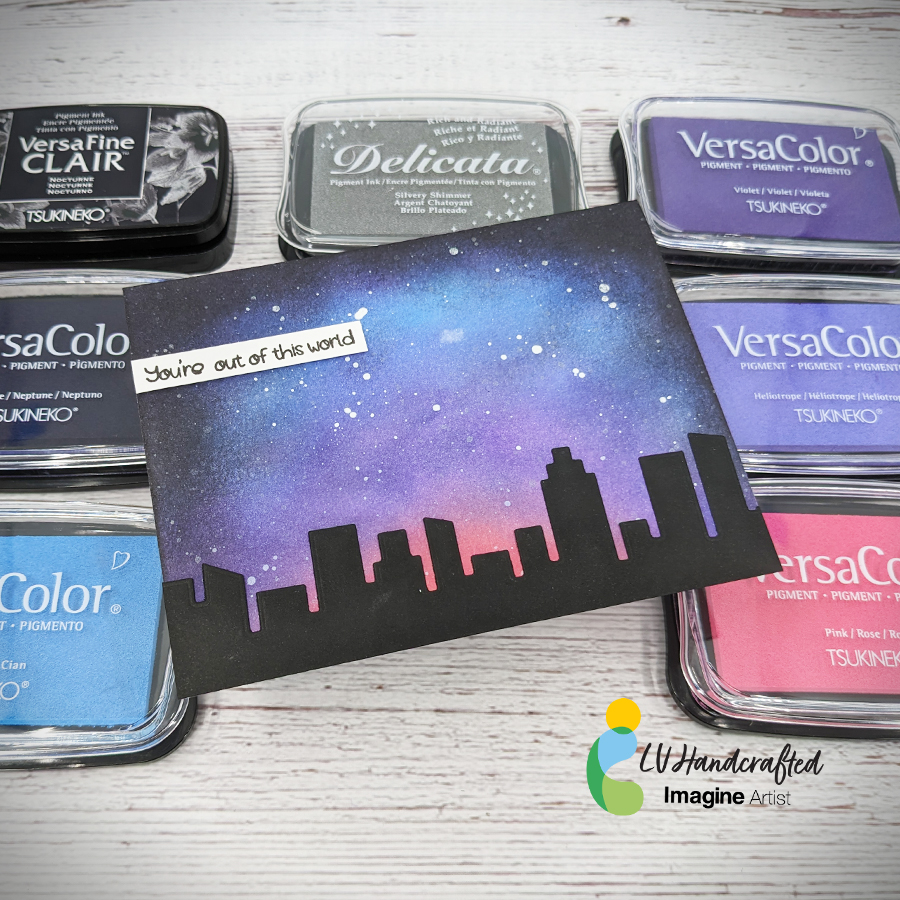
Hello friends! This is Linh (or LV Handcrafted on all the socials). In today’s video I’m showing how to create a fun galaxy with a combination of different inks! It’s so fast and easy to do!
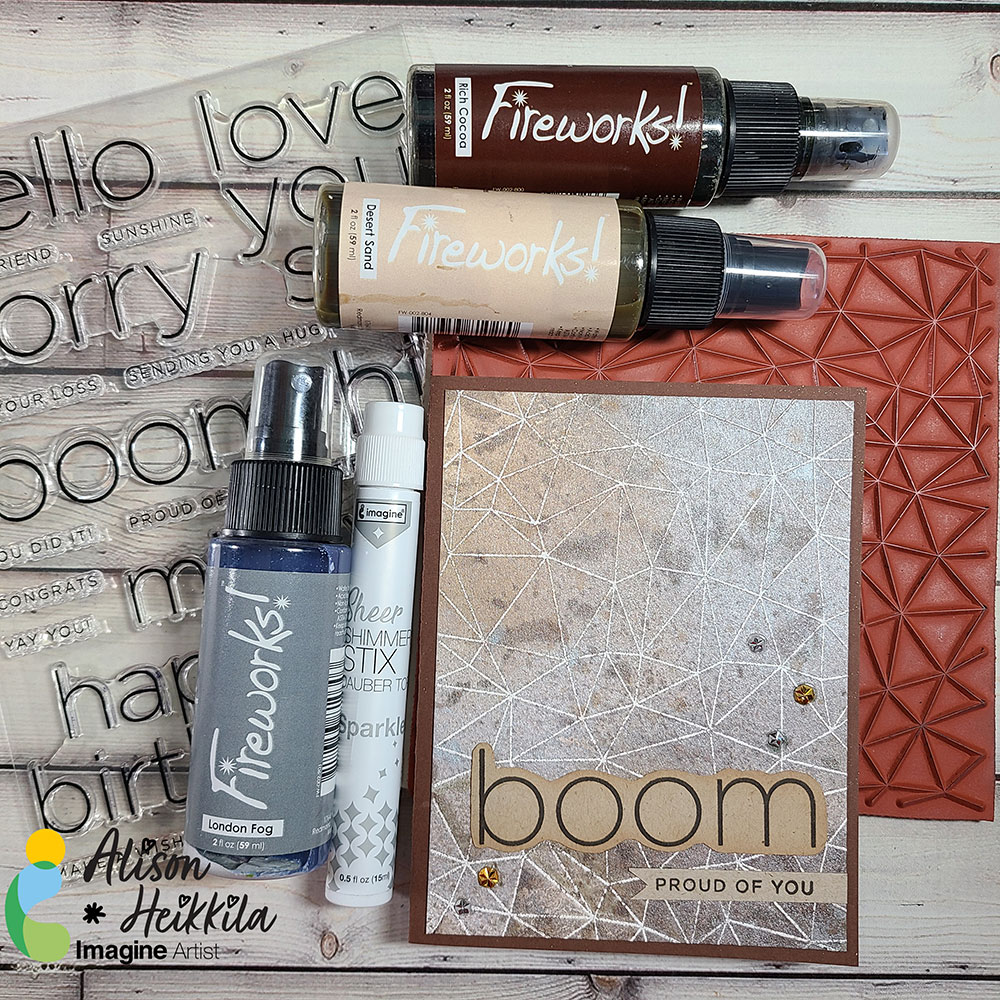
– Hello! It’s Alison Heikkila. Today we’re going to play with some Fireworks! Sprays on an emboss resist background. It’s a great masculine card, but I prefer to call it non-gendered. By changing up the background stamp and/or the colors, you can make this card as unique as the person you’re giving it to.
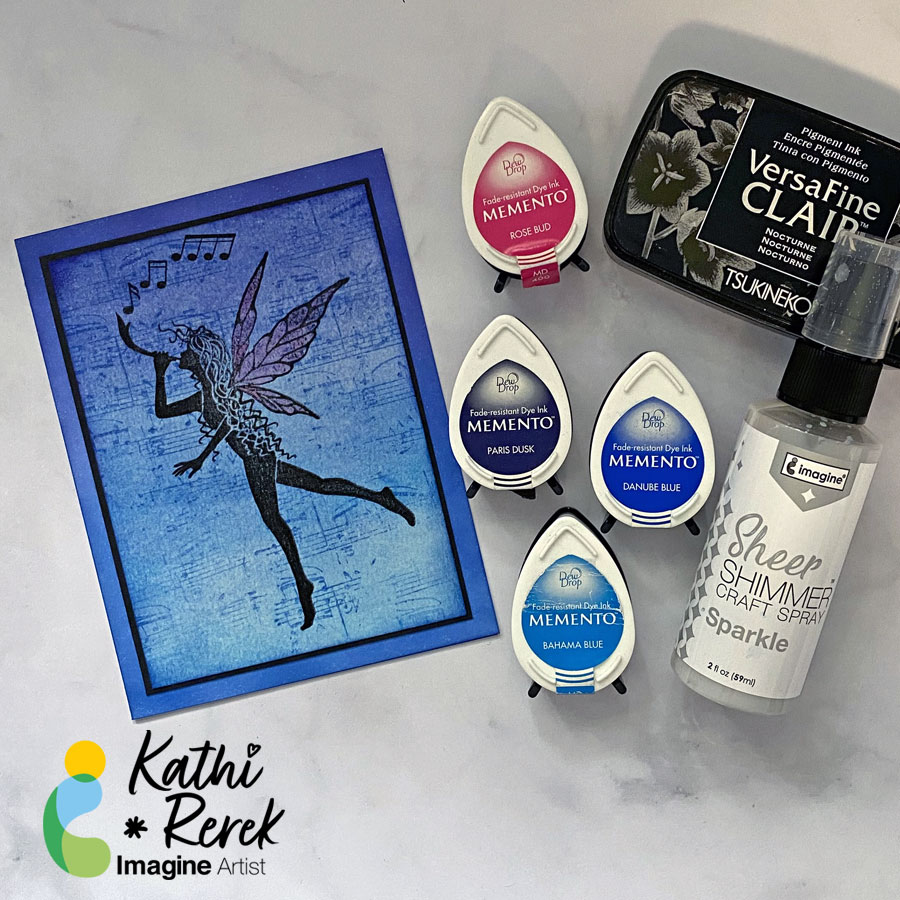
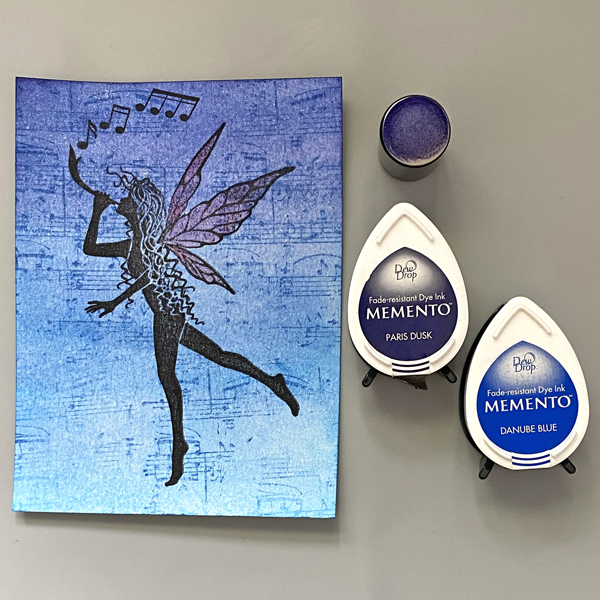
Greetings! It’s Kathi here to show you how to create fairy card with a magical shimmer using Memento Inks and Sheer Shimmer Sparkle Spray.
Skill Level: Beginner to Intermediate
Time: 1.5 hours
Instructions:
Step 1:
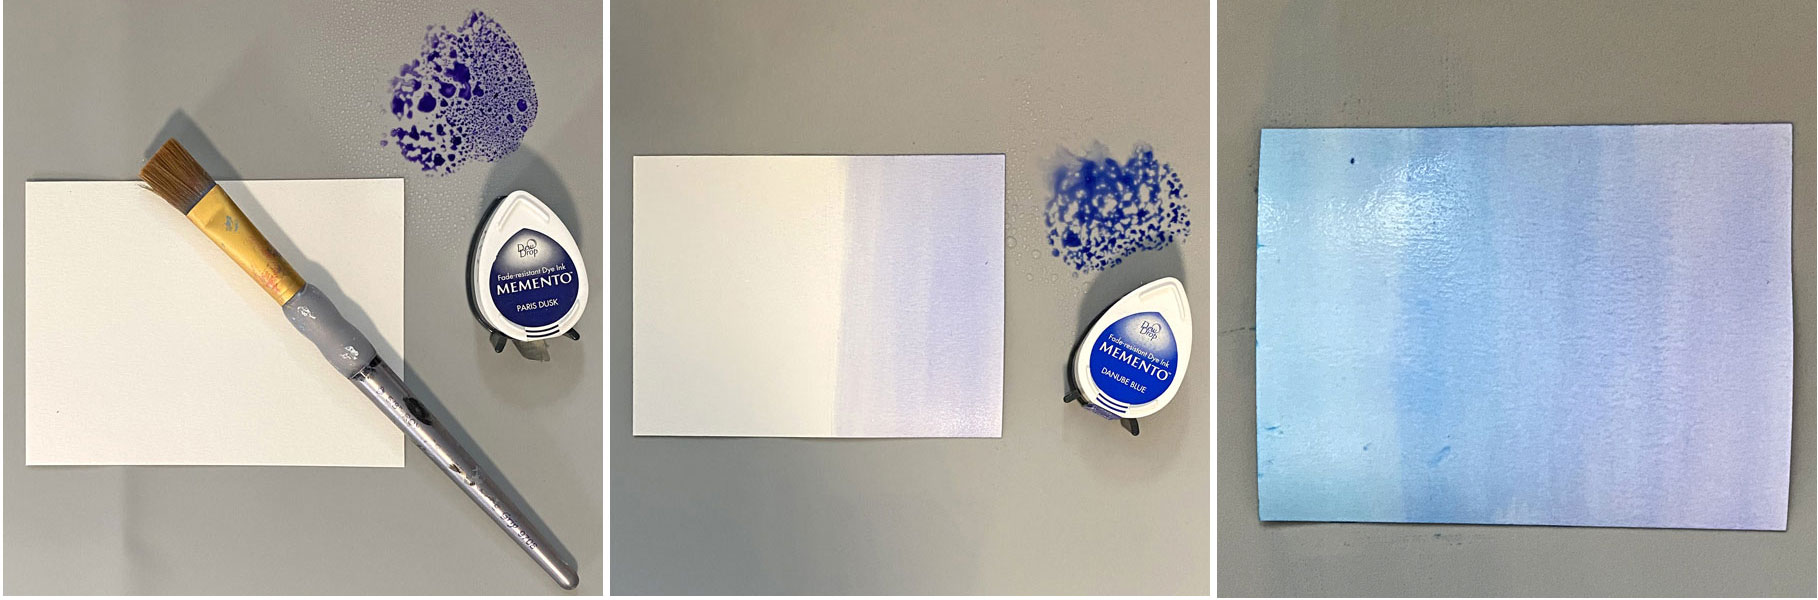
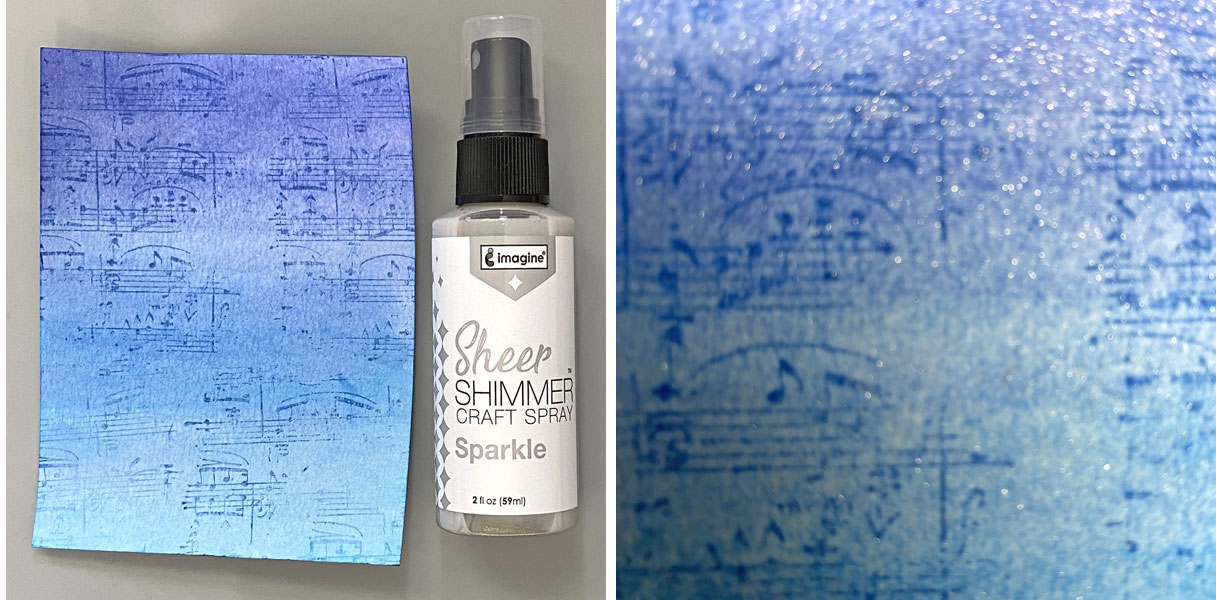
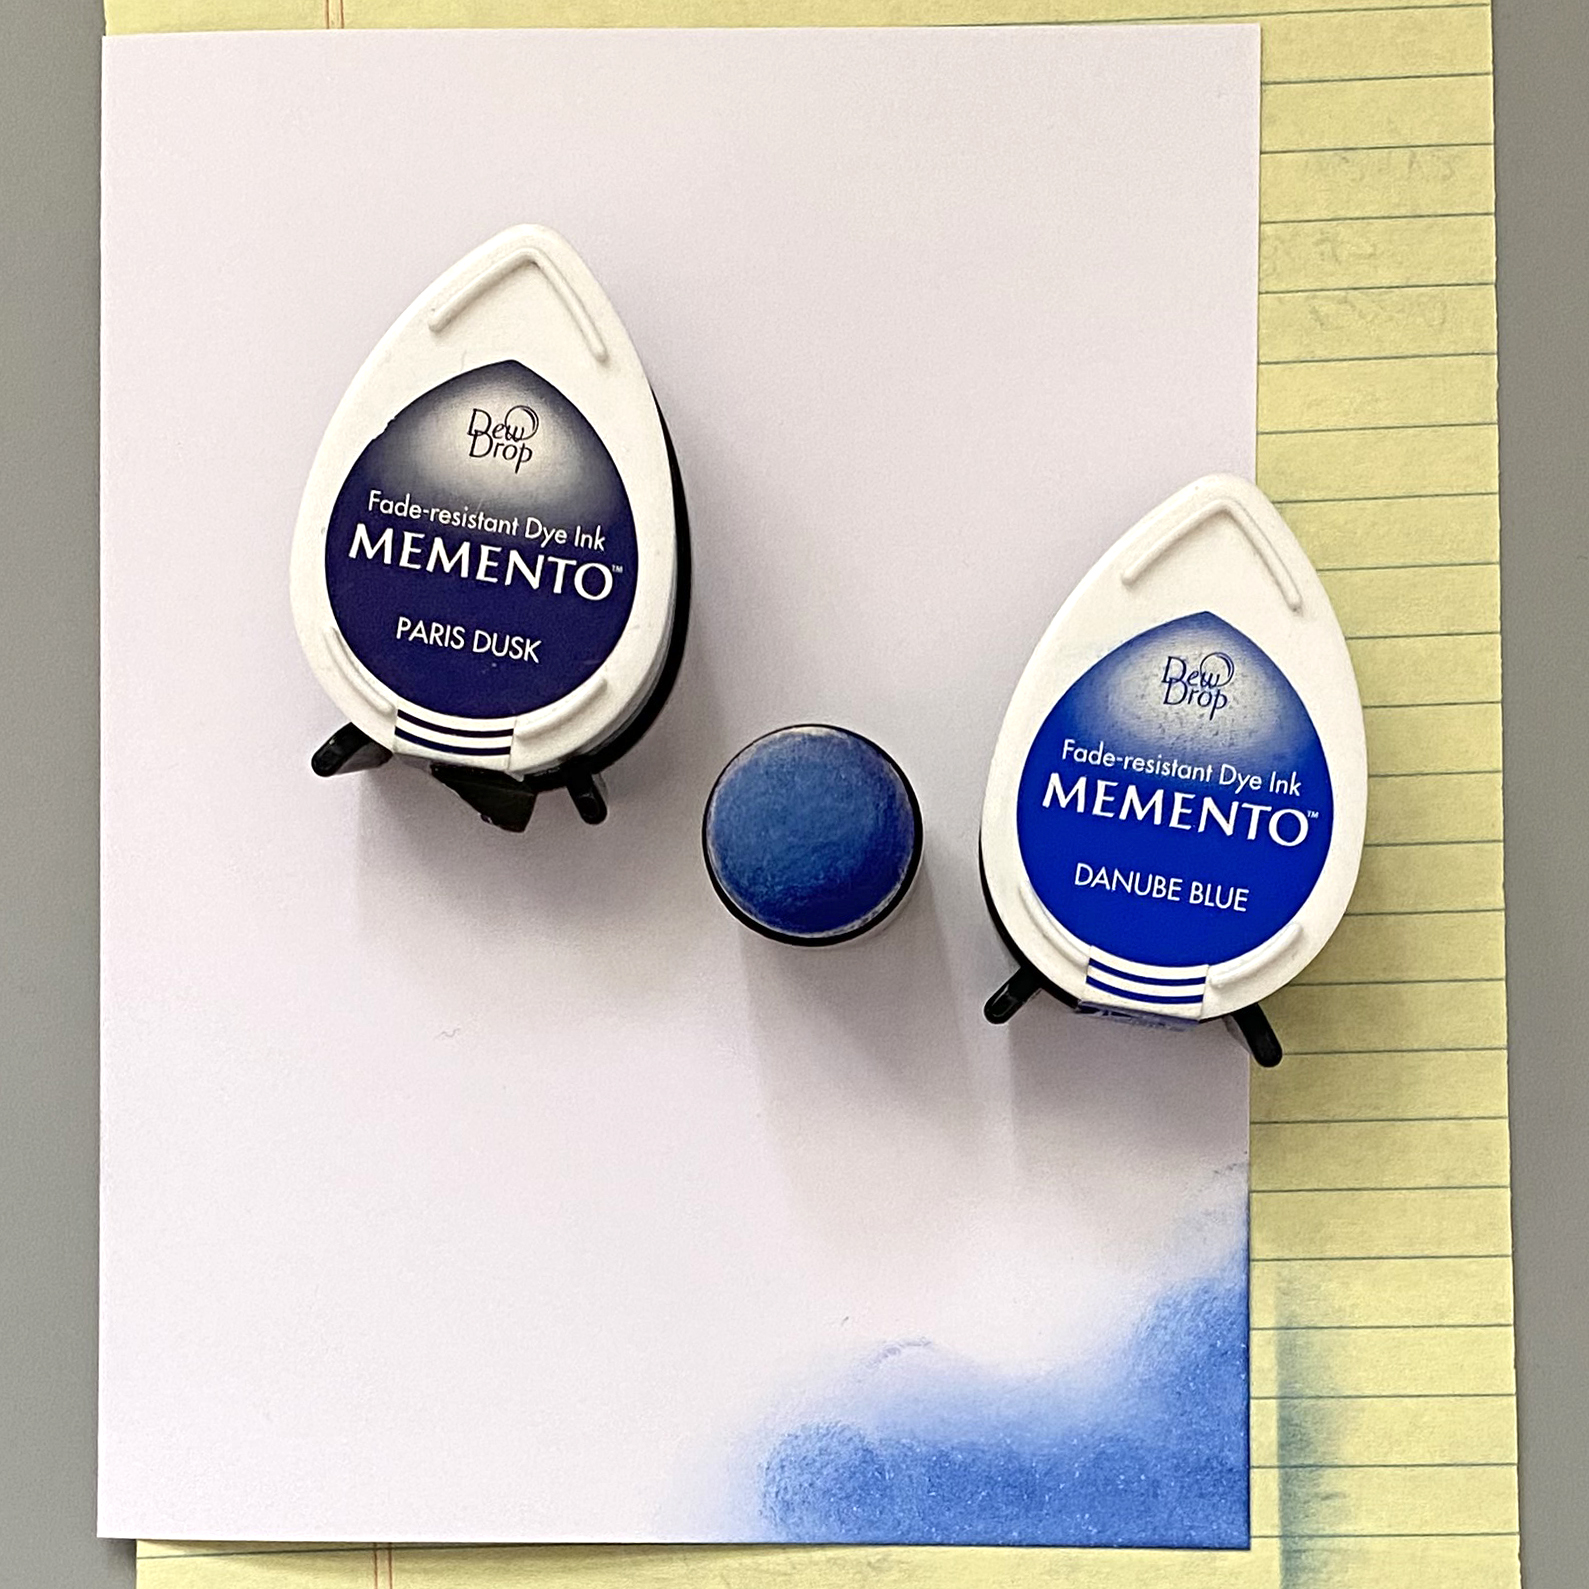
Smoosh Paris Dusk Memento Dew Drop Ink onto the craft mat. Mist with water and use a paint brush to apply diluted ink to the right edge of a 5.25” x 4” panel of watercolor paper.
Repeat with Blue Danube and then with Bahama Blue Memento Dew Drop Ink Pads until the entire panel is inked. Heat set the panel.
Step 2:
Ink the Sheet Music Texture Red Rubber Cling Stamp with Blue Danube Dew Drop Ink and randomly stamp onto the panel.
Step 3:
Spray the panel with Sheer Shimmer Sparkle Spray. Heat Set and admire the sparkle!
Step 4:
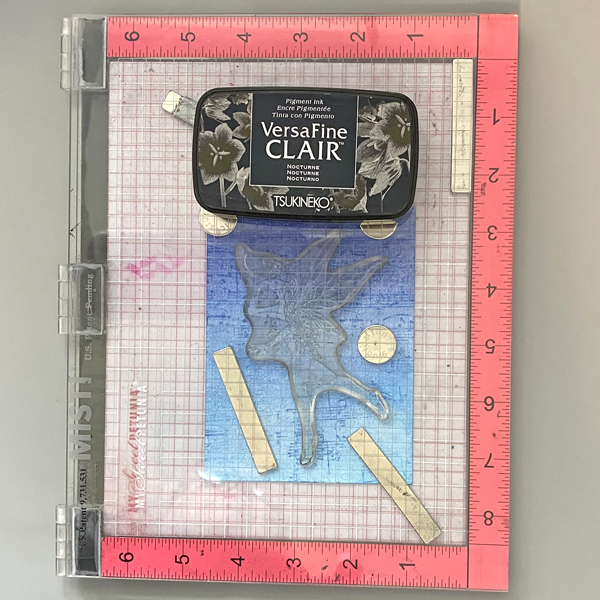
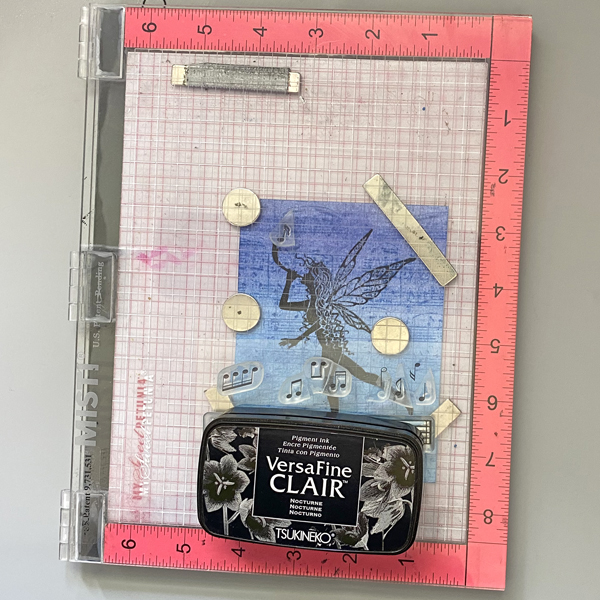
Using a stamping platform, position the Trinity Fairy Clear Stamp onto the image panel. Ink with Nocturne VersaFine Clair Ink and stamp. You might need to re-ink and stamp to achieve a clear impression.
Remove the panel from the stamping platform and heat set.
Step 5:
Place the image panel back onto the stamping platform. Position one of the notes from the Music Notes Small Clear Step Set facedown above the fairy’s horn. Ink the stamp with Nocturne VersaFine Clair Ink and stamp.
Remove the note stamp from the stamping platform. Place another note stamp from the same set, slightly to the right of the previously stamped note. Ink and stamp with Nocturne VersaFine Clair Ink and stamp.
Remove the second note stamp from the stamping platform. Place the four notes stamp to the right of the other notes. Ink the stamp with Nocturne VersaFine Clair Ink and stamp.
Heat Set the notes.
Step 6:
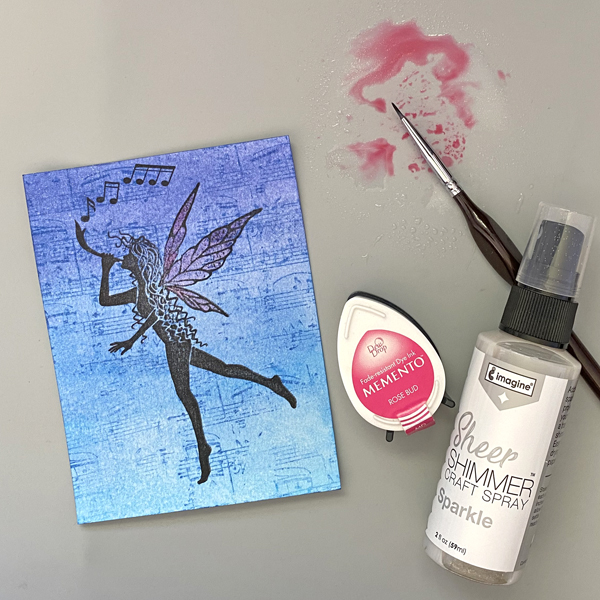
Smoosh the Rose Bud Memento Dewdrop Ink pad onto the craft mat. Mist with Sheer Shimmer Sparkle Spray.
Use a paint brush to apply the shimmery pink ink to the fairy’s wings. Heat set.
Step 7:
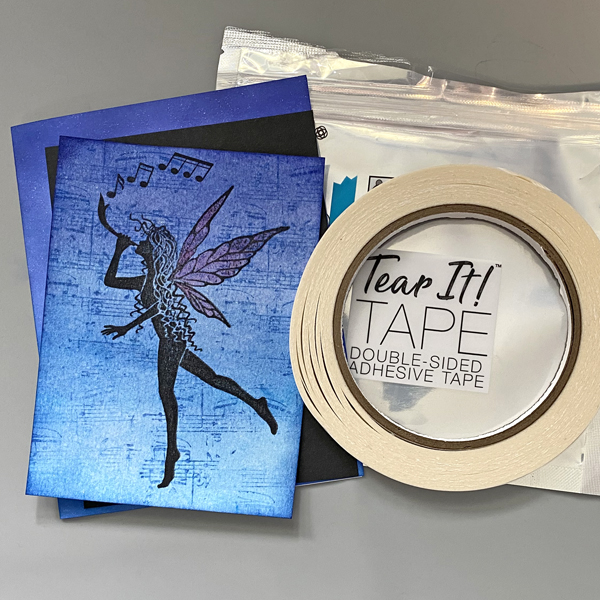
Trim the image panel to 3 5/8” x 4 7/8”.
Use a Sponge Dauber and Paris Dusk Memento Ink to edge the top part of the image panel. Use the Sponge Dauber and Blue Danube Memento Ink to edge the bottom part of the image panel.
Step 8:
Create an A2 card from white cardstock. Insert a piece of scrap paper into the card.
Use Sponge Daubers to ink the periphery of the white card with Paris Dusk and Blue Danube Memento Inks.
Step 9:
Cut a piece of black cardstock to 3 3/4” x 5”.
Use Tear It! Tape to mat the image panel with the black cardstock panel, then use the tape to adhere the matted panel to the inked card.
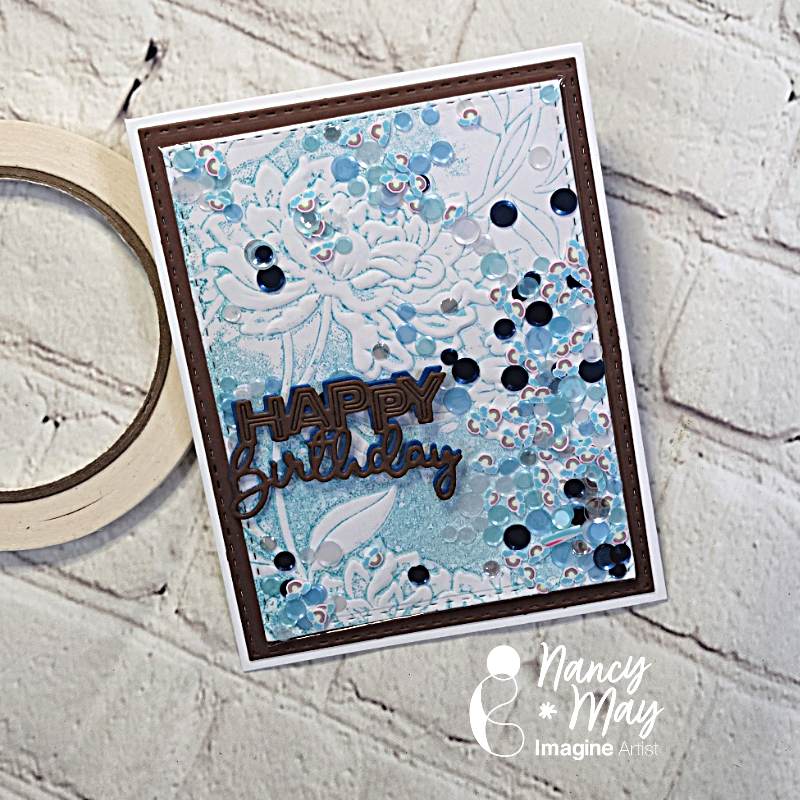
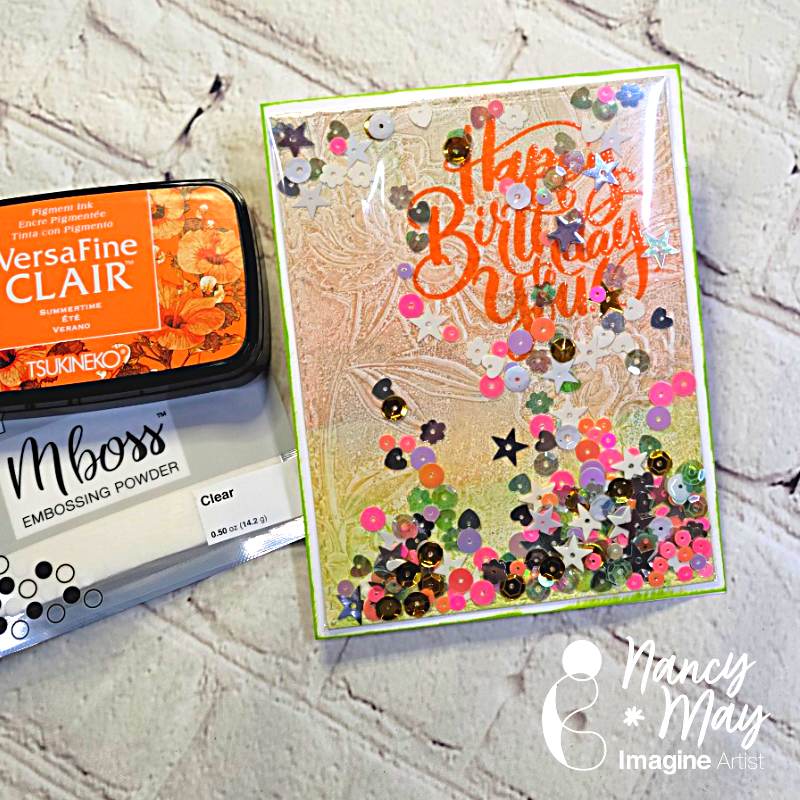
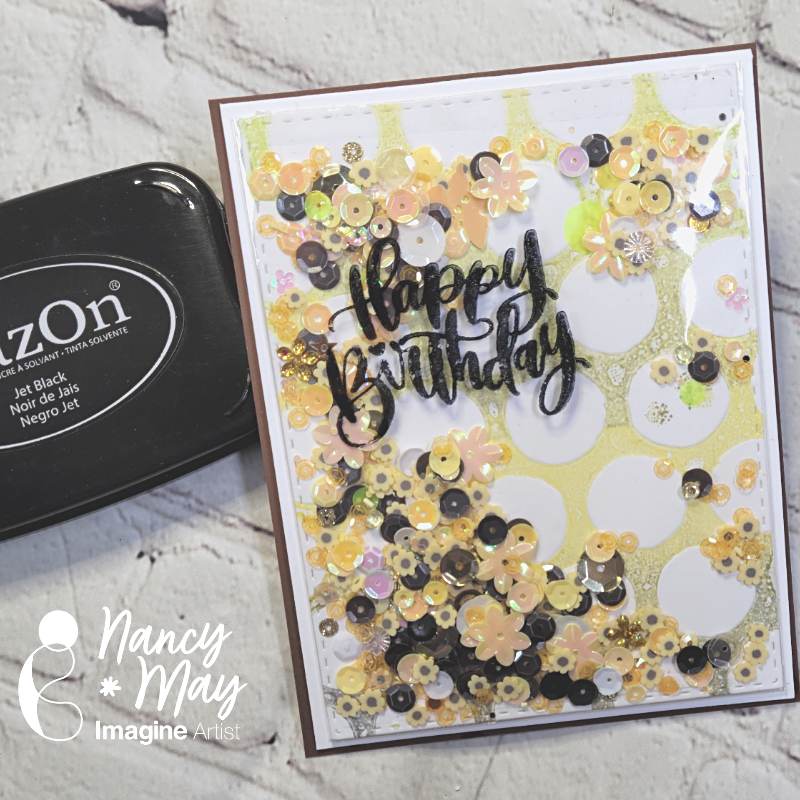
Last time we met we created a bunch of backgrounds together, using a few different inky mediums and a gel plate, along with some other supplies. This time we are going to turn one of those inky backgrounds into a lovely card. For the sake of time, we are only making one on screen, but I have 3 BONUS shaker cards to show you as well, so stick to the end!
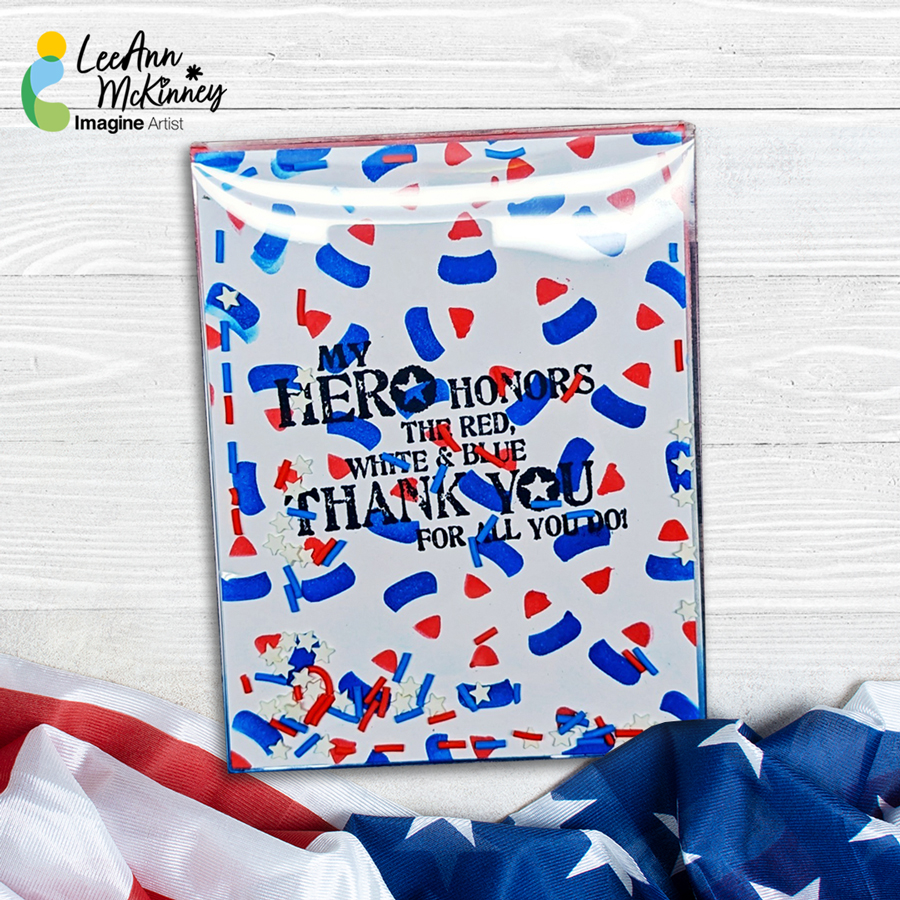
– Howdy friends and fellow crafters, LeeAnn here and today I have to share with you a fun and easy shaker card that I made using paper, a layering stencil, a shaker pocket and some shaker bits.
Hello Friends! Katy here and today I am sharing a super quick technique using VersaFine Clair.
In todays video tutorial I am sharing how I use VersaFine Clair in the color Chianti and some cream card stock with a 3D Embossing folder to create a quick, but elegant card. In the video I also share cleaning up the embossing folder so you have minimal to no staining. All this in just over 3 minutes! Check it out below.