How To Make Your Own DIY Thank You Card

by LeeAnn McKinney

LeeAnn here with my last video of 2020. This year sure did go by fast, however, I am so ready for 2021 to begin, what about you?

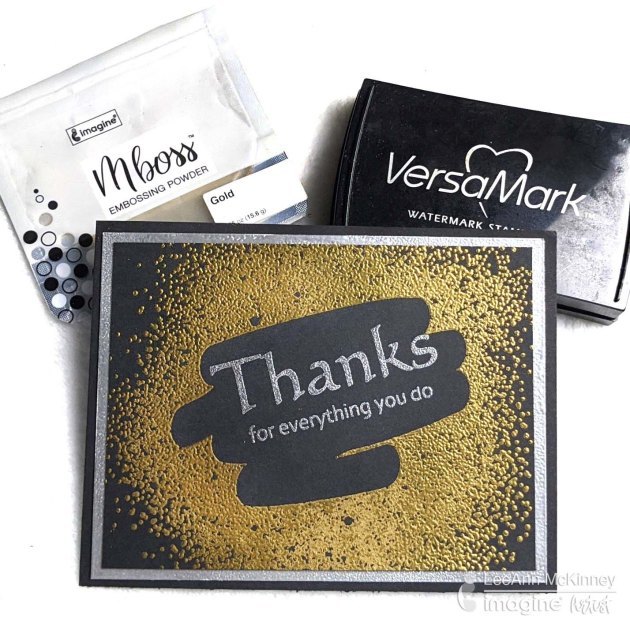
For my final cardmaking project, I am bringing you a fun and gorgeous Gold Thank You card on black paper.  I love creating and crafting with embossing powders, so I did a lot of it with this one. Here you will see a silver and gold theme expressing, “Thanks for everything you do!”

Art Supplies

Imagine

Other Products Used:

  • Recollections 110lb Cardstock White and Black
  • Picket Fence Studios Background Stamp
  • Create And Inkspire Thanksgiving Stamp

Letterpress Technique with Embossing Folders and Memento Dye Inks

Letterpress Technique with Embossing Folders and Memento Dye Inks

by Lisa Mensing

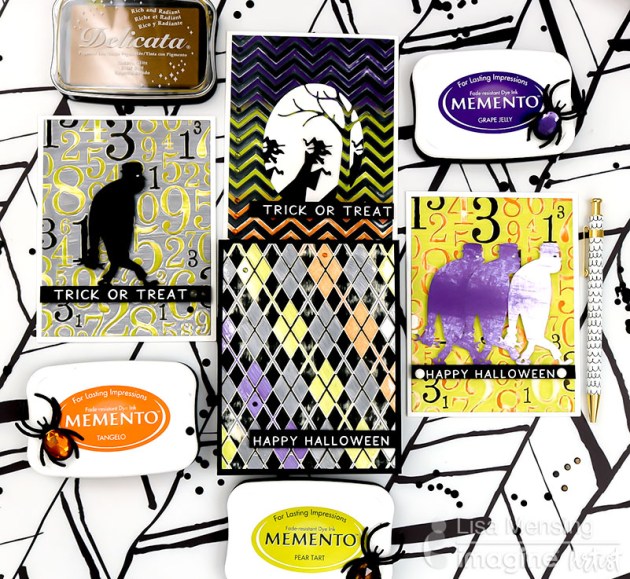
In this video, Lisa shares how to use everyday embossing folders to create fun Halloween backgrounds by using the letterpress technique with several different styles plus she shares a few tips along the way.

Use Memento dye inks with direct-to-paper techniques to create a distressed look across several card backgrounds such as a numbers theme, an Argyle plaid theme, and a chevron style. These matching trick or treat cards are perfect to pair with candy and gifts for Fall!

Skill: Advanced
Time: 10 minutes per card

Directions

Art Supplies

Other

  • EK Success POWDER TOOL Applicator 54-04002
  • Sirio Ultra Black | Cardstock Warehouse Paper Company Inc
  • CLASSIC CREST Avalanche White Card Stock – 8 1/2 x 11 in 100 lb Cover Smooth 250 per Package
  • Wagner HT400 Precision Heat Tool-0503038 
  • Hero Arts Nesting RECTANGLE DIES DI198
  • Journey Platinum Machine w/Plates
  • Embossing Folder – Take a Number
  • Darice Argyle Embossing Folder, 5-Inch by 7-Inch
  • Darice 1218-96 Embossing Folder, 5 by 7-Inch, Chevron
  • Copic Sketch Marker – Special Black 110
  • Whimsy Stamps – NEW Monster Parade Die Set 
  • FaBOOlous Sentiments – 4×6 Stamp Set

See How Heat Embossing a Metal Tin Makes a Lovely Gift

by Nicole Watt

See How Heat Embossing on a Metal Tin Make a Lovely Gift

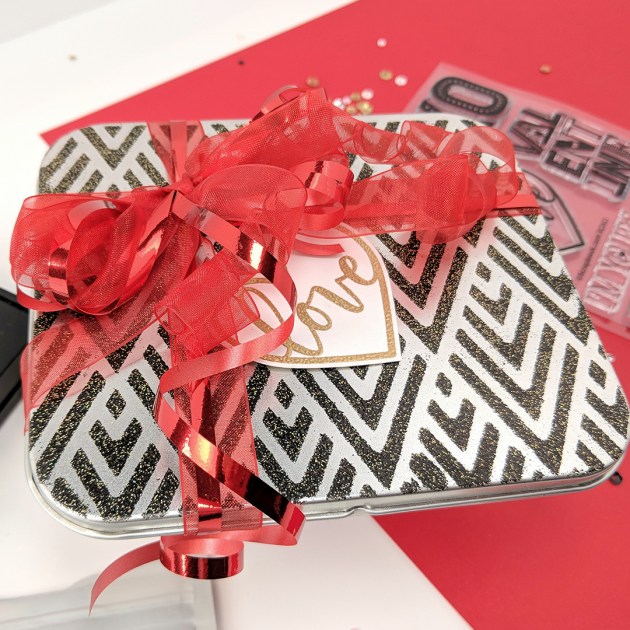
Metal tins are great for all sorts of projects – as a gift box, for a mini album or keepsake box. Why not take that tin up a notch with some heat embossing! Nicole will show you how easy it is to add beautiful texture and color to your next metal tin project.

Skill: Beginner
Time: 15 minutes

Directions

Supplies

Imagine
Other 
  • Altenew Feeling Dotty stencil
  • Altenew Deco Wallpaper stencil
  • Metal tin
  • Heat Tool

Happy New Year! It is 2020!!

by LeeAnn McKinney

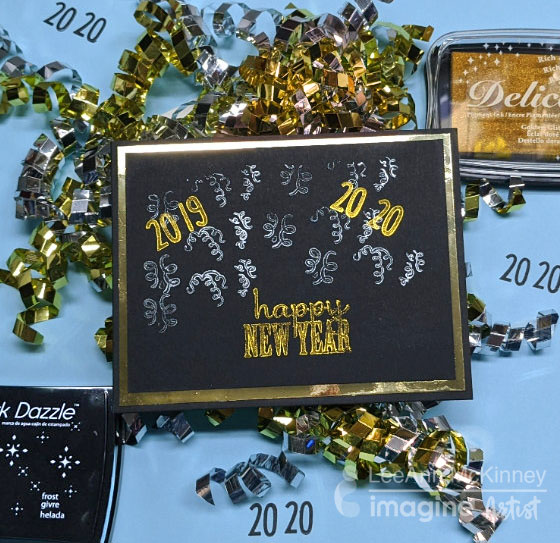
Using Celebration Themed stamps along with VersaMark Dazzle and Delicata Golden Glitz ink pads make a New Years Card. I will be making several of these cards to send to friends as well as co-workers to welcome in the New Year.

Supplies

Imagine
Other
  • Joy Clair- Let’s Celebrate
  • Peek-a-boo Designs- Poinsetta
  • Lawn Fawn- Celebration Countdown
  • Recollections 110 lb Black Cardstock
  • Gold Mirror Cardstock

Create a Beautiful Icy Blue Holiday Card

by Kyriakos Pachadiroglou

Create a Beautiful Icy Blue Holiday Card

Although red, green and gold colors are the most representative ones of Christmas, the last couple of years, I am quite fun of blue that combines so nicely with the silver and contrasts the white. Stars are favorite shapes of this season and using Delicata Sapphire Blue on lighter shades of blue, using MEMENTO bahama blue, give more depth on the card.

Skill: Advanced
Time: 30 minutes

Directions


Step 1

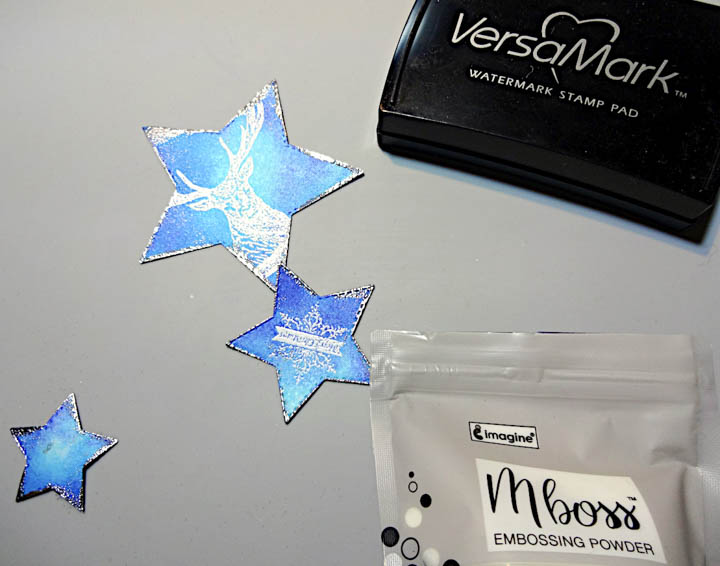
Die-cut 3 different sized star shapes.


Step 2

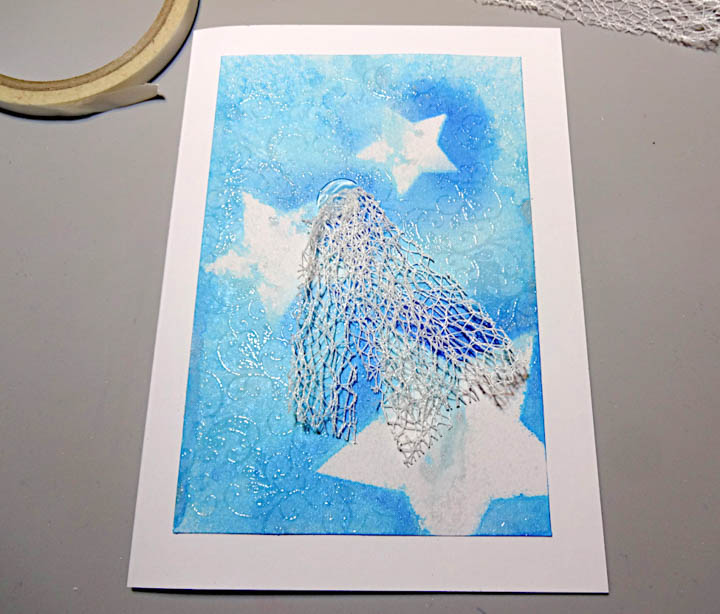
Place the star shapes on a piece of 4×6 card stock and spray first with the Fireworks! Bahama blue and then with Ink Potion No9. Remove the stars and dry the card stock with a heat tool.


Step 3

Lightly cover areas with MEMENTO Bahama blue ink pad.


Step 4

Place the star shapes, white side up, stamp with VersaMark the swirls stamp, cover with Mboss clear embossing powder and heat set.


Step 5

Distress the stars with Delicata Sapphire Blue.


Step 6

Stamp design on the stars, cover with Mboss white embossing powder and heat set. When finished, lightly press the edges of the stars on the VersaMark watermark ink pad, and heat set Mboss silver embossing powder.


Step 7

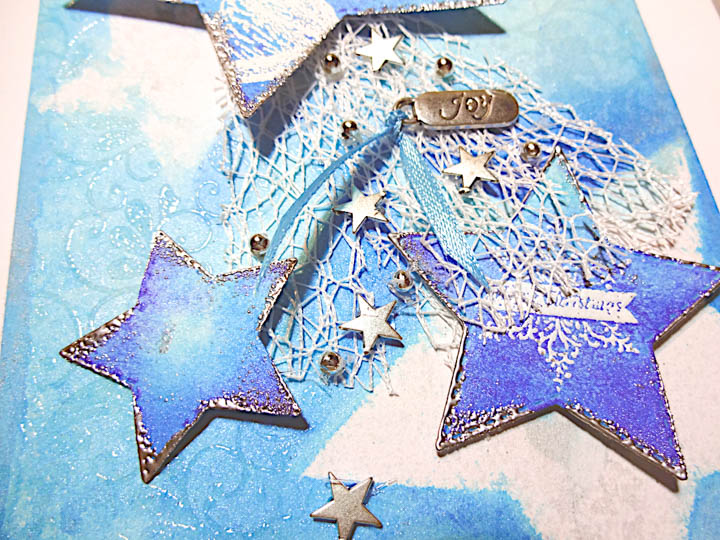
Set the card stock piece on the card with Tear It! Tape and start placing the ribbon.


Step 8

Continue adding the stars and the rest of the embellishments

Supplies

Imagine
Other
  • Star shape dies
  • Metal stars and beads
  • Mesh ribbon
  • Heat tool
  • Hot glue gun
  • White card stock
  • Viva decor – Peacock feather stamp set

See How to Make a Snowflake Shaker Ornament with Mboss

by Martha Lucia Gomez

Hello crafty friends, Martha Lucia here! Today, I am sharing a snowflake shaker ornament that you can use to decorate your gifts and/or Christmas tree. To create this, I am using a shaker dimension set with a snowflake design, VersaMark Clear Ink and Mboss Blue Icicle. Like this set came with a piece of acetate sheet to cover the free areas, I made it like a shaker piece adding some sprinkles.

Skill: Advanced
Time: 30 minutes

Directions


Step 1

Ink one of the sides of your or the ornament directly with the VersaMark Inkpad. Cover it with your selection of Mboss color. I used the Blue Icicle.


Step 2

Melt the powder with the heat tool. And repeat the process twice or three times to give more dimension to your ornament.


Step 3

Cut a piece of card stock with the same shape or your ornament and apply over it some touches of Frost Sheer Shimmer Stix. Let the paper dry naturally.


Step 4

Paste the base shape or double-sided foam tape onto the inked shape. Add your fillers, it could be sequins, sprinkles, beads or whatever you want. Adhere the clear acetate on top with liquid glue and cover it with the embossed design. Finalize your ornament adding a tie or pasting it to your gift. You can try different designs and different colors of Mboss to add your personal touch! Thank you for stopping by and see you soon!

Supplies

Imagine
Other
  • Snowflake Shaker Dimension Set by Kat Scrappiness
  • Chipboard Ornament
  • Cardstock
  • Plastic
  • Heat tool
  • Coffee Filter