Sparkle And Shine With This Jellyfish Theme Birthday Card

by Jowilna Nolte

Sparkle And Shine With This Jellyfish Theme Birthday Card

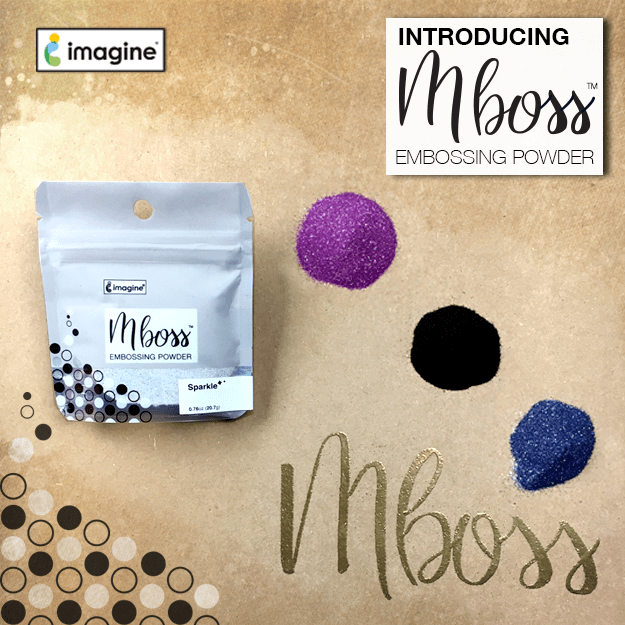
Thinking back when I did my first heat embossing, it was pure magic. That feeling of amazement and wonder hasn’t left but has been ignited once again with the amazing Mboss from Imagine. The new embossing colors are simply amazing and really are over the top beautiful! You have to get some for your stash to experience true magic! Take a look at how I used mine for a fun color-blocked effect.

Skill: Intermediate
Time: 30 minutes

Directions


Step 1

Tape off areas using washi tape on a white cardstock panel.


Step 2

Use your VersaMark inkpad and ink the taped off sections only by tapping the ink pad onto the cardstock.


Step 3

Use the Mboss packet and sprinkle the powder over the inked areas. Peel off the washi tape and then heat set the Embossing Powder using a heat gun.


Step 4

Use StazOn Pigment Piano Black and stamp Happy Birthday sentiment onto a blank area of the embossed panel.


Step 5

Stamp elements onto white cardstock and cut out. Add a little color using Memento Markers.


Step 6

Adhere the stamped elements onto the embossed panel with On Point Glue. Add diamanté and finishing touches.

Supplies

Imagine

Other

  • White cardstock
  • Washi tape
  • Joy Clair stamps
  • Diamanté and/or sequins

Create A Beautiful Hologram Flower Outline With Mboss

by Melissa Andrew

Create A Beautiful Hologram Flower Outline With Mboss

Today I am sharing the fabulous new Hologram Mboss embossing powder from Imagine. This fabulous embossing powder is fine for detailed stamping but also sparkles with colors of the rainbow. In this video, I show you how to stamp, emboss and fill in with a watercolor technique. The Memento inks are perfect for creating the peachy blended look.

Skill: Intermediate
Time: 1 hour

Directions

Supplies

Imagine
Other
  • LDRS Creative – If Friends Were Flowers stamp set
  • Whimsy Stamps – Card Builders Window die set
  • Antistatic tool
  • Paper Trimmer
  • White Card
  • Bristol Smooth cardstock
  • MISTI Stamping Platform
  • Gemini Jr. Die Cut machine
  • 6 round paintbrush
  • Spray bottle

See How to Make a Unicorn Holographic Card with Watercoloring + Embossing Powder

by Arjita Sepaha Singh

See How to Make a Unicorn Holographic Card with Watercoloring + Embossing Powder

For Today’s card, I used a few Memento Dual-tip Markers and the gorgeous Mboss Embossing powder by Imagine. I did a very light freehand sketch of a unicorn on some watercolor paper and colored the hair, ears, and flower using the Memento Markers. I used a brush and some Ink Portion No 9 to blend the dyes and to get a watercolored look.

Once the paper was completely dry I painted the horn and ears with a fine brush and VersaMark ink. I poured the Hologram Mboss and melted it with the heat gun. I finished the card by adding a sentiment “Rainbow, Glitter & Unicorns” in black. The card is super simple to create and the sparkle you get is amazing. This is a cute card for baby shower invites or a birthday card, even for a kid.

Skill: Advanced
Time: 1 hour

Directions

Supplies

Imagine
Other
  • Watercolor paper – Arches Cold Press
  • Heat tool
  • MISTI stamping platform
  • Cardstock – white, pink
  • White gel pen

Introducing Mboss Embossing Powder

Introducing Mboss Embossing Powder

Mboss is high-quality embossing powder available in new and revolutionary packaging that will make using it a breeze. Mboss embossing powder is great for sentiments and large area coverage. The large color range includes classic primary, metallic, pearlescent, and super fun glittery combinations. We had the crafter in mind with a unique selection of holiday and seasonally focused colors. The new packaging is very functional with a wide mouth for easy powder return.

Clear 013, Clear Matte 014, White 015, Black 016, Gold 017, Copper 018, Silver 019, Champagne 020, Red 021, Orange 022, Yellow 023, Green 024, Blue 025, Violet 026, Rose Gold 027, Metallic Berry 028, Metallic Orchid 029, Emerald 030, Icy Blue 031, Sapphire 032, Amethyst 033, Jade Pearl 034, Amber Pearl 035, Indigo Pearl 036, Gold Glitter 037, New Years Eve 038, Sparkling Champagne 040, Valentine 041, Lucky Stars 042, Sparkle 043, Black Hologram 044, Hologram 045, Birthday Party 046, Princess Party 050, Blue Icicle 047, Iridescent 048, Iridescent Opaque 049, Shimmering Night Sky 051

High quality all-purpose embossing powder

• Available in a wide range of colors with a holiday & seasonal focus for card makers
• Wide-mouthed resealable bag makes it easy to use and store at home
• Large color range includes classic primary, metallic, pearlescent, and glittery combinations

Check out our website to buy or learn more about Mboss.

Color a Journal Page in the Style of a Cute Nature Scene

by Elina Stromberg

Stamped collages provide an easy way to create beautiful and colorful pages into your art journal book. For this technique, you can mix and match stamps from various sets and take those small pieces of leftover papers and put them into use. Main images on stamped collages are like paper dolls; first, you stamp and cut out the body, then hair, clothes, and accessories. Finished pieces contain several layers; just like dressed paper dolls!

Skill: Intermediate
Time: 2 hours

Directions


Step 1

Stamp the main image on cream cardstock and again on brown, orange and patterned floral paper.


Step 2

Color the image face, hands, and legs. Add shadows and highlights to the brown hair and the flower-patterned skirt. Cut out. On the non-visible areas trim body image slightly smaller on the edges; this will ease the positioning of the colored and cut details.


Step 3

Using green papers hand-cut waves to build a landscape scenery. If you wish, decorate with stamped patterns.


Step 4

Ink the page background: Dab green ink on the bottom part of the page, and both lighter and darker blues on the top. The area in the middle may be left white as it will be covered with the green scenery papers. 
Create clouds on the inked sky by adding a hint of white gesso on top of the blue ink.


Step 5

Stamp trees on green patterned paper. Highlight the stamped lines with a color pencil. 
Cut out.


Step 6

Stamp flowers and stems on patterned or solid color paper. Color with color pencils and cut out.


Step 
7

Stamp small flower patterns on the layered landscape. Glue flowers on the background. Place the main image on the page. Stamp sentiment text on the bottom of the page. Done!

Supplies

Imagine
Other
  • Art Journal book
  • Colorful pieces of leftover papers
  • Carabelle Studio – “The girl smiling” stamp
  • 
Simon Says Stamp – One With Nature
  • 
Studio Calico – Set 17179
  • Gesso – white
  • Color pencils
  • Scissors

See How To Make These Artist Trading Cards With Vertigo Dragonflies

by Lori Warren

This cardmaking project is all about using layers of ink to create a collage background with stamps and stencils. It’s a great way to build a cool background in order to feature that perfect focal image, like a Vertigo, die cut dragonfly.

Skill: Intermediate
Time: 30 minutes

Directions


Step 1

Apply VersaMagic DewDrops to a Craft Mat and add water.


Step 2

Lay 8.5” x 11” piece of cardstock down into the wet ink. Repeat as needed.


Step 3

Apply VersaMagic through the diamond shape stencil with a sponge dauber.


Step 4

Stamp script stamp with StazOn Pigment Ink.


Step 5

Apply water and blot with a paper towel, pulling some ink away.


Step 6

Spray panel with Walnut Ink, blot and dry. This gives the paper a vintage or antique look.


Step 7

With a different stencil apply a different color of VersaMagic. This creates a beautiful layered effect.


Step 8

Using the same stencil, apply White VersaMagic to make a bit of a frosty ghost effect.


Step 9

Cut cardstock panel to multiple 2.5” x 3.5” ATCs or Artist Trading Cards.


Step 10

Stamp a vintage postcard image with VersaFine Clair.


Step 11

Edge ATCs with brown and black inks to continue the antique look.


Step 12

Tie string around each card a couple times to give the ATCs to give extra flair.


Step 13

Die cut dragonfly image from Vertigo Prism, color with VersaMagic.


Step 14

Prepare dragonfly with double-sided dimensional tape. This will give each dragonfly the effect of flying.


Step 15

Adhere dragonfly die cut to ATCs.


Step 16

Enhance dragonfly with a white pen and embellish with tag and sticky gems.

Supplies

Imagine
Other
  • Sizzix – Dragonfly
  • Jillibean Soup – Sticky Notes
  • Sticky gems
  • Lori’s Cards & Creations – Script Stamp
  • Clear Stamps – Postmarks
  • Uni-ball Signo -White
  • Black string
  • TCW Stencil – TCW202, TCW855