Meet the 2026 Imagine Design Team


A new year brings fresh ideas, new techniques, and a wonderful group of designers we’re proud to introduce.

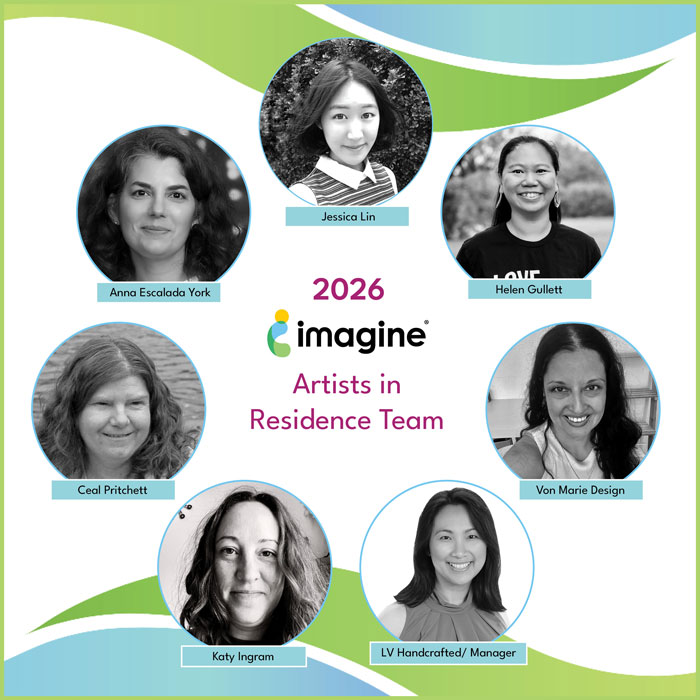
Each year, Imagine selects artists from across the country to join our Artists in Residence program. These talented creatives share thoughtful projects, along with step by step videos and tutorials on our blog so you can create right alongside them.

From clean and simple cards to layered mixed media and dimensional pieces, each designer brings a unique style, perspective, and voice. Together, they will fill the year with inspiration to spark your imagination and encourage you to try something new.

We’re excited for you to get to know them and follow their creative journey throughout 2026.


Let’s meet them:

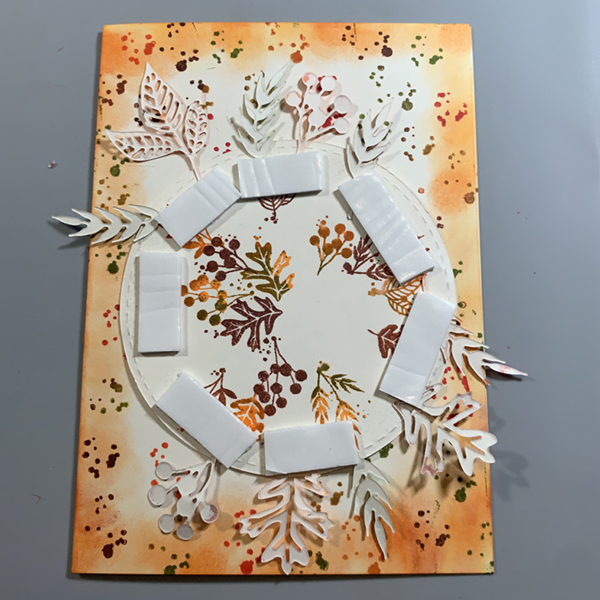
Linh – LV Handcrafted

Hi! I’m Linh – or LV Handcrafted on social media. I live in Seattle, WA with my husband and our two dogs. I’ve been crafting since I was in high school but took a long break as I started my career. Now (many years later) I am my own boss working as a business consultant, so I can balance my time and do more of what I love – papercrafting! There’s always so much to learn in papercrafting, and I find great joy in adding my own twist and sharing what I’ve learned. I love Imagine products. There’s such a wide range of media supplies. It’s so fun to experiment, have a bit of a play and create something exciting.  I’m honored to be a part of this amazing team.

YouTube – https://youtube.com/@lvhandcrafted
Instagram – https://www.instagram.com/lvhandcrafted/
Facebook – https://facebook.com/lvhandcrafted 
Blog – https://lvhandcrafted.com
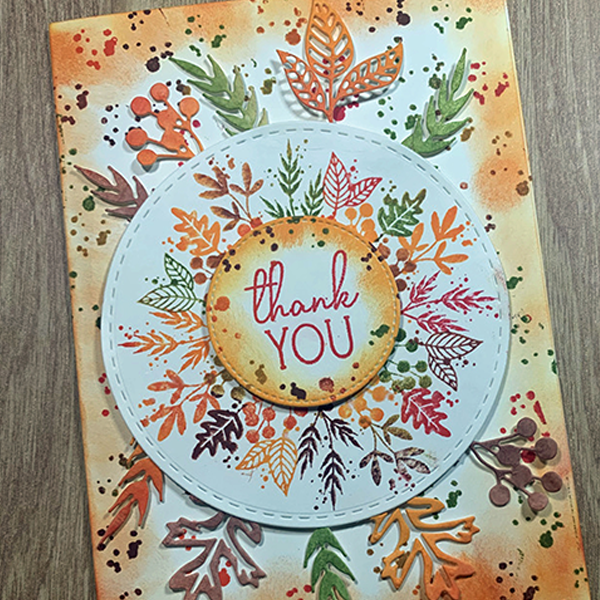

Anna Escalada York

Anna Escalada York grew up on a farm outside of Phoenix, Arizona and moved to Portland, Oregon to go to college, where she met her husband. They have two children (one in high school and the other in middle school), a cat and two guinea pigs. She is also a proud teacher at her local high school for almost 20 years in SE Portland, Oregon (go Lightning)! Her other hobbies are reading, riding her bike, nerding out to Star Wars, and reading. 

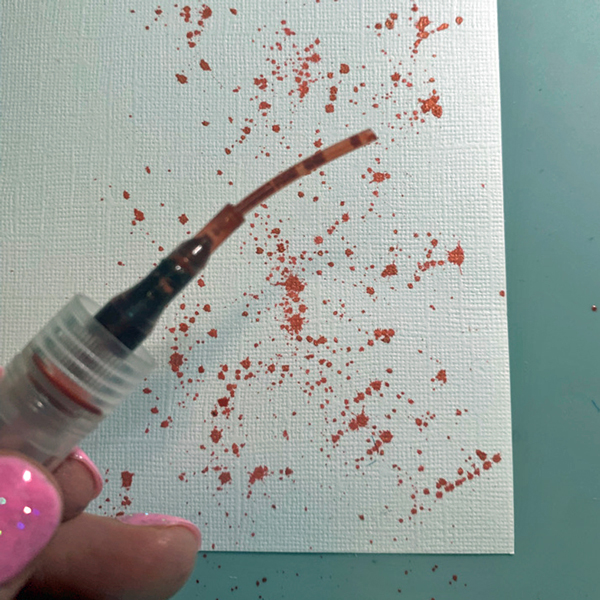
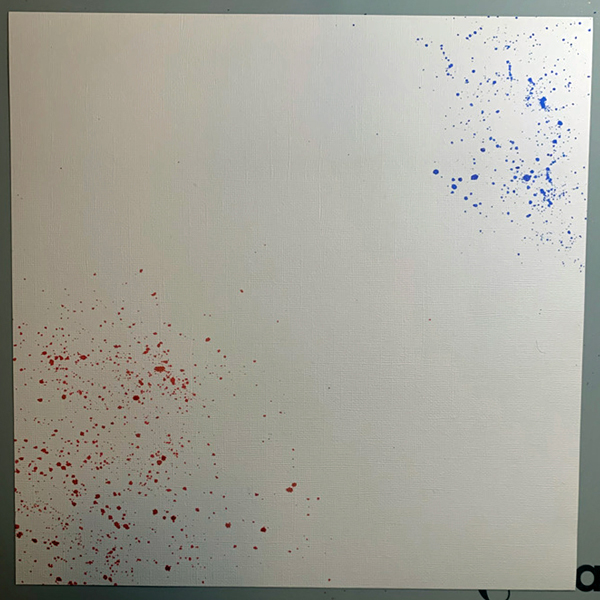
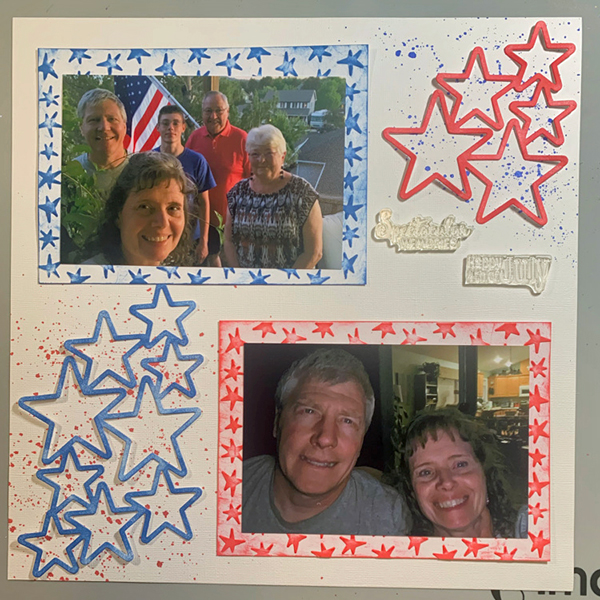
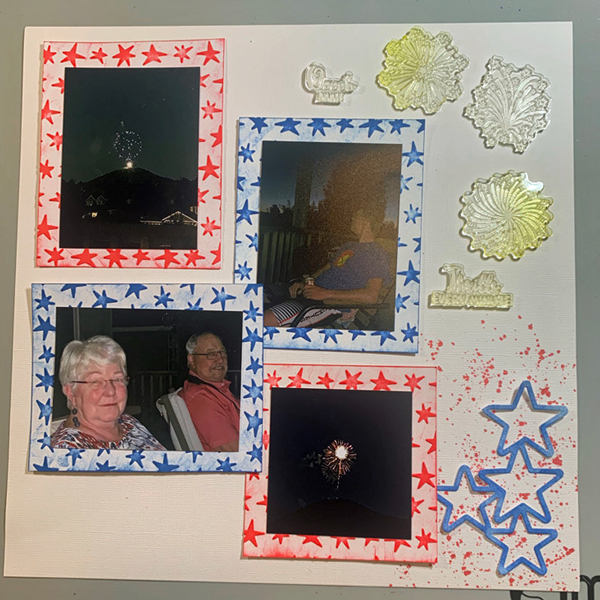
Anna has been crafting (almost exclusively card making) since 2004, but stepped away for a while when it was too hard to juggle the demands of being a mom of little children and working full time. She returned to her craft room in 2019 and started blogging consistently in 2020. One of her recent crafty achievements has been creating 700 cards in 2021. Her favorite craft supplies include heat embossing, using splatter, and coloring with markers. Her favorite style is sparkle!.

Instagram – https://www.instagram.com/sparklywallflower/
Facebook – https://www.facebook.com/sparklywallflower
Blog – https://sparklywallflower.blogspot.com/
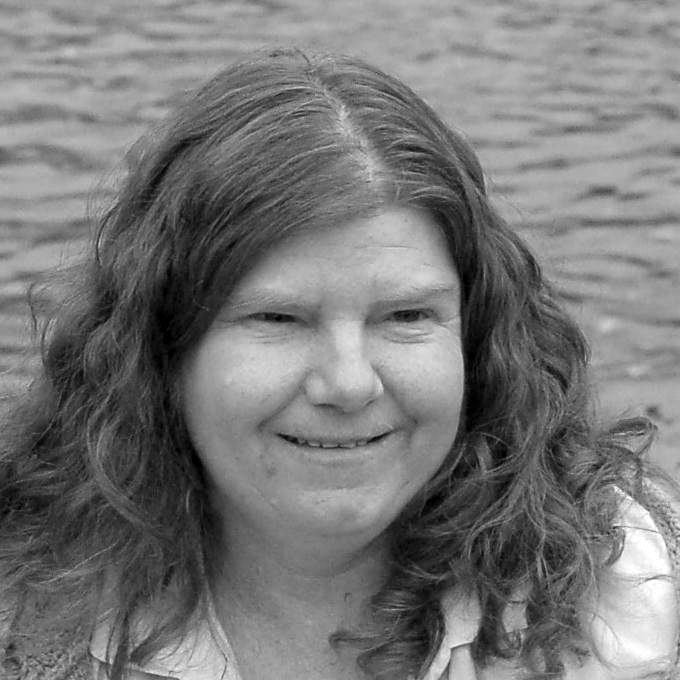

Ceal Pritchett

I am Ceal Pritchett, and I reside in the mountains of western North Carolina with my husband and our little fur baby Shih Tzu. I have been a crafter in some form since childhood. I fell in love with cardmaking around 15 years ago. I am a clean and simple cardmaker who sometimes dabbles in other things like art journals, bible journaling, and painting.

Instagram – https://simplybeautifulcreations.blogspot.com/
Facebook – https://www.facebook.com/profile.php?id=100053614696193
Blog – https://simplybeautifulcreations.blogspot.com/
Pinterest – https://www.pinterest.com/cealp/
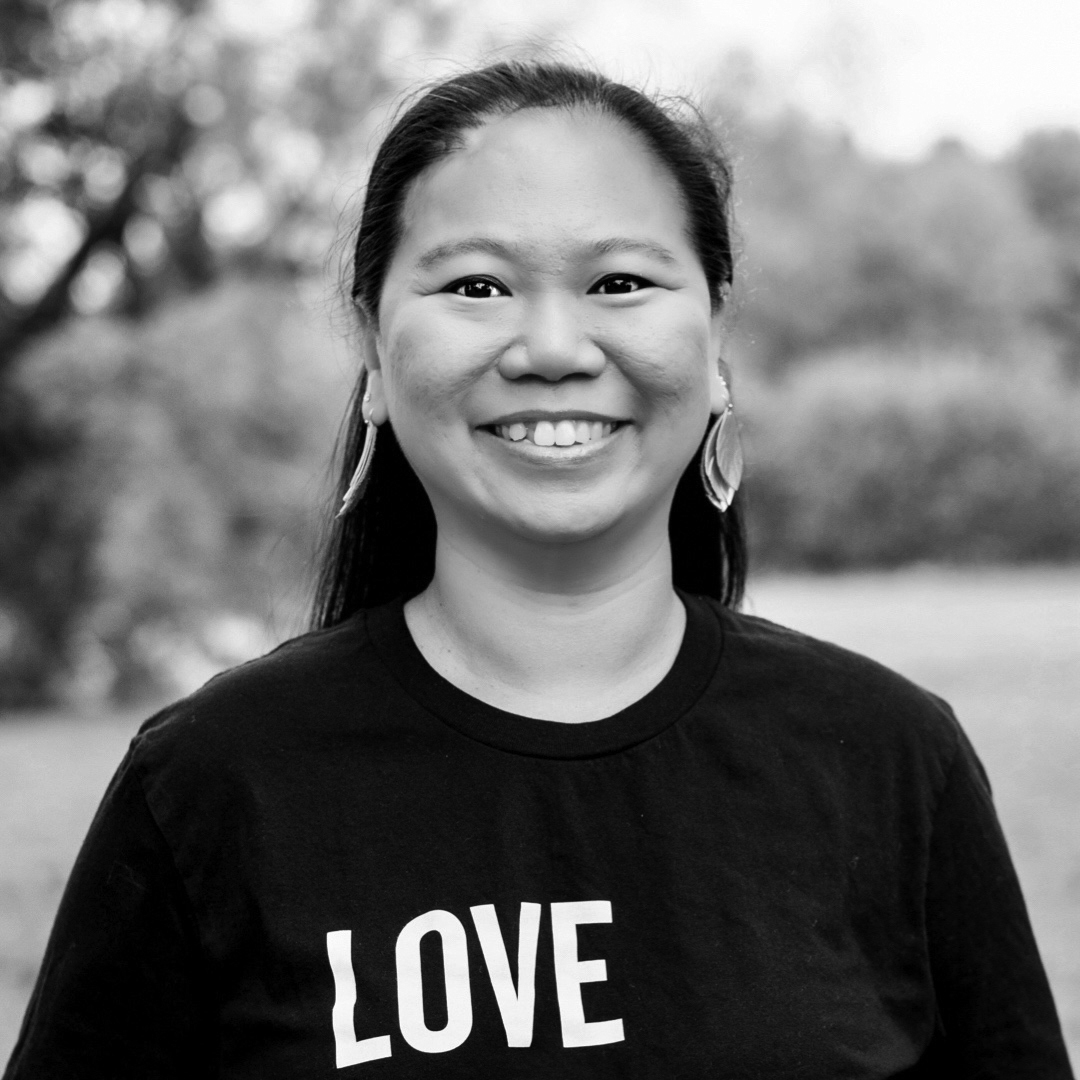

Helen Gullett

Helen is a stay-at-home mom living in Ohio with her husband and their two daughters. She volunteers as a translator for several non-profit organizations and enjoys using her skills to support meaningful causes. In her free time, she loves Bible journaling, making cards, paper crafting, and mixed media projects. She also likes drinking coffee, spending time with her family, hiking, and traveling.

You Tube – https://www.youtube.com/channel/UCz-gVkOO8hxCzSNWOoa_q8A 
Instagram – https://www.instagram.com/helengdesigns
Facebook –  https://www.facebook.com/helengullett
Blog –  https://www.helengullett.com 
Pinterest –  https://pinterest.com/helengdesigns213
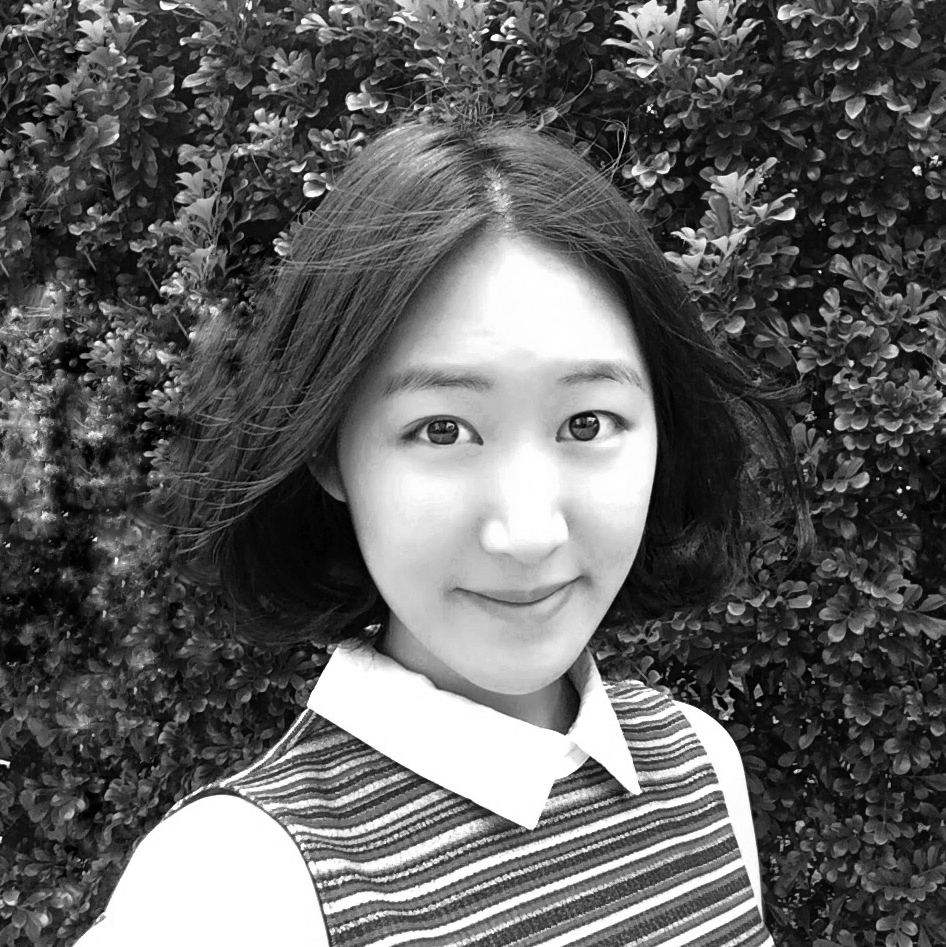

Jessica Lin

Hello crafty friends! My name is Jessica Lin. You may have recognized me or seen some of my previous projects, and I am so excited to be back on Imagine’s design team! I am a crafty gal in my late twenties, but my passion for cardmaking started a long time ago when I was 9. I was introduced to wooden stamps and I haven’t stopped stamping since. Some of my other hobbies include sewing, washi tape collaging, and I hope one day I’ll learn how to crochet, too. 

I grew up in Taiwan and speak Mandarin as my mother tongue, so my YouTube channel is mostly filmed in Chinese. This year, I decided to create a bilingual Instagram account. If you are inspired by bold, vibrant colors and enjoy detailed projects with lots of layers, come have a visit! I look forward to meeting and crafting with all of you! 

YouTube – https://www.youtube.com/channel/UCJDX4PHaBRYKcnSO8kWCmXw 
Instagram – https://www.instagram.com/jessicard2424/
Facebook –  https://www.facebook.com/profile.php?id=61553280188439
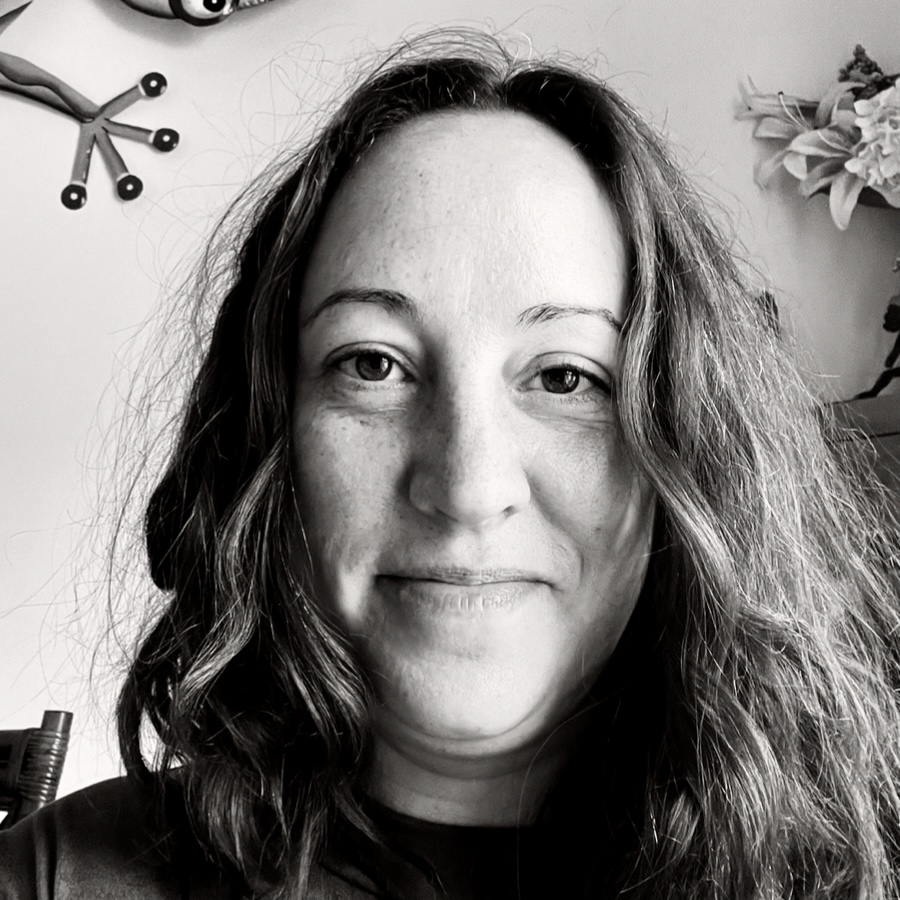

Katy Ingram

Hello Crafty Friends! My name is Katy Ingram — wife to a wonderful husband, mama to one amazing son, and caretaker to five kitties. I also care for my mother-in-law who lives with vascular dementia, which has deepened my appreciation for creativity as both joy and therapy.

We live off the coast of North Carolina, where I spend my time creating handmade cards and sharing my love for paper crafting. I began cardmaking in 2016, and in 2019 launched my YouTube channel and blog, Eastwicks Paper and Ink, as a place to inspire creativity and share tips, techniques, and inky fun. I’m thrilled to continue as an Artist in Residence with Imagine and look forward to creating alongside you!

You Tube – https://www.youtube.com/c/eastwickspaperandink 
Instagram – https://www.instagram.com/eastwickspaperandink/
Facebook –  https://www.facebook.com/eastwickspaper
Blog –  https://www.eastwickspaperandink.com/
Pinterest –  https://www.pinterest.com/eastwickspaper/


Von Marie Cervantes

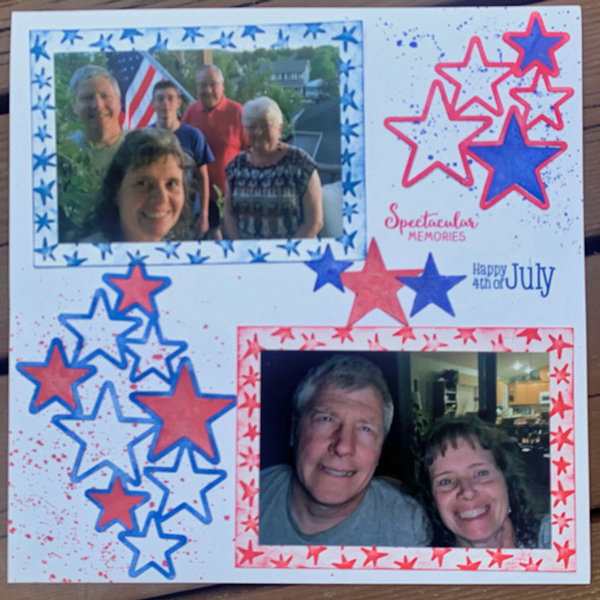
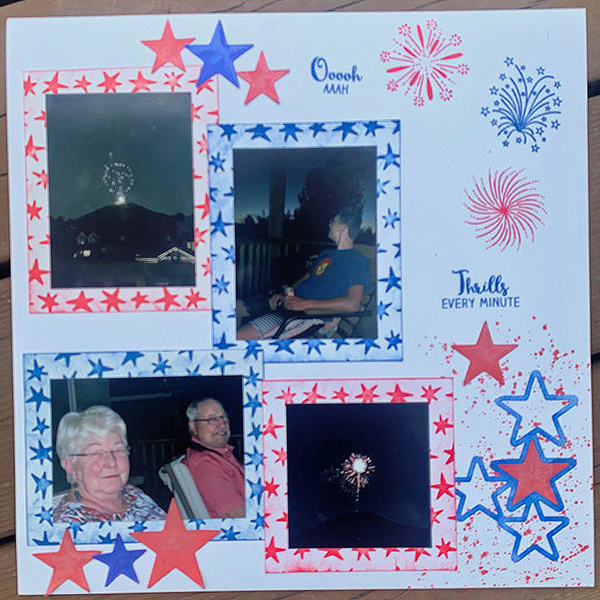
Hello, my name is Von Marie. I’m a California native and have been cardmaking for about 15 years, starting when I was pregnant with my first child. Before cardmaking, I was a scrapbooker, and while I don’t create full pages as often anymore, I still enjoy it from time to time. I love photographing my family, food, and scenery and hope to do more scrapbooking again someday.

I’m always excited to learn new styles and techniques, and I love to play, get inky, and see where my cardmaking journey leads. Spending time in my craft room brings me so much joy, especially when I’ve created something special.

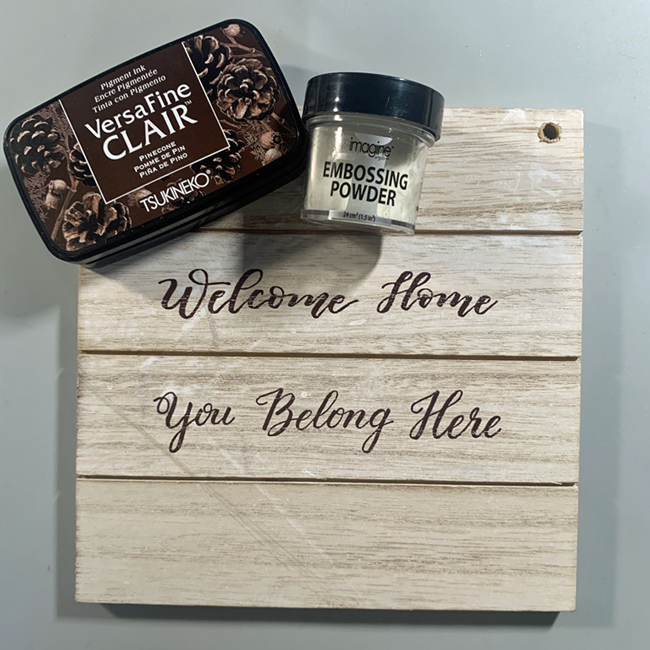
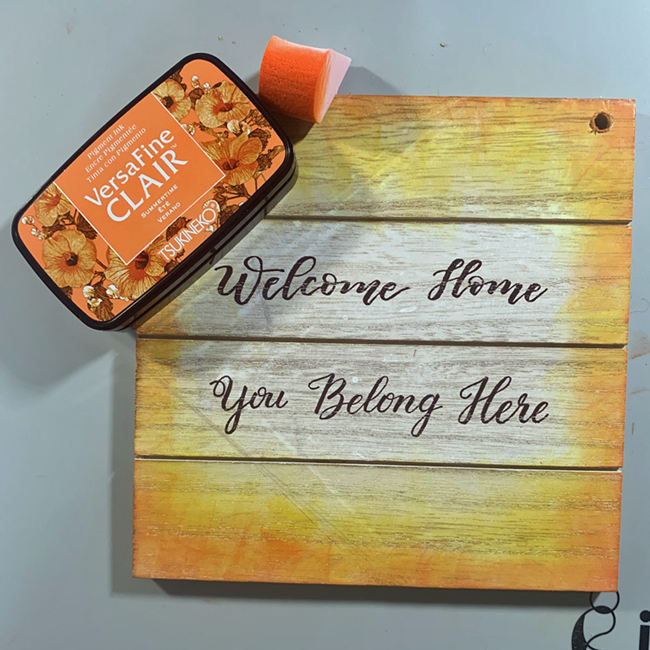
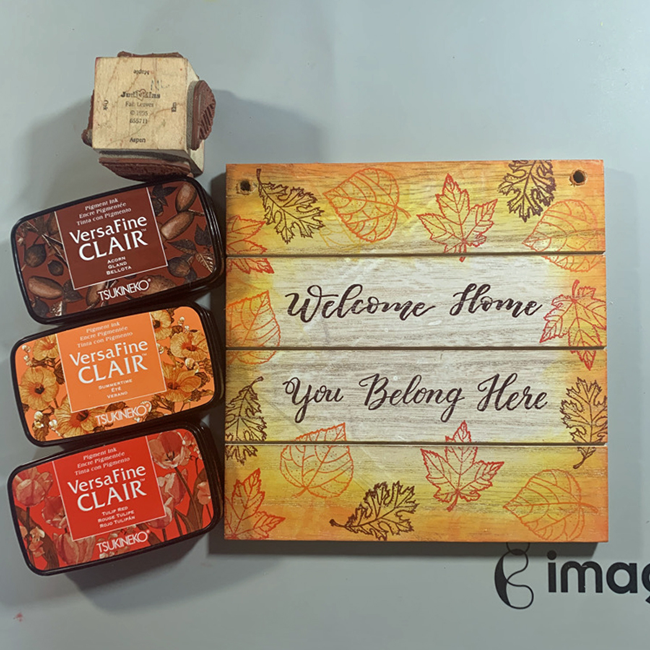
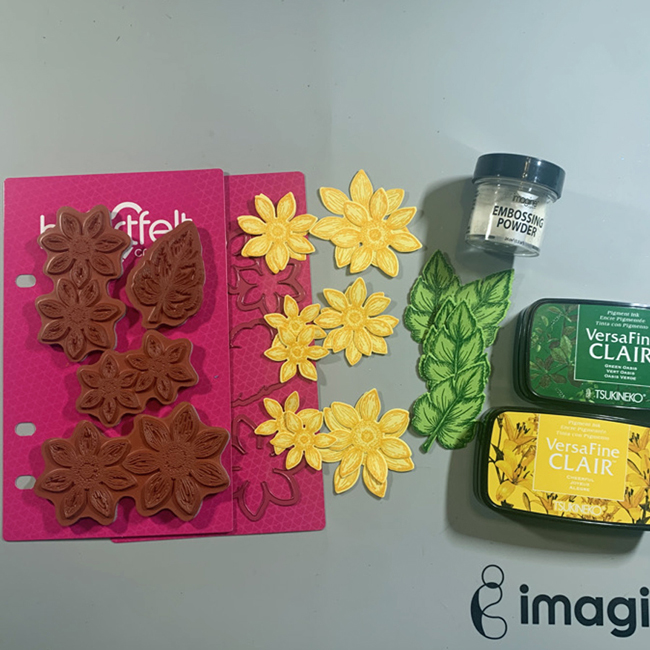
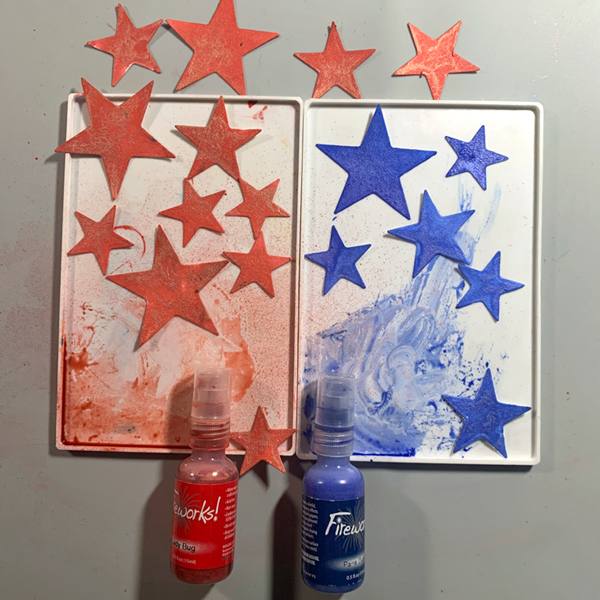
I love Tsukineko inks and I love using sprays. On Point Glue is a favorite. Embossing with ink and powder is especially satisfying, whether for images or sentiments. I don’t have a single defined style, but I’m currently enjoying learning to create more CAS cards. My motto is: Sometimes Less is More!

You Tube –  https://www.youtube.com/@vonmariedesign
Instagram – https://www.instagram.com/vonmariedesign/
Blog – http://www.vonmariedesign.blogspot.com

Learn to Make a Welcome Home Wood Sign

By Neva Cole –

In today’s tutorial you will learn to create a super easy wood sign using the ever versatile VersaFine Clair inks.  The VersaFine Clair worked beautifully for this project that took just under and hour from design concept to completion!  The ink pads are nice and juicy, so the first stamp image was perfect every time, which is helpful when free hand stamping with out a stamp platform.

Skill:  Beginner

Time:  1 Hour

Directions:

Step 1:

Remove twine from the sign so it will lay flat on your work surface.  With lines on the sign already in place it was easy to line up the sentiment and acrylic stamp block.  Once the stamps are aligned, place a large acrylic block over the stamps lining up the edges to allow perfect positioning.

Step 2:

Stamp the sentiment in VersaFine Clair Pinecone and heat emboss with clear Embossing Powder.  Gives the sentiment a bit of shine and keeps it from smearing!

Step 3:

Using and ink blusher ink the edges of the sign with VersaFine Clair Cheerful.  Start from the outside edge and blend toward the center to create a slight ombre look.

Step 4:

Using and ink blusher ink the edges of the sign with VersaFine Clair Summertime.  Start from the outside edge and blend toward the center but not as far as the Cheerful layer.

Step 5:

The leaf images are stamped using a very old stamp that features Fall leaves. The Oak leaf is stamped in VersaFine Clair Acorn, the Aspen leaf in Summertime, and the Maple leaf in Tulip Red.  The sign can be heated with a heat gun, or set aside until the ink dries.

Step 6:

Replace twine through holes in the sign and display! 

Art Supplies

Imagine:

Versa Fine Clair–Pinecone, Acorn, Cheerful, Summertime, Tulip Red

Embossing Powder–Clear

Ink Blusher

Other Products:

Square 7” x 7” Wood Sign

Recollections Clear stamps sentiments from 2020

Judi-kins Fall Leaves Cube 

Neva Cole

http://snippetscrafter.blogspot.com/

n.cole@windward-performance.com

Learn to Make a “Thinking of You” Sunflower Card

By Neva Cole –

Versa Clair Fine is now my favorite pigment ink!  So versatile and allowed me to create a beautifully colored card in just a few steps.  This is one of the few cards that my husband has asked me to specifically make for a friend, it was easy to do with just a few inks, stamps, and dies!

Skill:  Intermediate

Time:  2 hours

Directions:

Step 1:

Stamp sunflower images on yellow cardstock with Versa Fine Clair Cheerful and heat emboss with clear embossing powder.  Stamp leaf images on light green paper in Versa Fine Clair Green Oasis and heat emboss with clear embossing powder.  Die cut with matching dies.

Step 2:

Place flowers and leaves face down in matching shaping mold and mist lightly with water.  As the images are heat embossed, they will stay sharp and crisp.  Close mold and pressure emboss.

Step 3:

Remove flowers and leaves from mold and set aside to dry.  Once dry assemble flowers with On Point Glue, adding black glitter to centers.  (Not shown)  Set aside to dry.

Step 4:

Ink the edges of an A7 size card with and ink dauber and Versa Fine Clair Green Oasis.  Set aside to dry, as the ink is very juicy.

Step 5:

Sunflowers are a rustic flower, so corrugated cardstock seemed to be a good choice for a background.  Versa Fine Clair in Cheerful and Summertime are inked randomly on the corrugated cardstock with ink daubers.

Step 6:

Ink the sentiment with Versa Fine Clair in Green Oasis and heat emboss with clear embossing powder.  Die cut with die from the Eyelet Frame Gateway set.  I trimmed off a portion of the sentiment, then edged the sentiment with Versa Fine Clair in Summertime.

Step 7:

Die cut a Border from the Regal Boarder set using light orange paper.  Gently shade the edges with Versa Fine Clair Summertime and an ink dauber.   

Step 8:

Adhere corrugated cardstock to base card with Tear It Tape!  Adhere border with On Point Glue  Adhere flowers with Tear It Tape!

Art Supplies

Imagine:

• Versa Fine Clair–Cheerful, Green Oasis, Summertime

• Embossing Powder–Clear

• On Point Glue

• Tear It! Tape

• Ink Dauber

Other Supplies Used:

• Light yellow, light orange and light green cardstock

• Corrugated kraft cardstock   

• Heartfelt Creations–Rustic Sunflower Stamp/Die/Shaping Mold, Regal Borders and Pockets Die, Eyelet Frame Gateway Die, Heartfelt Expressions stamp

• Black Glitter

• Die Cut machine

• Stamp Platform

Neva Cole

http://snippetscrafter.blogspot.com/

n.cole@windward-performance.com

Learn How to Make a Vividly Fall Colored Thank You Card Using Kaleidacolor

2022_Sept_Neva_KaliedacolorLeavesThankYouBeauty_600

By Neva Cole –

There are many Kaleidacolor pads that are in the autumn themed pallet.  Even though this card is multi-layered it comes together in a short amount of time considering all of the inked embellishments!

Skill: Intermediate

Time: 2 Hours

Directions:

2022_Sept_Neva_KaliedacolorLeavesThankYouStep1
Step 1:

Trim cream cardstock to 5” x 5” and center the overlay and stamp on the center rotation point of the Turn About Stamp.  Place on stamp platform to pick up stamp, and remove overlay.

2022_Sept_Neva_KaliedacolorLeavesThankYouStep2
Step 2:

Ink up the stamp with Kaleidacolor in Autumn Leaves with the green end of the pad and stamp the image.  Rotate the paper 90 degree to the right.

2022_Sept_Neva_KaliedacolorLeavesThankYouStep3
Step 3:

Ink up the stamp with Kaleidacolor in Desert Heat with the orange end of the pad and stamp the image.  Rotate the paper 90 degree to the right.

2022_Sept_Neva_KaliedacolorLeavesThankYouStep4
Step 4:

Ink up the stamp with Kaleidacolor in Cappuccino Delight with the brown end of the pad and stamp the image.  Rotate the paper 90 degree to the right.

2022_Sept_Neva_KaliedacolorLeavesThankYouStep5
Step 5:

Ink up the stamp with Kaleidacolor in Desert Heat with the red end of the pad and stamp the image.  Rotate the paper 90 degree to the right.  After I started the card I realized it can also be completed with two complementary Kaleidacolor pads, just by using opposite ends to ink the image.  Die cut the completed wreath with a circle die cut.

2022_Sept_Neva_KaliedacolorLeavesThankYouStep6
Step 6:

Ink the sentiment from the red end of the Kaleidacolor Desert Heat pad and stamp.

2022_Sept_Neva_KaliedacolorLeavesThankYouStep7
Step 7:

Die cut the sentiment.  The edges are then blended in with an Ink Dauber and the yellow end of the Kaleidacolor Desert Heat pad.  

2022_Sept_Neva_KaliedacolorLeavesThankYouStep8
Step 8:

More embellishment is added with included stamps from the set from various sections of all three Kaleidacolor pads.

2022_Sept_Neva_KaliedacolorLeavesThankYouStep9
Step 9:

Spritz a section of cream cardstock with Ink Potion No. 9.  This will allow the ink to spread more uniformly on the cardstock.  Generally glossy cardstock works best, but the rest of the card was regular cream cardstock, this is a good work around.

2022_Sept_Neva_KaliedacolorLeavesThankYouStep10
Step 10:

Using a 2” rubber brayer add ink liberally to the white cardstock until fairly well blended.  All three Kaleidacolor ink pads are used on one piece of cardstock with the intention to have several colors to die cut the coordinating leave dies.

2022_Sept_Neva_KaliedacolorLeavesThankYouStep11
Step 11:

Decorate the front of the 5” x 7” card front in the same way the sentiment die is inked and stamped in Step 8. 

2022_Sept_Neva_KaliedacolorLeavesThankYouStep12
Step 12:

Arrange die cuts from the brayered section of cardstock on the card base.  Use repositionable adhesive to pick up the edges of the die cuts and flip over the entire front circle wreath.  Add dimensional foam adhesive to secure die cuts in place.  (You will notice that the reverse side was the first try, however it wasn’t the best, so it is simply flipped over and the other side was used.  You only see the mistake in the demonstration step!)

2022_Sept_Neva_KaliedacolorLeavesThankYouBeauty_13
Step 13:

Adhere stamped wreath to card front.  Adhere the sentiment to the center of the stamped wreath with dimensional foam adhesive.

Art Supplies

Imagine

• Kaleidacolor–Autumn Leaves, Desert Heat, Cappuccino Delight

• Ink Potion No. 9

• Ink Dauber

Other:

• Cream  Cardstock

• Concord & 9th–Harvest Wreath Turnabout Set and Dies

• Elizabeth Craft Designs–Stitched Circles

• 2” Rubber brayer

• Temporary repositionable adhesive

• Dimension Foam adhesive

• Die Cut machine

• Stamp Platform

Create a Watercolor Sunflower Card using Stencils and Fireworks! Shimmery Craft Spray

2022-Aug-WatercolorFireworksSunflowers-600

By Neva Cole 

In today’s tutorial, I will share how I used layering sunflower stencils to create a water color look to my image.  Notice there is no stamp outline, that helps achieve a more organic look to the project.  I learned a few things along the way, and almost want to include a few blooper photos!  Instead I share the way that will give you the cleanest look avoiding the pit falls!

Skill: Beginner

Time: 2 Hours

Directions:

2022-Aug-WatercolorFireworksSunflowers-Step1

Step 1:

Trim white watercolor cardstock to 4 1/4” x 9 1/4”,  or about 1/4” on each side larger than your stencil.  this will allow you to handle your project more cleanly.  Use reposition able painters tape or washi tape to secure stencil along left side with edges matching along the upper and left hand side.  Spritz with Fireworks! in New Sprout until color depth desired is achieved.  In this close up photo freezer paper is used underneath the stencil and paper with the plasticized side up.  This allows collection of the over spray for background papers.  Carefully lift stencil to keep excess Fireworks from leaking under the stencil and adding unwanted color.

2022-Aug-WatercolorFireworksSunflowers-Step2
Step 2:

Secure next layer of layering stencil in place and spritz with Fireworks! Shimmery Craft Spray in Bamboo Leaves.  This photo shows a spray box that protects your work area from over spray.  It also shows the best distance of 12” to 18” to spray the stencil to avoid large droplets of Fireworks!. 

2022-Aug-WatercolorFireworksSunflowers-Step3

Step 3:

Clean stencils with sections of watercolor paper after each layer.  Move the watercolor paper around on the freezer wrap to pick up excess spray.  Keep color families together, as both colors of green are used on this background paper.  Clean up excess with paper towels or baby wipes. 

2022-Aug-WatercolorFireworksSunflowers-Step4
Step 4:

Continue with additional layering stencils.
Here Dandelion is used for Stencil 3, and Tangelo for Stencil 4. 

2022-Aug-WatercolorFireworksSunflowers-Step5
Step 5:

Sometimes as a designer you discover easier methods in the process of designing a project.  I was not satisfied with the color through the stencil by just spraying with the stencils that were smaller openings.  It is recommended to use this method for the rest of the layers.  Fireworks! in Tangelo is shown here sprayed on a plastic sheet.  Using a cotton swab the color is carefully dabbed through the stencil to give better color depth.  A cotton swab also prevents leakage underneath the stencil of excess color.  A lot less of the spray was used with this method!  Stencils 5 and 6 used this method to complete the look.  Stencil 5 used Fireworks! in Lilac Posies, and Stencil 6 a mixture of Fireworks! Rich Cocoa (for shimmer) and Walnut Ink in Java for a darker color. 

2022-Aug-WatercolorFireworksSunflowers-Step6
Step 6:

Here are the images from the entire stencil set.

2022-Aug-WatercolorFireworksSunflowers-Step7
Step 7:

One “blooper” photo, all the backgrounds made with the over spray and Fireworks! left on the stencils.  To be used in future projects?  The green sheet is trimmed to 4 1/4? to 5 1/2” to cover the front of the card.

2022-Aug-WatercolorFireworksSunflowers-Step8
Step 8:

Tap drop of Fireworks! in Dandelion on white watercolor paper trimmed to 3 3/4” x 5”.
Use quilted card front die to add texture to front panel.

2022-Aug-WatercolorFireworksSunflowers-Step9
Step 9:

Part of the remaining background section is stamped with Memento Luxe in Lilac Posies using a sentiment from the Sunflowers stamp set.  It is die cut with a Spellbinder die.

Step 10:

The Sunflower is die cut with the coordinating die.  The layers are adhered together with Tear It! Tape with dimension foam tape behind the card front.  

Art Supplies

 Imagine
Other:
  • White Watercolor Cardstock
  • Pink Fresh Studio Sunflowers Stencils, Coordinating Die, and Clear Stamp
  • Concord & 9th Quilted Card Front Die
  • Spellbinders Fancy Tabs
  • Dimension Foam adhesive
  • Cotton swabs
  • Die Cut machine
  • Stamp Platform

Fourth of July Layout Made Easy with Memento inks and Fireworks!

2022_June_Neva_Scrapbook_blog

By Neva Cole –

Today I will share how easy it is to create a very cohesive layout using just two ink colors and the matching Fireworks! colors for an amazing Fourth of July scrapbook layout.  With just white cardstock, an embossing folder, a large die cut, and stamps this layout is perfect for Independence Day

Skill:  Beginner

Time:  30 Minutes

Directions:

2022_June_Neva_4thofJuly_step1

Step 1

Trim white cardstock to 1” on each edge larger than the photos.  Pressure emboss with Star Blanket.  Ink raised portion of embossed areas and edges with Memento Danube Blue or Lady Bug.  For my layout I trimmed two sections 5” x 7”, three sections 4” x 5”, and one section by 4” x 4” to back my photos.

2022_June_Neva_4thofJuly_step2
Step 2

Die cut two sets from Spellbinders Cascading Stars die and remove the stars.  Trim one outline die cut into a section of five stars, with the other being four stars.  Use Jumbo Dauber to tap Memento Danube Blue over one die cut and the smaller portion of the trimmed die cut.  Tapping the ink onto the paper keeps from damaging the die cut, which can occur if a rubbing motion is used.  The larger portion of the trimmed die cut is inked in Memento Lady Bug.  Continue to add ink until it is the desired hue. 

2022_June_Neva_4thofJuly_step3

Step 3

The splatter method is used with Fireworks! to add some interest to the white background.  Shake the bottle to distribute glimmer and then remove spritzer nozzle and gently tap the top to splatter ink from the outside of the spray tube.  Continue to tap until the desired amount of ink is on the paper.  I choose sections where the die cuts would be eventually placed.  I alternated the color choices from the die cut color.  This is the lower right corner of the right page.  

2022_June_Neva_4thofJuly_step4

Step 4

The left side of the layout shown completed with splattered Fireworks! in Memento Lady Bug and Danube Blue.

2022_June_Neva_4thofJuly_step5

Step 5

Determine placement placement of elements to add stamped sentiments.  Place on layout and remove other elements.  Use a stamp platform to stamp sentiments in proper position.

2022_June_Neva_4thofJuly_step6

Step 6

On the right page the stamped elements are determined, then half are removed before stamping to allow for clean stamping of correct colors.  The remaining elements are added and stamped.  It was easier to stamp all the images Memento Lady Bug at one time, then follow with images in Memento Danube Blue.

2022_June_Neva_4thofJuly_step7

Step 7

Spritz Fireworks! into a plastic tray or surface.  Place die cut stars from step 2 face down on the Fireworks! ink to add color.  Use tweezers to move around in the ink and add more ink to tray as needed.  About a third of the stars were inked with Fireworks! in Lady Bug the remaining in Fireworks! Danube Blue.

2022_June_Neva_4thofJuly_step8

Step 8:

Determine correct placement of Fireworks! stars in the die cut.  I rotated the star until it fit properly into the die cut area.  Not all the stars are identical, so taking the time to find the right one was worth the effort for a seamless look.  

2022_June_Neva_4thofJuly_step9

Step 9:

Adhere elements to layout.  Tear It! tape was used to adhere the photos to the textured mats.  The die cuts are adhered with On Point Glue.  The small dots around the star frames keep the layout clean and smudge free.  

Art Supplies

Imagine

Memento–Lady Bug and Danube Blue

Fireworks!–Lady Bug and Danube Blue

Jumbo Dauber

Tear It! Tape

On Point Glue

Other

White Cardstock

Cuttlebug Star Blanket embossing folder

Spellbinders Cascading Stars

Technique Tuesday Spectacular Memories

Hero Arts CL493 Holiday Sentiments

Tweezers

Die Cut machine

Stamp Platform